From Country Style To Contemporary - How To Transform A Kitchen

We all know that kitchens are the area of the home that can suck away all our hard-earned cash. The units, worktops, fixtures and fittings - all these things often cost a lot of money. I know people who have been put off purchasing a home as the kitchen has not been to their taste or style, and they can't afford to also purchase a sleek, shiny new kitchen on top of the property price.
These pendant lights are from Urban Cottage Industries
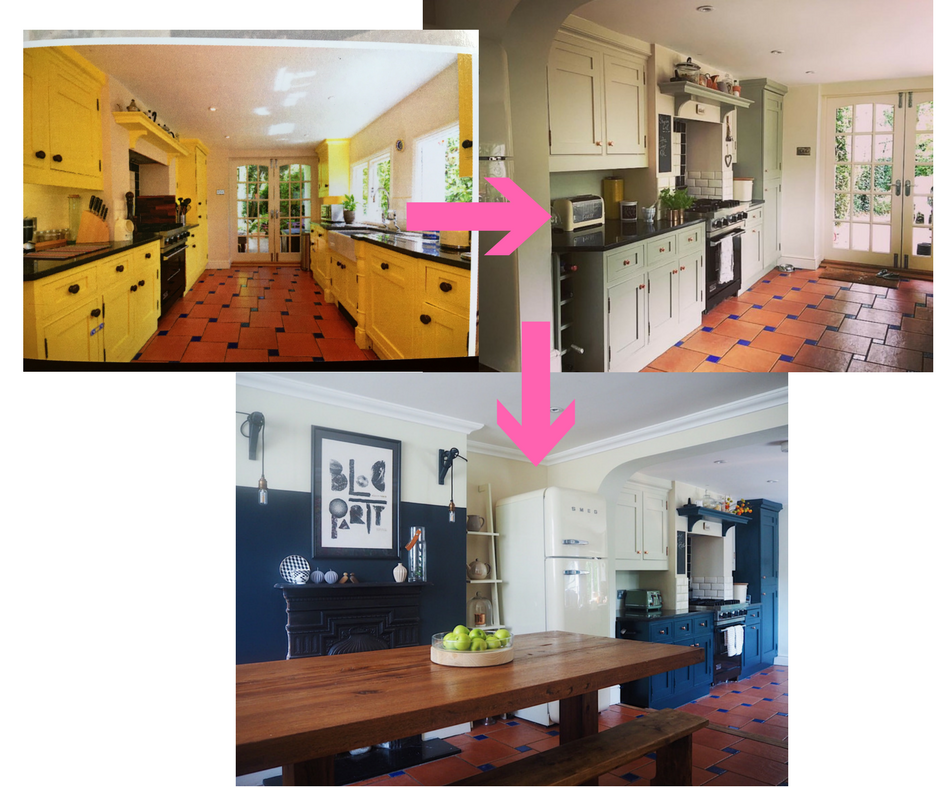
When we moved into our house it certainly wasn't my 'dream kitchen'. After unpacking all of our boxes carried in by the moving services, I started to think about how I could change the existing look of it. The cabinets were yellow - and I don't mean a nice sorbet lemon yellow - I'm talking full-on canary. They had oversized old wooden knobs on them, and they clashed dramatically with the lovely terracotta floor with tiny bolt-blue square tiles. However, I could see past the colour clash to know that the units were structurally sound, and this could actually be a beautiful family kitchen. Once we moved in, I quickly chose a colour from the Farrow & Ball colour chart that I liked (French Gray), and set to work trying to paint out Big Bird:
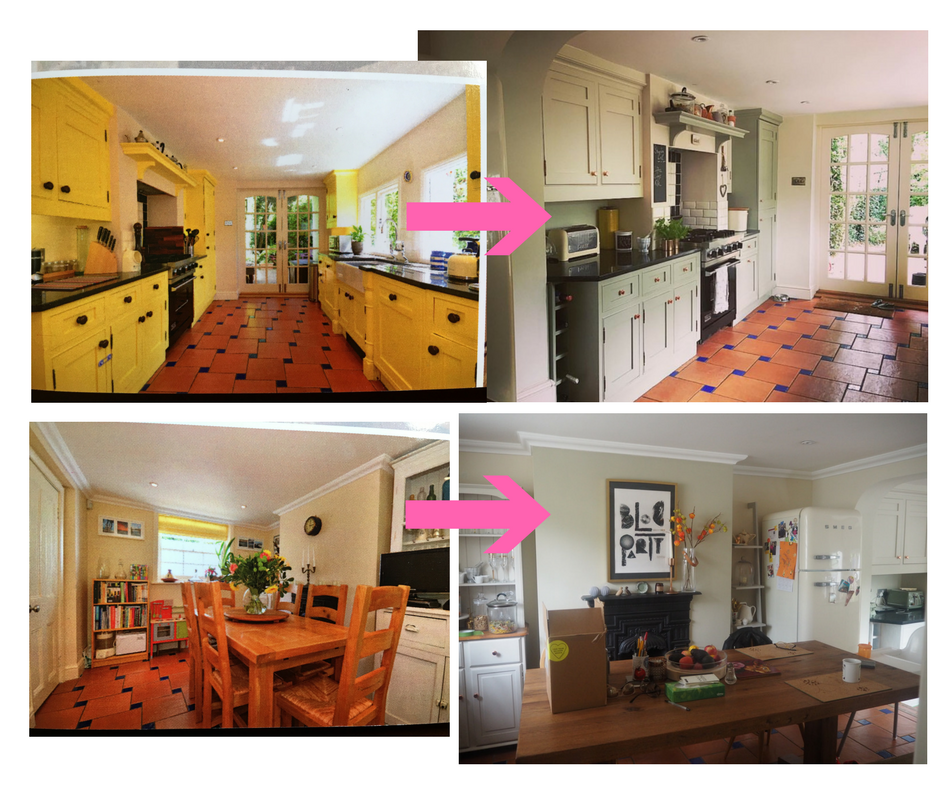
Our kitchen, left, as photographed by the estate agent (photo credit: Fine & Country). Then right, how it has looked since we moved in.
The kitchen looked loads better, but the decision was made too quickly and what I ended up with was a country-style kitchen with shaker units in a light sage-green. I went with the style and added in accessories to work with the look like bunches of dried lavender hanging over the cooker, and hanging wicker hearts as decoration. As the rest of the house evolved over the next two years to my particular interior style, which I consider a bit more contemporary, the country kitchen did just not fit in with the rest of the house. It was time for a change.
If you are a regular reader to this blog you know that I hate waste. I'm a make-do-and-mend type of person, rather than a rip-it-out-and-start-again person, which is lucky considering I don't have wads of cash bulging out of my back pocket. Instead, using DIY and new accessories, I'd completely change the style of the kitchen from country to something more contemporary. Flicking through an interiors magazine, I saw a picture of a kitchen that had dark navy base units and white units overhead. I loved the look, and used this as the starting point of my contemporary kitchen make-over:
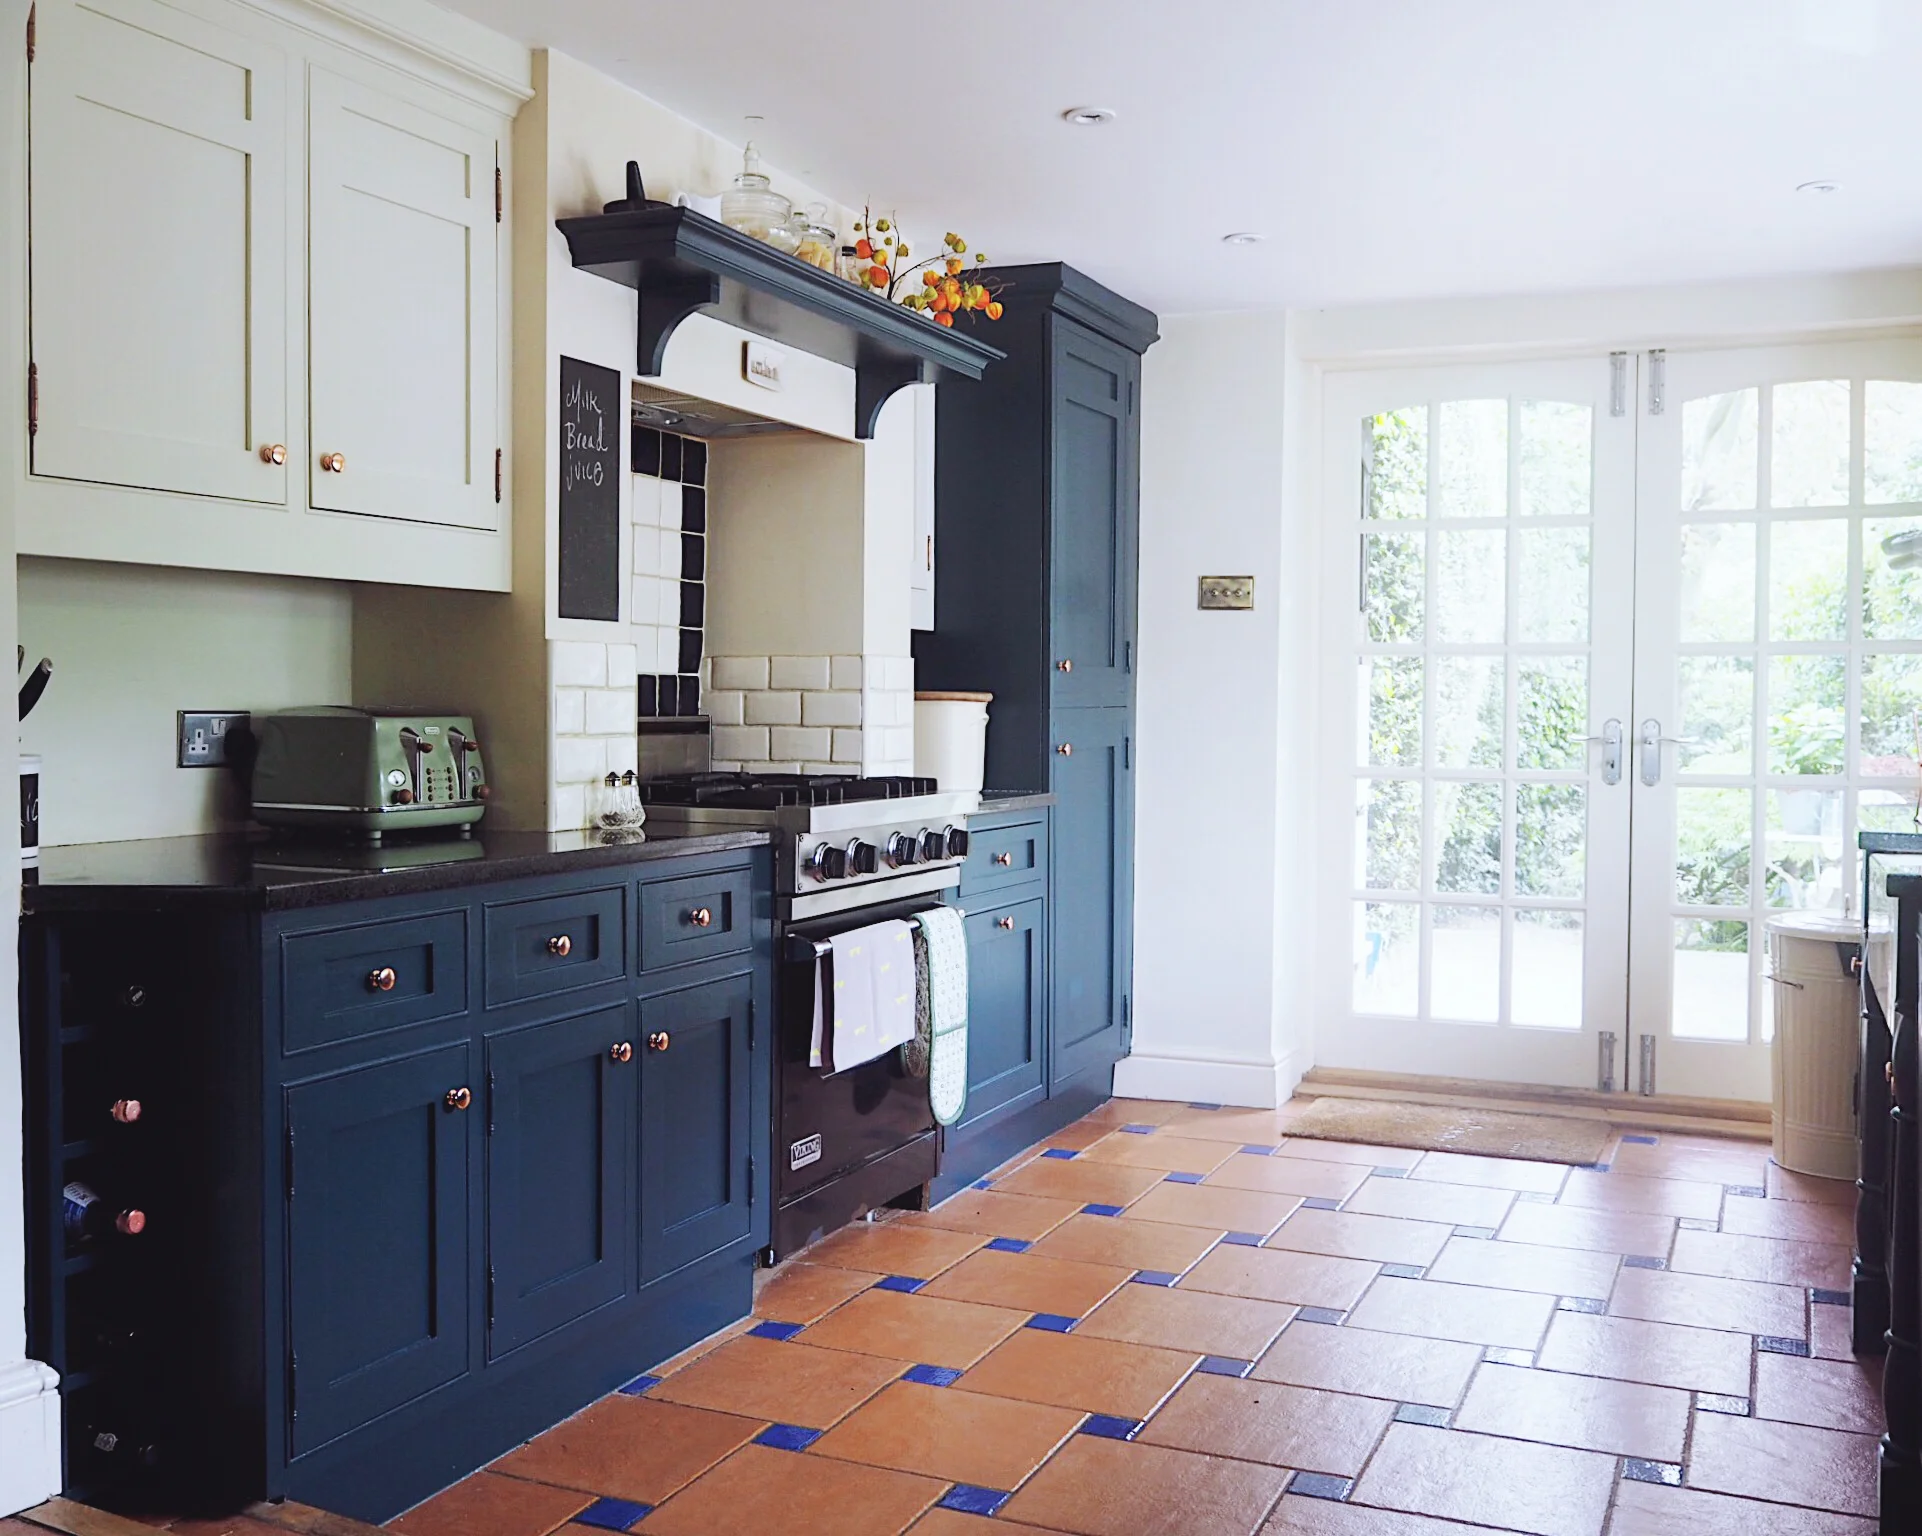
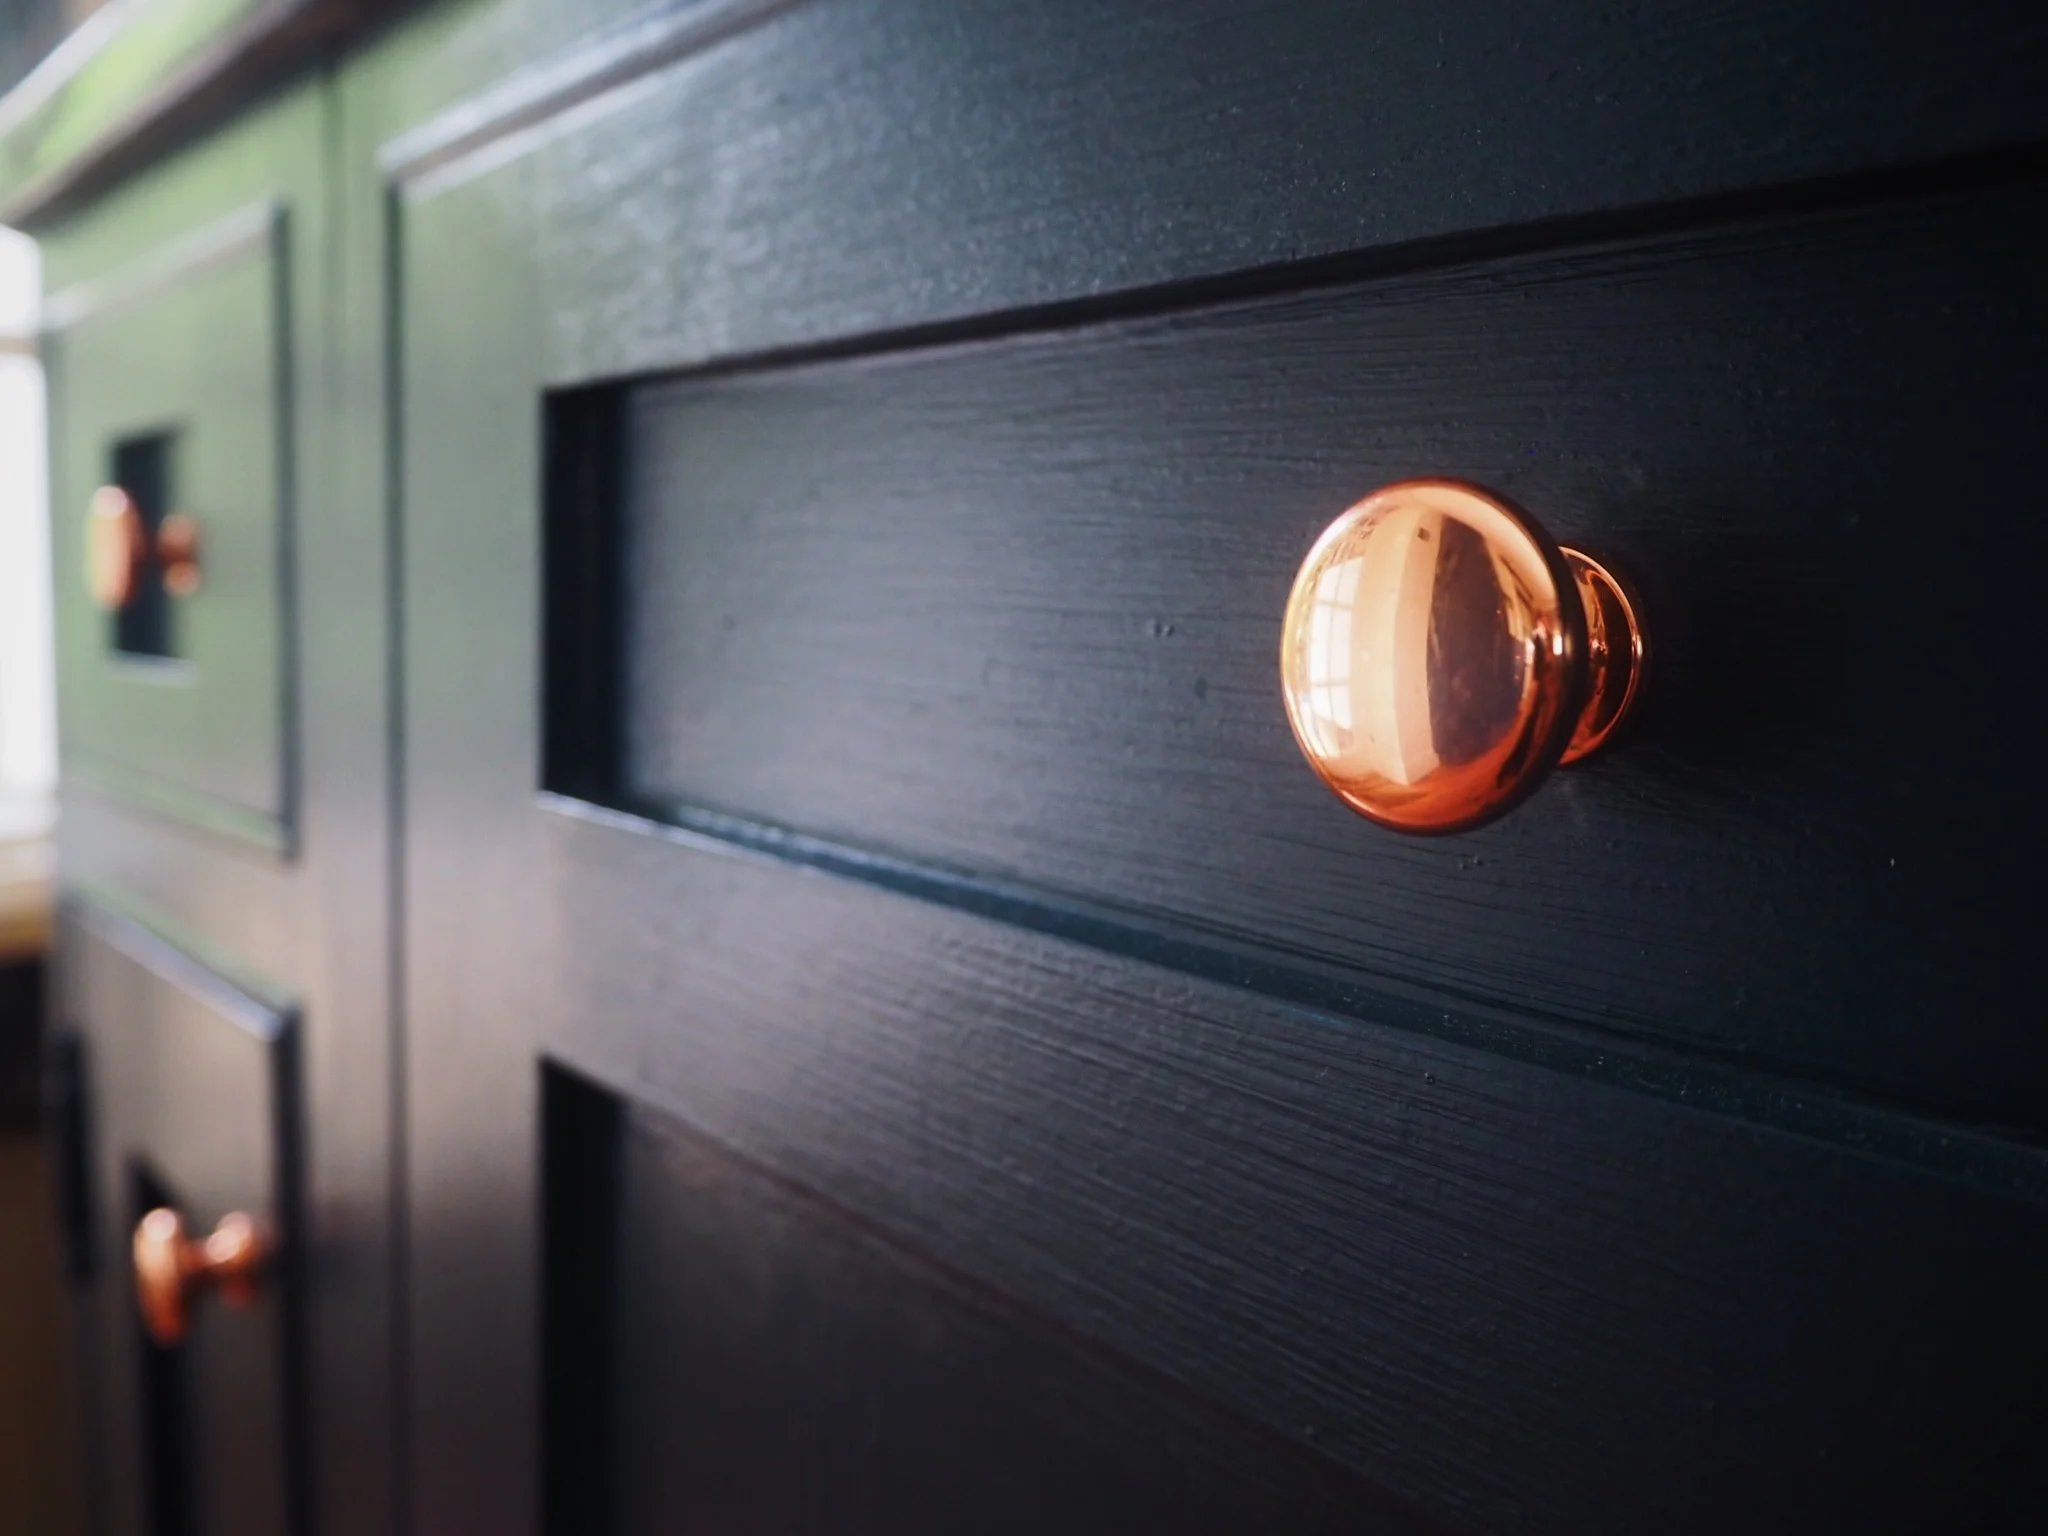
How my kitchen looks now, with base units painted in Hague blue, and top units painted in Clunch, both Farrow & Ball.
After doing some paint colour research (also known as looking at colour charts, then googling that colour on Pinterest to see what it looked like in other people homes), I decided that the bottom units in my kitchen would be Hague Blue by Farrow & Ball. The top units would be painted in Clunch. Although slightly hesitant to bring a dark colour into my bright kitchen, I knew from a talk I attended by Joa Studholme that if you use a dark colour below eye level, it will not encroach on a space like if it is used above eye level. I was therefore confident in my choice of this inky, navy blue.
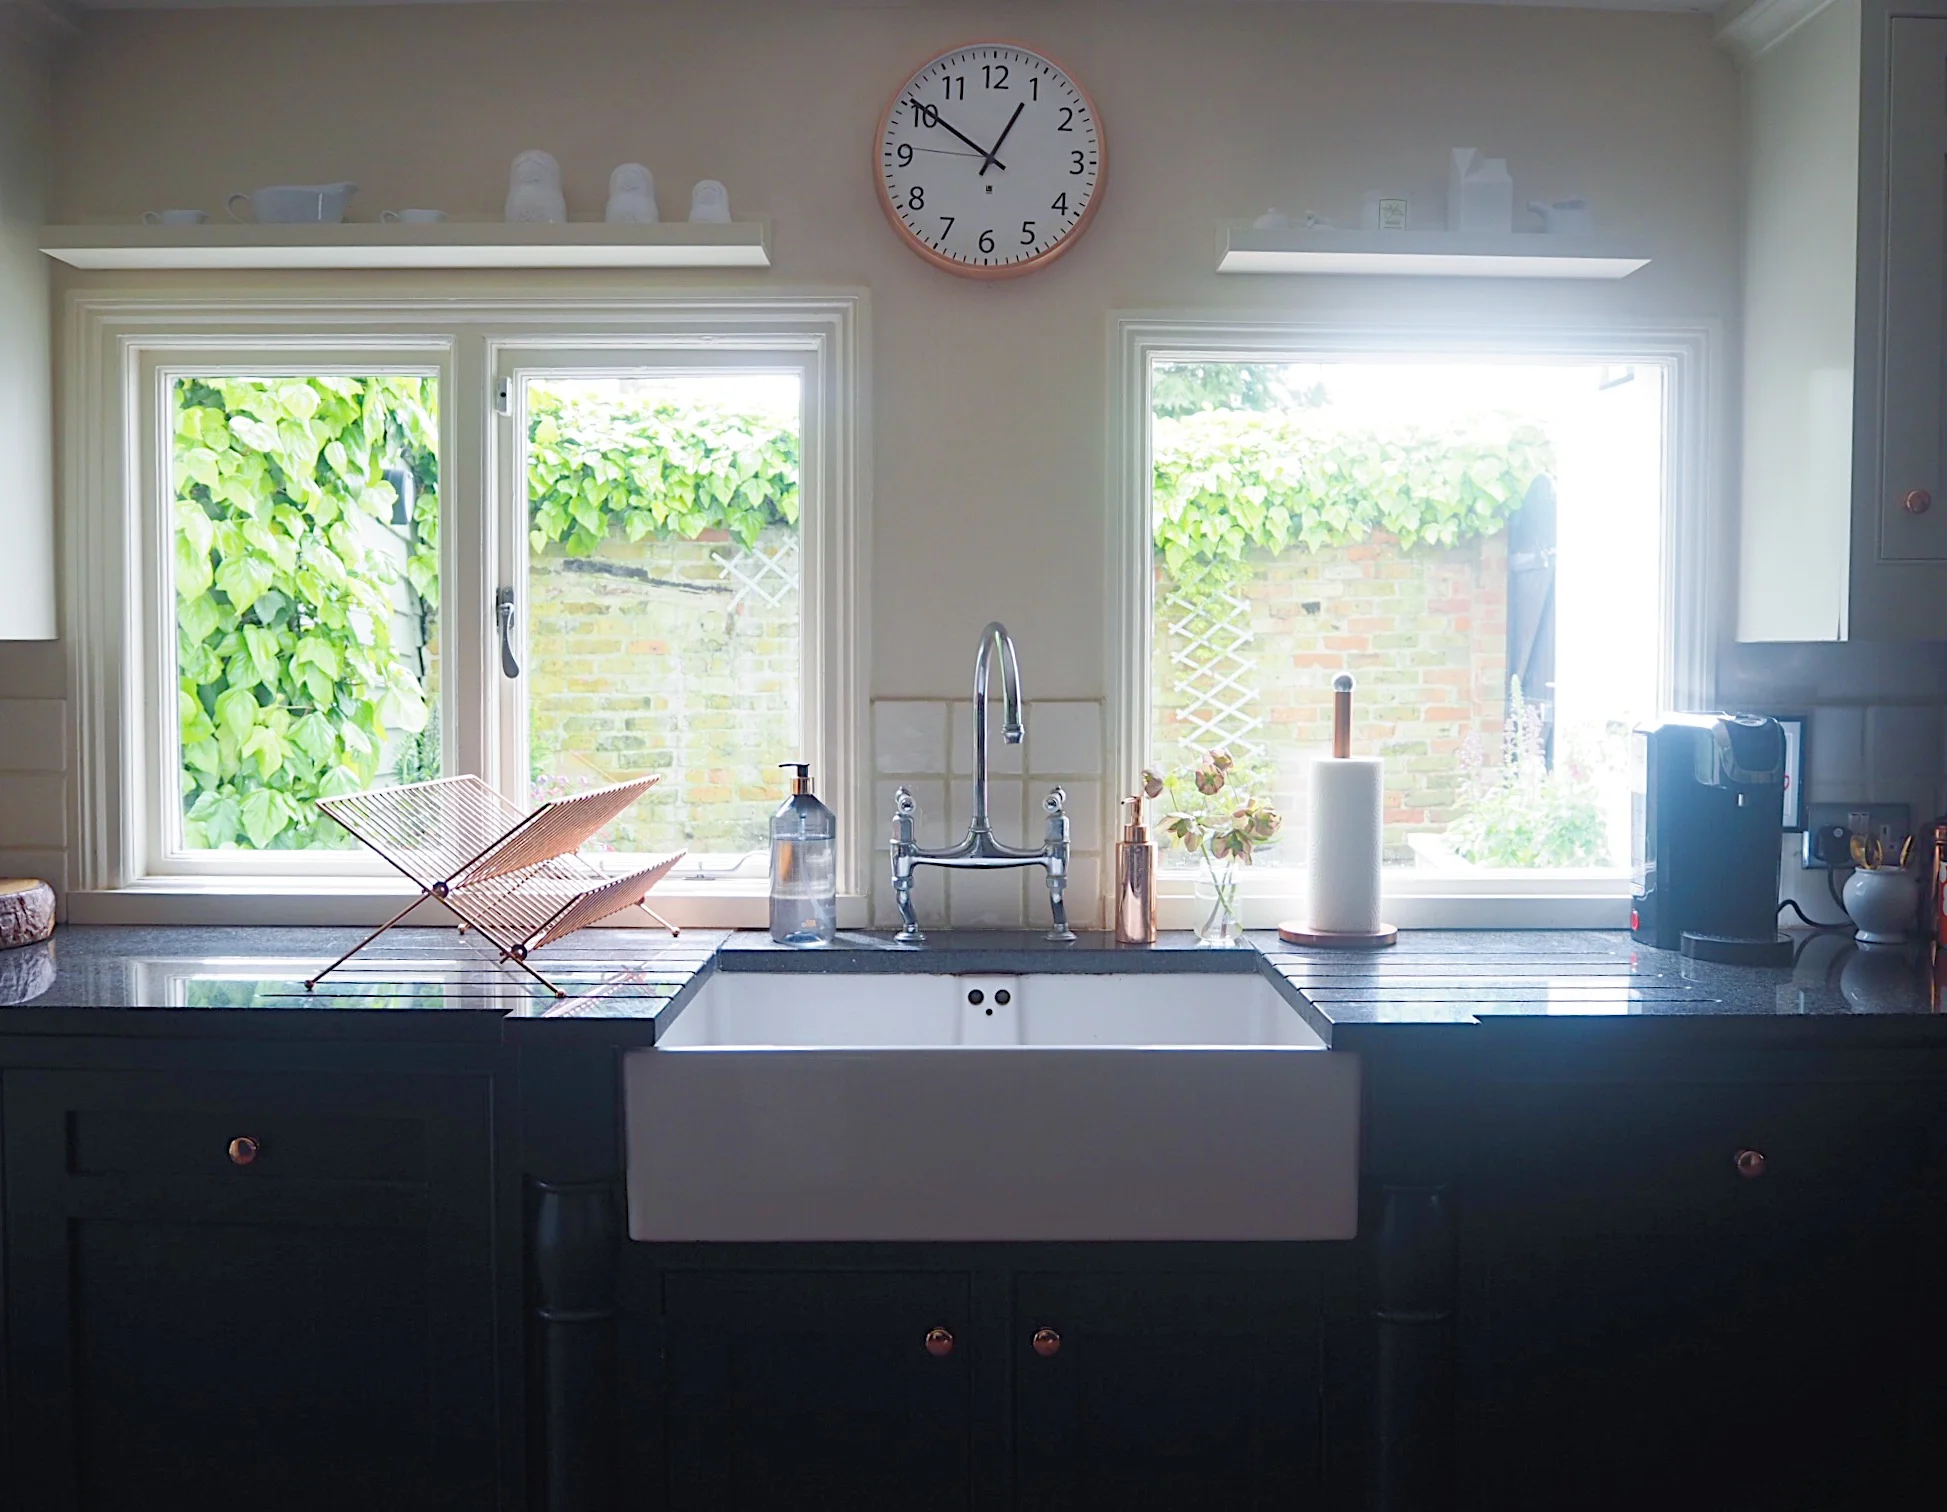
I put up IKEA picture rails that I cut to size to make the most of the space above the windows. The copper clock was purchased in Homesense.
The Hague Blue also complemented the units to the floor, making the kitchen look more cohesive in style.
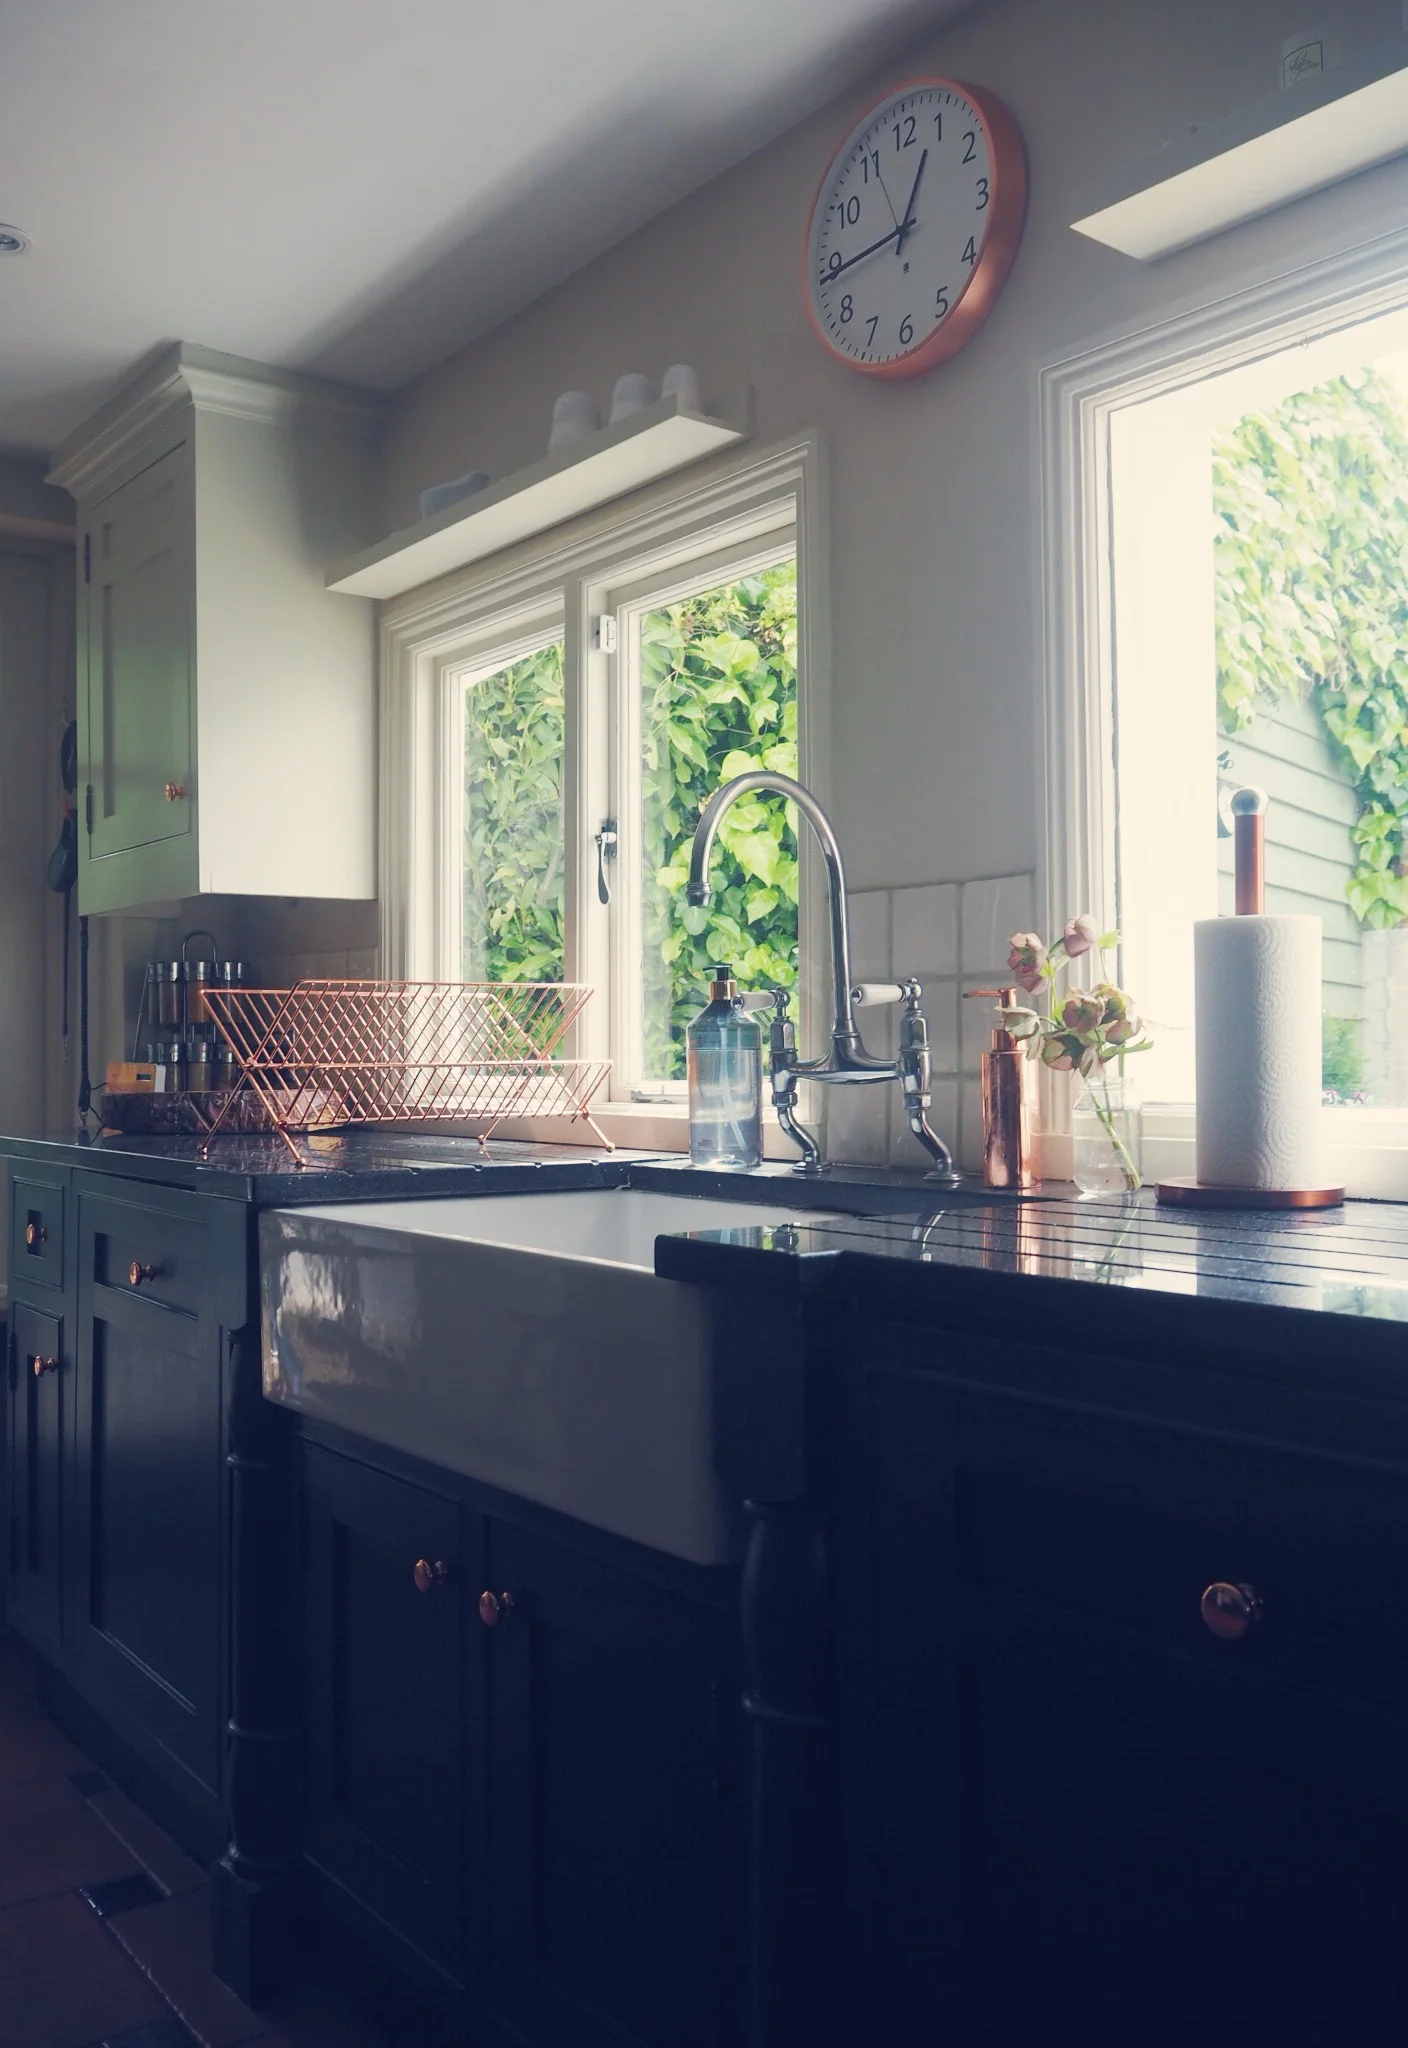

I'd already traded in the old wooden over-sized knobs on the units for some lovely copper pulls, and knew these would work well against the navy. I then brought more on-trend copper elements into the kitchen with a copper dish rack, copper clock, and copper kitchen accessories to tie the look together.
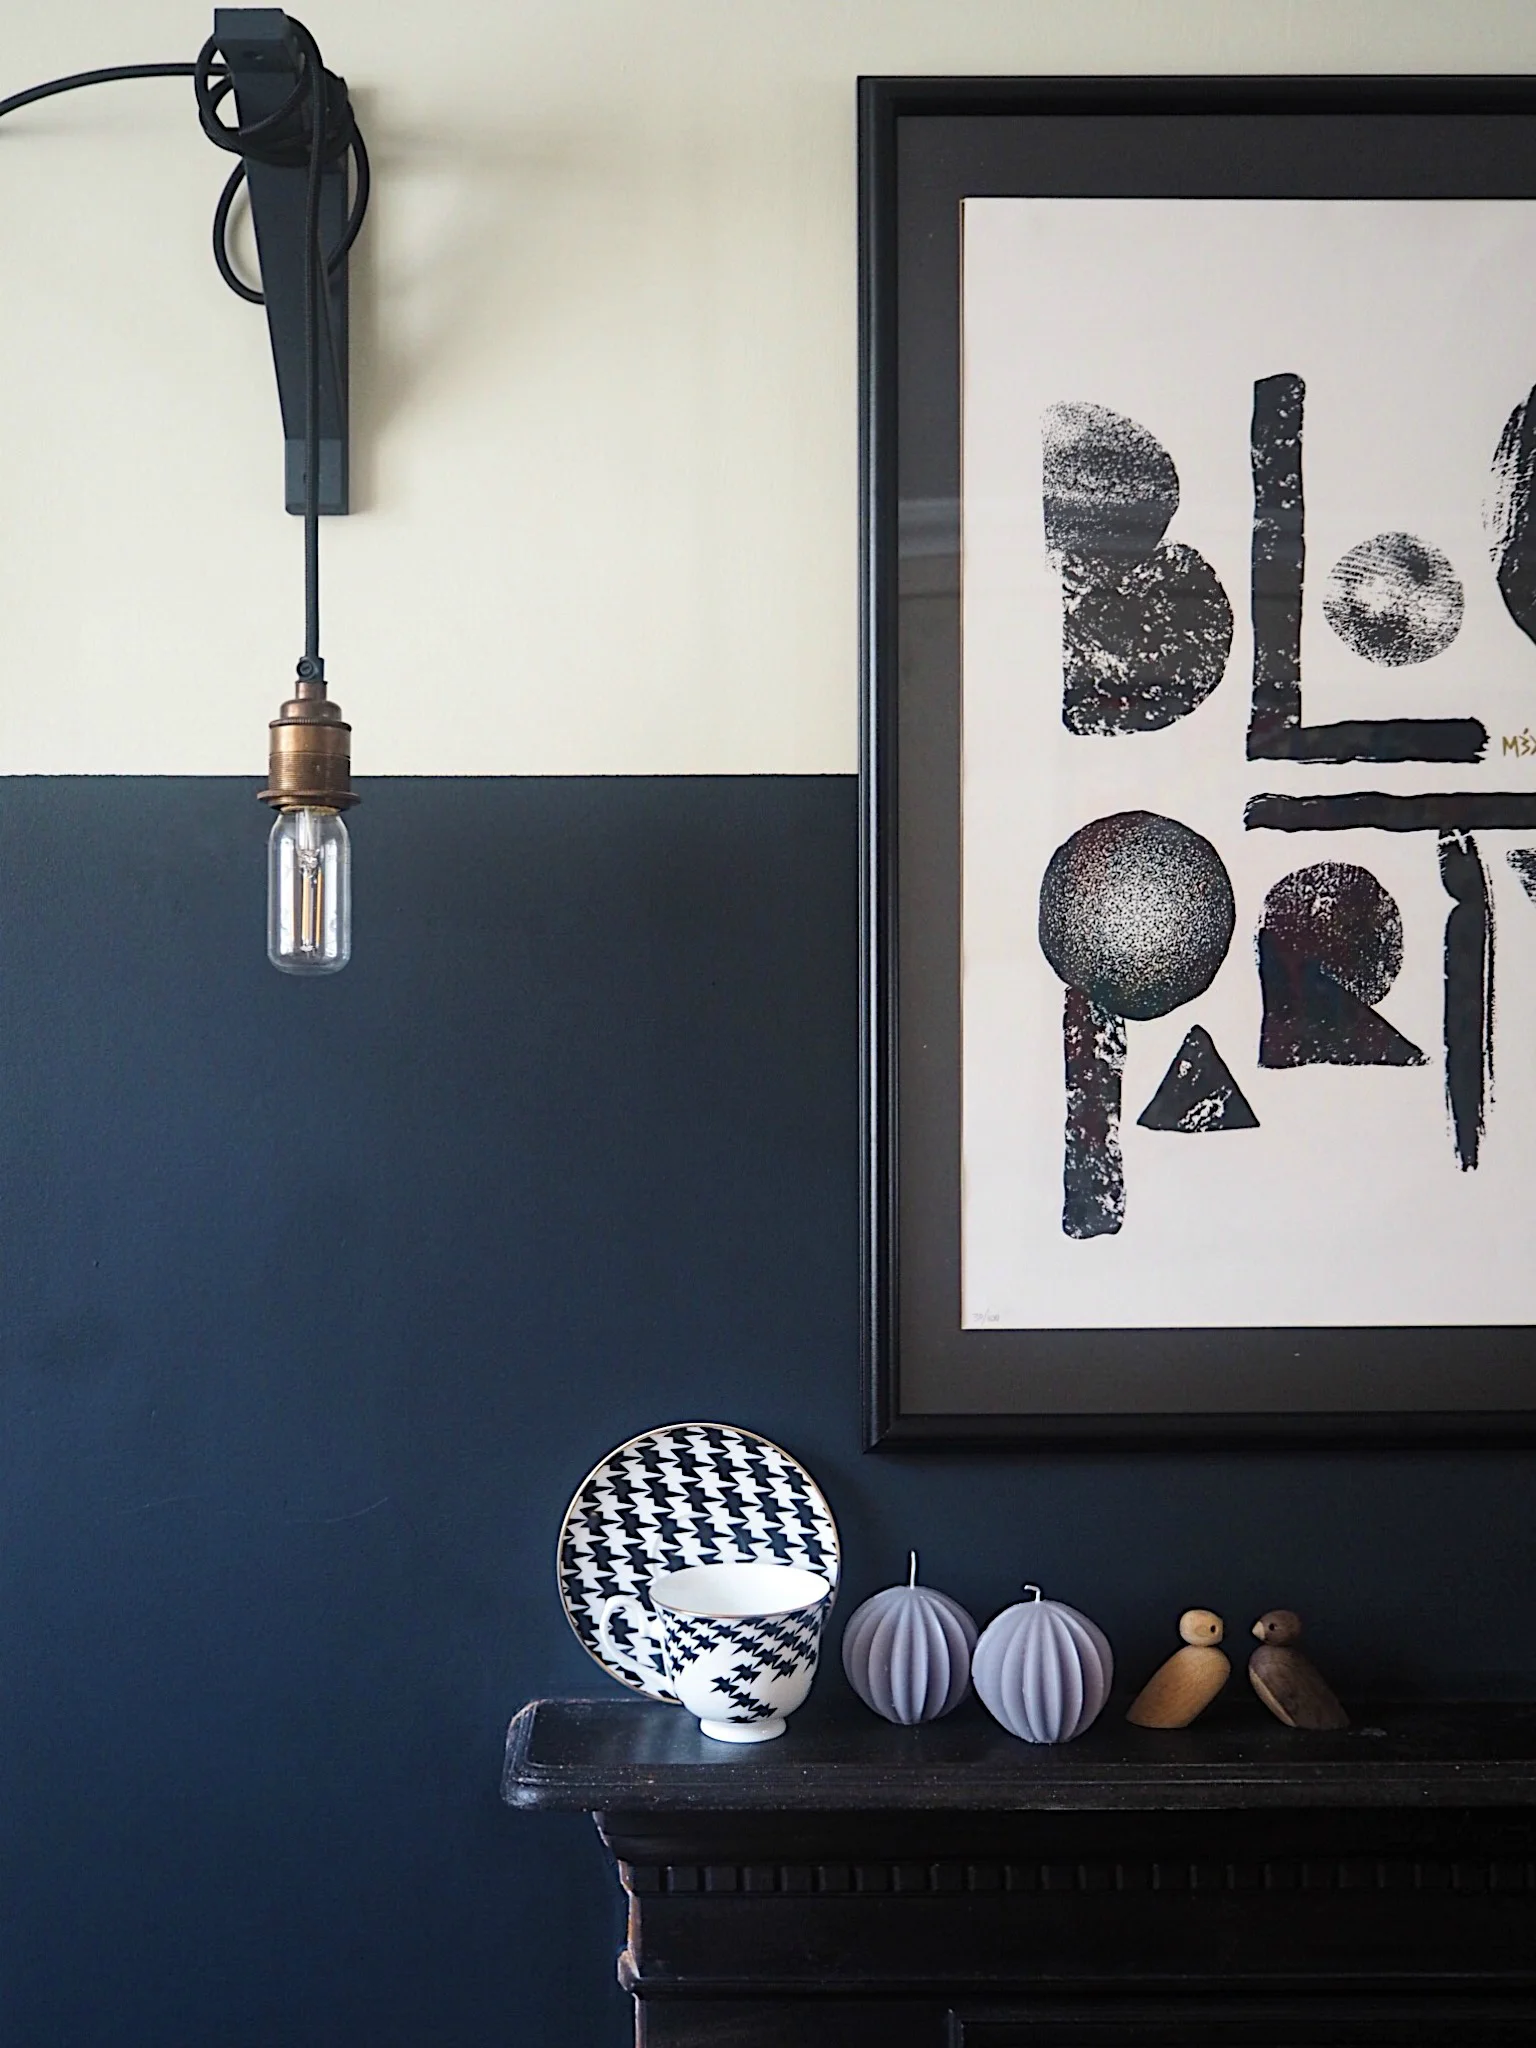
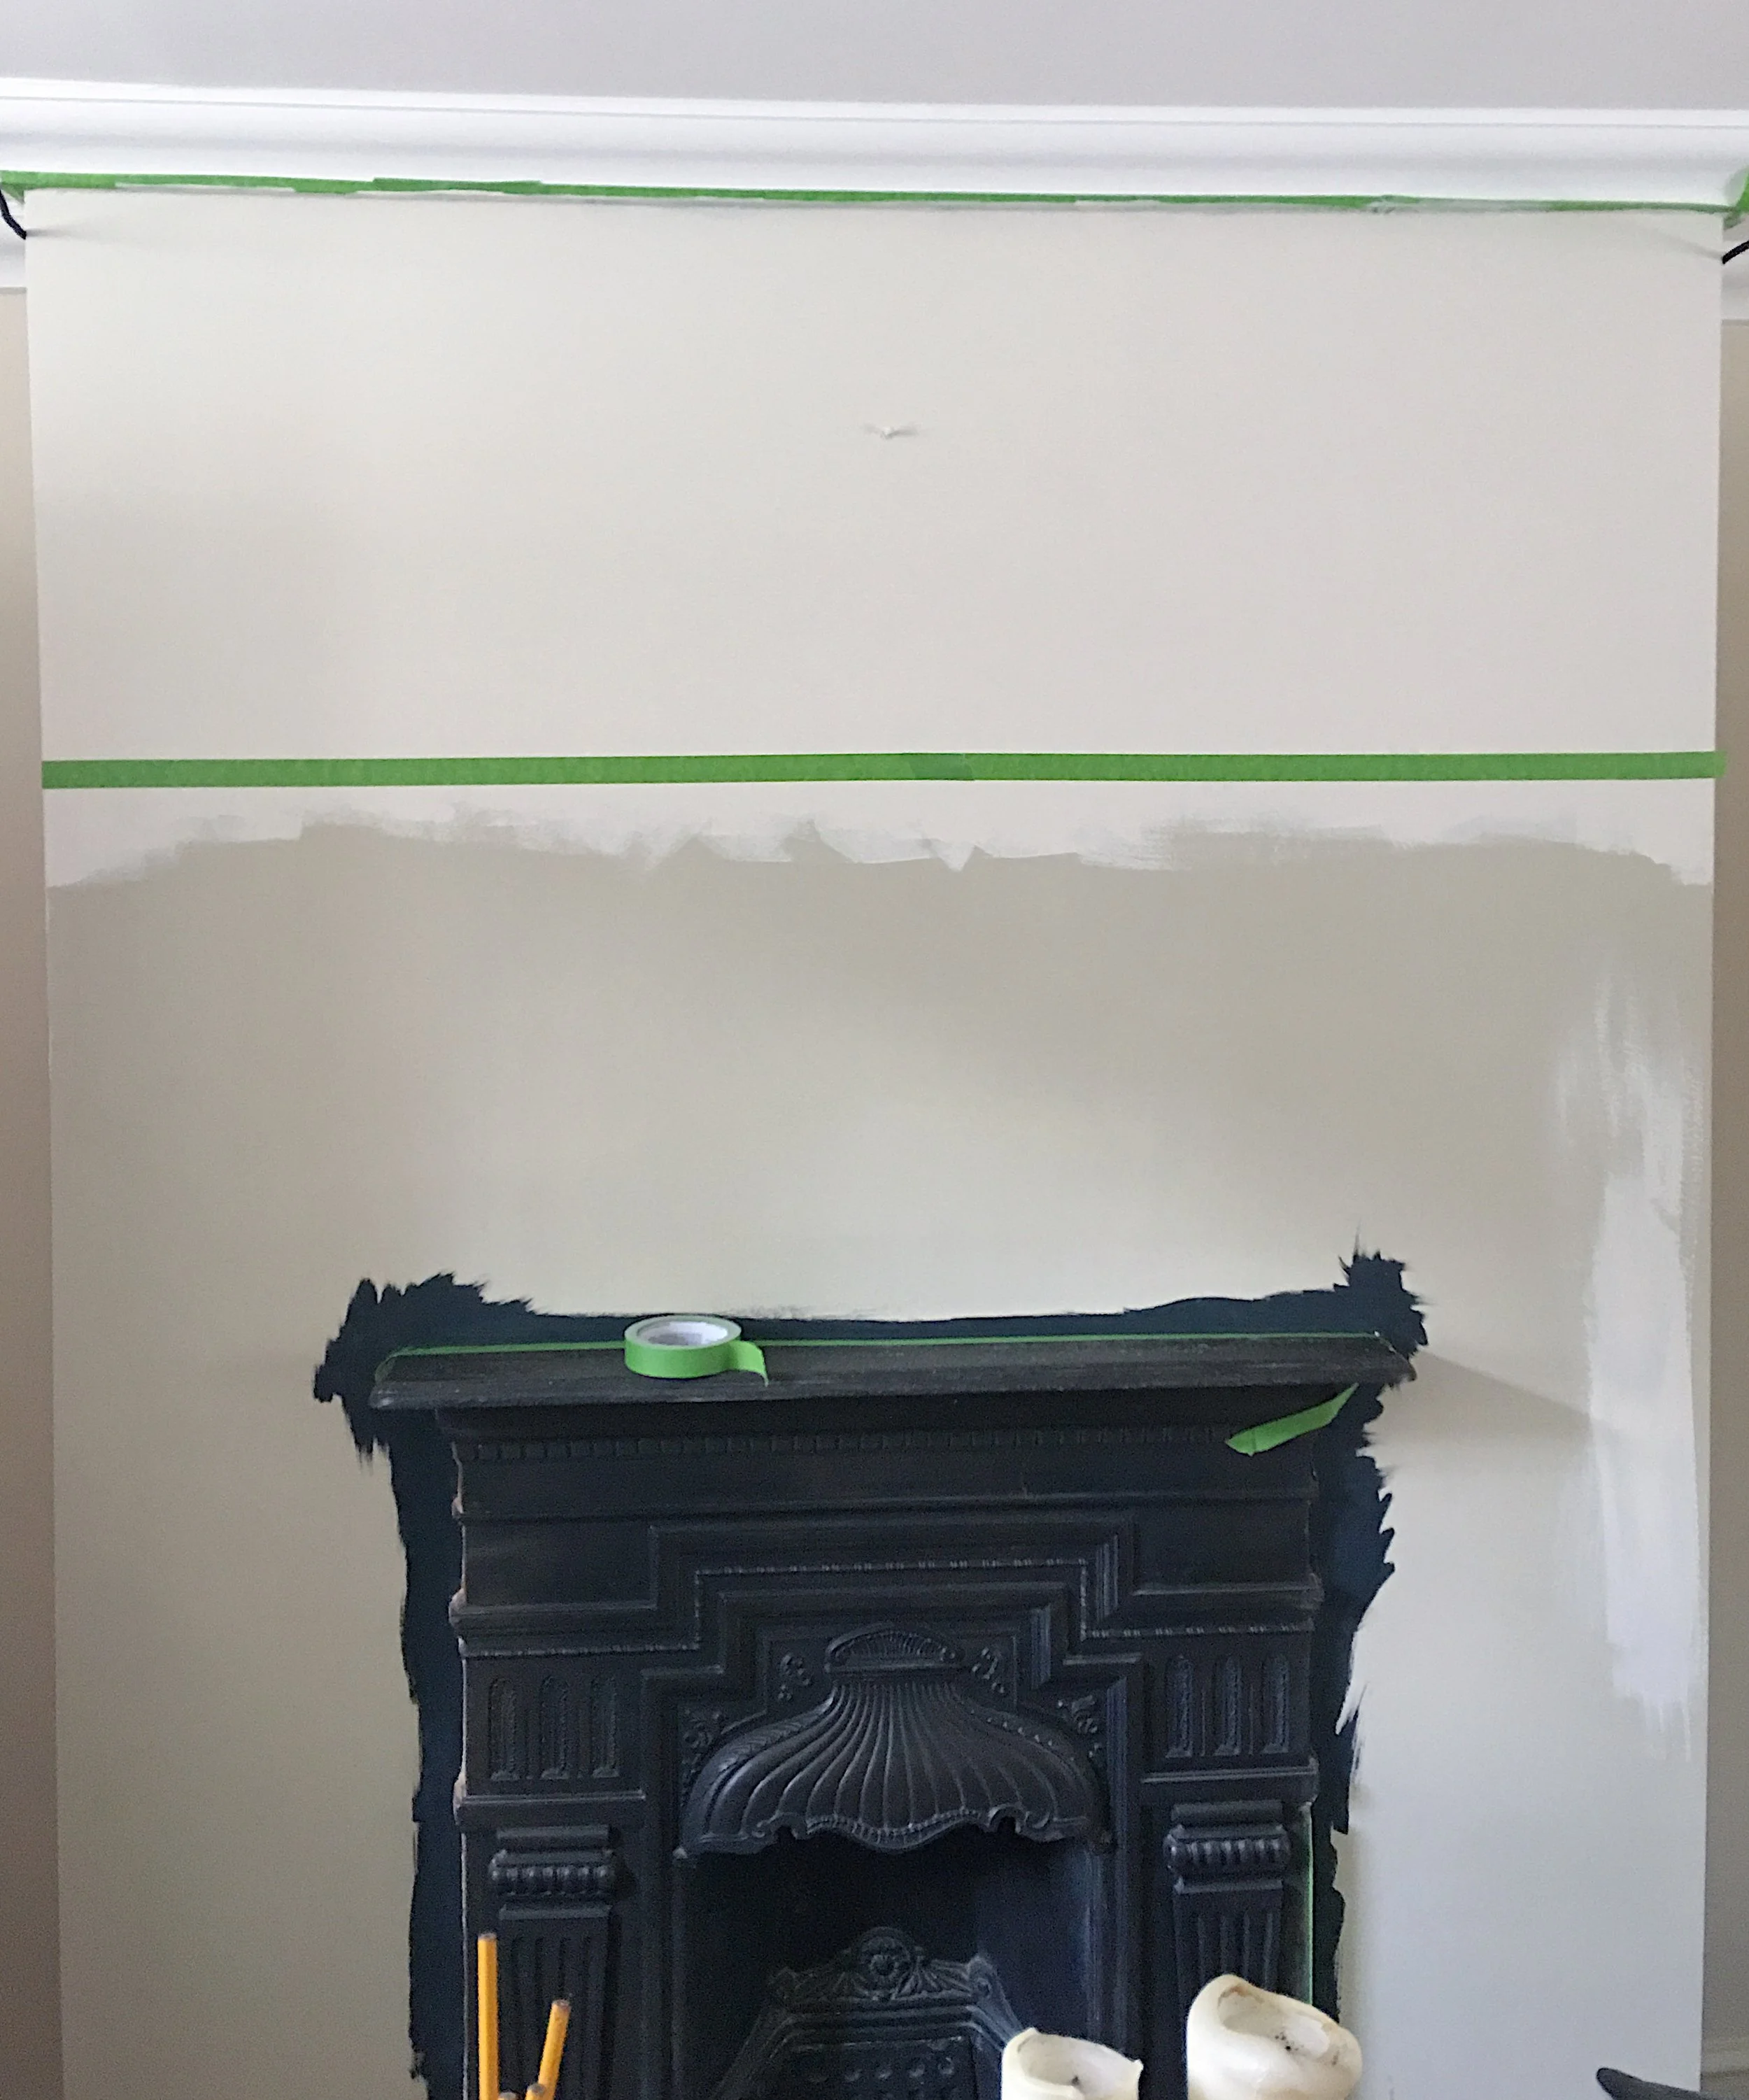
Even though the kitchen preparation area and the dining area are really all in one room, the room is long and thin and divided with a step and an arch. Previously they had looked disjointed, so I wanted them to flow together in terms of style. To do this, I created a colour-block paint effect on the chimney breast in the dining area to 'match' the look of the units. Using a low-tack tape I 'cut' the wall into two areas, whereby I painted the top half a neutral, and the bottom half in 'Railings' by Farrow & Ball, which is a darker navy blue than the Hague Blue on the kitchen units.

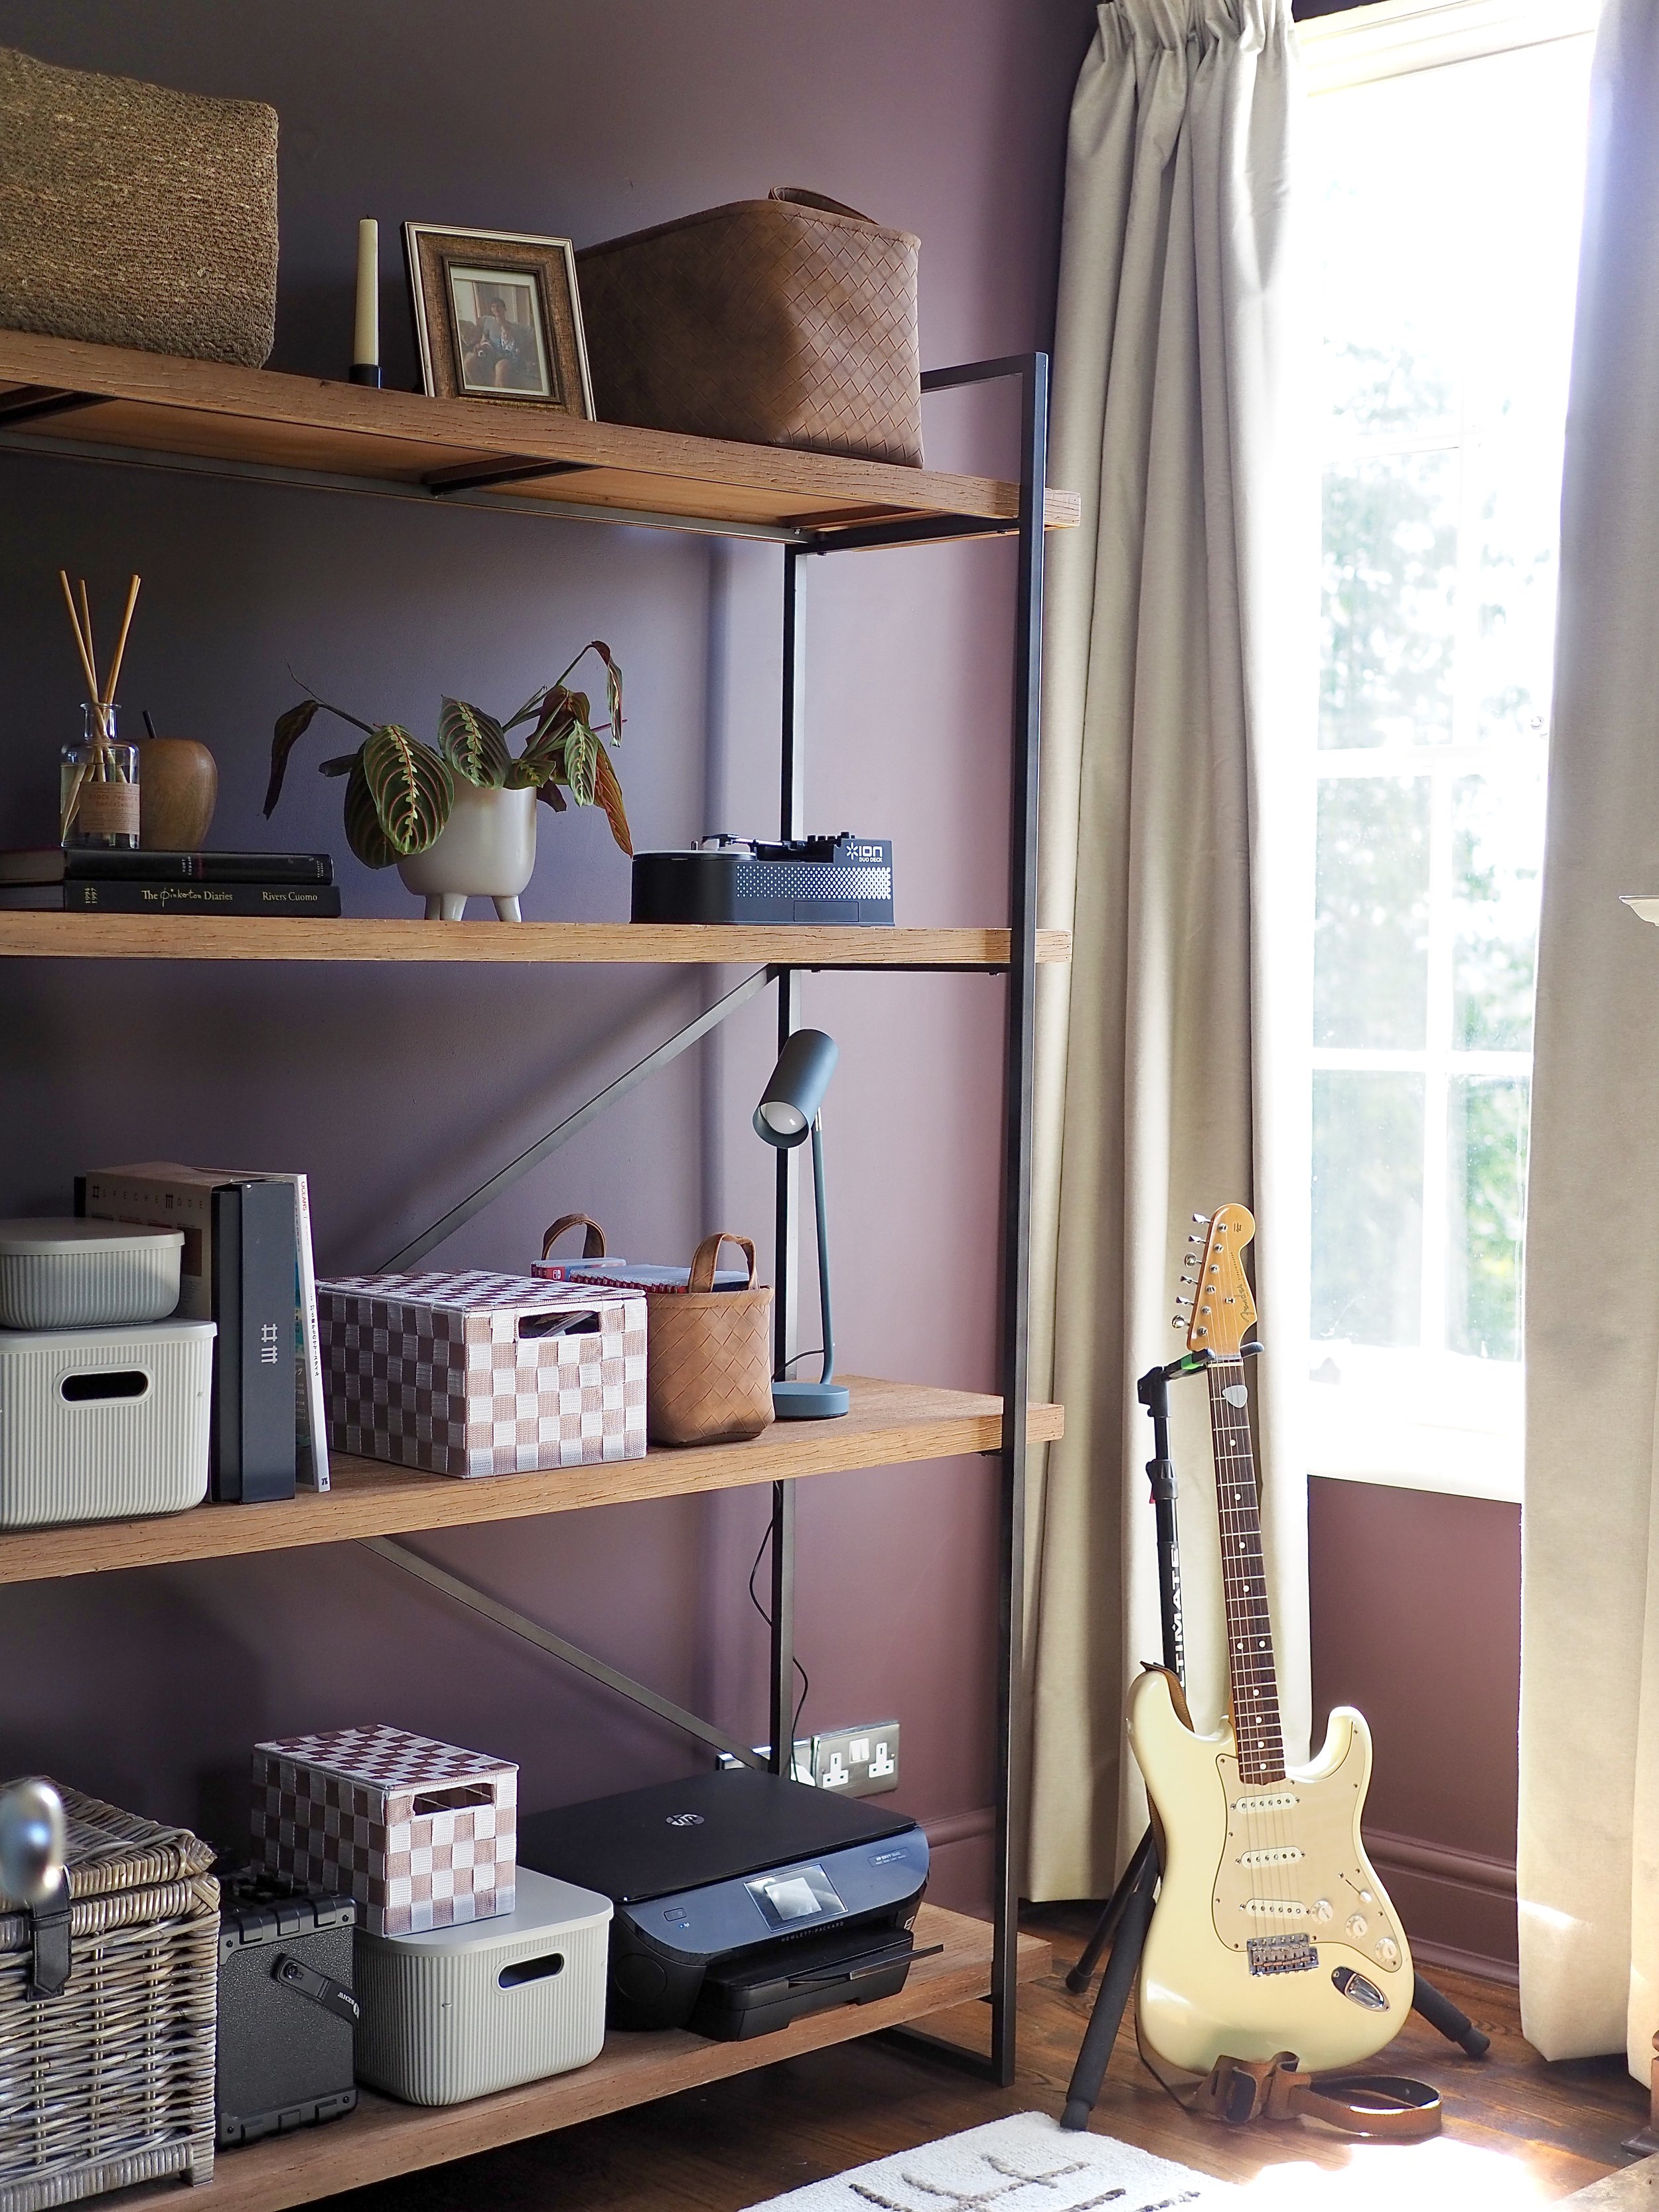
I then styled this area with artwork, plus some hanging pendant wall lights for a modern feel.

The selection of gold and copper wine glasses are by LSA International.
I'm so happy with the Railings colour on the chimney breast, as everything I place on the fireplace now pops out against the dark hue:

Hellbore flowers against Railings by Farrow & Ball
How can I get a kitchen that I love on a budget??
The key to transforming a kitchen is all about looking past what exists, and thinking about what you can create with paint and a change of hardware. If you look at the three stages of my kitchen over the past two years, each one has had a different look, yet structurally absolutely nothing has changed:
If you are doing up a wreck, or do need to replace a kitchen that is structurally redundant, a great way to save a vast amount of money and still get your 'dream kitchen' is to buy a second hand or ex-display kitchen. Most kitchens can actually be re-configured to fit a new layout or different size kitchen. If you buy a second hand or ex-display kitchen but it's not your style (hello multiple pine kitchens everywhere!) think how you can transform the units with paint and handles. There are some great decorating products out there now which means you can even get a flawless finish on kitchens that are made from MDF with a melamine coating.
The Used Kitchen Exchange is an excellent place to purchase a well made kitchen at a fraction of its RRP. The family-run business salvage kitchens that are removed ahead of their time due to building work, or because they are not to the owners’ taste. As well as the money saving side, this makes a Used Kitchen Exchange kitchen a completely ethical purchase! It's like charity shop buying a kitchen - you can find an absolute gem for a fraction of the cost you know it is worth, all because someone decided they didn't want it anymore.
The kitchens pictured below are all kitchens for sale on Used kitchen Exchange, which start at a minuscule £1500 and mostly include worktops and the integrated appliances!! With some paint, new hardware, the right lighting and accessories, you could cheaply create the Pinterest kitchen of dreams:

Clockwise from bottom left - kitchens for sale on Used Kitchen Exchange. Middle picture by School House Electric & emerald green kitchen by Refinary29.UK (Pinterest). Bottom right picture by @lyndenlane on Instagram.
Used Kitchen Exchange have a surveyor that assesses the kitchen for you to confirm its age and make sure that the kitchen is in a great condition (check each listing for full condition details). They then professionally remove it for you and deliver it to your door. They can even store it for you if you've found the kitchen that you want, but your home isn't ready for installation.
So, How Do I Get It Looking Like I Want?
Simple! To update my kitchen units I gave them a light sanding as they were wood, washed them down then gave them two coats of Zinsser B.I.N primer. If your cabinets are melamine, wash them down in soapy water then you can just coat the cabinets in B.I.N. This primer and sealer will make your paint grip to the units, stopping any chipping from taking place, as well as block out any stains or marks that currently exist on the surface.

Once I'd given the primer adequate time to dry, I coated the cabinets in three coats of durable estate eggshell F&B paint. You have to give your cabinets a few days for the eggshell to harden, so don't close any units - even if they are dry to the touch!
The ultimate finishing touch is to replace the handles. These copper pulls are from All Handles And Pulls. Also check out Buster + Punch for beautiful kitchen hardware.
Have you heard of Used Kitchen Exchange before? Don't you think it's a great idea to reuse and recycle a used or ex-display kitchen? What do you think to my contemporary kitchen update?? Let me know in the comments section below!
* This post is in collaboration with Used Kitchen Exchange, a small business that I wholeheartedly support. All thoughts, opinions and DIY advice are my own. I would also like to thank Farrow & Ball, Tor-coatings and Urban Cottage Industries for kindly supplying some products to me in order to complete this kitchen make-over. Kindly note this post also contains some affiliate links.