Make These Urban Concrete And Spray Paint Geometric Place Mats
Hand made from start to finish - concrete place mat with spray painted geometric pattern
I can never seem to find place mats that I like. I'm not into the cork ones, or the weave ones, and I never like images or patterns on the plastic ones. I would rather have ones made from natural materials like marble or wood, but if you are looking for around 8-10 mats then it becomes pretty expensive for such a basic item.
I was recently reading a copy of Style At Home magazine, and they had an article on making your own planters from concrete. I didn't need any planters, but I thought why not try making place mats out of concrete? (I know, bit random, but that's just how my brain works). Concrete as a material is so cheap, so it was completely worth a try, but in all honestly it took me a lot of attempts to get this right. At first I attempted to make the mats out of your basic standard concrete, which failed as it took ages to set and constantly cracked once fully dry (it was hard not to add too much water to the mixture.) Next, I decided to use rapid setting concrete to speed up the process, but didn't really realise how fast rapid setting concrete set (clue: fast - especially in the heat we've been having). I destroyed a nice cake-mixing bowl trying to mix the concrete before I emptied it into the mould, which just set in the cake bowl instead. Eventually I worked out the best way to make the mats, and once I had that sussed it was pretty easy to make them all.
How to make concrete table mats - step by step:
YOU WILL NEED -
A mould for your mats. I wanted rectangular mats and found a cheap bowl/tray thing in the local pound shop that was the appropriate dimensions of 23x33cm. The mould needs to be a bit bendy and flimsy so you will be able to loosen the mould from the set concrete.
Extra Rapid Cement
Jug of water
Pen
Old wooden spoon
Hand sander or good quality sandpaper
Wax and a polishing pad
Self adhesive felt protective pads

Make sure your mould is the correct size for your mats and is flimsy so that you can manipulate out the dried concrete. Mark on the template how thick you want your placements so that you can measure out your cement easily.
Mark in your mould how thick you want your mats to be (remember the thicker they are the heavier they get-concrete weighs a ton), so you have a guide for how much cement to pour in the mould. Pour into your mould the dried cement powder from the bag until it reaches the marked level (you do not need to mix in sand).
Pour in enough water to cover the cement. To make 7mm thick mats, 23x33cm in size, I used around 900ml of water. As quickly as possible, stir the cement and the water together until all the dried mix has gone and you are left with what I can only describe as a liquidy Glastonbury-style mud. Gently pick up and shake the mould lightly from side to side to level the cement mix on the top.

Pour the powdered cement up to your marking line in your mould. Add water, quickly stir it together, then gently shake the mould to spread out the mixture and leave until dry.
Leave for about 45 minutes - 1 hour to dry, then gently push the sides of the mould away from the concrete so the concrete is dislodged. Turn the mould over, one hand supporting the mat, and lift off the mould.

Once dry, push the sides of the mould away from the cement to dislodge the placemat and gently remove it.
Once you have made the number of mats that you require, leave them to dry completely overnight. They will now be ready to sand down so the brittle edges can be removed, and the top can be smoothed. I used a hand sander for this but you could also use a sanding block.

Sand down the placements so that they are smooth and there are no rough edges.
Once sanded, I did want to 'polish' the concrete, but further investigation into this online revealed that this wasn't something you could do by hand, and you needed to invest in a machine (If you DO know how to do this by hand then please tell me in the comments box below!) I just wanted to make the mats smoother and shiny so tried using a polishing pad and some old beeswax I had laying around (which is actually meant for wood). Although not brilliant, it did give a smoother, more shiny appearance (and made them smell like honey), so it would do.

Give your mats a sheen and a smooth texture by applying a generous amount of wax and applying it with a polishing pad.
I wanted to add a pattern to the mats in spray paint to give them an urban feel of graffiti on a wall. I printed off three copies of a geometric pattern from Google Images and made three separate stencils by cutting out parts of the pattern on the separate pieces of paper with a kitchen knife on a chopping board. I then used Frog Tape to go over the edges I had cut out so the spray paint would not bleed when applied to the mats.

1. Print out a pattern to create a stencil. 2. Add frog tape to the cut stencil to stop your spray paint bleeding. 3. Cover your mat and spray the first colour. 4. Remove the stencil. 5. Use your second stencil and spray the next colour. 6. Continue with your stencils and spraying until the pattern is complete.
Once the stencils were ready I took the first stencil and placed it in position on the first mat and made sure the whole of the mat was covered. I stuck down the stencil with frog tape and used kitchen roll to cover any exposed areas I did not want spray painted. First off I used a copper spray paint to apply one side of the cube in the geometric pattern to the mats. I then took the second stencil, lined it up, and sprayed using a white spray paint. Finally, I used a gold for the top of the cube.

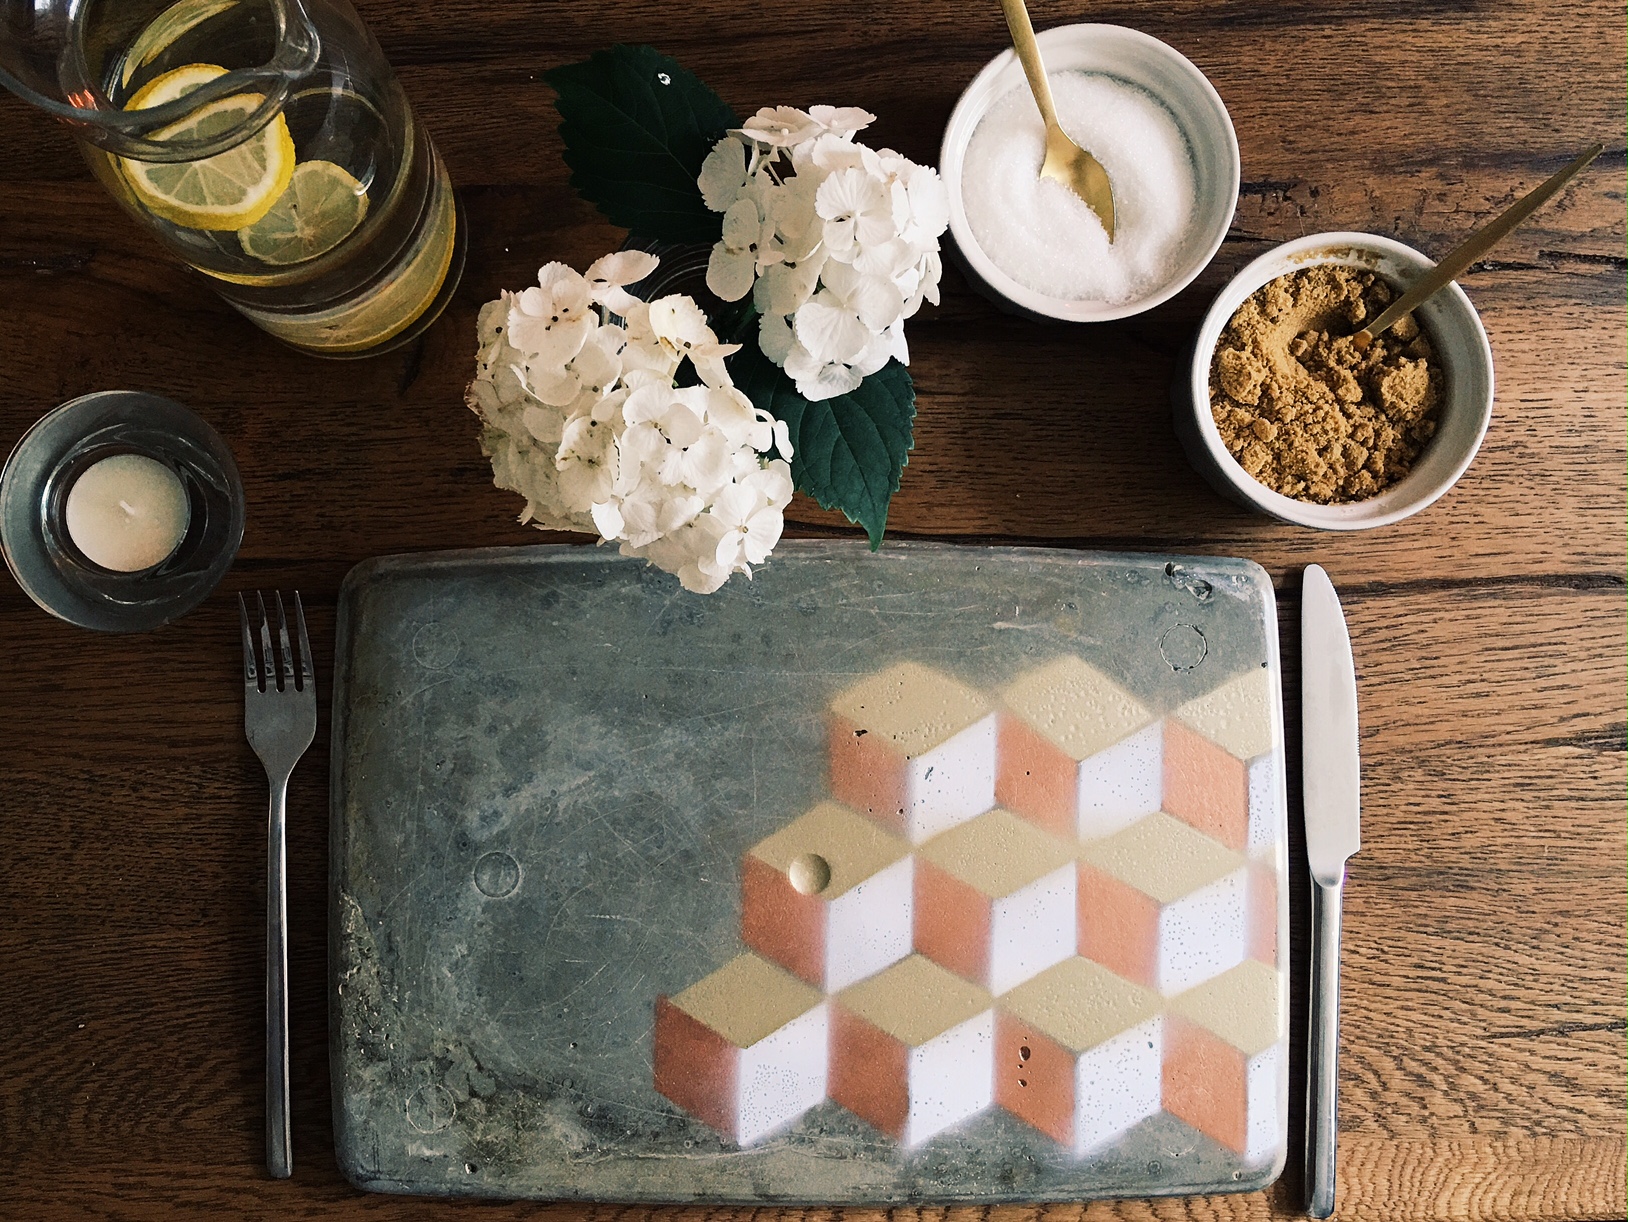
The completed copper, gold and white geometric pattern on one of the mats.
Once the spray paint had dried, I added four self -adhesive protective pads to the base of each mat to provide a more leveled surface and protect the table where the mats would be placed.

To protect the surface area where the mats will be positioned, and to make the mats more level, I applied four protective felt pads on the base of each mat.
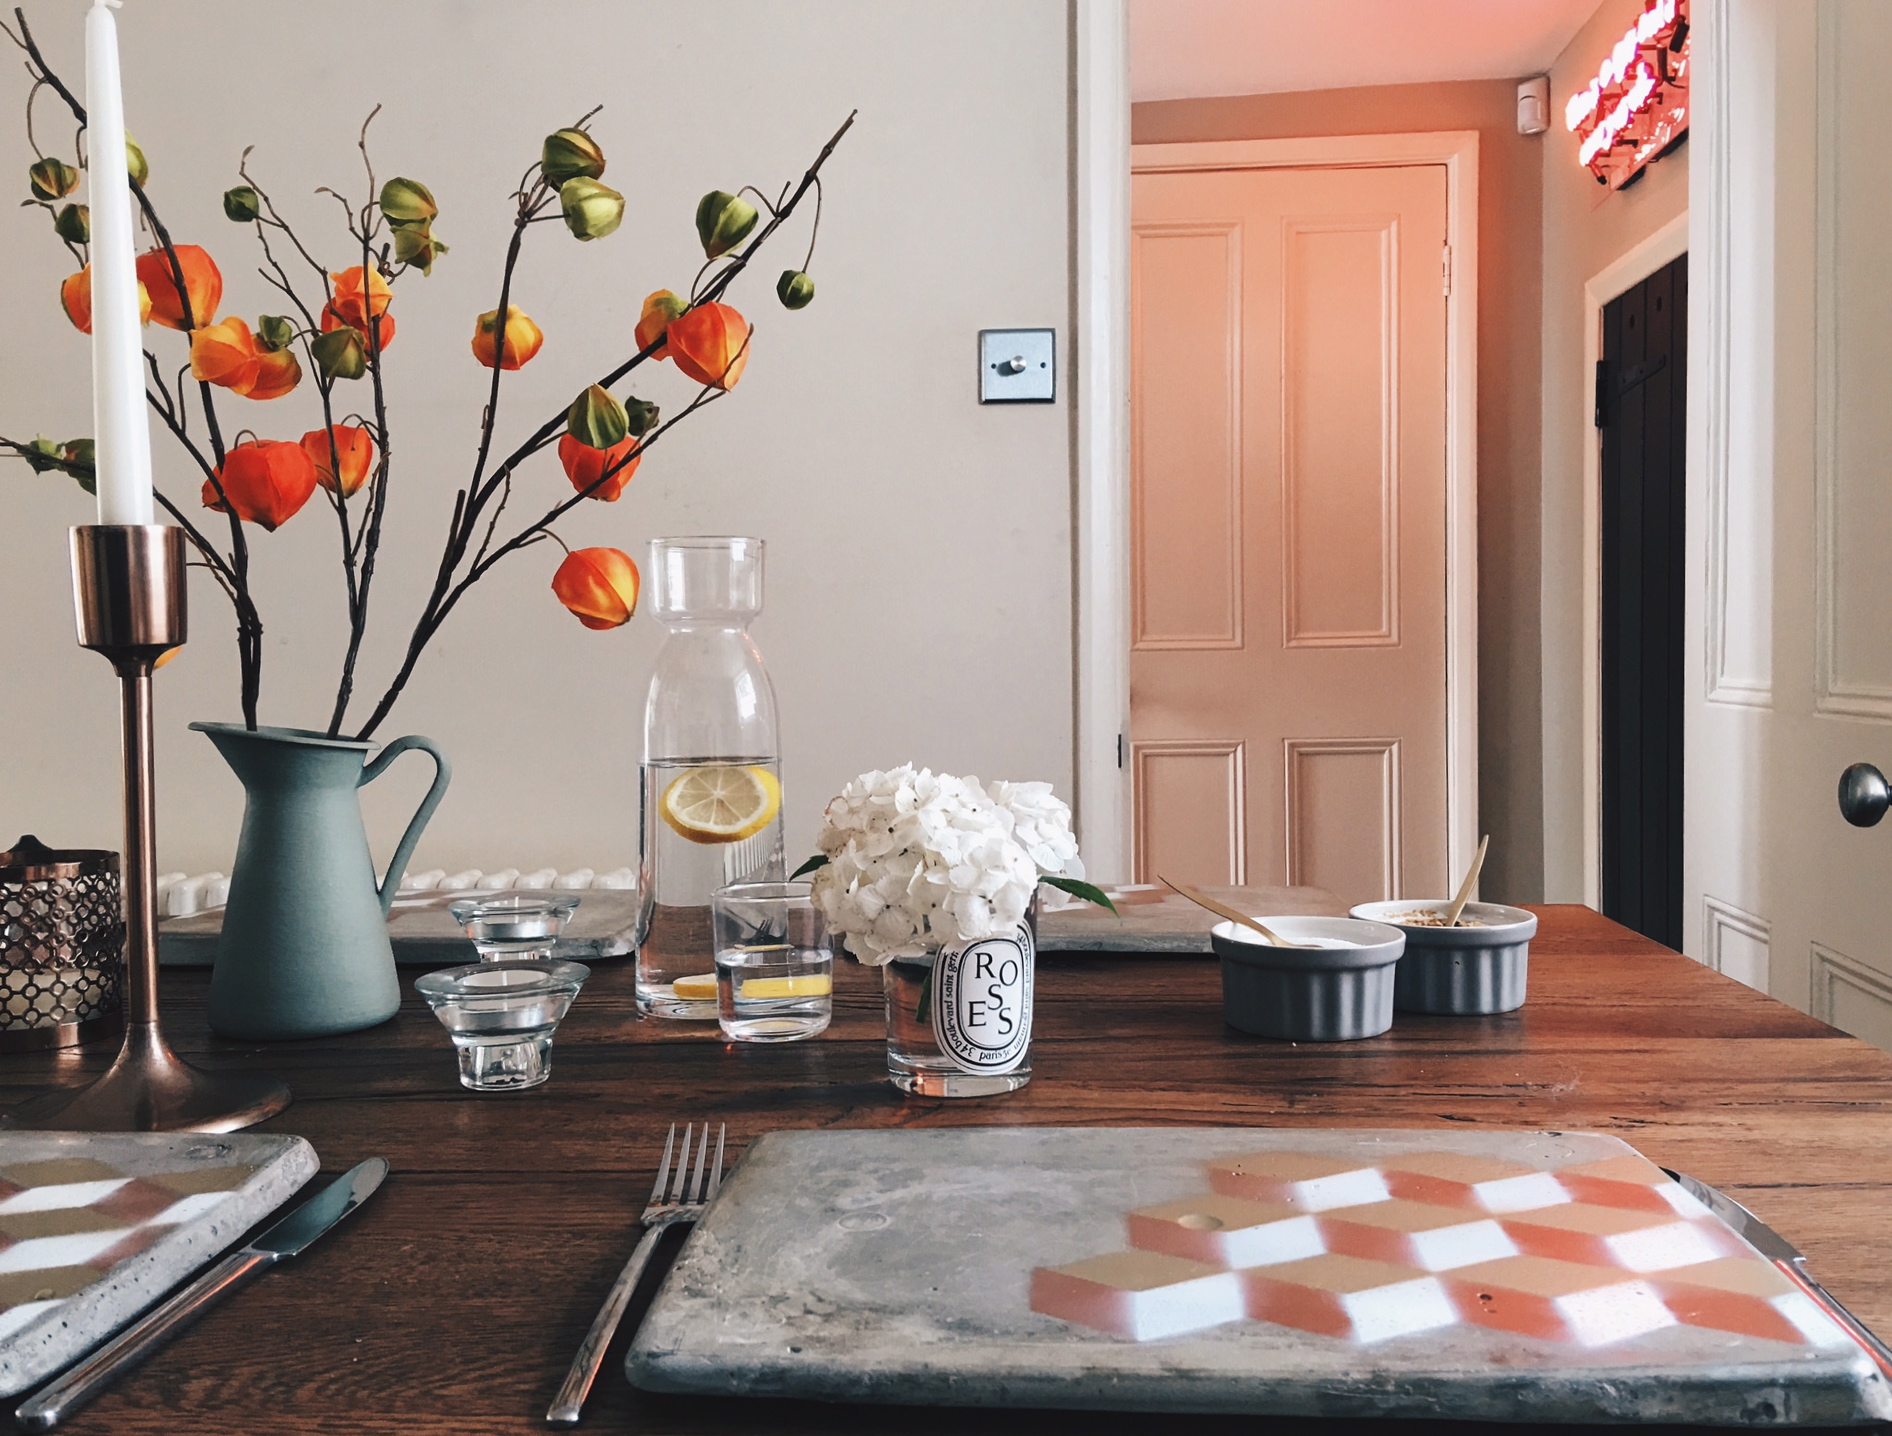
And here are my urban concrete and spray paint table mats in use in my home! The mats are really strong and sturdy and I like how the geometric pattern came out. I think they would really work well in an industrial space like a warehouse or loft, on say a steel table with industrial lighting hanging over them:

Combining concrete and spray paint makes the mats have an urban style.
My home however is a suburban Georgian house so they don't really fit in with the rest of the decor! I'll probably just paint over the concrete entirely with one block colour of paint later on down the line so they suit the rest of the kitchen; but with cement being around a fiver for a big bag you can literally make loads of table mats and do what you want with them.
Have you ever used concrete in your home to make anything? What is your experience like of using it? Let me know in the comments section below!