How To Paint Your Kitchen Cabinets
I’m delving into the archives a bit with this one as I last painted my kitchen units three years ago, but they are holding up well and it’s a DIY question that I get asked about a lot, so I thought I would revisit this topic.
I think that the kitchen is the most tricky room in the house to ‘make your own’ if you inherit it from a previous owner. It’s easy to walk in a living space and know that with a change of wall colour, some art and your own furniture you can make the space feel like yours. With kitchens, it’s often the case that you wouldn’t have chosen an existing type of tile, work surface or unit colour. The problem here is that ripping out these elements and starting again takes a lot of money and a lot of labour. Many of us need to ‘make the most of what’s there’ and a good way to do this is to repaint the units.
Kitchen units can be made from various woods such as timber, ply or MDF. They also come veneered or made from melamine, which is an easy-to-clean plastic. The good news is that all of these surfaces can be painted to a non-chip standard with the rights products and tools.
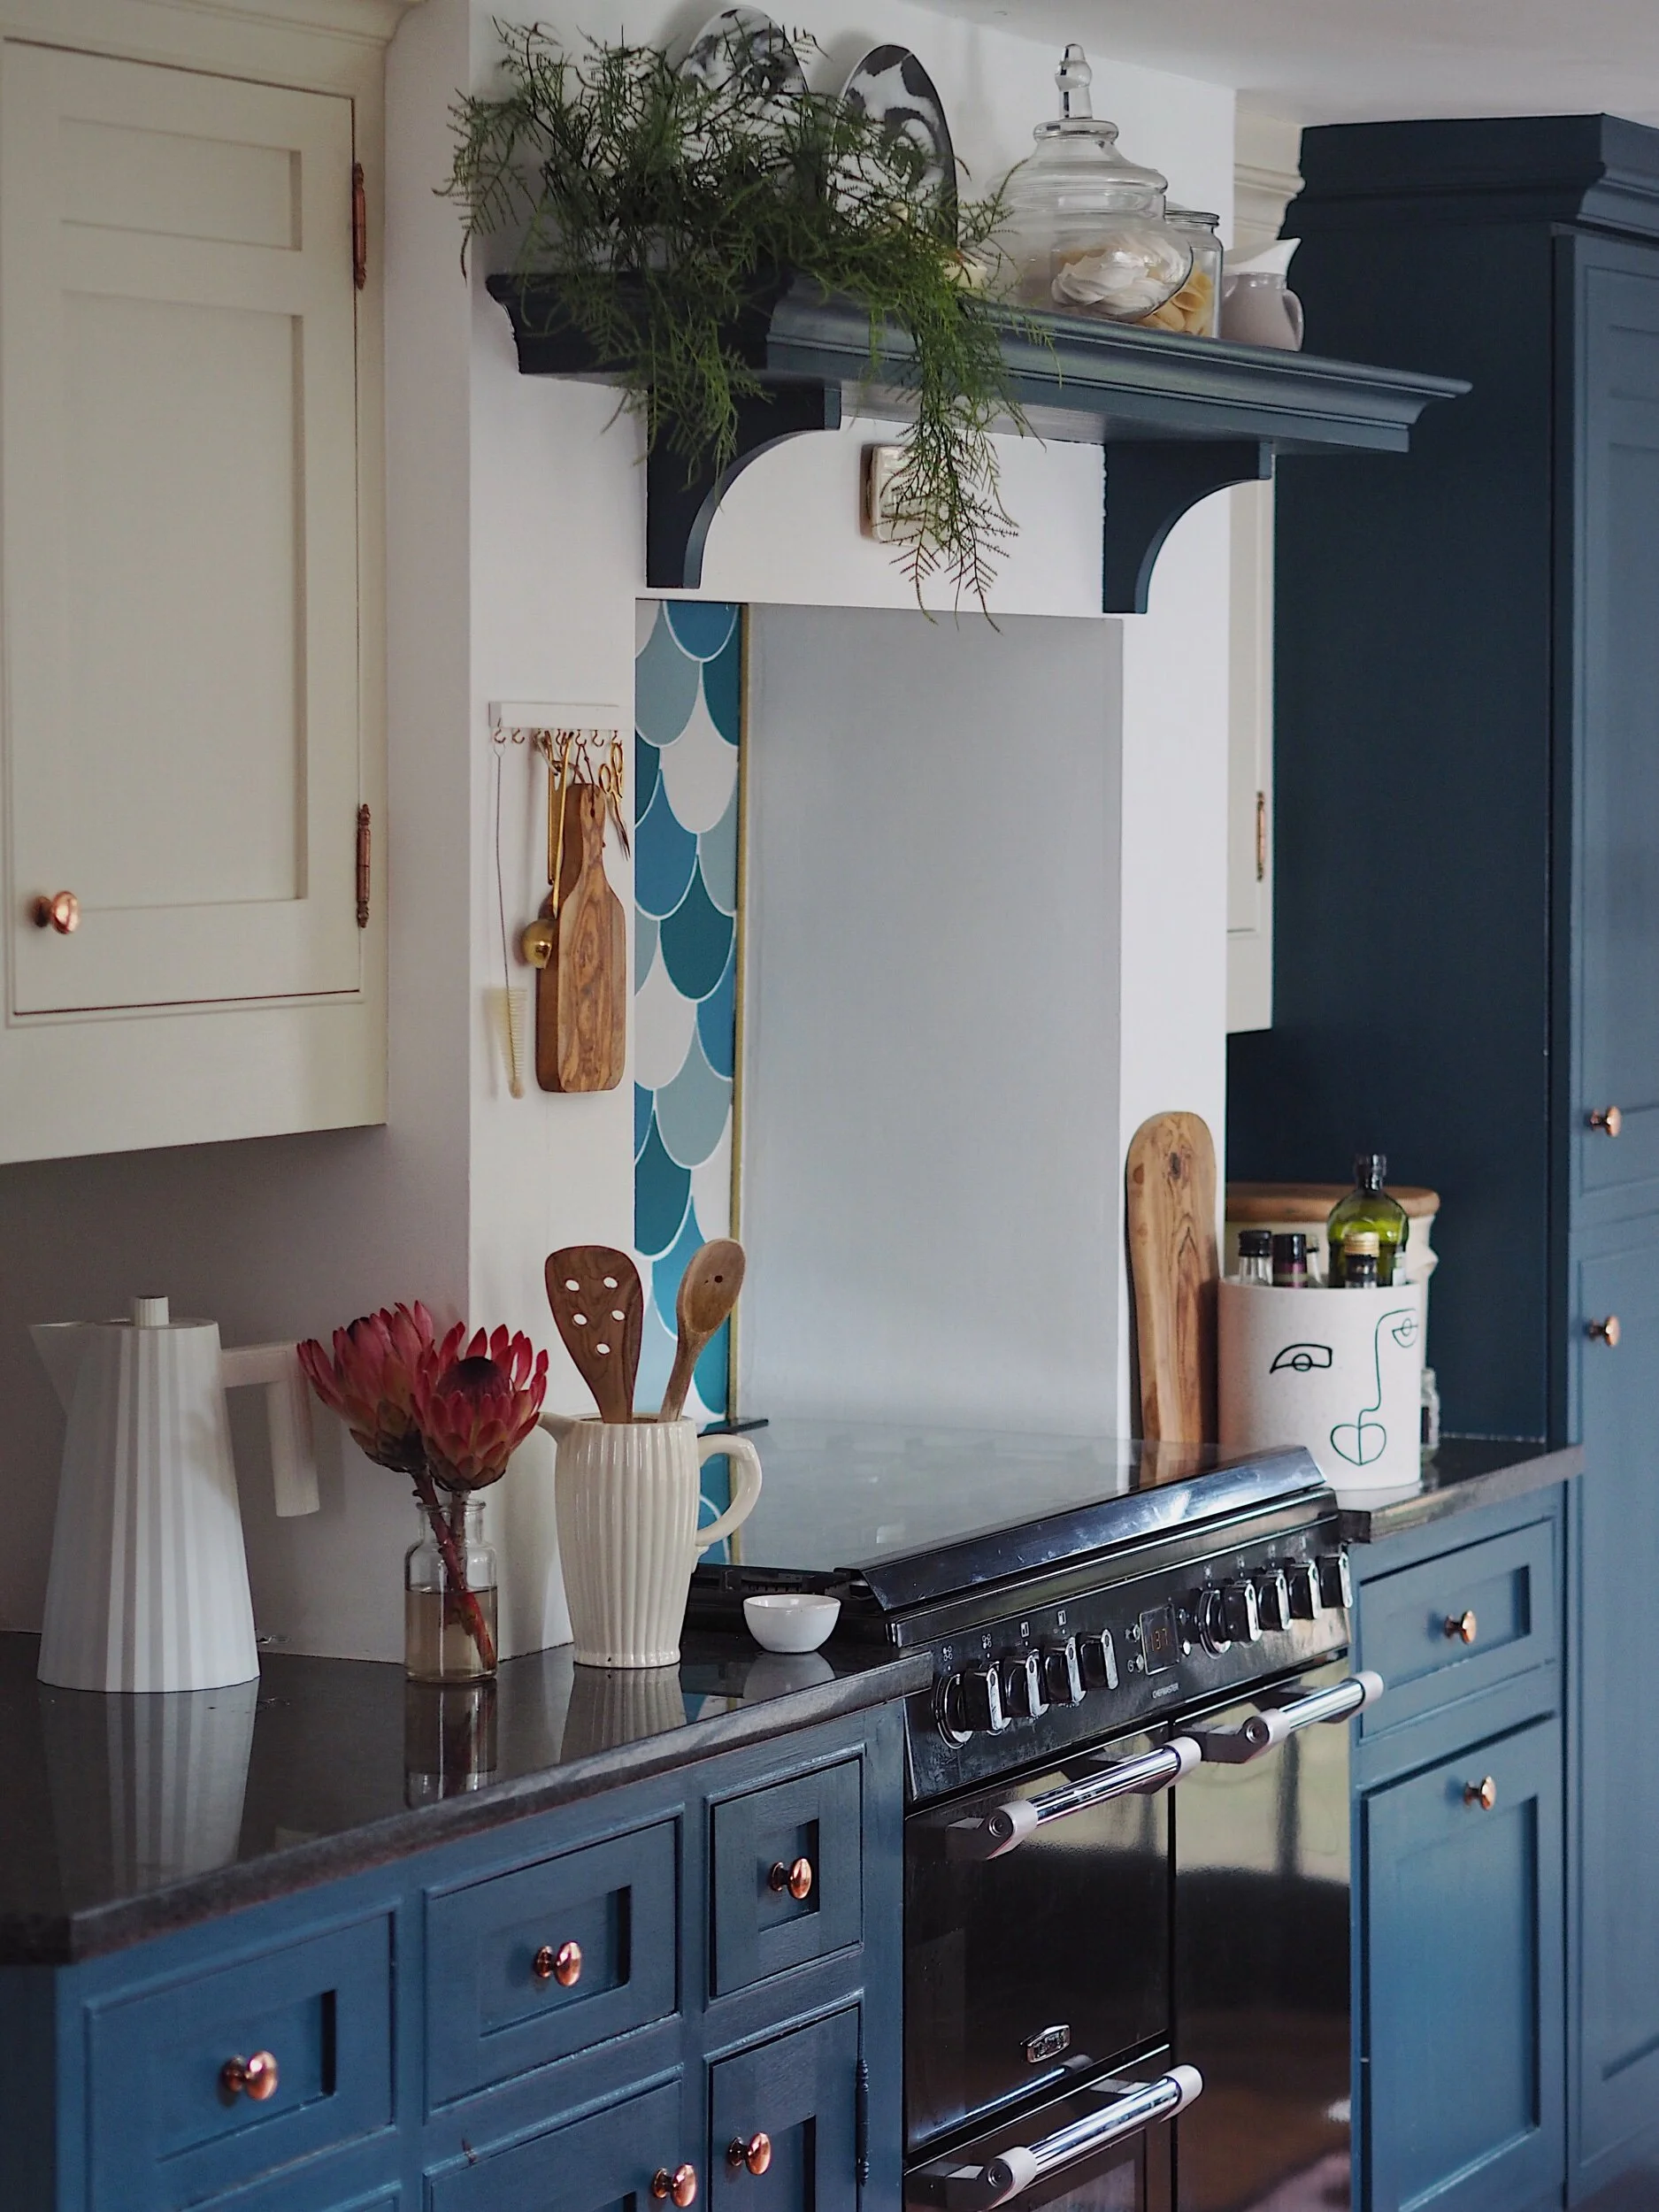
When we moved into our house the kitchen was canary yellow with oversized wood knobs. The kitchen itself with its wooden shaker doors was actually rather lovely, but as soon as we got through the door this was the first colour to go! Instead, it is now painted in Hague Blue by Farrow & Ball on the base units, and Clunch - also by F&B - on the top units. The navy units bring a contemporary, strong depth of colour to the space while giving also giving it personality. By keeping this dark colour below eye level and keeping it light up top, the deep blue doesn’t feel domineering or encroaching.
The yellow kitchen we inherited, as featured in the estate agent lookbook.
Regardless of if your units are wood or plastic, I’d always recommend the same method of painting them which involves a top-level primer, a roller especially for cabinets and a water-based eggshell paint. There are other methods you can follow, such as spraying on paint or using an oil-based eggshell, but I’ll talk about why these approaches can be a bit problematic a bit further down this post.
What our kitchen looks like now.
For no-chip kitchen unit painting on any surface you will need:
Sugar Soap - I much prefer the pack of sugar soap wipes than using a spray bottle and an old rag as it is easier and cleaner
Screwdriver (optional - to remove handles)
Good quality mini roller set for cabinet painting
Zinsser B-I-N primer with a shellac base
Sash window brush (optional - you will need one of these if you have detailed units such as shaker, rather than flat fronts)
Water-based eggshell paint in a colour of your choice
Prep
Start by removing any door furniture that you have such as drawer knobs and handles. Give your kitchen units a really good clean down with sugar soap. Sugar soap is much better to use than just regular soap and hot water, as it actively removes grease which will show up under any new paintwork.
Make sure your floor or work surfaces are fully protected from any primer or eggshell paint drips, which are a lot harder to remove than basic emulsion paint that you apply on your walls. Apply a protective painter’s tape to protect any areas that you do not want to paint, such as where the cabinets meet the wall or the kickboards meet the floor. I always use a low-tack tape that is easy to apply and peels off without damaging the surface beneath it.
Prime
I swear by Zinsser B-I-N as the best primer for painting your kitchen cabinets. First of all, it makes paint adhere to pretty much any surface, meaning you can use it on your melamine. Unlike other primers, there is no need to sand your surface first for adhesion - saving so much time and mess! It is also a stain blocker, so if your wood has knots or unsightly marks, it will stop them bleeding through into your new paintwork. The only thing about it is that it is really high in VOC’s with an accompanying strong chemical smell, so always wear a good quality respiratory mask when applying it. The primer is quite thin, but I find ‘breathing’ it for a while can thicken up the mixture (do make sure you give the tin a good stir beforehand.)
Invest in a good quality mini roller for cabinet fronts for both your priming and your painting. Avoid buying just a cheap emulsion roller as your finish will be nowhere near as good. Wood-finish rollers give you a really smooth, professional application, so it is worth spending the extra fiver. Make sure you have two roller heads - one for the primer and one for the eggshell paint.
Apply 2-3 coats of primer, leaving adequate time between each coat.
These pictures were taken when I primed the kitchen units. At the time I used a paintbrush, but l would have got a better finish with the right roller - something I’ve learnt with further experience painting wardrobes and other units around the house!
Paint
Professional kitchen cabinet painters will often reject water-based eggshell paints in favour of oil-based ones, as they swear that the oil-based is more durable and chip-proof. The reason that I never recommended it is that oil-based is high VOC and takes absolutely AGES to dry - like, days. Many paint companies either stopped producing oil-based eggshells or concentrated on perfecting their water-based formulas due to the environmental impacts of water vs oil paints. I’ve talked to so many paint companies who now swear that their water-based is as good - if not better - than their previous oil formulas. The best thing to do is to choose your shade and then consult the paint company's website as to which finish provides the most durability. Farrow and Ball now do a ‘modern eggshell’ as well as just an ‘eggshell’, with the modern being more durable (both, however, are water-based).
Give your units 2-3 coats of your eggshell paint with your roller, using a pointed sash window brush to get into any tough corners or edges that the roller cannot reach. Leave an adequate drying time between coats (consult the back of the tin for a re-coat guide). Once you’ve finished painting your cabinets, be really careful with them for a week or so - keep them open if possible and try not to touch the painted surfaces if you can. The reason for this is that the paint will need time to ‘cure’ and reach its 100% maximum hardness level.
Re-apply your door hardware and you are done! Although, if you really want to transform your units, changing up the knobs for something shiny and new is a really good way to do this. I buy new drawer knobs and pulls from Dowsing & Reynolds , All Handles and Pulls and my favourites Swarf Hardware.
If you have unit doors that come off the hinges and you cannot see the rest of the carcass which doesn’t need to be painted, you might want to take all the doors off and spray paint them for a completely flawless finish. I’d advise against doing this outdoors as the wind can often blow debris and small bugs can get caught in the line of fire! A well-ventilated shed or outbuilding is perfect if you use a paint-spraying machine. Make sure that you follow the manufacturer’s instructions as it may require you to thin the eggshell paint out a bit with some water (resulting in you needing to apply more coats). If you use an all-surface paint in a spray paint can, be extra vigilant with your PPE as the VOC level is really high. Never use spray paint inside your home as the paint particles will travel across all your surfaces.
If spraying your cabinets interests you but you are a bit scared of DIYing, there are companies who will do this for you professionally in a warehouse. A simple Google search should throw up a local kitchen spraying company. If painting your units is not an option, yet you crave a bit of colour or a change-up in your kitchen, opt for bespoke glass splashbacks that come in a variety of shades or designs. You could also do something as simple as change up your kitchen hardware for a completely new look or lay a washable kitchen rug on the floor to add texture and pattern.
If you have any questions, would like to add any tips or would just like to comment on my original yellow kitchen, leave a comment in the box below!


