How To Make An Outdoor Wall Mounted Welly Boot Holder
Make this wall-mounted outdoor wellington boot holder with a couple of pieces of wood and garden paint.
It's dark at 5pm, it's suddenly really cold - yep - winter has arrived! Along with your winter gloves and scarf, the welly boots need to be on hand for those really bleak days. Although a necessity, I really do hate welly boots in the house. They are bulky, flop over on their side, leave dried up mud bits around and generally just get in the way when left by the back door or in the hallway.
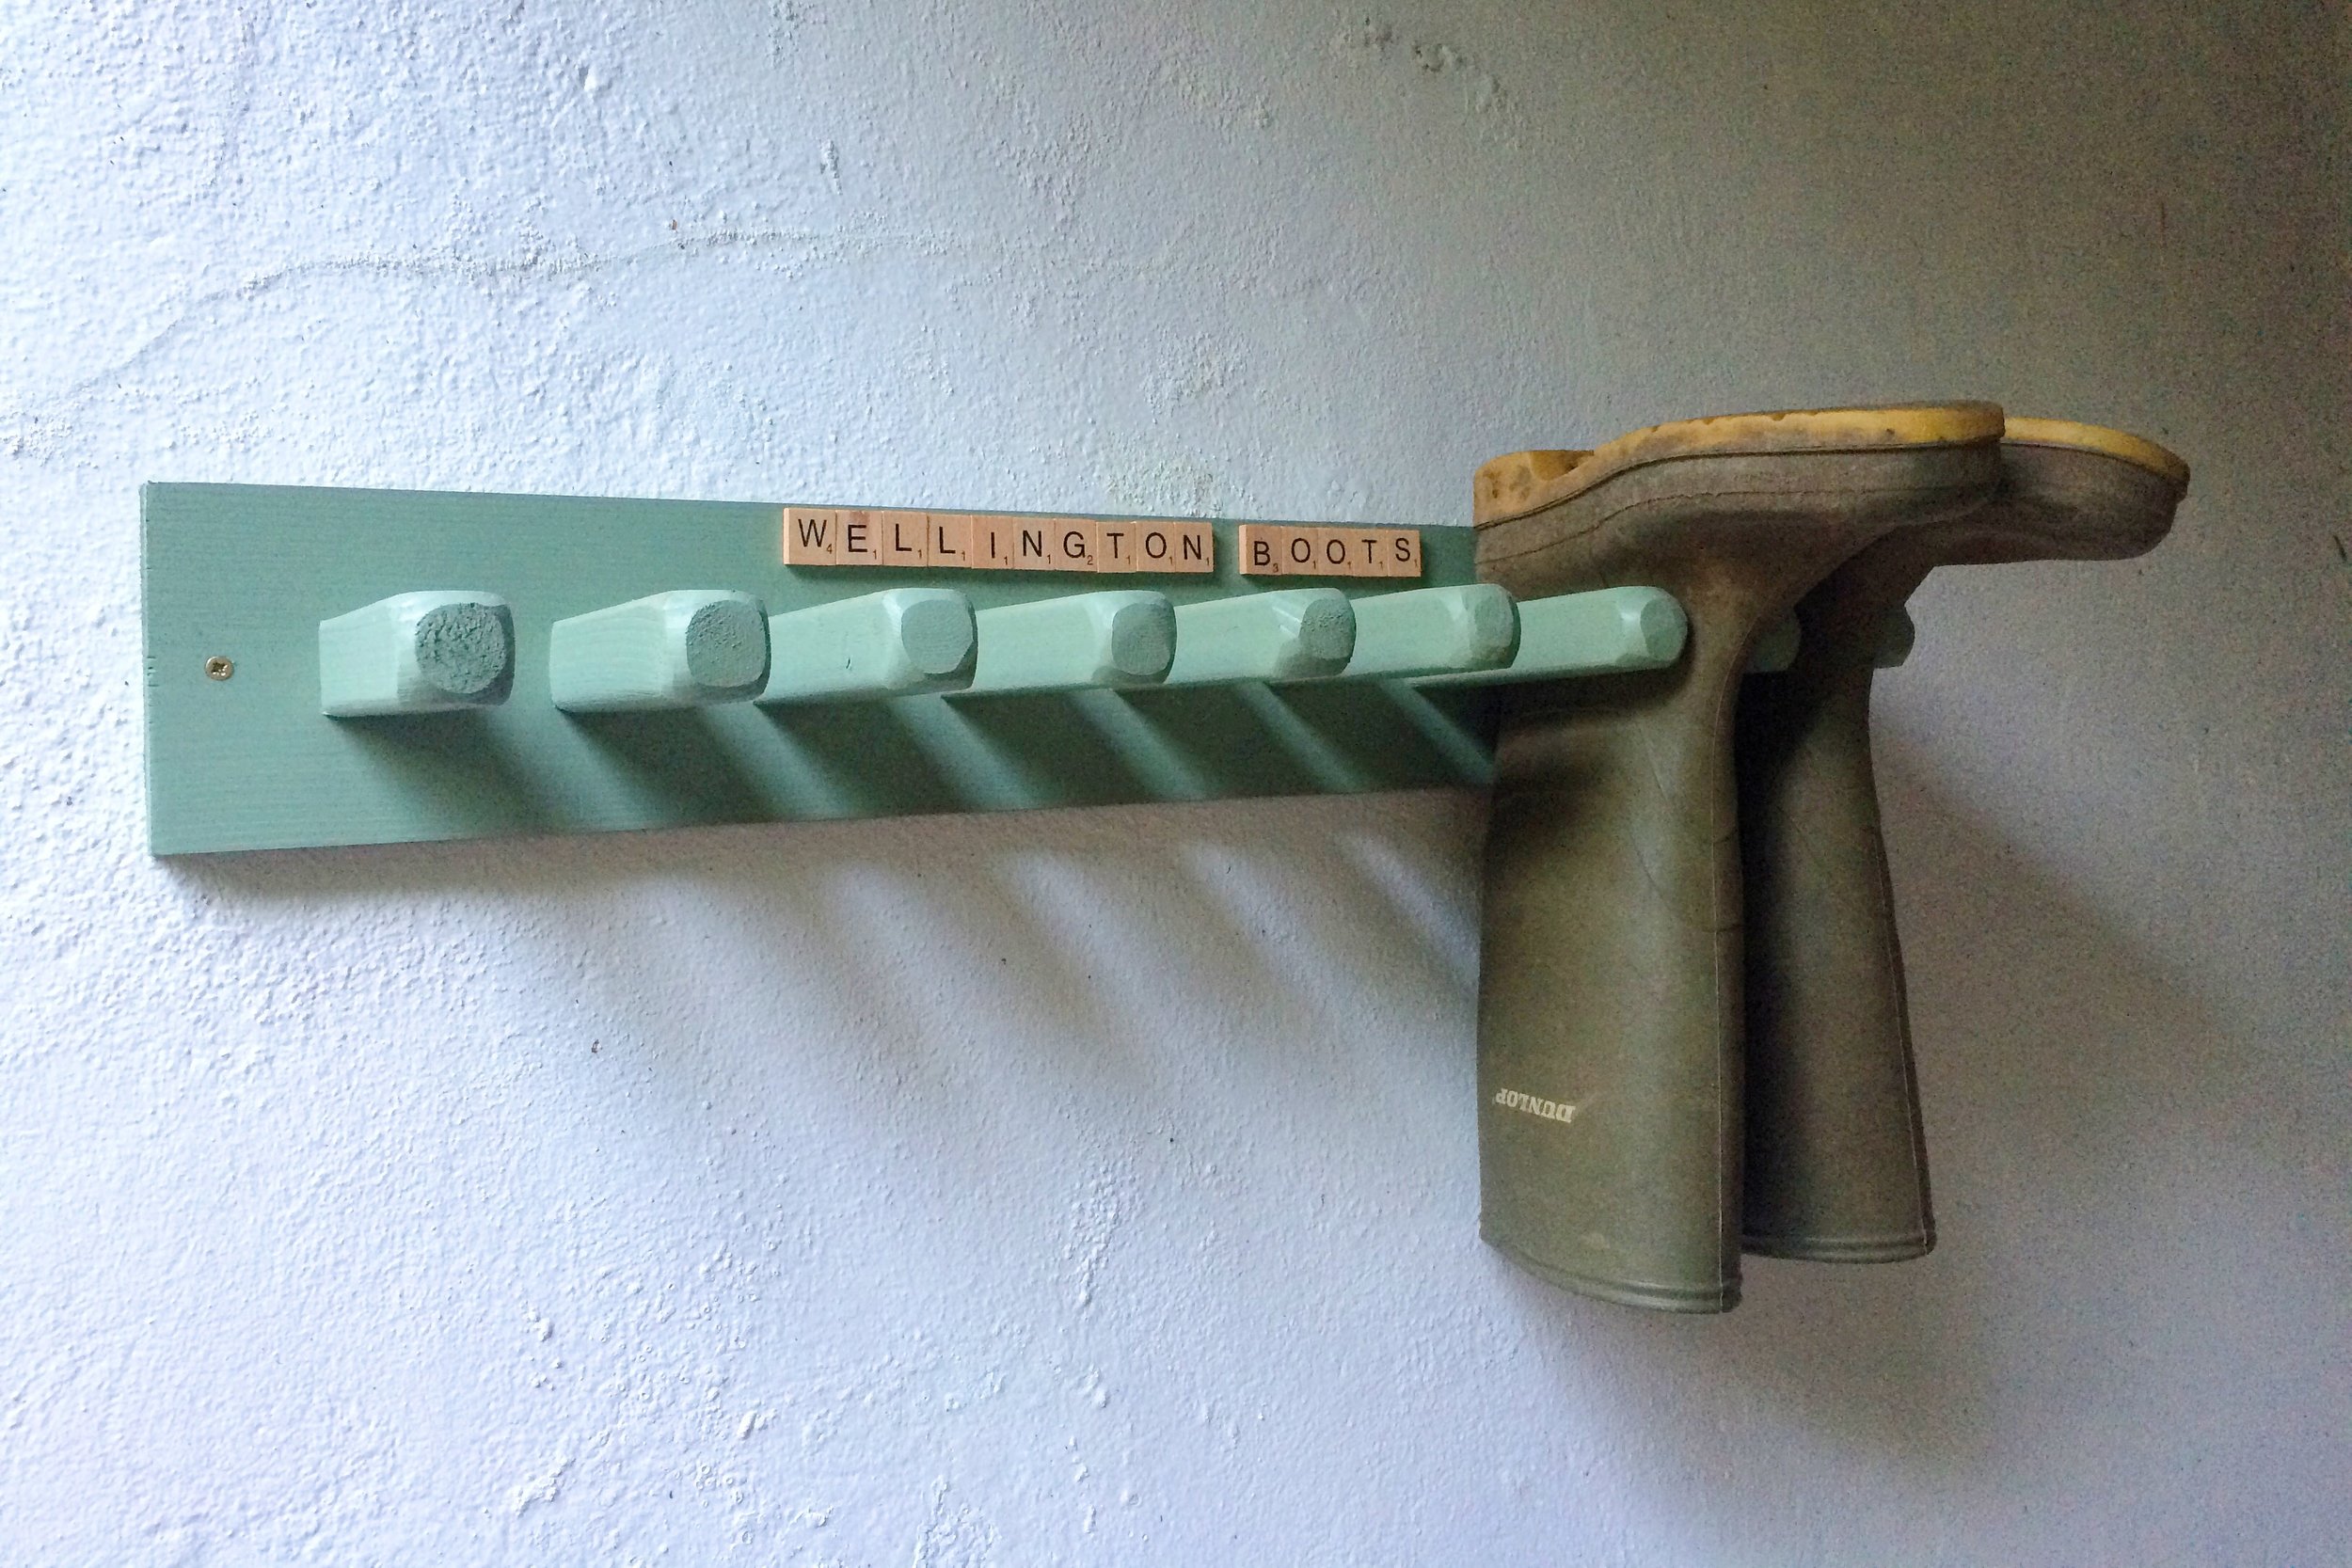
Earlier in the year I was watching a C4 Kirstie & Phil 'Love It or List It' property programme. Kirsty showed the participating couple a 'space saver' house with welly pegs on the wall by the back door to house filthy wellies, rather than store them inside. Inspired, the next morning I knocked out this simple welly boot holder to hang on an outside wall on our house. To make it a bit more interesting and quirky, I also coated it in two coats of left over garden paint, and stuck some scrabble letters on the top to spell out 'Wellington Boots' (just to remind people what it's there for!)
How To Make This Welly Boot Peg Holder:
To make this welly holder you will need the following items:

- One plank of wood - the length is dependent on how many wellies you want to support! My welly holder supports 4 pairs of wellies and is 70cm in length.
- Two poles of wood to create the pegs. Try looking under spindle or fence post wood in your local DIY store. It should be about 32mm in thickness.
- A saw
- Sandpaper/electric sander
- Electric drill and screws
- Pencil
- Measuring tool
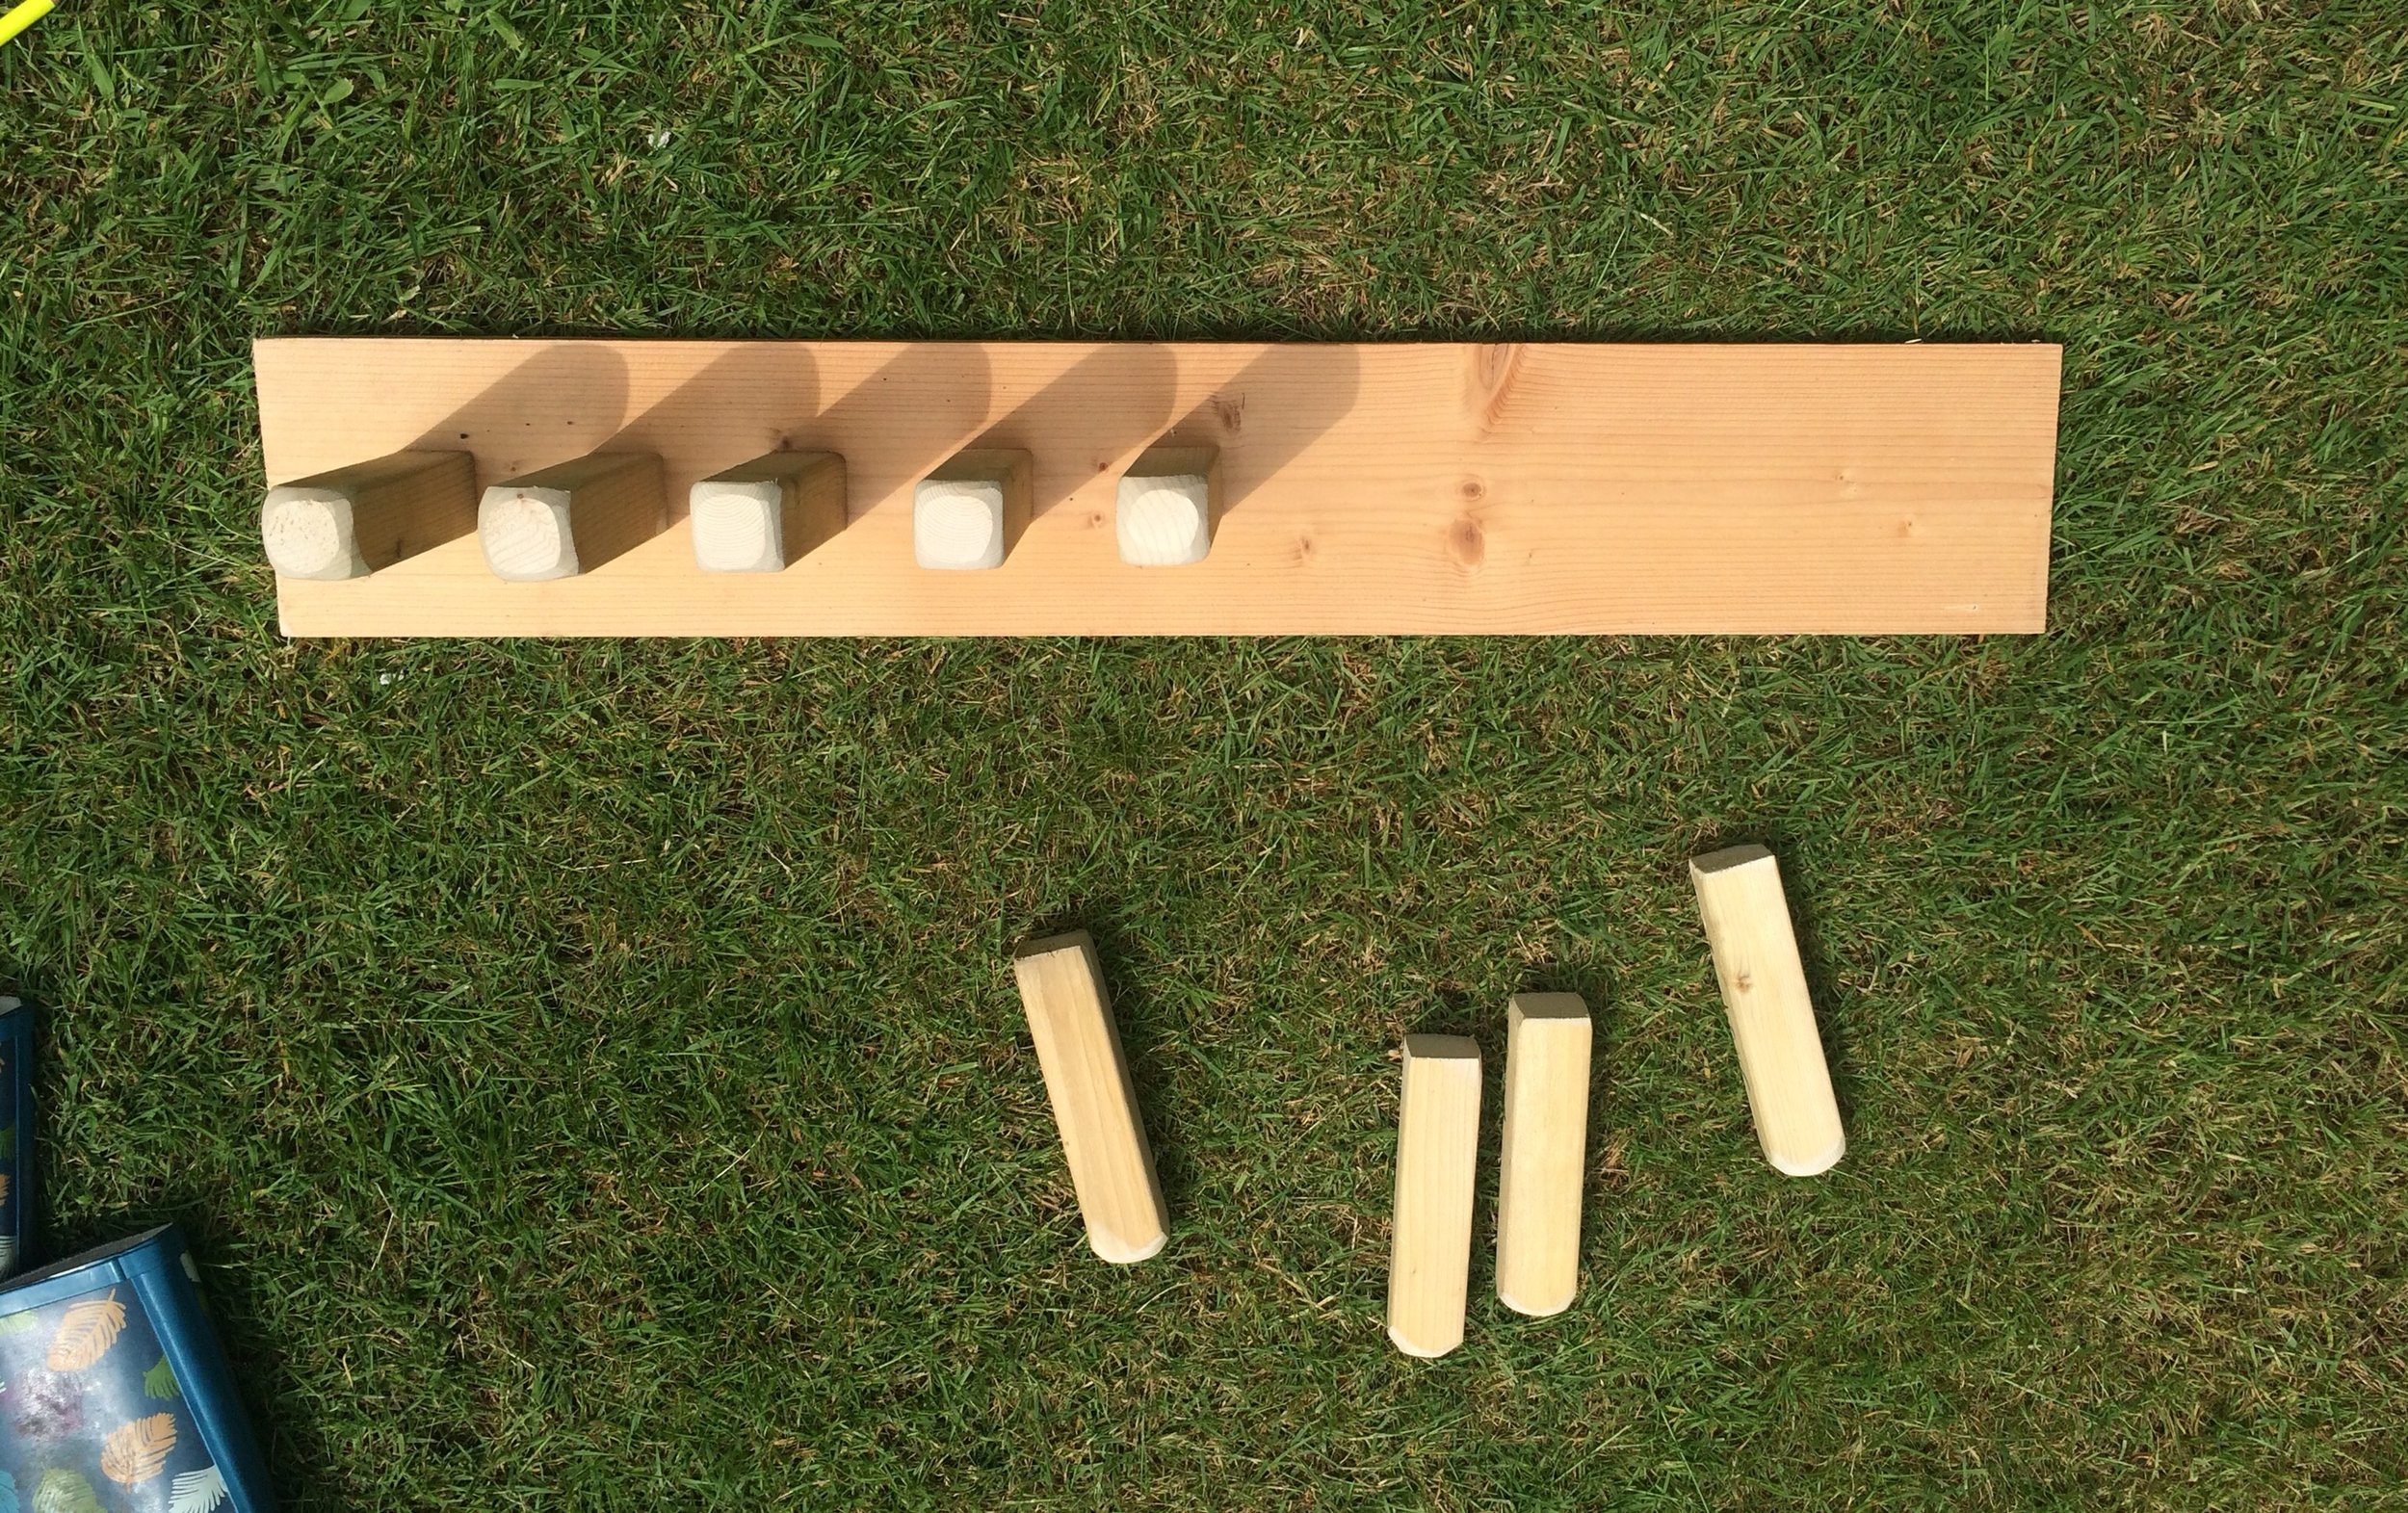
Step 1: Measure, Cut and Sand Your Pegs:
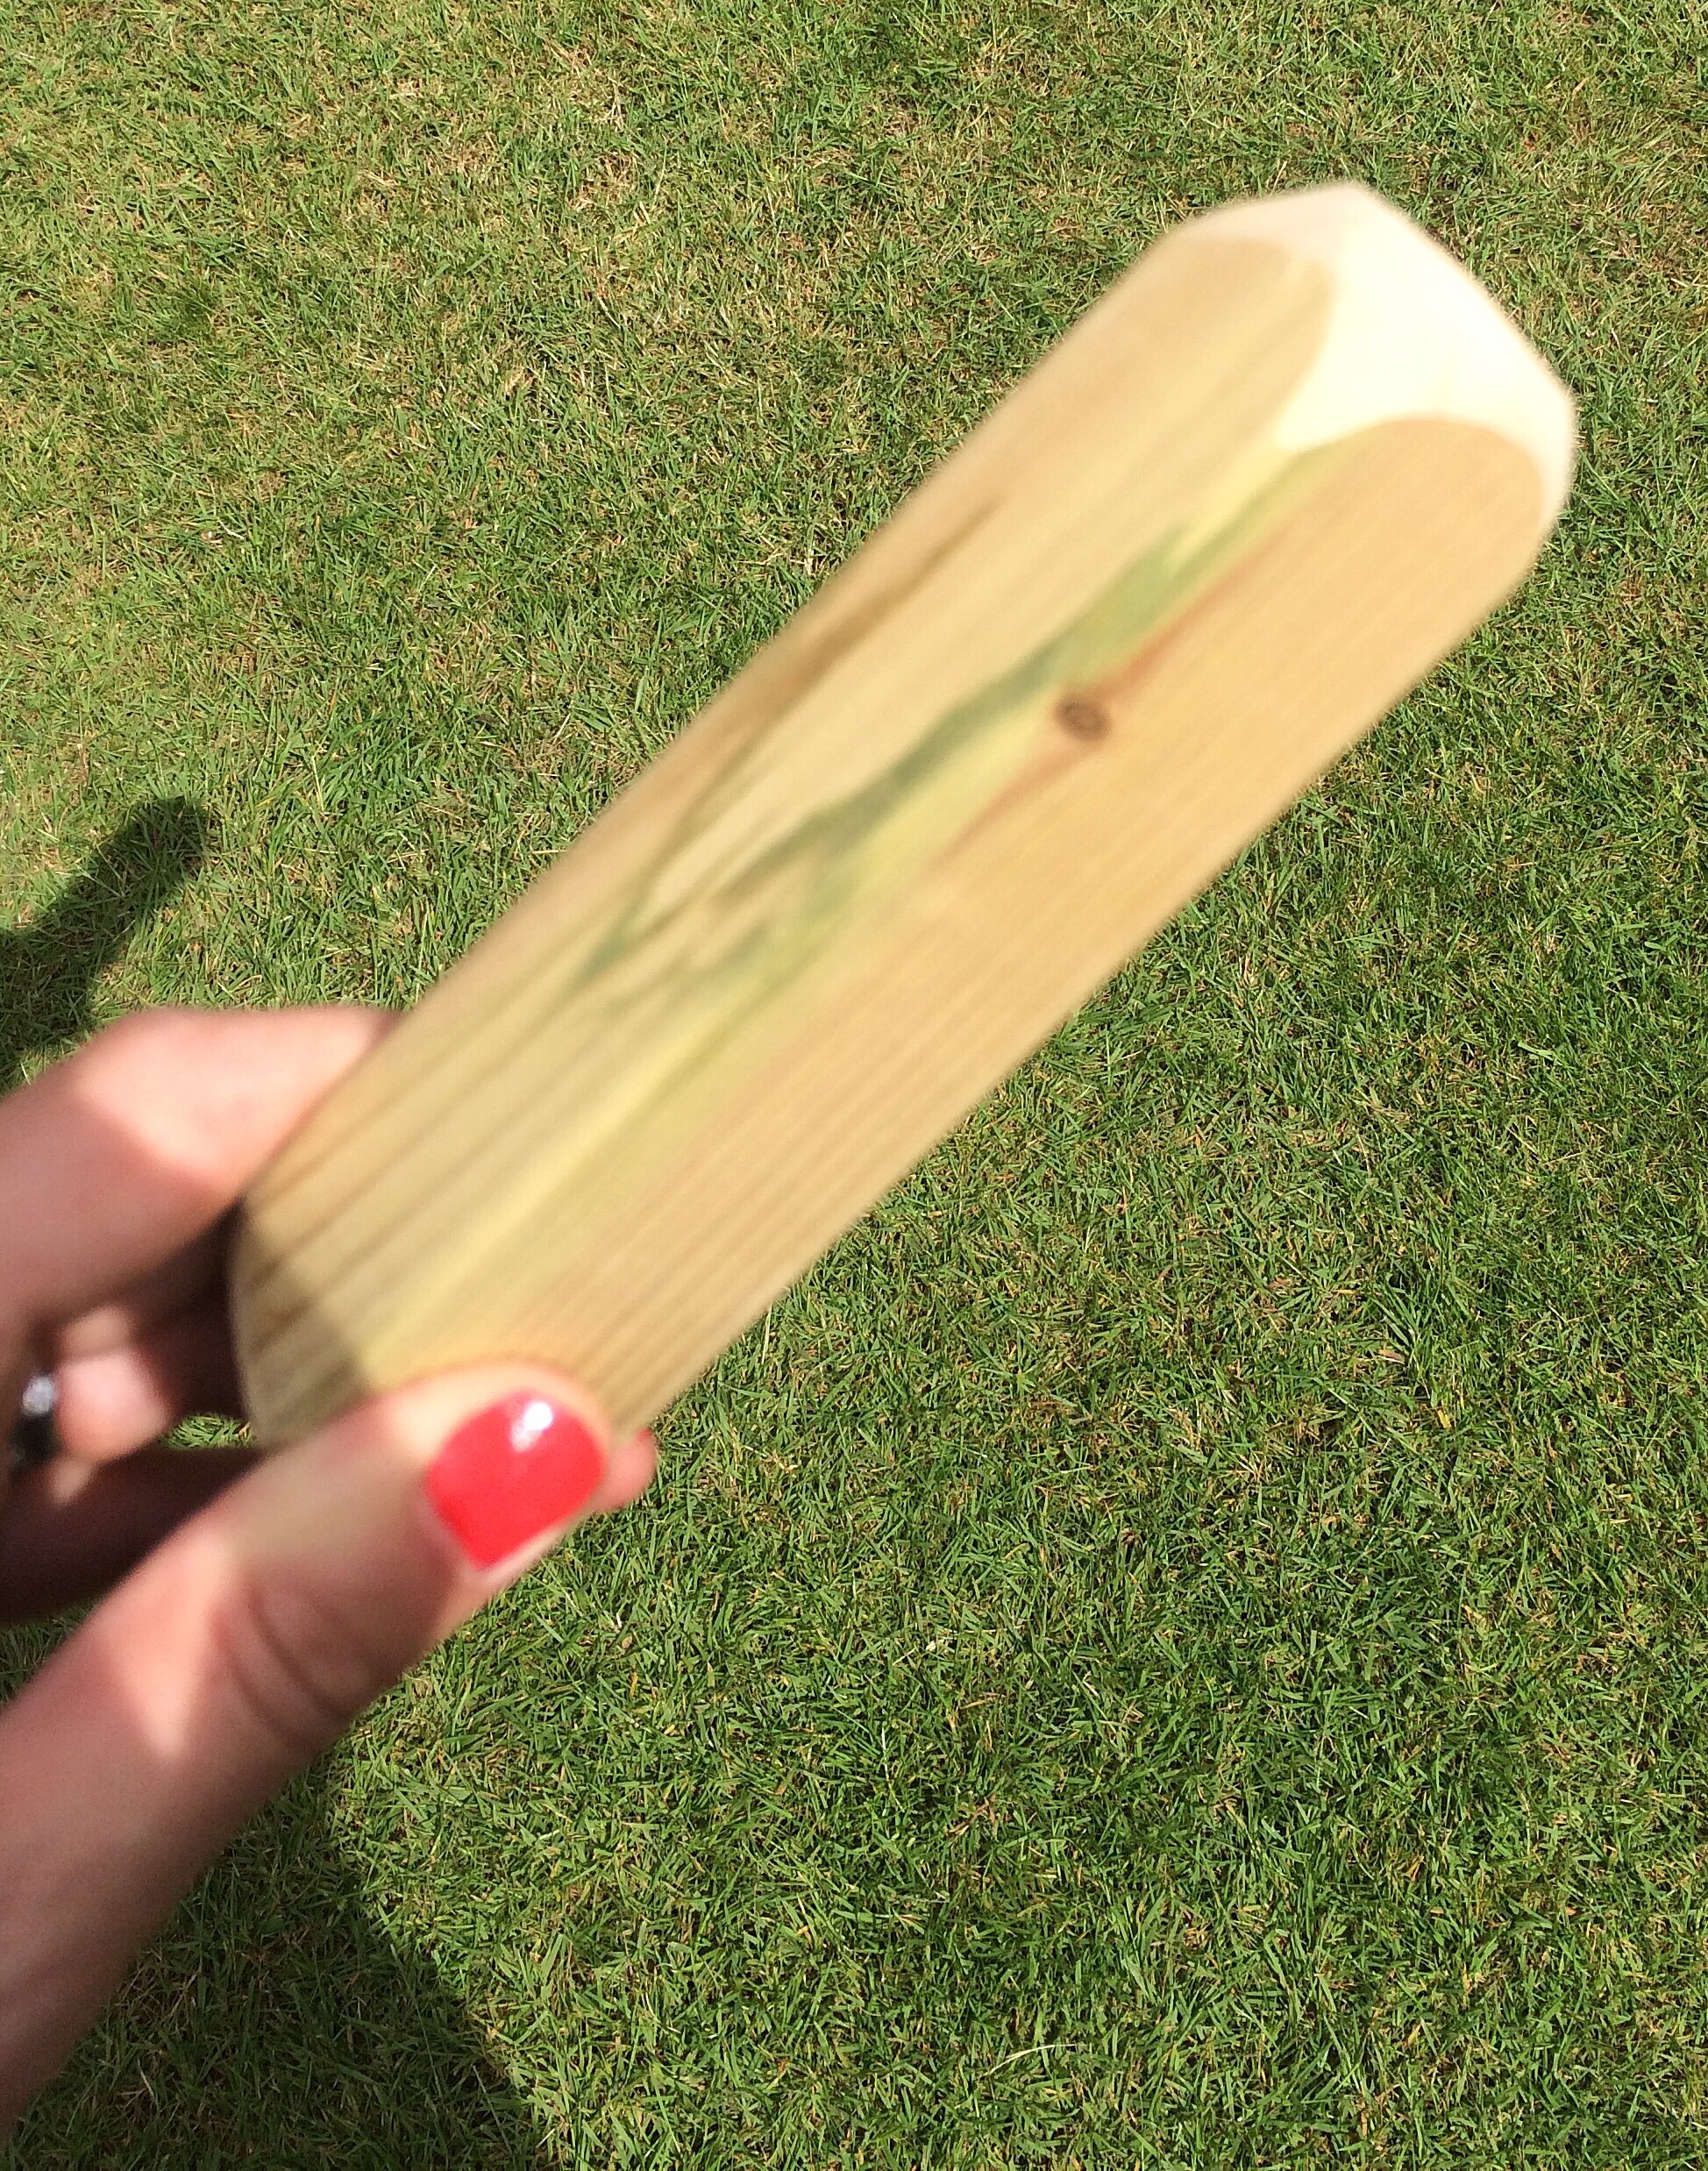
Decide how long to cut your welly pegs (You may want to make your pegs shorter or longer depending on the size of your feet!) My pegs are cut 14cm in length, and this works fine for supporting both adult male and toddler wellies.
Make sure your pegs are measured out all the same length with a measuring tool, then cut your pegs all the same size.
Once cut, take your sandpaper and sand down one end of each peg so they are smooth and won't cause any accidents.
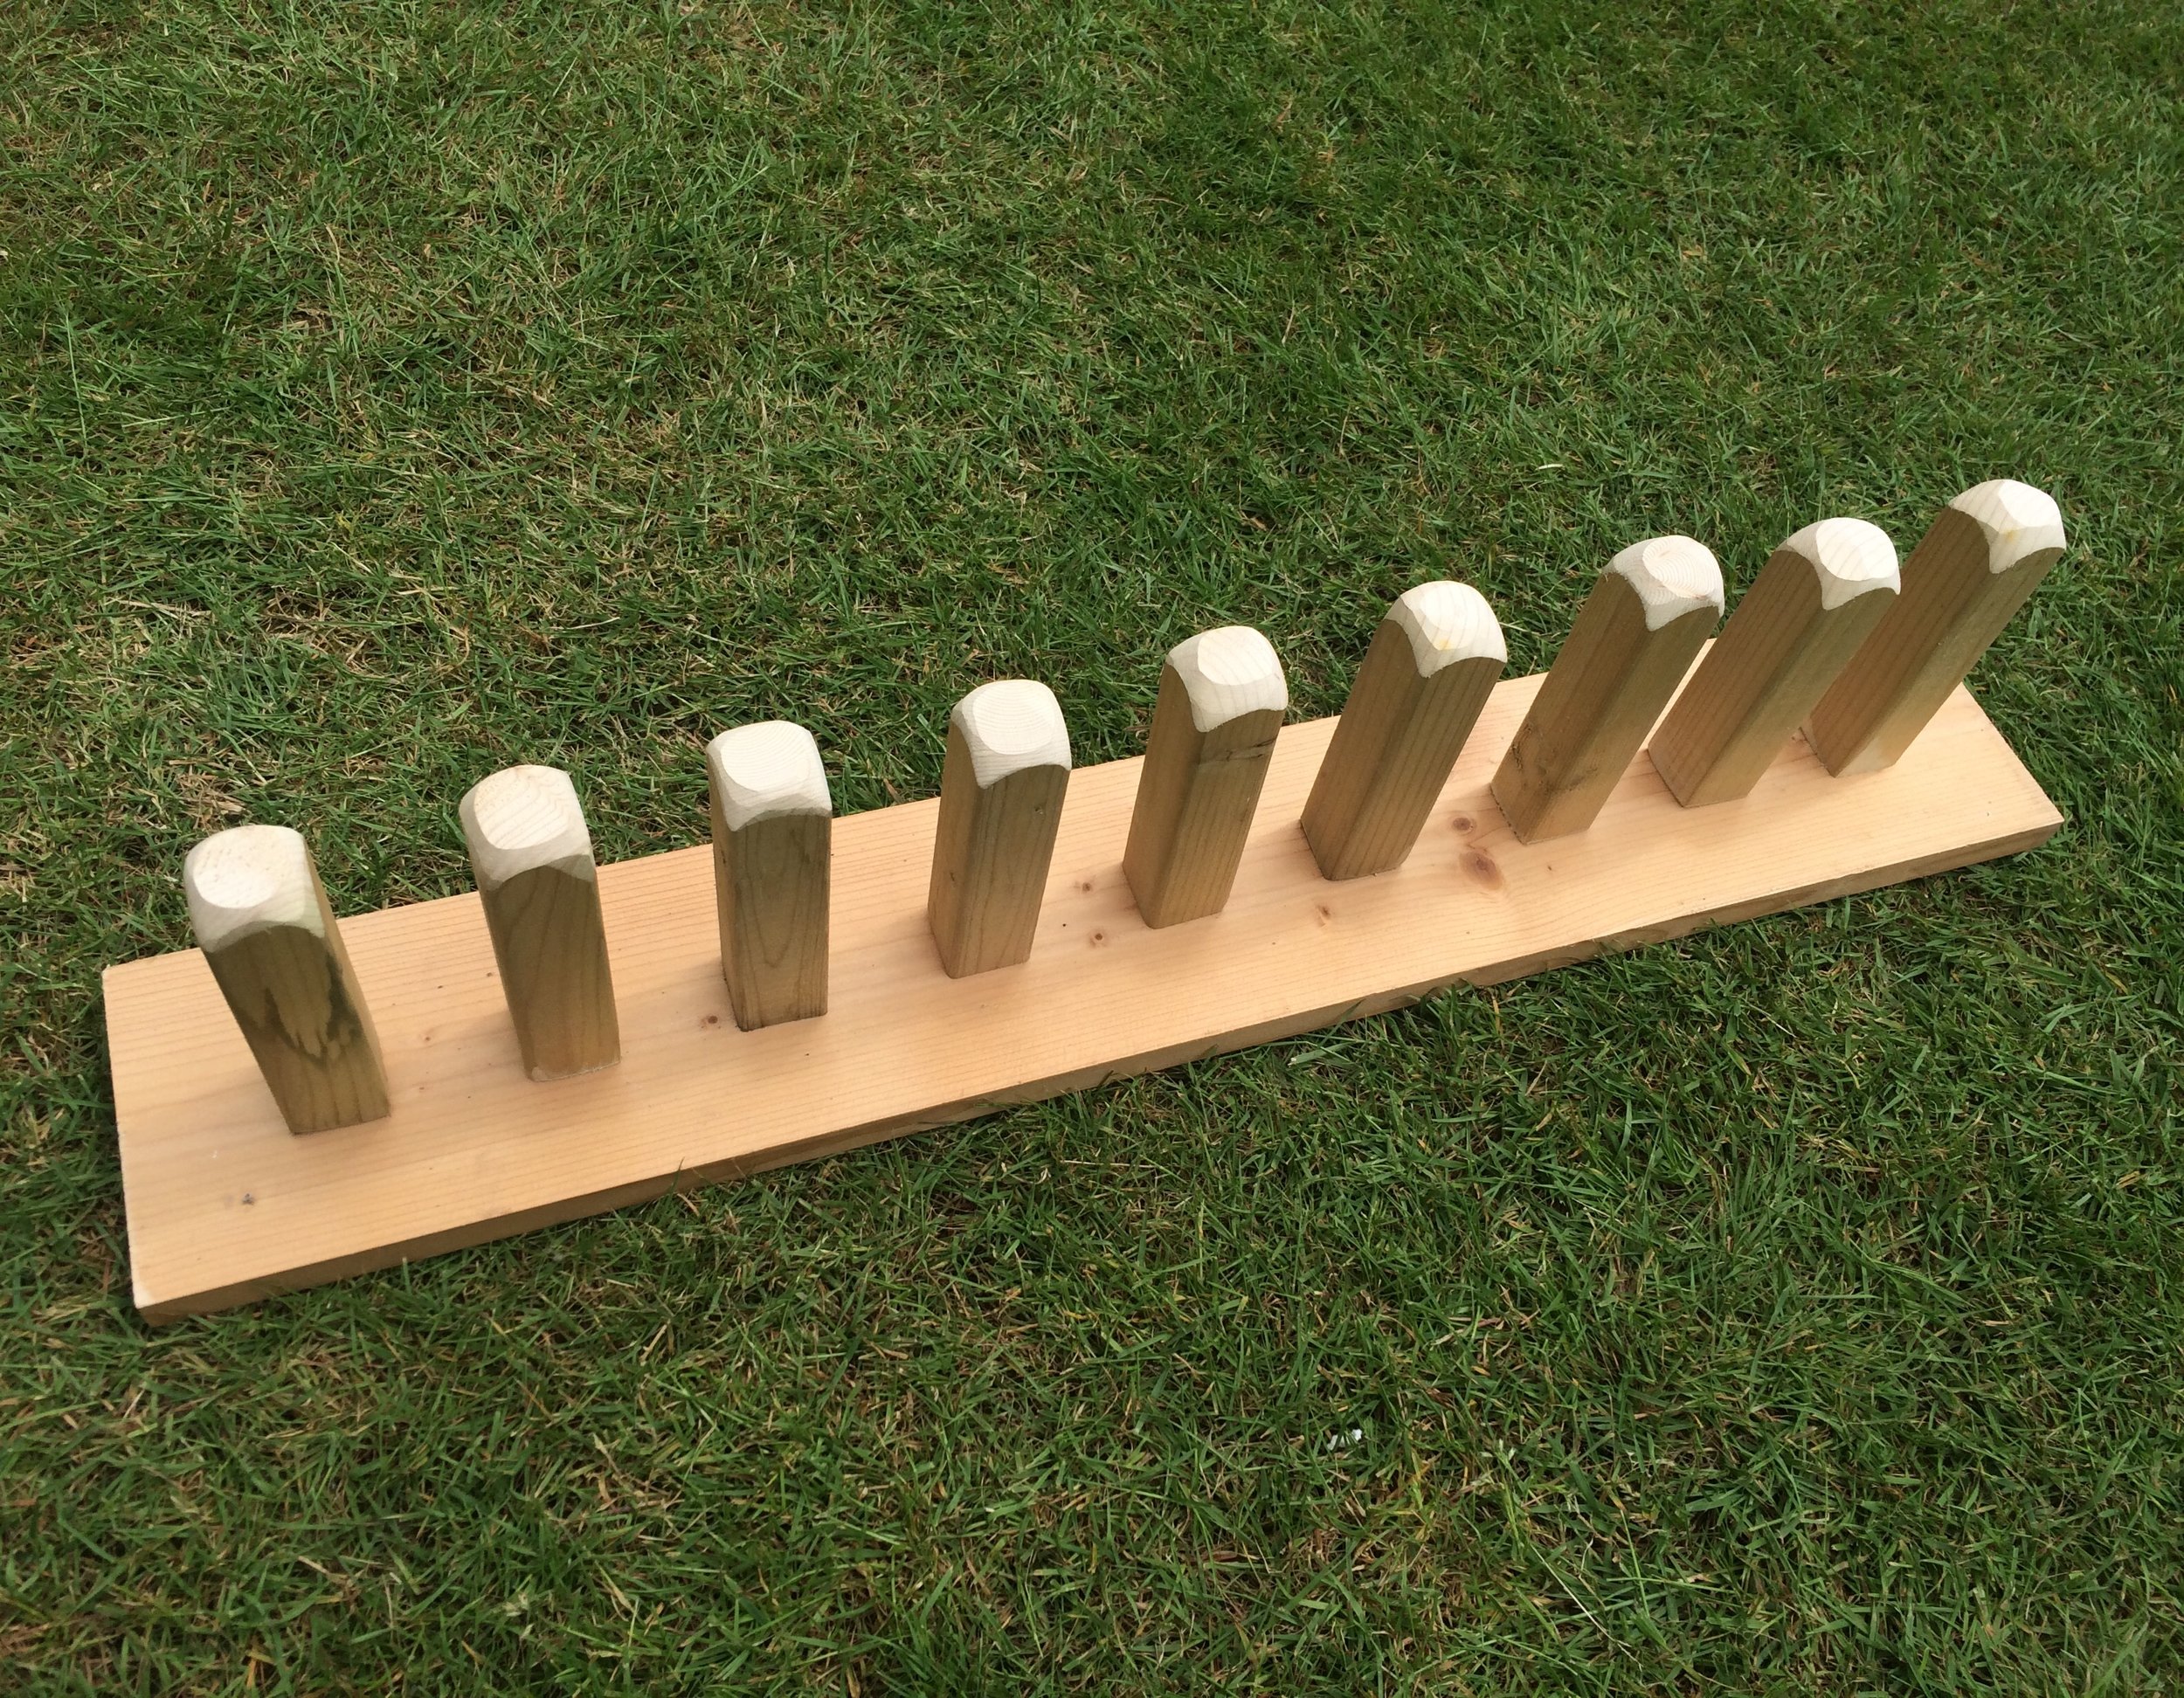
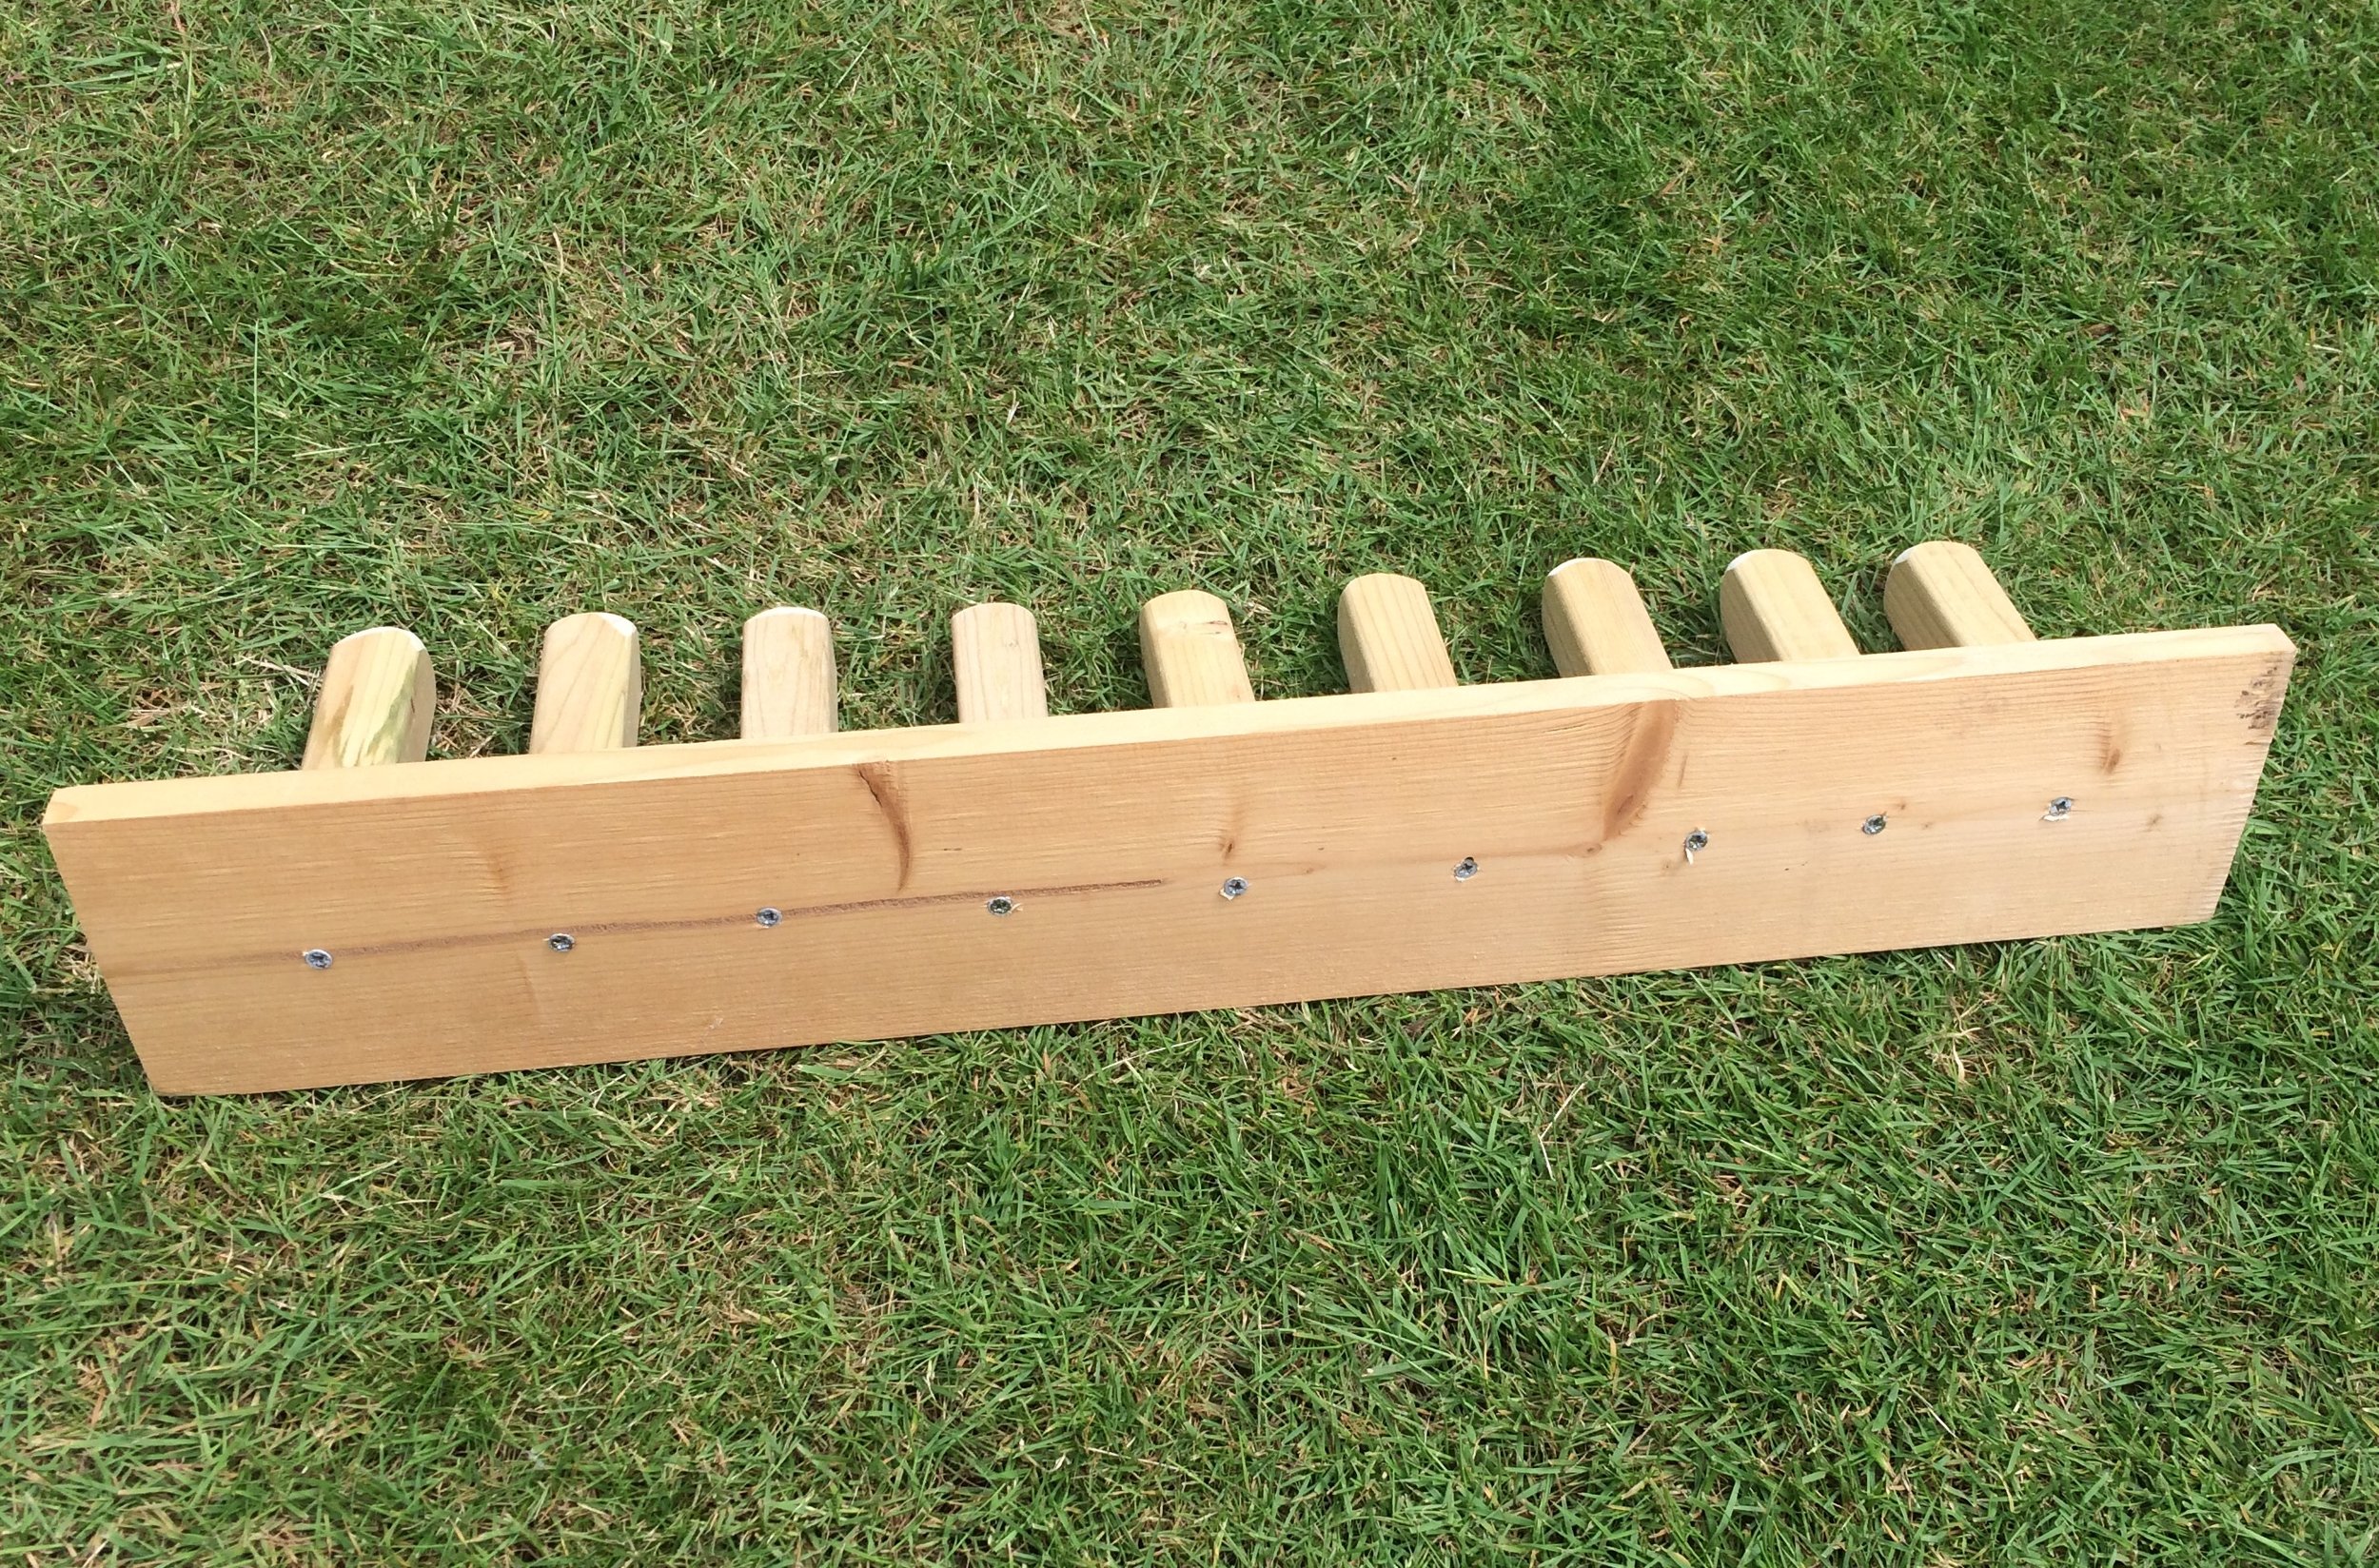
Step 2: Screw Your Pegs Into The Wood Plank:
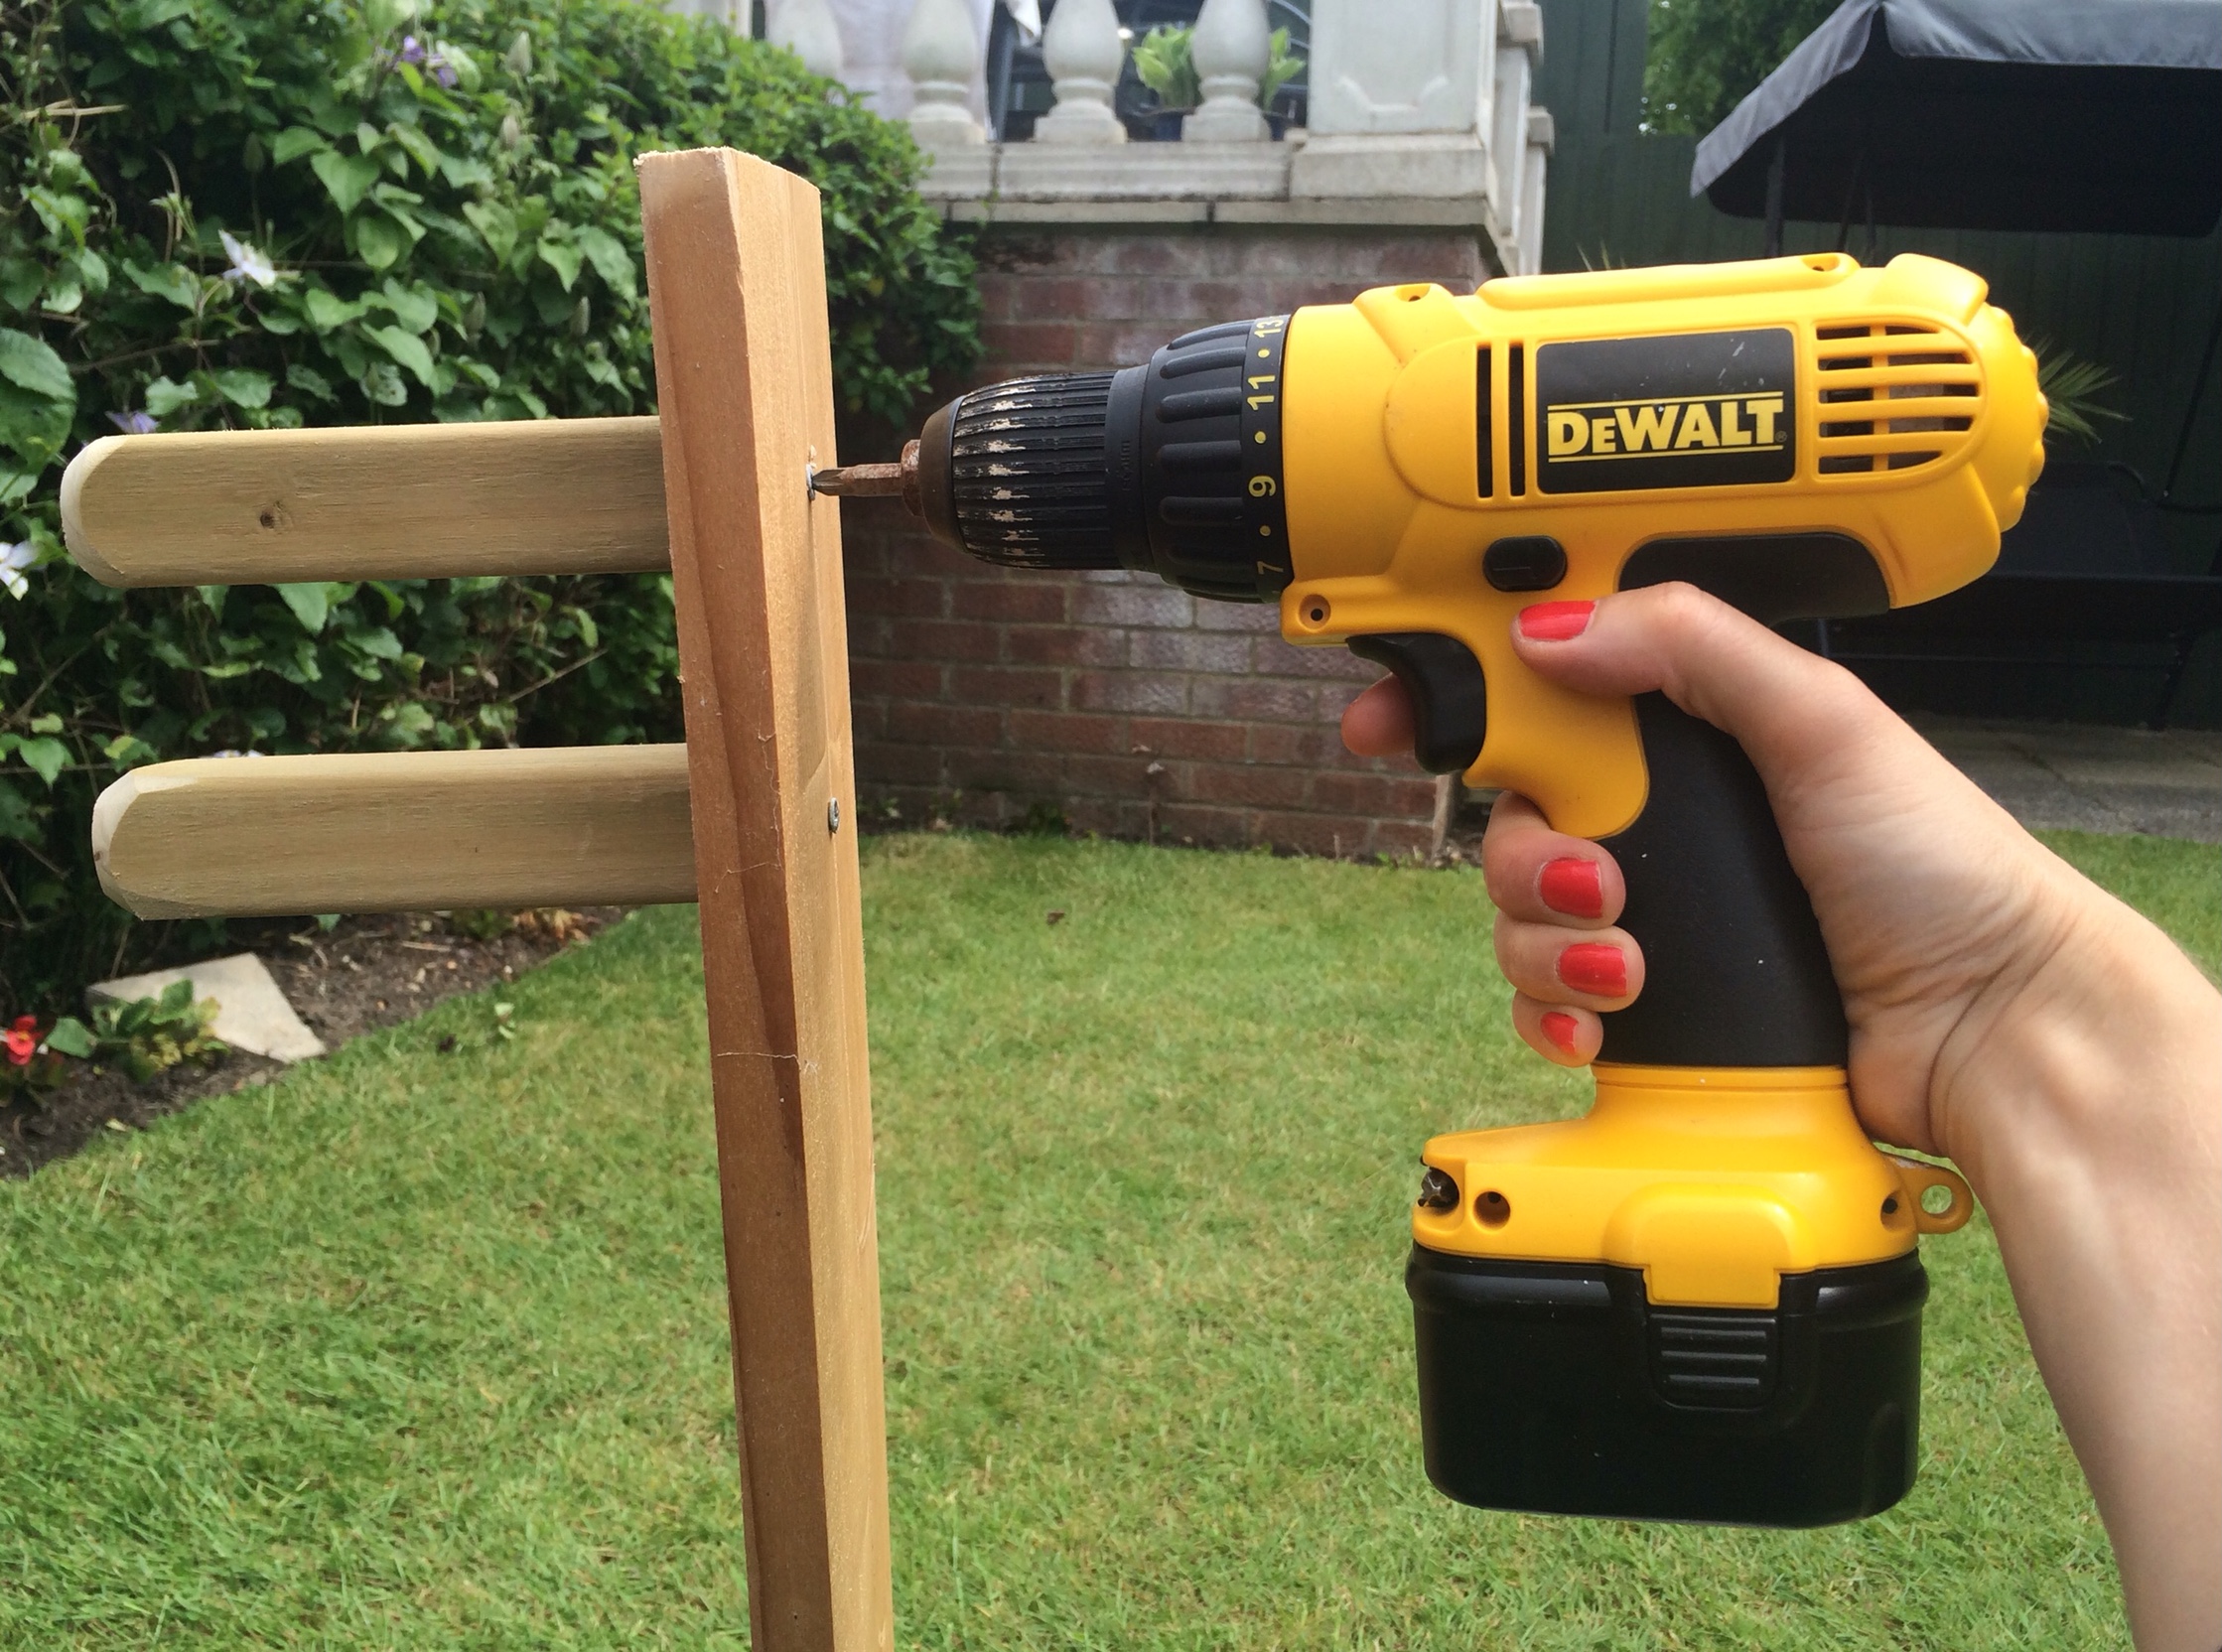
Measure out how far your pegs need to be apart on your board by placing a welly between a couple, then screw the pegs into place by driving a screw through the back of the wood plank into the centre of the peg. This provides a really strong support.
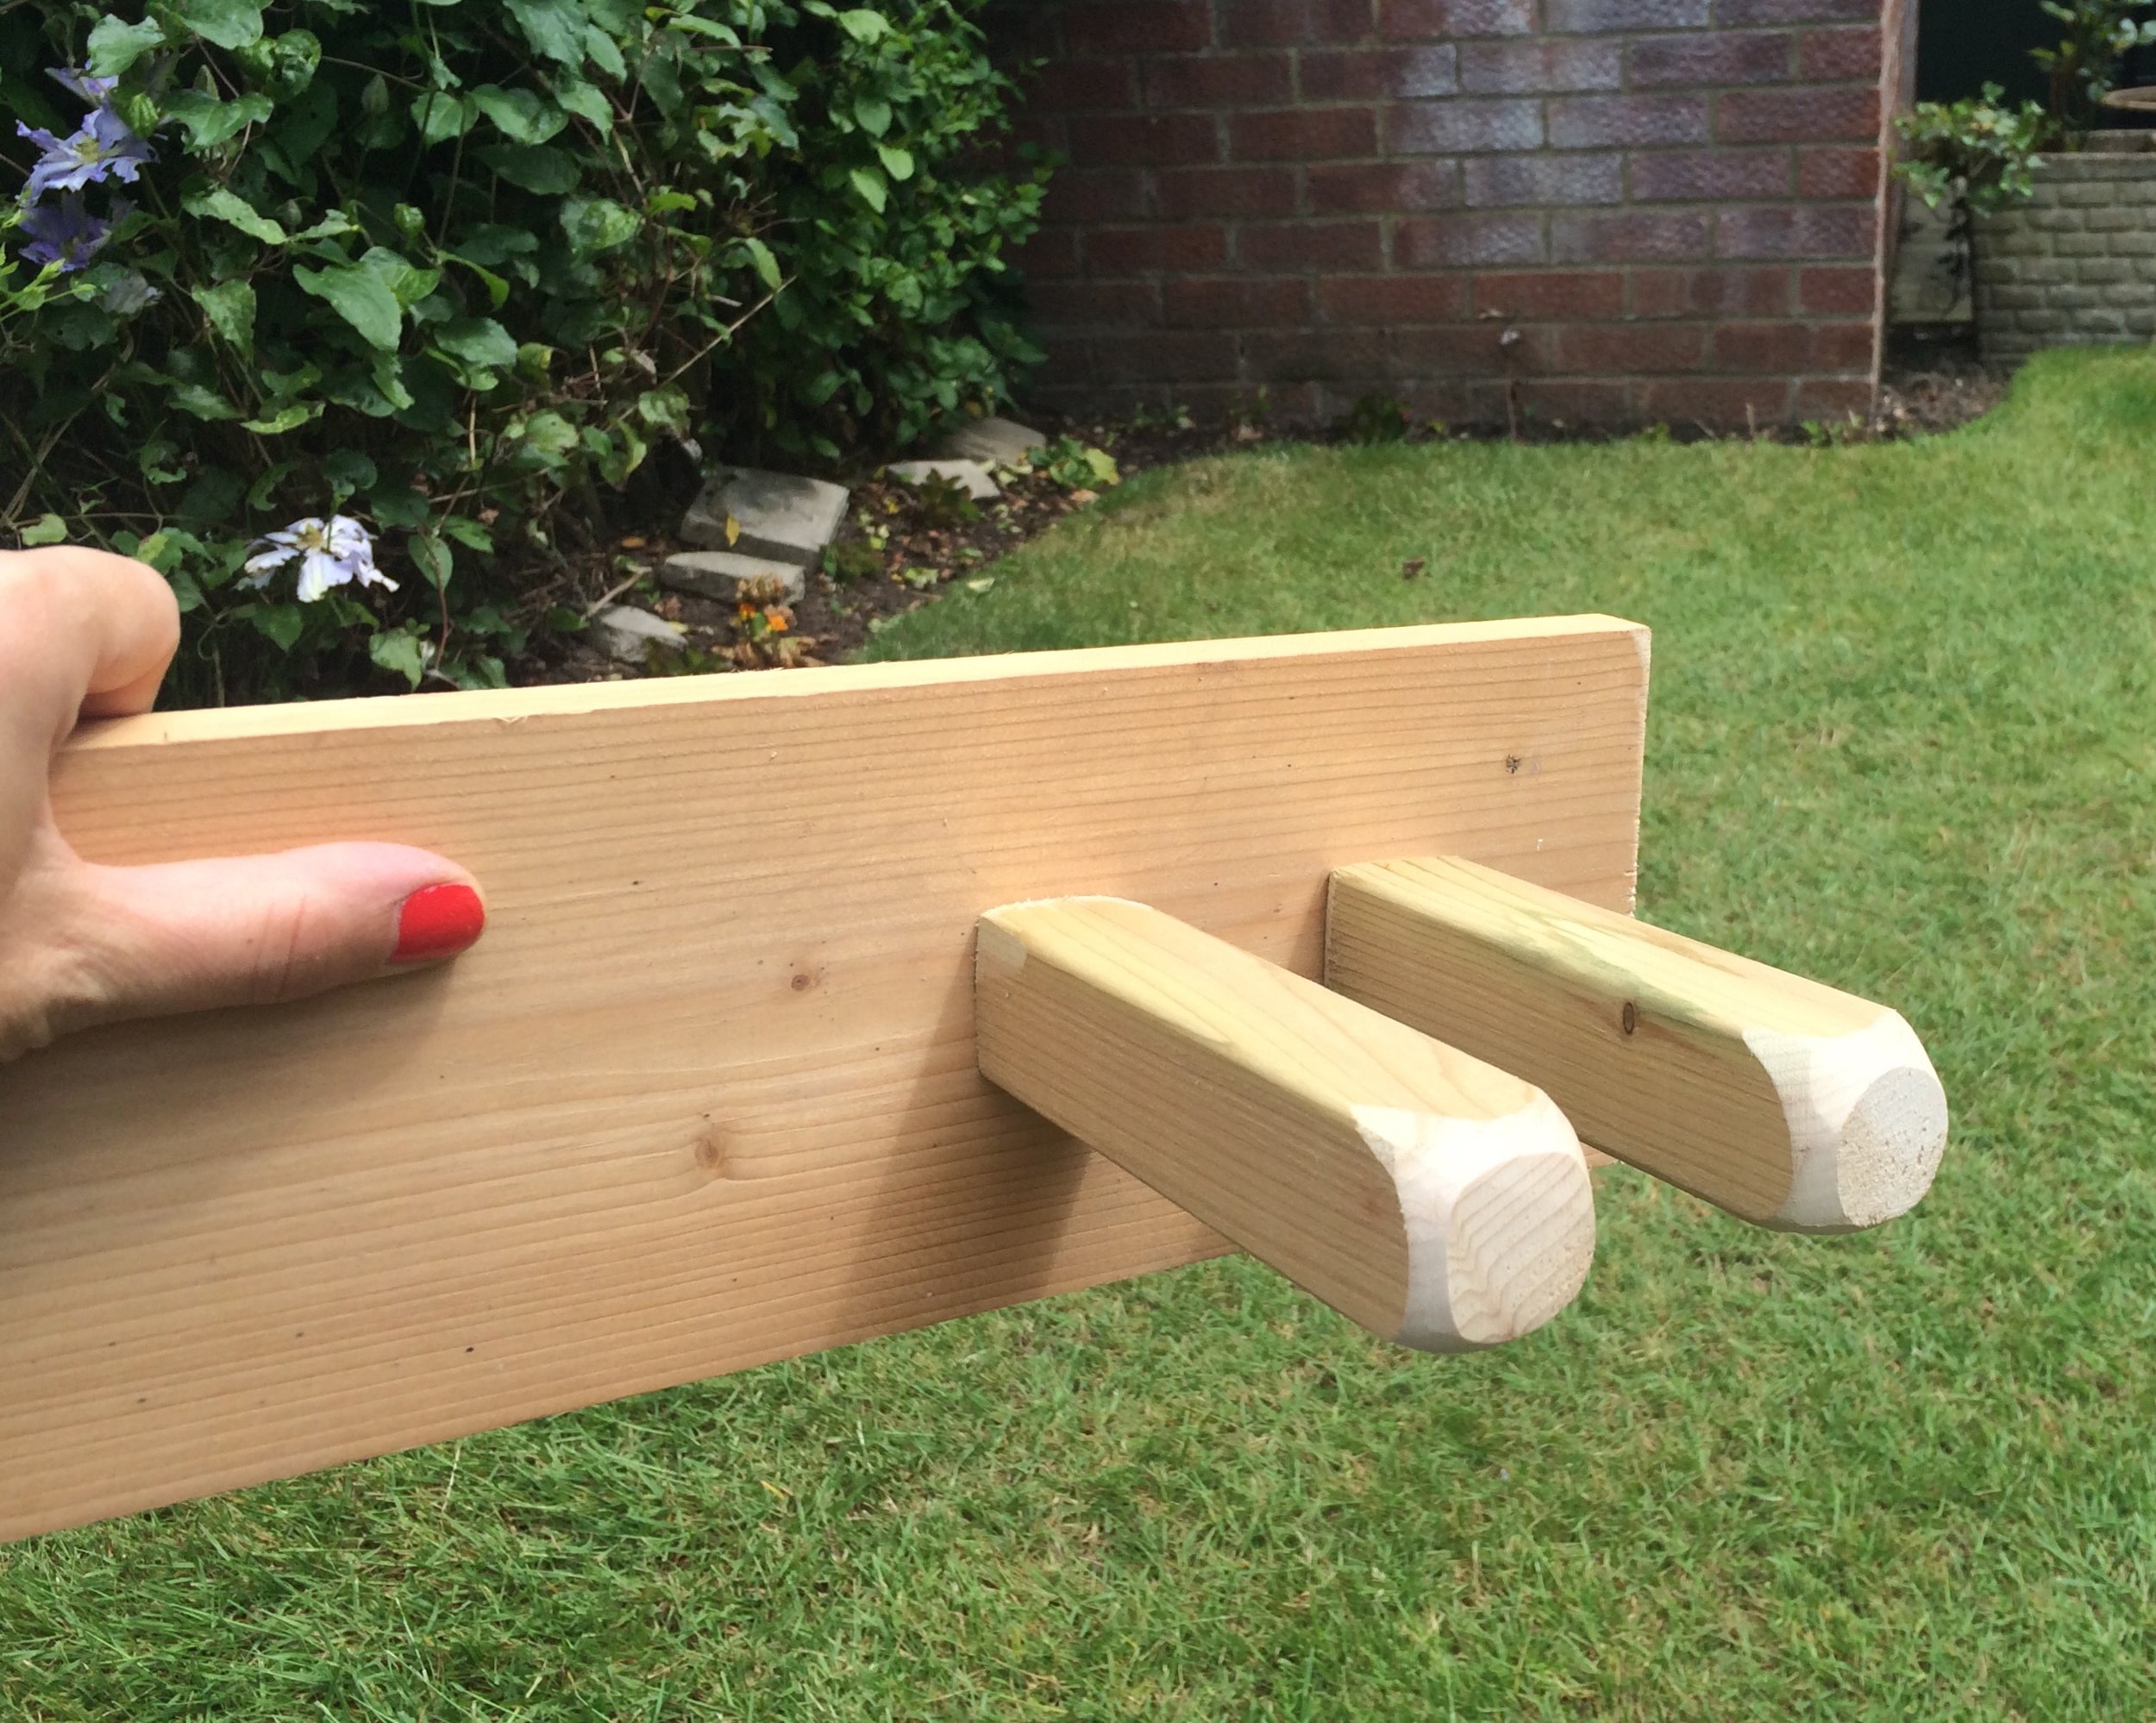
Check the width of the pegs by placing a welly boot in between the pegs (upside down with the front of the boot facing out). If this width works then make sure the rest of your pegs are screwed in the same distance apart.
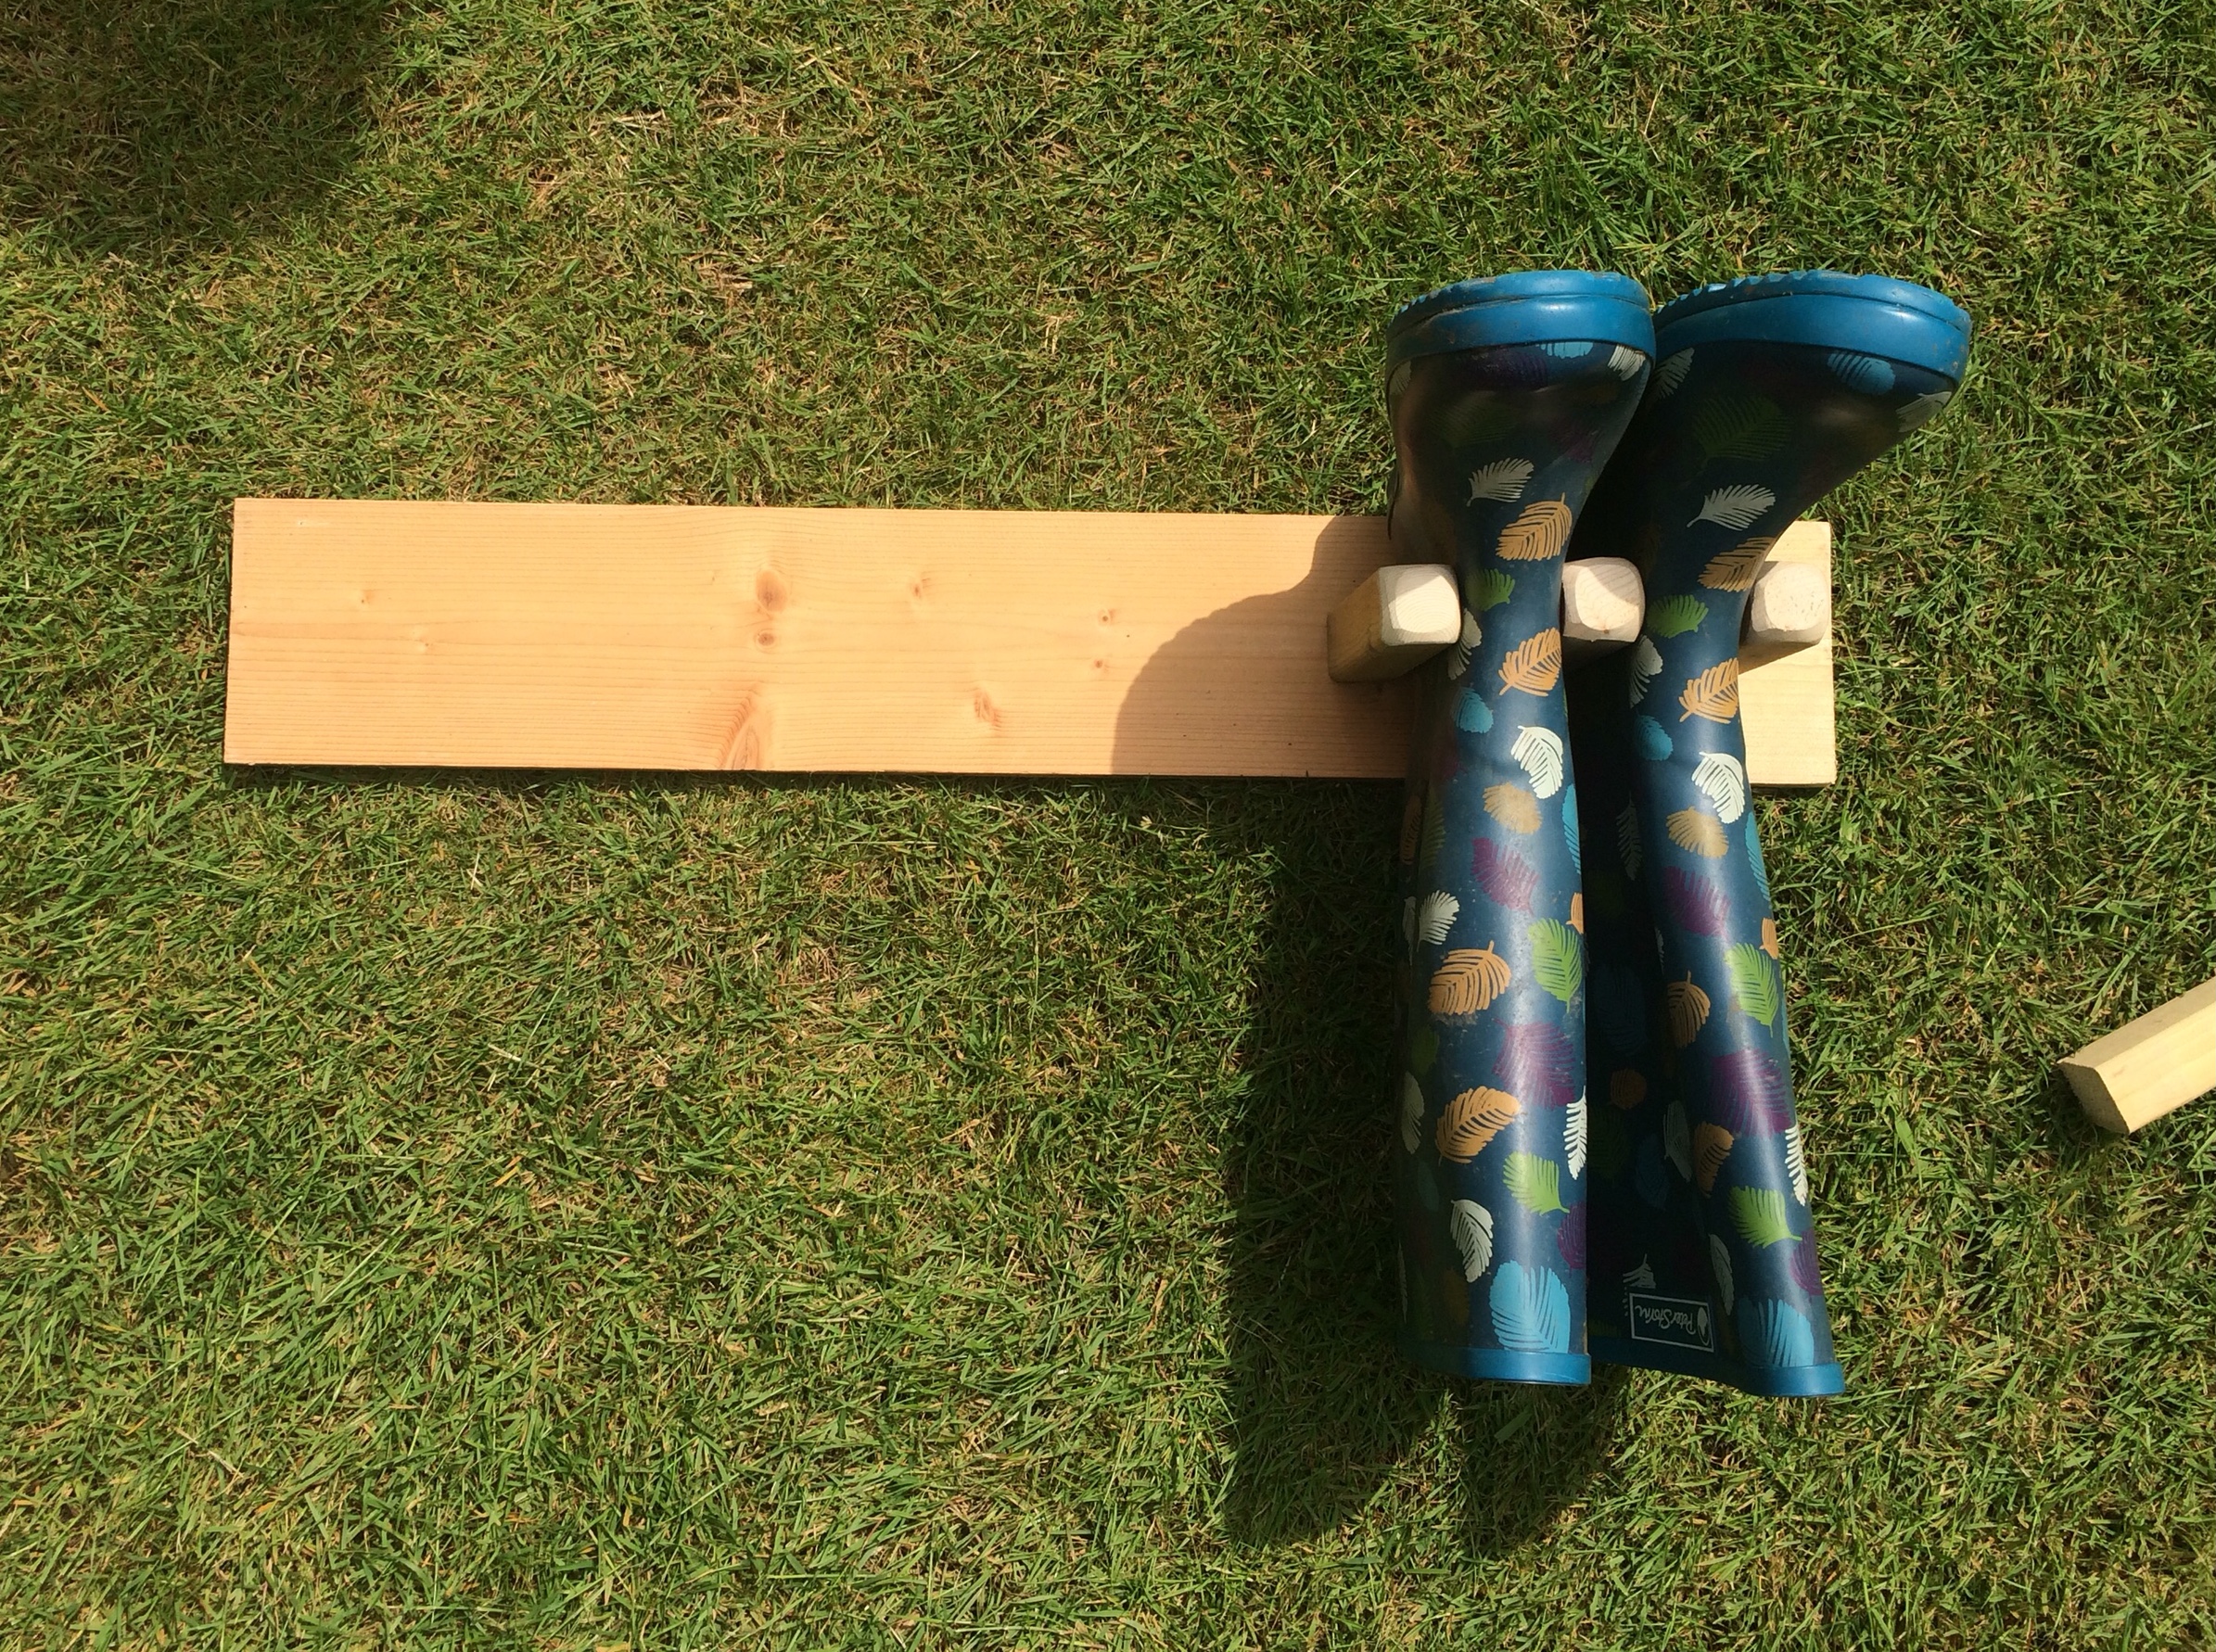
I used 9 pegs to support 4 pairs of wellies:
Step 3: Finishing Touches:
Make a hole either end of the plank so you can secure the welly holder to the wall:

If you want to paint your welly holder, make sure that the paint is suitable for exterior conditions. I gave my welly holder two coats of Cuprinol Garden Shades in 'Willow'.

I then added scrabble letters to add a decorative touch. You can buy scrabble letters online as craft items, or you can buy board games for a few pence from the charity shop.
When you stick on your letters, make sure that it is with a strong glue suitable for exterior conditions otherwise any rain will make them fall off!

I then just drilled my welly holder on an external wall with wall plugs and screws. I have to say it has been the most useful item, and adds a bit of country charm to the back of the house.
Have you ever made anything for your home that's been inspired by other peoples? Let me know in the comments section below!