Before & After: A Budget-Busting Porch Transformation

Door painted in French Gray by Farrow & Ball.
I can't emphasise enough how paint and a little bit of DIY effort can go a long way in transforming your home. Even if you do not change anything else in the room, a coat of paint a different colour, or a 'freshen up' if the paint work is looking tired, can totally revolutionise a space.
I was recently hired by my first ever client (YAY! Go me!!) to re-vamp her front porch. Mrs A was sick of coming home to her porch the way it looked, and felt it gave a really bad impression to people visiting her home. What she wanted was a pretty (but not fussy), fresh, welcoming, cheery entrance. So - cue photo time - she was currently coming home to this:
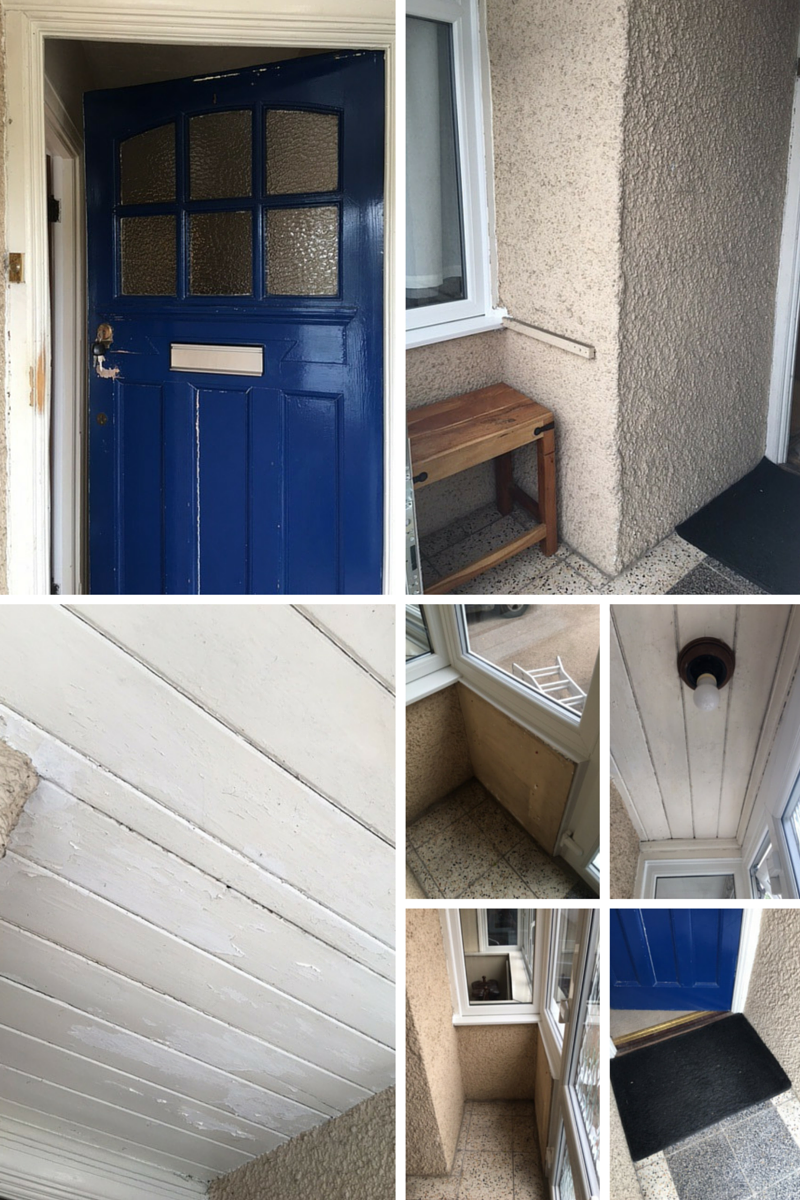
Before the revamp......
As you can see - the porch was anything but fresh and welcoming. Paint was peeling off the ceiling, the front door was cracked and the paint worn away, the walls were 'yellowing pebble-dash'. Fixtures and fittings were unappealing. The letterbox was silver but the door bell and key hole were brass - it just was not working for Mrs A. I needed to transform this area for her, but work with what was already there. Ideally, I'd plaster over the pebble dash and replace the floor tiles, but the aim here was to revamp the space on a shoestring.
I grilled her for a while on the sorts of things she liked, then went away and put together a brief for her to approve, which included the below mood-board:
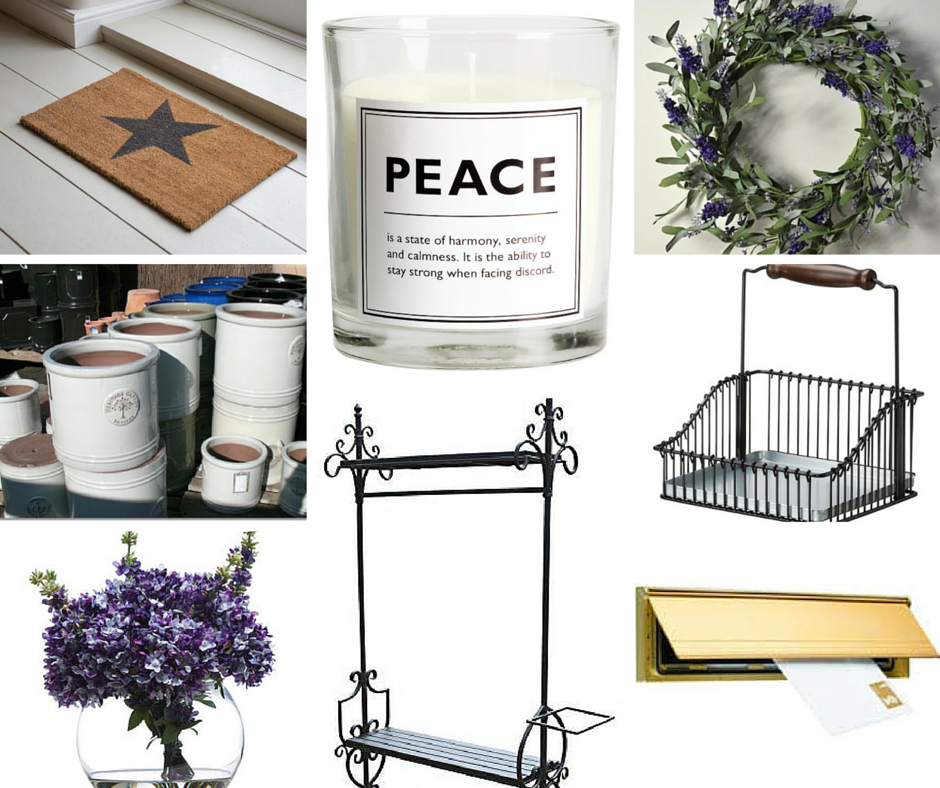
It's always good to create a mood board before you decorate a room, as it helps you really grasp what the room is going to look like once everything is next to each other. Luckily, Mrs A was all over my porch update ideas, so over the space of two days I set to work.
First thing to do was all the prep - the worst job. I hate the prep as it takes so long, it's filthy work, and you see no instant results. It's a necessary evil however, as if you don't prep the final result will not look as good or last as long. I sanded back the ceiling and the door to get rid of the flaky paint and provide an abrasive surface for the new paint to stick to. Secondly, I washed down the walls with sugar soap which really gets rid of all the grease and grime before painting. I then filled in all the gaps in the door, the door frame and the ceiling with filler.
Once the prep was out of the way, I painted the ceiling and walls in a pure brilliant white masonry paint and gave the front door three coats of 'French Gray' by Farrow & Ball in eggshell, removing the door hardware and protecting the glass in the door with frog tape.

By far the hardest part of this transformation was painting the pebble-dash. Oh. My. God. It was horrible to paint! I literally had to stab the wall with a brush to cover the surface area. But yeah, yeah, yeah, I know, less moaning, more 'After' pictures (if you haven't just scrolled down to these already - I know I would have just done that!) So - here is Mrs A's porch now - much more fresh and welcoming don't you think?
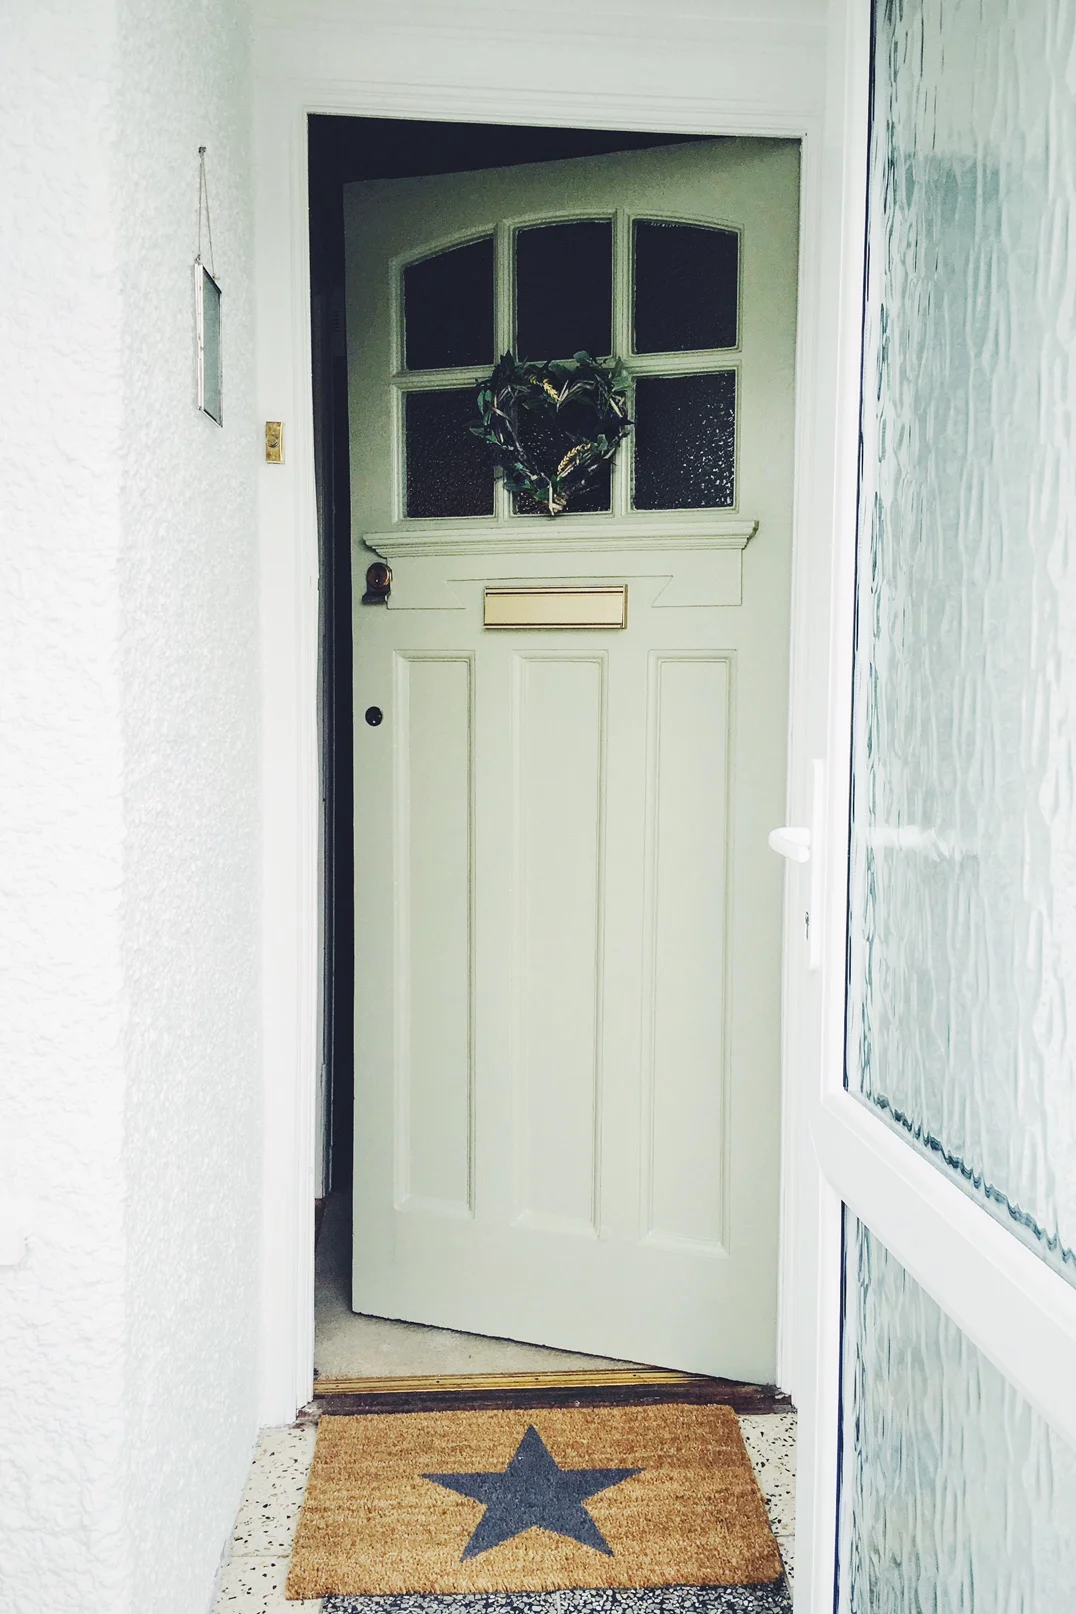
Once fixed up the door looked so lovely, as the lighter colour highlighted all the detailing between the glass and the letterbox. This door mat is by Garden Trading. The hanging picture frame is from H&M Home and makes it easier to swap pictures than standard picture frames.

The existing table suited the space and just needed a light sanding. I added a candle and some faux flowers (no maintenance required) and dried lavender scented with lavender oil to create a beautiful light smell when you enter the porch.

Finishing touches included a black traditional coat rack (an Ebay steal at £6) which fitted the T shaped area nicely, and an industrial flush fitting with a filament bulb. If I was to change anything it would be the light, the wiring was right by the entrance to the porch door and there was only around 10cm clearance between the ceiling and the door opening. I picked a modern fitting that could be adjusted so it fit in the space, but in retrospect I wish I'd chosen a standard pendant fitting and hooked it up away from the porch door by the wire, so it was nearer the front door to the house.
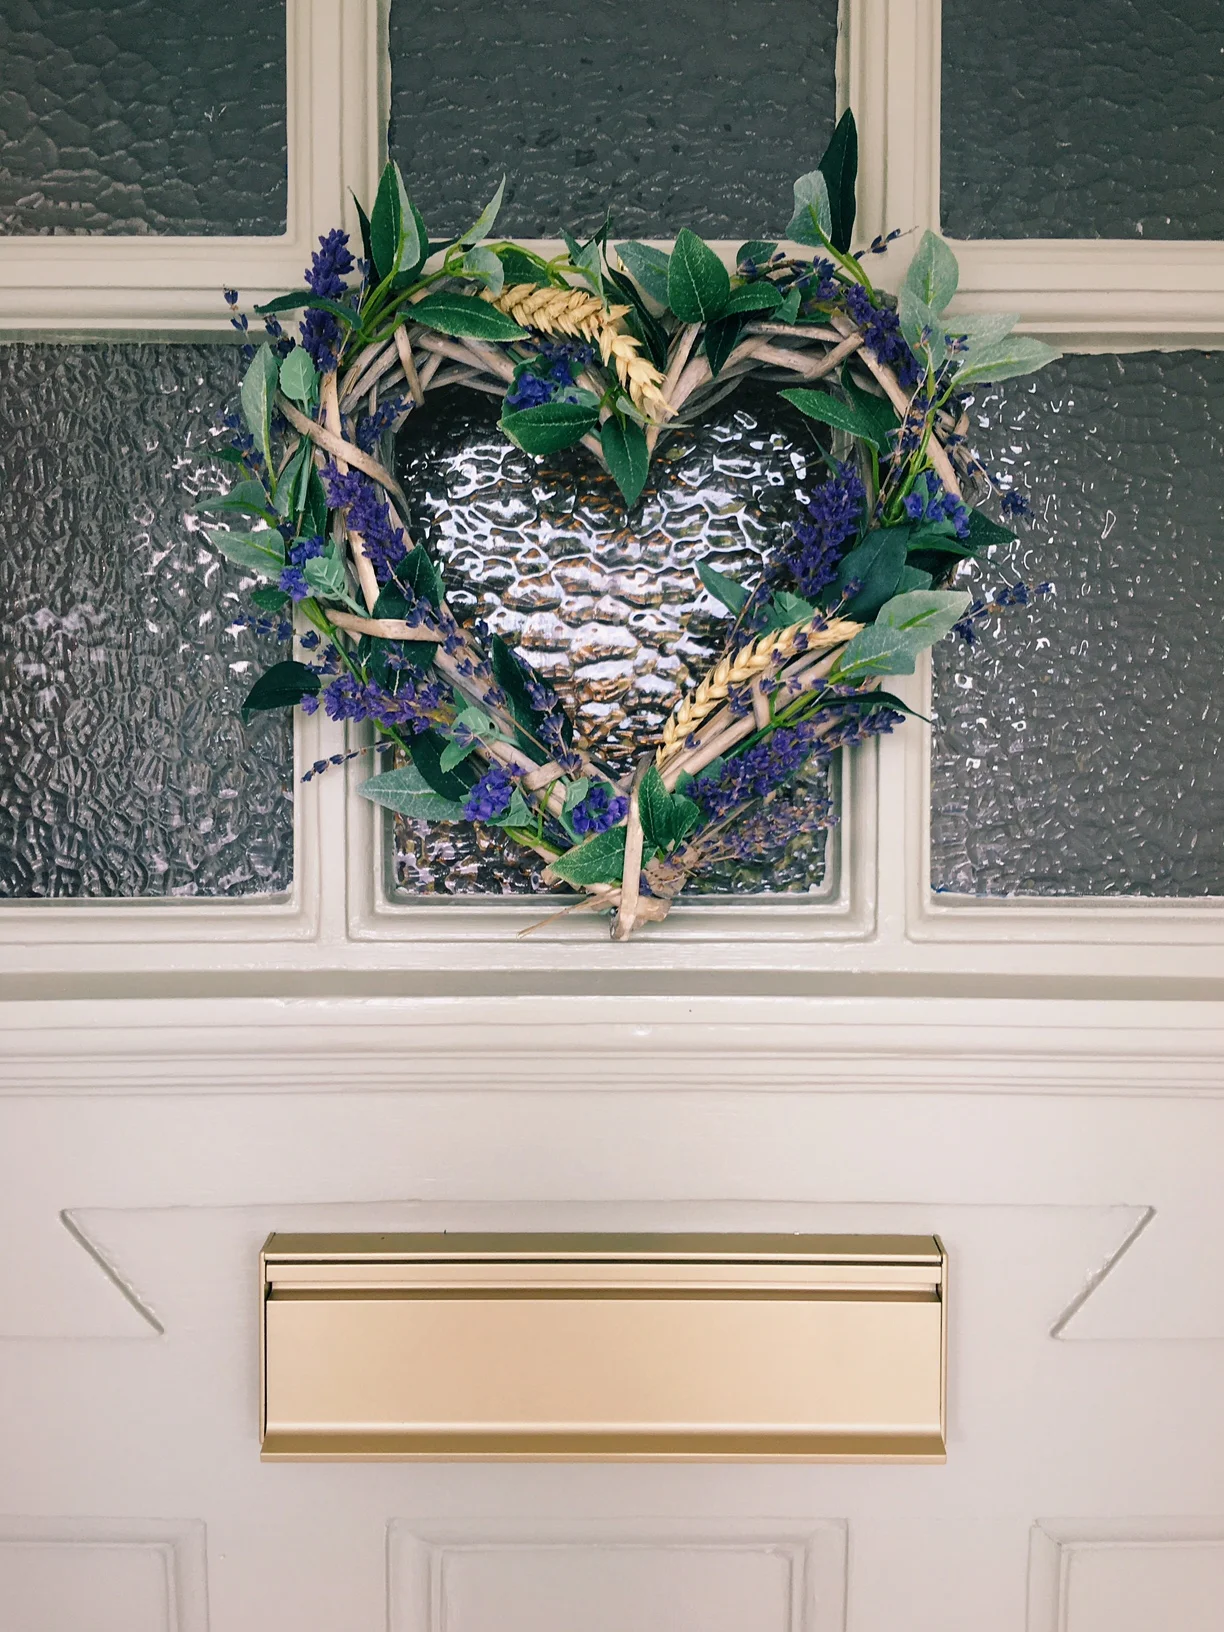
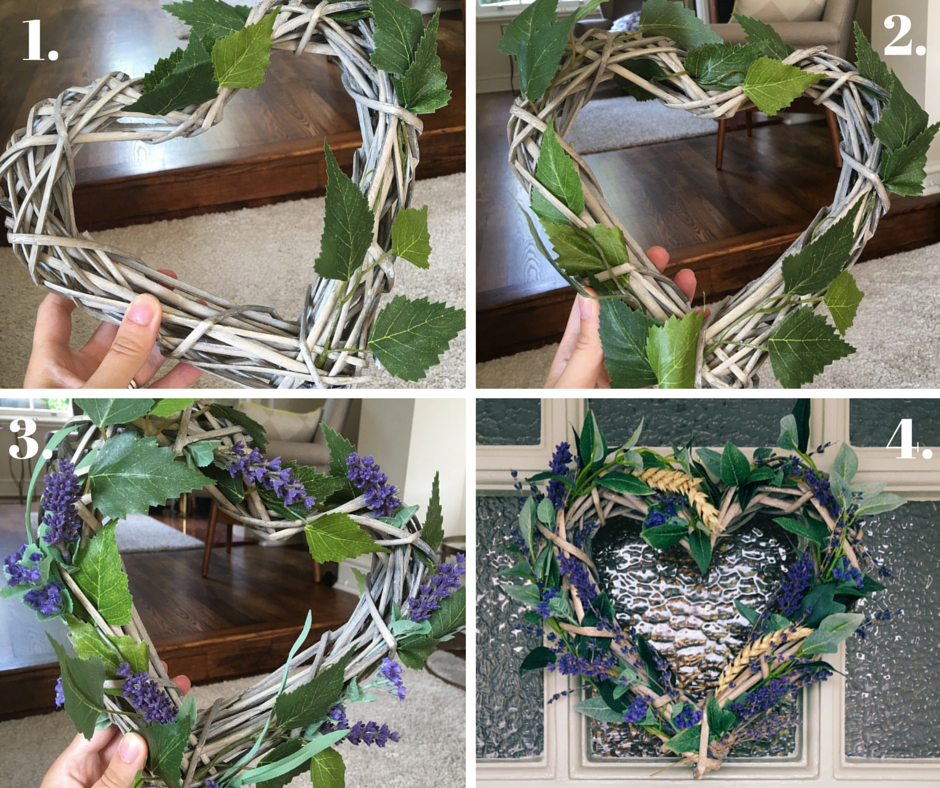
Two of the things that came out well was spray painting the existing letterbox gold to match the door bell and keyhole, which saved replacing the letterbox; and this wreath that I made with faux flowers, dried lavender and heart wreath structure from Hobbycraft. To make a wreath like this yourself you just need the following:

Hobbycraft heart wreath (£4), scissors, some faux lavender, some dried lavender, some faux leaves & lavender oil.
Pull all the faux flowers apart so you have sprigs of leaves and just the tops of the faux lavender. Start with the leaves and wind them in and around the front of the wreath so they are secure. Add in the faux lavender tips around the heart each side. Cut off the real lavender gently (it breaks so easily) and carefully poke it in the heart. Add a few drops of lavender oil and it will smell amazing!
The prep and painting took a full day, with a second day to do the last coat on the door. Here is a breakdown of the total cost for everything:
F & B Door Paint £22, 5l Masonry Paint £17, Frogtape £5, Dustsheet 78p, Letterbox Spray Paint £4.99, Sugar soap & sponge £3.99, Door Mat £13.95 (Amara.com), Basic Wreath £4.00 (Hobbycraft), Faux flowers in wreath & pot £17.40 (Aromaround) , Silver Frame £7.99 (H& M Home), Candle £6.99 (H&M Home), Light Fitting £19.99 (Ebay), Coat Stand £6.00 (Ebay).
What do you think of this before and after? What would you have added? Leave your comments below!