
Bedroom Wardrobe Hack! How To Upgrade The Doors With Decorative Fabric
This quick and easy wardrobe hack has totally transformed my old bedroom wardrobes! A sustainable DIY that uses up surplus fabric, I was really happy with this simple upgrade.
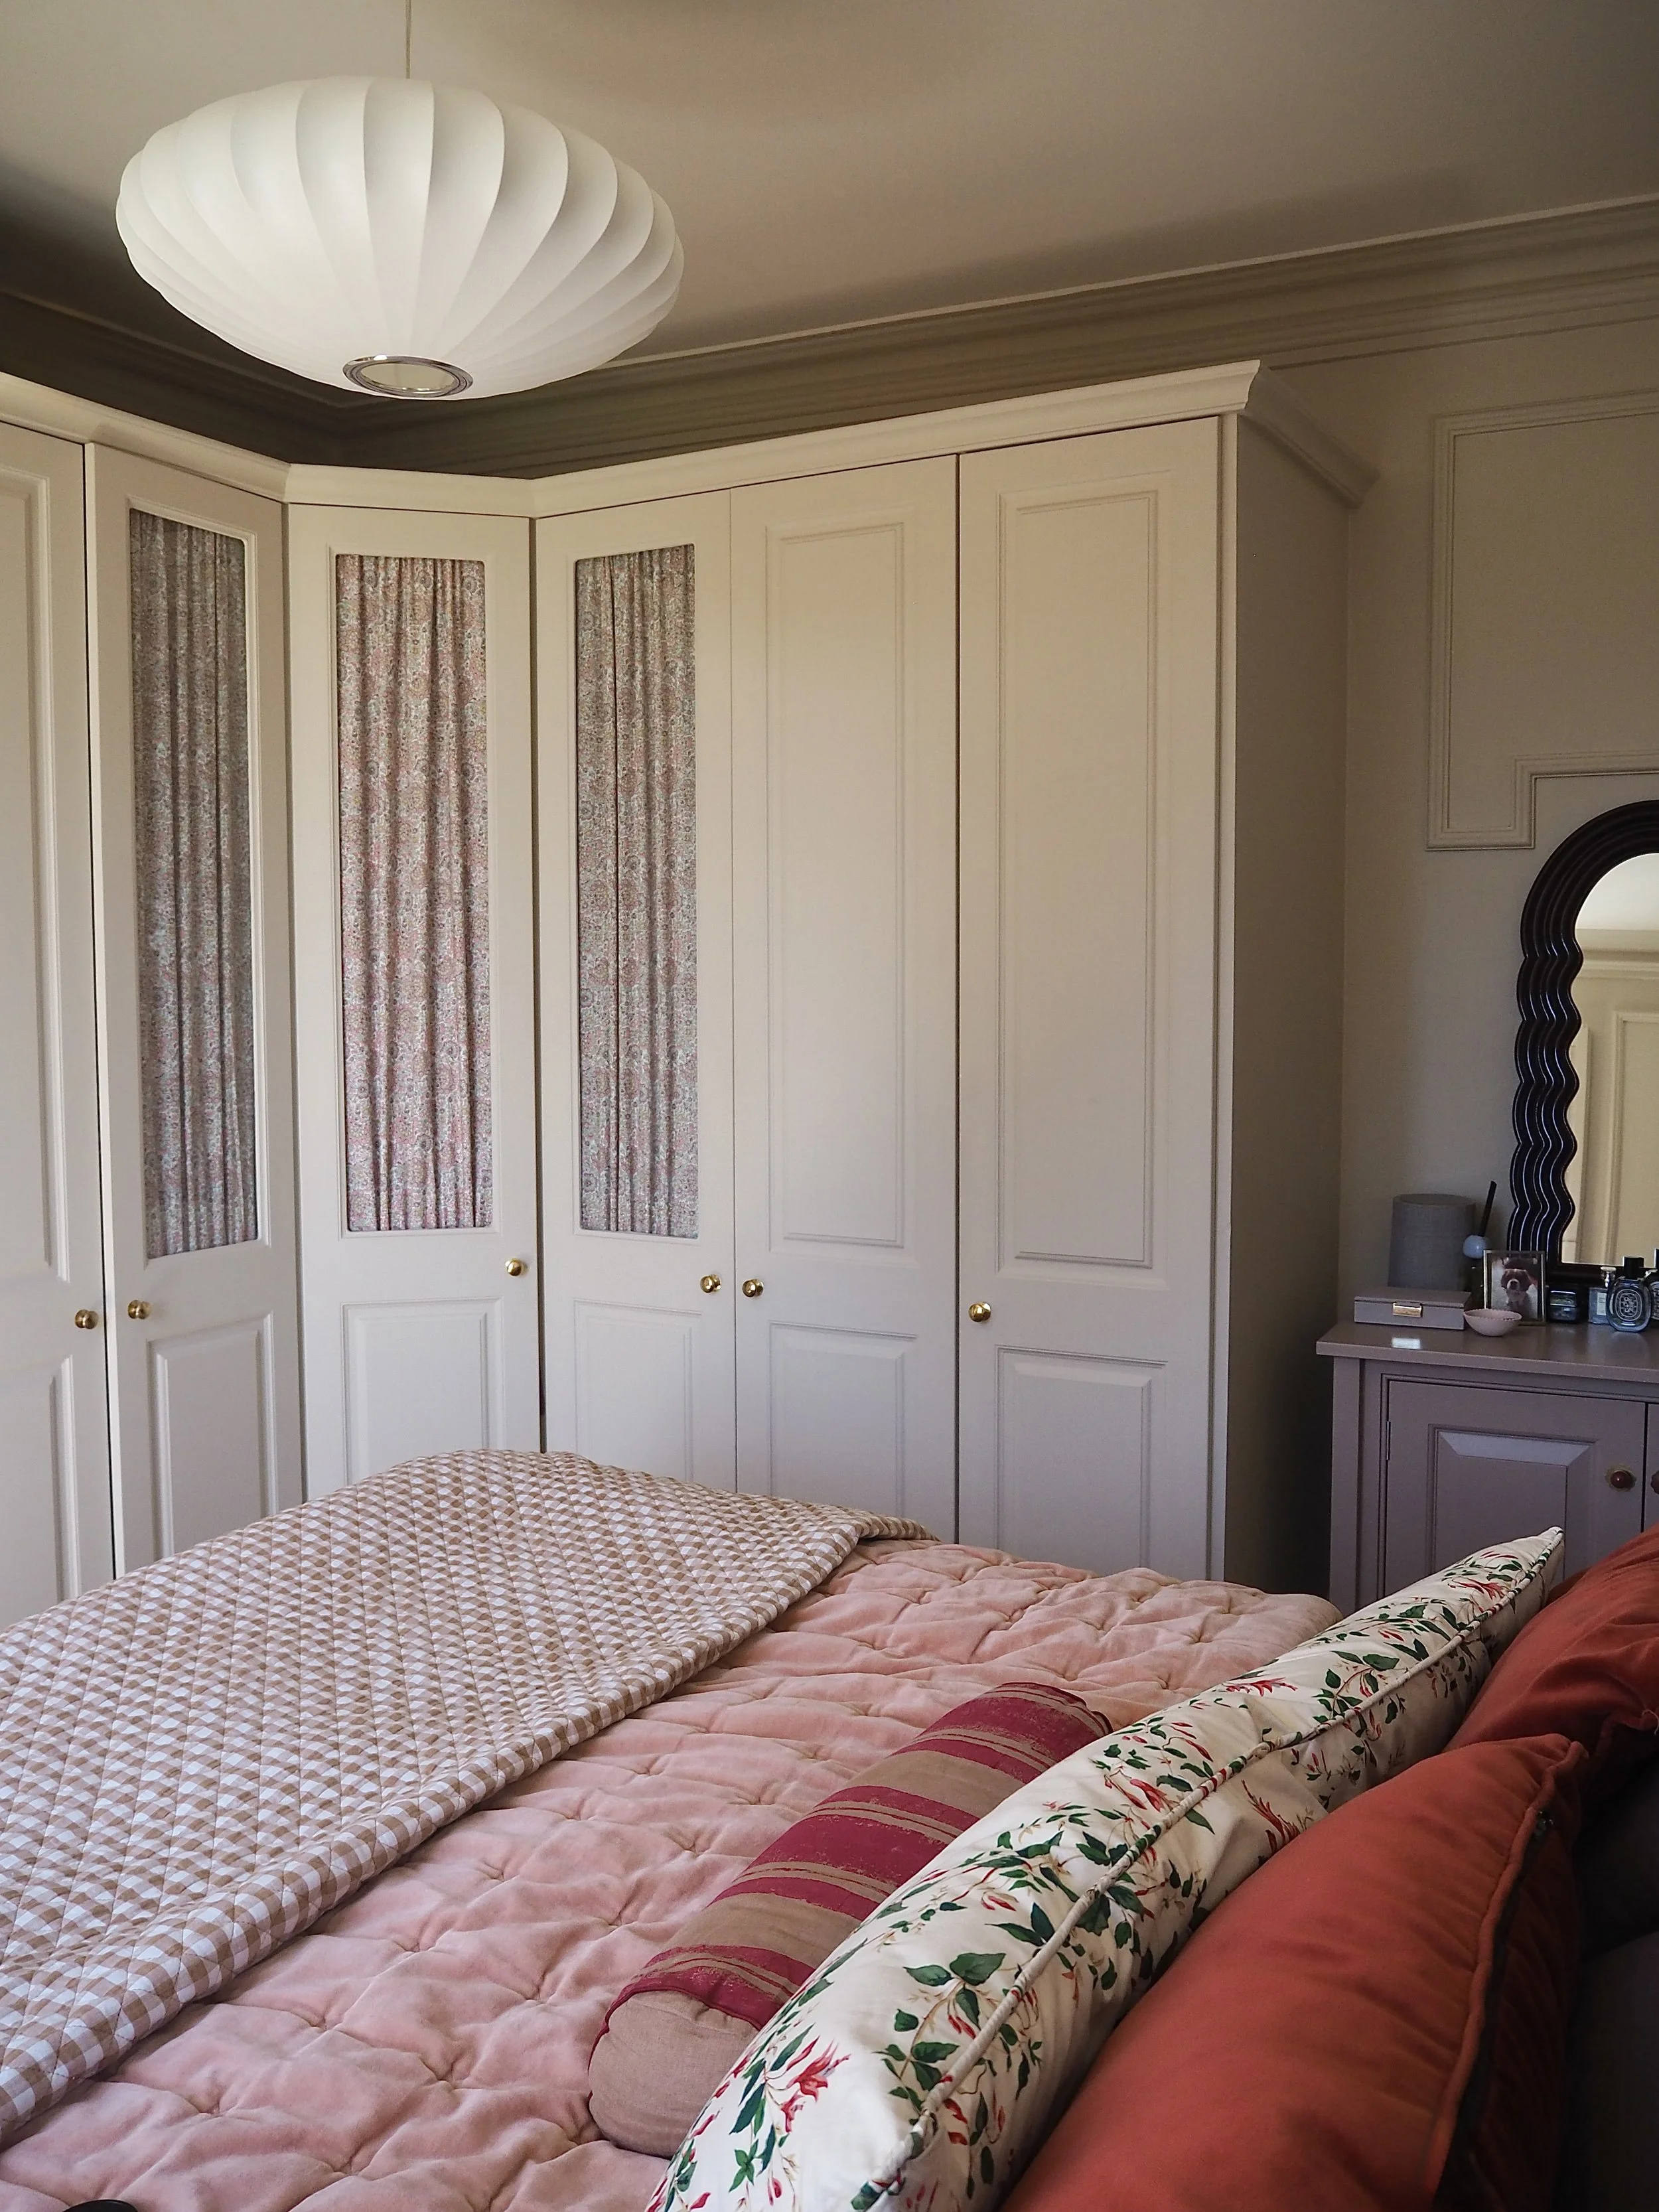
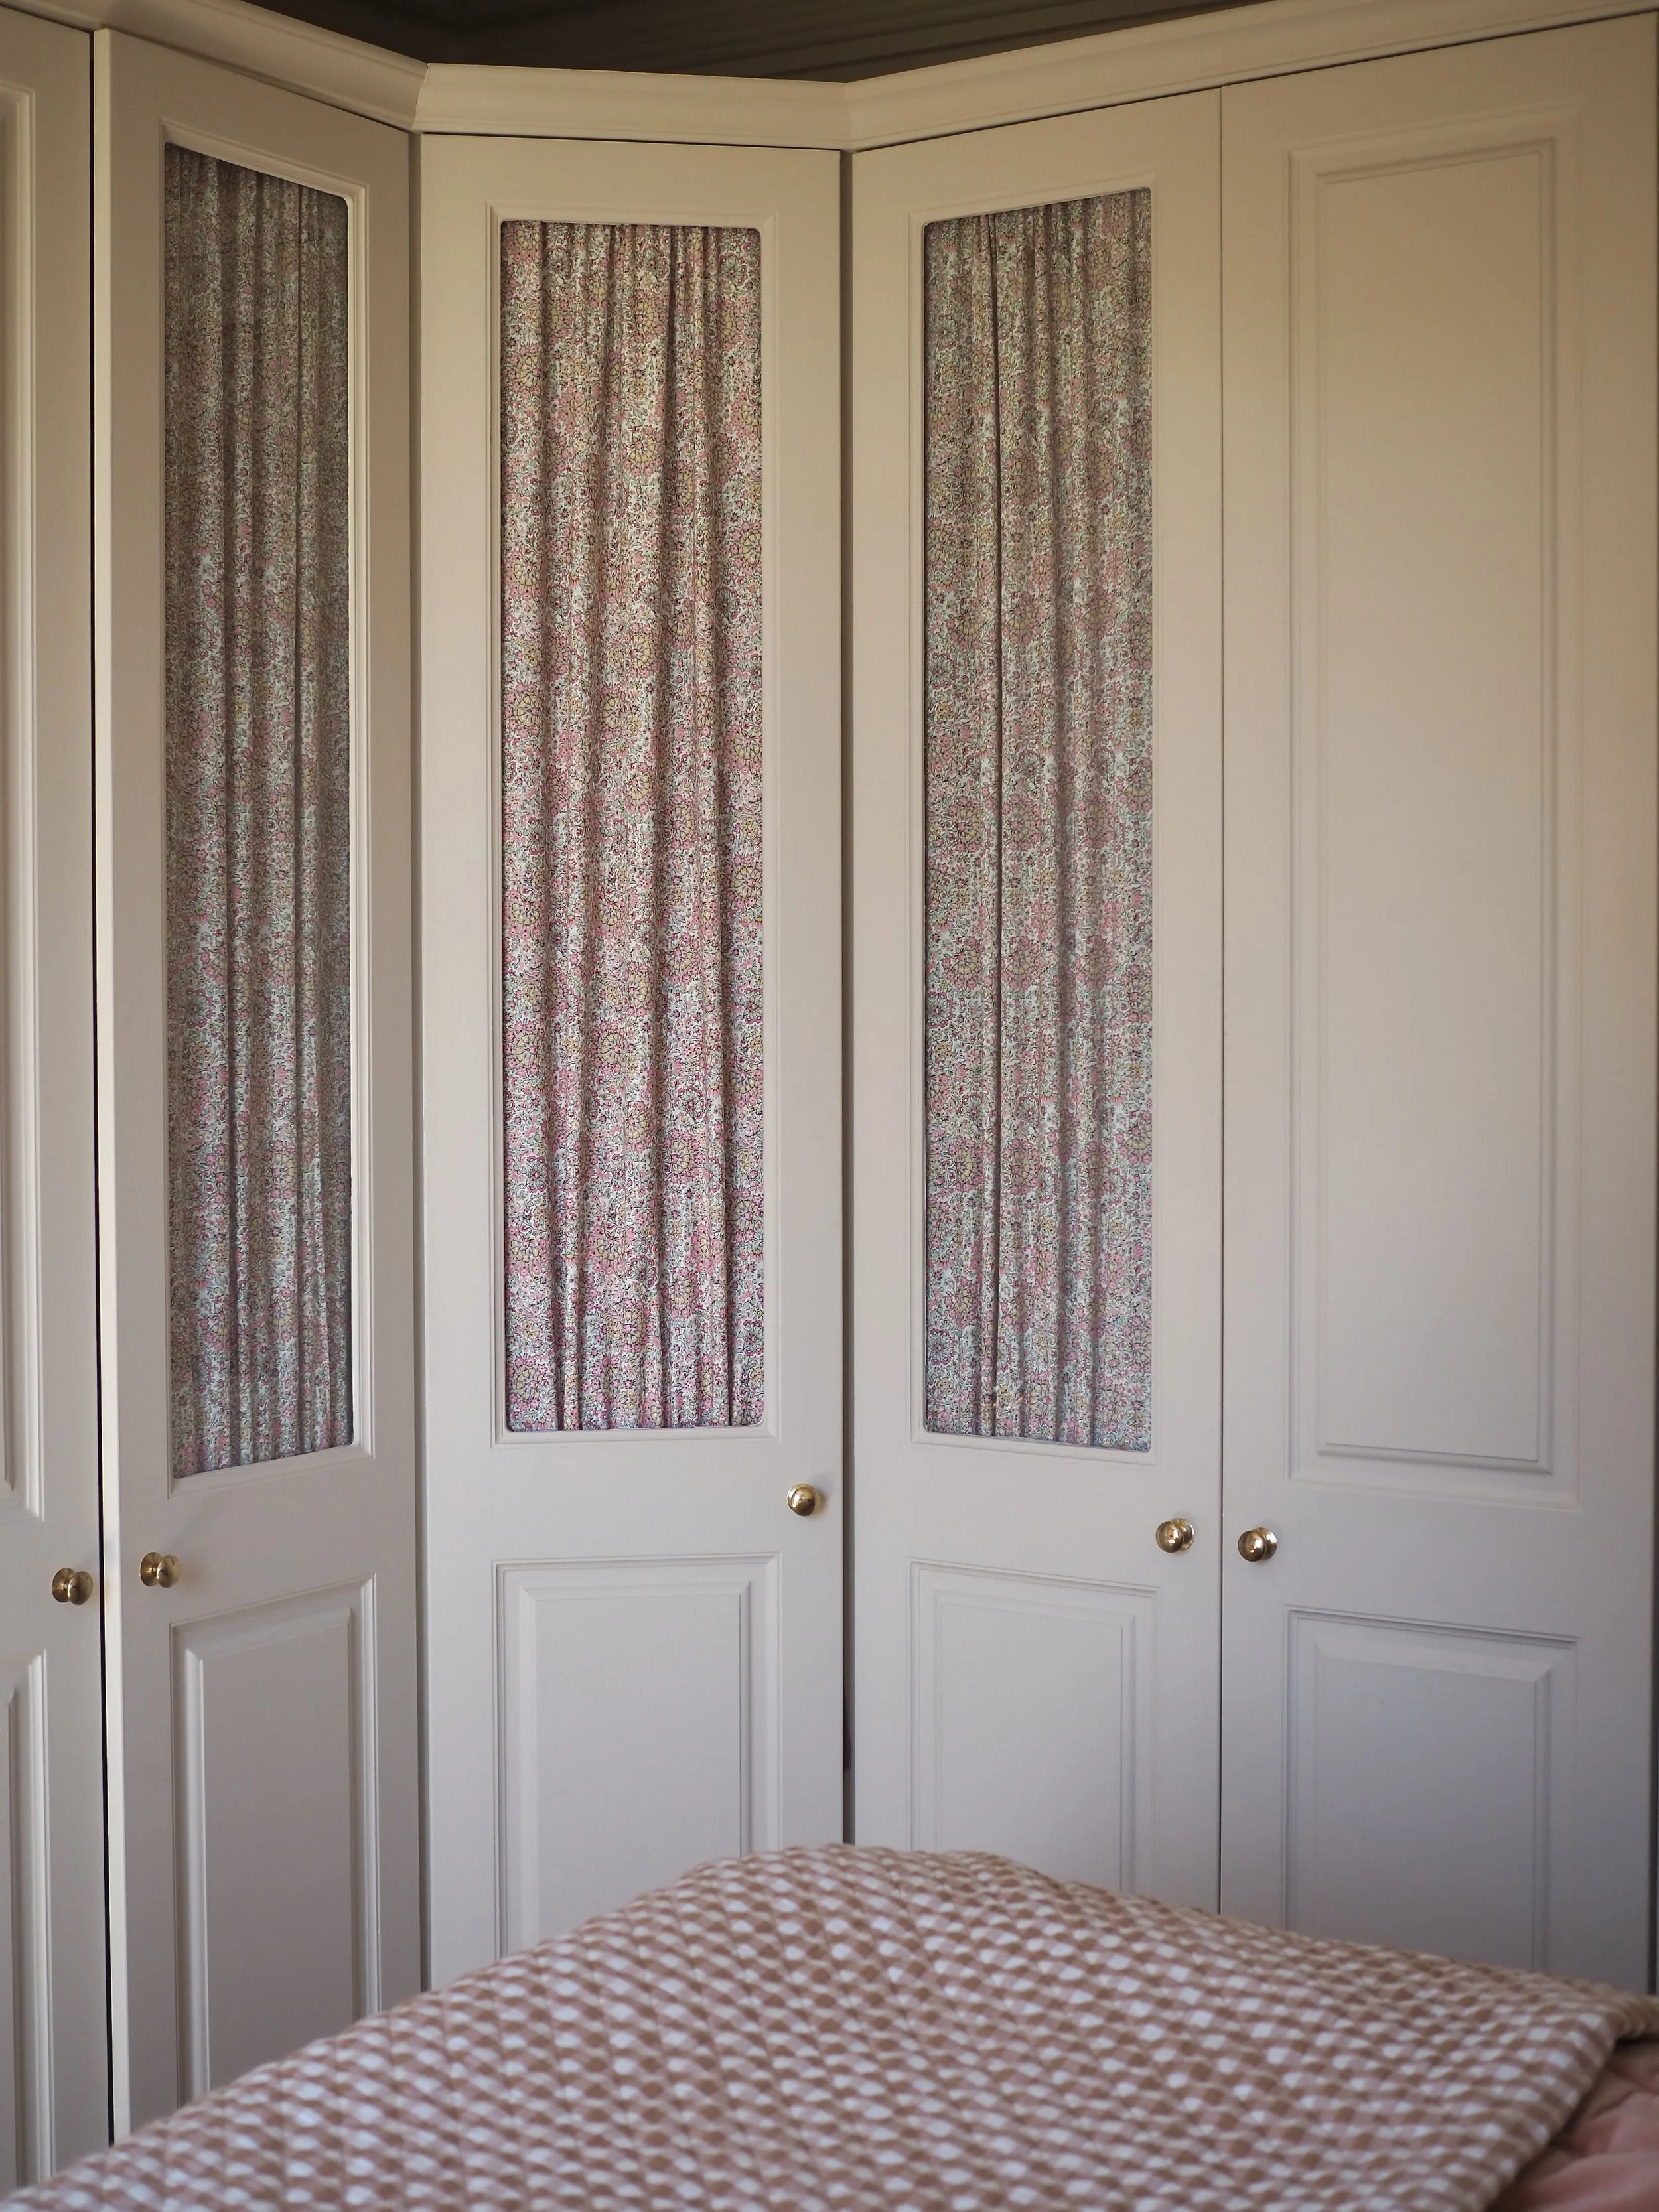
When we moved in, our bedroom featured some sturdy built-in wardrobes. While they wouldn’t have been my choice aesthetically, there was no way that I was going to rip out something so functional (it’s actually a pet peeve of mine when I see goods in perfect working order thrown in the skip - especially as there are so many options these days for products that can update what you already own).
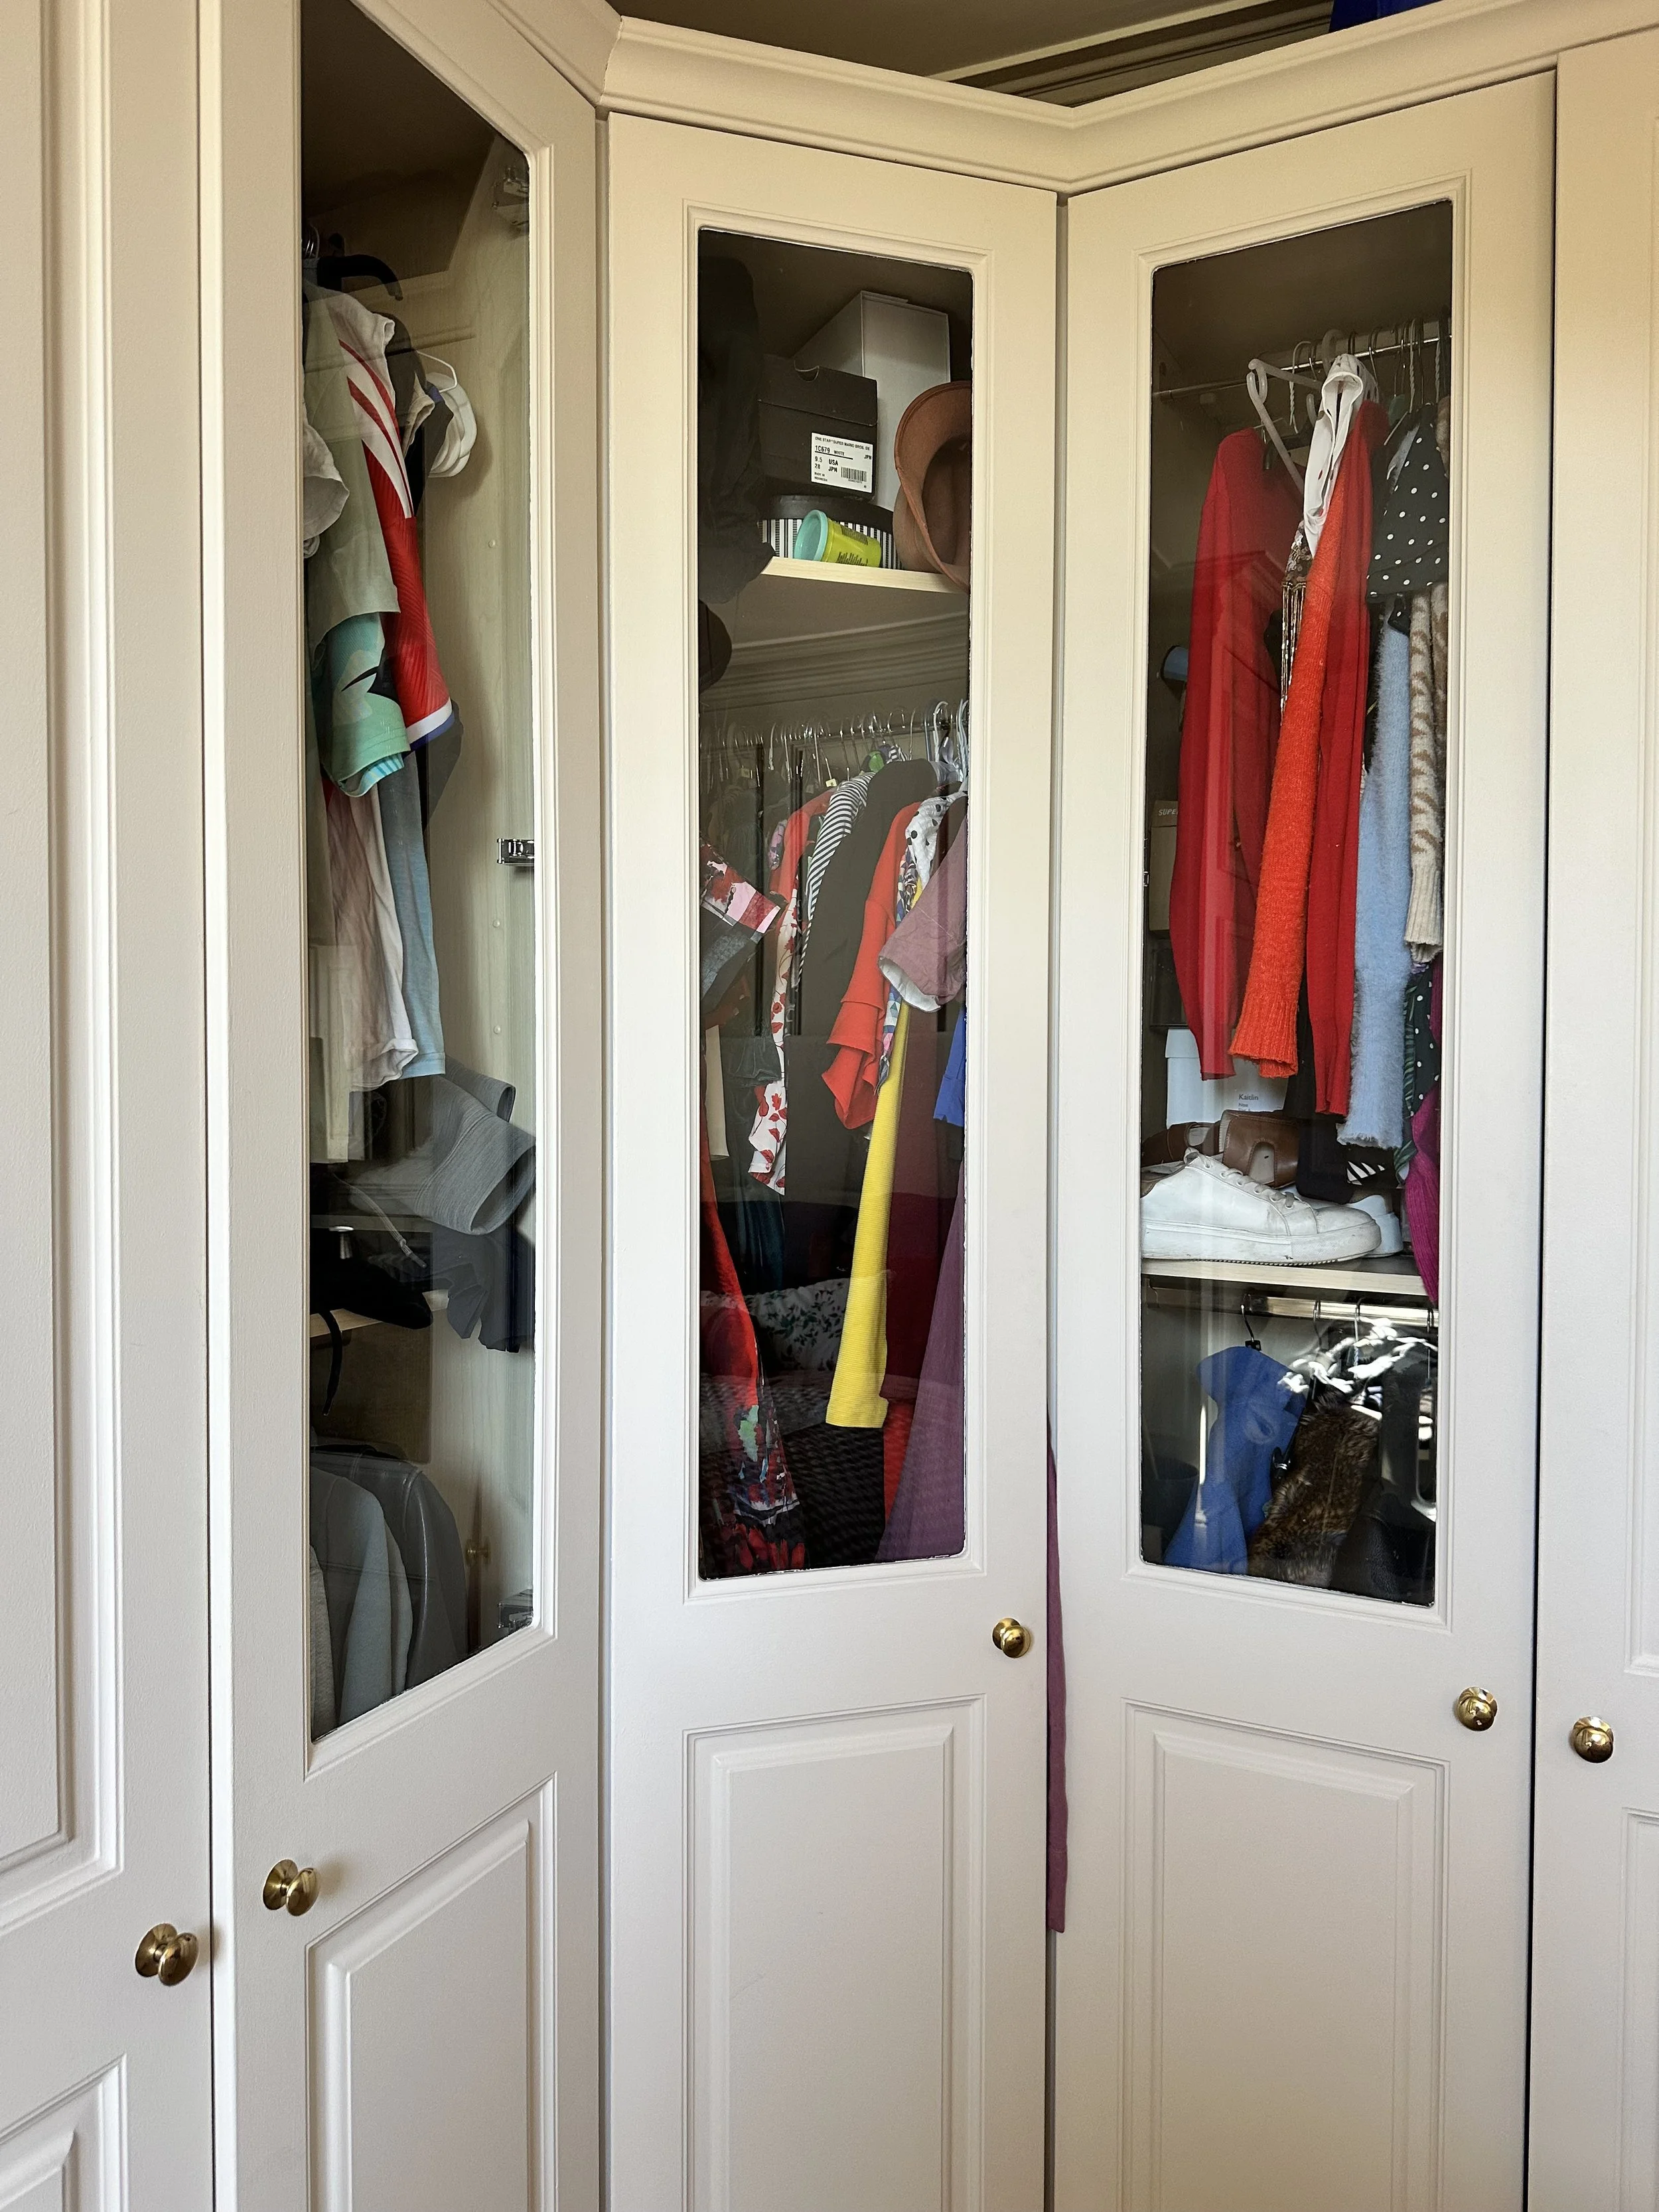
The wardrobes ‘before’.
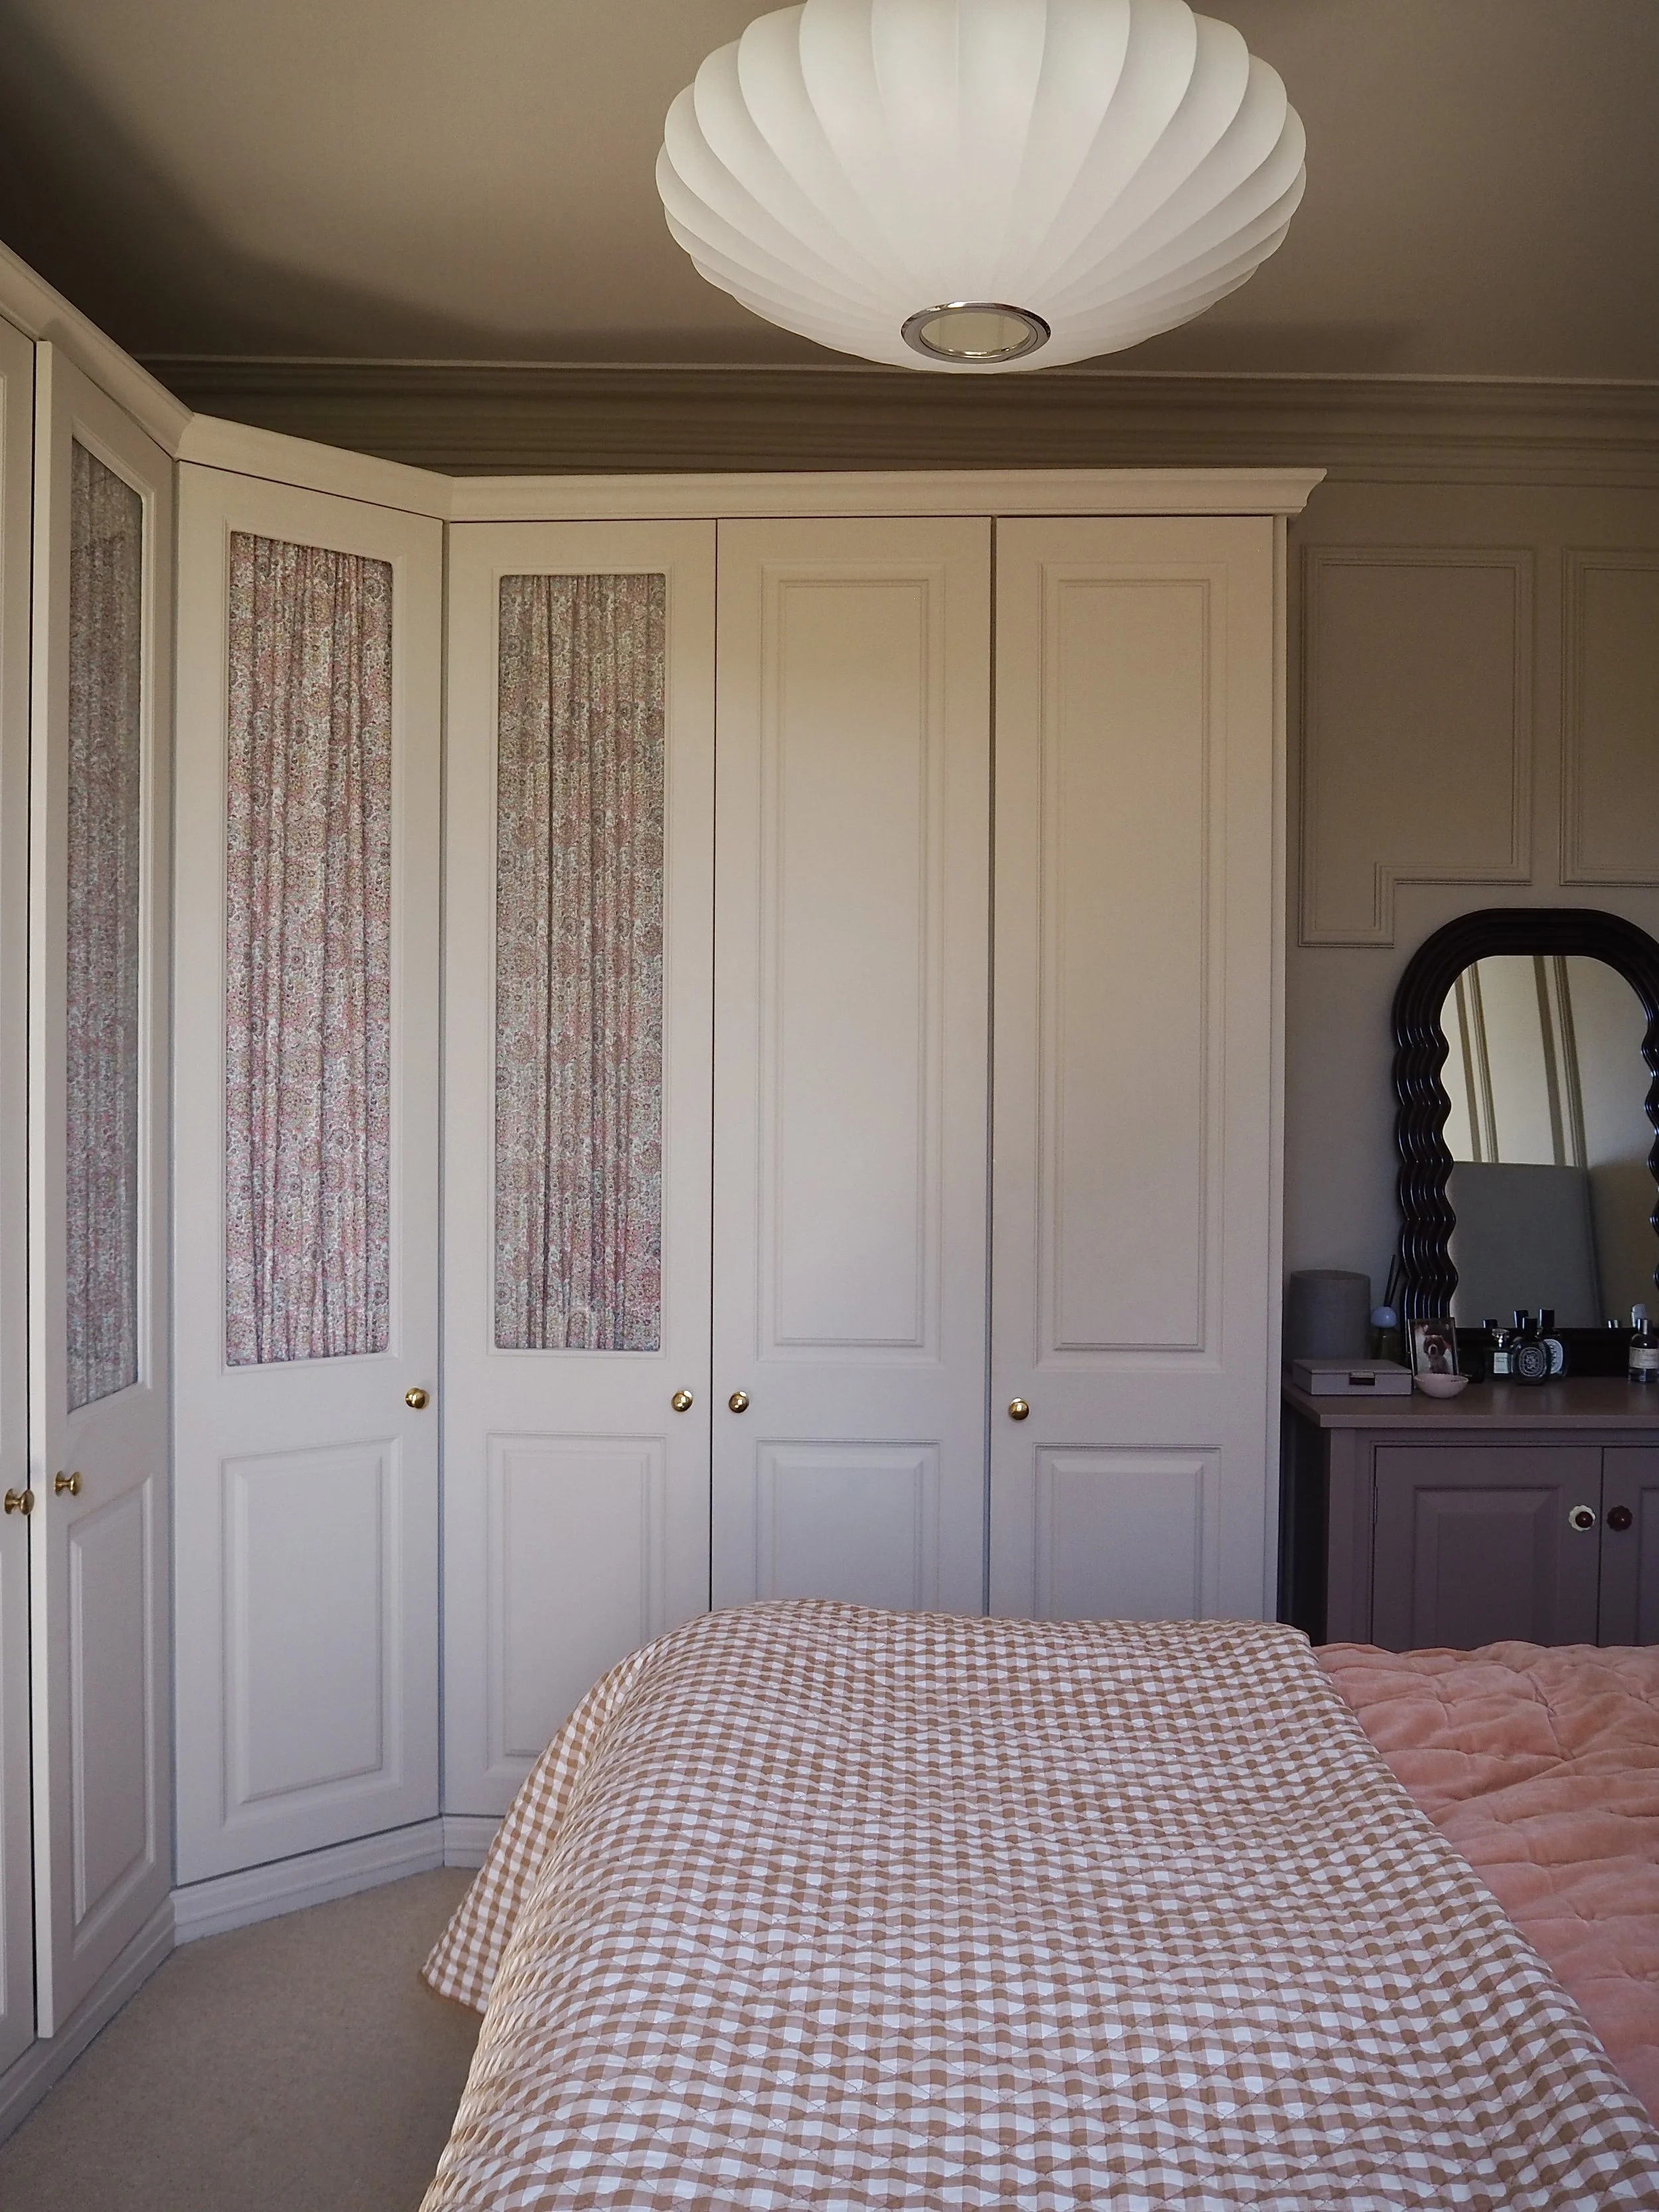
And after.
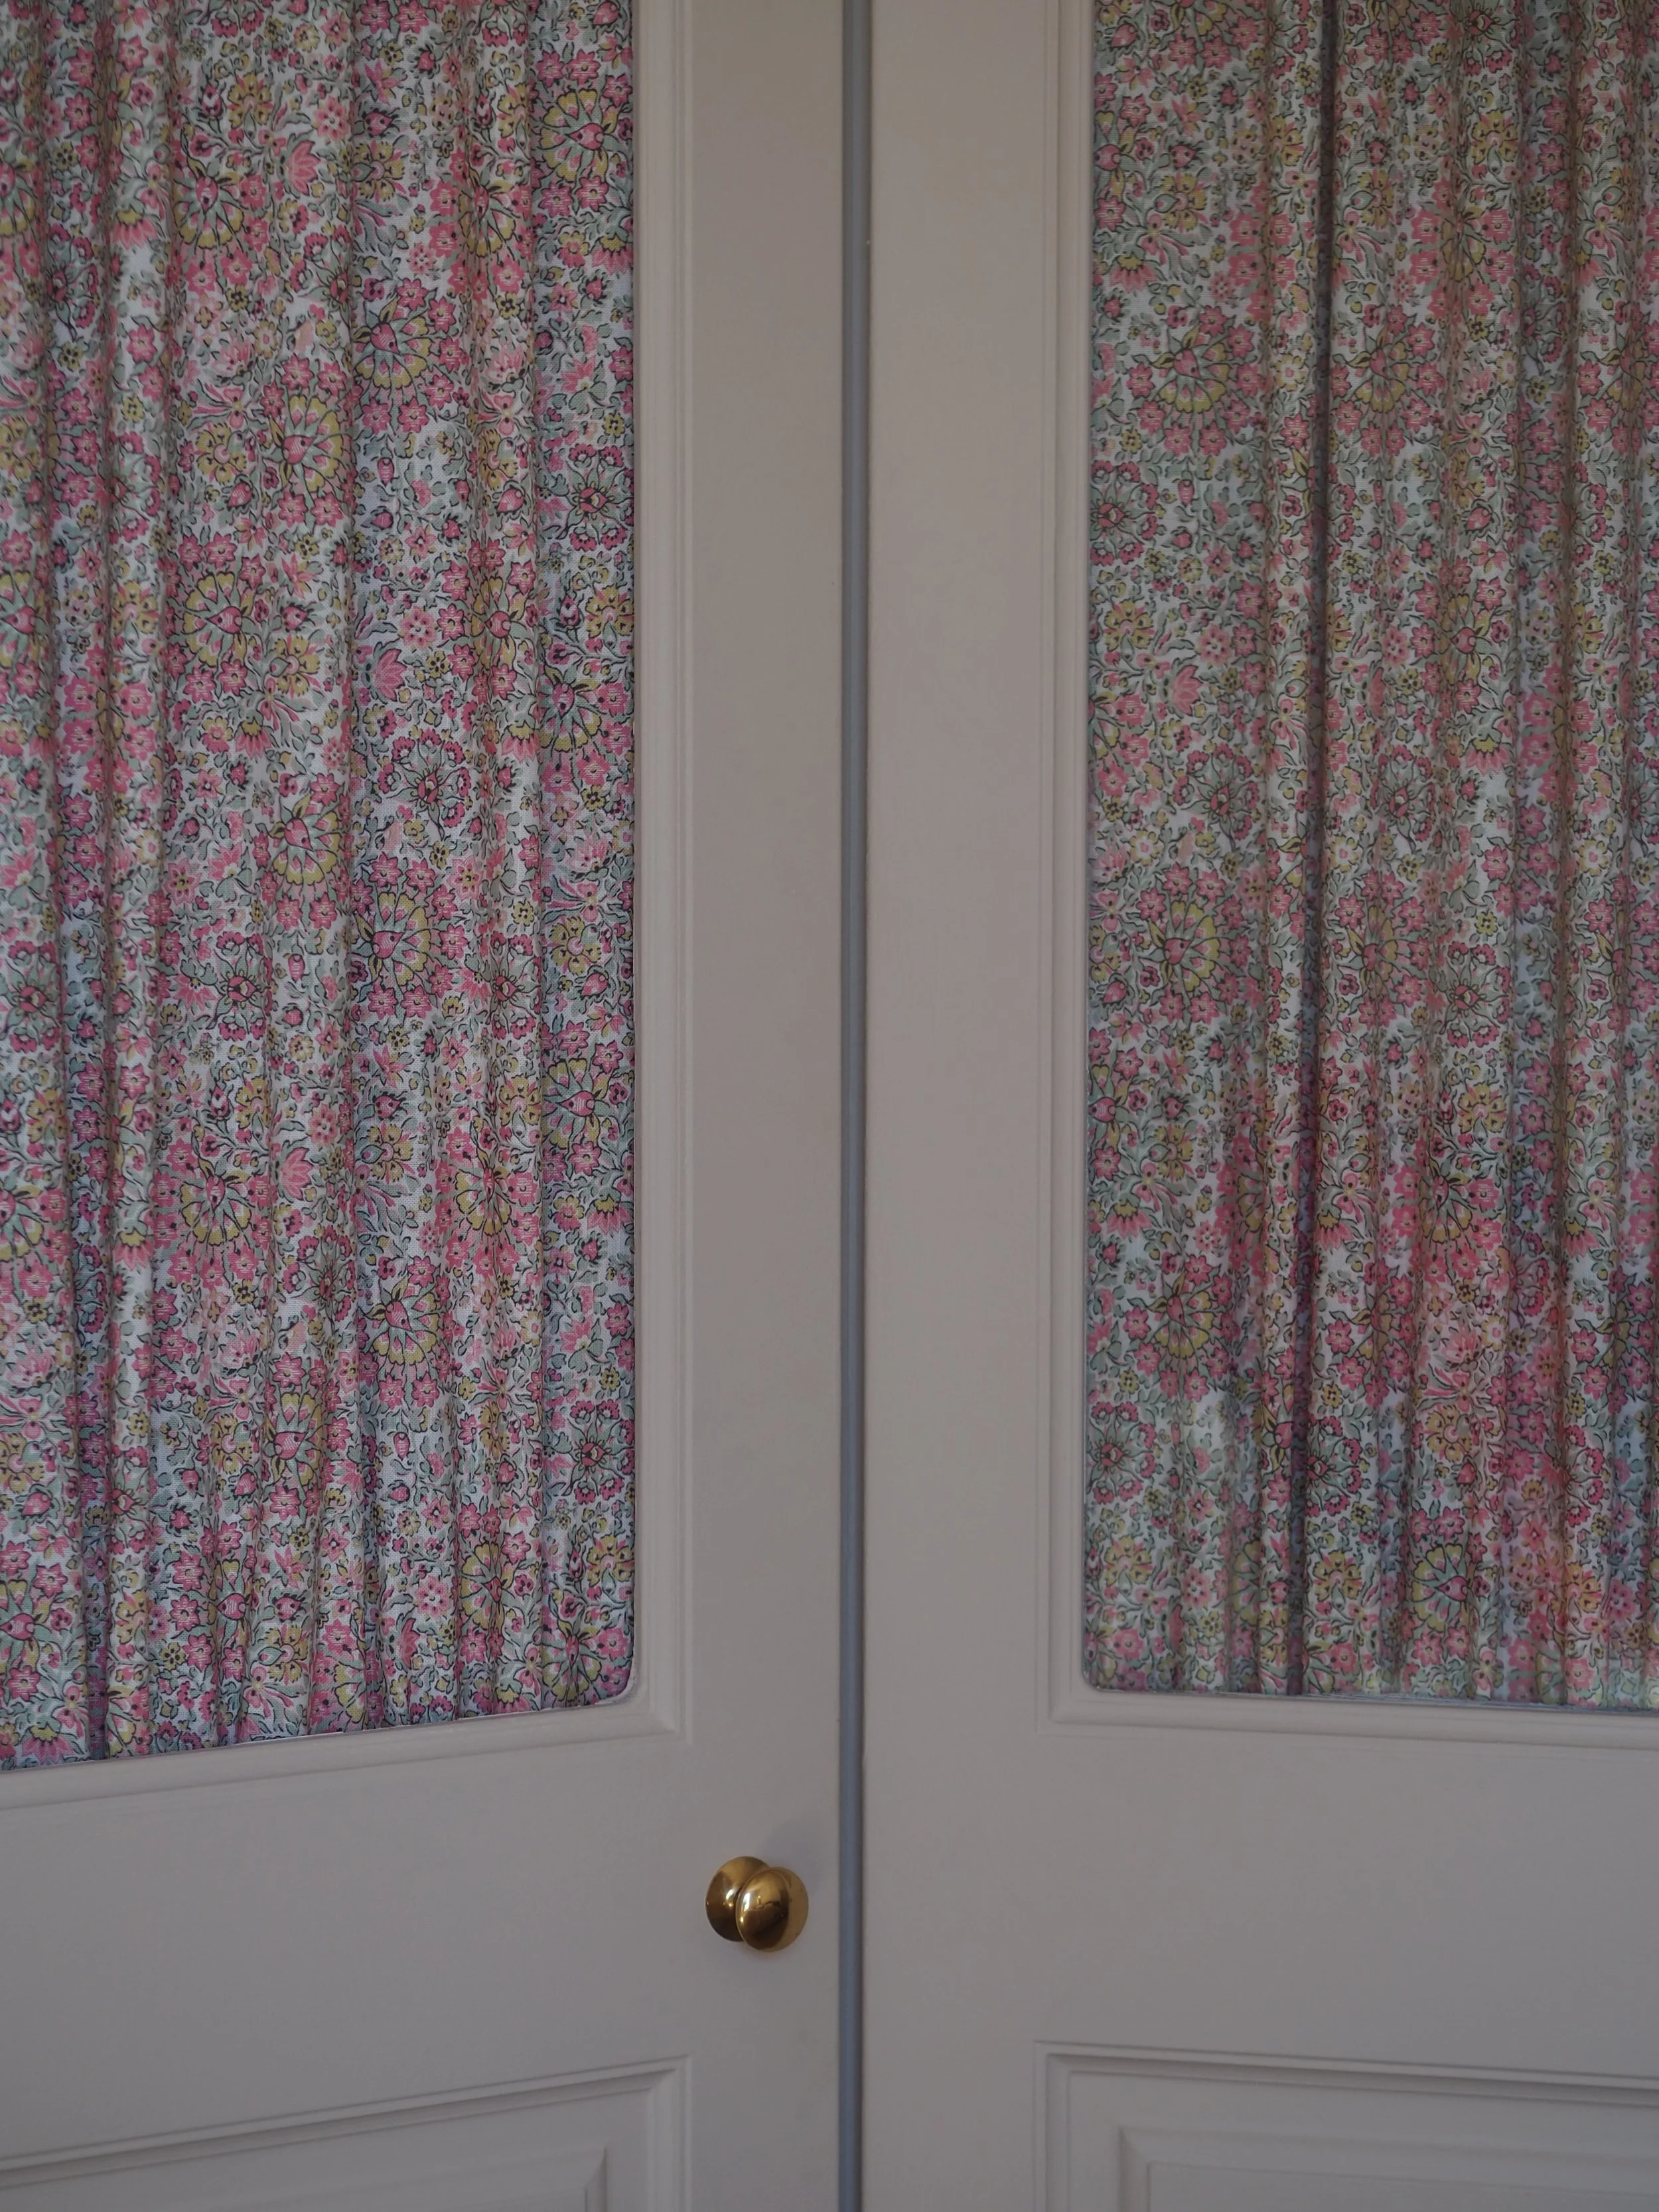
Unfortunately, one of the central glass panels had broken after 11 years of us owning them and it was only a matter of time before the glass fell out (and slicing off my foot in the process!) I needed to safely remove the glass and think of something else to put in its place. I love the whimsical look of gathered fabric in wardrobes, so I decided to use a left over metre of paisley Laura Ashley Painswick fabric to create a gathered effect in the doors. I was really happy with the outcome which solved a problem as well as looking pretty!
To do this yourself, you will need the following:
Fabric of your choice (at least double the width of the area on display).
Dressmaker scissors (or long, sharp scissors)
Ruler (a long aluminium one is best)
Pins/needle/thread to sew the top and the bottom of the fabric
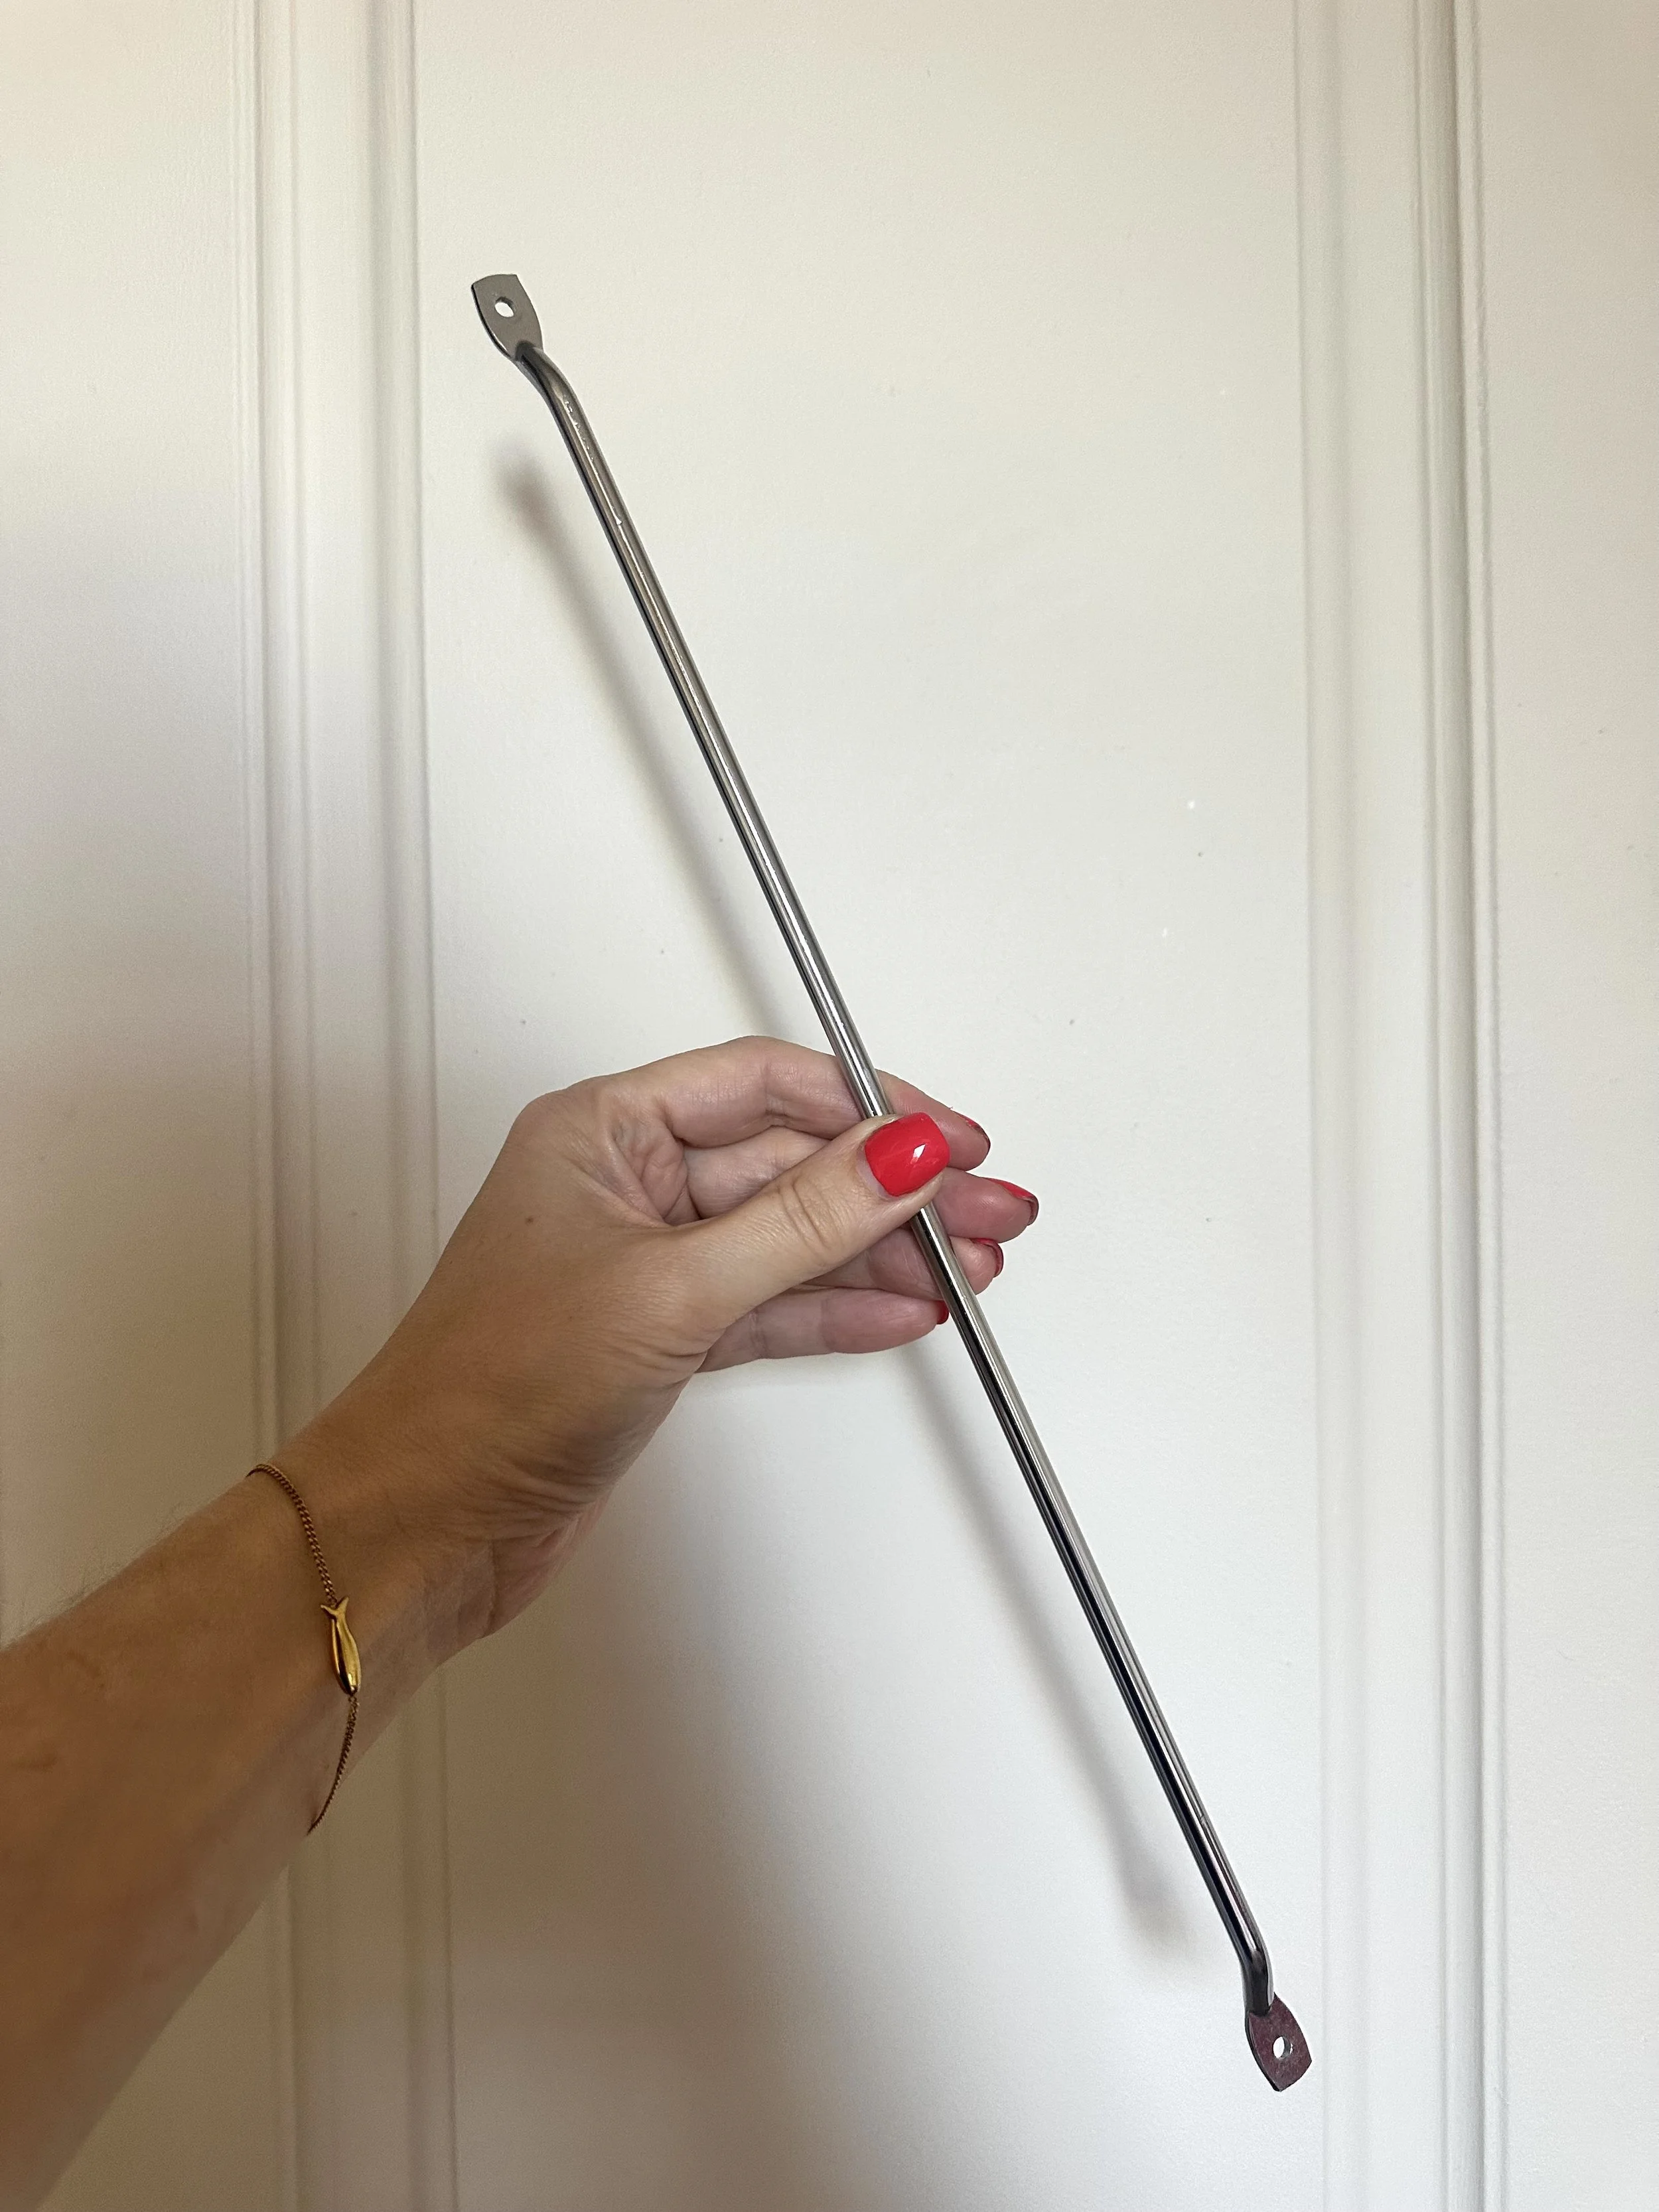
Tie/scarf rails (also know as door rails)
Screws and a screwdriver
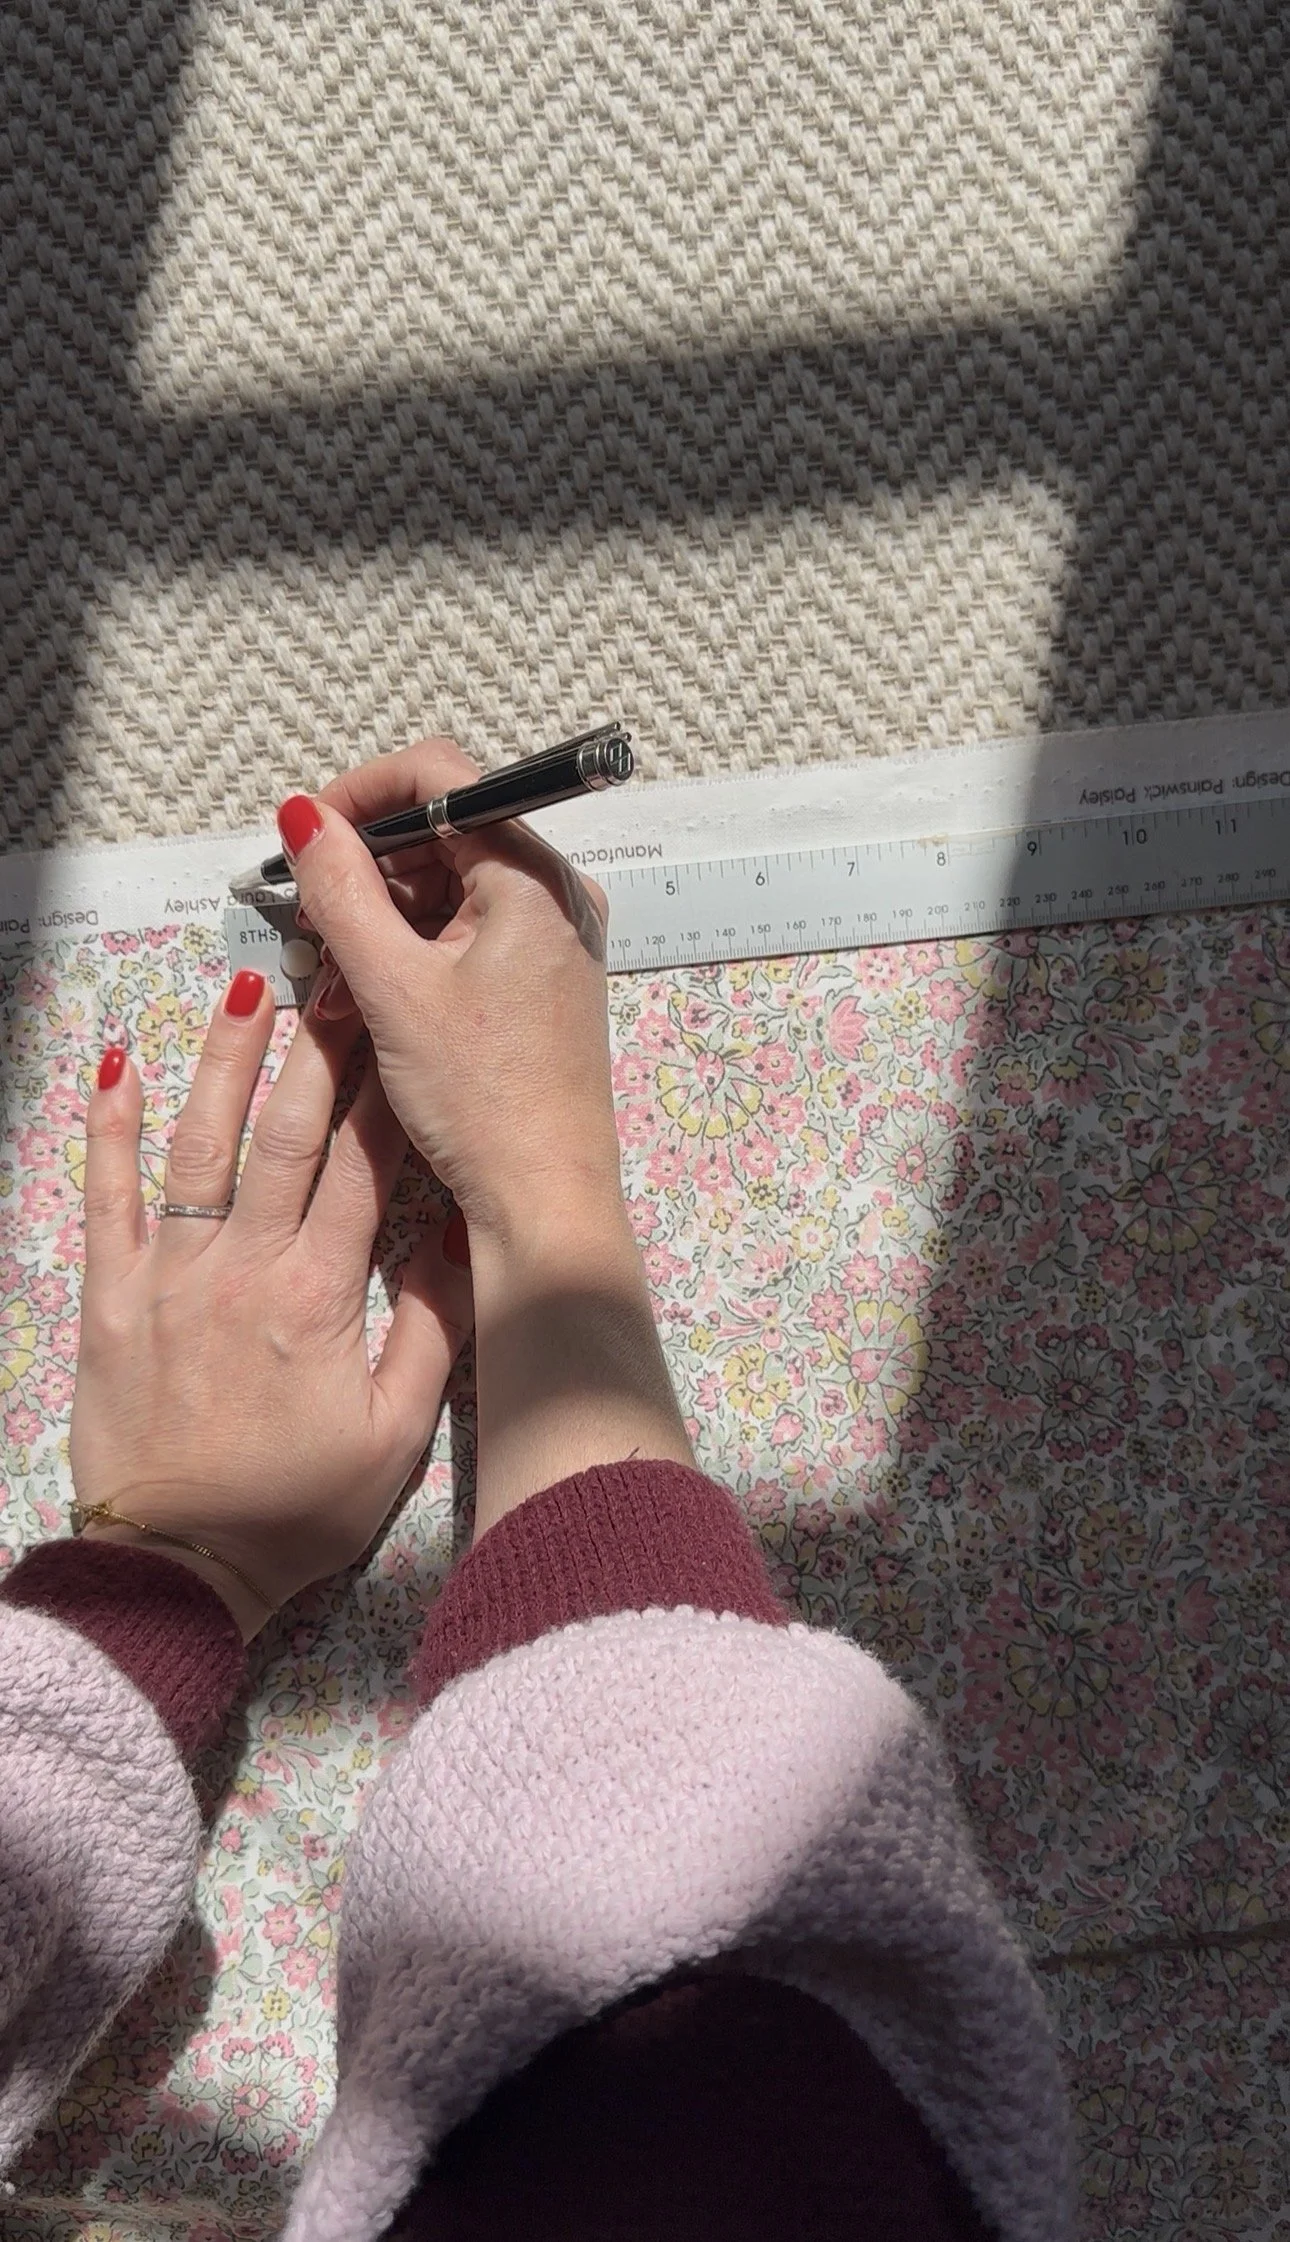
Measure out your fabric
To start, I measured out my fabric, making sure it was long enough to cover the top and the bottom of the exposed area. I left 15cm extra at each end in order to hem so they could be looped through each tie rail.
You’ll need double the width of fabric to the area you are covering to enable the gathered look. Once measured, I cut my fabric down using dressmaker scissors (a new purchase for me, but they are so much better at cutting fabric than any other scissors I've used!).
Add a tie rail at the top of your wardrobe door
To make sure that everything was going to hang right, I first screwed in the tie rails to the top of the wardrobe doors just above where the fabric was to drape down.
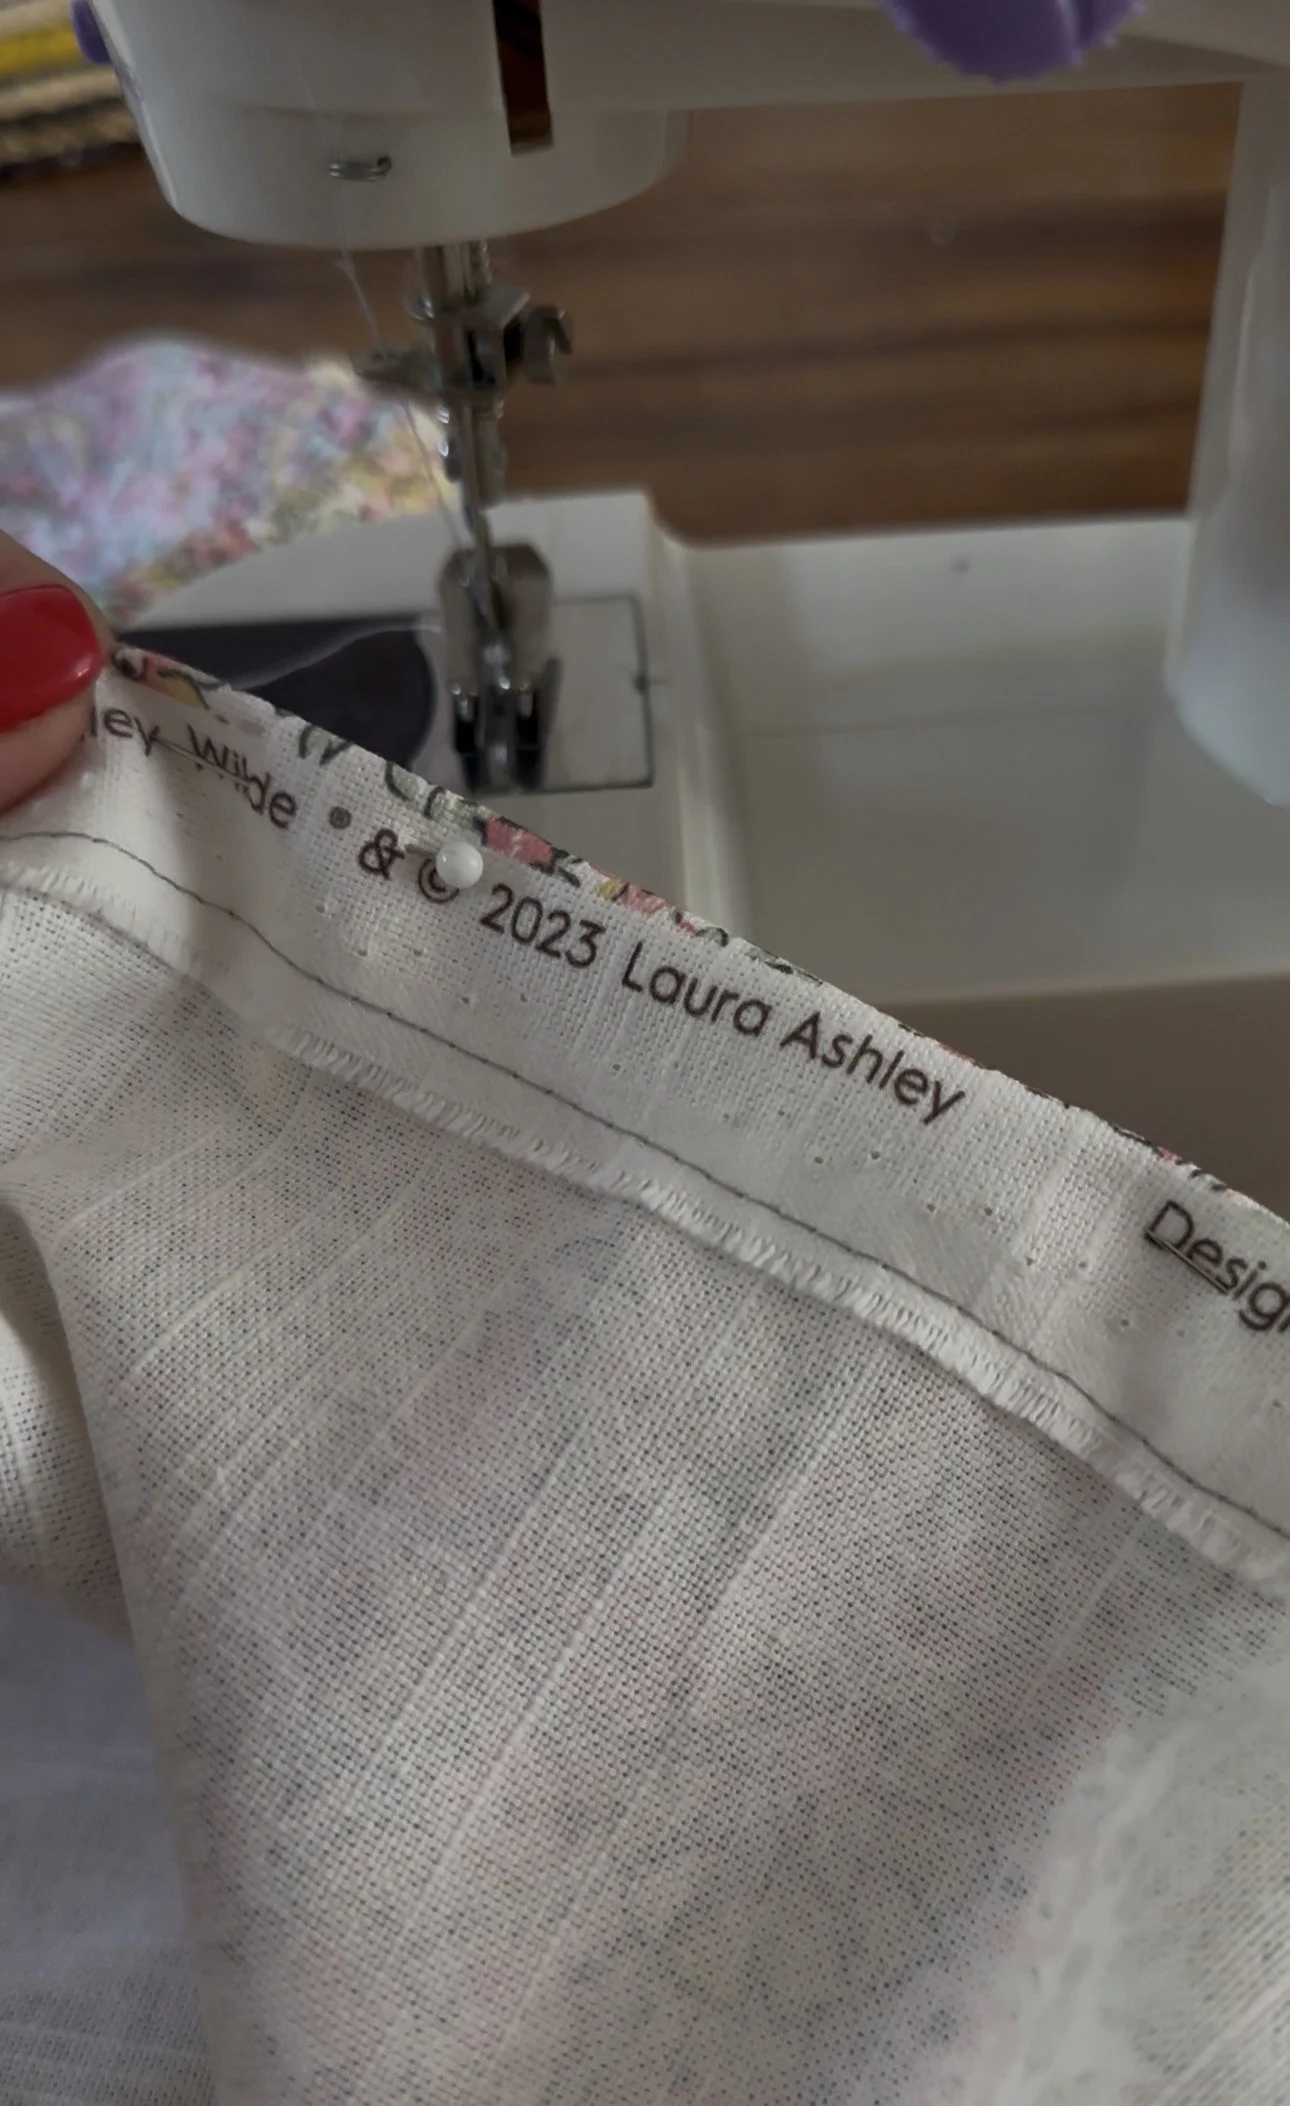
Hem the top of your fabric
I then hemmed the top of my fabric on a sewing machine. If you are not a confident at sewing, please be comforted by the fact that you only need one single line at the top (and as it will be hidden, it doesn’t need to be completely straight!)
Thread your hemmed loop through your top tie rail
Push your hemmed edge through the top rail. You can now tightly pull your fabric down and work out where your bottom rail needs to be placed. Mark where to secure your rail and then on your fabric, where you need to sew the bottom hem. It’s best that the fabric is pulled as taut as possible, as this looks best when gathered. Remove the fabric from your top rail and hem (same as you did the top end).
Hang!
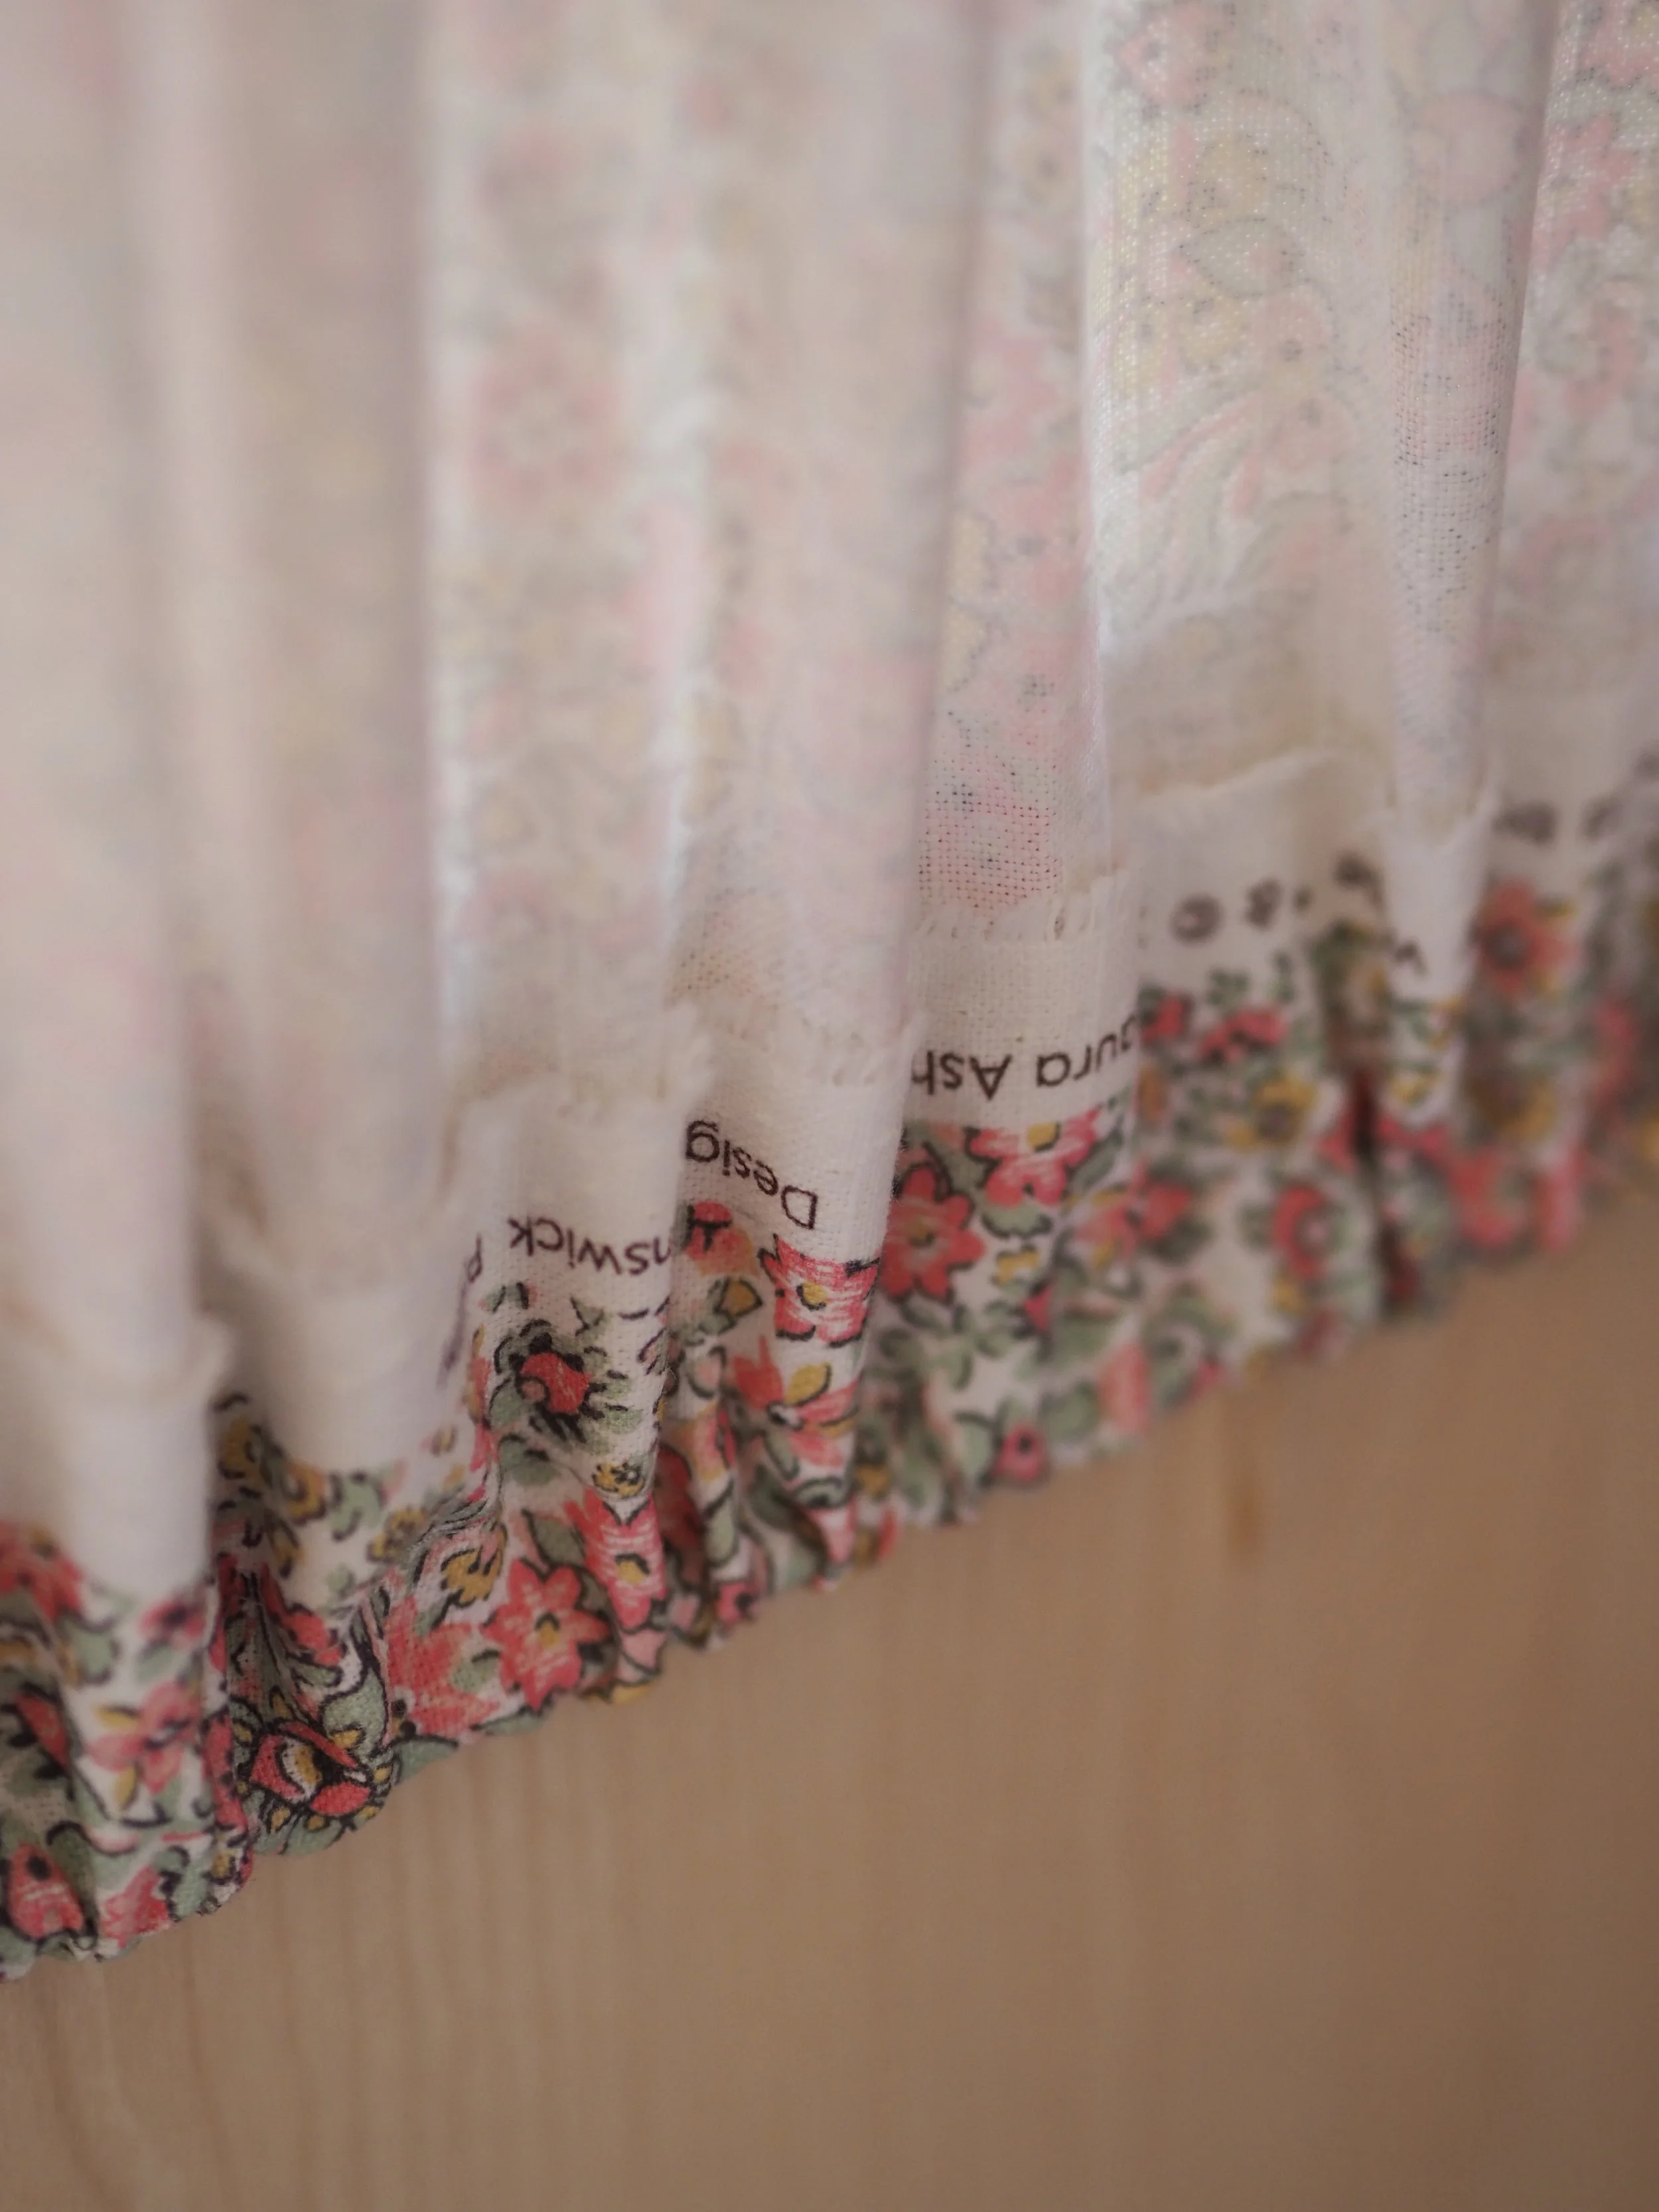
Once you have both ends hemmed, slot your fabric panel through both rails and gather the fabric in bunches. You can fiddle with the fabric to make your bunched fabric look symmetrical once the fabric has been hung.
And that’s it! I’m so happy with this budget-friendly update, especially as you cannot see our clothes stuffed in the wardrobe anymore!