How To DIY This Pink Velvet & Gold Legged Bedroom Bench From Scratch!

I have to admit I spend a fair amount of my time online just saving images of pink and gold chairs and sofas. Seriously, if you follow me on Pinterest and look through my boards it's all full of pink and gold decor. Blush pink in interiors has been huge for 2016, and as the metallics trend continues to thrive blush pink and gold has been featured a lot in furniture and homeware by brands such as West Elm. The new Tom Dixon designed resturant Bronte in London is also awash with dusty pink chairs and a candy pink concrete bar. I LOVE pink and gold together, but seeing as I wasn't going to be able to convince my husband that we needed to replace our perfectly fine sofa with a pink number anytime soon, I decided to bring a bit of pink & gold in the bedroom by DIY-ing a pink & gold bedroom bench from scratch.
To build the bench I needed to buy the following items:
One thick, strong piece of timber/MDF that was the length I wanted my bench to be, or could be cut to size. My bench was to be 140cm long by 33cm wide, so I chose a thick piece of MDF that was 180cm by 60cm in Wickes.
Upholstery foam seat pads ( I brought mine on ebay, they were 14" x 14" in size and 4" thick.)
Hairpin iron legs in gold (I also brought these on ebay - a set of four 10mm steel rods, 16" with 3 legs in gold which cost me £37)
Thick pink fabric that would be suitable enough for upholstery. I chose a dusky pink flat velvet from a wholesale fabric warehouse in North London (the fabric cost £6.95 a metre and I used 2 metres). If you buy budget-friendly fabric from a warehouse, it may not be overly clean, so consider using Brisbane upholstery cleaning.
2 packs of 22mm self-cover buttons (again, eBay, but I'm sure they are available in haberdashery shops).
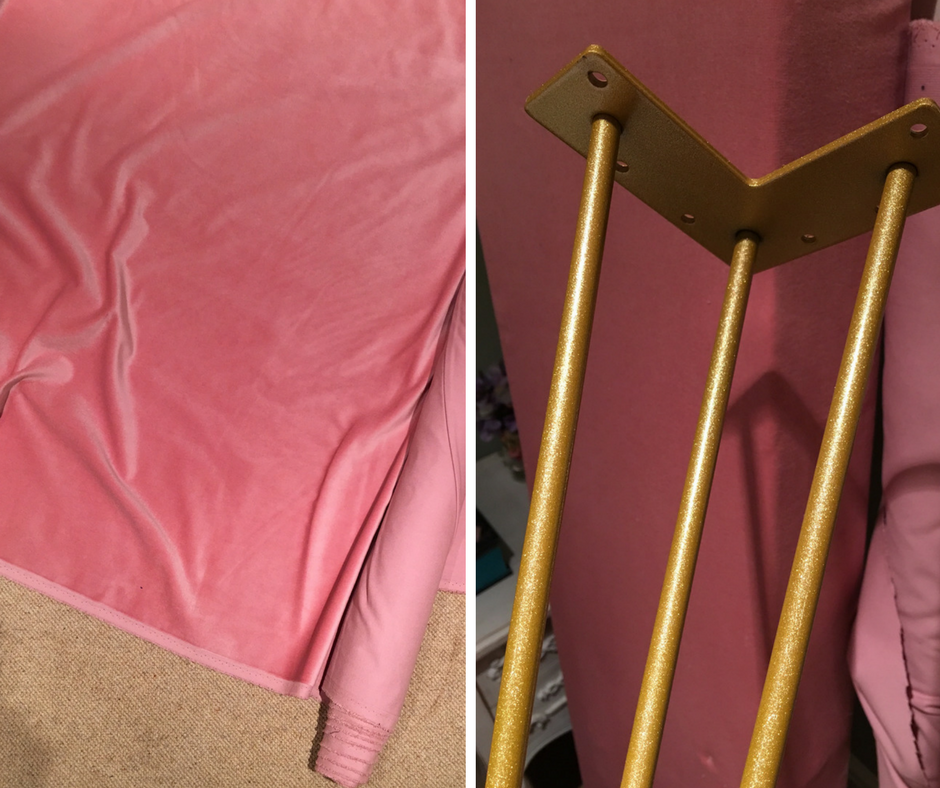
The pink flat velvet fabric I brought at a North London fabric warehouse, and the gold iron hairpin legs from ebay.
The tools that I used were a tape measure, hand saw, pencil, ruler, drill, No More Nails glue, staple gun, twine or string, long thin screwdriver, needle & cotton, small brass wood screws and an electric screwdriver (or your basic hand screwdriver would be fine).
how to make the bench - step by step:
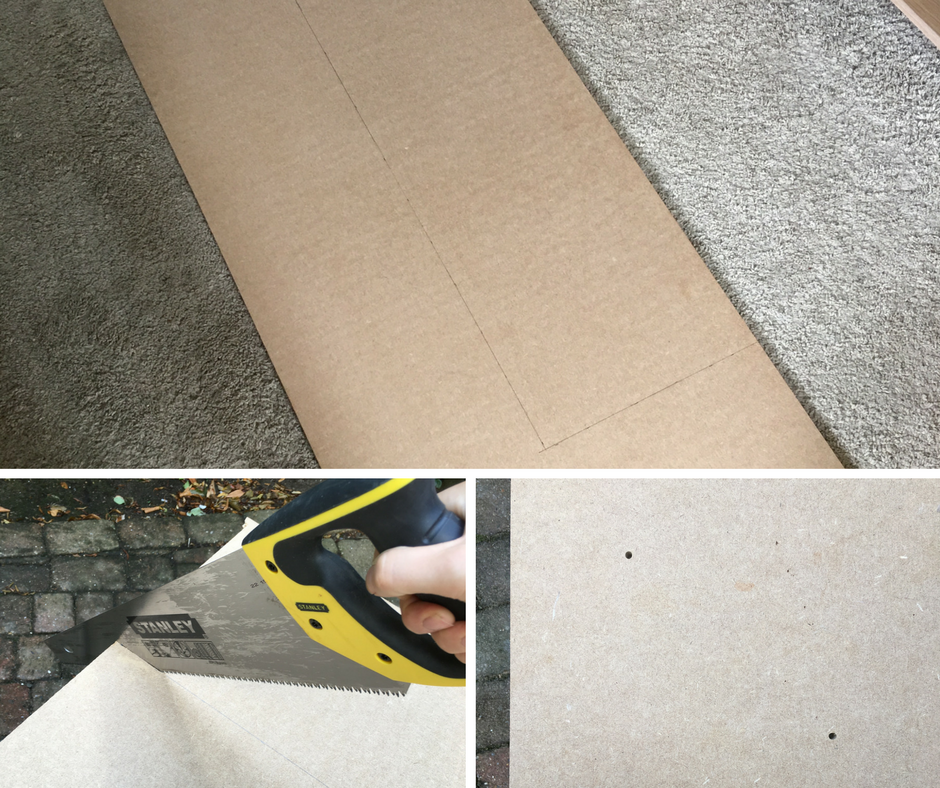
1. Measure how long and how wide you want your bench and cut your timber/MDF to size. Remember, if you want a long bench then your wood/MDF needs to be as strong as possible so it doesn't bow in the middle when it's sat on. If you want a long bench like mine, you will need to reinforce it either with extra legs in the middle, a thin metal bar going across the underside of the wood, or by doubling up your wood. To test, cut your wood to size and then suspend each end of it on some chairs. If it doesn't feel strong enough to sit on in the middle then you will need reinforcement!
2. If you are going to add in buttons to your upholstery like my bench, measure out where you want your buttons to go with a tape measure and pencil, then drill a hole through the wood. On my bench I decided that I wanted 5 buttons on one line and four buttons on the second line in a zig-zag pattern. My bench was 140cm long, so I divided 140 by 5 and knew I needed my holes to be 28cm apart. Once marked out in pencil I drilled a small hole through the marking, so that I would be able to thread the button through the wood.
3. I took the foam seating pads and cut them to size. I then stuck them on the wood with glue. The foam pads should cover the entirety of the wooden base:
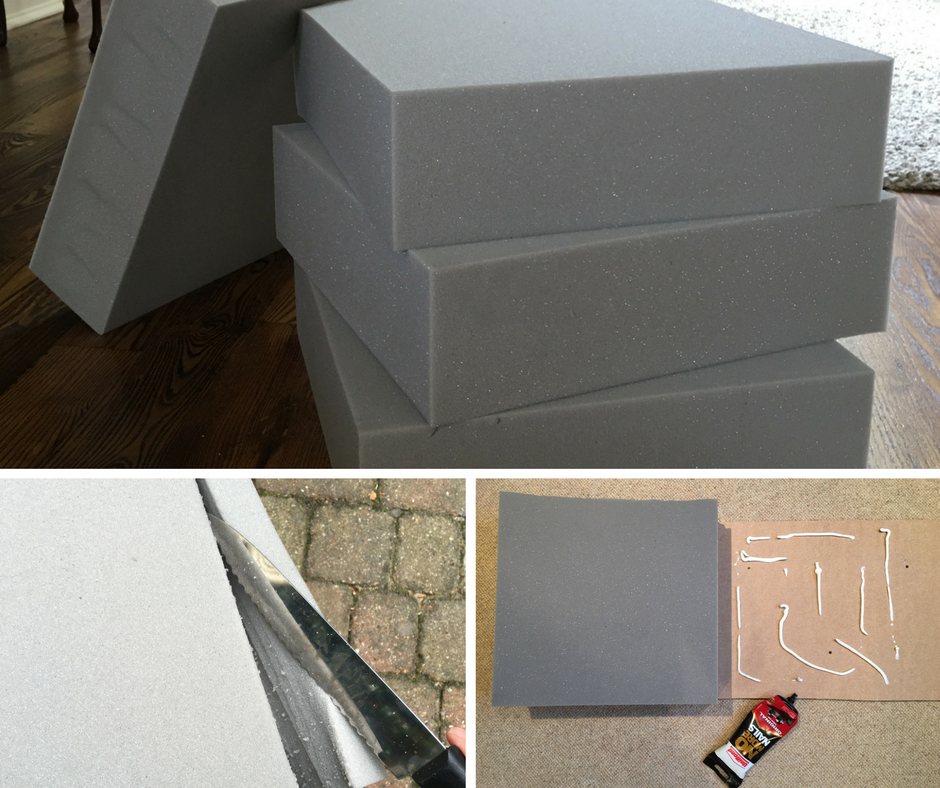
You should now have your wood and foam bench seating area looking like this:


4. Lay your bench seat (foam facing down) onto the reverse of the fabric, and cut your fabric to size. It needs to be big enough so that it covers all the foam padding and it can be brought up over onto the wooden base to be secured. Pull the fabric tight and then staple it in place around the edges of the wood:

Keep checking as you staple that the fabric is tight over the foam and there are no loose flappy bits of fabric. The hardest part of this process is doing the corners - there seems to be no trick to getting this right other than just making it look as neat as possible. To get my corners looking the best that they could look, I cut away any excess fabric at the corners and then just made little folded pleats. You could also fold the fabric like how you do when wrapping a gift to make it look tidy and neat. Staple as much as you need to. If you don't get it right first time don't worry! Just use your screw driver to loosen the staples, pull them out with pliers and start again until you do get it right.
Once all stapled the underside of your bench should look like this:

5. You'll now want to add your upholstery buttons, so take any fabric offcuts and your packets of buttons, and separate the claw back of the buttons from the tops. Place the top of the button on the reverse side of a fabric offcut and cut in a circle around the button about 1cm away from the button edge.

Fold the fabric over and push into the underside of the button centre, then loosly place the claw part of the button back on the button top so the fabric is slightly secured. With scissor tips, push all the fabric in as far as it will go between the button top and the claw back. Once the fabric is in as far as it will go, press the claw back down firmly. Rotate the button in your fingers to even out the fabric around the button.
6. Once you have made all the buttons, go back to your bench seat and with a long, thin screwdriver; push the screwdriver through each of the drilled button holes, through the foam and out through the top of the fabric -this will create an area for your buttons to be threaded through. Pull out the screwdriver and then cut a long piece of twine and wind it over the top of the screwdriver. Push the screwdriver with the twine covering back through the hole until you can pull a twine loop out of the top of the fabric. Remove the screwdriver taking care that the twine remains looped out the top of the bench seat:

The loop holes on the self cover buttons were really small, so I used a needle and thread to attach them to the twine. Ideally, if you can get another piece of twine through the button holes I'd do that and knot it to the twine coming out the fabric. However, here I used cotton thread and just made sure it was really really secured to the twine (otherwise buttons will start popping off the bench!)
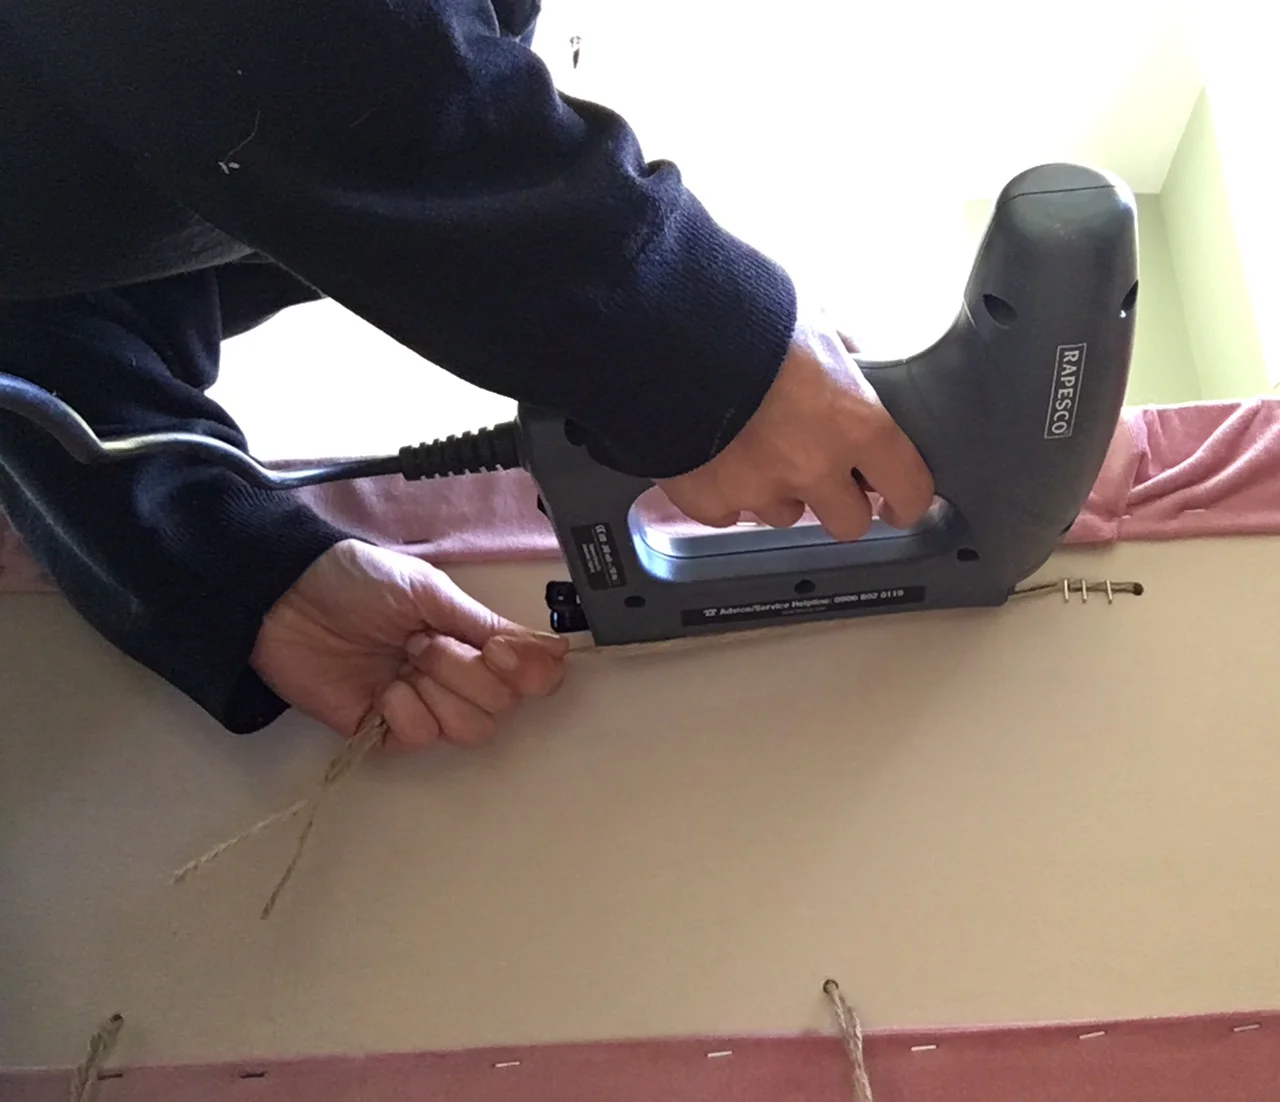
Once the buttons are attached to the twine, pull the twine down through the wooden base until the button sits nicely on top of the fabric. Then, with one hand push the button into the foam as far as you want it to go. At the same time, pull the twine, tighten, then use a staple gun to secure the twine to the wood:
Once all your buttons are secured, the top of your bench should look like this! Again, if some don't look right don't worry - remove the staples and give it another go:

7. You'll then want to cover the unsightly drill holes, twine and staples on the bottom of the bench, so cut another piece of fabric the width/length of your bench, fold over the edges to create a hem, then staple it down so it looks like this:

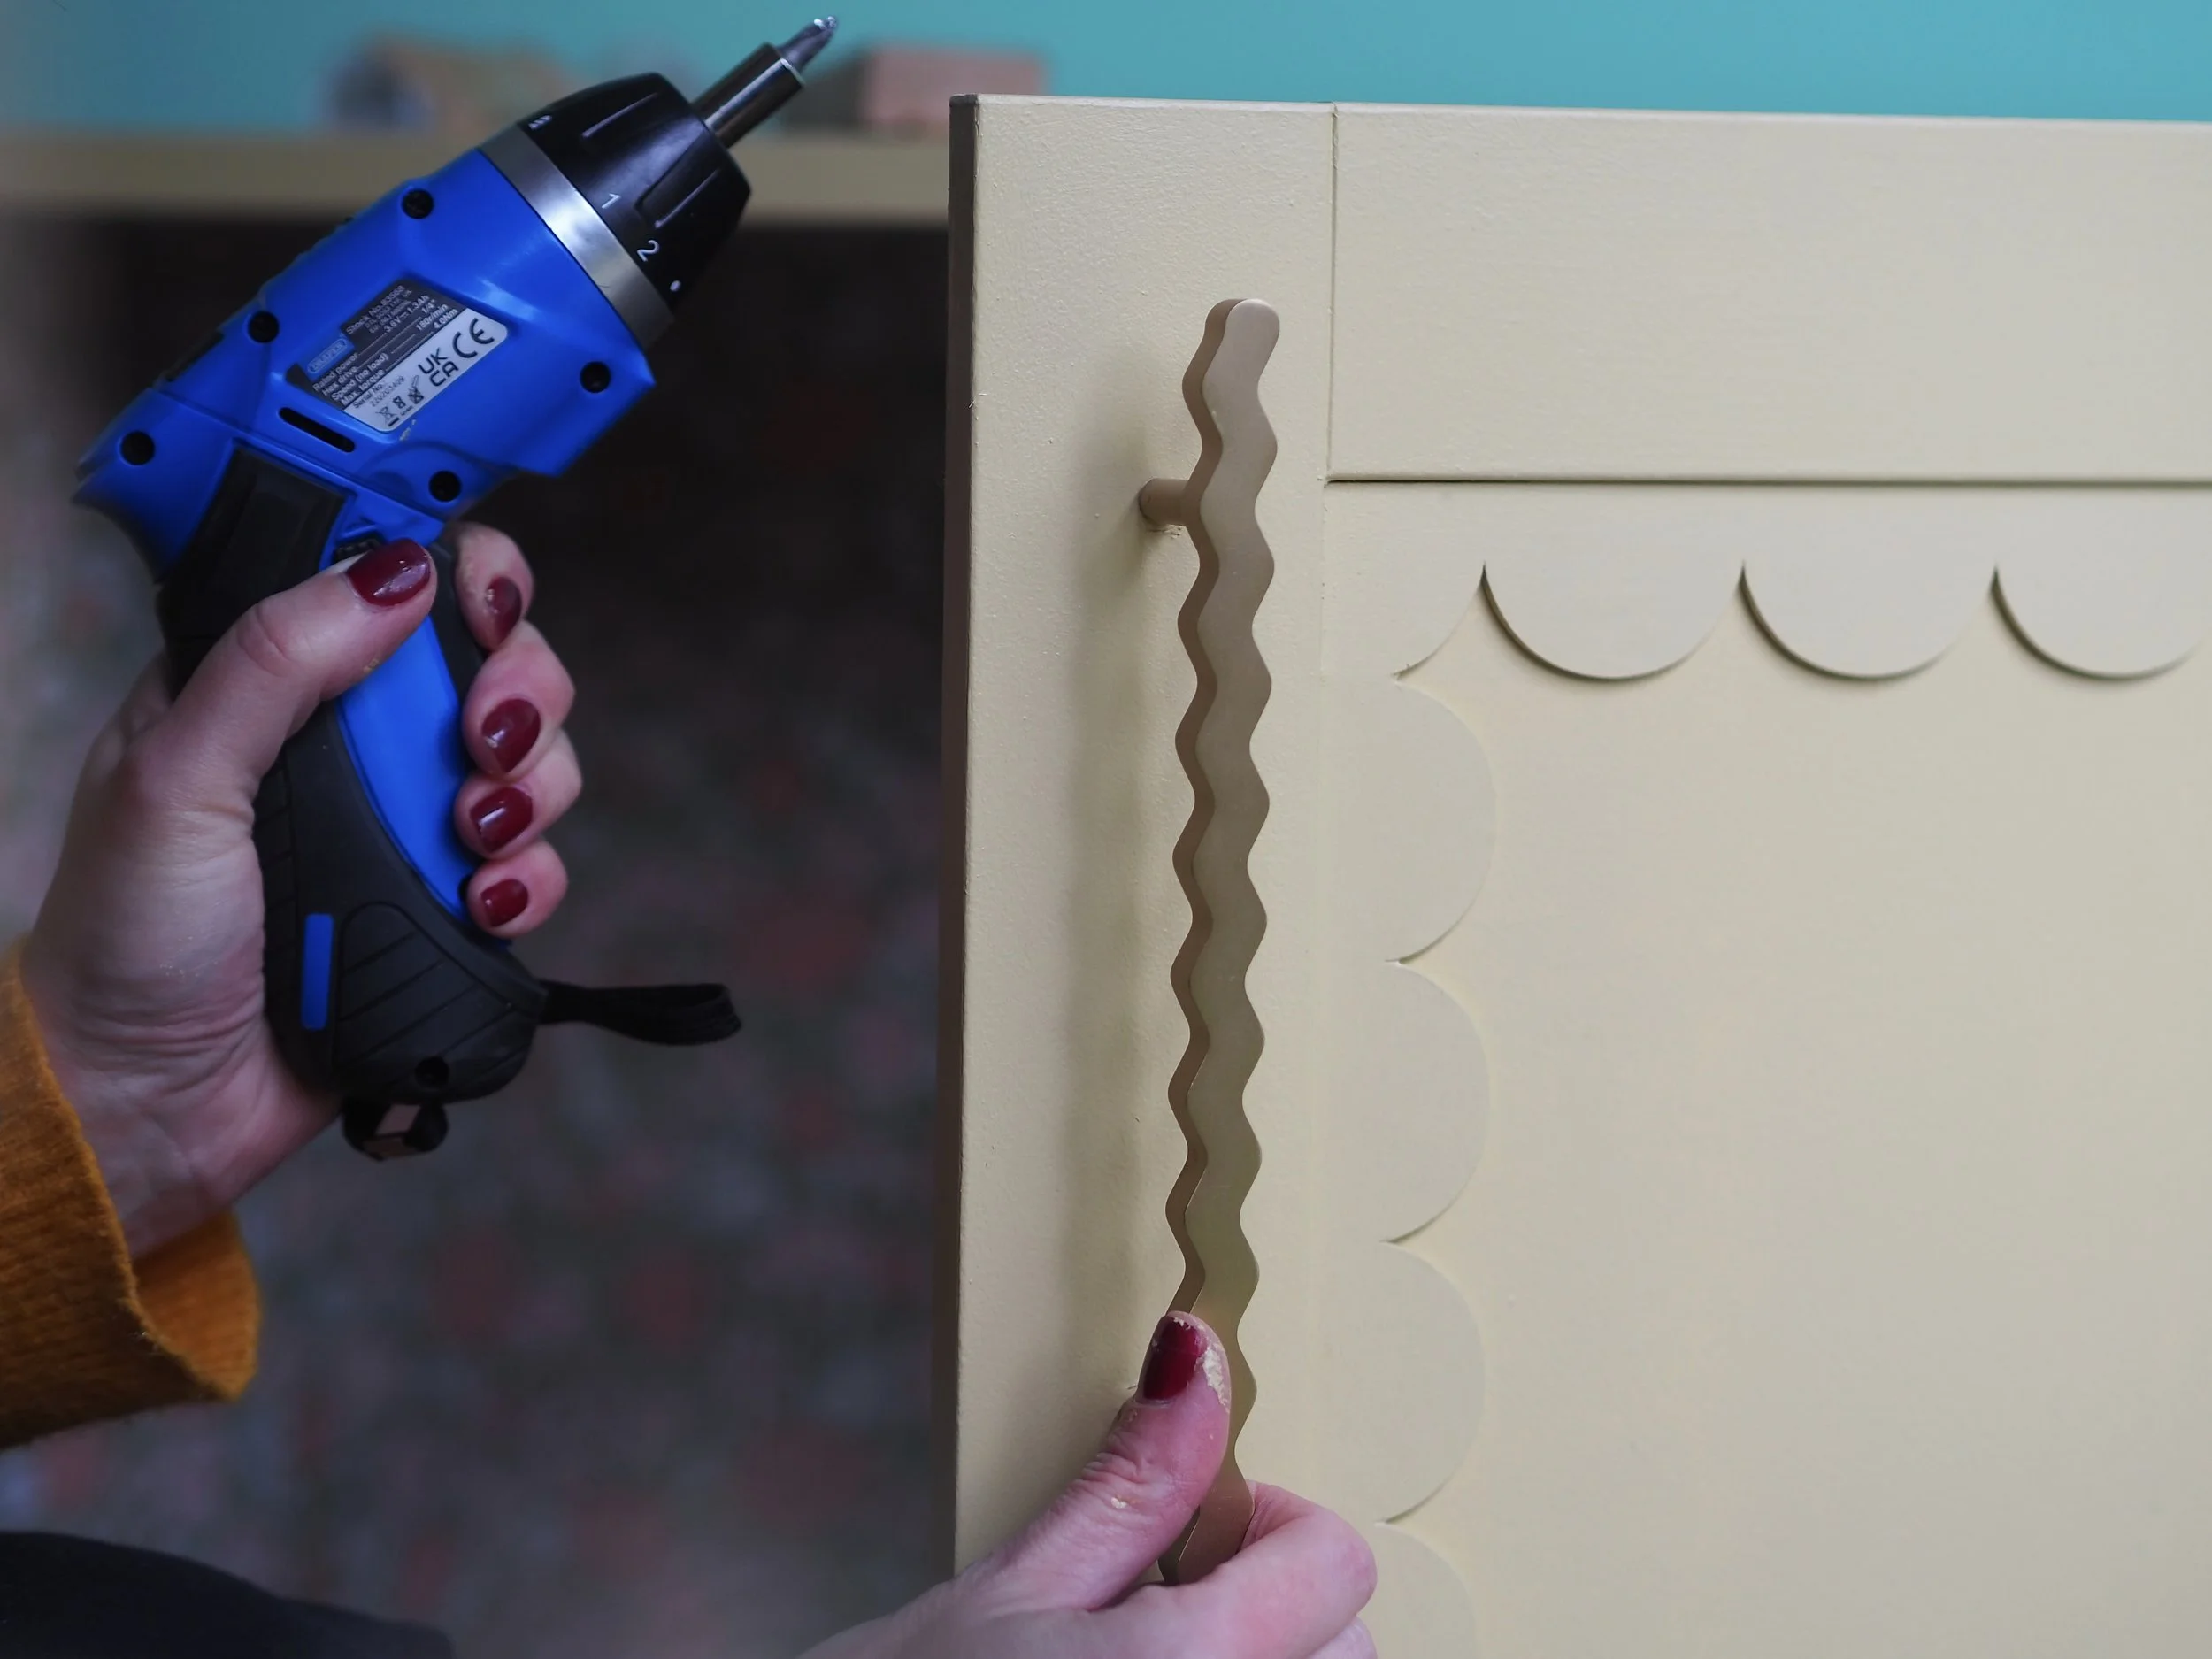
8. The final stage is then just to screw on your hairpin legs. Measure them the same distance apart at both ends so they are equally positioned, then use an electric screwdriver or a hand screwdriver to screw them into the wood base:

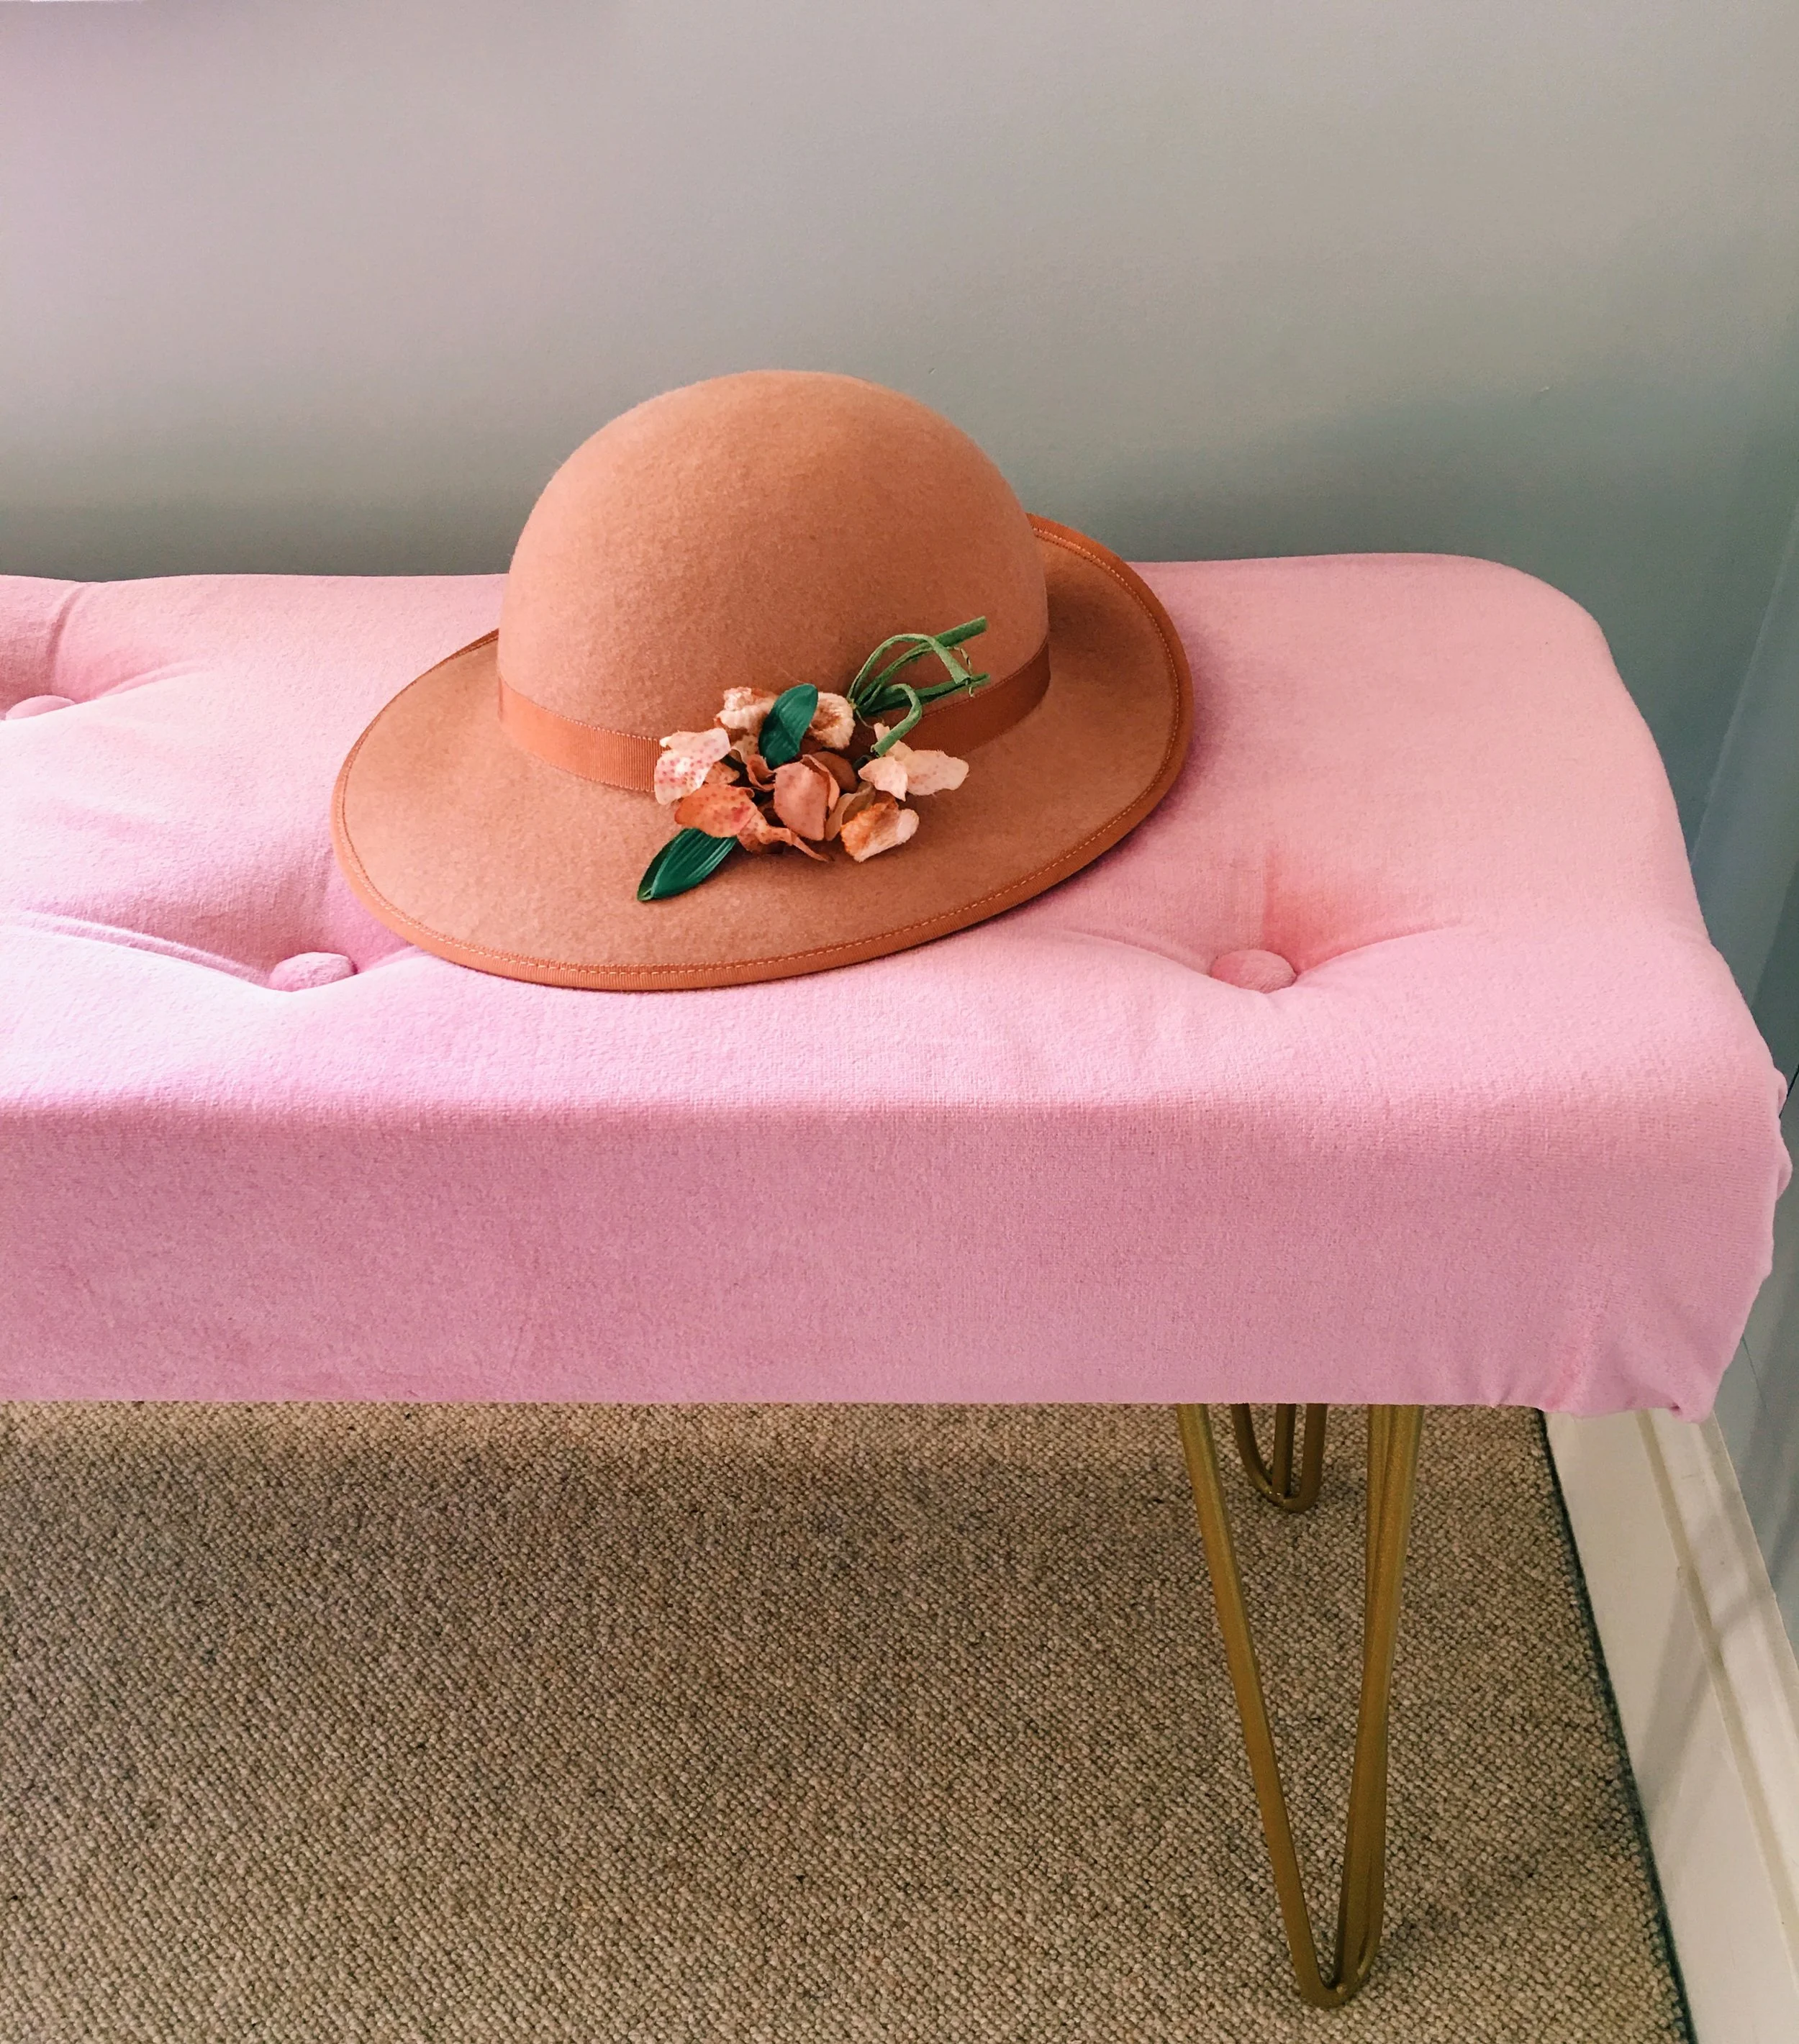
And here is the result of my new pink velvet & gold bedroom bench! After I took these photos I put the bench at the base of our bed, and it has been great to put clean washing and other bits and bobs on. Did I mention it's also PINK and GOLD! The ultimate goal...

Are there any colours in interiors right now that you are aspiring to? How have you brought these colours into your home? Let me know in the comments below!