DIY Pastel Easter Door Wreath Made From Cheap Plastic Eggs

For my Easter door wreath this year, I wanted to make something really full-on and dramatic. I feel like I've achieved that with this egg-tastic door wreath! This wreath was really cheap to make, but it wasn't the quickest thing to knock up. If like me you are dedicated to the cause of having the best Easter wreath in town for a few quid, then read on my like-minded friends...

For this door wreath you will need the following:
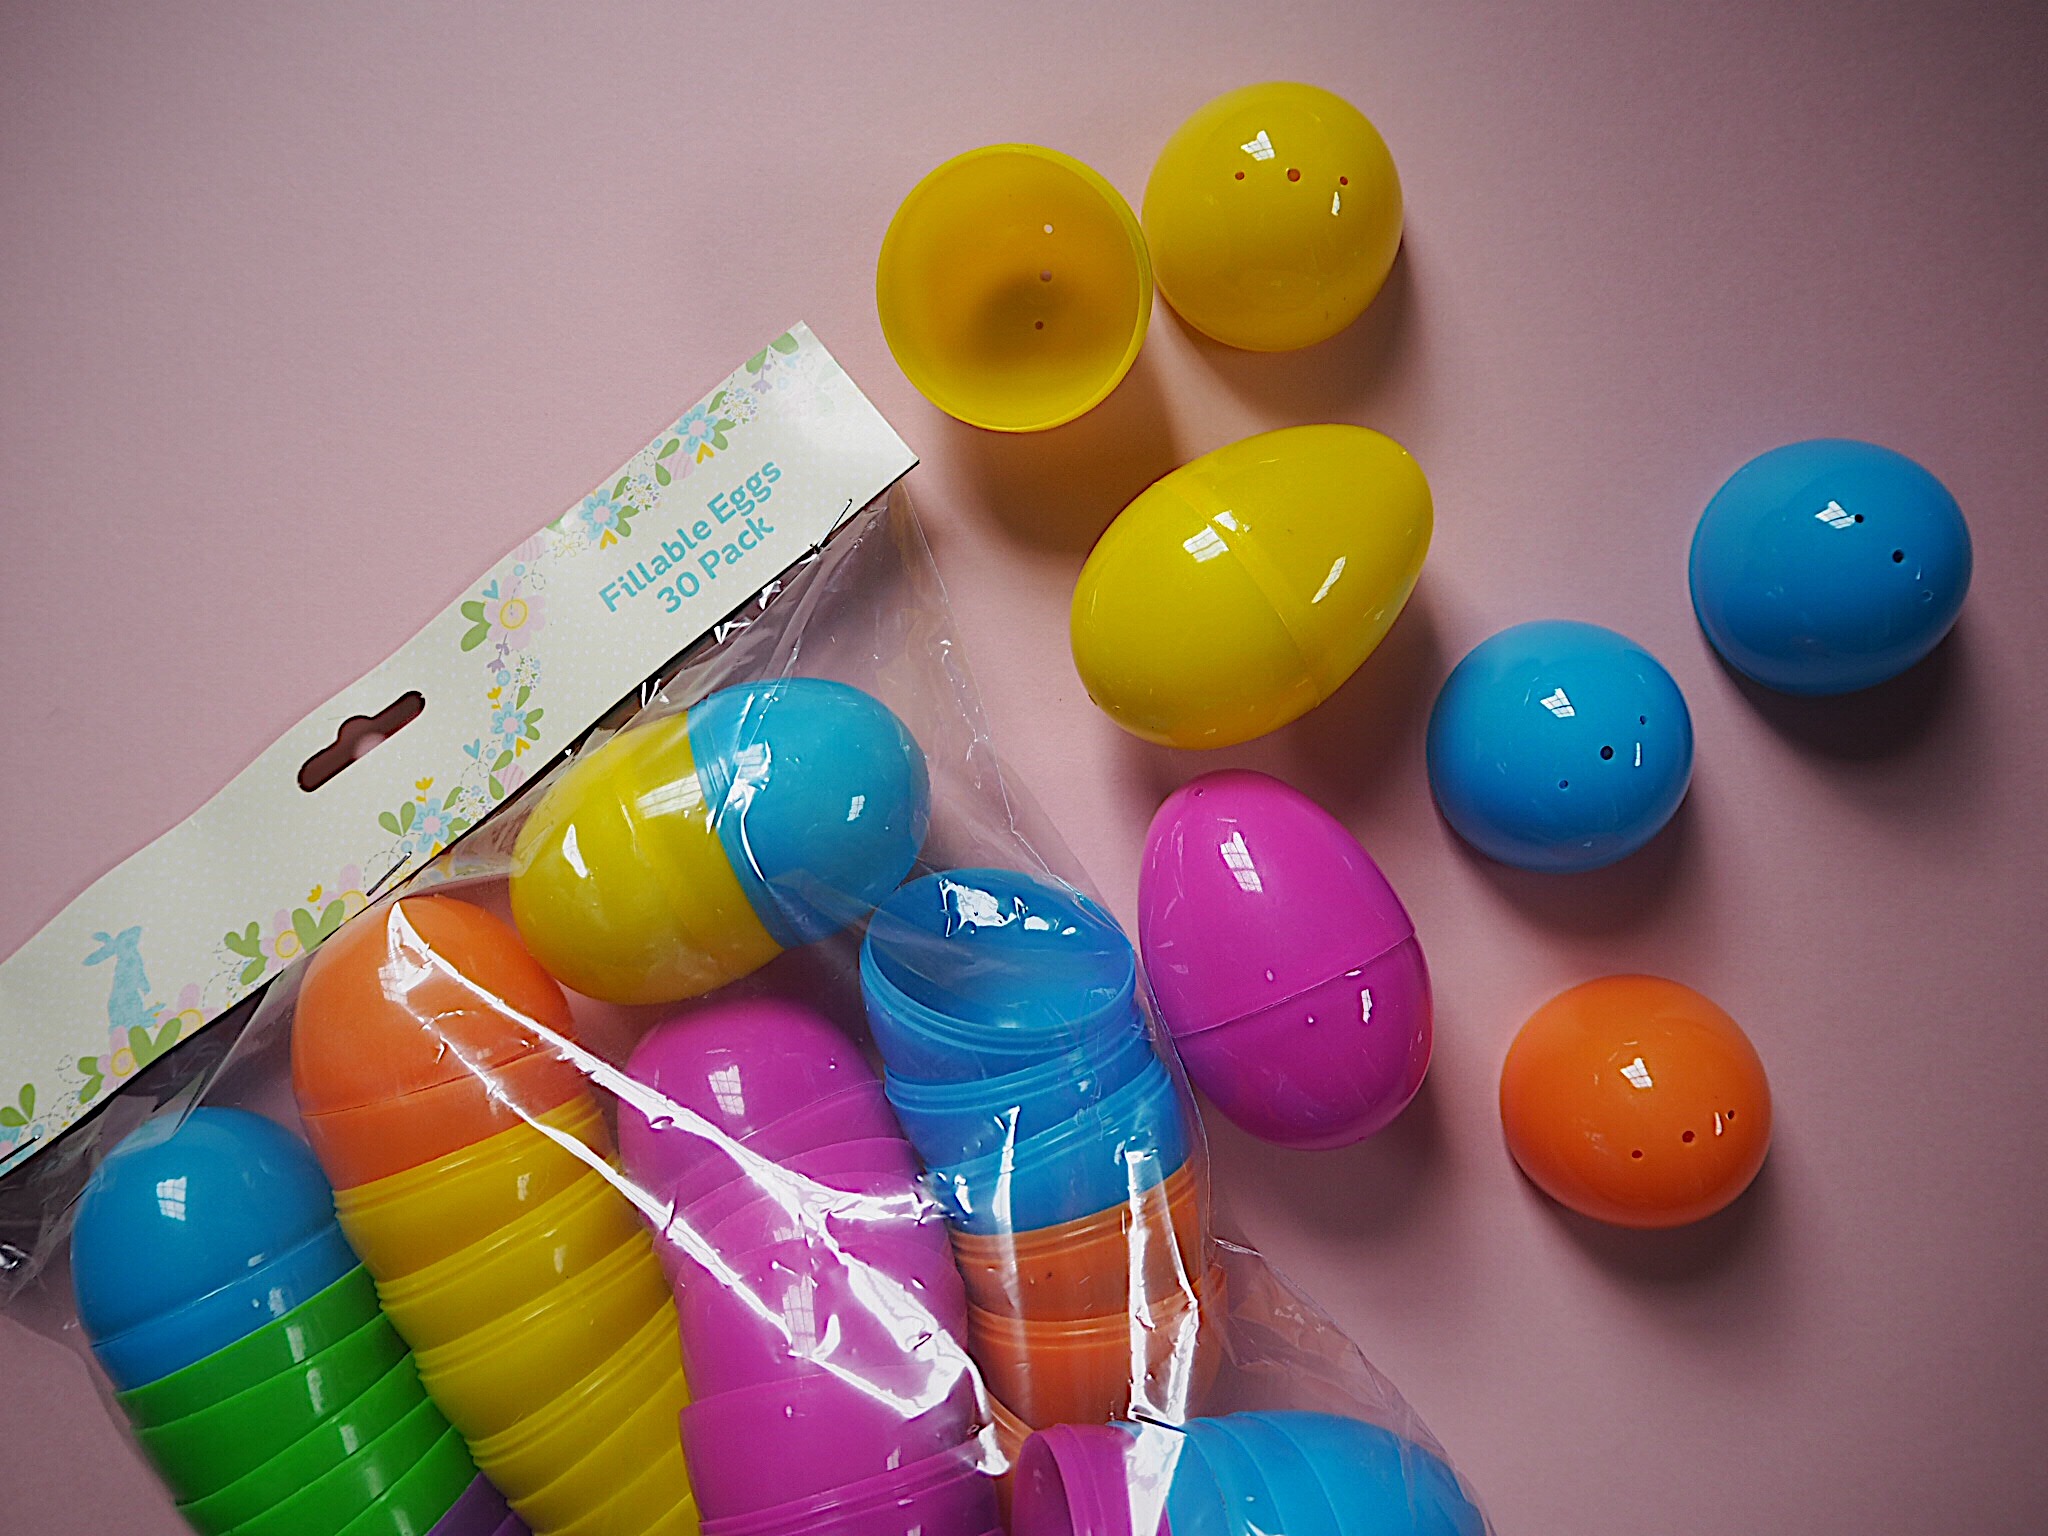
Cheap eggs. The cheapest I found were a pack of 30 of these fillable plastic eggs for £3 a packet from Hobbycraft. I ended up using around 55 eggs so buy two packets!
A polystyrene ring. I used a 350mm one for my wreath, which was £4.
A glue gun and two packets of 7mm glue sticks.
A number of left over tester paint pots in colours of your choice
Thin ribbon around 5mm in width
Craft glue
Scissors
Blue Tack
Plastic primer spray paint
Twine and/or decorative ribbon to hang the wreath on the door
A selection of faux flowers. I brought mine from Aromaround
Build the eggs, then stick a bit of blue tack on one side. Stick a number of eggs (with enough space between them) down on an old piece of wood (or whatever flat surface you don't mind discarding after), and give them one coat of sprayable primer for plastic. The side of the egg stuck down will not be primed but do not worry, this will be the side that will be glued down to build your wreath and won't be seen.

Once your primer is dry (this shouldn't take long), coat your eggs in two coats of tester pot paint that you have stored away! I chose traditional pastel Easter colours for mine in 'Teresa's Green' by F&B (left over from the guest room), Old White by F&B (left over from choosing kitchen cabinet colours), 'Celestial Blue' by Little Greene Paint Company (a contender in the blue living room revamp), Candy Love 4 by Dulux (from a decision to paint the living room skirting pink, something that never materialised) and 'Lemon Juice' by Homebase's own brand (brought for this project). If you do not have any tester pots of the colours you want to hand, buy the cheapest tester pots available in your local DIY store. Own-brand tester pots should come in at just over a quid each and one tester pot will be more than enough for your eggs.
Leave your eggs to dry, then pull them away from the blue tacked base.

The paint doesn't cover the join between the top and the bottom of the plastic eggs, so I brought a few metres of 5mm wide ribbon in a selection of complementary colours. Ribbon this thin should only be a few pence a metre. Wind some ribbon around the egg and cut where it meets along the join. Use some simple craft glue to stick on the ribbon and hold it in place. Make sure the join of the ribbon meets at the back of the unpainted part of the egg, so all the eggs look seamless.

Take your polystyrene ring and wrap some twine around so you have something to attach the wreath to the door with. Now the fun part! Using a hot glue gun (hot glue will guarantee your eggs stick firmly in place), carefully stick each egg down with hot glue in a circular motion, with each egg facing the same direction. Try and cover as much of the white polystyrene as possible. Don't glue your eggs too much on the underside of the wreath base, as you want your wreath to lay flat against your door.

Due to the shape of the eggs, it's inevitable that you'll have small gaps where you can see the polystyrene wreath. To hide these, and to add an extra spring touch, pluck some heads and foliage off some faux flowers and glue them in to hide the gaps. I chose faux blossom and hydrangea flowers for my wreath. You really don't actually need that many flowers, so only a couple of faux flower branches need to be purchased.
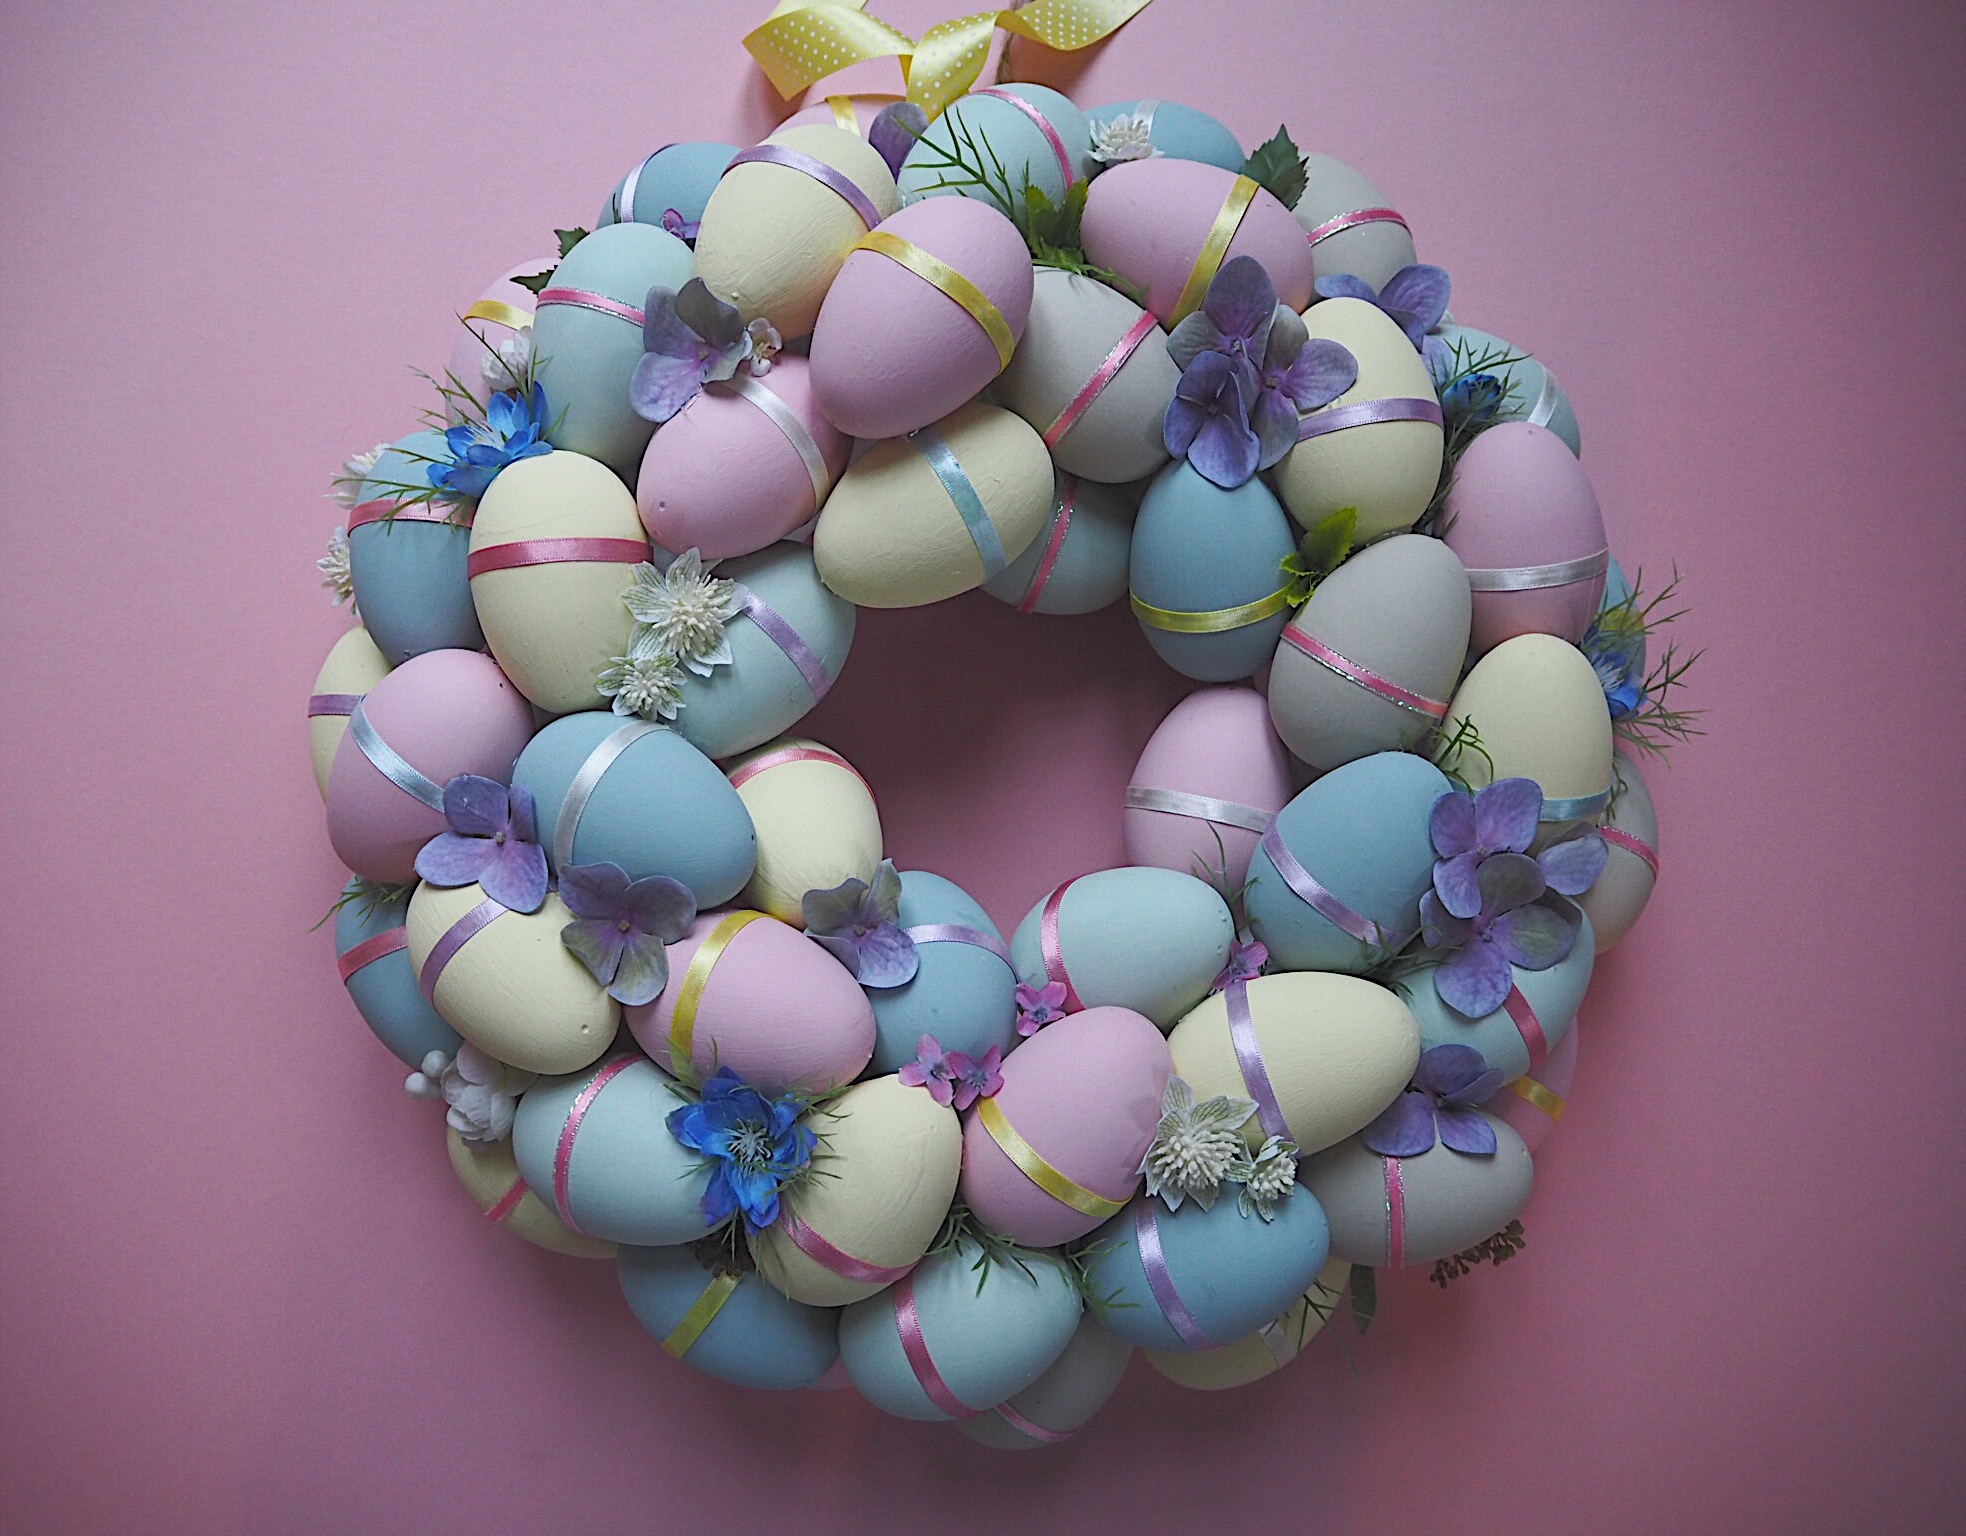
I added a decorative yellow ribbon to my wreath, even though I used the twine to really secure it to the door.

What do you think to my dramatic, DIY wreath? Let me know in the comments section below!