DIY Autumn Door Arch Home Decor Idea
Creating a decorative door arch for autumn at home…
Read More
Creating a decorative door arch for autumn at home…
Read MoreMeet 8 inspirational women who started up their successful home and garden businesses as a result of COVID-19…
Read MoreHow to make moss base Christmas wreath for your front door…
Read MoreSmall posies of dried flowers have become a popular micro-trend within home and interior styling. Within this post you’ll find my top source list for the best dried flowers available to buy in the UK..
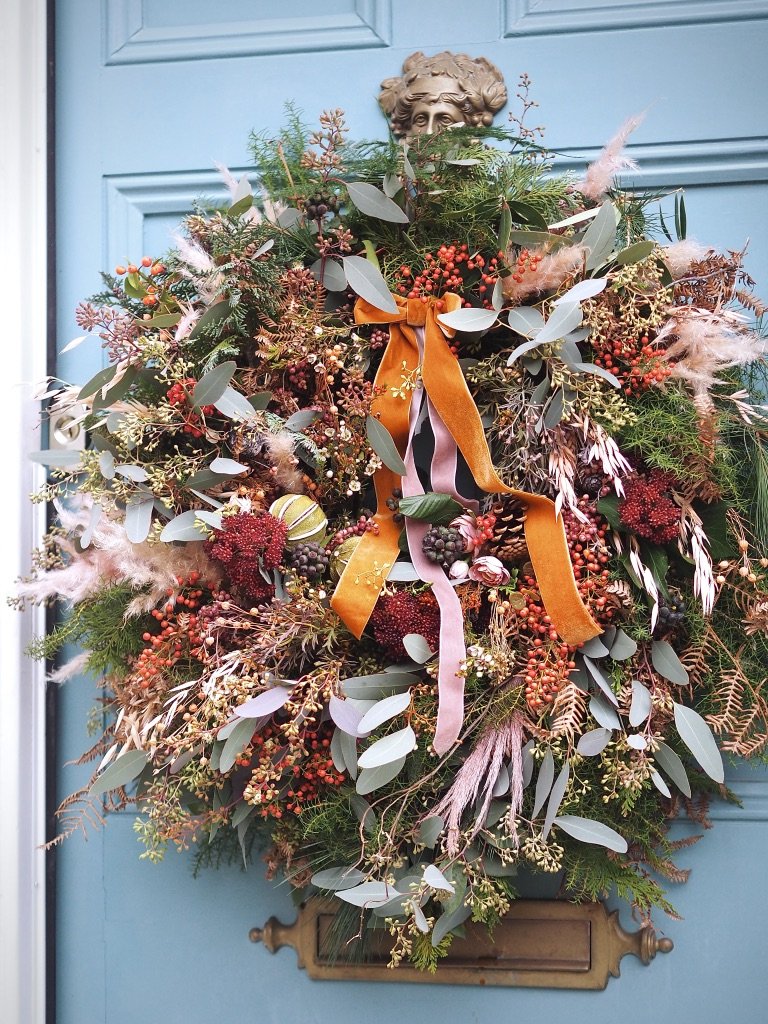
Read MoreThis dried flower festive wreath is a little bit different to traditional Christmas wreaths. The good news is that it is really easy to make and as it is mostly all dried, it lasts the whole holiday season. In this blog post I’m going to list all the flowers I used to make this wreath, plus the few simple rules you need to follow in order to make it successfully.
Read MoreHaving previously painted the back of my front door this vivid turquoise colour, I really wanted to make the most of this attention-grabbing entryway so decided to create a dried flower wreath that would stand out against the bold hue.
Read MoreI was recently commissioned by the chocolate company Green & Black’s to create some Instagram Christmas content with their Miniature Bar Collections. I decided to create an indoor wreath which also doubled up as a DIY advent calendar, as this way I was creating something decorative for the home as well as it having a function! This is the end result below, which I was quite happy with as it looked quite pretty and filled the house with the smell of eucalyptus.
Read MoreI always make a Xmas wreath every year for my front door, but I'm totally self-taught. I just go with an idea in my head and run with it, which is great, but sometimes it is nice to get an insight into just how the professionals do it. When a really great florist makes a wreath, there is often something unexpected in the mix, and you know it will last right through over Xmas without wilting or drying out!
Read MoreI am well aware that I may be becoming boring and predictable as this blog is full of door wreaths for all seasons, but designing and making a new door wreath for my front door is something I personally enjoy doing in my spare time, so apologies, they are just going to keep popping up round here!
Read MoreFor my Easter door wreath this year, I wanted to make something really full-on and dramatic. I feel like i've achieved that with this egg-tastic door wreath! This wreath was really cheap to make, but it wasn't the quickest thing to knock up. If like me you are dedicated to the cause of having the best Easter wreath in town for a few quid, then read on my like-minded friends...
Read MoreIt was an absolute honour to recently be asked to write a guest post for the lovely ladies at Mia Fleur. If you have not heard of Mia Fleur, they are an incredible family run business who sell the most beautiful and interesting homeware products! Chances are if you've seen something totally original and quirky for the home, it's come from Mia Fleur.
Read More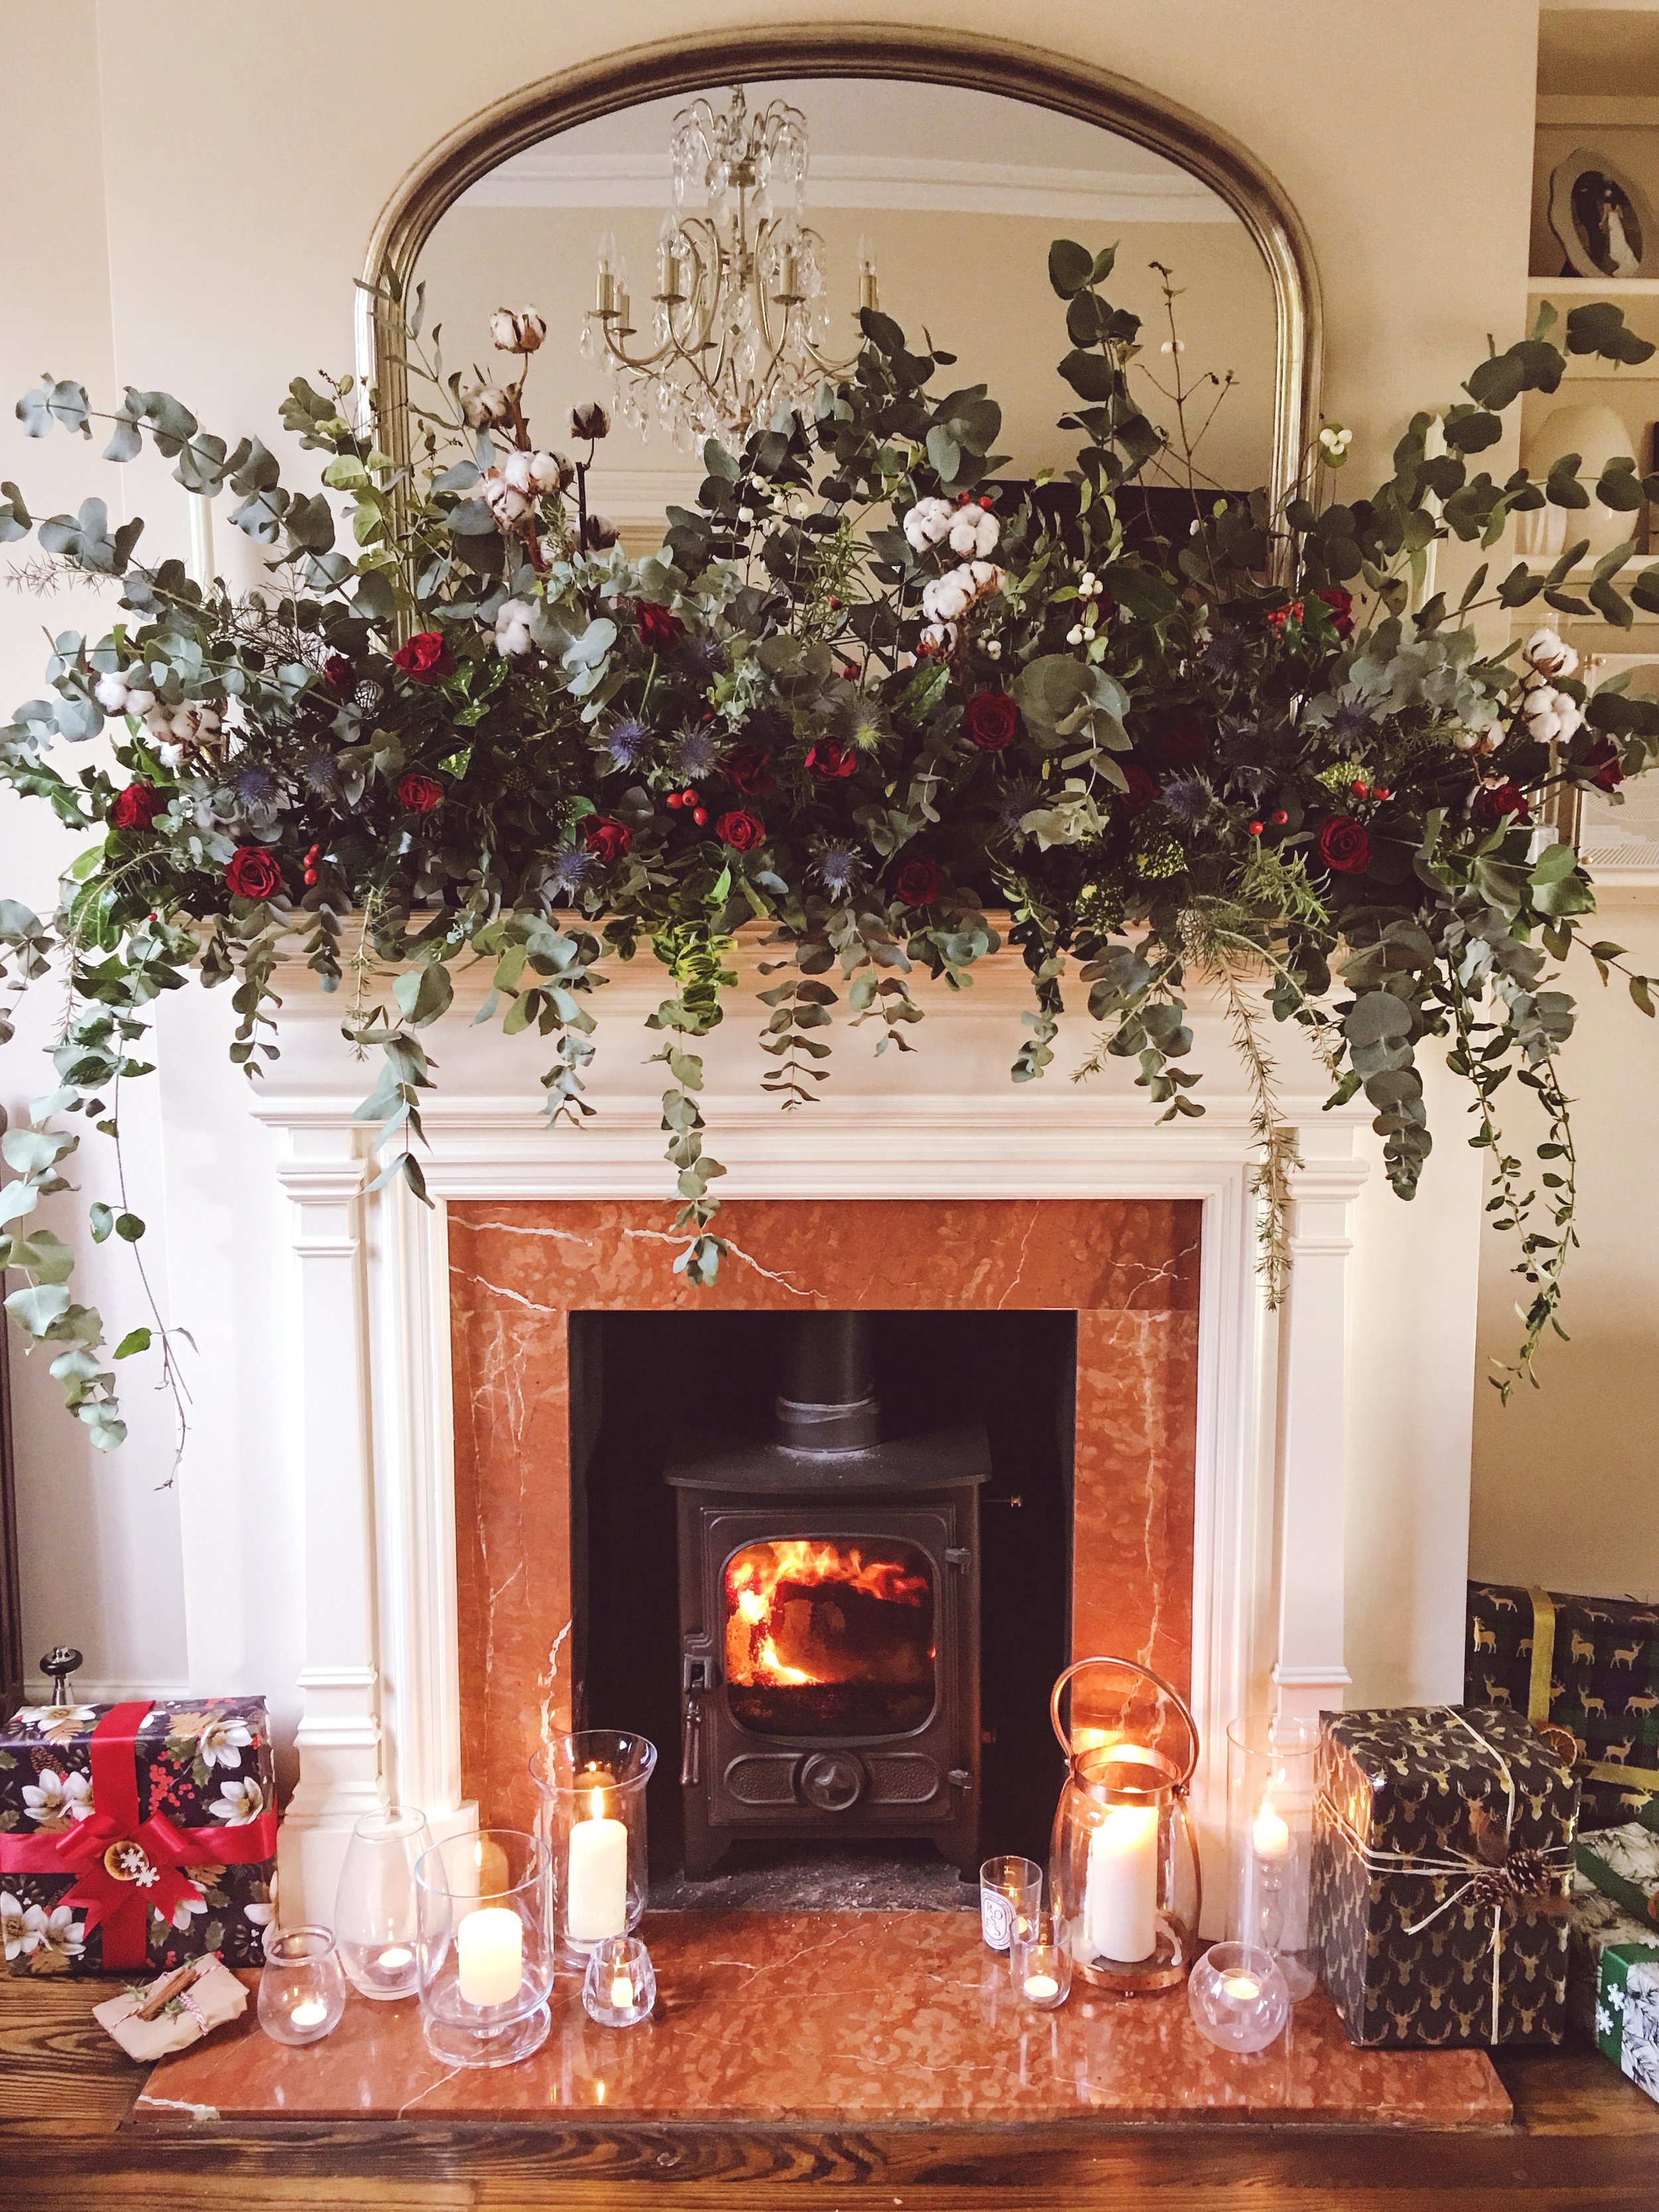
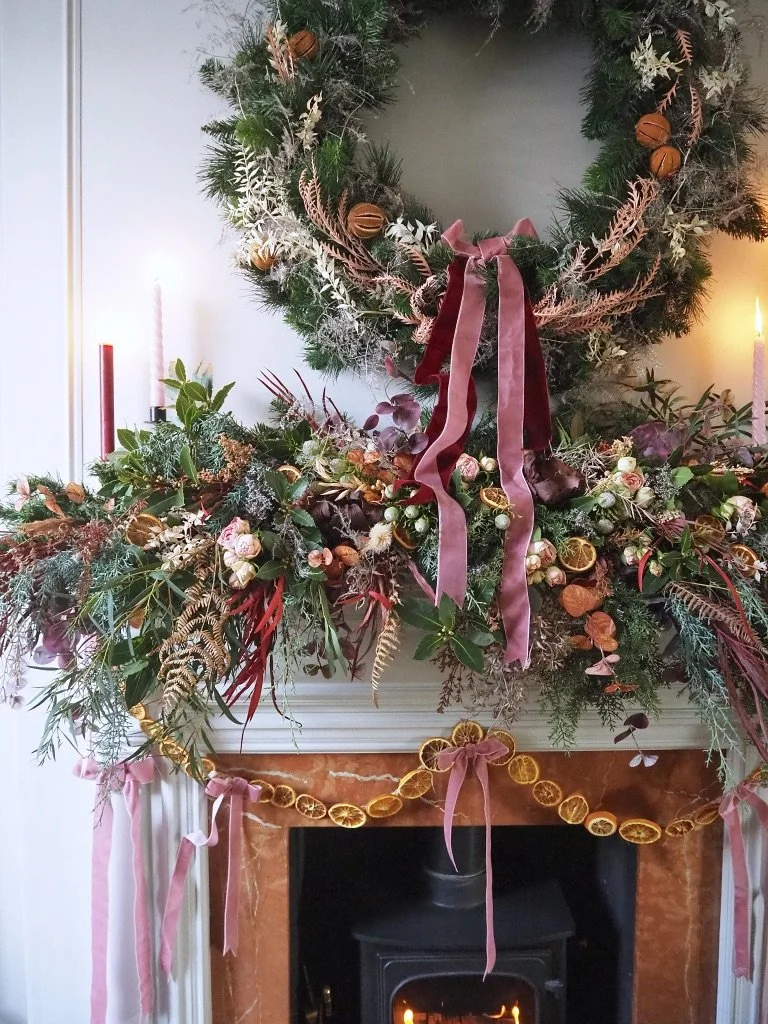
I've gone all out this year with a real flower fire surround garland!
Welcome to my house at Christmas! If you are joining me as part of the UK Blog Hop from We Love Home, an extra thank you for joining me here! I'm so chuffed to be part of the first ever UK Home Blog Hop, courtesy of the lovely Kimberly of the ultra-fabulous Swoonworthy. In my Hop, you'll find some crafty Christmas DIYs and tips on having a handmade Xmas. So come on in, help yourself to a mince pie and let me show you around.....
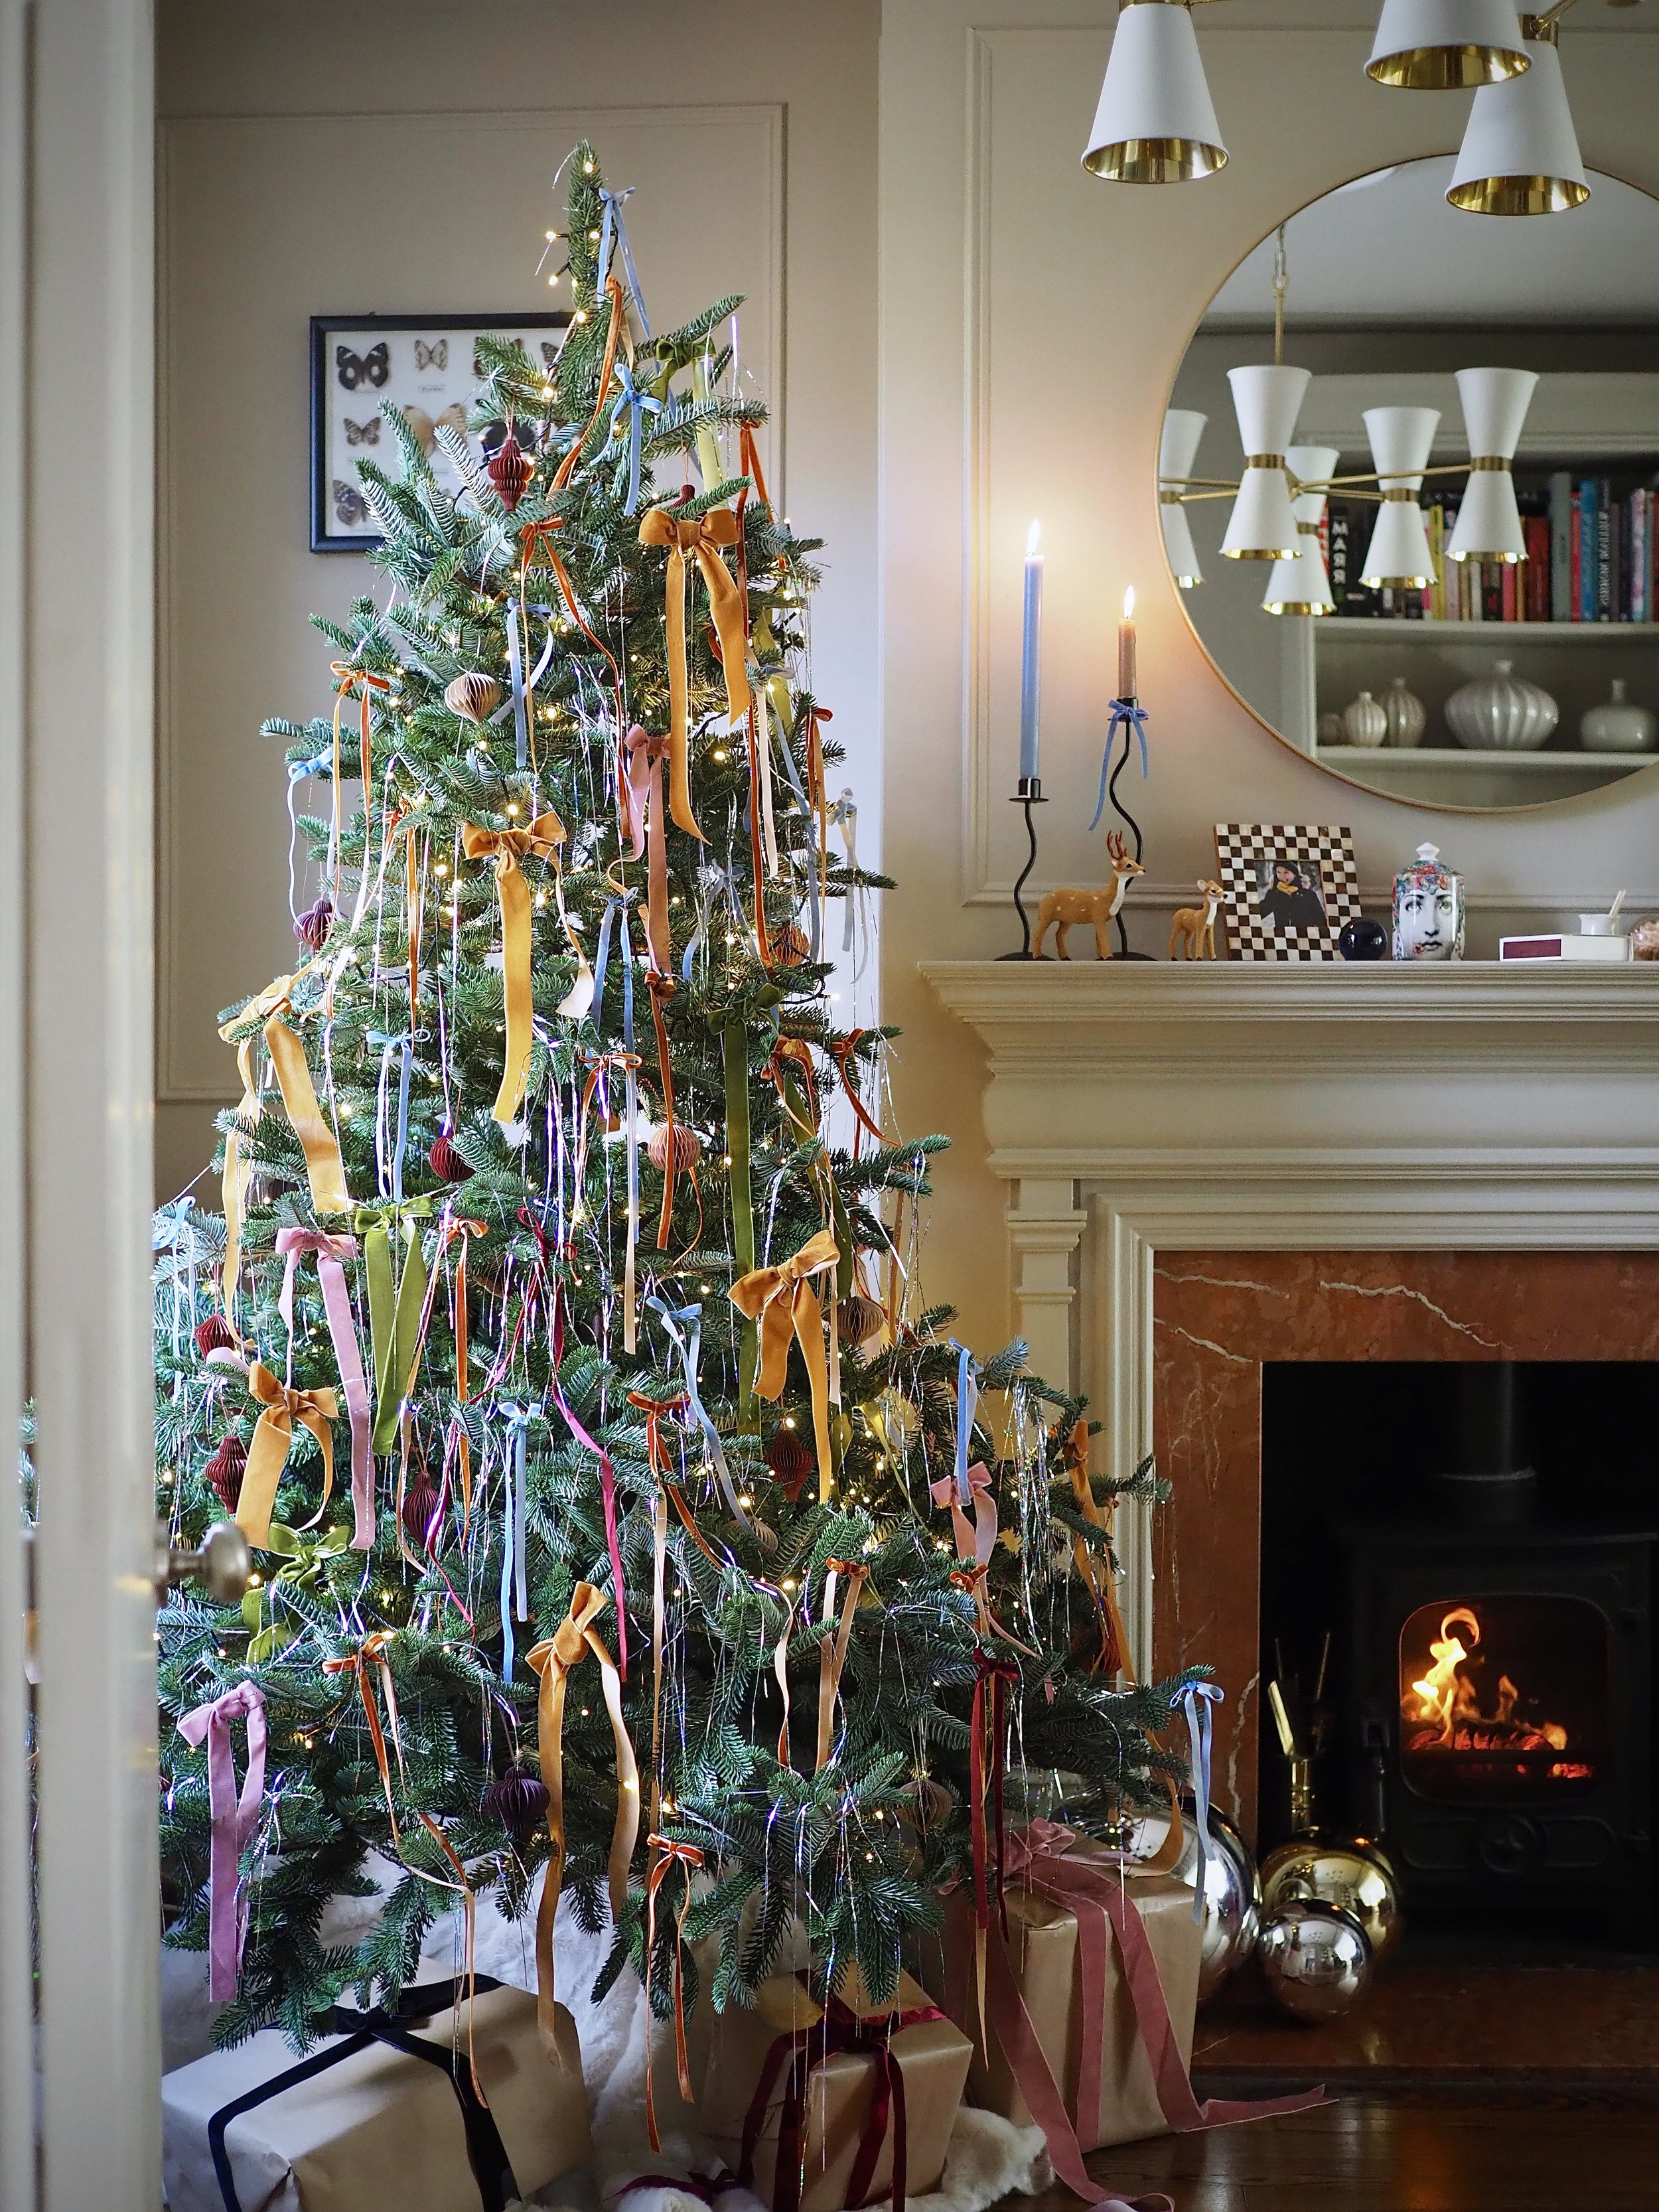
Even though I'm a fan of more contemporary decor the rest of the year, at Xmas I prefer a traditional look (reds, golds, greens, fir cones and berries). However, I like to go BIG! BIG tree, BIG flower displays, LOADS of table decor.
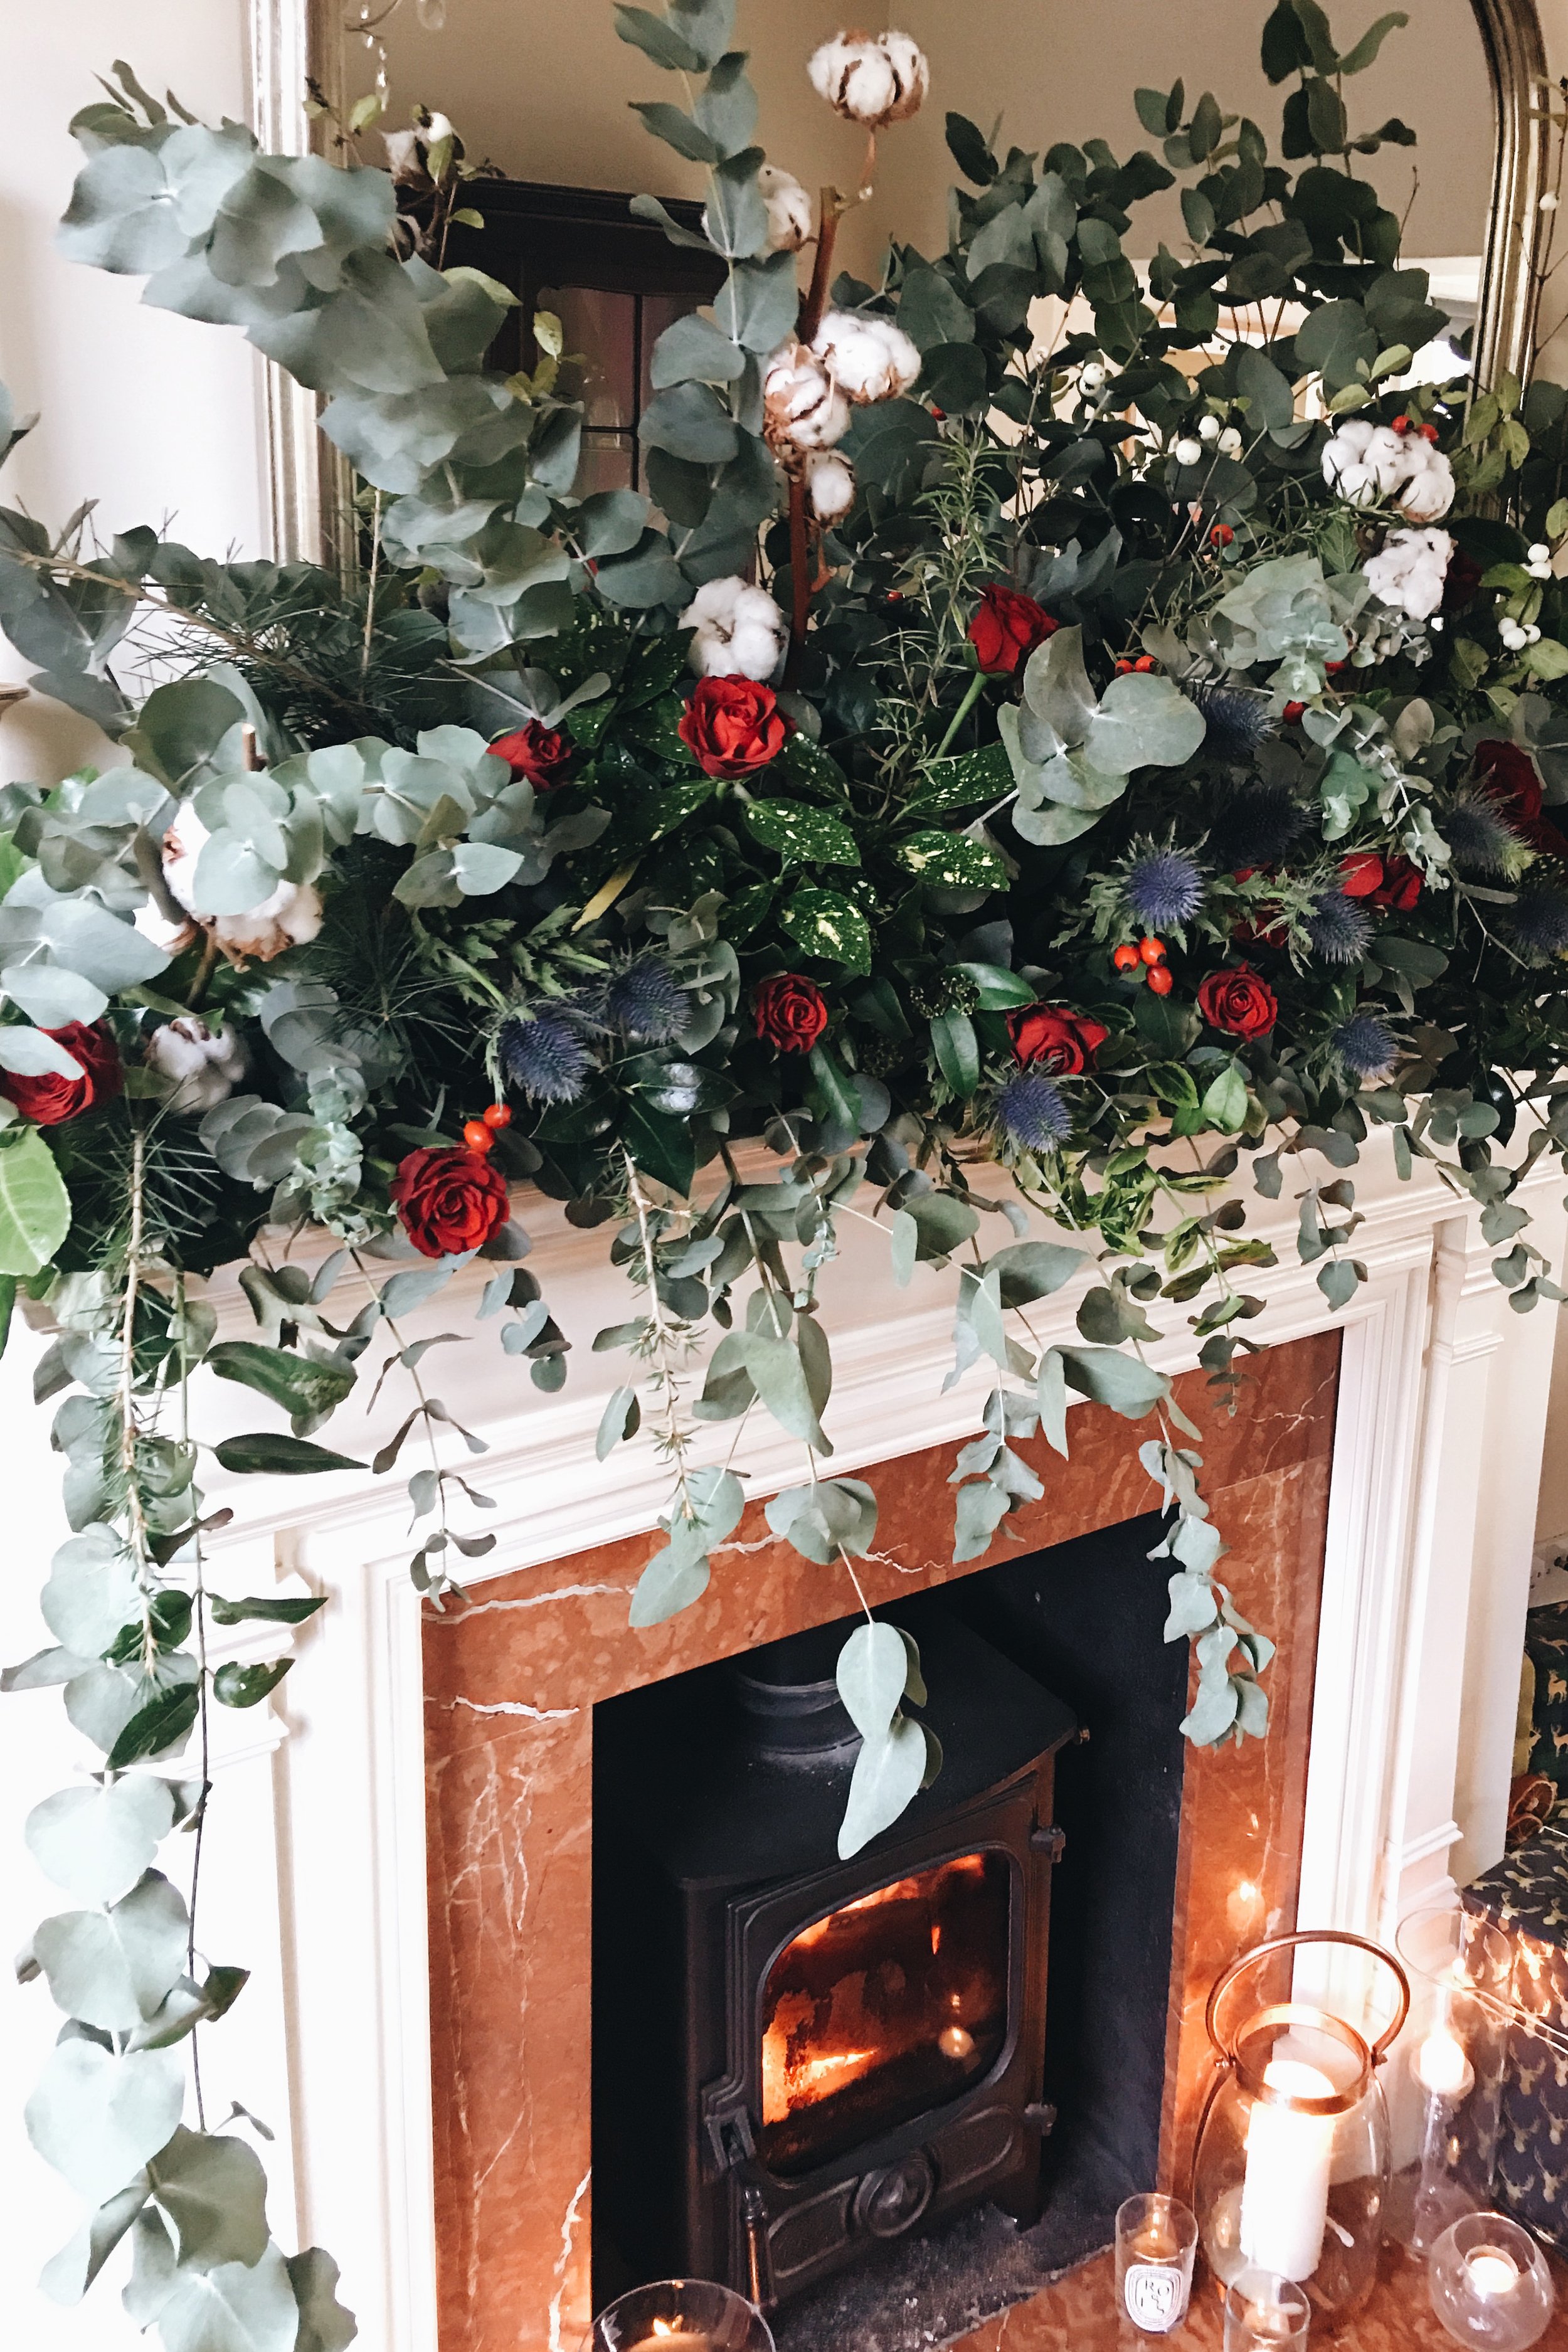
Earlier this year at a Red magazine event I attended, florists had decorated the mantels over fireplaces in the room with these huge pink summer flower garland displays. It was really effective, so there and then I decided I was going to do a festive version in my home this year for Xmas. A few oasis blocks and a few bunches of flowers later, here it is in my living room. It's perfect as a striking decoration if you are throwing a party over the festive season - and at a total of £32 to make (£24 on flowers, £8 on oasis) it looks a lot more expensive than it is! To learn how to make this garland yourself, scroll down to the guide at the bottom of this post...
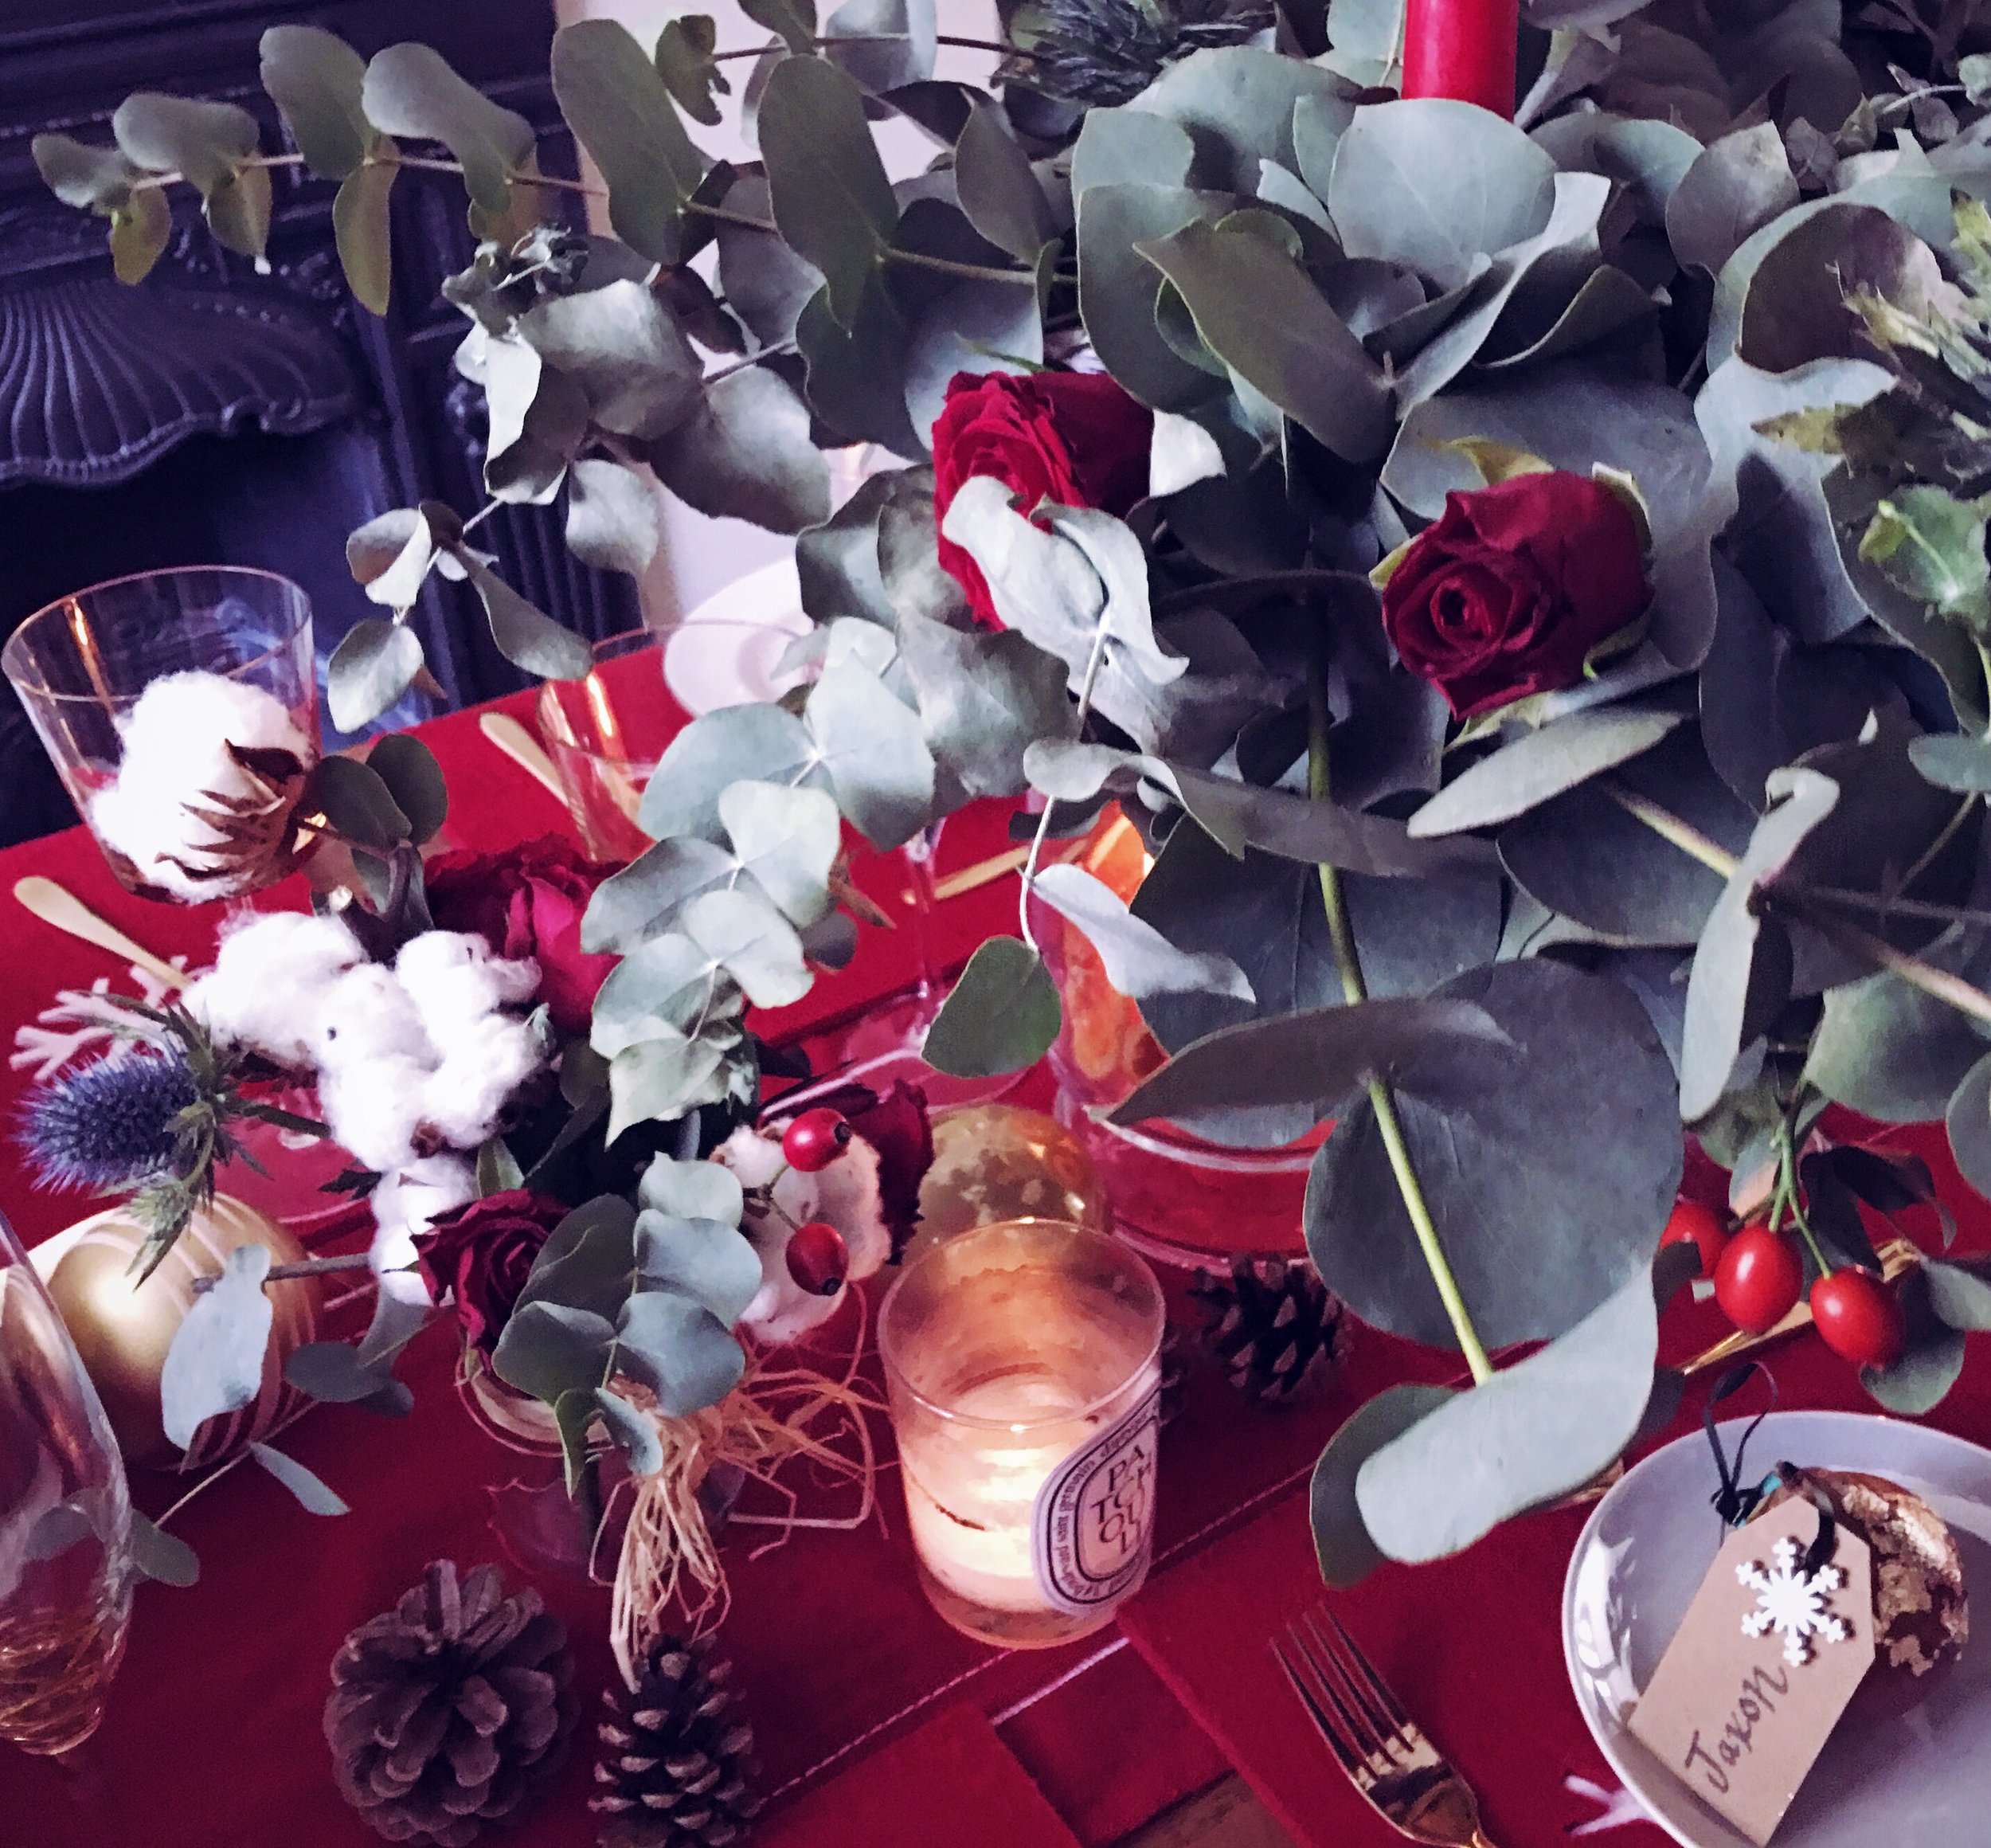
Putting together the table decor is one of my favourite parts of Christmas. I make flower arrangements a couple of days before (usually with foliage I've cut locally, like holly and rosemary), then go to town with candles and red and gold table wear. A few years ago I made these gold leaf pear place name holders after seeing the idea on a Kirstie Allsopp Christmas craft program. They went down pretty well at a dinner party that year, so this year I've made them again:

This fruit bowl is the LOTTA glass and ash base bowl from LSA International.
For tree decorations, I'm all about glass and birds! I bloody love a faux-bird on my Xmas tree. Joining the pheasants, robins and peacocks this year will be a 2016 interiors classic - a flamingo! (A purchase I made in October when I stumbled across him in John Lewis.)

I brought this peacock decoration in Liberty. I pimped him up for the top of the tree by sticking on real peacock feathers from Hobbycraft on the back.
I also love real glass decorations which I make by filling with feathers, pom poms and glitter. You can find out how to make these yourself here.

These glass and feather tree decorations are easy and cheap to make.


I always make my door wreath for Xmas. Learn how to make this wreath here.
Once boxing day has passed and we move towards New Years Eve, I move away from traditional Xmas decorations to something more fun and colourful. Having a child and getting old means I hardly go out NYE anymore (no-one wants to babysit NYE, and I now baulk at the extra charges for a drink/cab), so NYE is usually spent at home with friends. I'll therefore change up my decor to something like this fun pom pom indoor wreath!


These super pretty bird and butterfly decorations are from Pom Pom & Twiddle
I handmade this Pom Pom garland for a guest post on the Mia Fleur blog which is coming soon!

For my top present wrapping tips click here.
You will need:
Oasis blocks and an accompanying tray. I measured the length of my fire surround and discovered that I would need 5 blocks of oasis to make a garland the required length. You can buy oasis blocks in craft stores for around £3 for a pack of four. Alternatively, a local florist will sell you single oasis blocks. You will also need an oasis tray to keep topping up your oasis with water if you are going to have your garland up for a good while. These trays cost 80p each from my local craft store.
A selection of flowers and foliage to make up your garland. For my garland, I brought two large bunches of eucalyptus, 20 red roses, 4 stems of cotton flower and one large bunch of thistle. I brought my flowers from Columbia Road Flower Market and it cost me a total of £24 for everything! Flower markets are great for getting a large choice of cut flowers. Go later on in the day and you'll also get yourself a bargain as they slash prices to clear stock.

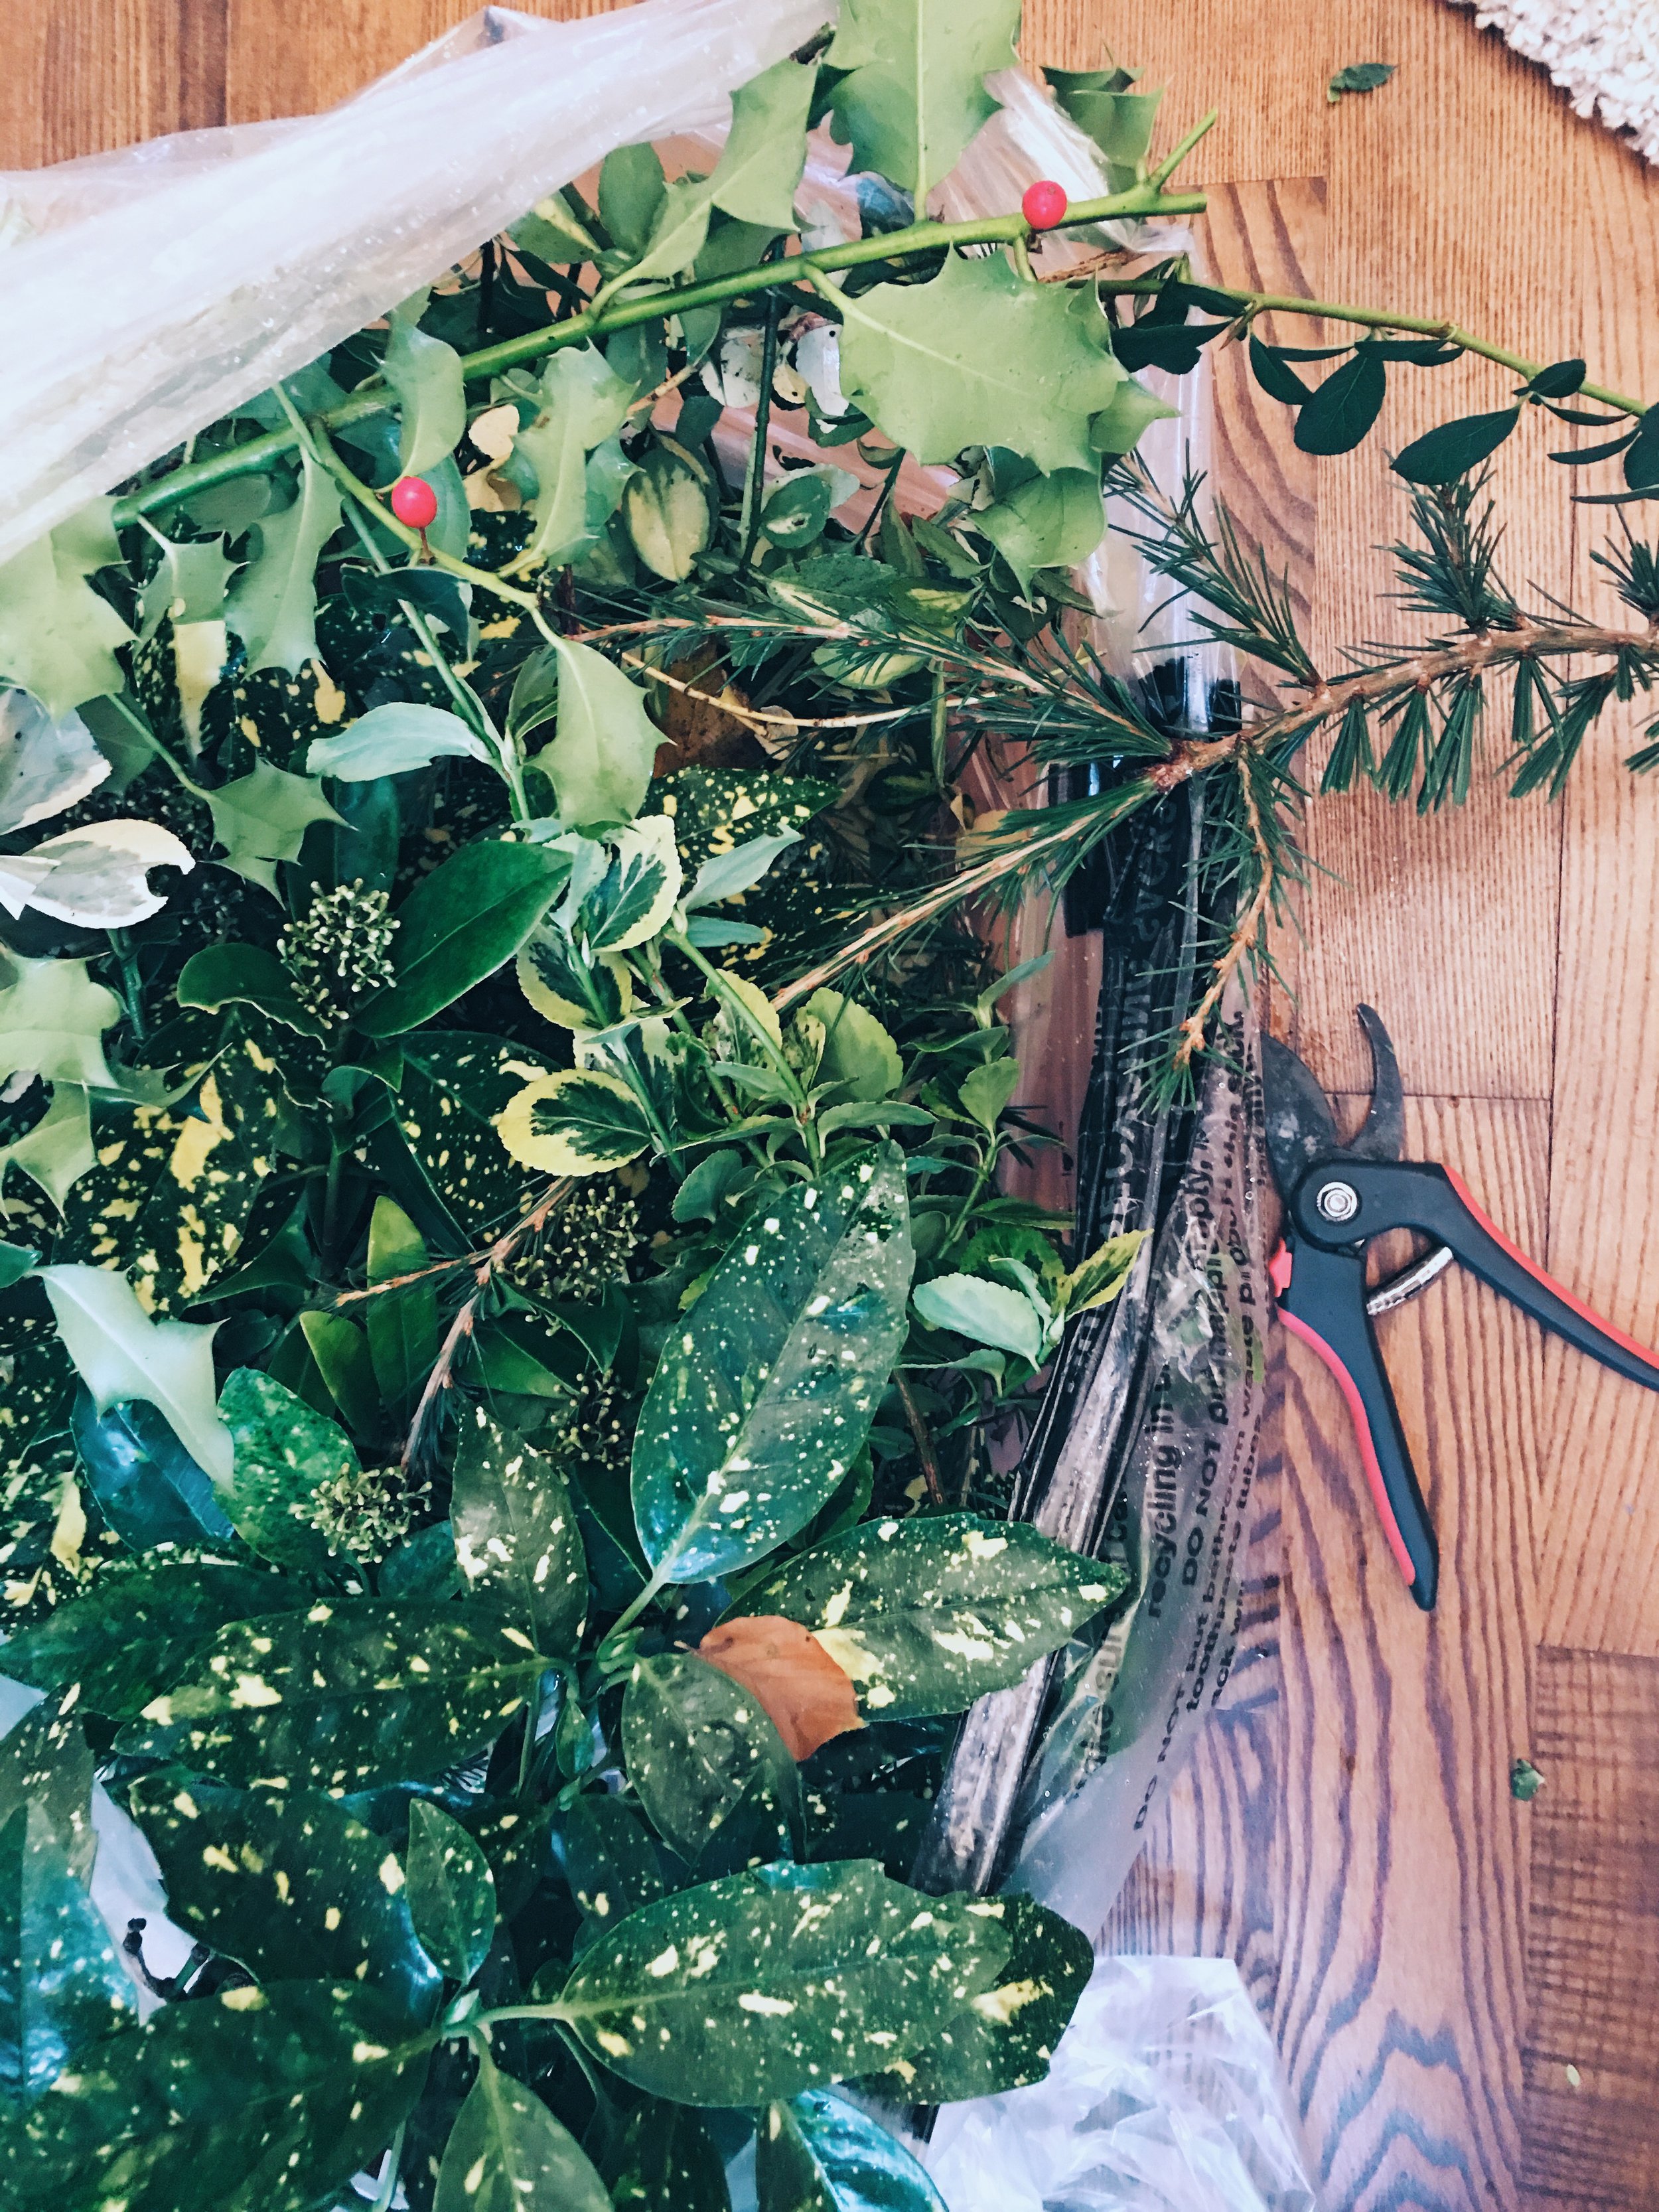
Some garden secateurs, a plastic bag and some protective gloves to go foraging with! To bulk up the display, cut greenery from hedgerows and evergreen plants. There are loads of holly berries around this year as well as snow berries. Take a few cuttings where you can!
Start by filling a bucket/the sink/bath with water and submerging your oasis blocks in it for about 15-20 minutes so they suck up loads of water. Remove them into the oasis trays and put them in a line across your fire surround.
Start with your eucalyptus/chosen foliage and stick it in the oasis blocks, concentrating on creating height. Stick your tall eucalyptus sticks towards the back of the oasis blocks, saving the front for your floral display.

Place some shorter, single eucalyptus sprigs at the bottom of the front of the blocks so it creates a trailing effect over your fireplace.
Start to add in your other flowers at the front, larger flowers first, leaving smaller flowers like roses and berries until last. Position them evenly across the garland.

Once your brought flowers are all used up, use your foraged greenery to fill in any gaps. The aim is to not see the oasis blocks or have any gaping holes in the garland.
My garland took about 30 minutes to put together and was easier than I had anticipated. My top tip is just to shove it all in! If it looks bad in places move some stuff about, cut away anything that looks too long, have fun with it!

So that's all from me, and Bowser my King Charles Cavalier (doesn't he look so happy being made to wear a doggie Santa hat for this post??) Thank you for taking the time to look round my home at Christmas - we've loved having you!
You can find all my Xmas DIYs here if you want to get crafty at Christmas this year. Otherwise, hop on over to Fresh Design Blog tomorrow from 11 am to continue the Hop! A full list of other bloggers’ houses from the week can be found below - just click on the links! There have been some great posts this week full of crimbo inspiration, so enjoy! And Merry Christmas!

The Christmas wreath, for me, is an integral part of Xmas decor. I take huge pride in my Christmas wreath, as everyone sees it when they pass your home. It's also the first thing guests see when they arrive for celebrations! The thing is, a pretty Xmas wreath can often cost more than buying the Xmas tree! Go to a florist and you'll be looking at £100+ for anything detailed. Even local flower markets charge a good £30-£40 for a basic 'real' wreath base with no frills. Yet with a bit of prep, a bit of foraging and a glue gun, you can create a really professional-looking, real Xmas wreath for less than £20.

Every year I make the Xmas wreath for our house and I find it really enjoyable. I whack on the Xmas music, pour myself a (large) sherry and it gets me in the mood for Xmas like nothing else!

DRY OUT SOME SLICES OF ORANGE
You can buy dried orange slices in craft stores, but they are so easy to make. After you've turned the oven off one night after cooking, slice up an orange thickly and lay the slices on some baking paper in the hot (but turned off) oven and leave them overnight. In the morning take the slices out of the cold oven and leave them on the side for 24 hours. What you will have at the end are hardened orange slices.

Slice oranges about 1cm thick.
DRY OUT SOME HYDRANGEA HEADS
If you had a hydrangea plant in your garden over summer, go outside and cut off the now red/green/brownish heads and hang them over your cooker (or on a bright, dry window sill) for a few days. The heads will dry out , but won't crumble and shouldn't lose their colour.
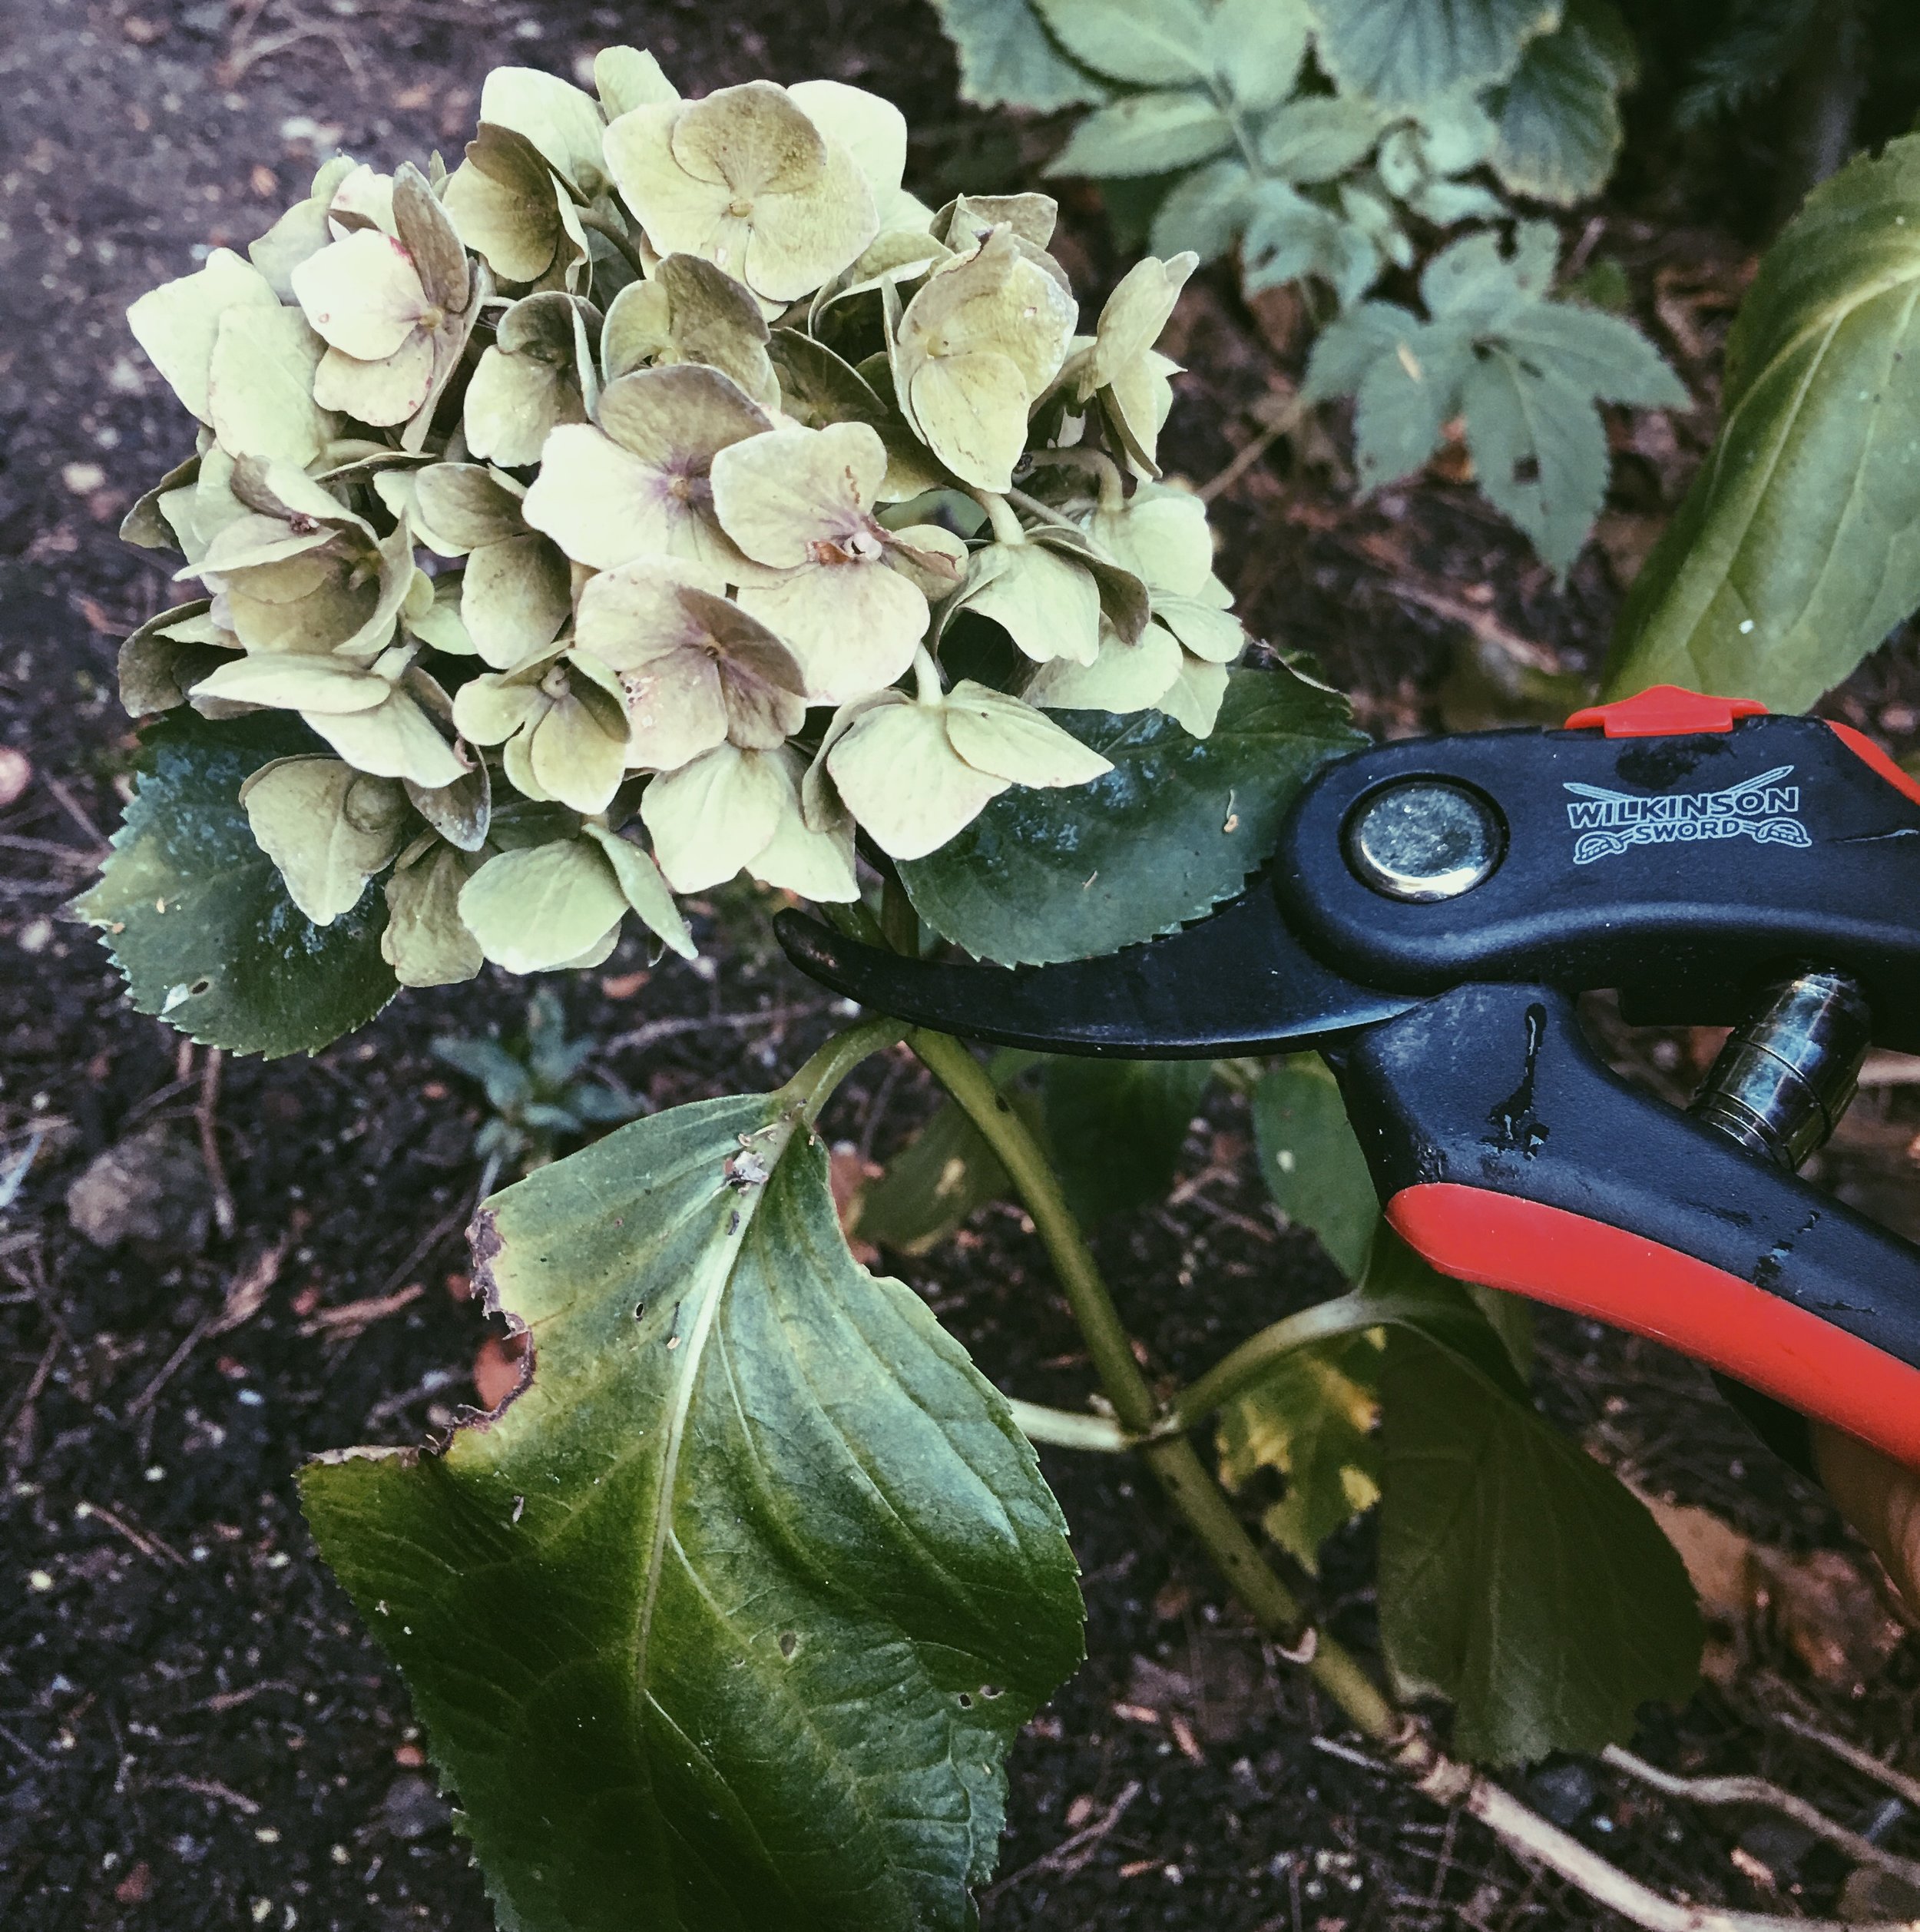

Leave cut hydrangea heads to dry out for a few days on a window sill.
BUY SOME CINNAMON STICKS FROM THE SUPERMARKET
You'll find these in the aisle with the herbs. Group them together in bunches of 3 and tie them with some decorative ribbon or twine.
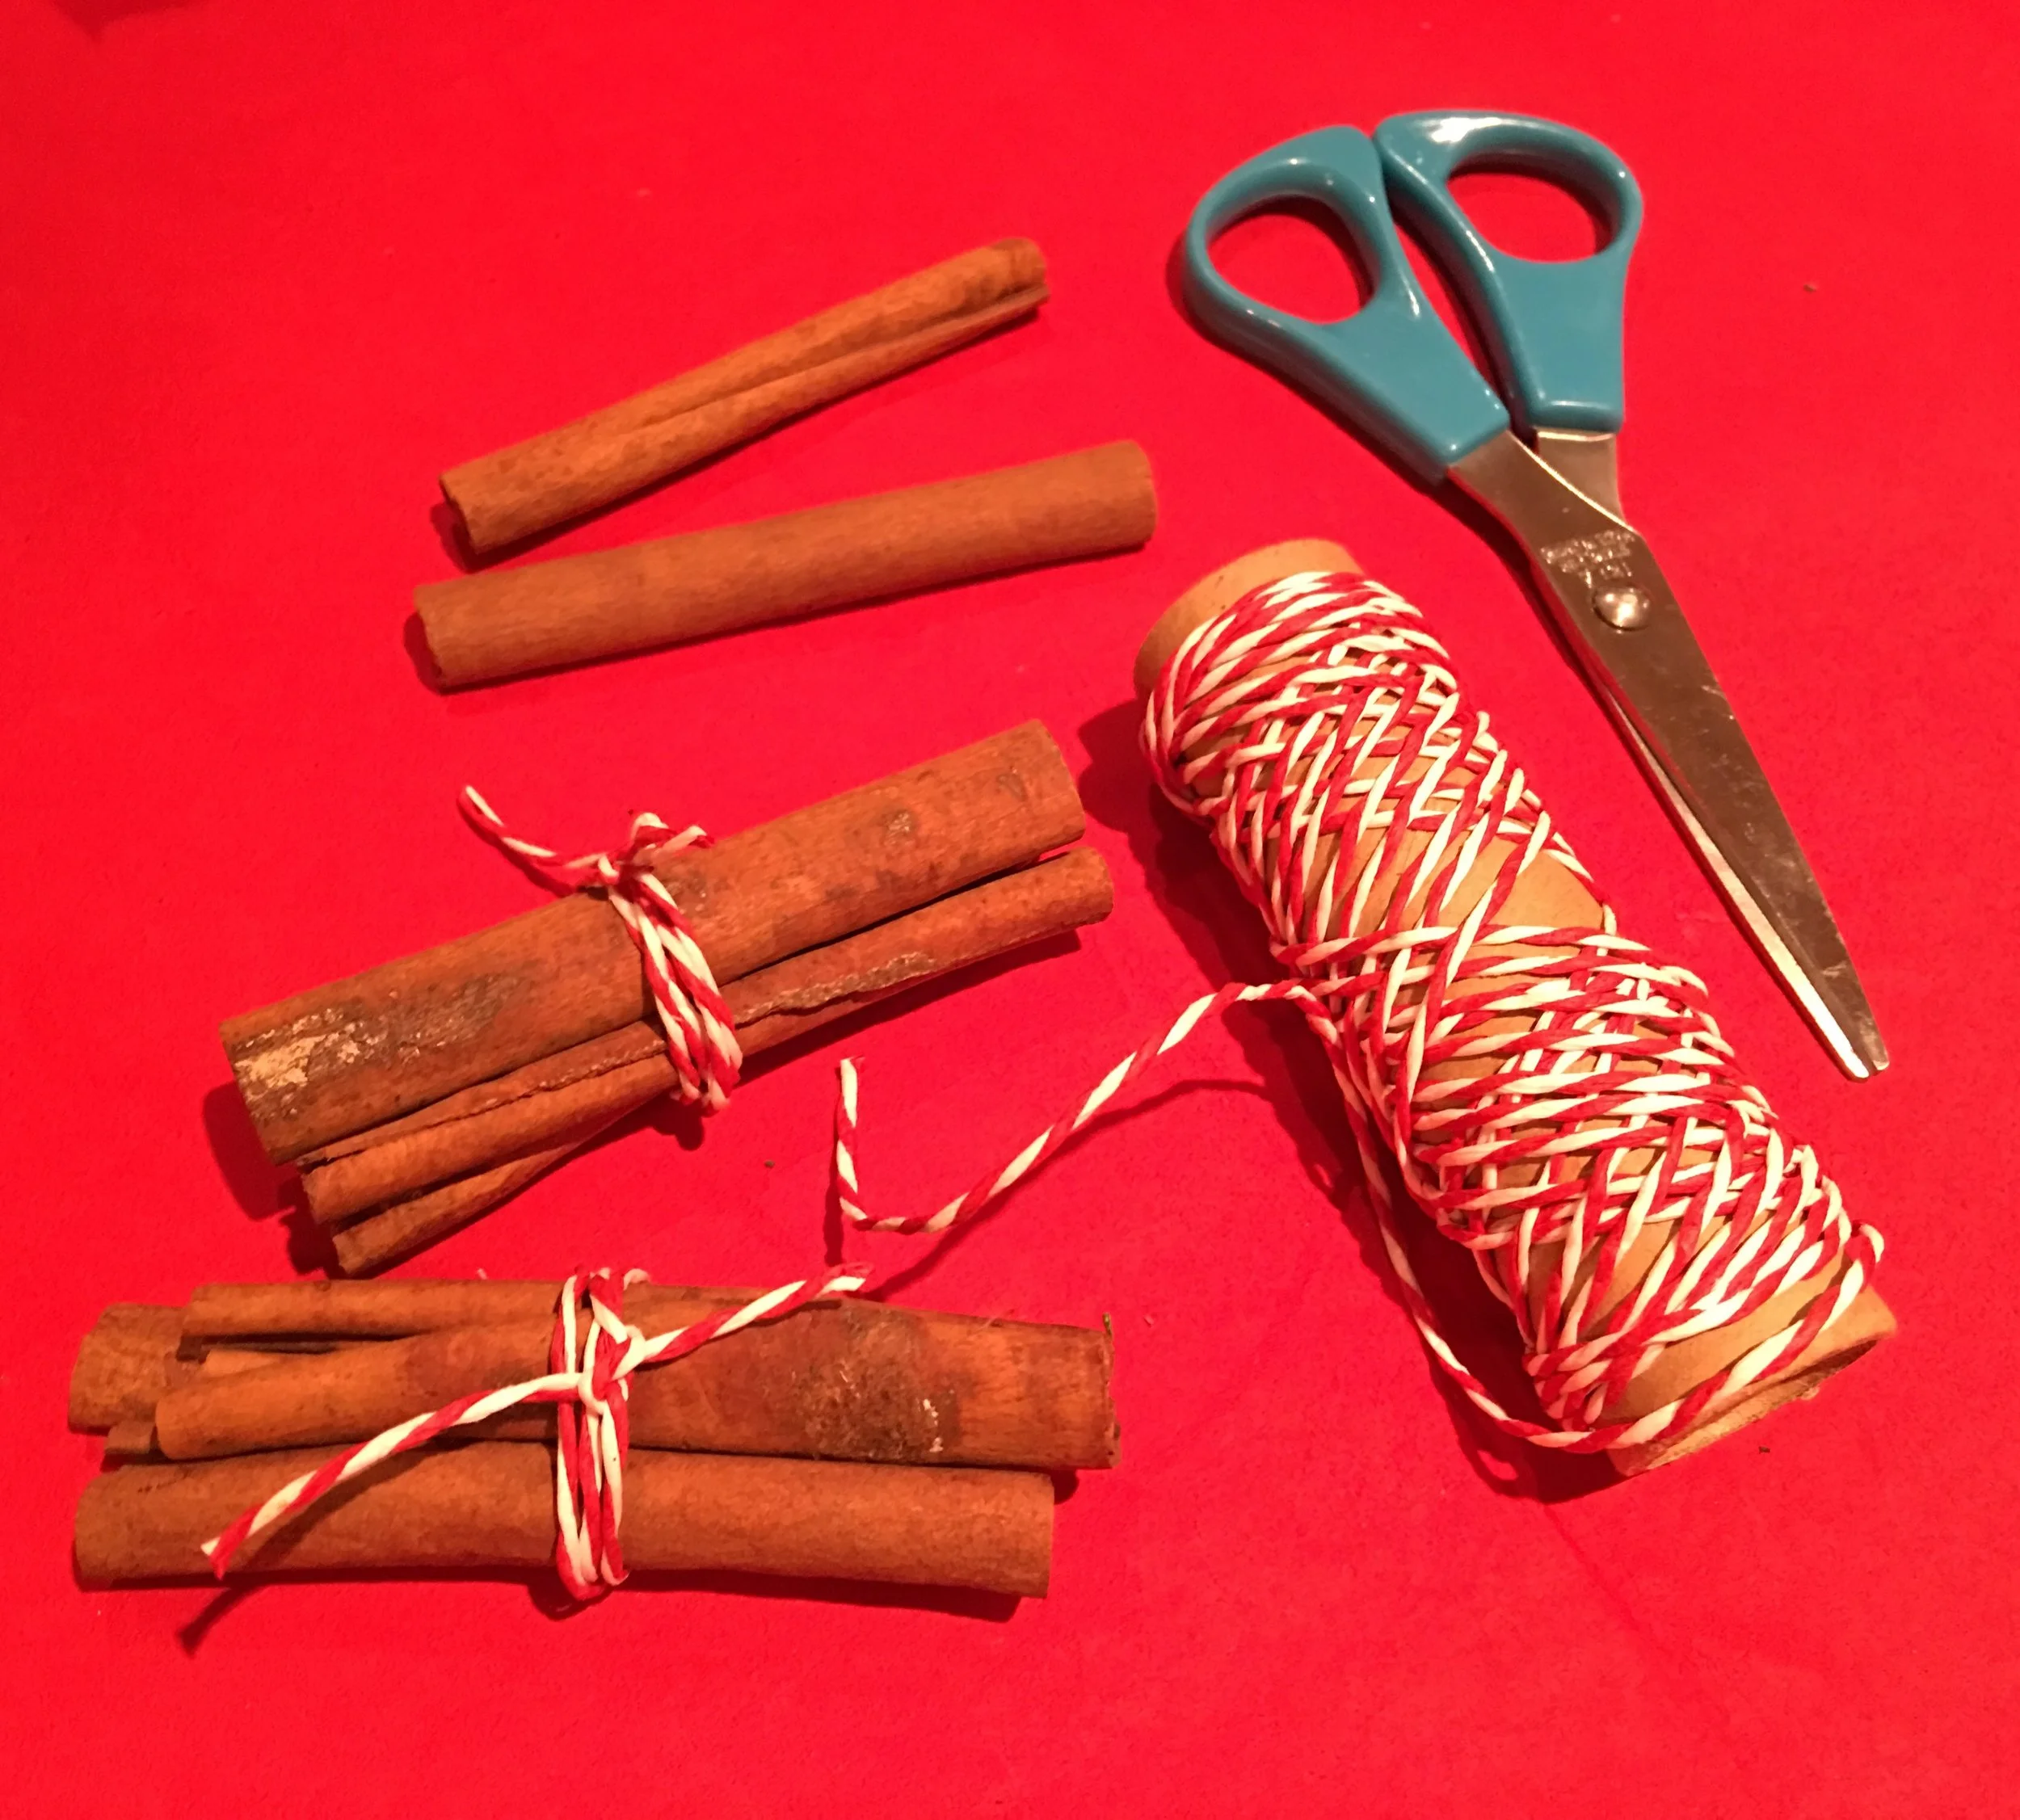
Group cinnamon sticks in bunches of three.
GO FORAGING FOR PINE CONES, STRONG FOLIAGE & BERRIES
The base of your wreath will be made up of foliage to bulk it out. The trick here is to get really strong foliage that won't wilt after a week. A real Xmas door wreath should last about 3 to 4 weeks, so you need foliage that will stand the test of time. I can't say I'm an expert when it comes to foliage names, but look around and see what foliage has thick and strong leaves- nothing that 'flops' when you pick and hold it up basically. Ivy, bay leaves and holly leaves are all good. Hedgerow is best as it's strong and evergreen.

Pick strong foliage with woody bases that won't wilt for a few weeks.
Go for a Sunday walk with a carrier bag and a pair of hand shears and collect your greens. While on your stroll pick up fir cones and collect sprigs of berries for decoration on the wreath.
POP INTO A CRAFT STORE AND BUY A 12" POLYSTYRENE WREATH BASE, A HOT GLUE GUN, SOME XMAS RIBBON AND RED PRE-‐MADE BOWS & TWINE
You'll need a wreath base, a hot glue gun and some decorative elements to complete your wreath. I prefer the polystyrene bases to the wicker or twig ones as they have a larger surface area for you to create a fatter wreath. A polystyrene base should only cost about £2-3.

Add some twine to the top of your wreath before you start to attach the wreath to your door.
You will also need a hot glue gun to securely attach all your wreath elements to the base. I use a mini hot-glue gun that you can buy for around a fiver.
Pick a couple of decorative elements like bows and Xmas ribbon. I find the red Xmas velvet bows are particularly attractive on the wreath.
Firstly, loop some twine around your polystyrene base and leave enough twine at the top for your wreath to be securely attached to your door.

Glue down the base of the foliage stalk to attach to your polystyrene base.
Use your foliage to completely cover all the white of the polystyrene base. Make sure your foliage all flows in a clockwise manner so it looks tidy and professional. Distribute the foliage evenly and secure it to the base with the glue gun.

Build up your wreath. Make sure the foliage is attached in a clockwise pattern.
Take your dried hydrangea heads and distribute them evenly on the wreath, facing forwards. Secure with the glue gun.

This now just needs decorative elements!

Along with your dehydrated orange slices and cinnamon sticks, use fir cones and red velvet bows.
Add your cinnamon bundles, dried orange slices, fir cones, bows and berries onto the wreath, spreading them out so the same one isn't too close to the other, and there is a level of symmetry.
Once you have glued everything on, gently hold up the wreath and check everything is glued on properly. Hold up the wreath by the twine and check it from every angle - are there any spaces that need filling? Is there any of the white base showing? Fix any problem areas then leave your wreath a couple of hours to completely dry.

Hang your wreath on your front door and enjoy the festive appeal it brings to your home! Here is my wreath on my front door in all It's glory. It is so much more enjoyable knowing you made it yourself and it cost a fraction of a pre-made wreath by someone else.
What would you add on your Xmas wreath? Let me know in the comments section below!
I'm sure i've probably mentioned this before, but I'm a sucker for a door wreath. They are such a brilliant decoration to celebrate an occasion/season, and they really add serious kerb appeal to your home. Everyone loves to walk past and look at a home with a beautiful door wreath don't they? Autumn provides the easiest and the cheapest opportunity for a door wreath, as you can pick the supplies up scattered all around outside in the street! Conkers, acorns, dried leaves in a multitude of reds, yellows and browns are all great to use on a home-made Autumn wreath, so it's a great craft to do with kids as you can get them to run around sourcing all the bits!
Read MoreMy front door is very visible from my street, so on holidays and occasions I like to DIY a wreath to hang out the front. It gives the house a lot more kerb appeal and they are always fun to make. Of course, you can buy seasonal wreaths in the shops, but they start from around £18 upwards for something 'decent', when you can purchase all the basic materials to put together an Easter wreath from haberdashery and craft shops for under a fiver...
Read More