
How To Paint Wooden Furniture Like A Pro: A Simple Step-By-Step Guide

I recently picked up a small wooden cabinet in my local furniture recycling centre to fit an empty alcove within my home.
I love sourcing secondhand and vintage furniture, because older pieces tend to be well-made and constructed from real hardwood, as opposed to MDF or chipboard, which many modern, flat-pack pieces are assembled from. However, secondhand furniture can often be stained, chipped and dented, requiring some love and attention.
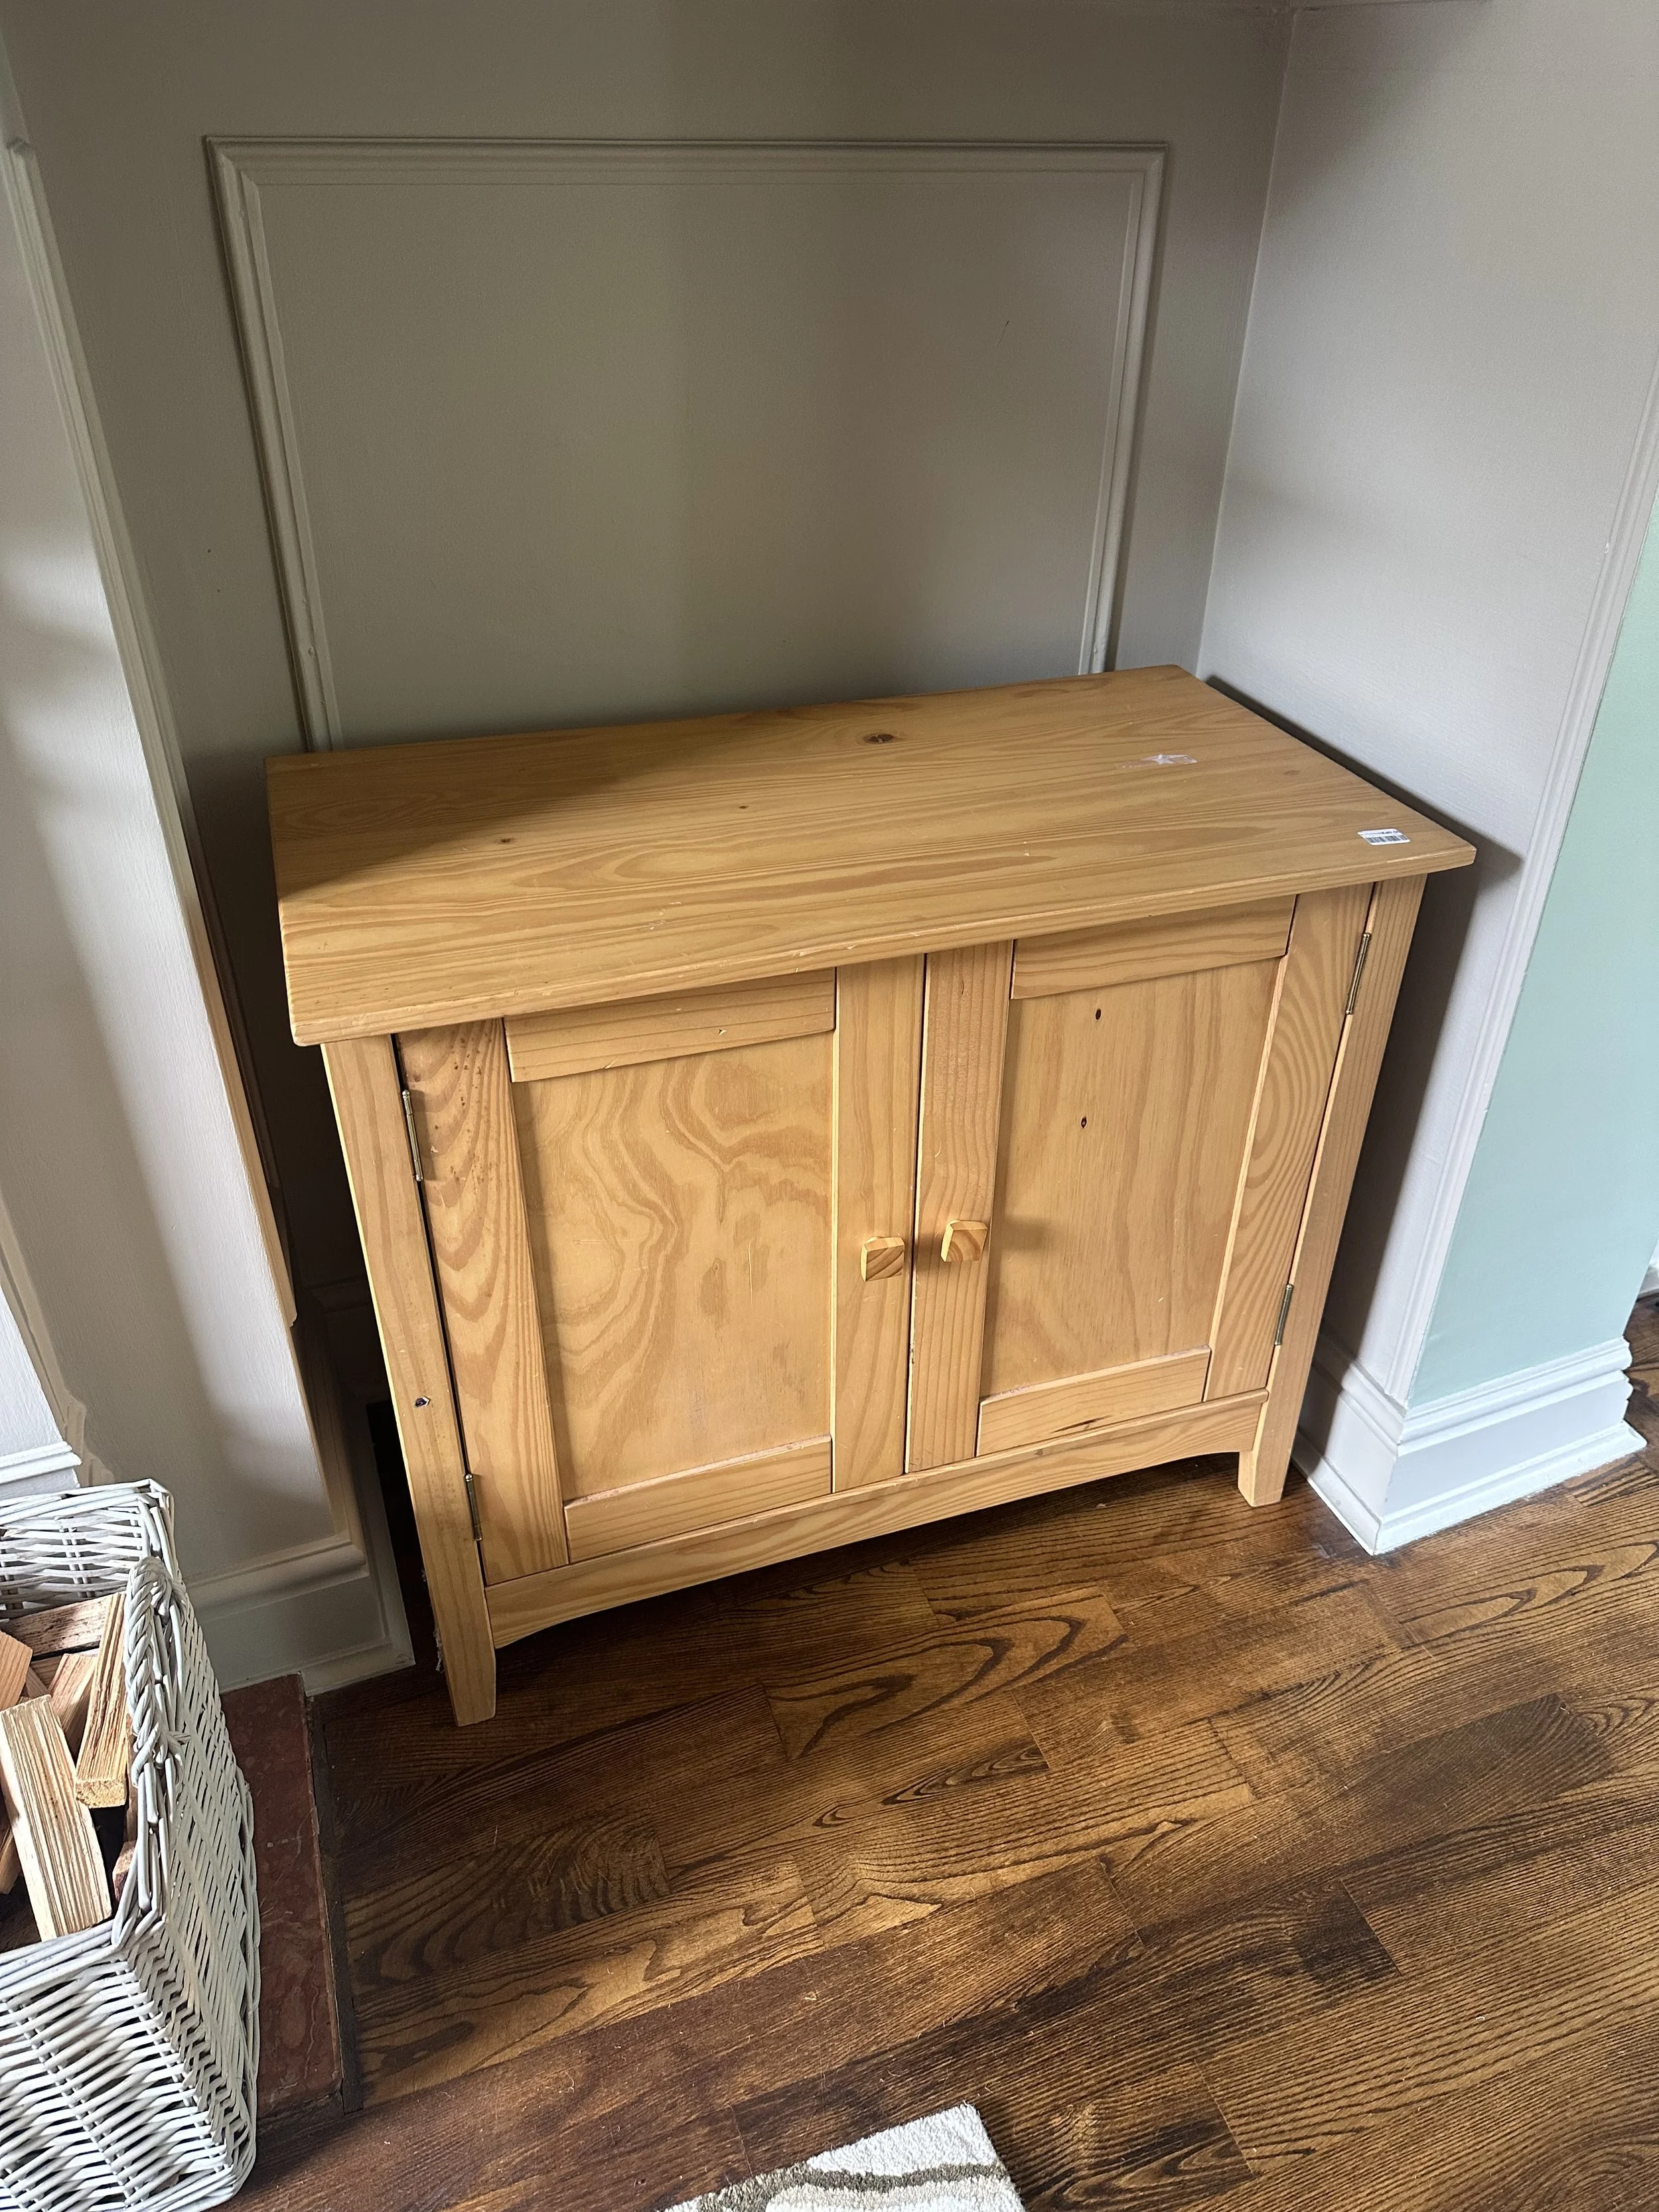
When it comes to old wooden furniture, I’m not a fan of the commonly found orange-tinged pine or more oppressive, darker woods; as a rule, I always buy these pieces in order to paint them.
Varnished or untreated wood will automatically require some prep work before you paint it for a smooth and flawless no-chip finish. While some products (like chalk-based furniture paint) often don’t require a primer, I like to use an eggshell paint for a slight sheen and a more ‘shop-bought look,’ as opposed to an obvious upcycle. Eggshell paint has an attractive 10-15% sheen level, which works well on furniture. I’m also a fan of Little Greene’s Satinwood paint, which is slightly more durable if you are painting chairs or heavy-use objects.

To successfully paint wooden furniture, you will need the following:
A wood or an all-purpose tube of filler
A sheet of fine-grade sandpaper (200- 220 grit)
A stain-blocking primer that can eradicate wood knots from seeping through your paintwork (I like to use Zinsser Bin)
An eggshell or satinwood paint of your choice
A pointy-ended sash window brush for painting those intricate details
A low pile roller for flat surfaces (I am a fan of wood-finishing mini rollers)
Paint tray
Sugar soap wipes or a sponge and a light degreaser (like Fairy Liquid)
A tack cloth or a microfibre cloth
Decorator’s tape (optional)
To start, wash down your piece of furniture thoroughly. If you’ve purchased it secondhand, it will probably need a hefty clean with a sponge, warm water and a degreaser (Fairy liquid or CIF is fine). Otherwise, use some sugar soap wipes all over to get rid of any greasy finger marks (I also tend to use supermarket floor wipes, which do the job).
Remove any handles, take doors off their hinges and remove drawers so that you do not paint over the hardware.
Sand any knocks, dents, or uneven surfaces with a wood filler/all-purpose filler using a filling knife. Once the filler has hardened, use your sandpaper to sand down the surface so that it’s all level. You can also use your sandpaper on areas which are raised or where the wood has been scratched to even it out.
Use your microfibre cloth to clean off any sanding particles. If there are areas of your piece that you do not want to paint, use decorator’s tape to create a sharp paint line edge.

If your wood is untreated or if it has previously been varnished, I would recommend using a primer such as Zinsser Bin to block out any stain marks, discolouration, and wood knots. You can also use Bin on previously varnished furniture, eradicating the laborious and messy job of completely sanding back your piece in order for the paint to adhere correctly.
Apply 1-2 coats of primer using tight-knit, low-pile felt rollers and using a brush to get into any crevices. Once your primer is dry, go over your piece of furniture to check for any problem areas. Using your sandpaper, very lightly run it over the unit to smooth down your finished coat of primer. Clean any particle remnants away using a microfibre cloth.

Your wooden unit is now ready for painting! Stir your paint thoroughly and pour it into a paint tray. Using your pointy paintbrush, first paint inside any crevices or detailed areas and then use your low-pile roller to paint in one direction, covering the rest of the unit. Leave the first coat to dry and then check over your furniture again for any issues. Use a tack cloth or microfibre cloth to get rid of any dust before applying your second coat.
Once you have finished painting your piece of wooden furniture, leave it to dry until the surface is no longer tacky. If you have used a water-based eggshell, this should be within a few hours (and fully dried within 12 hours), but if you have used oil-based, this can take up to 2 weeks. Do not place anything on or in your furniture until the paint has completely cured and feels hard.

Rehang your doors, reinsert any drawers and update the unit with some brand-new handles (if required) for a new, modern look.
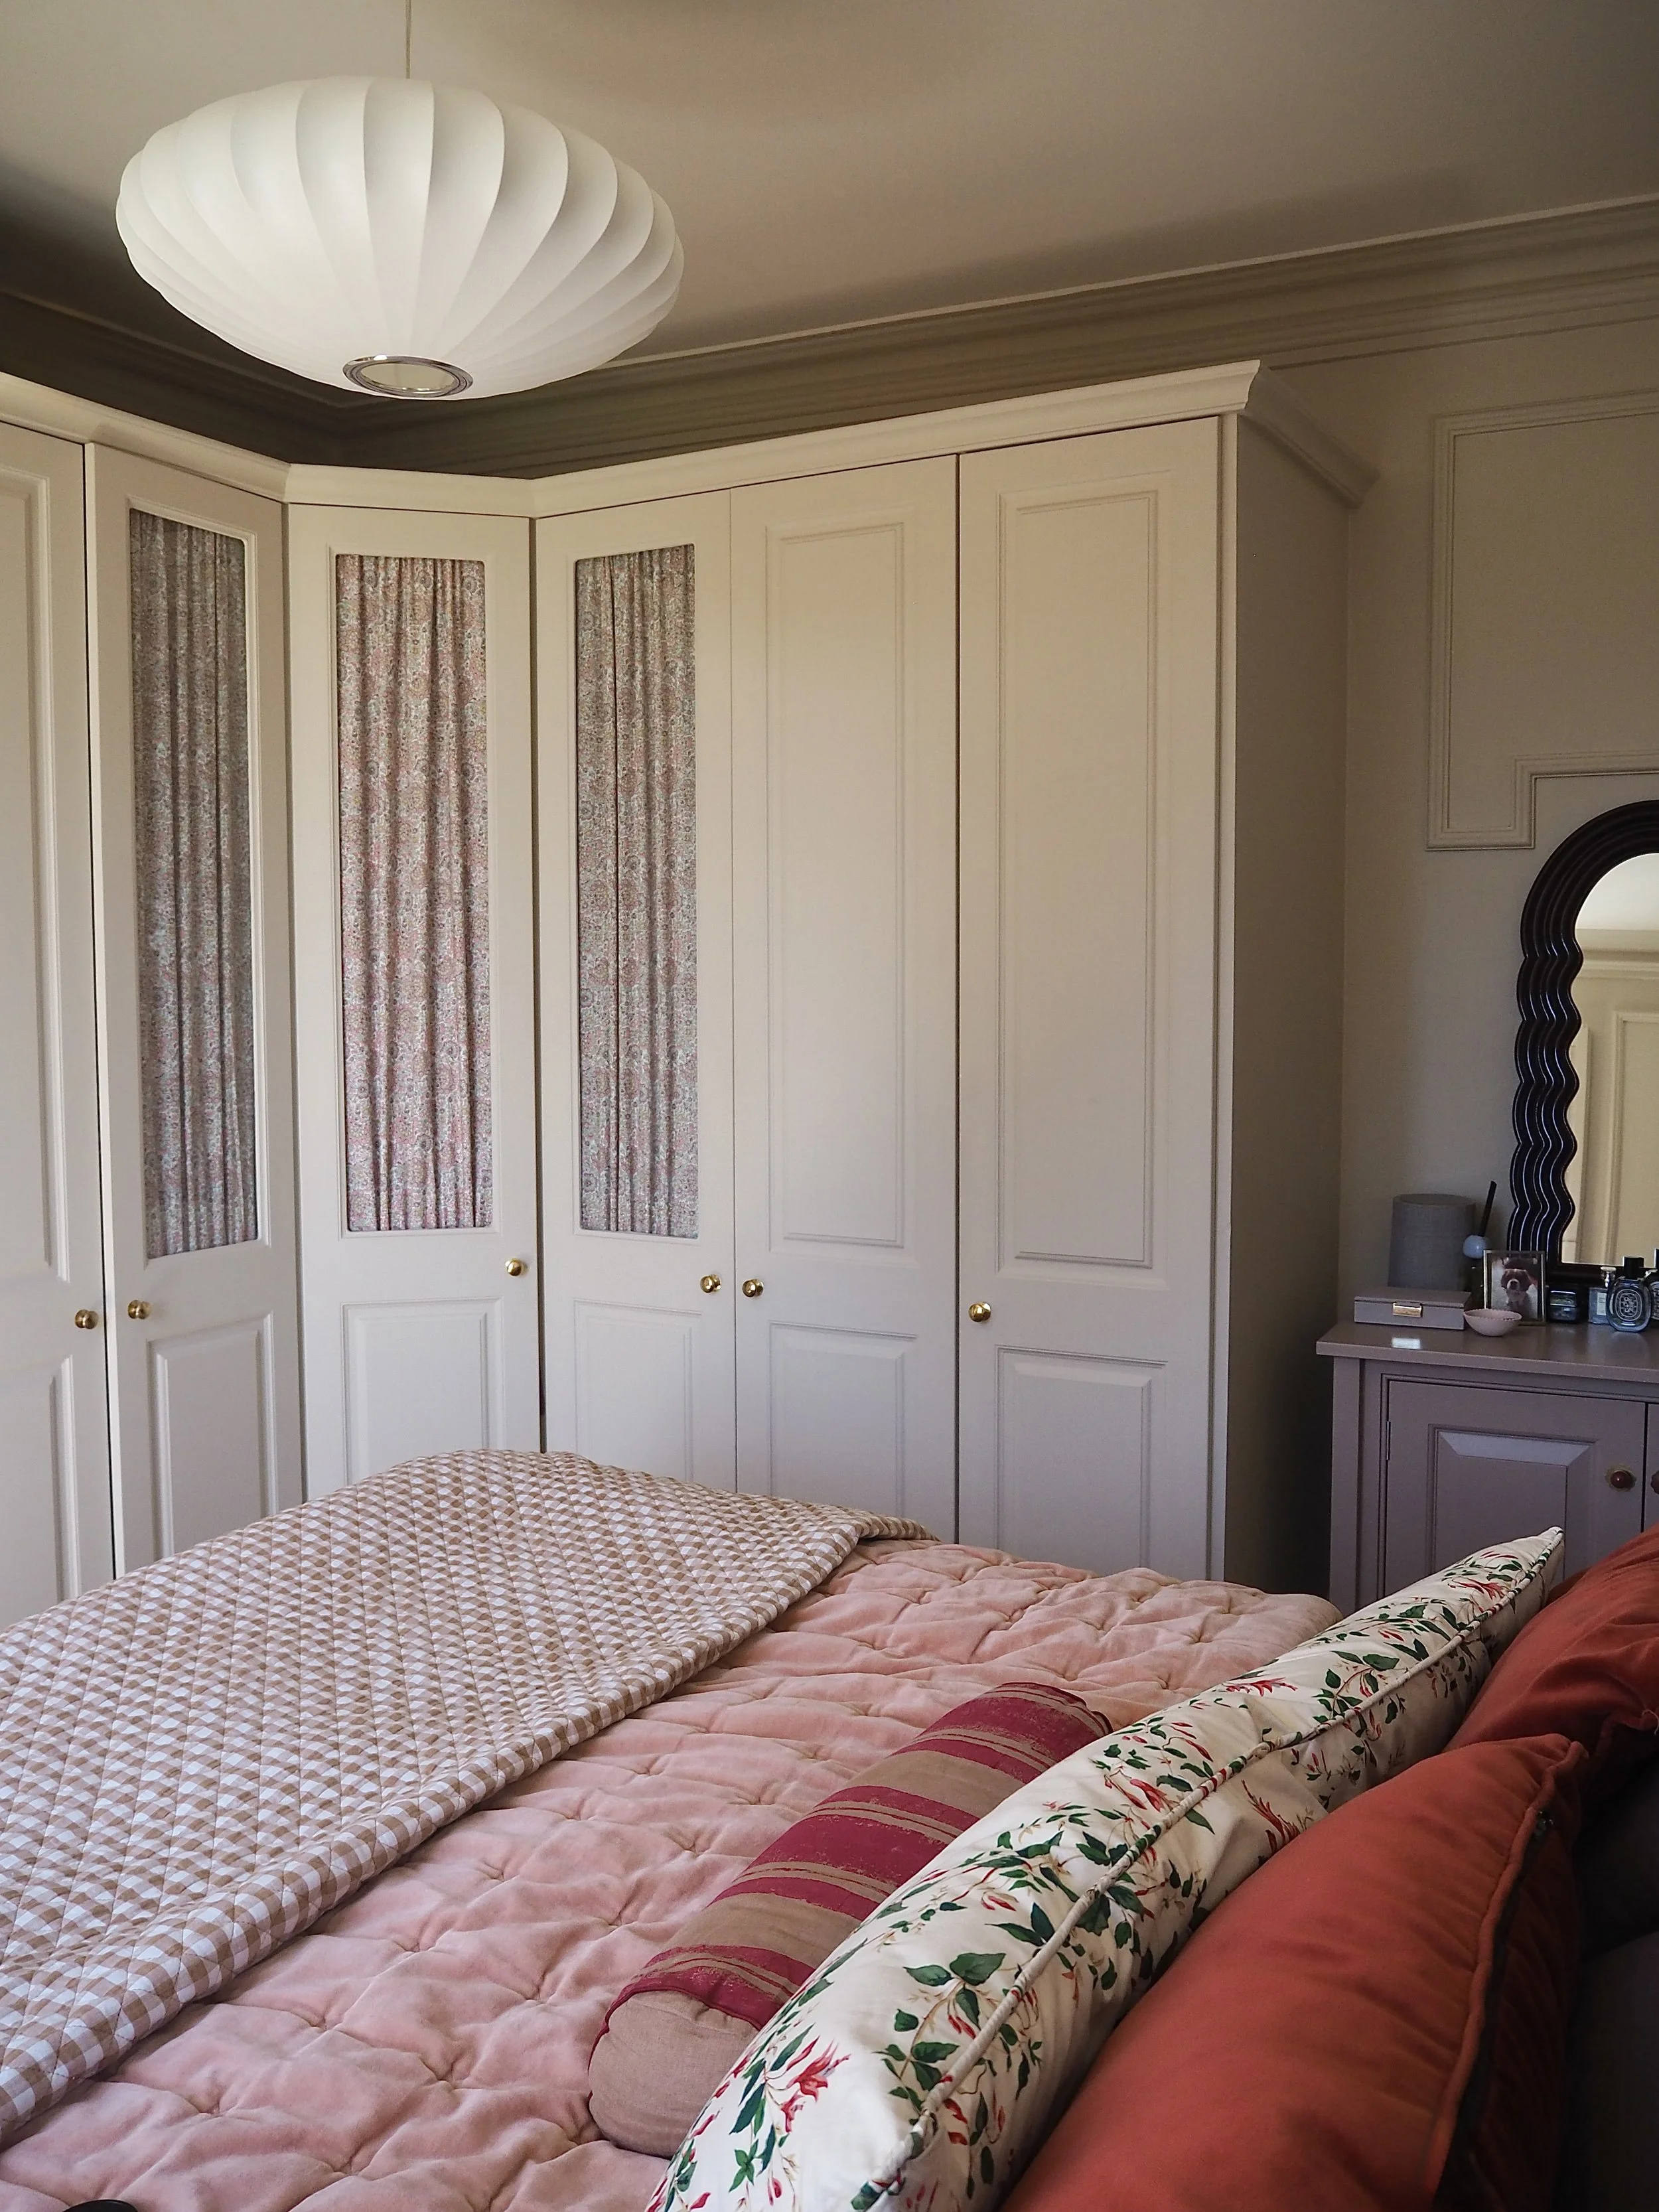
I’m so happy with my recent cabinet update that I painted in a midtone colour called ‘Caddie’ by Paint & Paper Library. It gives me more storage space and I only paid £40 for the piece, as well as saving a perfectly good bit of furniture from going to landfill.

The six key DIY tools every home should own…