Get Creative: DIY Wavy-Edged Window Pelmet For A Kids’ Bedroom
Follow my step-by-step tutorial on how to create this wavy window pelmet...
Read More
Follow my step-by-step tutorial on how to create this wavy window pelmet...
Read More
Fluffy Neo Mammoth Head Wall Decor from Cuckooland.com in this gender-neutral nursery design.
When welcoming a newborn into the world, creating an inviting and comforting baby room that's gender-neutral will allow your child to feel right at home when surrounded by soft tones, subtle patterns and all of their essential sleeping essentials - no matter their gender! If you want a beautiful space for your new arrival, read below for tips and tricks for designing a gender-neutral nursery.
Neutral colours such as creams, whites and taupes make an excellent background for your baby’s new room, creating a soothing environment while providing plenty of scope to add pops of colour for character and personality. Soft pastel hues will be gentle on little eyes and can accommodate any gender-specific accessories you might wish to add later on.
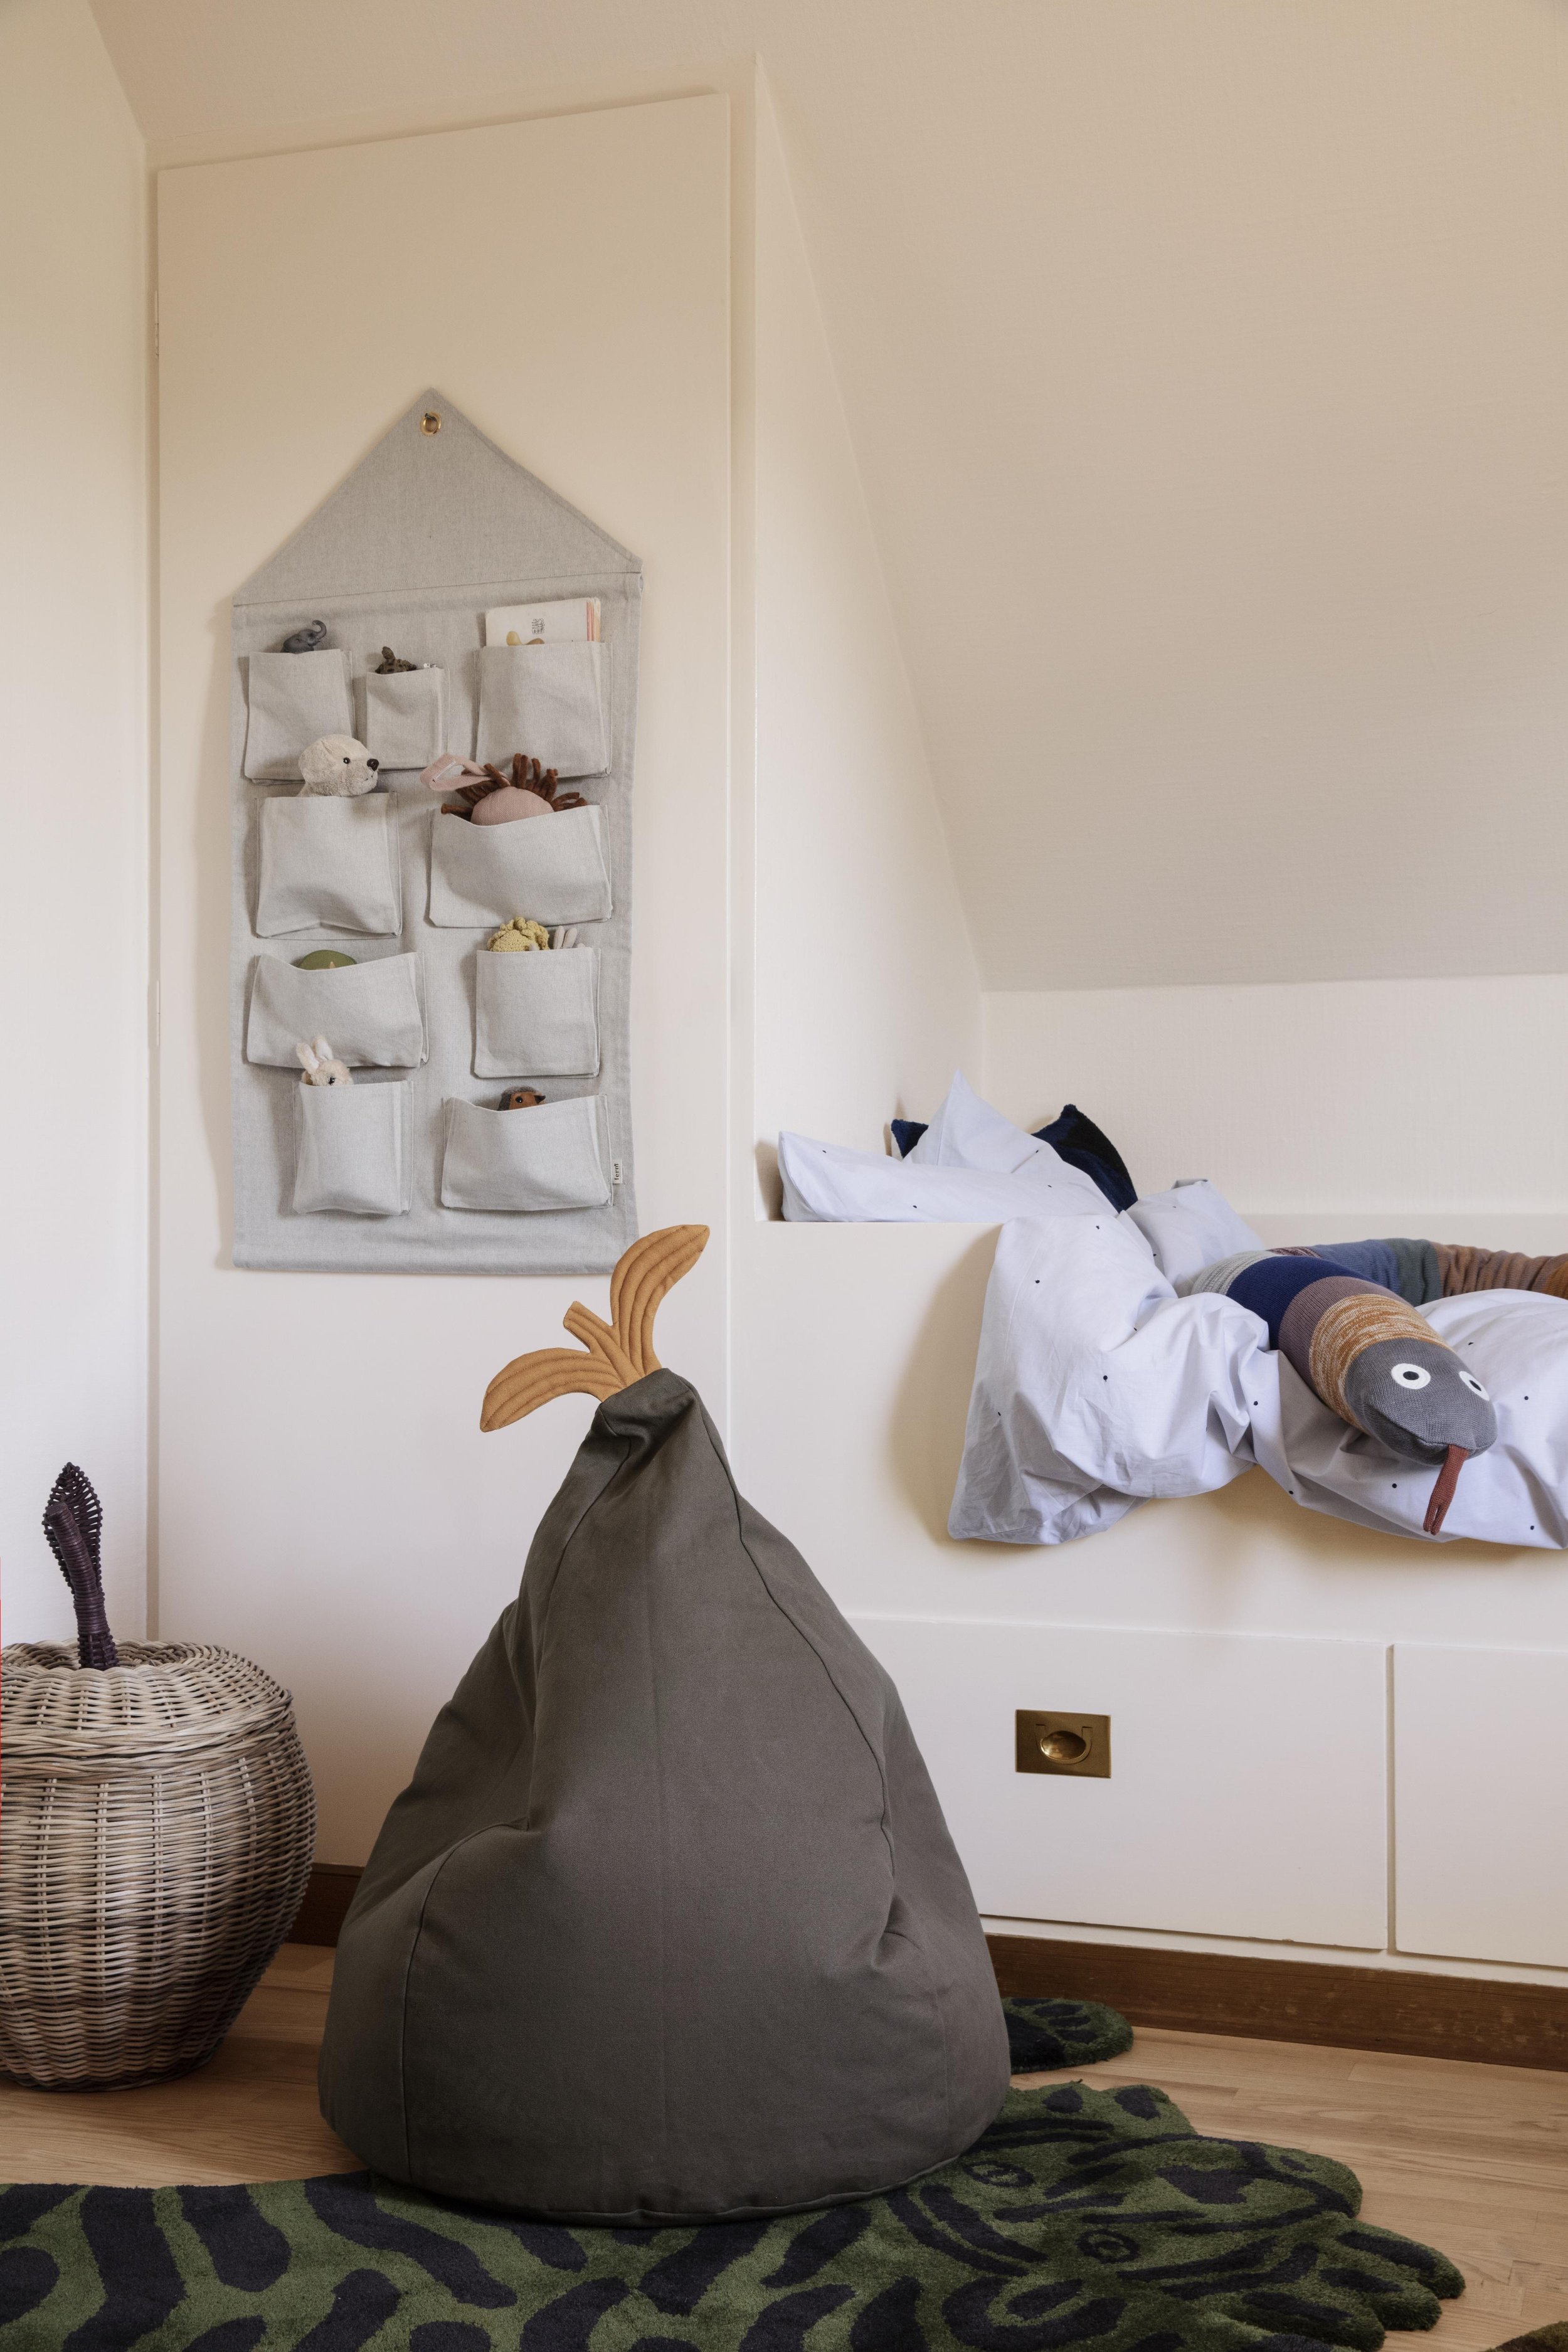
Ferm Living Pear Bean Bag available via Nest.
Invest in quality gender-neutral pieces that can grow with your child over time. Look for timeless shapes and styles that won’t need replacing when they get older, like on-trend but child-friendly wavy fabric designs, or seats and chairs that adjust as they grow. Investing in high-quality pieces like kids’ beds is a wise decision to ensure longevity in your child's room decor. Choose beds are built with durable materials and meticulous craftsmanship, providing a secure and cosy environment for your child's growth and restful sleep.

Leander High Chair in Walnut, Cuckooland.com.
When selecting bedding and other decorative textiles, select gender-neutral patterns or classic solids. Opt for items made from organic materials like wool, cotton and bamboo for a safe sleep environment without toxic substances. To add some flair, vibrant accent pillows and cosy blankets offer additional warmth when snuggling close to your baby.
No baby room would be complete without wall art that adds a special touch. From boho-chic prints to family photos, hang pieces that create a homely feel and are interesting for your baby to look at. Vintage lamps, wooden blocks or personalised toys layer the room and add charm and are suitable for all genders.

Oeuf Rhea Cot Bed in White & Walnut, Cukooland.com.
Be sure to incorporate plenty of storage solutions in your baby room design as newborns need a LOT of stuff! This can be in the form of open shelving, wicker bins or wall-mounted cabinets for books and toys that look better when stored away. Ample organised storage solutions will help keep their room neatly arranged and tidy and it will be less likely to clutter quickly.
To ensure a safe and cosy space for your baby, be sure to install window coverings tailored specifically for children's rooms - such as Roman Blinds (ensure that all hanging chains and strings are out of the way from little hands) and blackout curtains which provide excellent light control while keeping sunbeams at bay for those important daily naps.

Oliver Furniture Wood Mini+ Kids Low Bunk Bed in White, Cuckooland.com
To set the right ambience in any room, add appropriate light fixtures. From nightlights for late-night feedings to gender-neutral decorative shades for pendant fittings such as this easy-fit hot air ballon, available from Dunelm.

This hot air ballon easy fit shade is available from Dunelm.
Always prioritise safety when designing your baby's room. This includes checking that wall sockets are covered, furniture is securely fastened to walls and will not tip over and suffocating items are out of reach. Make sure there are no sharp corners by installing corner bumpers and install a baby gate on the door if necessery.

A colourful nursery featuring furniture and accessories available from Dunelm. Iris Sherpa Rocking Chair, £169.
5 creative and affordable nursery bedroom ideas…
Read MoreCheck out my latest furniture flip…
Read MoreAmazing wallpaper inspiration for a child’s bedroom…
Read More10 inspirational kids’ bedroom decor designs and ideas…
Read MoreAs I helped my son put on his uniform for his very first day at school, I scanned his bedroom and quickly realised that he had drastically outgrown the room I had decorated for him when he was just a year old. No longer a baby, his nursery-like bus wallpaper and aeroplane-themed furniture handles did not reflect this strong-willed young boy in front of me. His room needed to be updated, so over the space of 6 months I worked on different areas of the room to make it more in-line with his age.
Read MoreA bright wall mural in a child’s bedroom or nursery is a great way to create a bespoke interior for them, without spending too much money. Thanks to the recent release of Gorilla Crystal Clear Mounting Tape Squares, part of the new Stationary range from Gorilla, I decided to go one step further and create a 3D wall mural in my son’s bedroom. These clear, pre-cut 1” x 1” squares allowed me to bond toys and figures to the mural up to seven pounds in weight, adding another dimension to the landscape scene that I had painted.
Read More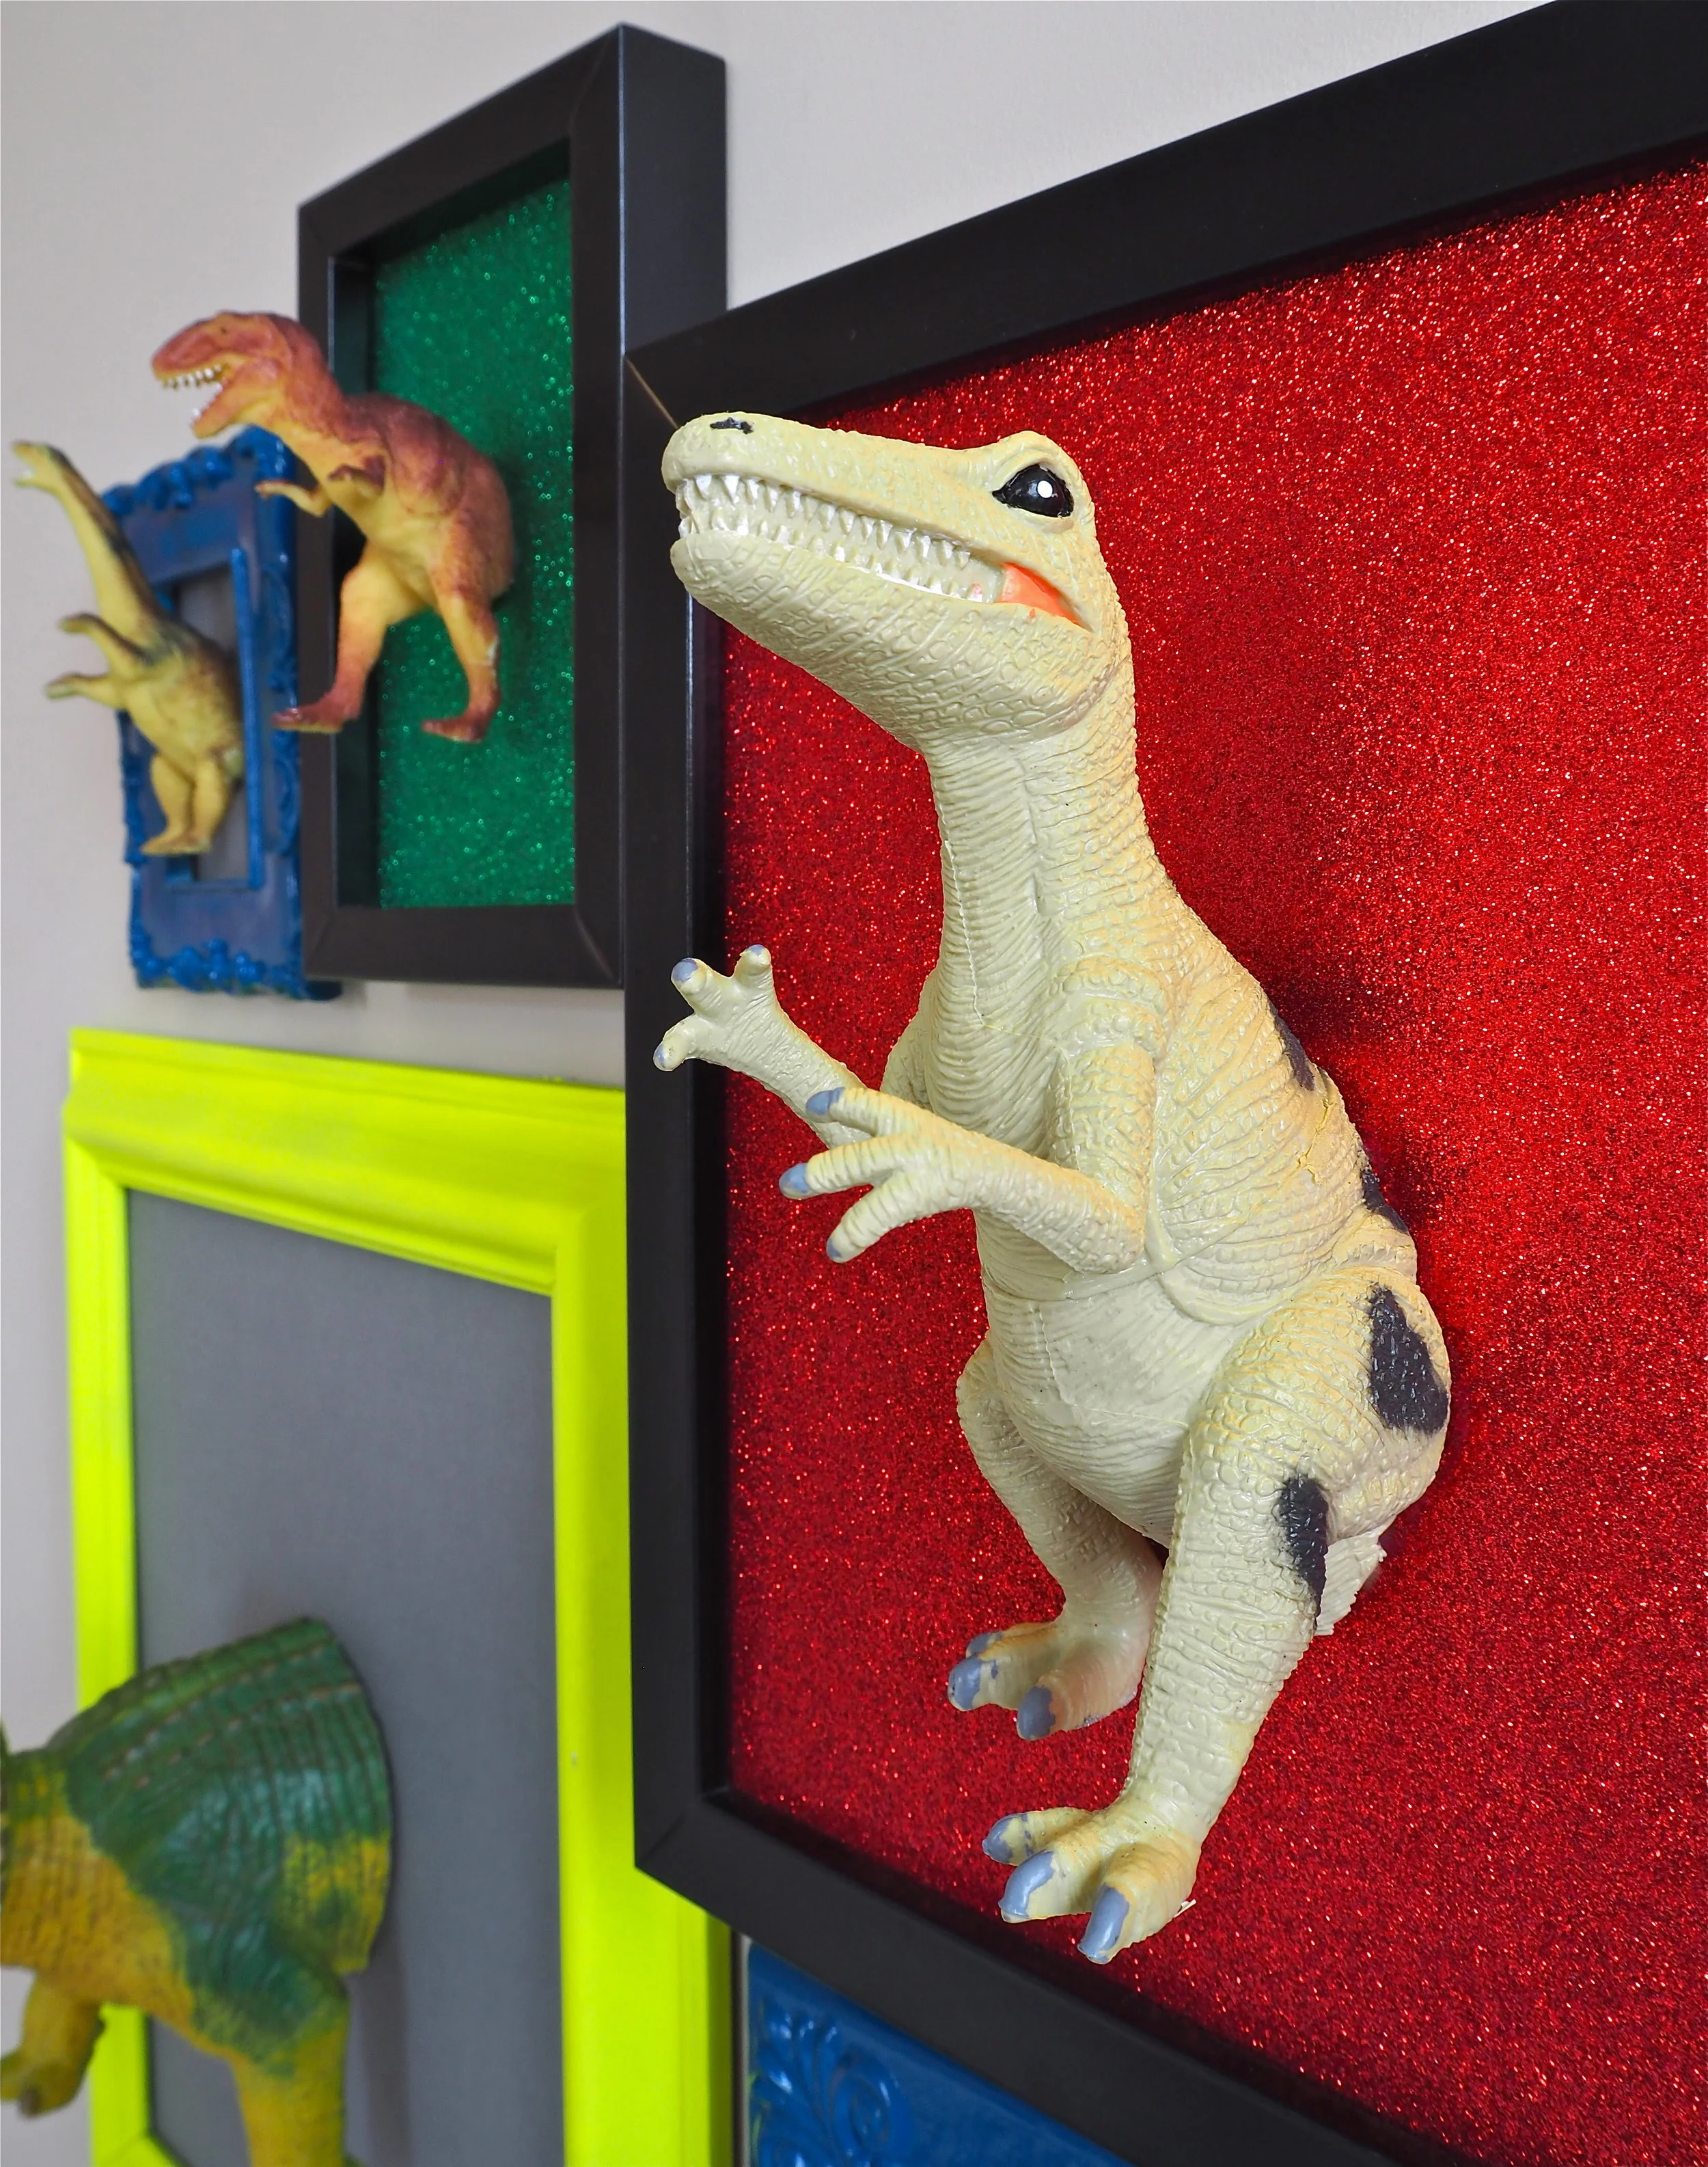
How to make this 3D Dinosaur art for a kids’ room using plastic dinosaurs and old pictures frames.

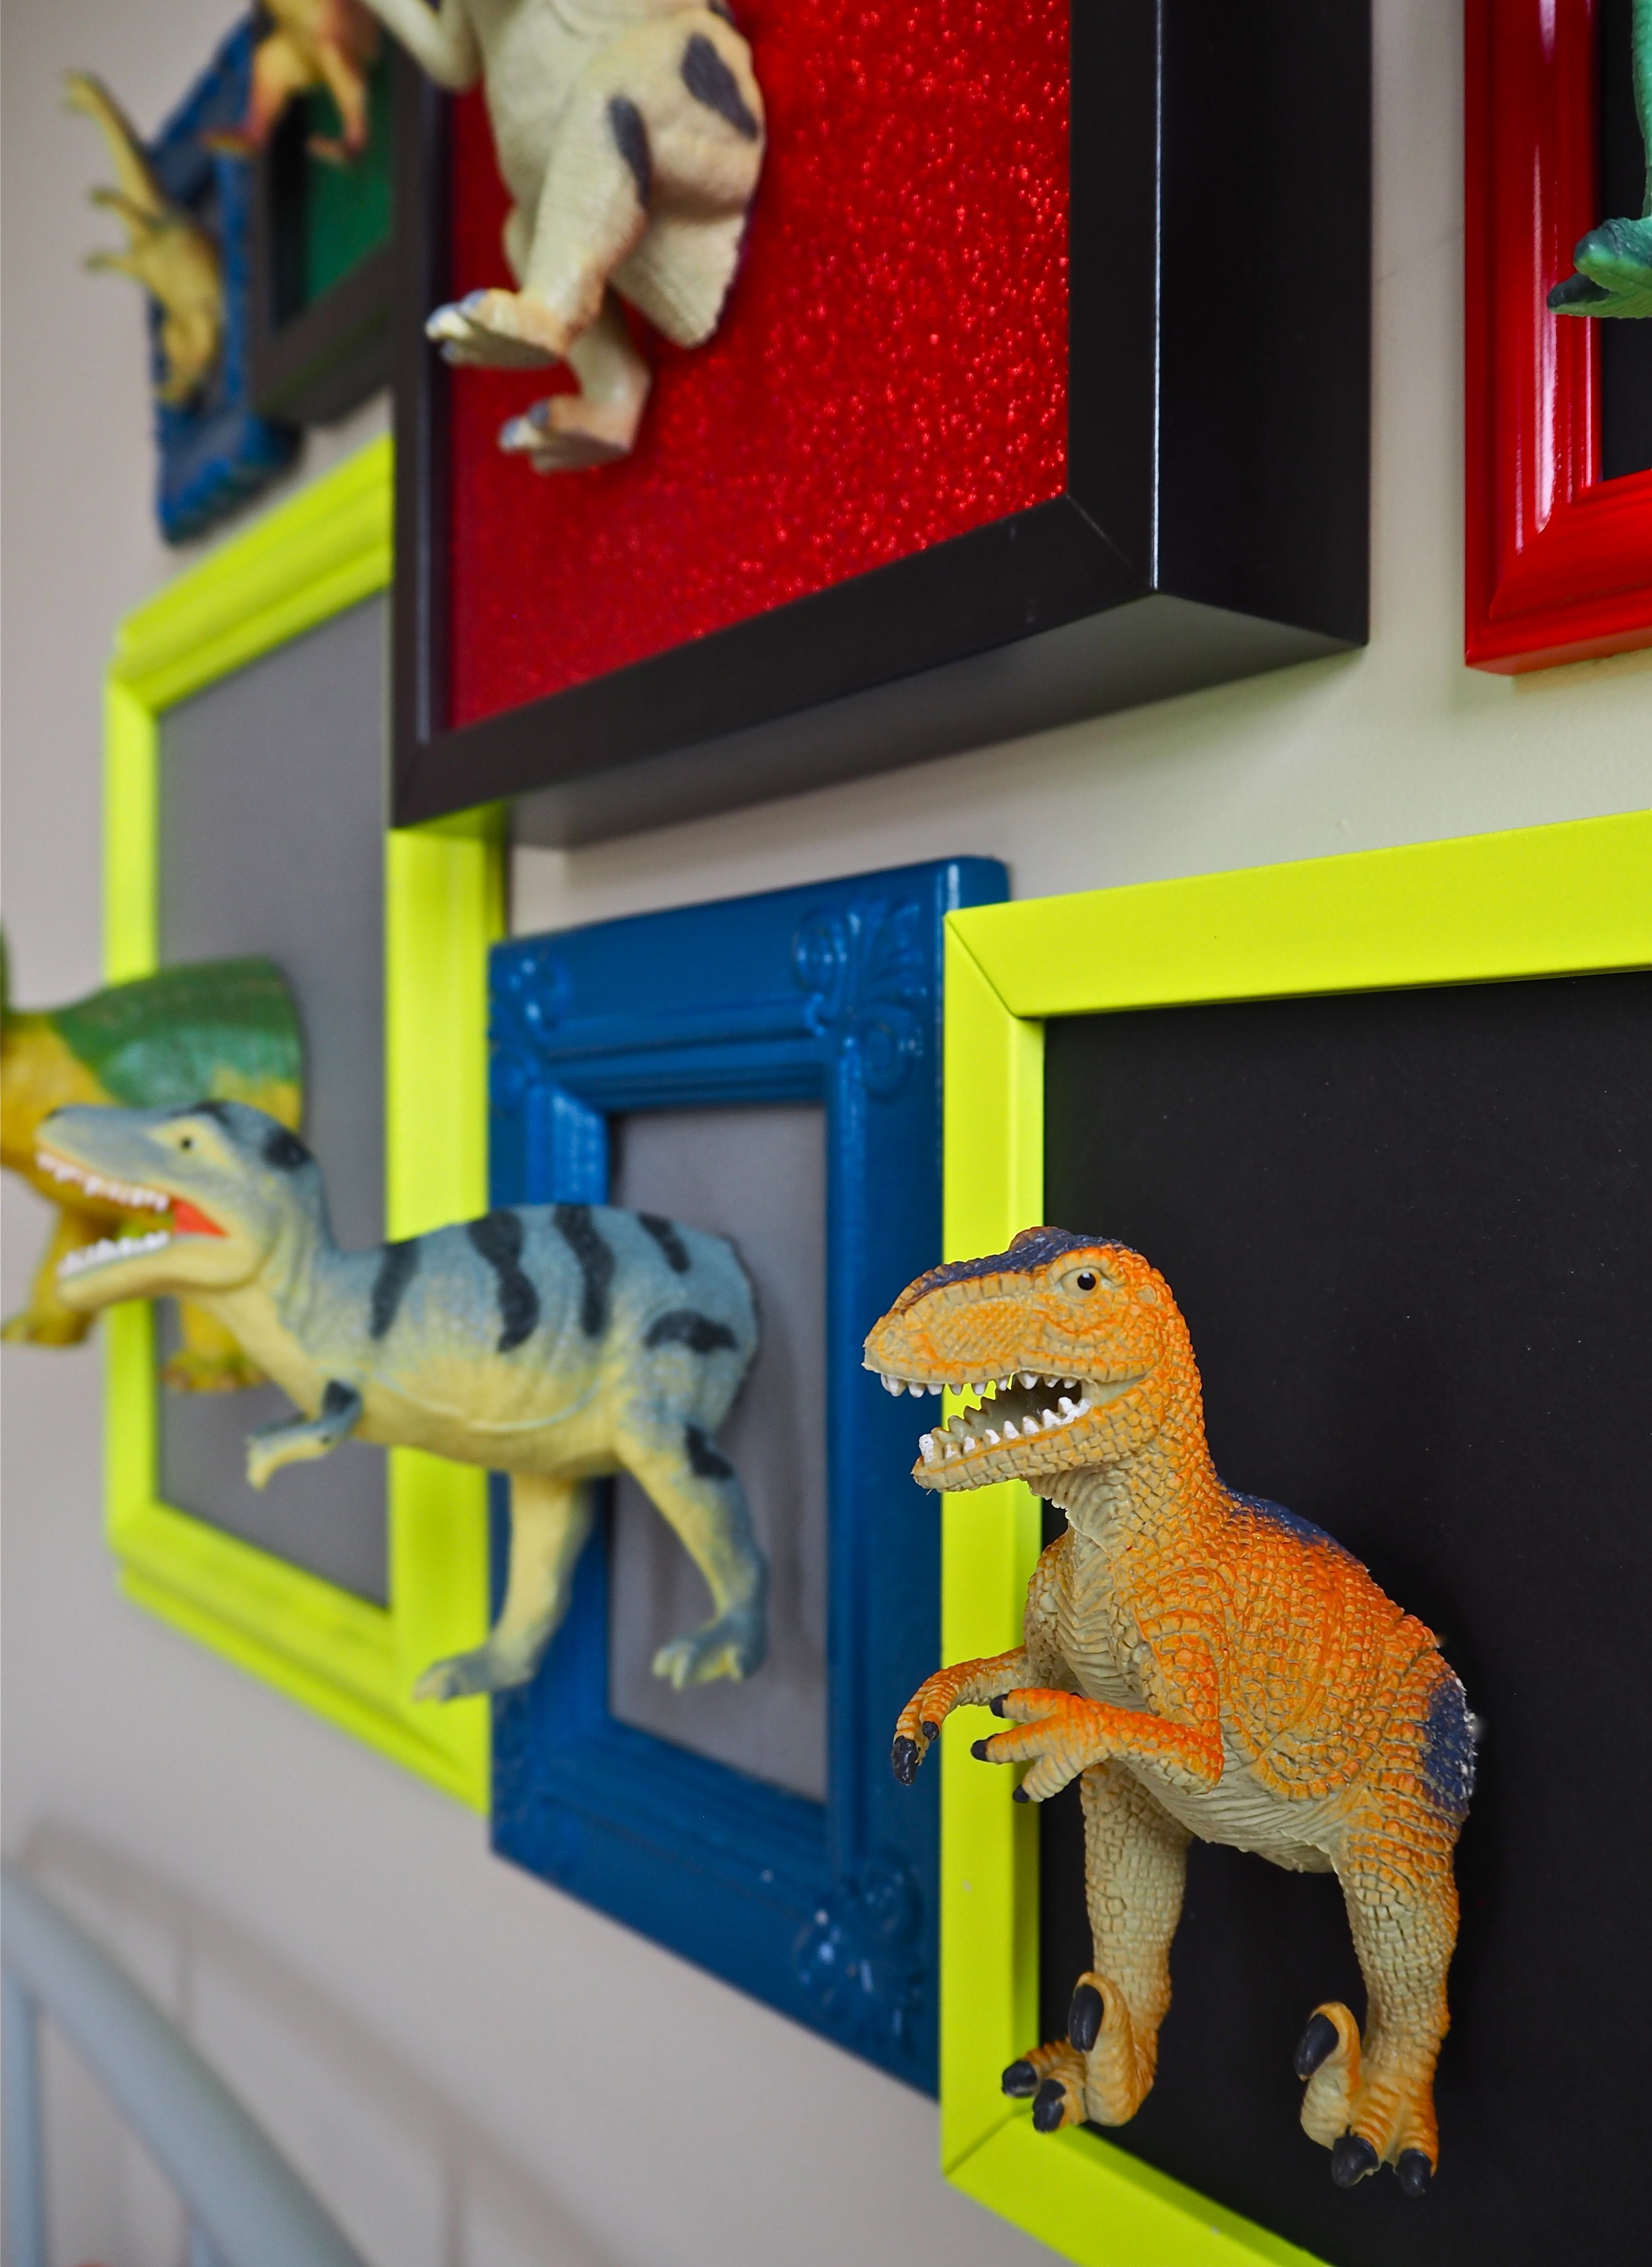

If you do not have any dinosaur figures to hand, used plastic dinosaurs are ten a penny in charity shops and car boot sales across the country. In fact, I picked up most of the dinosaurs used in this DIY in the first charity shop I popped into on my local high street! While I was in there I also sourced a collection of frames in different shapes and sizes. I just removed the old artwork and cleaned up the frames they came in.
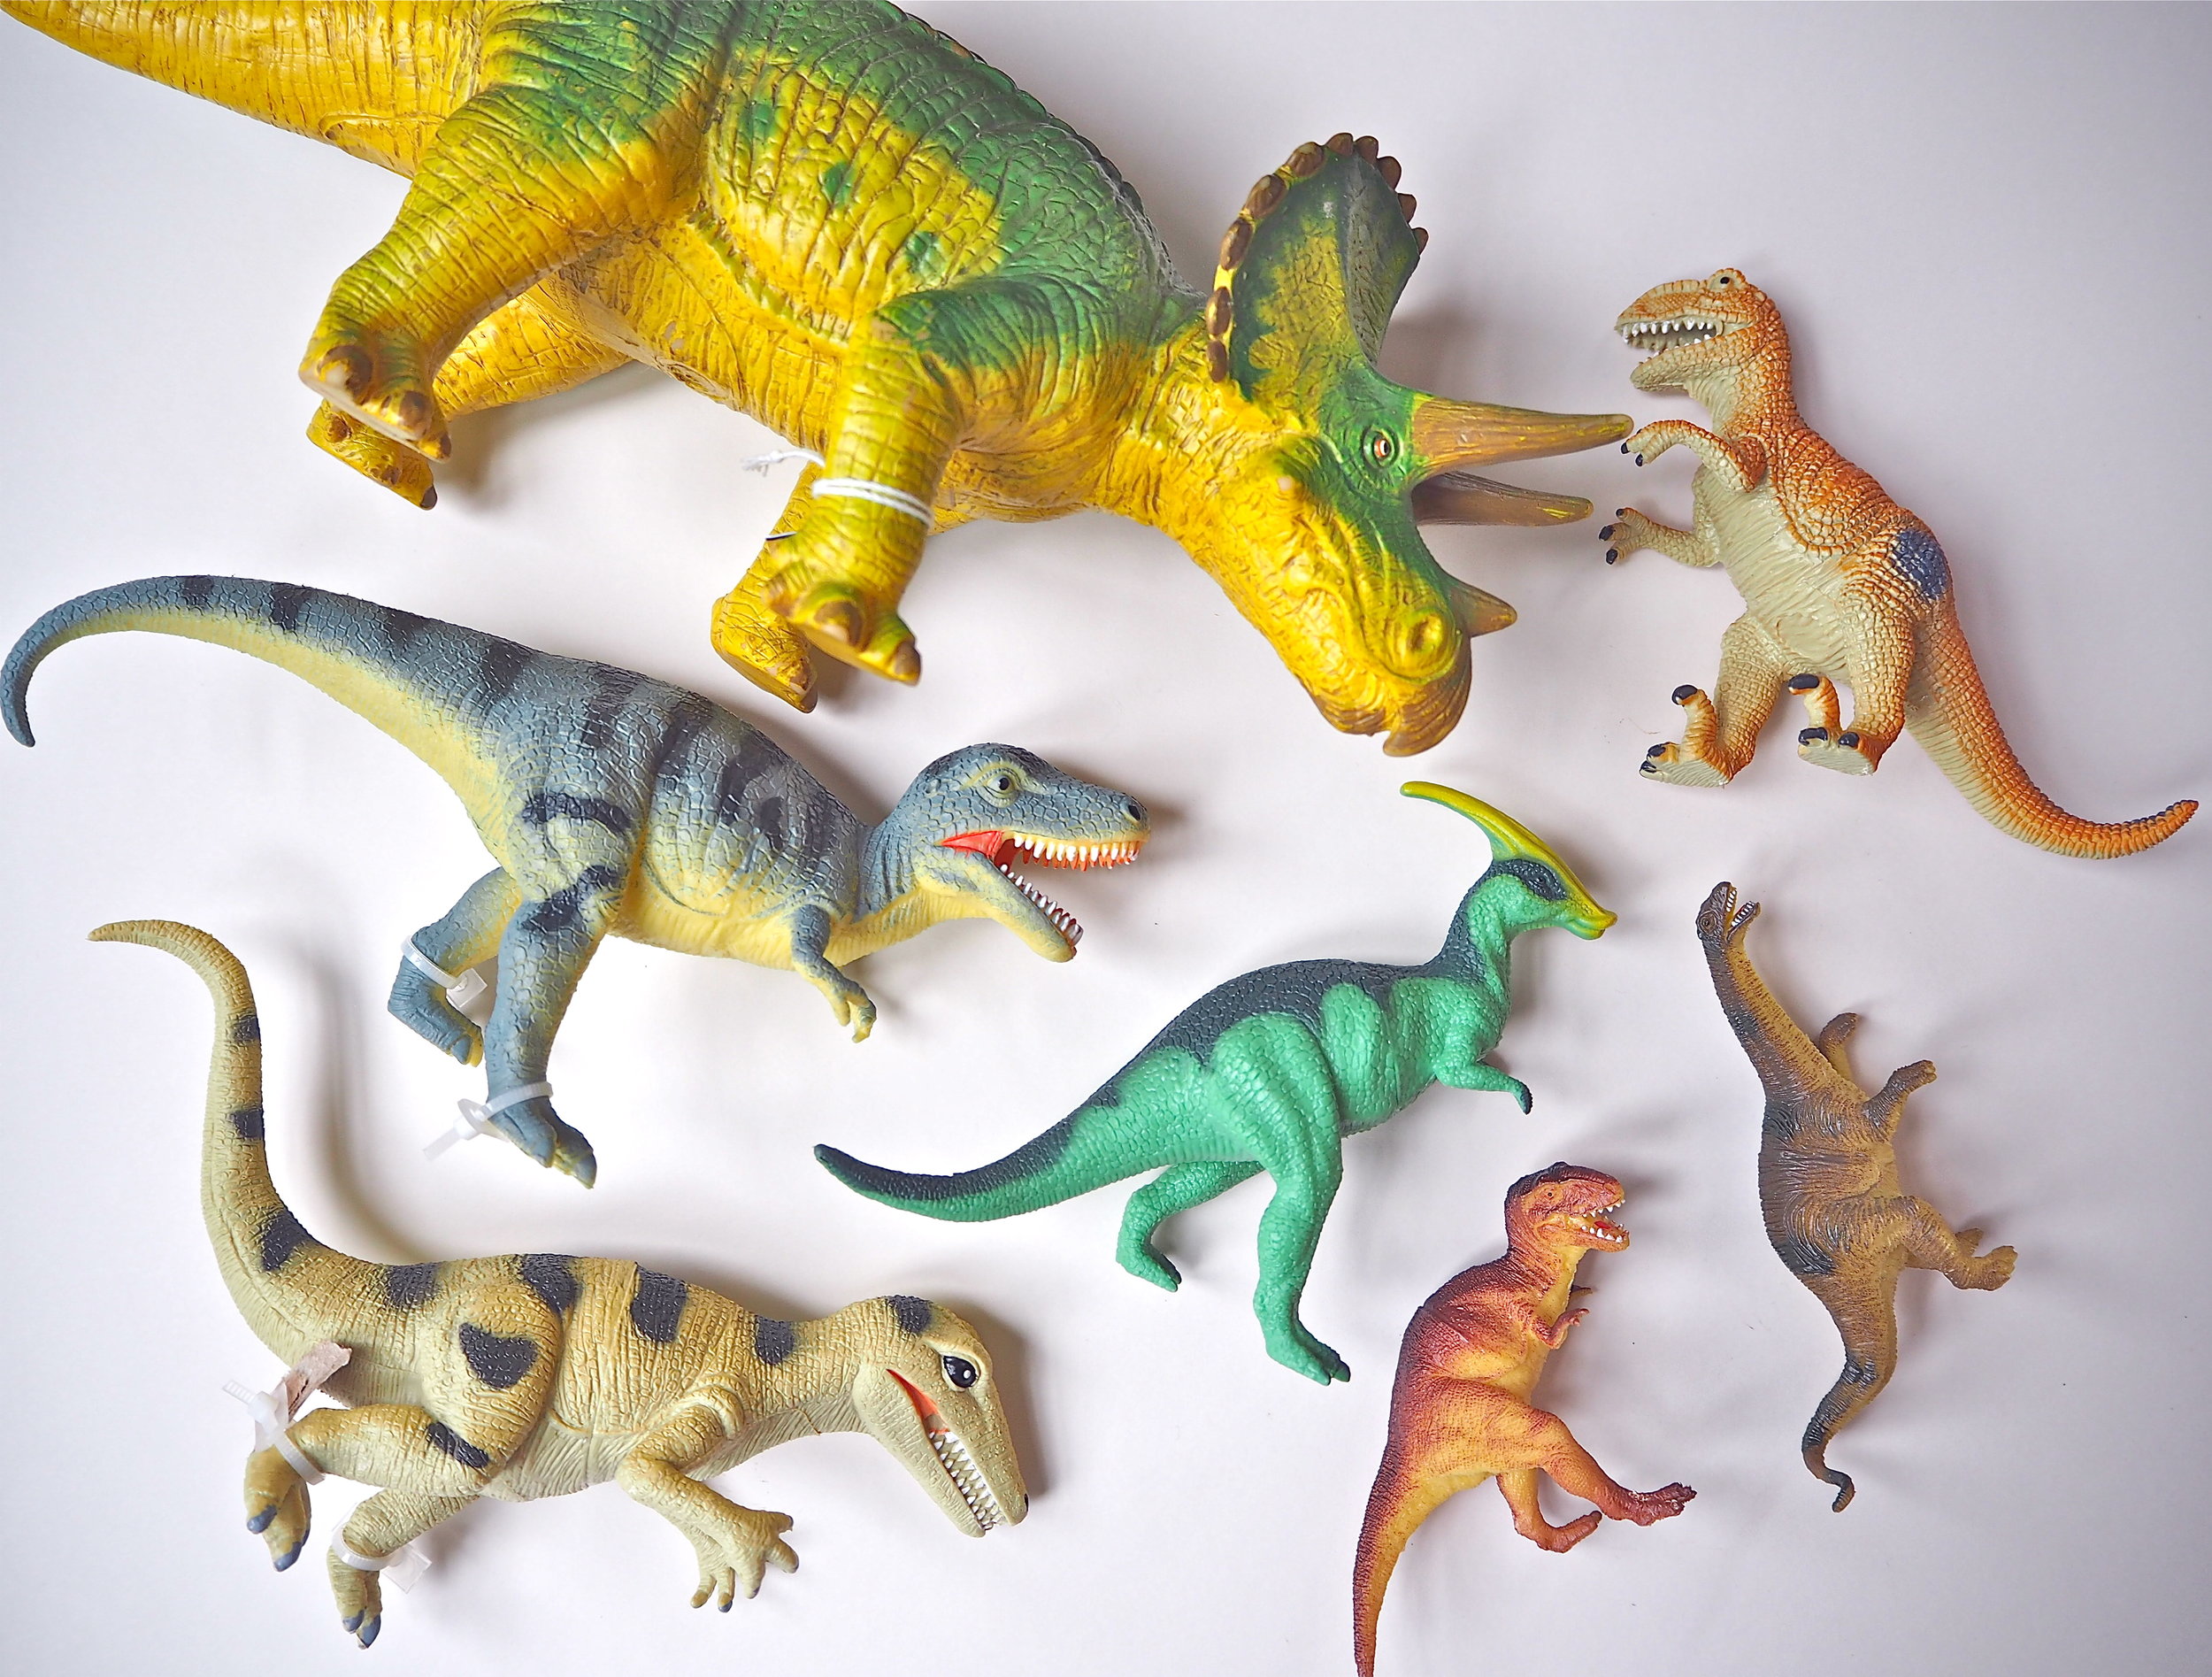

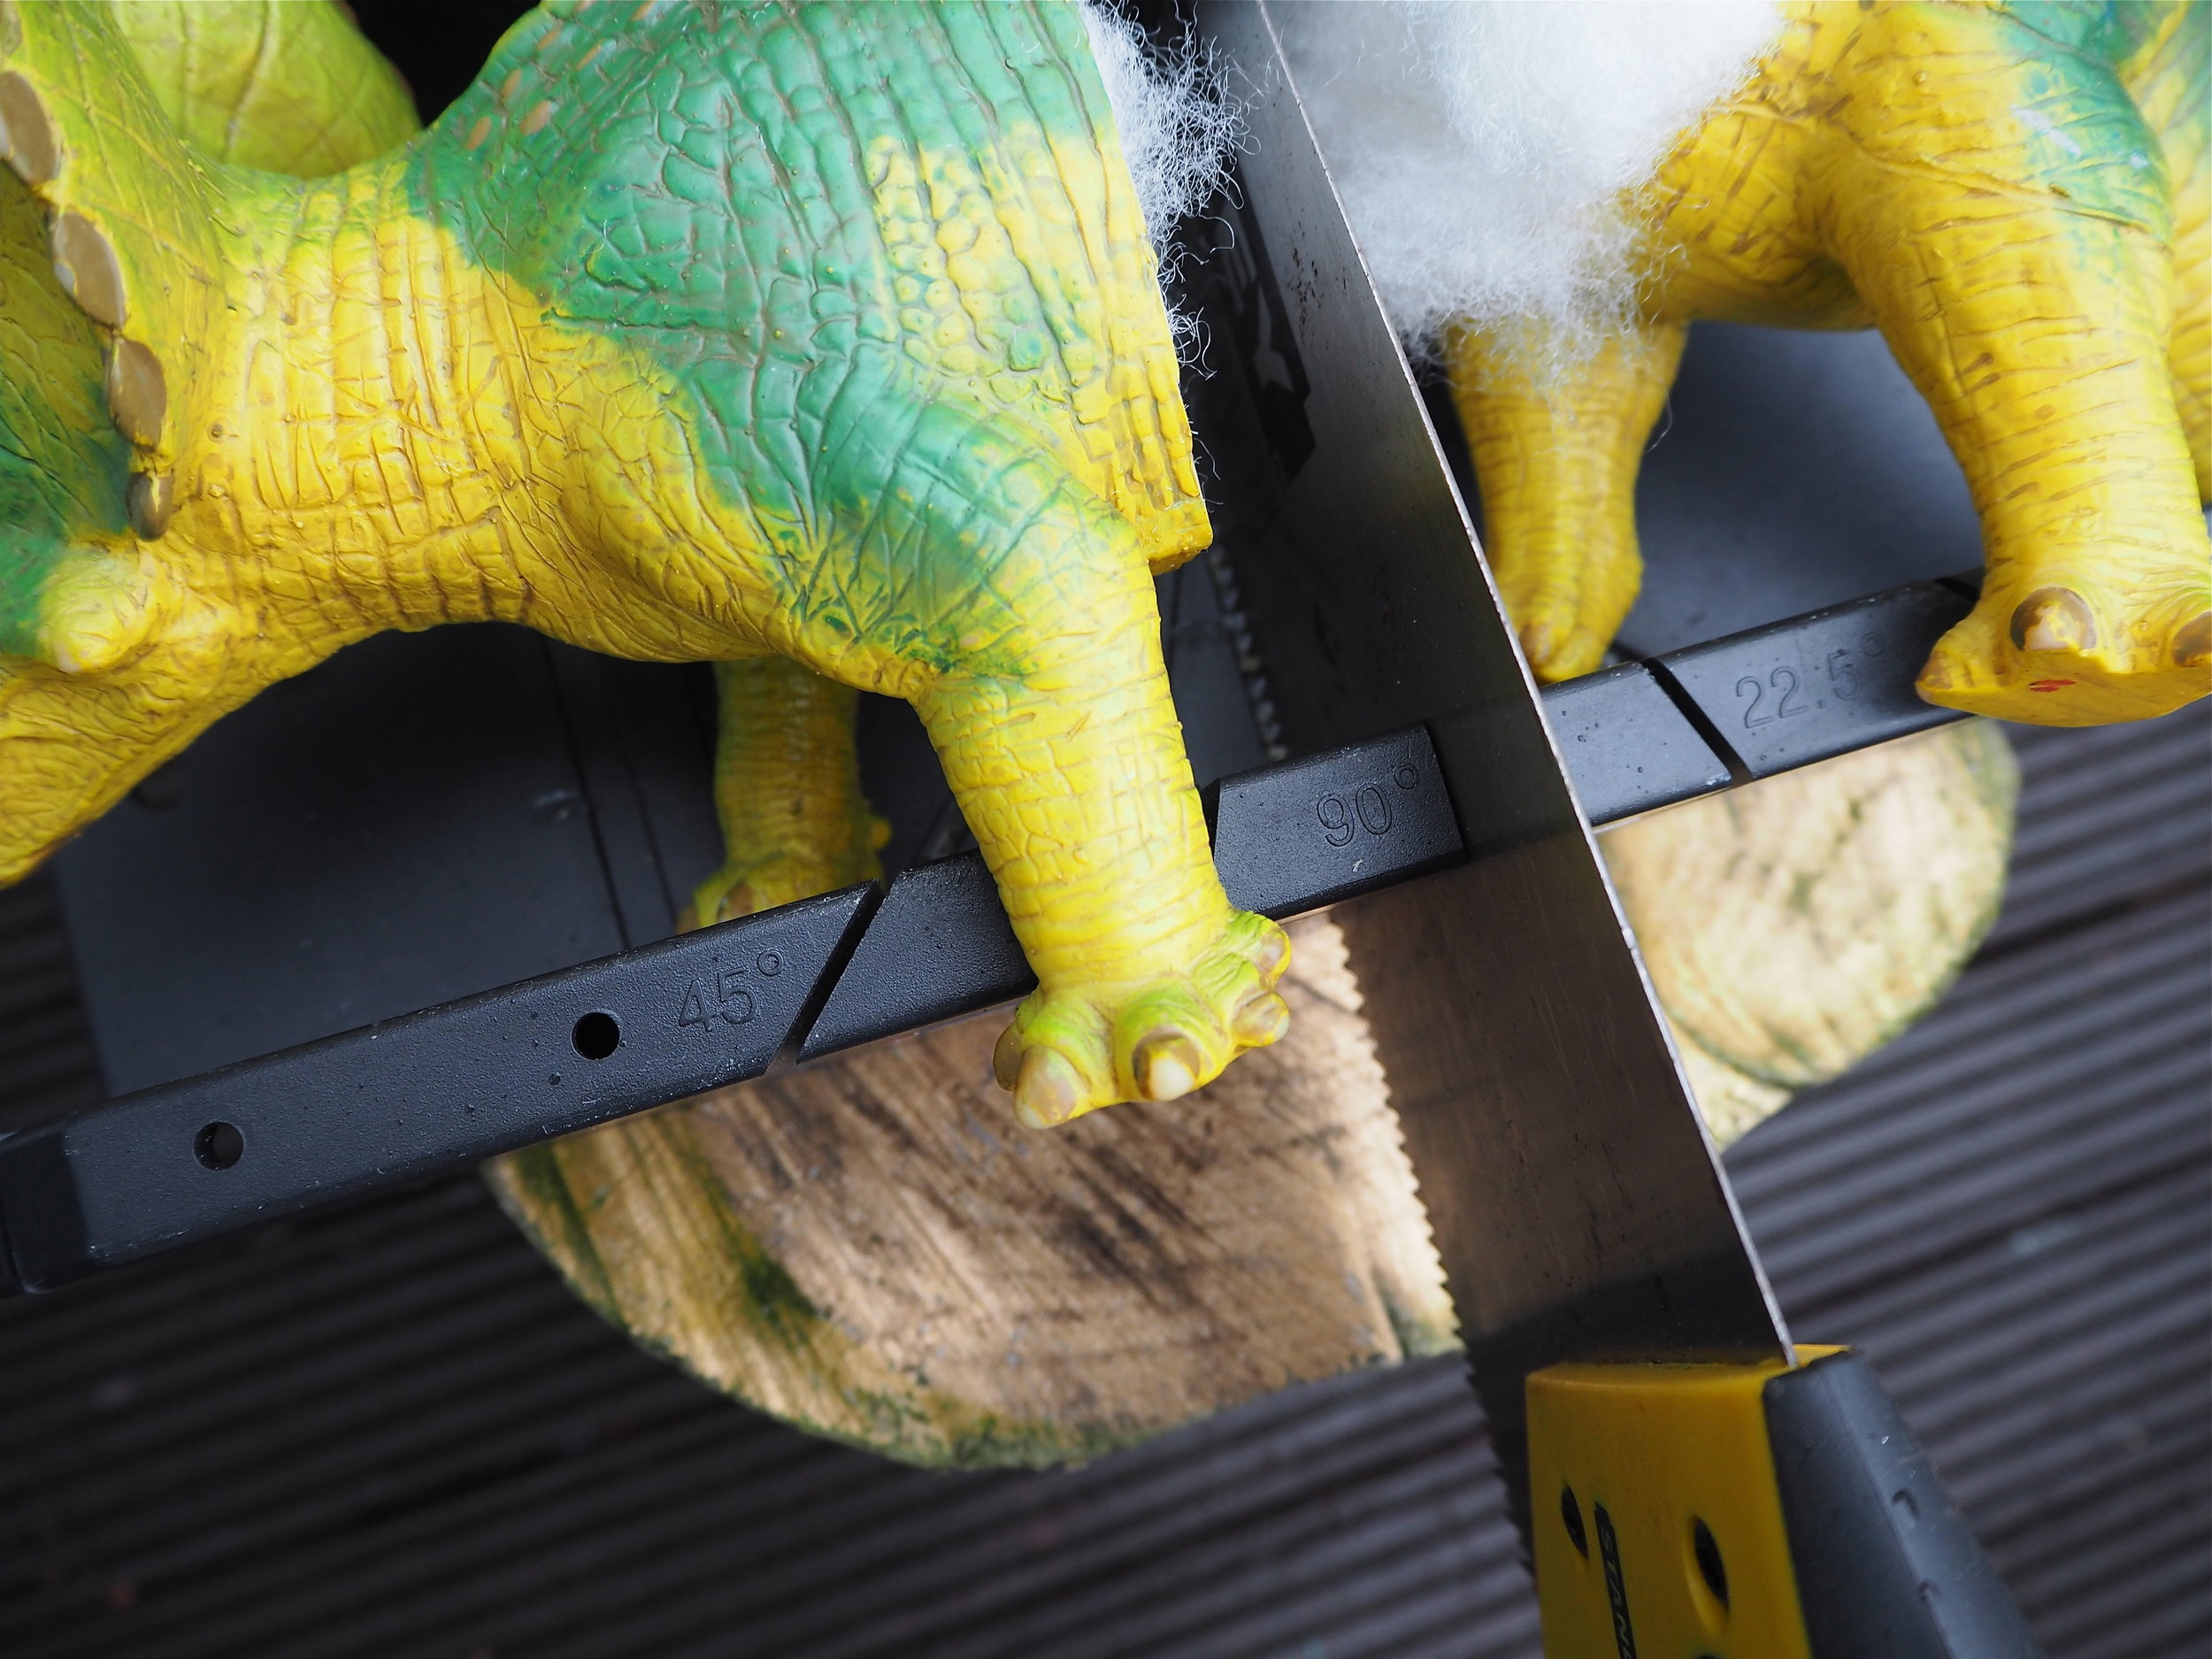
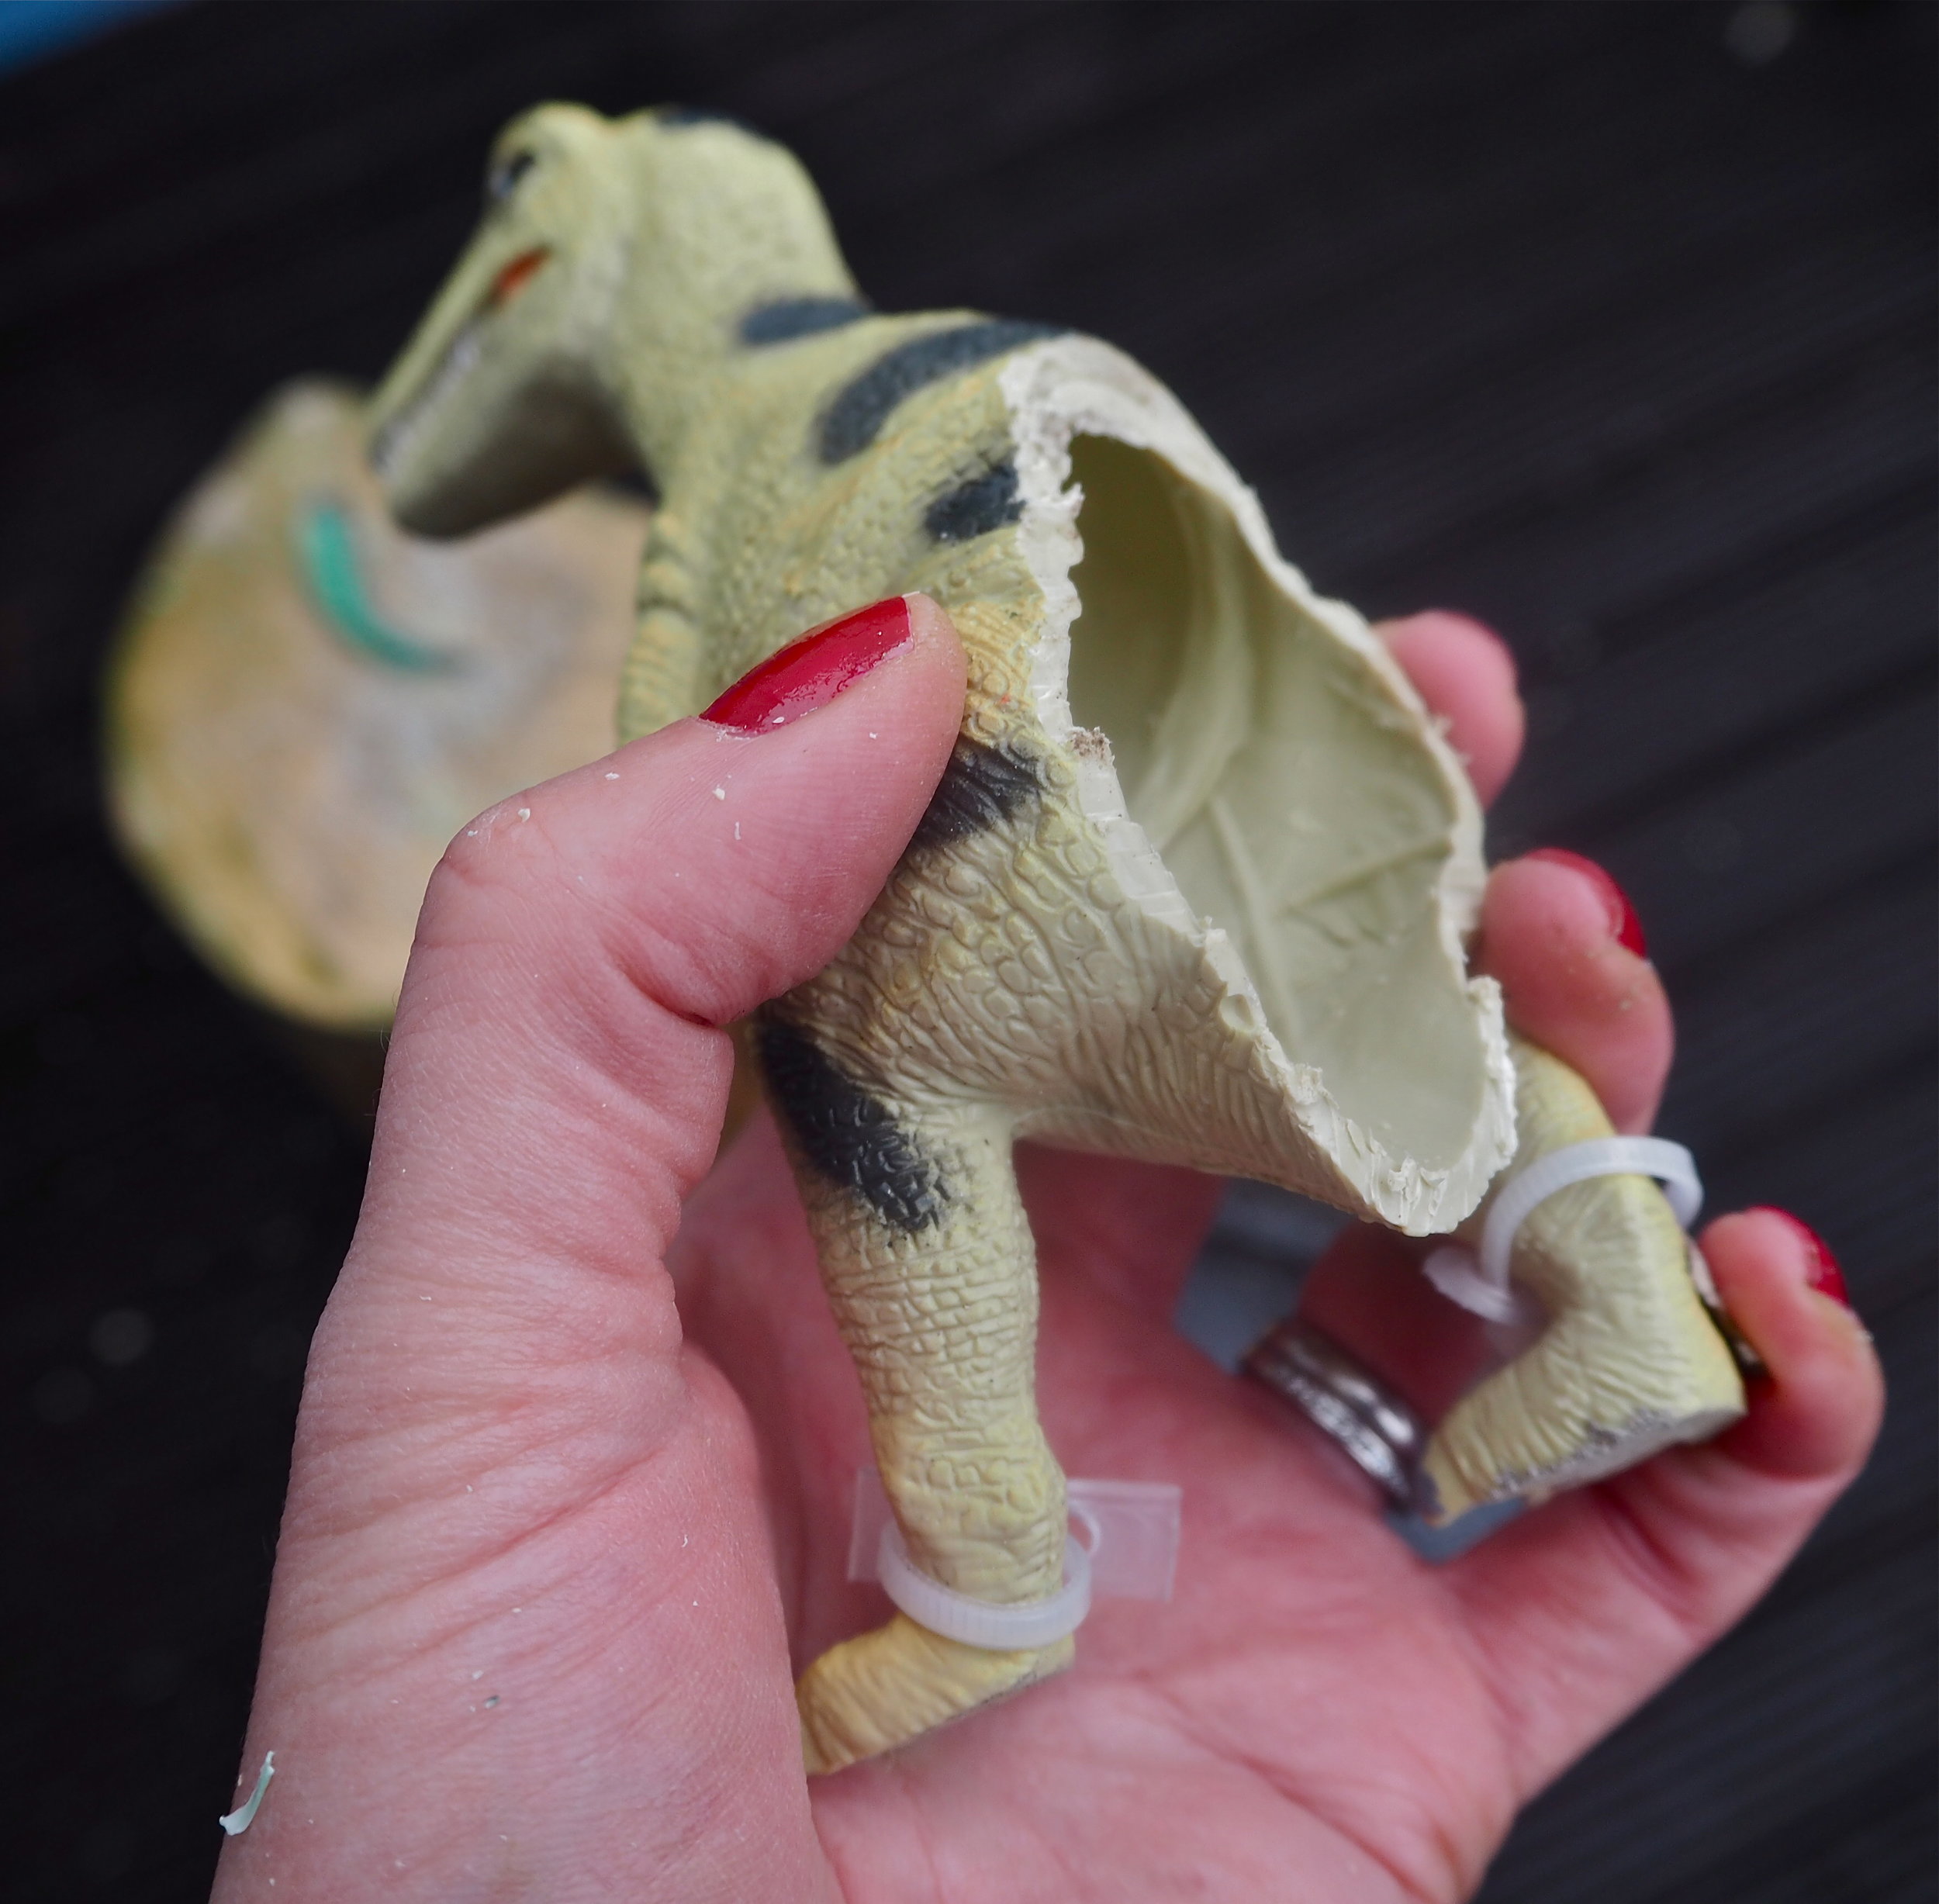
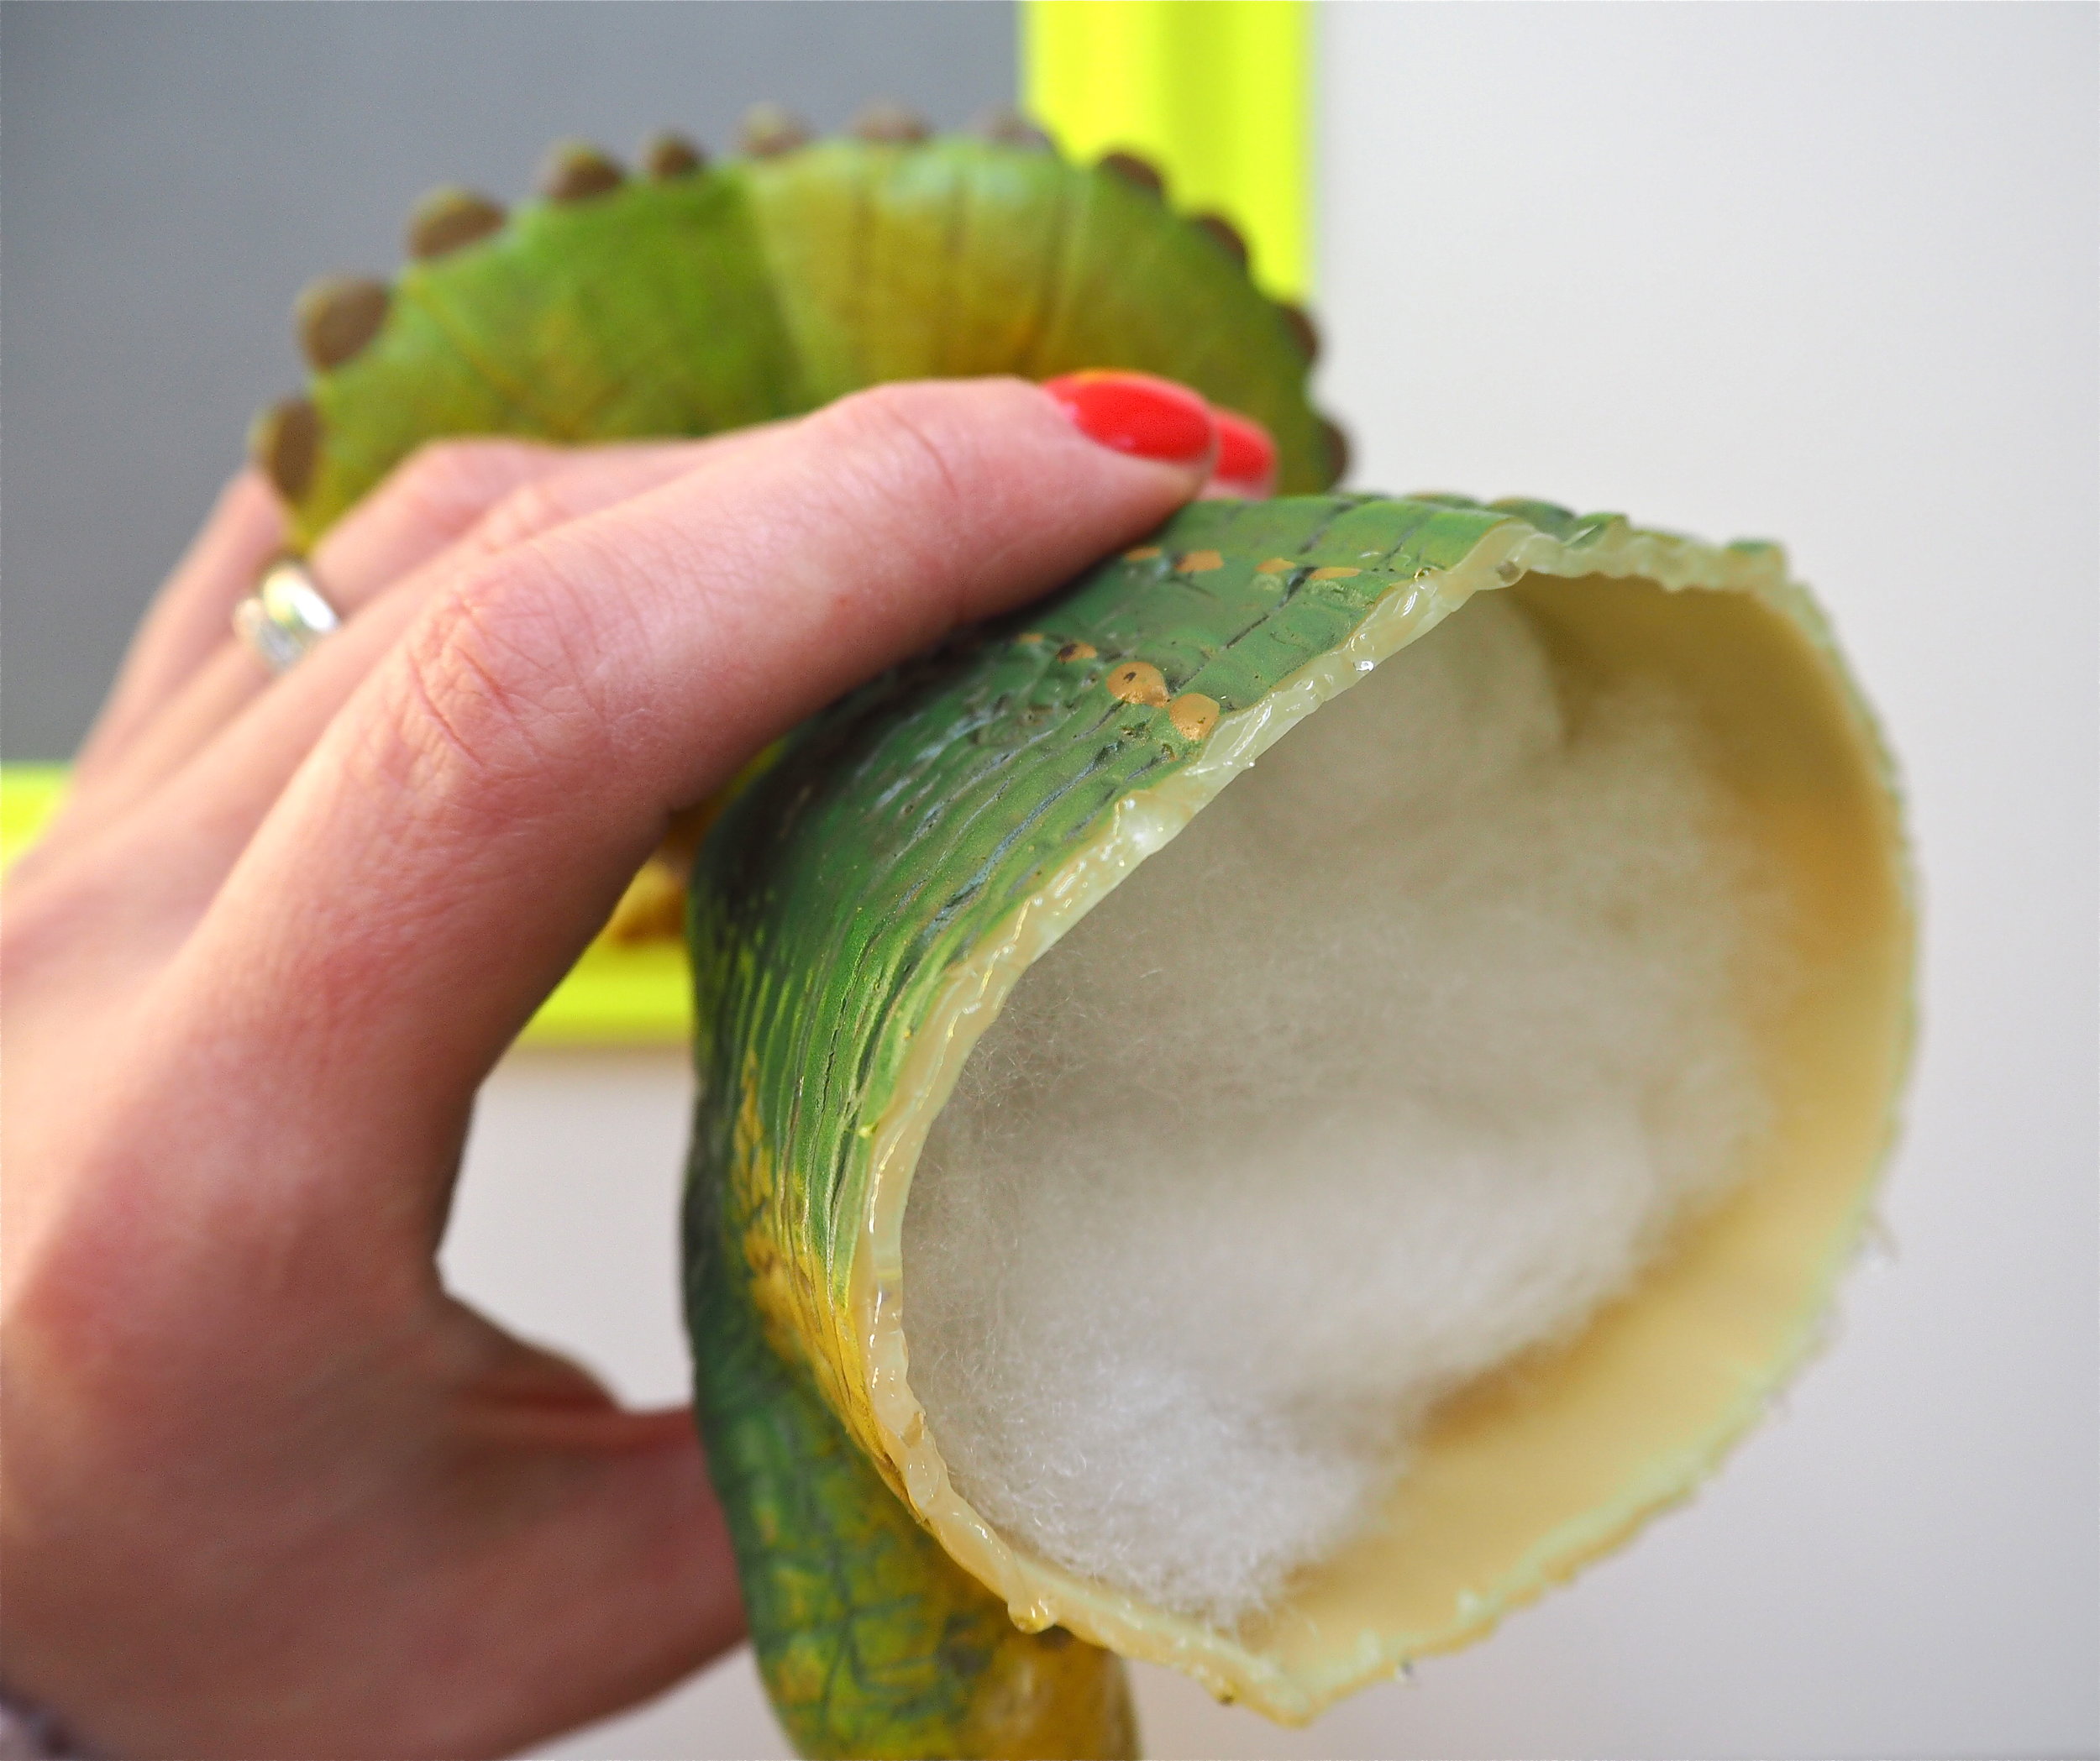
The first step in creating this DIY is to dispose of the back end of the dinosaur! I took each dinosaur and worked out what I wanted to ‘pop’ out of the frame and what I could get rid of from the back. I mostly kept all legs but got rid of the tail. You do not want your dinosaur to be too top-heavy, but if it is missing a leg it might look strange. Work out your cutting point and then slice him in two using a handsaw. I used a mitre box so that I could make a nice clean, straight chop. However, a mitre box is not essential if you have a good grip.

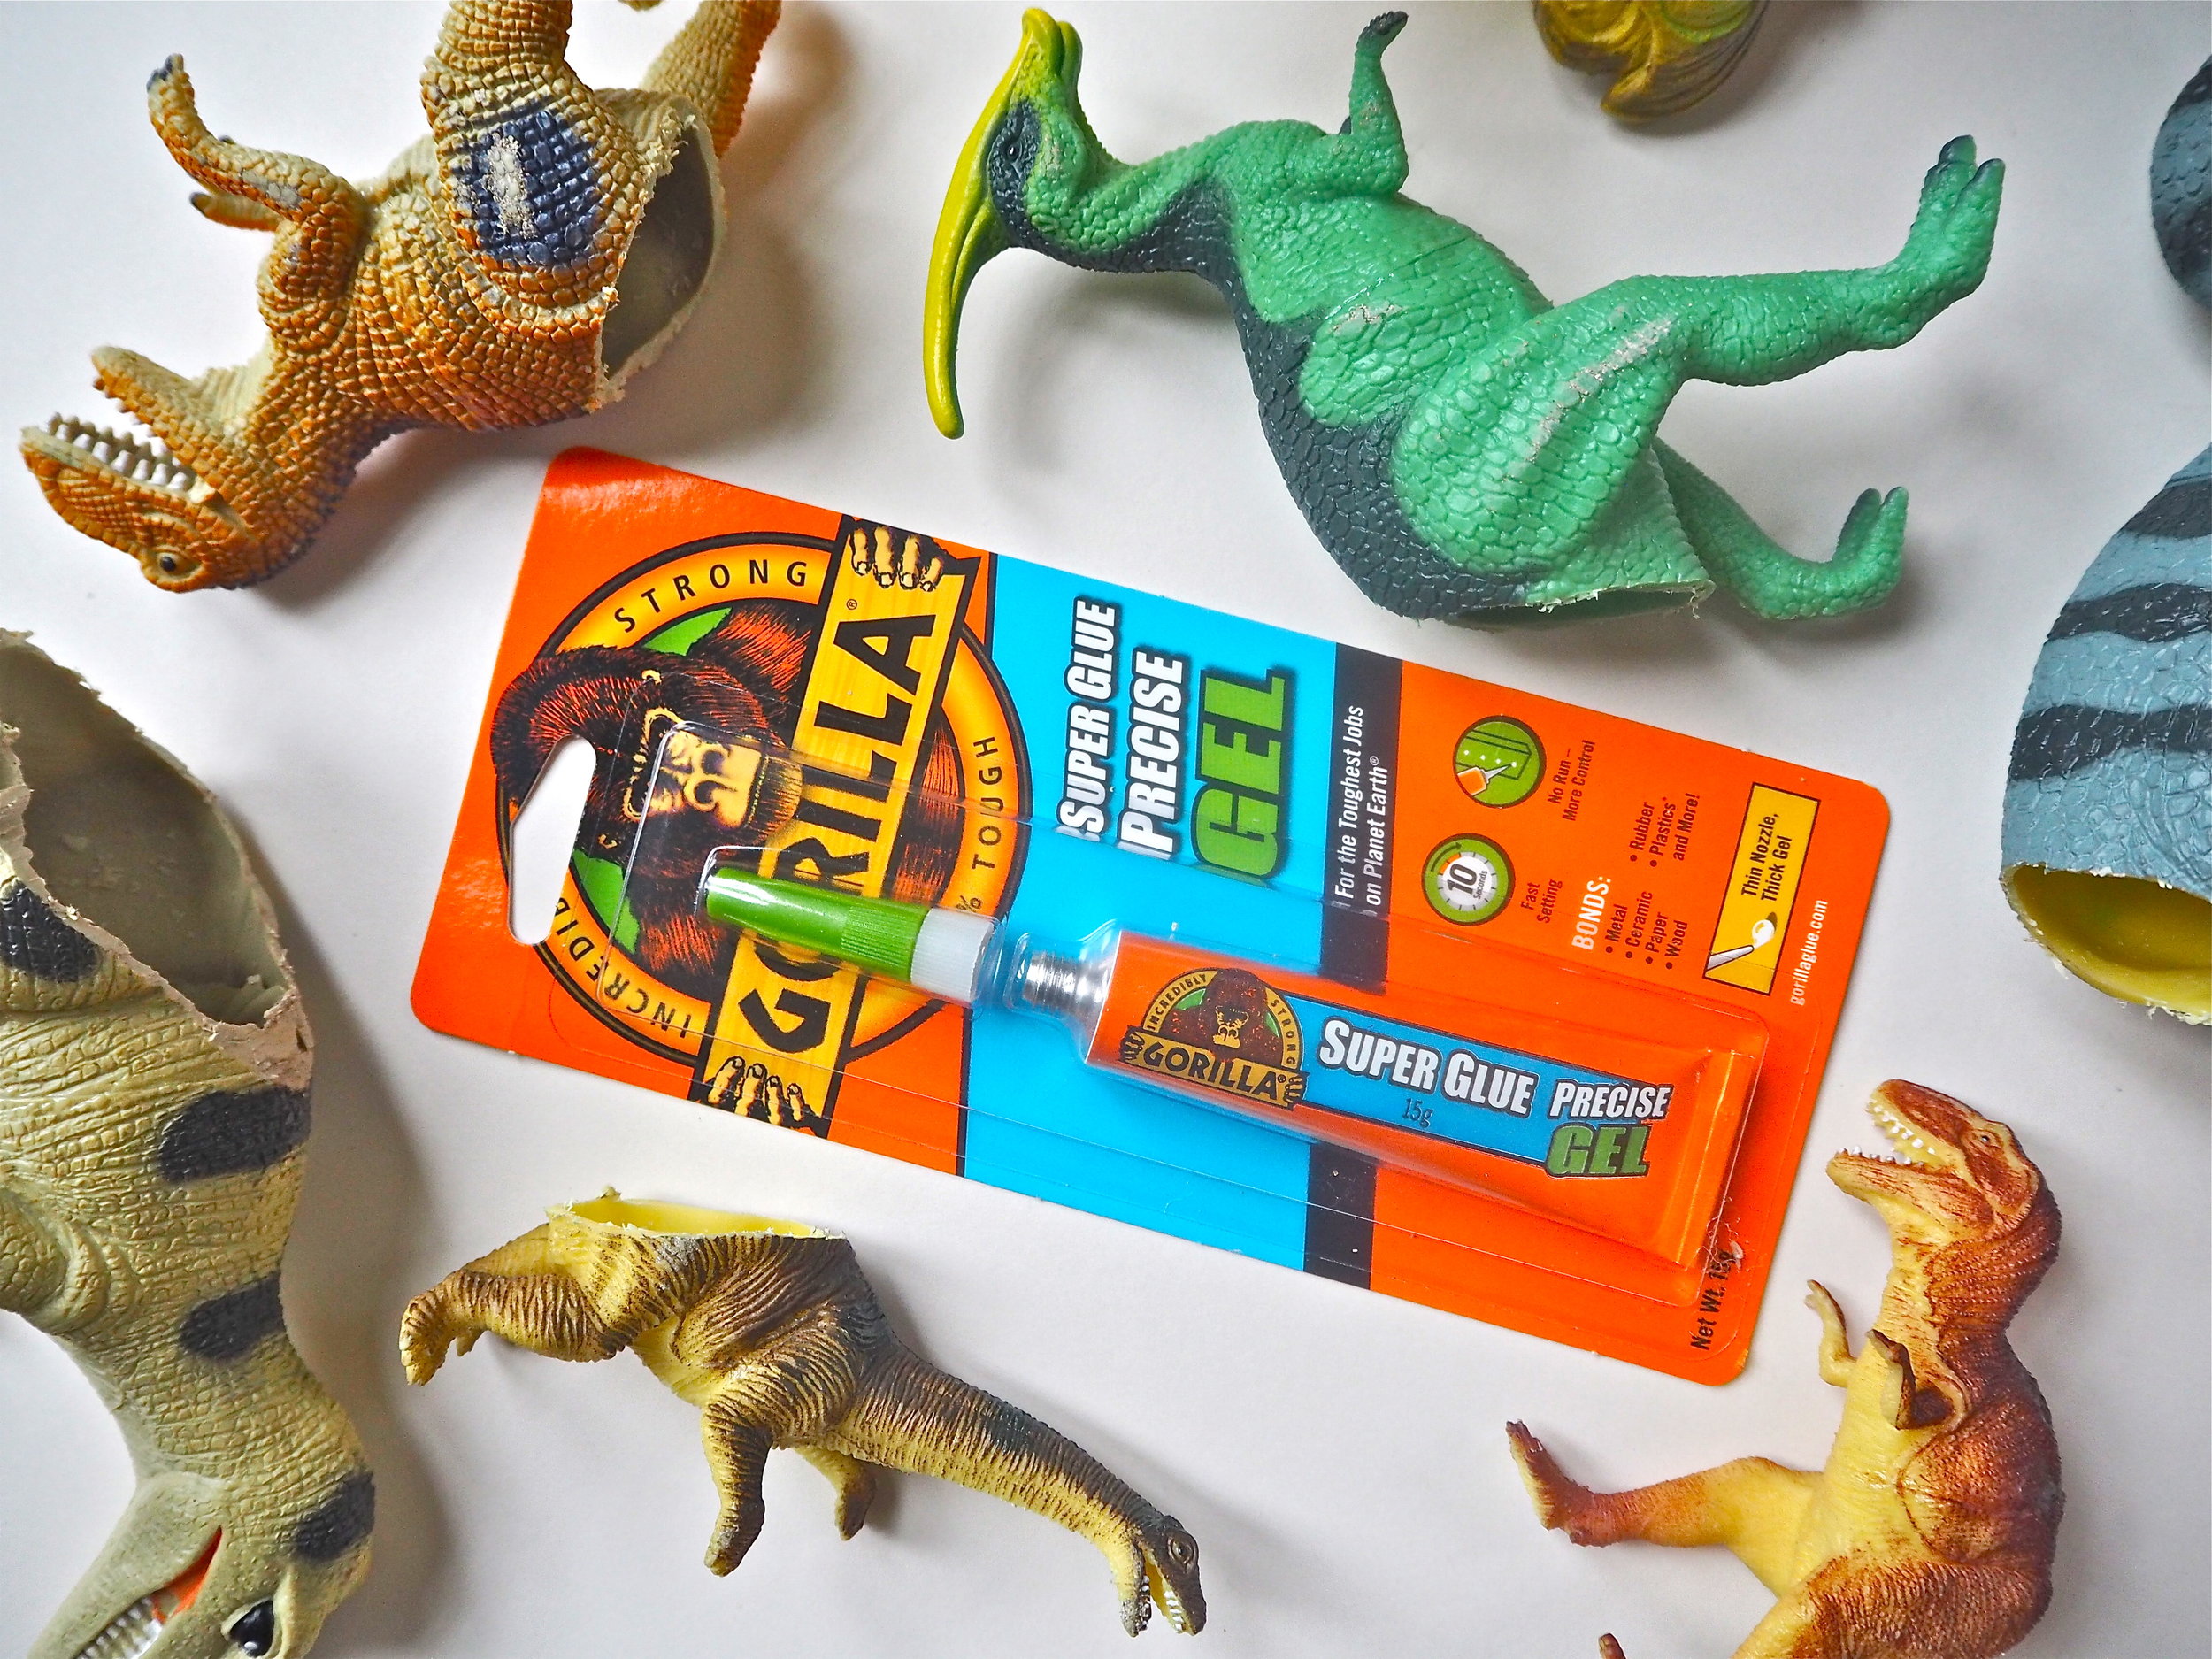
Once you’ve cut your dinosaurs you’ll find that in most instances your dinosaur is hollow and the sawed plastic rim you need to glue onto your mount inside the frame is quite thin. This is why I chose to use Gorilla Super Glue Precise Gel for this DIY. The gel can be applied in a very precise manner with the thin nozzle. As the glue is a thick gel it will not run, meaning that I can apply it to the cut outline easily without mess. The Precise Gel bonds metal, wood, ceramics, paper, rubber and plastics*. As my dinosaurs are a mix of rubber and plastic to be secured to the card, I knew this was the perfect product to use as they would join successfully.
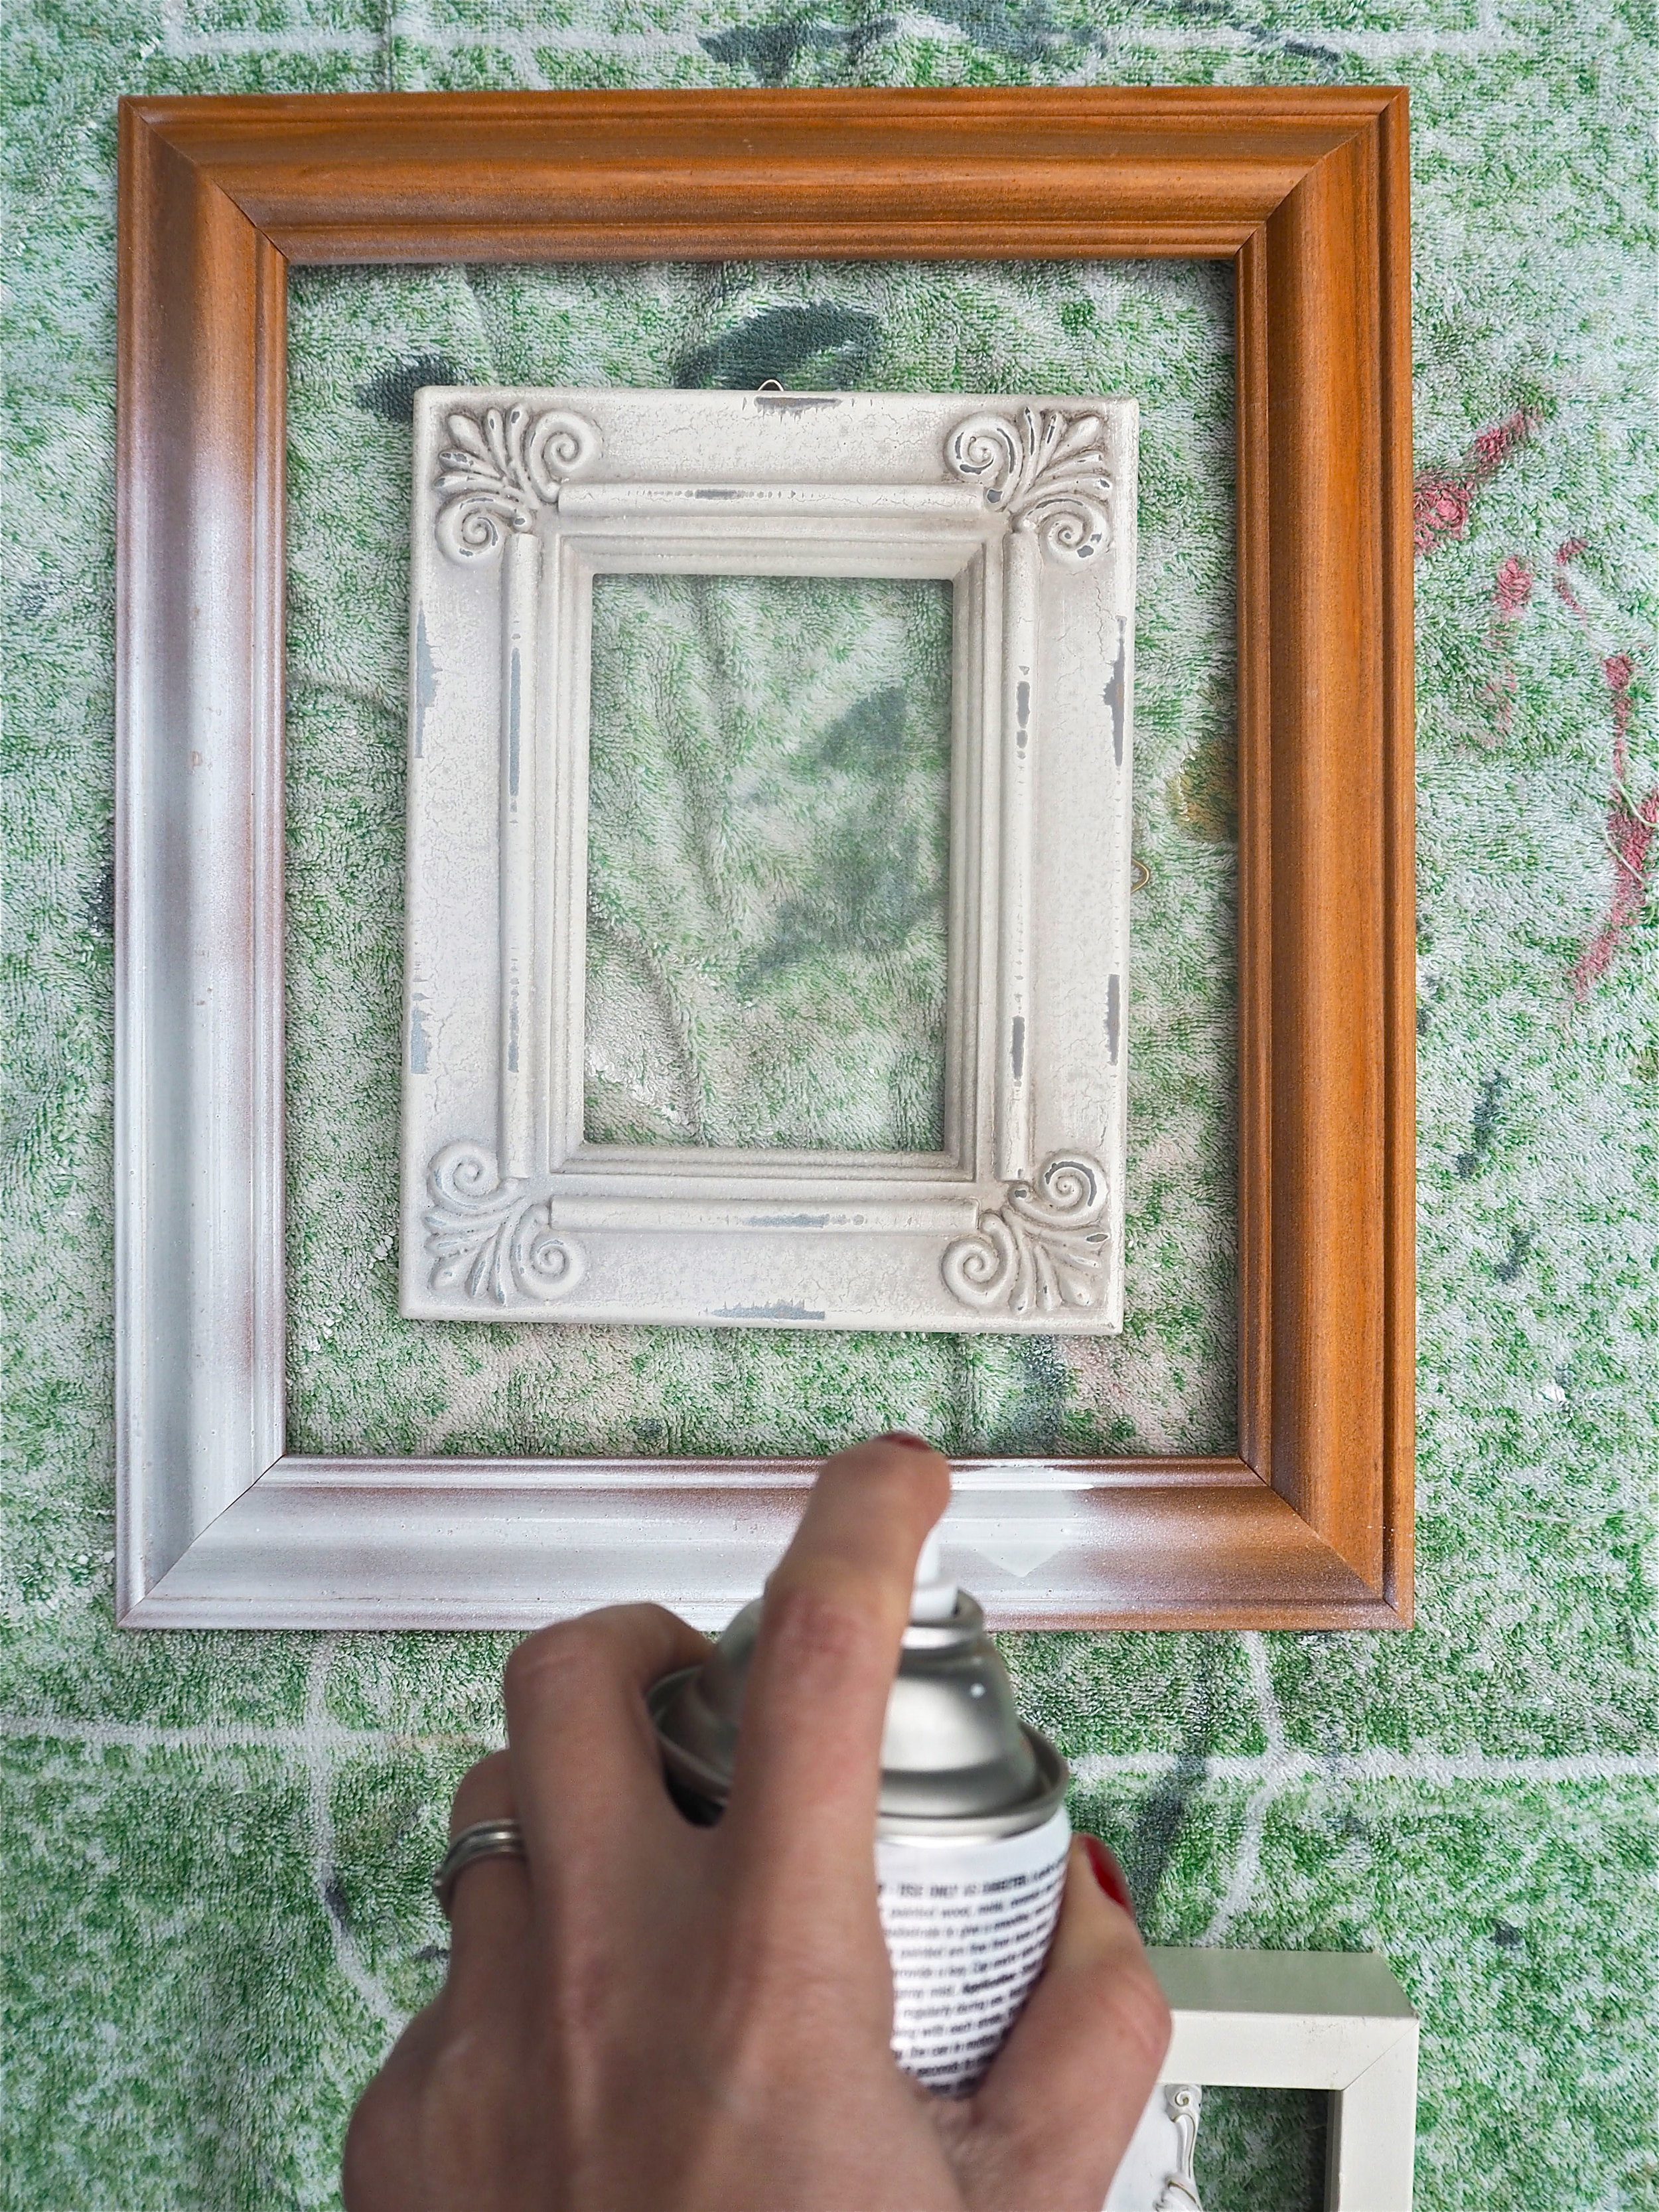
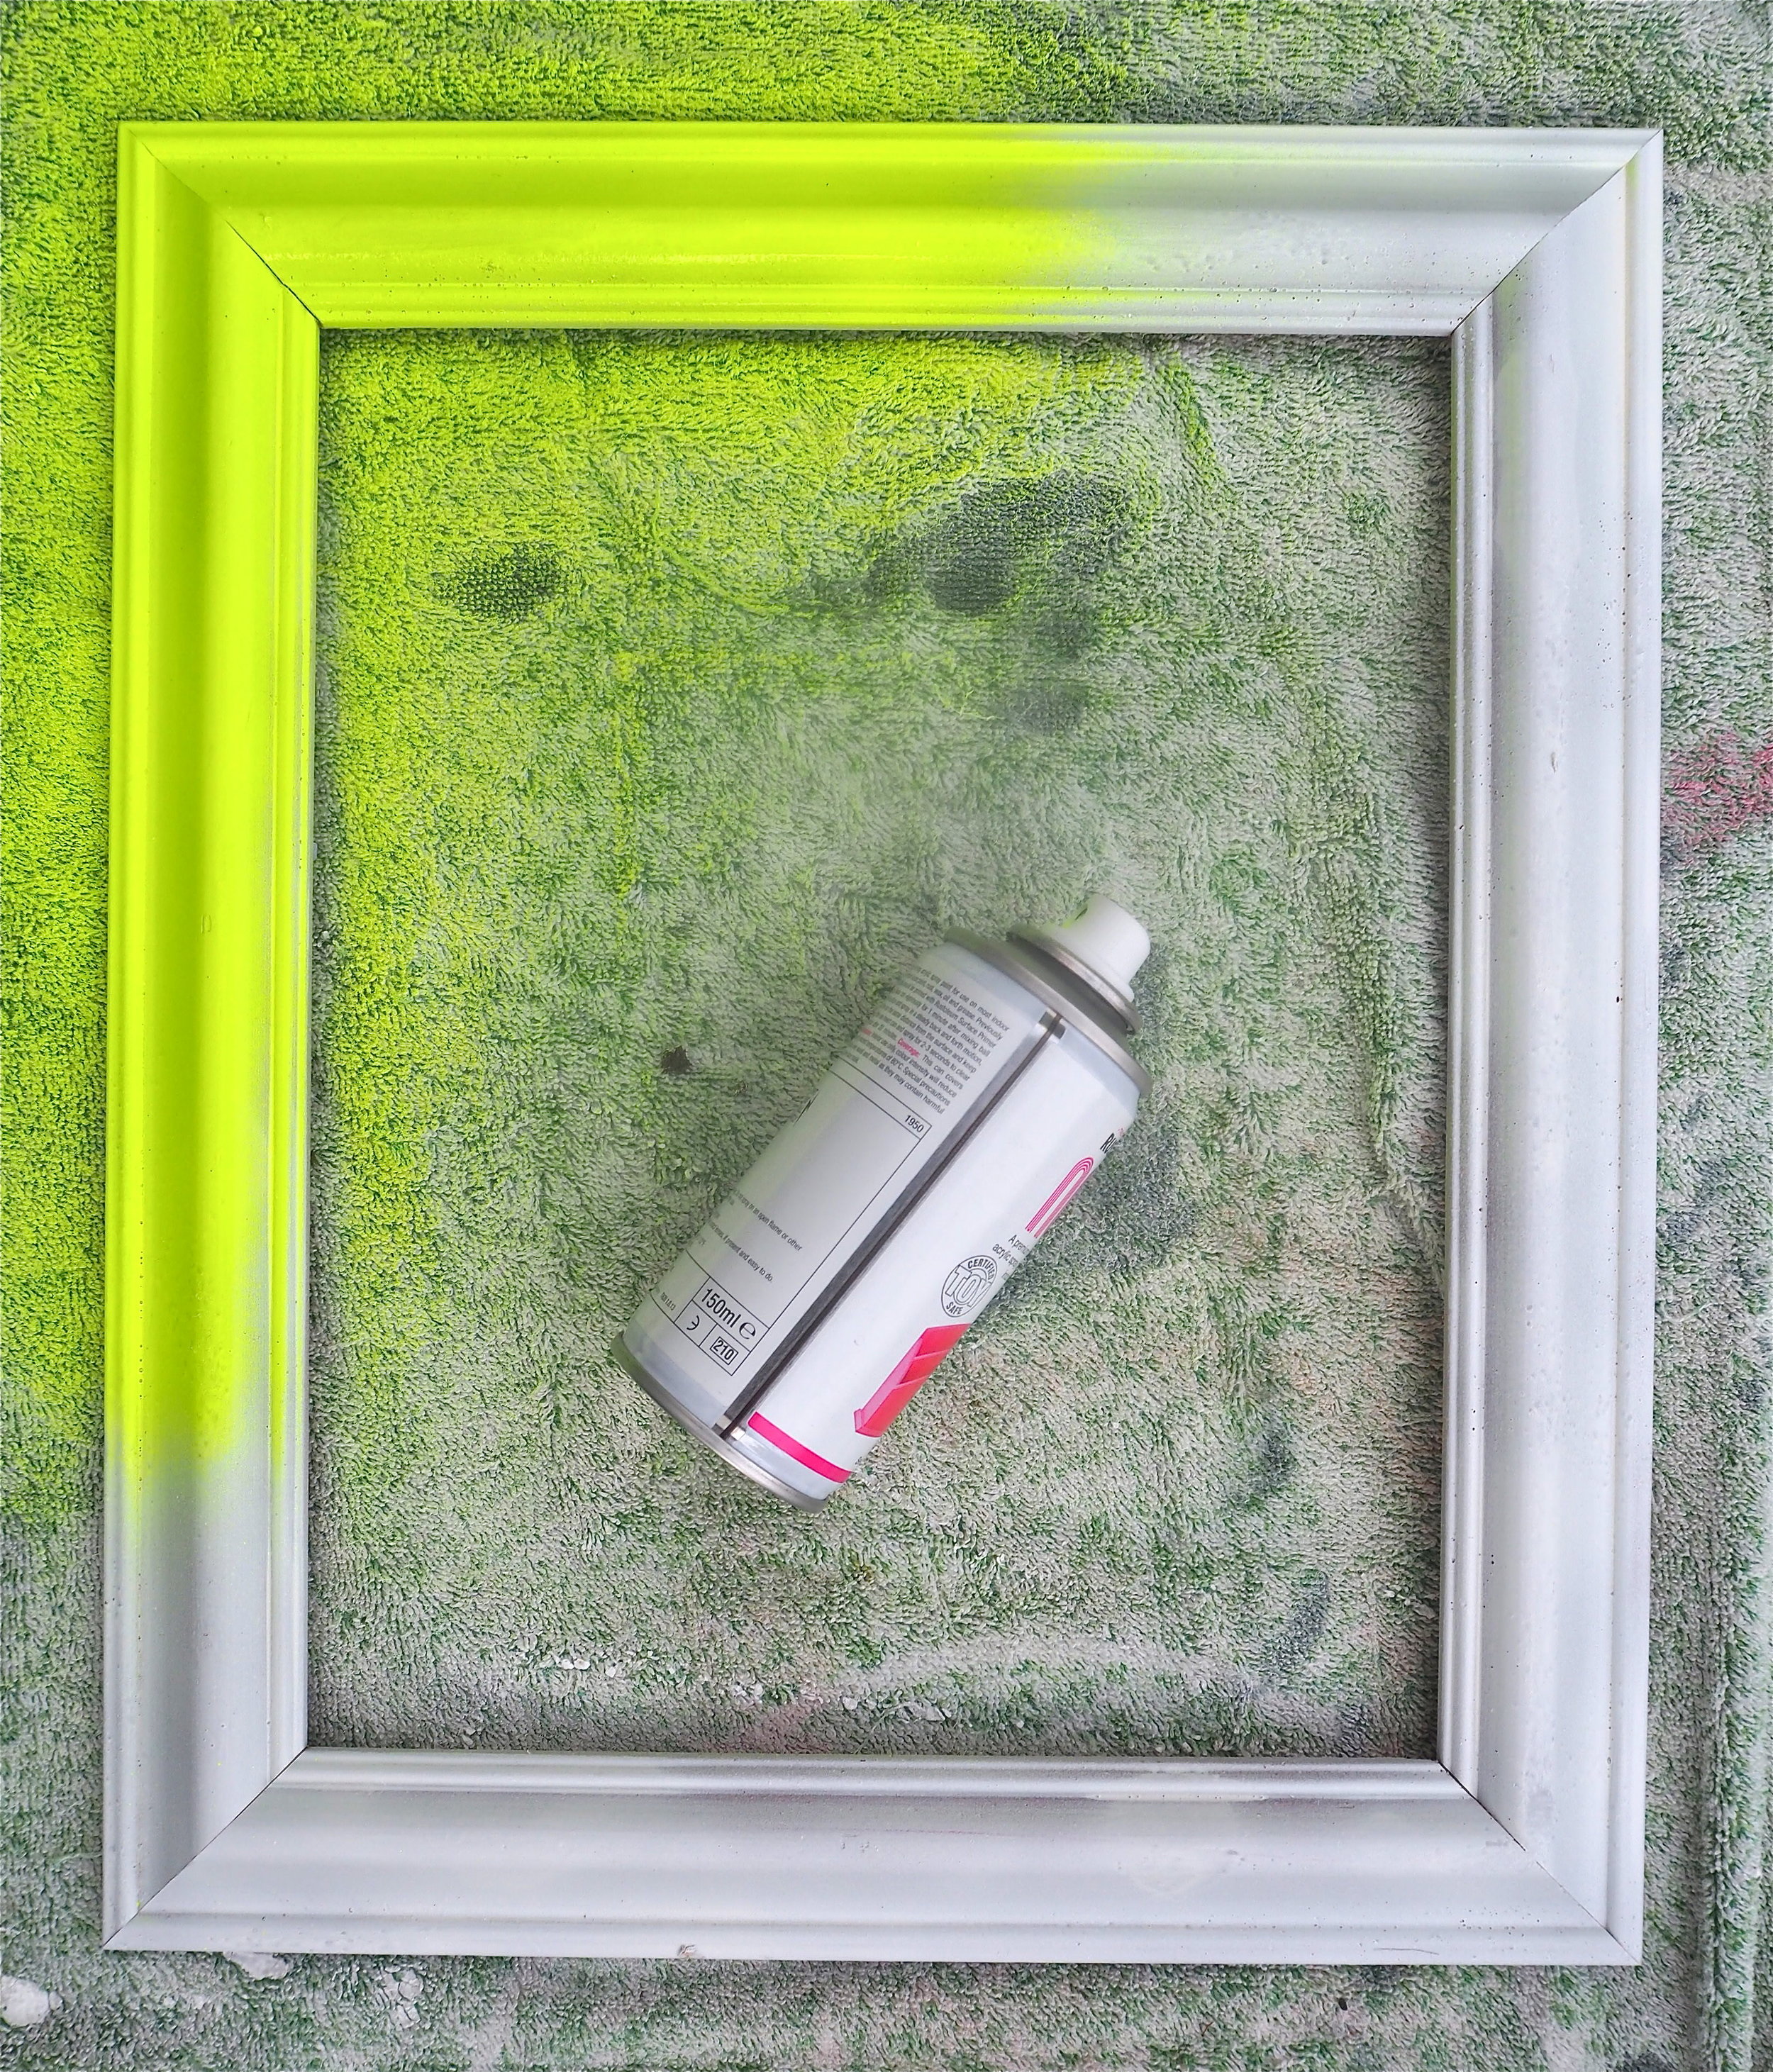
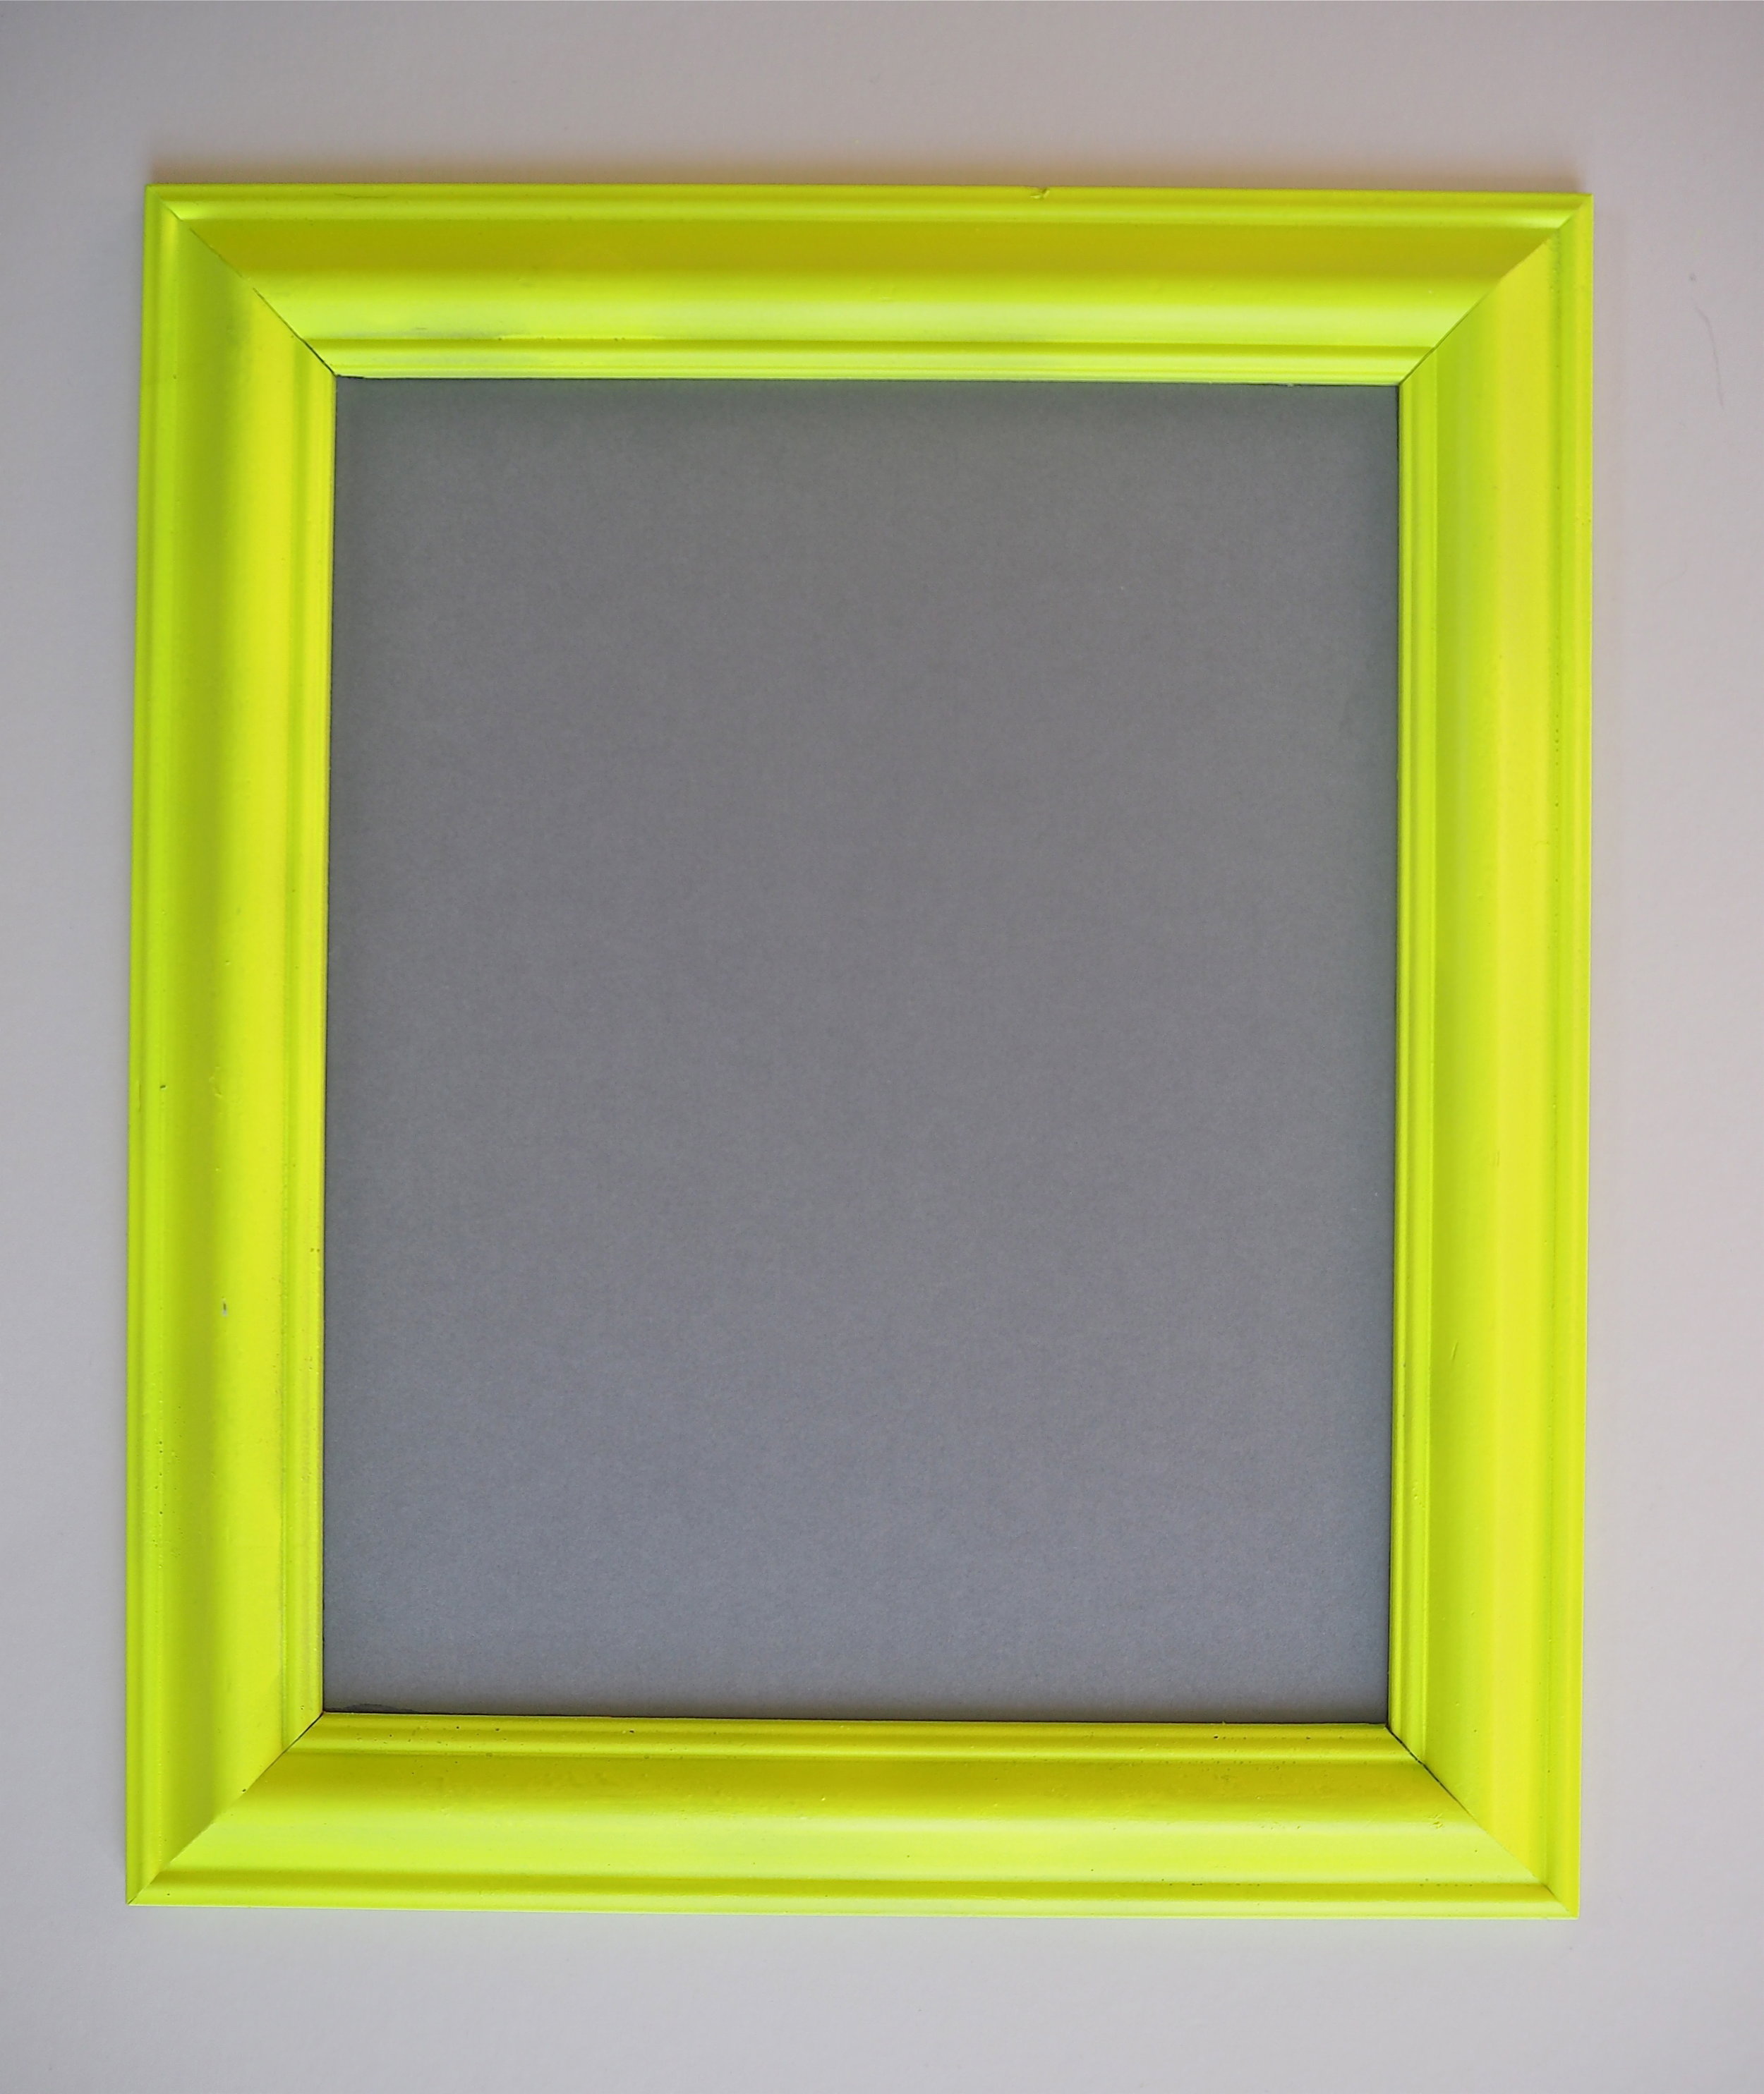
To make my frames less mismatched and more interesting, I sprayed them all in a variety of bold colours. First of all, I cleaned the frames by wiping them down in soapy water so they didn’t have any dirt or grease on them, then once dry I gave them all two coats of primer in spray-paint form. Once the primer was dry, I used the small craft tins of gloss spray paint to add some colour. I gave all the frames two coats, making sure the frames were covered in paint from each angle.
Once the frames were dry I set about creating the mount to sit inside the frame. To create the mounts I purchased a couple of coloured mounting card boards from a craft supply shop. You need your mount to be strong and not bend as a thin piece of card will not take the weight of a plastic dinosaur. If your frame came with glass you may wish to place a piece of coloured paper behind the glass and glue the dinosaur directly on top of the glass. Both the mounting card and glass options work well for this DIY.
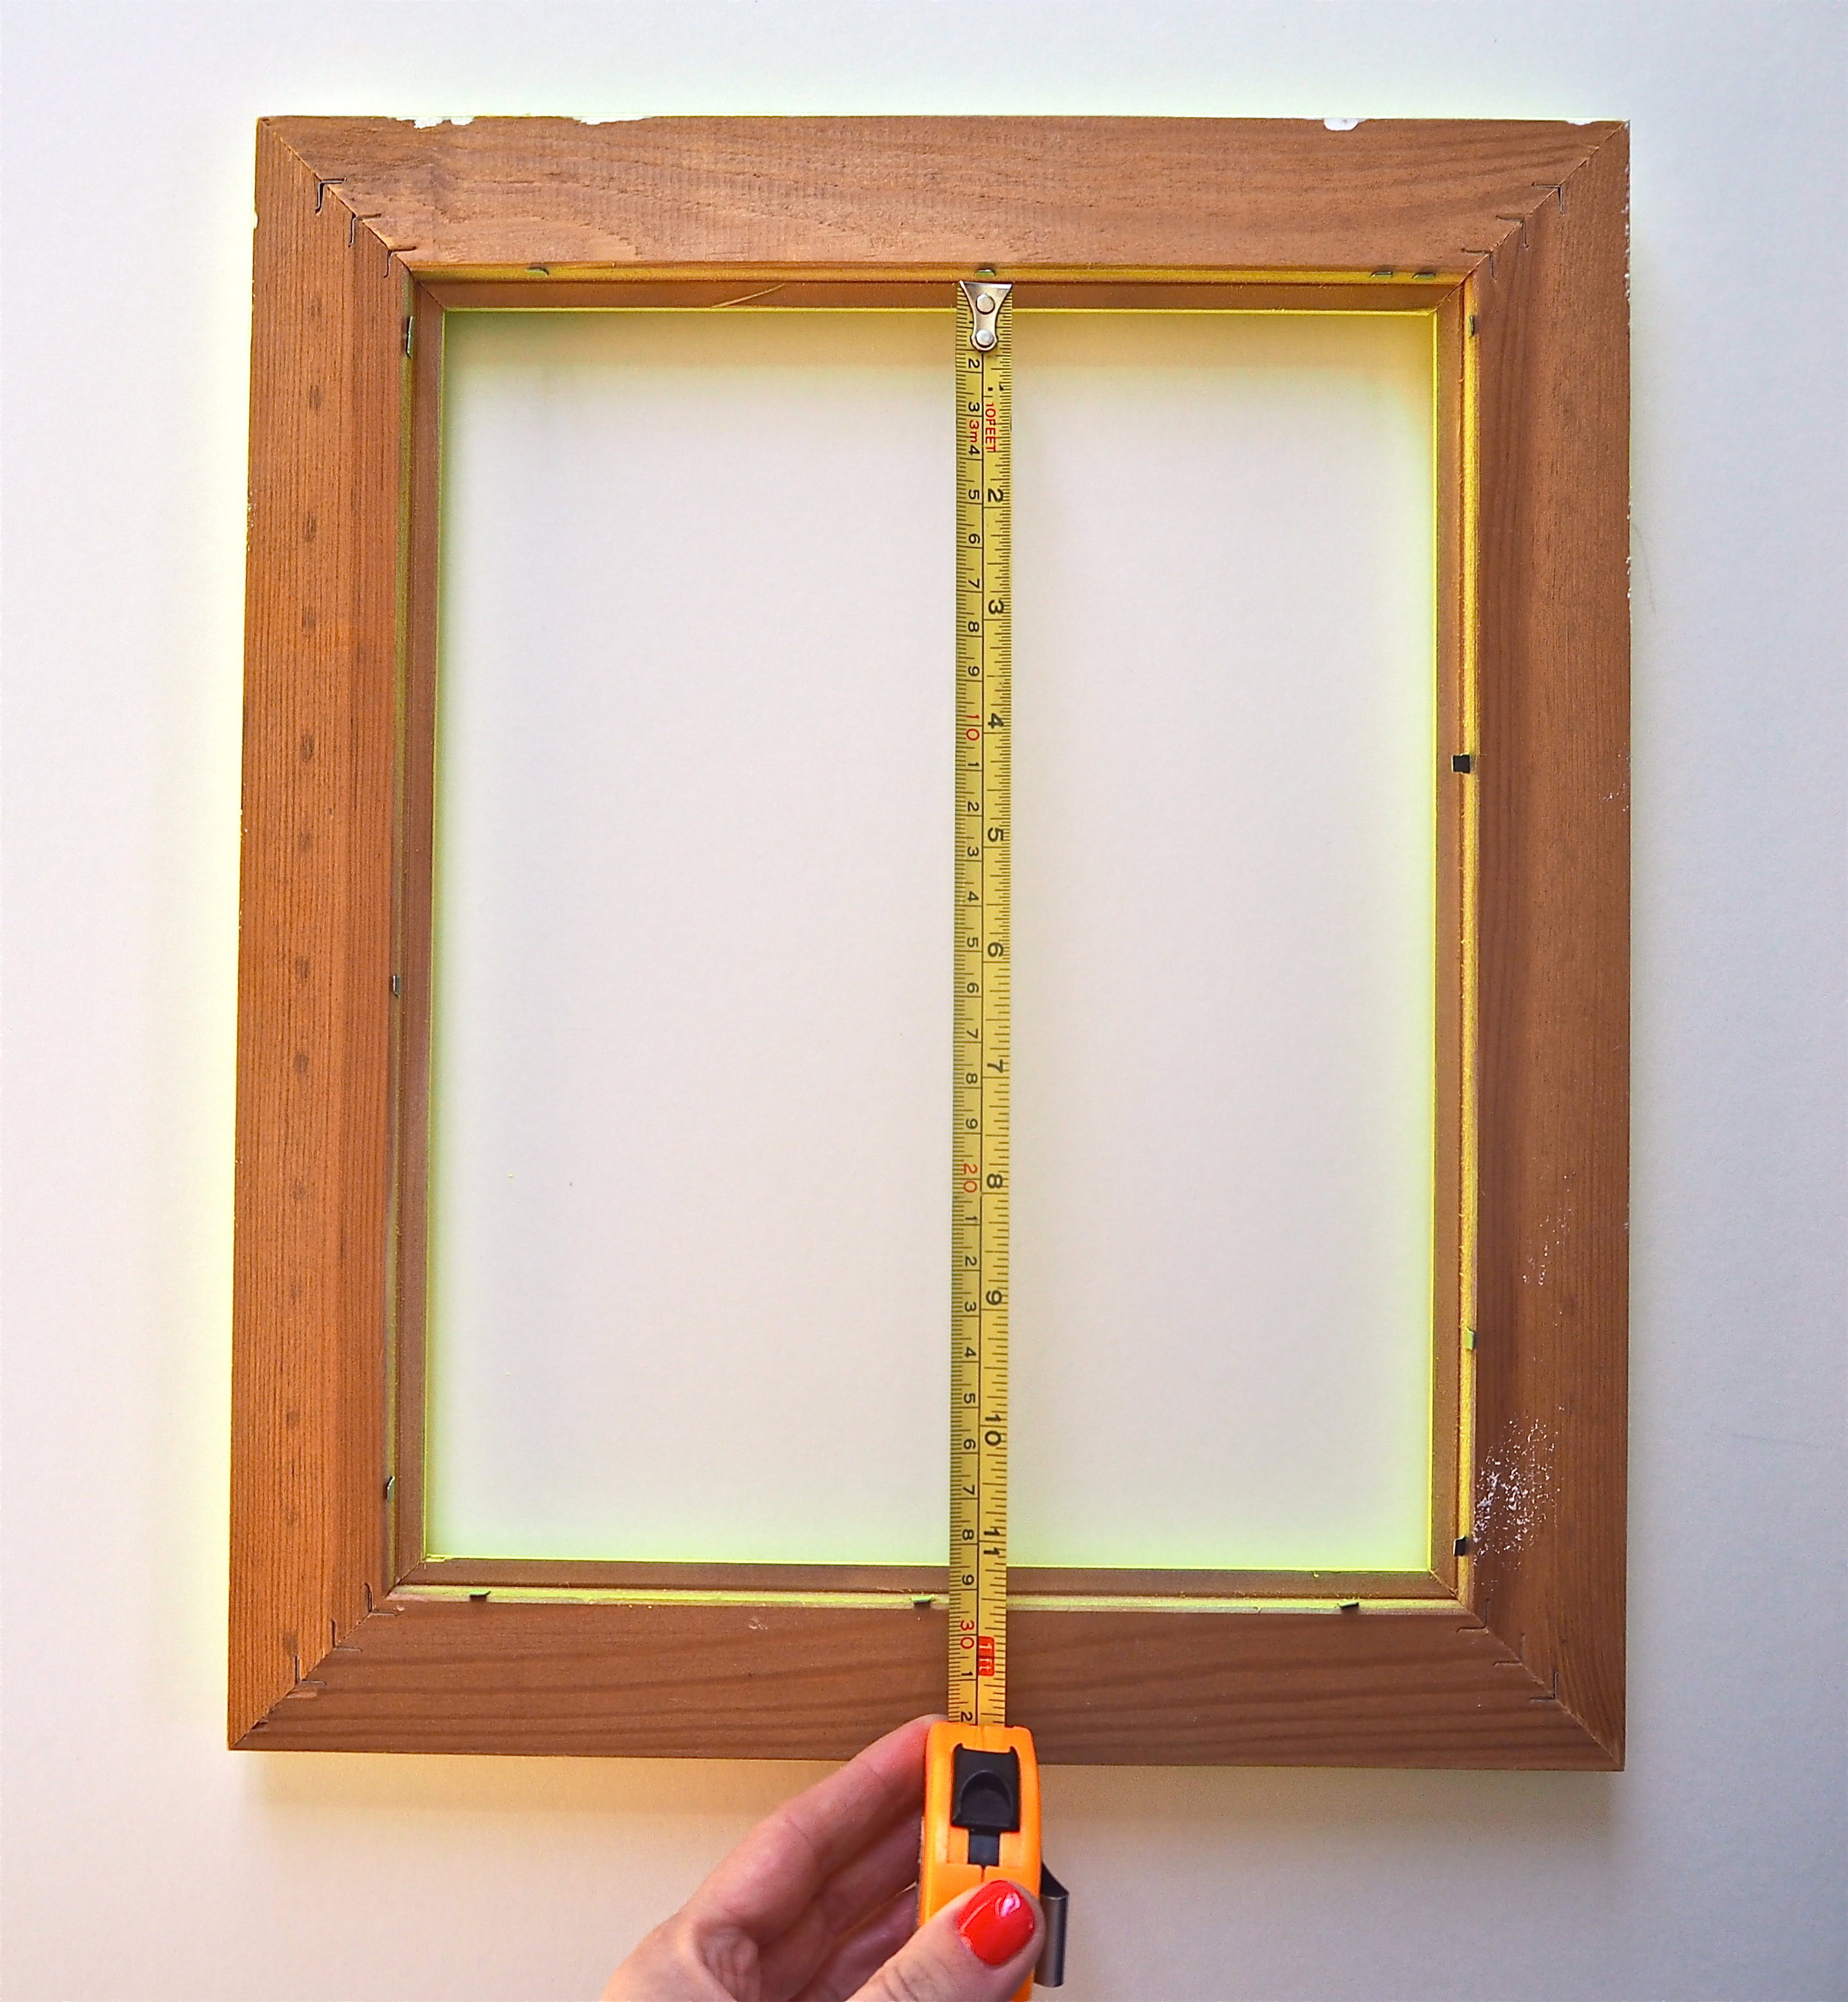
To create the mount I measured the inside of the frame or drew around the glass that it came with. I then cut out my mount with scissors and made sure it fitted my frame and could be easily inserted. Once I was happy with the mount size I applied a small amount of Gorilla Super Glue Precise Gel to the inside of the frame and stuck my card down so it did not shift or move about inside the frame and was completely secure.

Once I was happy with what dinosaur suited a particular frame, I applied Gorilla Super Glue Precise Gel to the thin rim of the dinosaur innard. As the application is so exact, I did not have to worry about the glue spilling over the edges of the dinosaur and marking the mounting card.
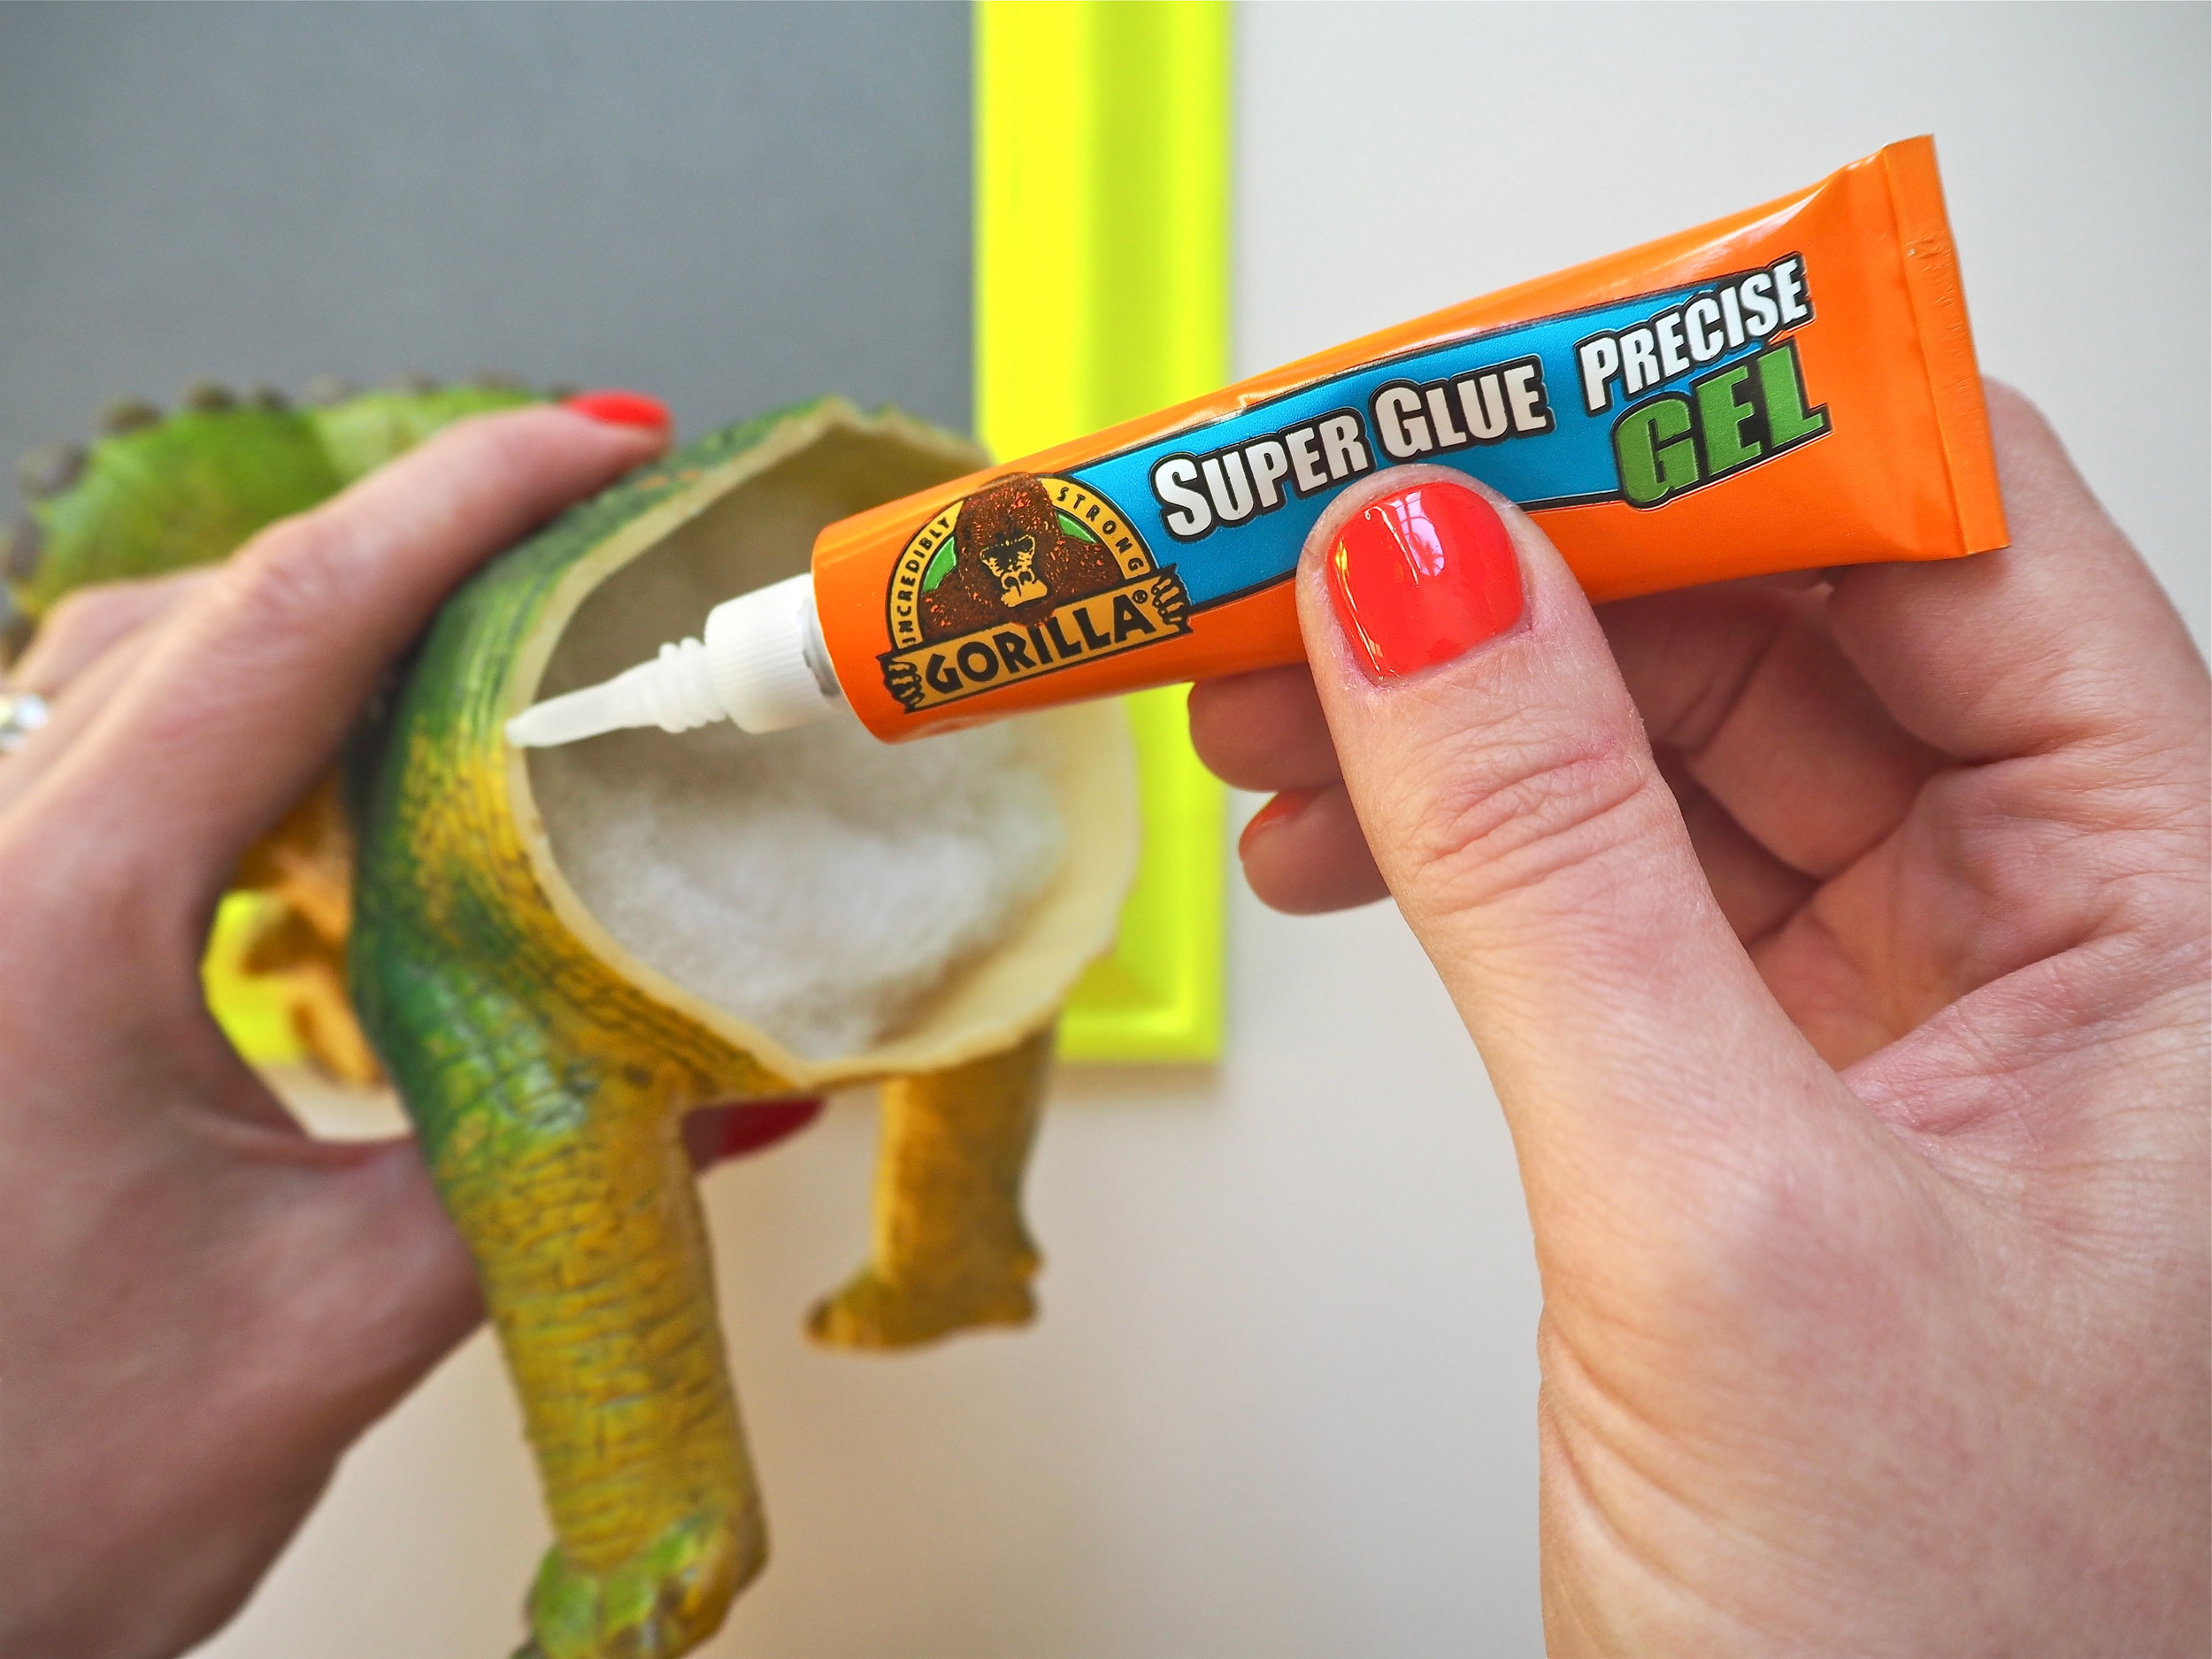
I carefully positioned the dinosaur front where I wanted it to sit in the middle of the frame and held it in place for 10-45 seconds in order for the glue to adhere to each surface. I then allowed my dinosaur art to cure for 24 hours until the glue had completely set.


Gorilla Heavy Duty Mounting Tape provides a quick and easy solution to provide a strong and secure, permanent bond to a surface. I simply cut the tape to size with scissors, applied it to the back of the frame vertically (Gorilla recommend this), removed the protective liner then pressed the frame firmly on the wall for a few seconds to grip.


My son loves his 3D dinosaur gallery wall and it makes a real statement as part of his bedroom decor. As Gorilla Glue can take real impact, I also know the dinosaurs can take a few knocks without falling off the wall or coming apart.

The 12th - 18th March 2018 is National Home Improvement Week - a week to inspire, celebrate and enable people to improve their own homes. So when DIY & Home Improvement online marketplace Mano Mano asked me to share a great DIY that people could easily copy, I instantly thought of the nursery project that I had recently carried out for one of my clients.
Read MoreA really fun styling job I have completed recently was to transform a blank room into a bedroom for two very much adored grandchildren for when they come to stay. The boys, aged 6 and 5, are both pretty cool kids, so I wanted to design them a room that was a bit trendy and they wouldn't grow out of too fast. The bedroom as it stood was completely empty, so I needed to buy everything for the boys ready for when they were due to stay in a few weeks time. This included beds, mattresses, bedding, lights and window treatments. As this room was not going to be a room in use everyday, the aim was to create something within a reasonably low budget. To achieve this, I sourced everything for the room from homeware departments in supermarkets, Ikea, and the cheaper end of the high street.
Read More