How to DIY a Rainbow Mural

The 12th - 18th March 2018 is National Home Improvement Week: a week to inspire, celebrate and enable people to improve their own homes. So, when DIY & Home Improvement online marketplace Mano Mano asked me to share a great DIY that people could easily copy, I instantly thought of the nursery project that I had recently carried out for one of my clients.
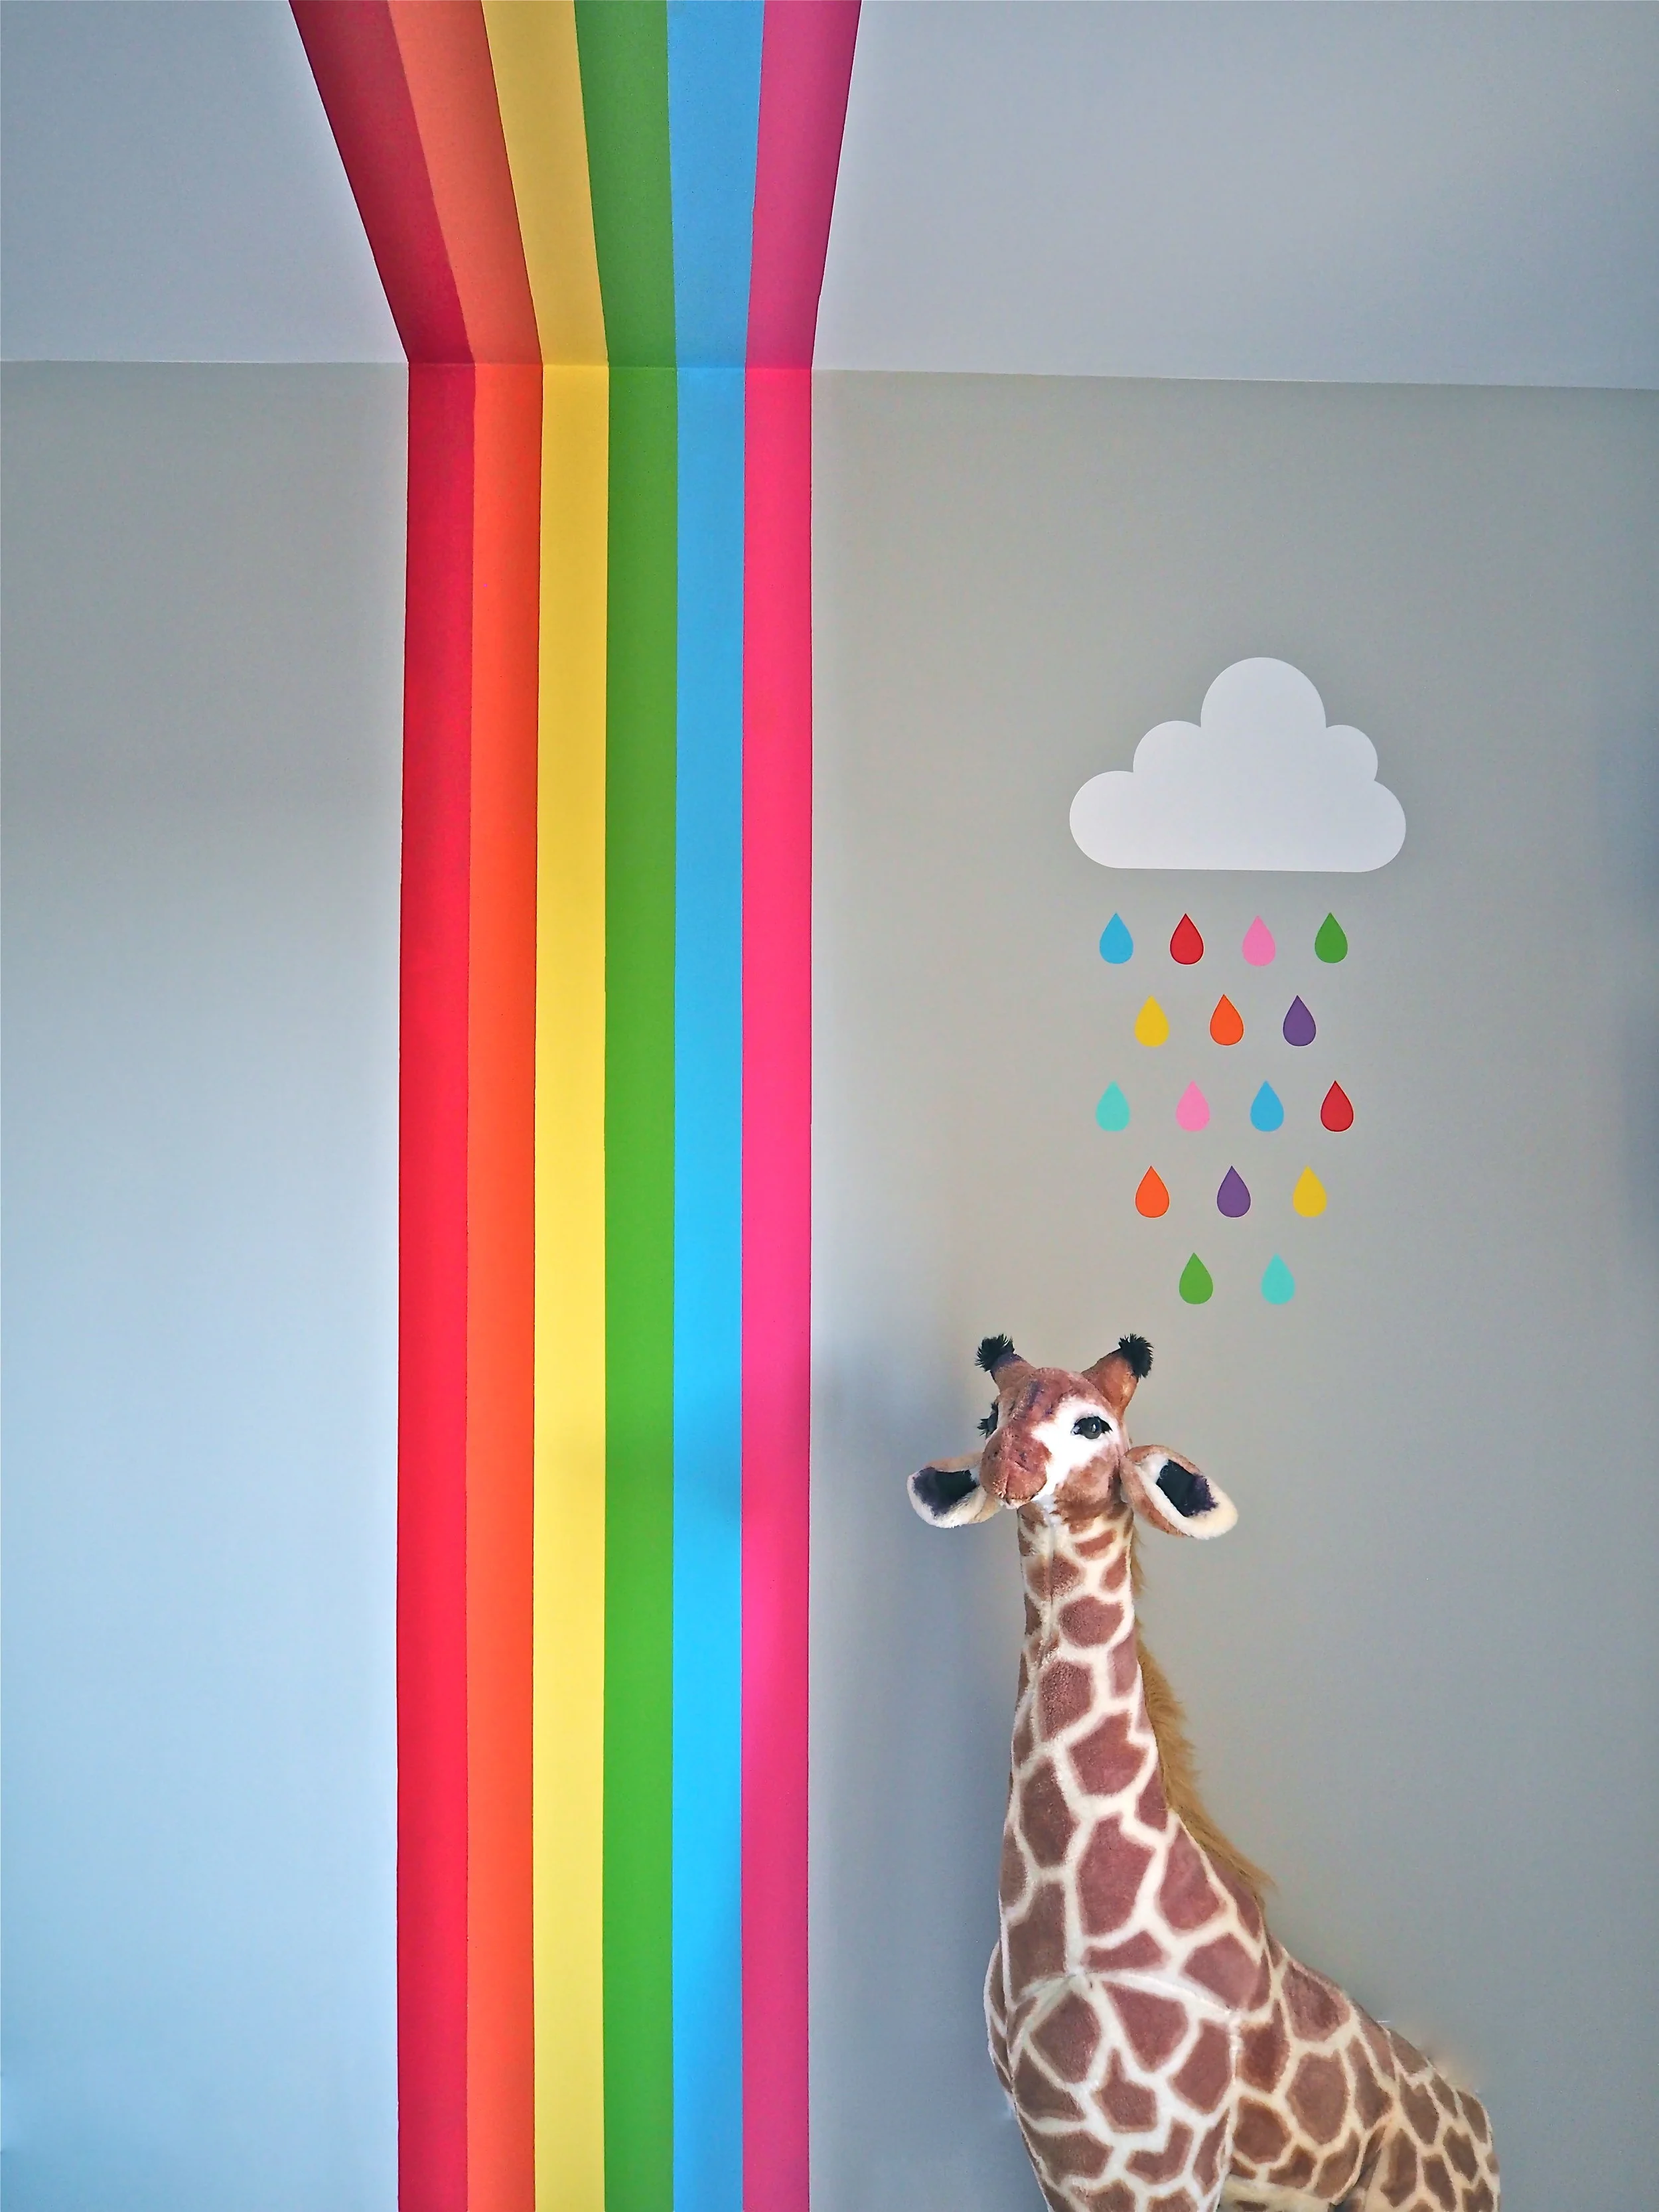
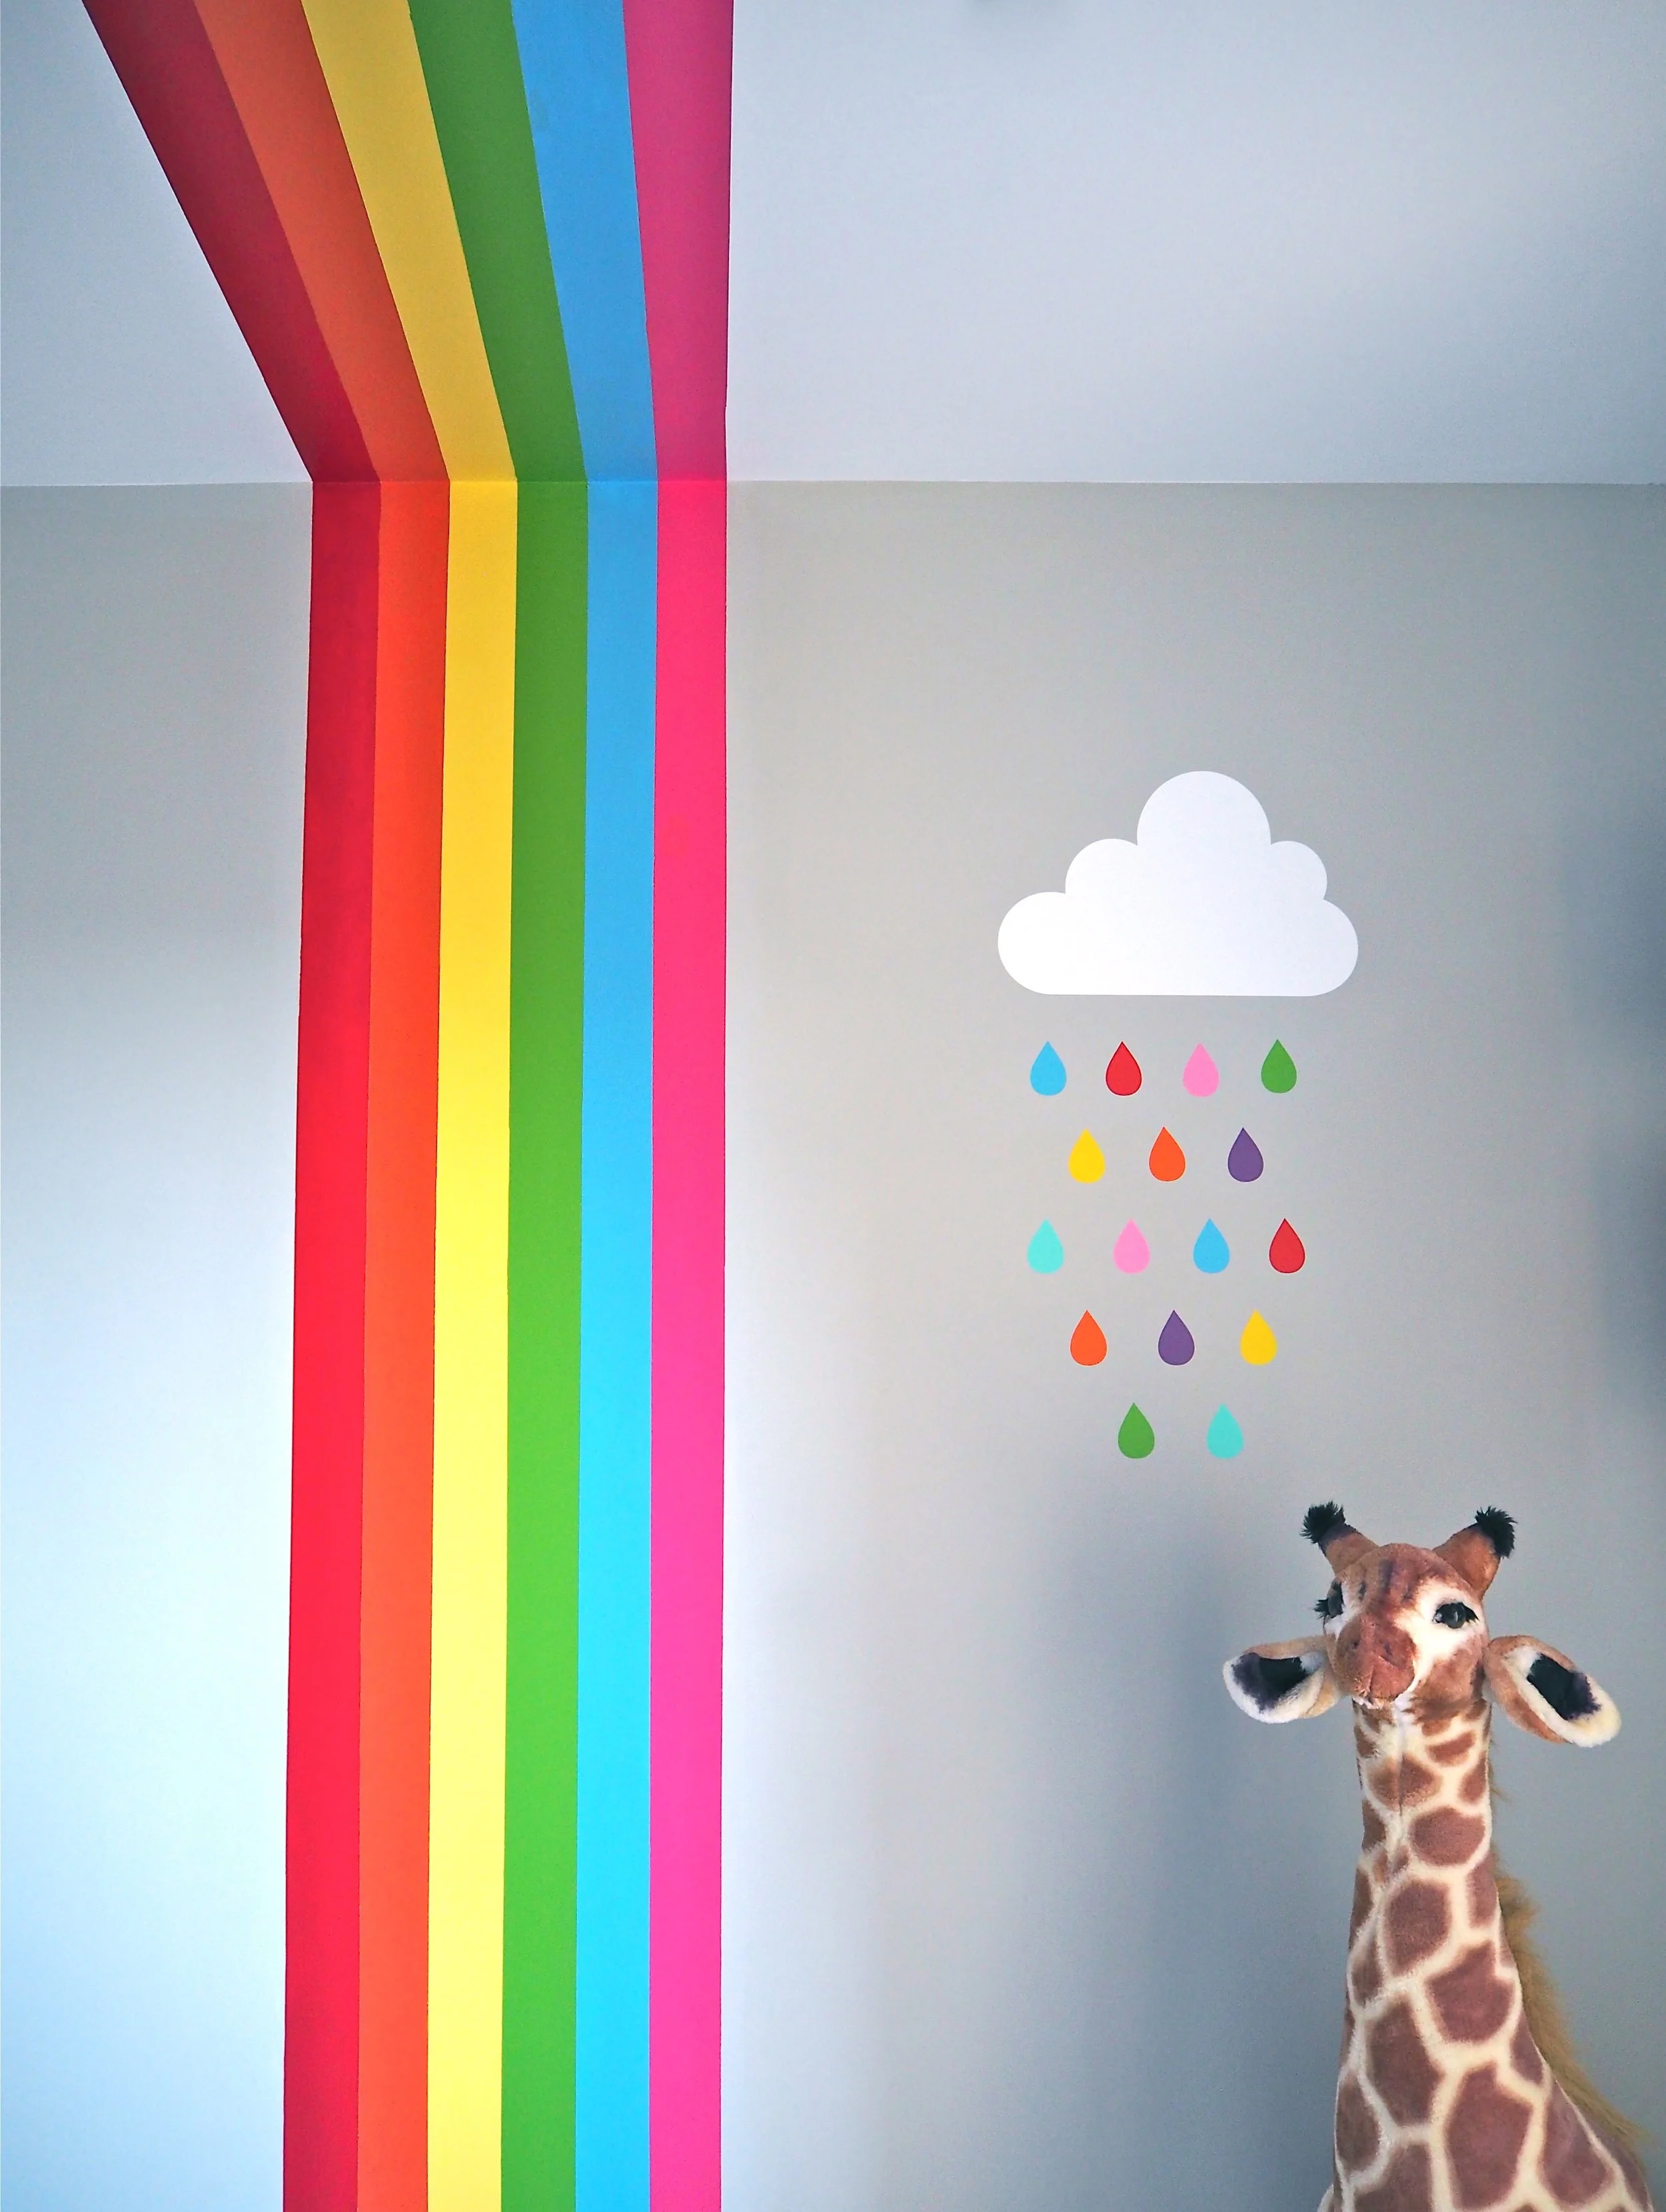
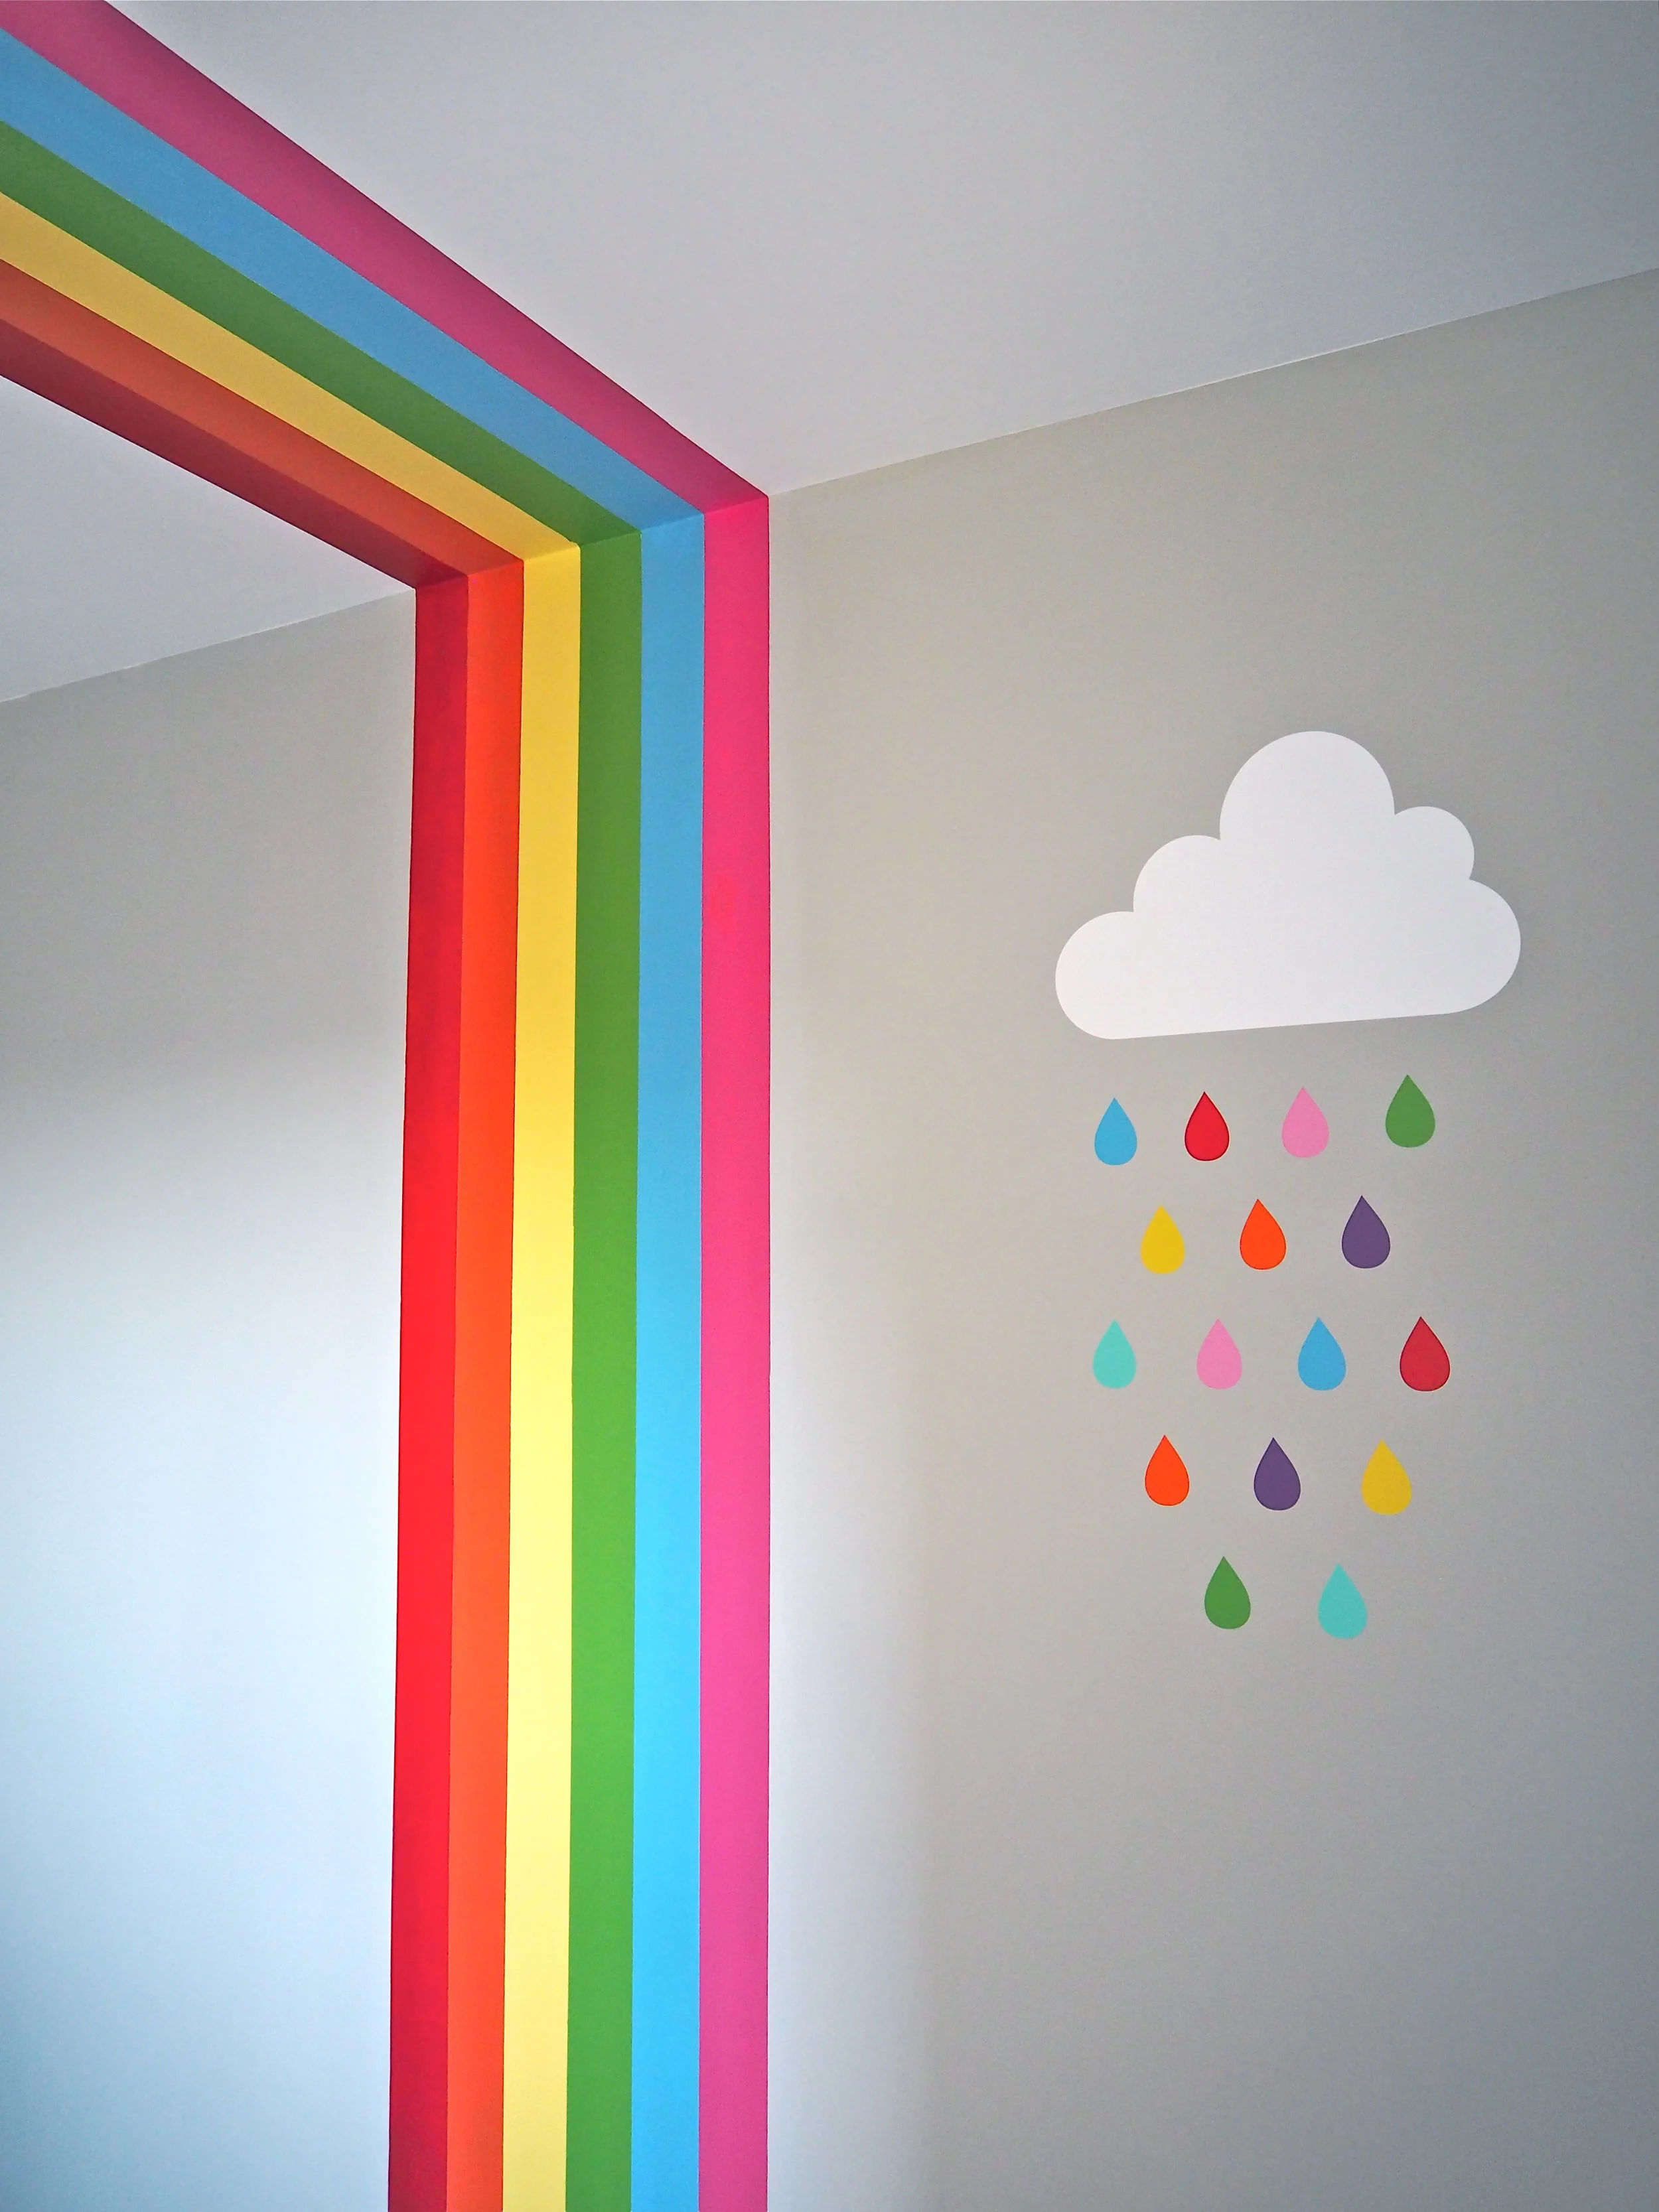
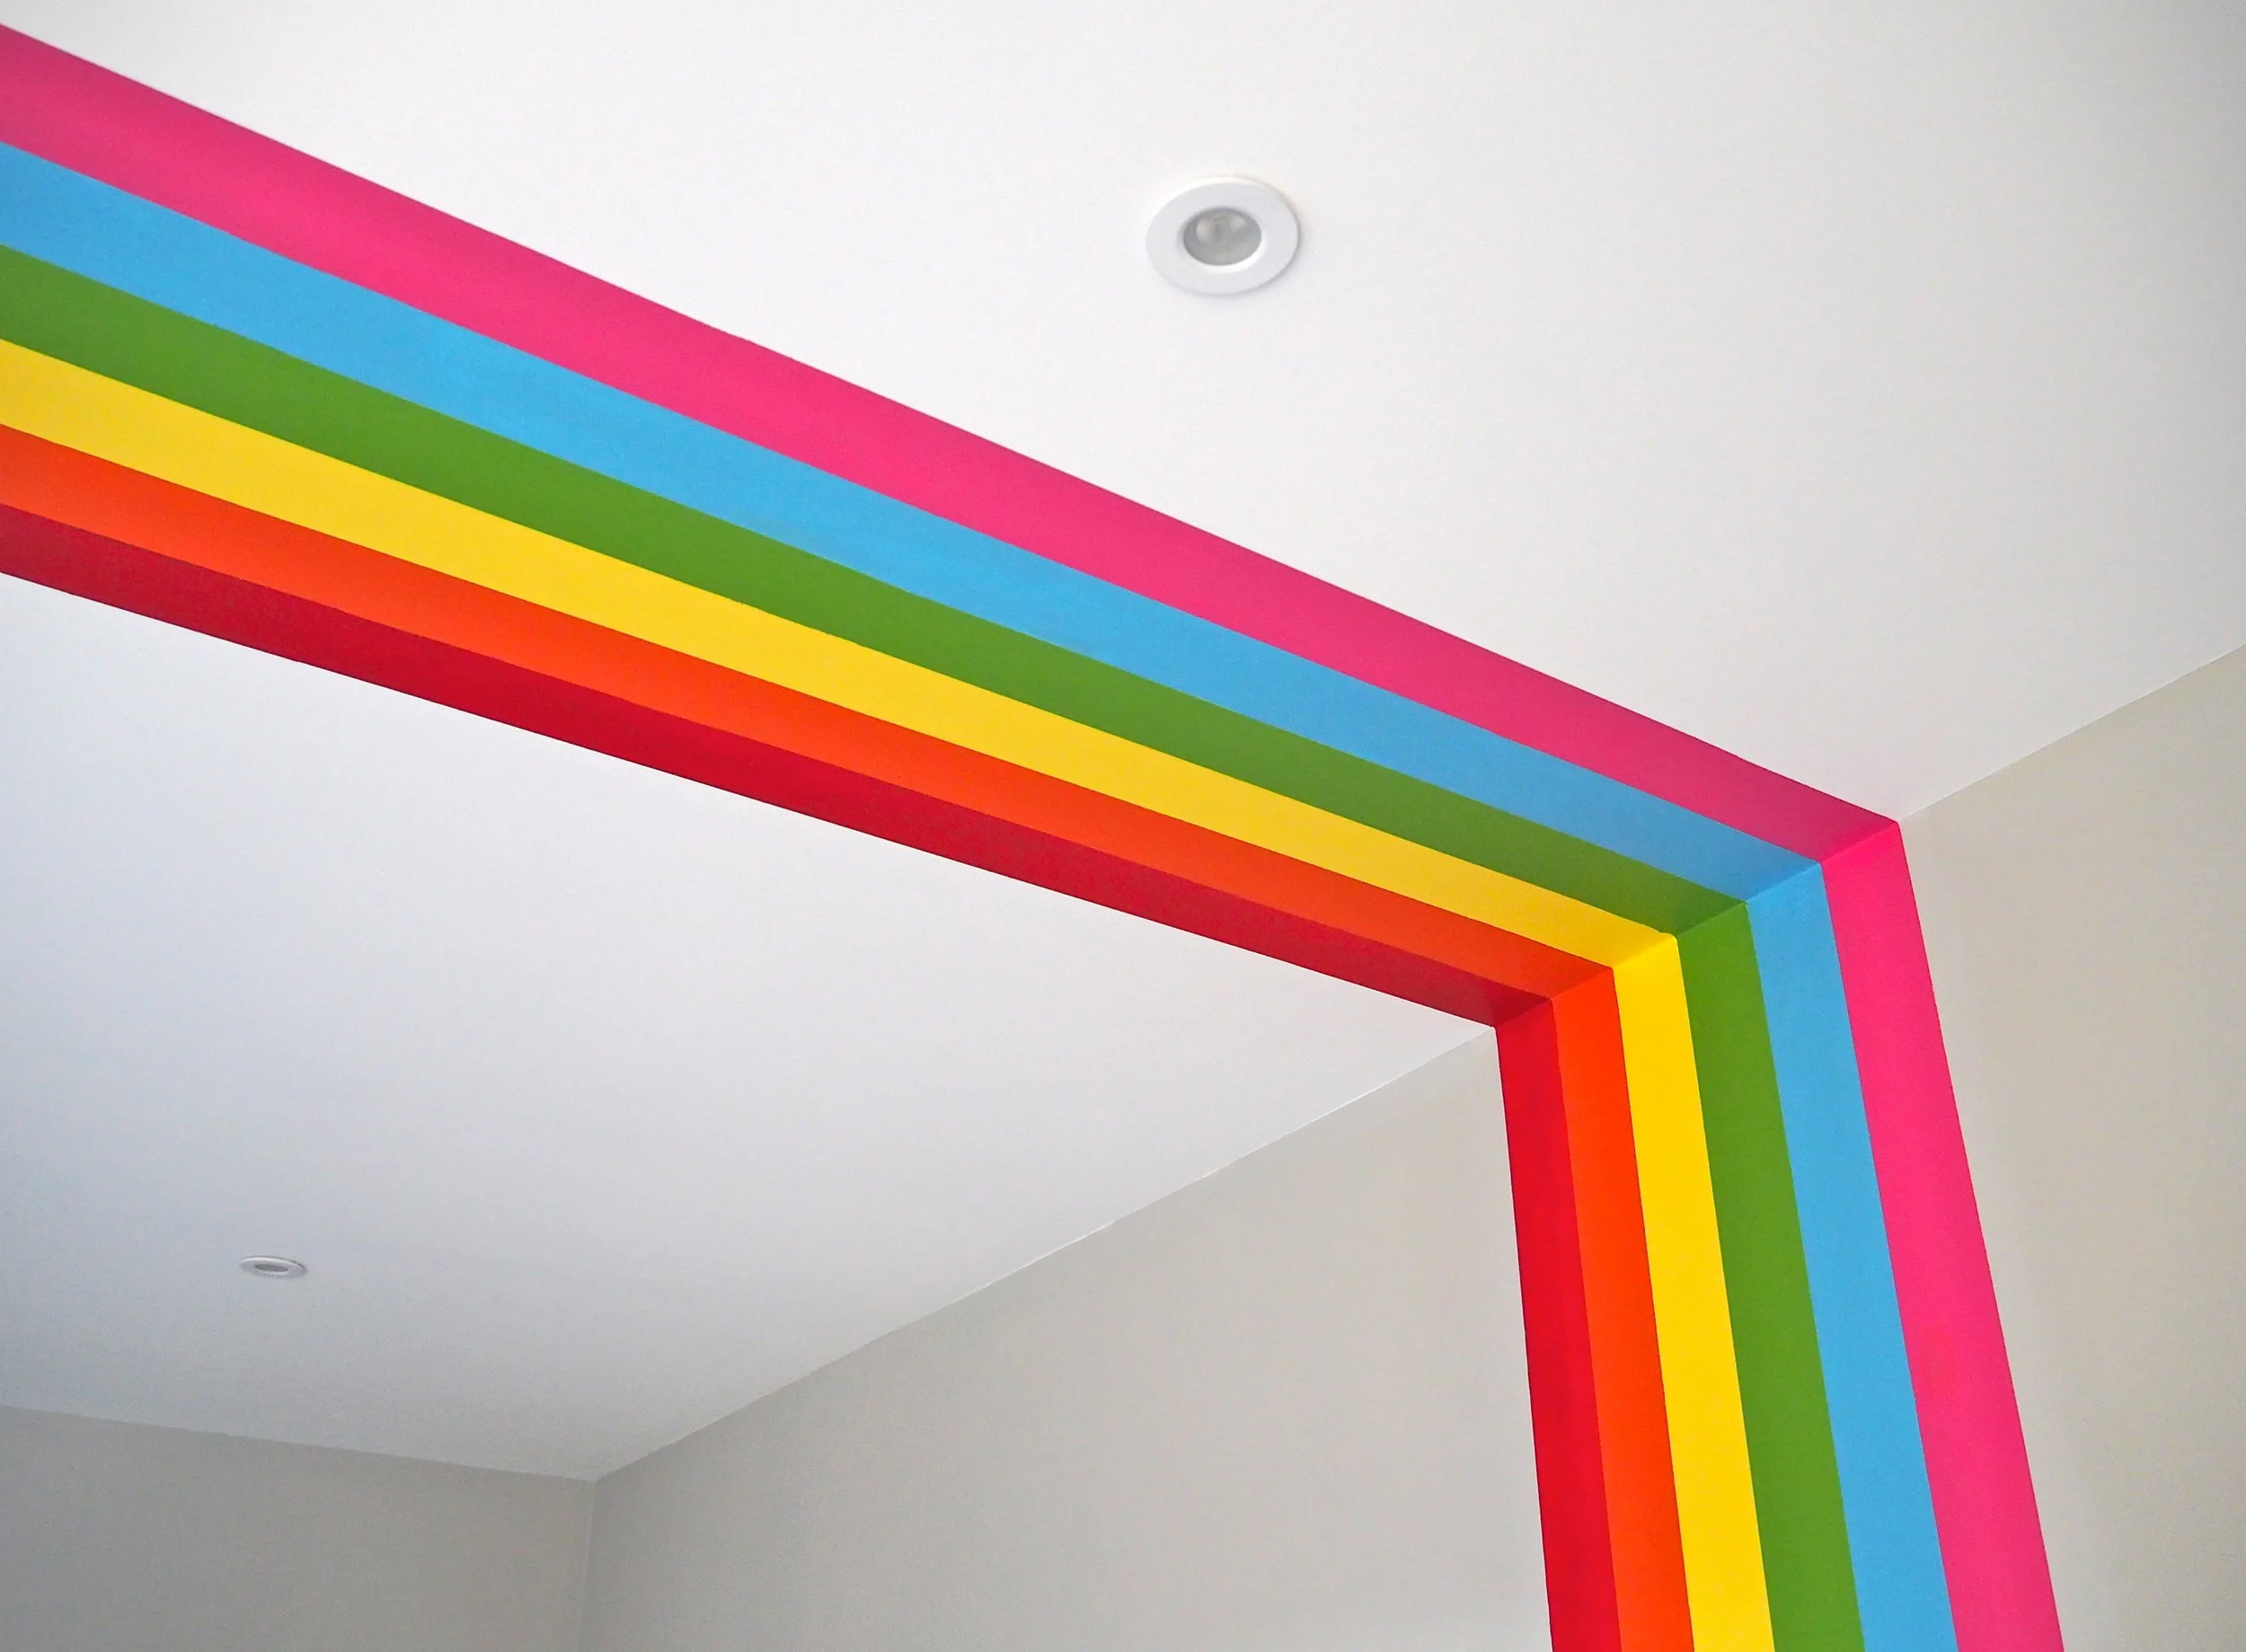
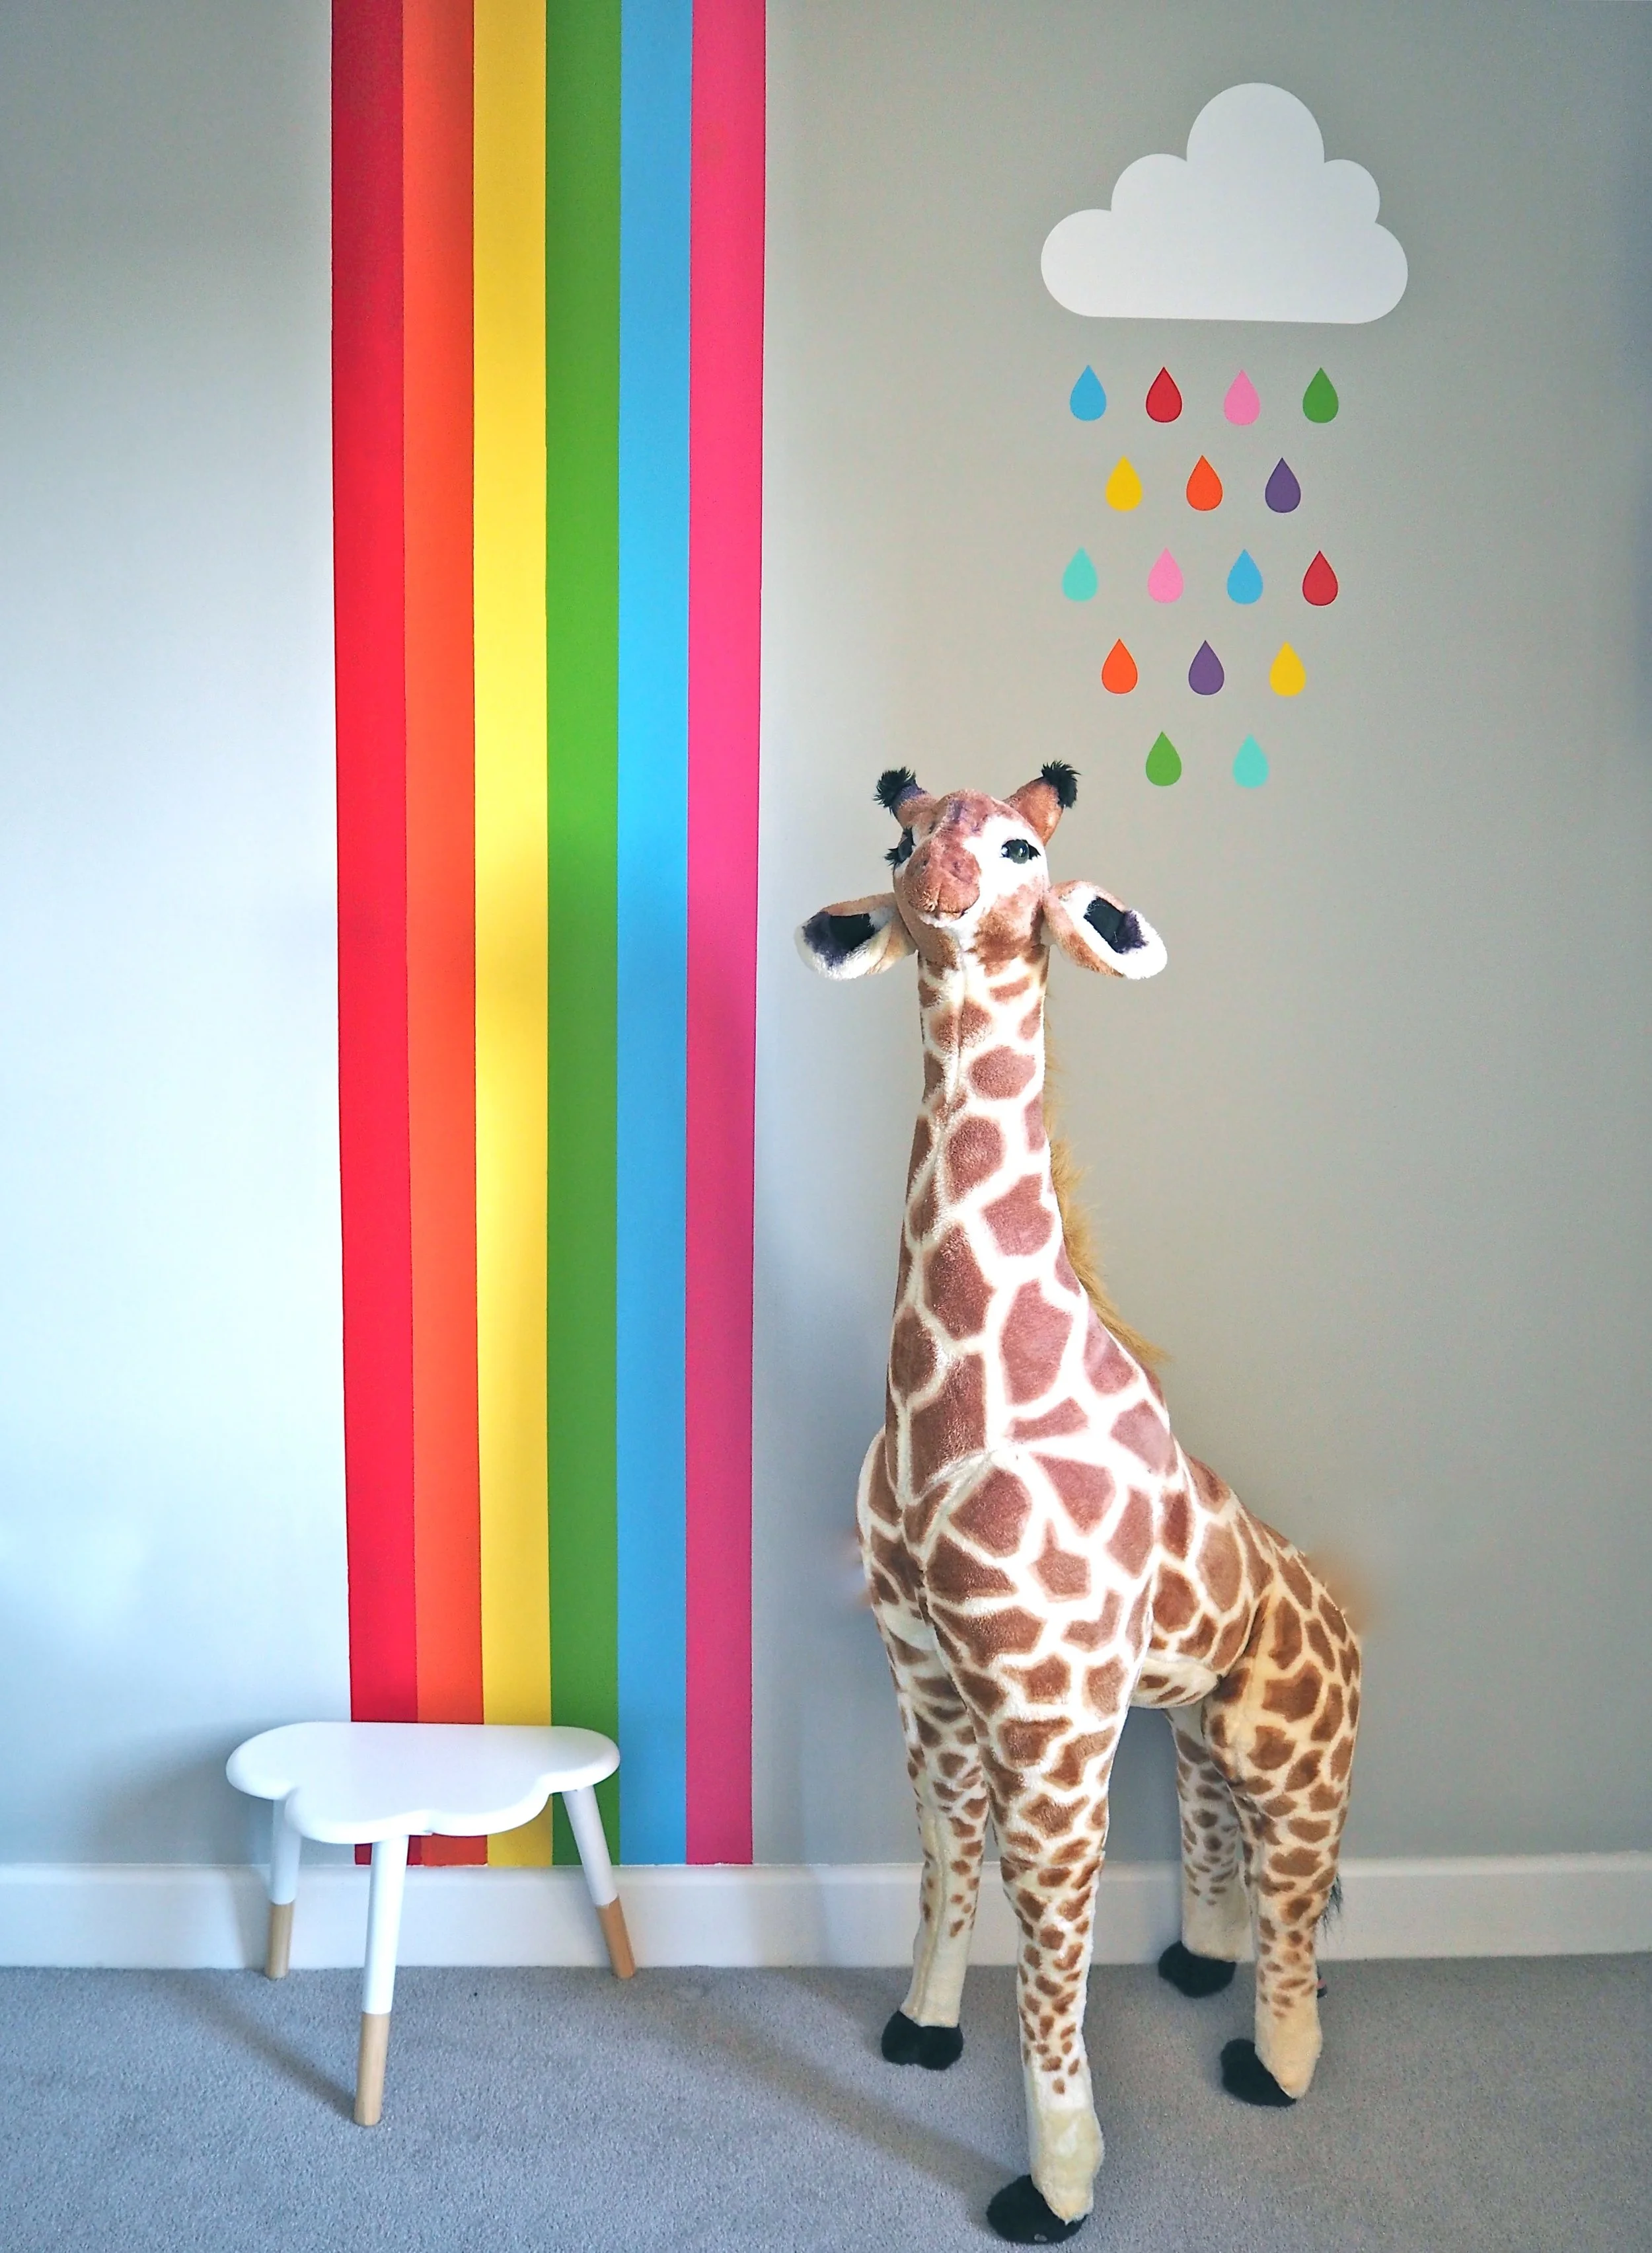
My clients had a new baby on the way and wanted to turn an empty white box room in a new build apartment into something much more fun for their newborn. When we held a meeting at the property and were trying to think of a theme for the nursery, their sprightly daughter Grace excitedly bursted out that the room needed a rainbow! Who could argue with that great idea? There and then it was decided that a large rainbow would glide up the wall and across the ceiling.
At first I looked into purchasing a rainbow vinyl sticker, but the area we wanted to cover with the rainbow was really large and it just wasn't a budget friendly option. Instead, I decided that the rainbow could be completed with a number of tester paint pots, painter’s tape and some time and patience. The aim was to make a real statement for under £50 in materials.
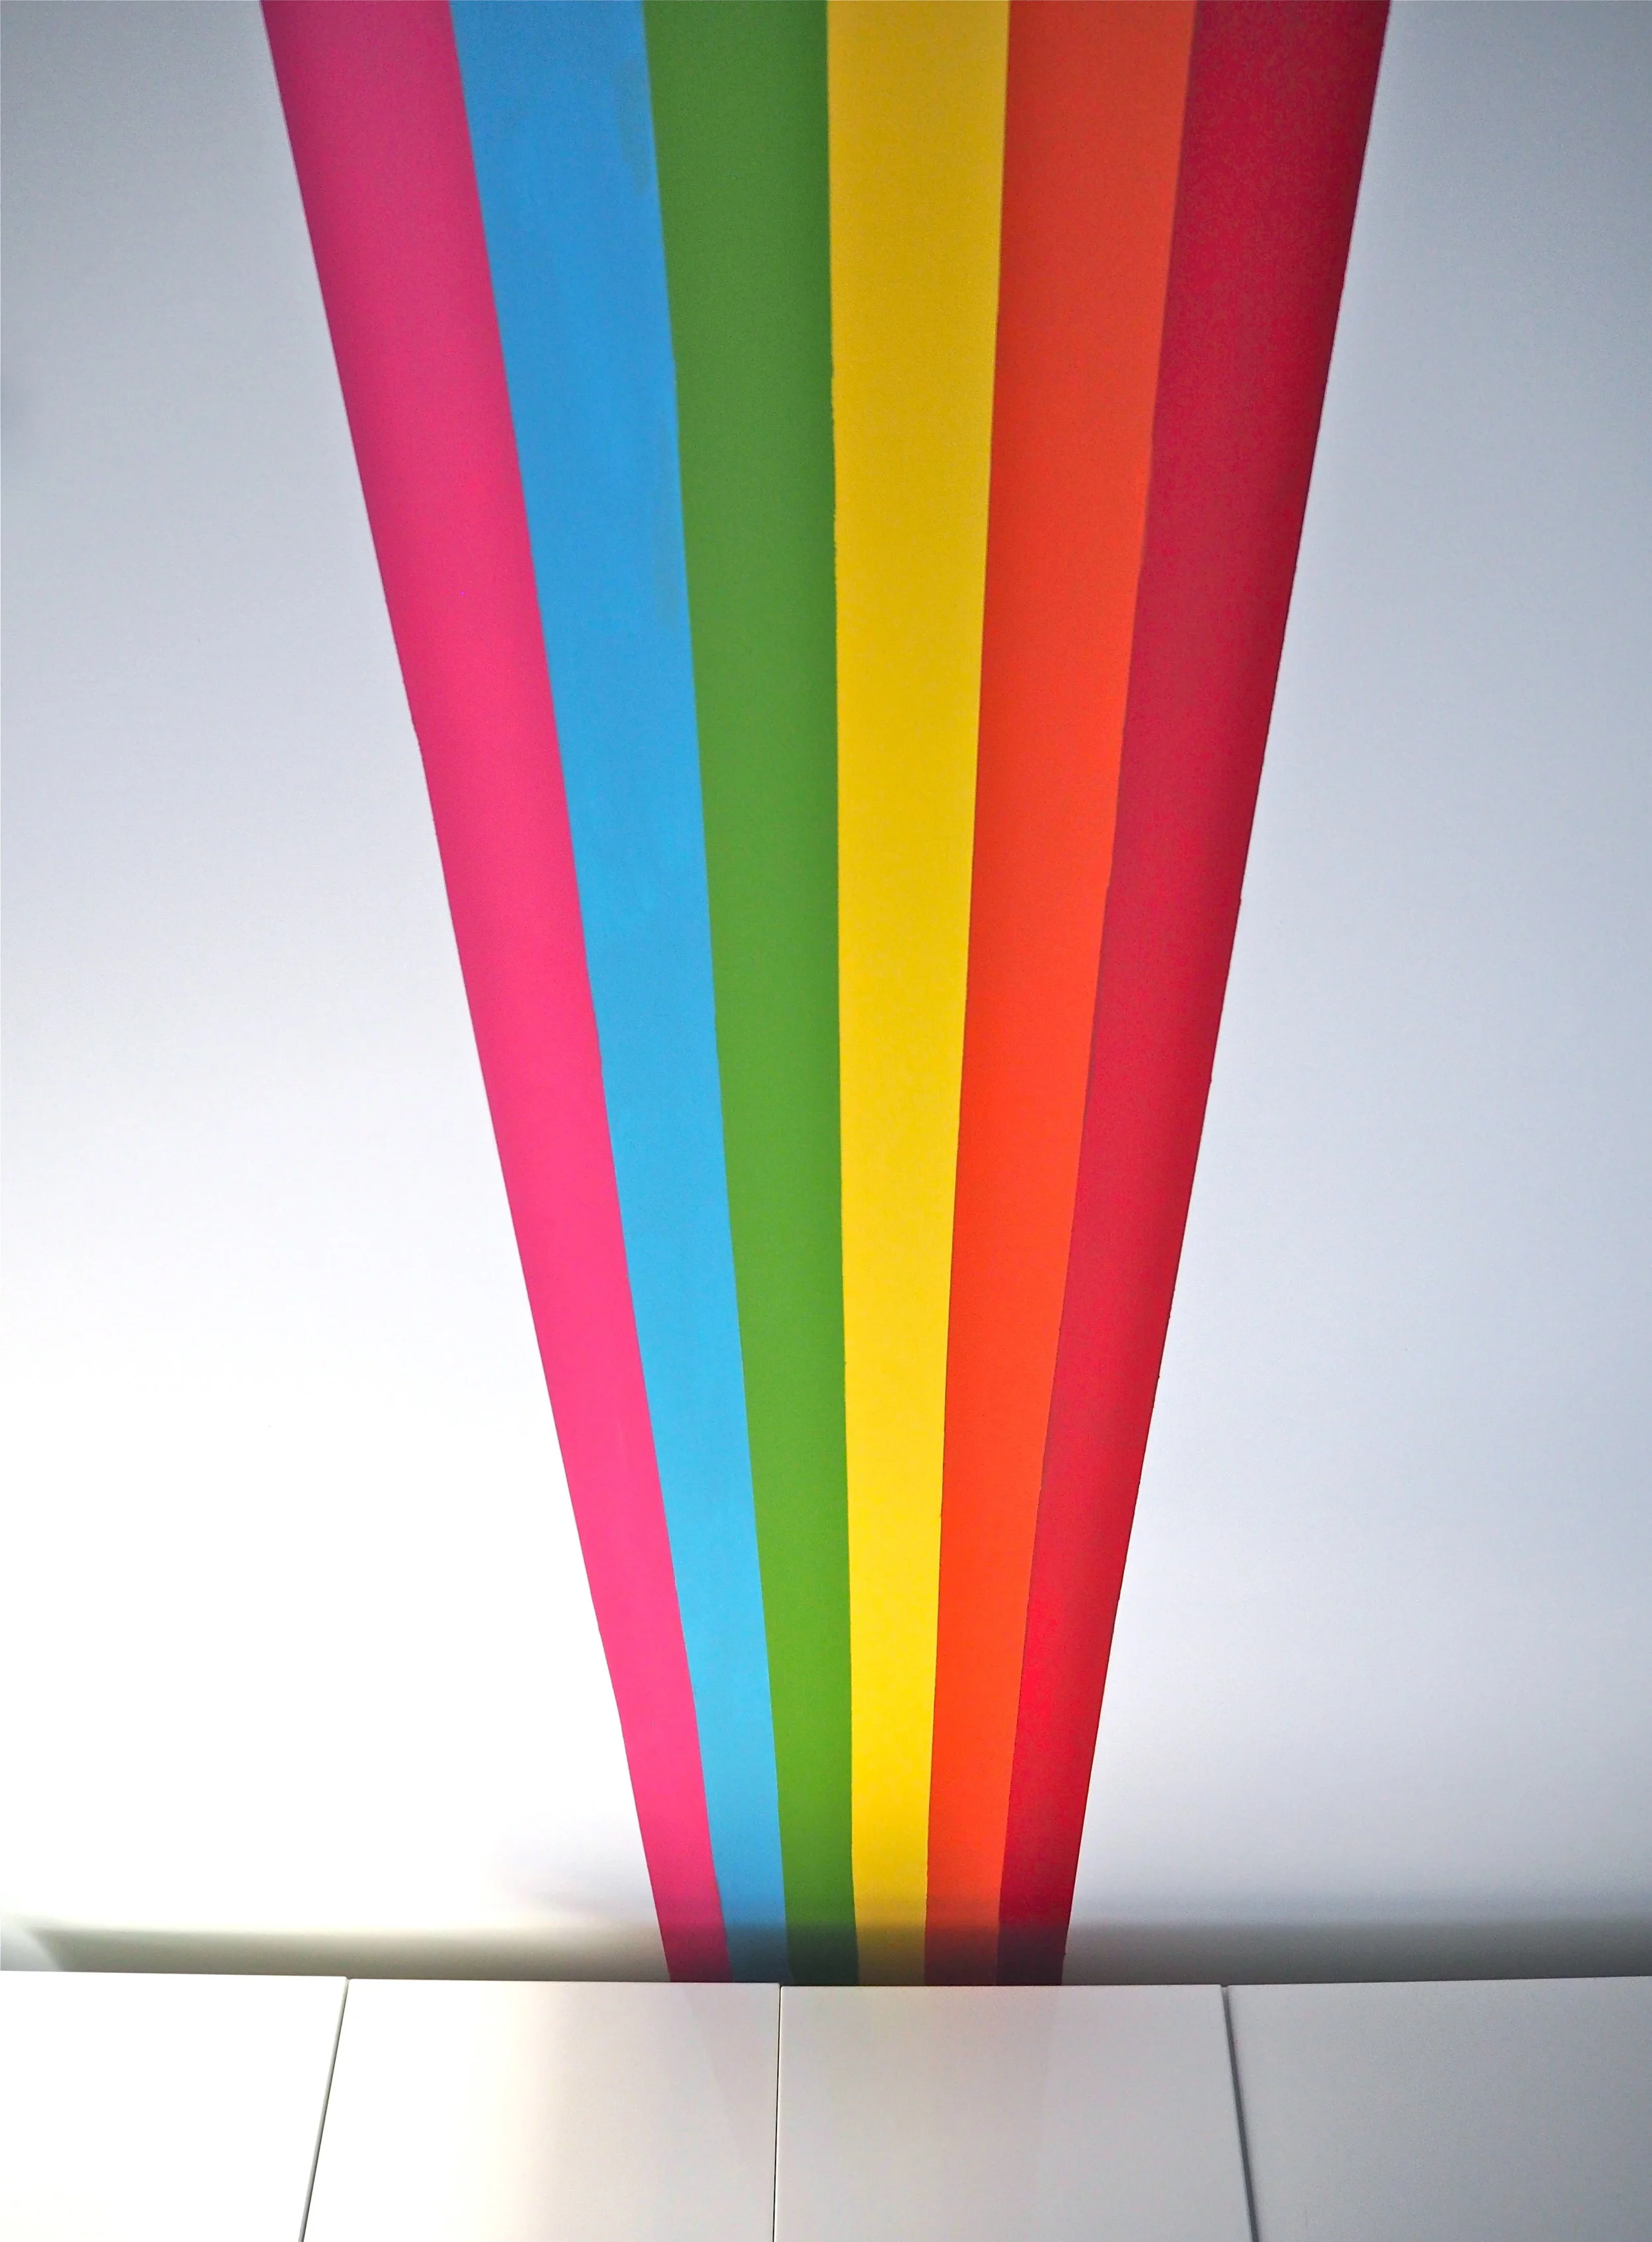
The first thing to do was to mark out how large the rainbow was going to be. With a pencil I marked the desired width of the rainbow on the wall. The rainbow was going to be made up of six vivid colours, so I measured the space between the two markings and divided by six. Each colour stripe for my rainbow was going to be 6cm wide, so these were my measurements to now mark on the wall and ceiling, ready to fill in with tester pot paint.

First I painted the walls of the room a pretty light grey to provide a good back drop for the rainbow. I was also going to be adding white vinyl sticker clouds to another part of the wall so the grey provided a great contrast.
To draw the rainbow on the wall ready for painting I used a pencil, a ruler with a spirit level , tape measure and a step ladder.
Once all the lines of my rainbow had been drawn on the ceiling and wall - and I was happy that it was completely straight - I set about planning to add my first few strips of colour. The thing with a rainbow mural is that even though it is relatively easy to do, you cannot rush it. You need to paint a couple of stripes, then leave those to dry well enough to then add tape over the top of them to paint in the next stripes. Leave your previous stripe too wet and you'll undo all your hard work!
Using a low-tack painter’s tape (I used Frog Tape), mark the edges of your stripe you are going to paint on the pencil lines. Press the tape down firmly to stop any bleeding along the lines.


Using a good quality paintbrush, do two or three coats of your chosen colour within the Frog Tape markings. You may need to do one coat, then come back and do the second coat the next day. Remove the Frog Tape as soon as you have completed the last coat, as I found this gave me a sharper line (if the paint is tacky removing the tape can pull off sections of your painted stripe).
Once your first set of stripes are dry and you've removed the tape (give it at least 24 hours), add painter’s tape to complete the last three stripes:


Again, remove your tape once you've completed the last coat of paint - making sure any wet paint on the tape does not brush onto your mural. Be warned that your rainbow may not be perfect at this point! On my rainbow areas of paint had bled - plus areas of paint had chipped when removing bits of tape. Fix these problem areas with a tiny artist’s paintbrush.


Once you've completed these steps you'll have a wonderful rainbow mural that your kid(s) will love!
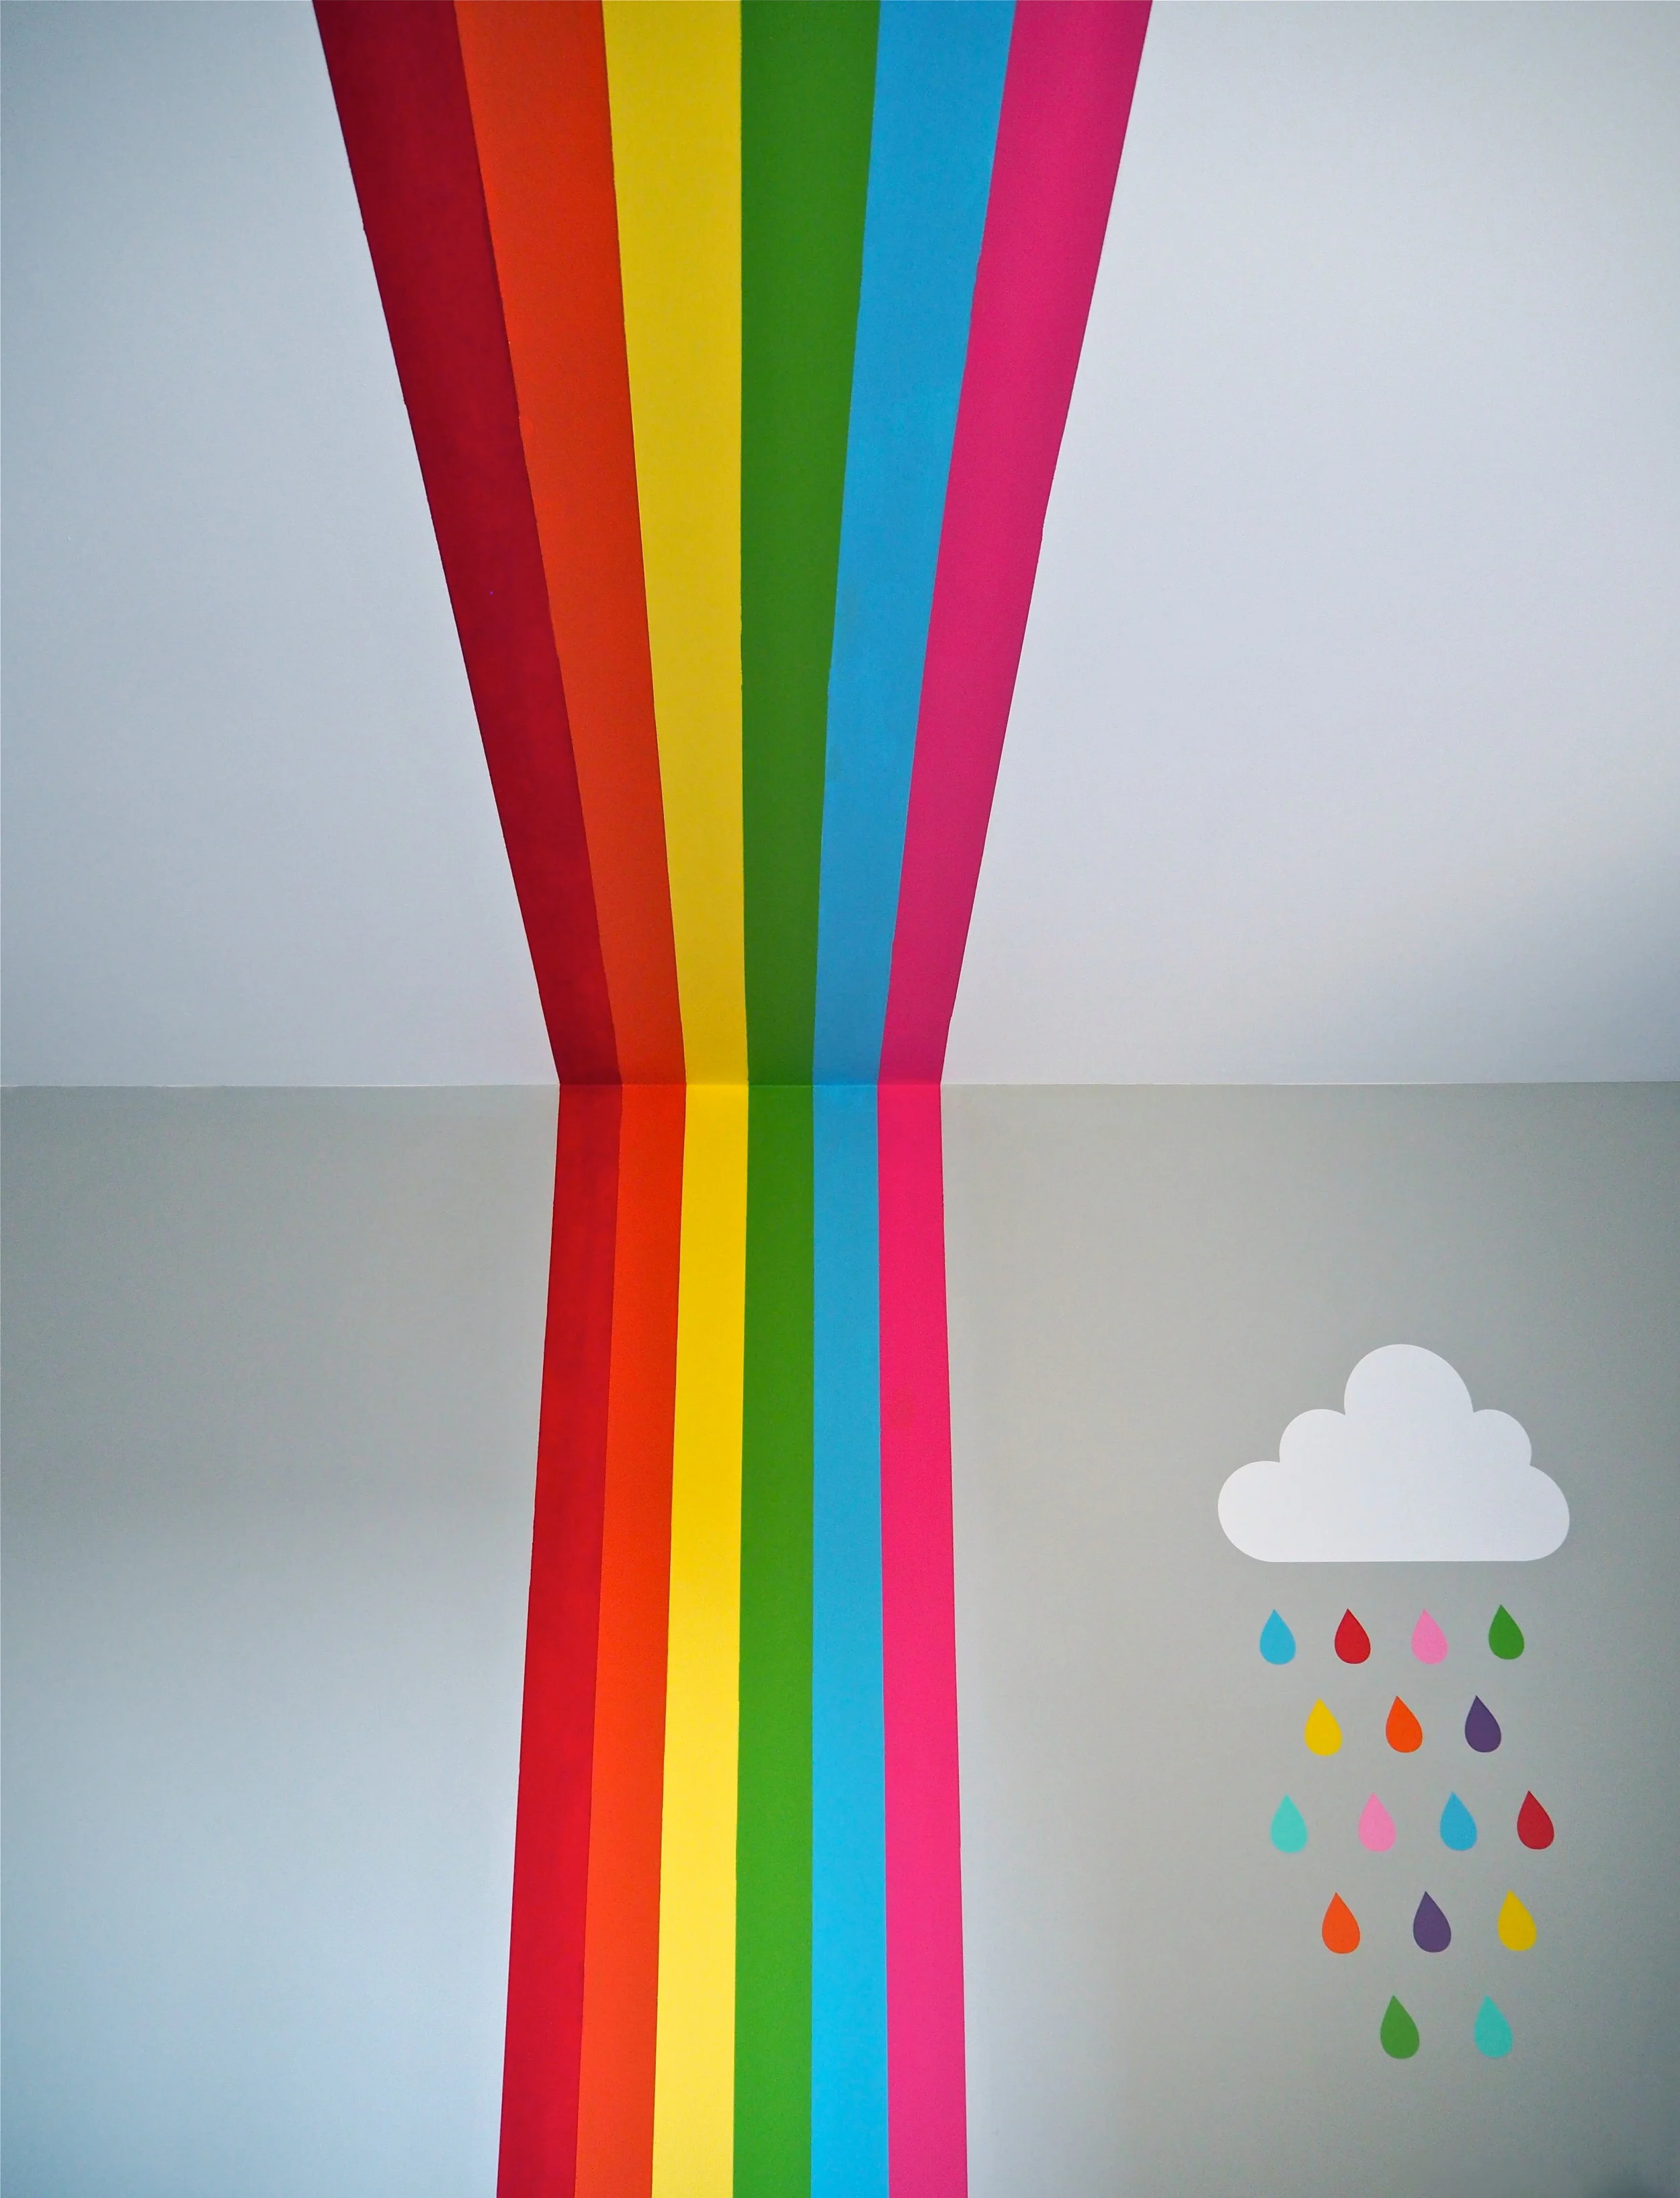
As my clients had large wardrobes on one side of the room the rainbow 'disappears' behind them. This felt quite magical - like the end of the rainbow can never be found!

I teamed the rainbow with some cloud and droplet stickers from Little Chip.
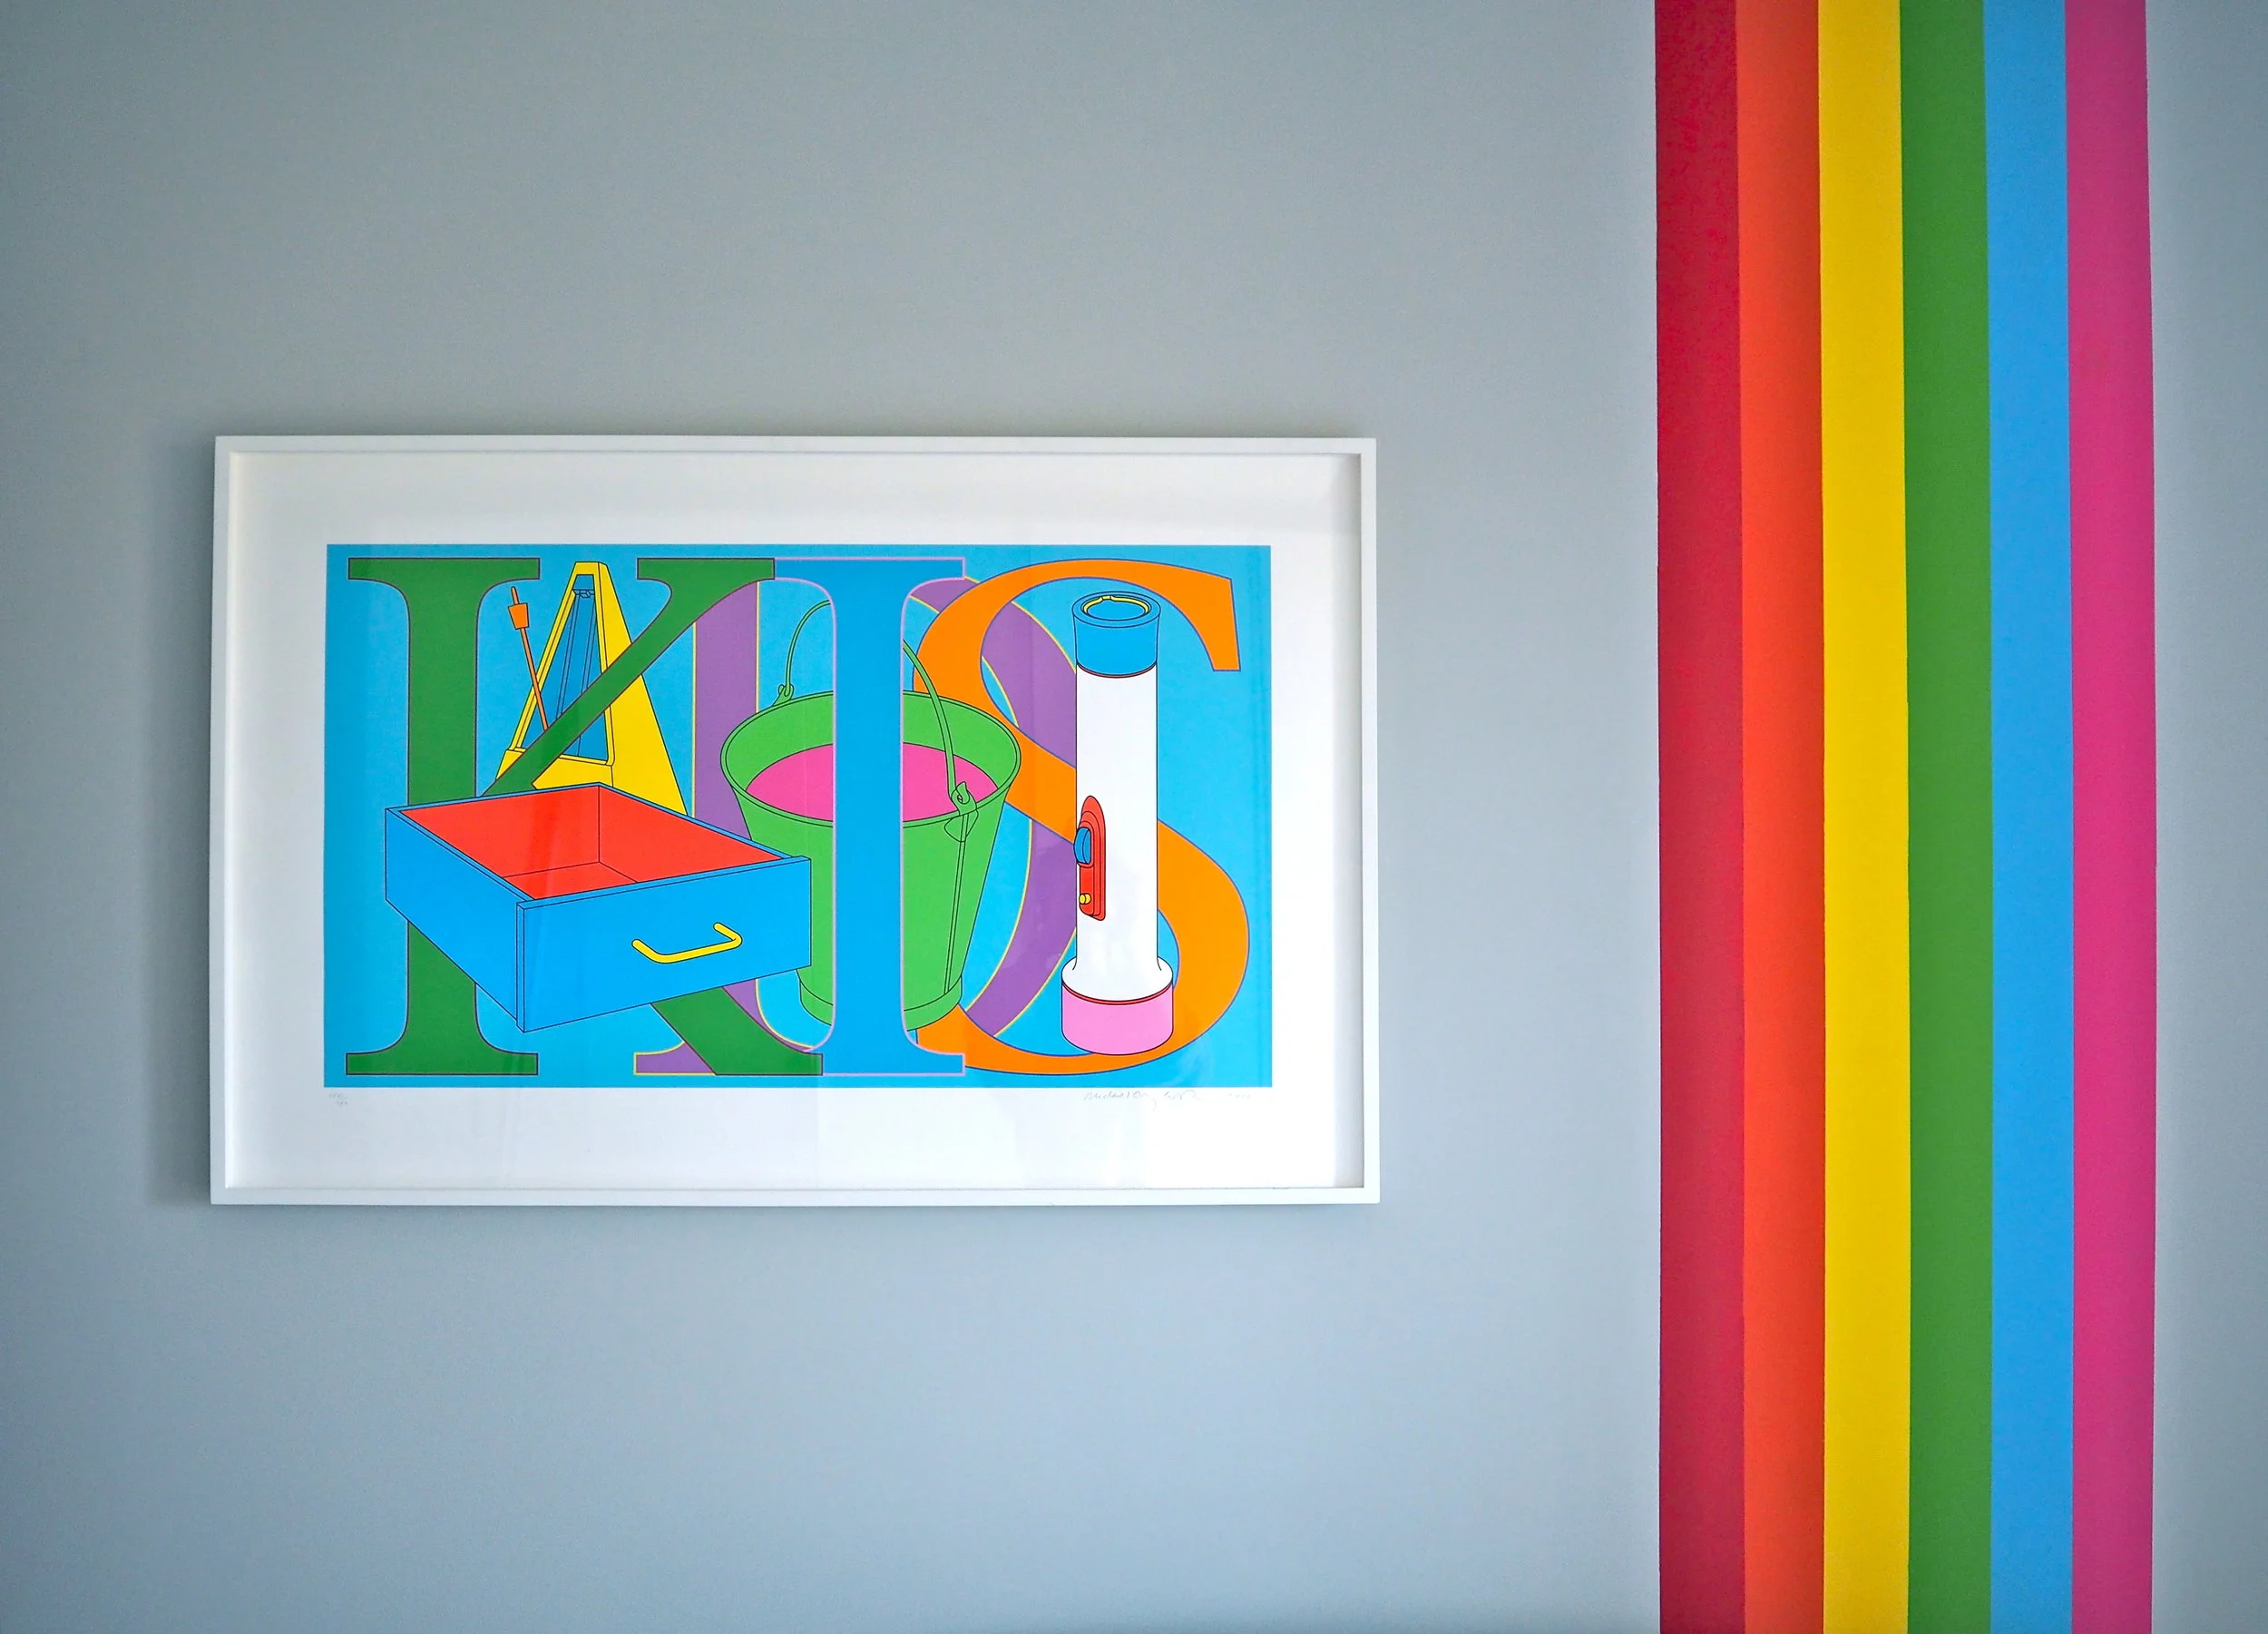
This amazing artwork pictured below (which reads KIDS) belonged to my clients already, so we moved the art print into the room alongside the rainbow:

The paint colours that I used for the rainbow were the following:
Red = Dulux's 'Ruby Fountain 2' / Orange = Charlotte's Locks by Farrow & Ball / Yellow = Sunny Savannah 5 by Dulux / Green = Emerald Delight 3 by Dulux / Blue = St Giles Blue by Farrow & Ball / Pink = 'Shocking Pink' by Crown.
I found Dulux Trade colour tester pots were the best option to buy, as you get a much larger tin than standard tester pots for the same price.
Will you be getting up to any DIY during National Home Improvement week? If so, let me know in the comments section below....
* This post was a collaboration with Mano Mano, who gifted me some DIY tools in exchange for providing them with some content they could use during National Home Improvement Week.