How To Easily DIY Wall Panelling In Your Home
In the first few months of starting this blog, I attempted a little DIY of adding some home-made wall panelling over a damaged wall in my hallway. Fast-forward a couple of years and this blog post is still my most popular post ever. Even though I look back on the post (the terrible photography, the over-linking, not to mention the shoddy DIY job itself!) and cringe a bit, it points out that loads of you actually want to DIY wall panelling in your own home and are seeking out how to do it online.
In the past two years, I feel I've turned from a DIY novice to someone who really knows a thing or two when it comes to doing up my home (which has all been learnt through practice and just having the confidence to give things a go.) With this new-found DIY knowledge, I took on the challenge of DIY panelling my whole sitting room as part of the Revamp Restyle Reveal transformation. So today, I thought I would re-post an updated version on how to create DIY wall panelling in your own home, just using products purchased from your local DIY or building store.


Decorative Moulding / Lost Head Nails / Tape Measure / Laser Level / Mega Bond Adhesive / Handsaw / Hammer / Gun / Primer / Paintbrush / Spirit Level / Caulk / Mitre Box
The products featured above are everything you need to create this look. If you are time-poor but more cash-rich, you may want to invest in an electric mitre saw which will be a lot easier on your hands than cutting with a handsaw and a mitre box. However, if you are only doing one small room, you can pick up both the mitre box and a handsaw for under £10. As the decorative moulding is so thin, I really did not find it too much effort to saw each piece manually.
If you want to save further cash, then you can opt-out of a laser level and just use a spirit level and a pencil mark. However, I did find the laser level made things less stressful when it came to making sure you applied the moulding strips at the correct angle.
In the DIY store, there is always a large selection of decorative moulding (also called 'beading'). Choose a style that you like in your preferred size. What I would advise is that the more detail the moulding has, the better will look, as the grooves will catch the shadows and the moulding will stand out more. Also, pick a moulding that is raised in the middle and flatter at each edge so one side does not look bulkier than the other.

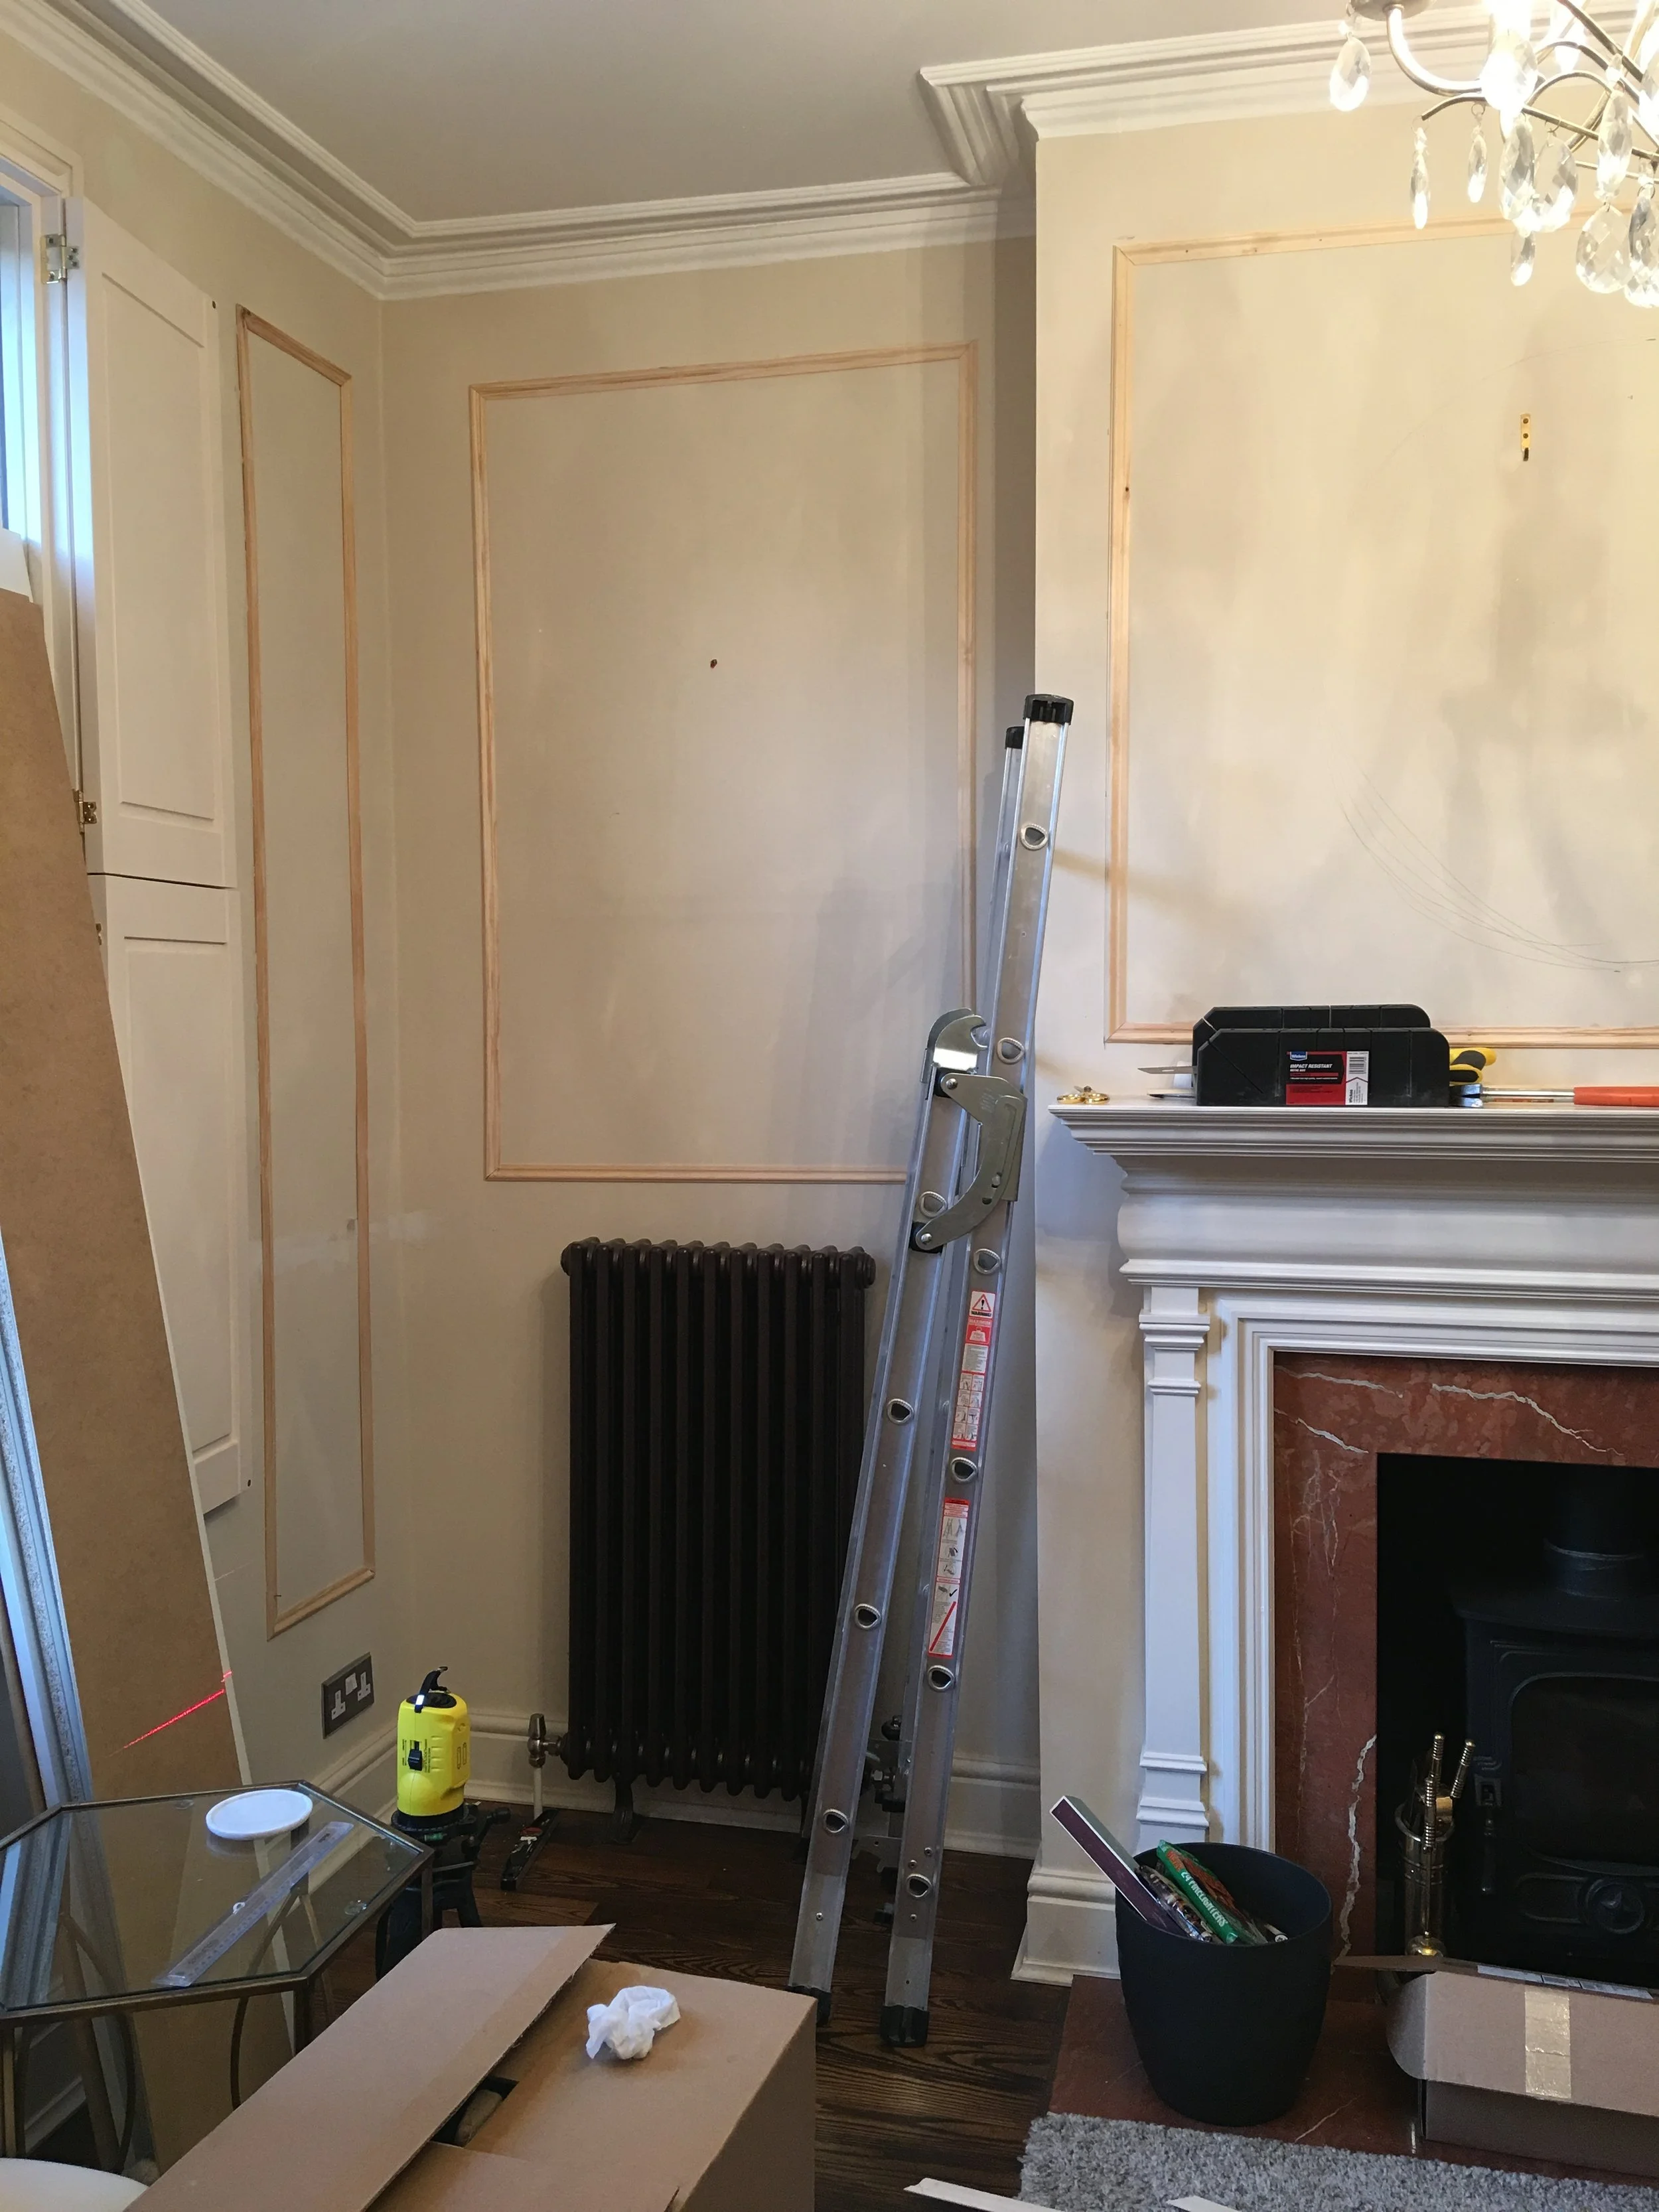
Initially, I was just going to place the decorative moulding above the fireplace and in the surrounding alcoves. However, once I got started and it looked so good, I decided to put it all around the room. All your panels should look similar in size, so I made sure that each panel was relatively the same distance away from the corners or the wall edge. All your panels should start from the same distance away from the ceiling and from the floor/skirting (for example, all my panels started 15cm down from the ceiling and 15cm up from the skirting), so go round the room and mark these basic measurements in with a pencil before you start.

Once you know exactly the size your panel needs to be, you need to cut your moulding to size in the mitre box. A mitre box enables you to cut at an exact 45° angle so that your corners match up neatly (like picture frames). Measure the width and height of your panel, then cut four pieces of moulding to size. The top and bottom pieces should be cut the same length, as should the two sides (so if you are making a panel a metre wide and two metres tall, you should have 2 x pieces of decorative moulding cut at 1 metre, and 2 x pieces cut at 2 metres). Just a note: I found marking the direction of the angle to be cut with a pencil helpful, so I did not cut the moulding incorrectly. Once cut, check the pieces match up in size by laying them side by side on the floor. If one piece is a few millimetres out, you should trim it down so your panel pieces match up and there are no gaps between the joins.
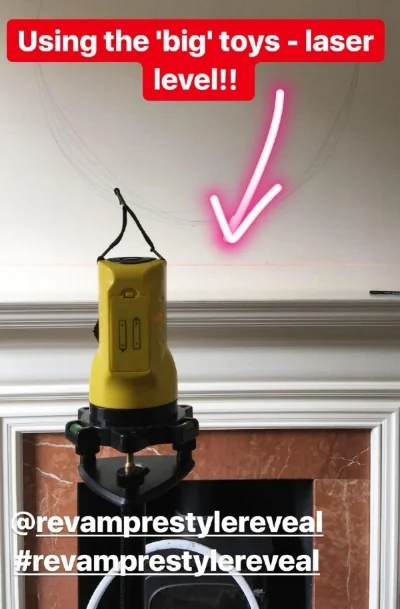

One major piece of advice is not to rely on your ceiling or floor to be level and just measure up or down from that. Most ceilings or floors, especially in older houses, are completely NOT level! If you rely on this only you'll end up with wonky panels! Instead, use a laser level or a spirit level (or preferably, both), to make sure you apply your DIY panels perfectly straight and exact. A laser level is so helpful as it shines a perfectly straight laser line on your wall so you can apply each panel piece with confidence. You can just use a pencil and a spirit level for this, but it depends on how confident you are with your measurements! I used both tools to feel secure that my applications were spot-on.

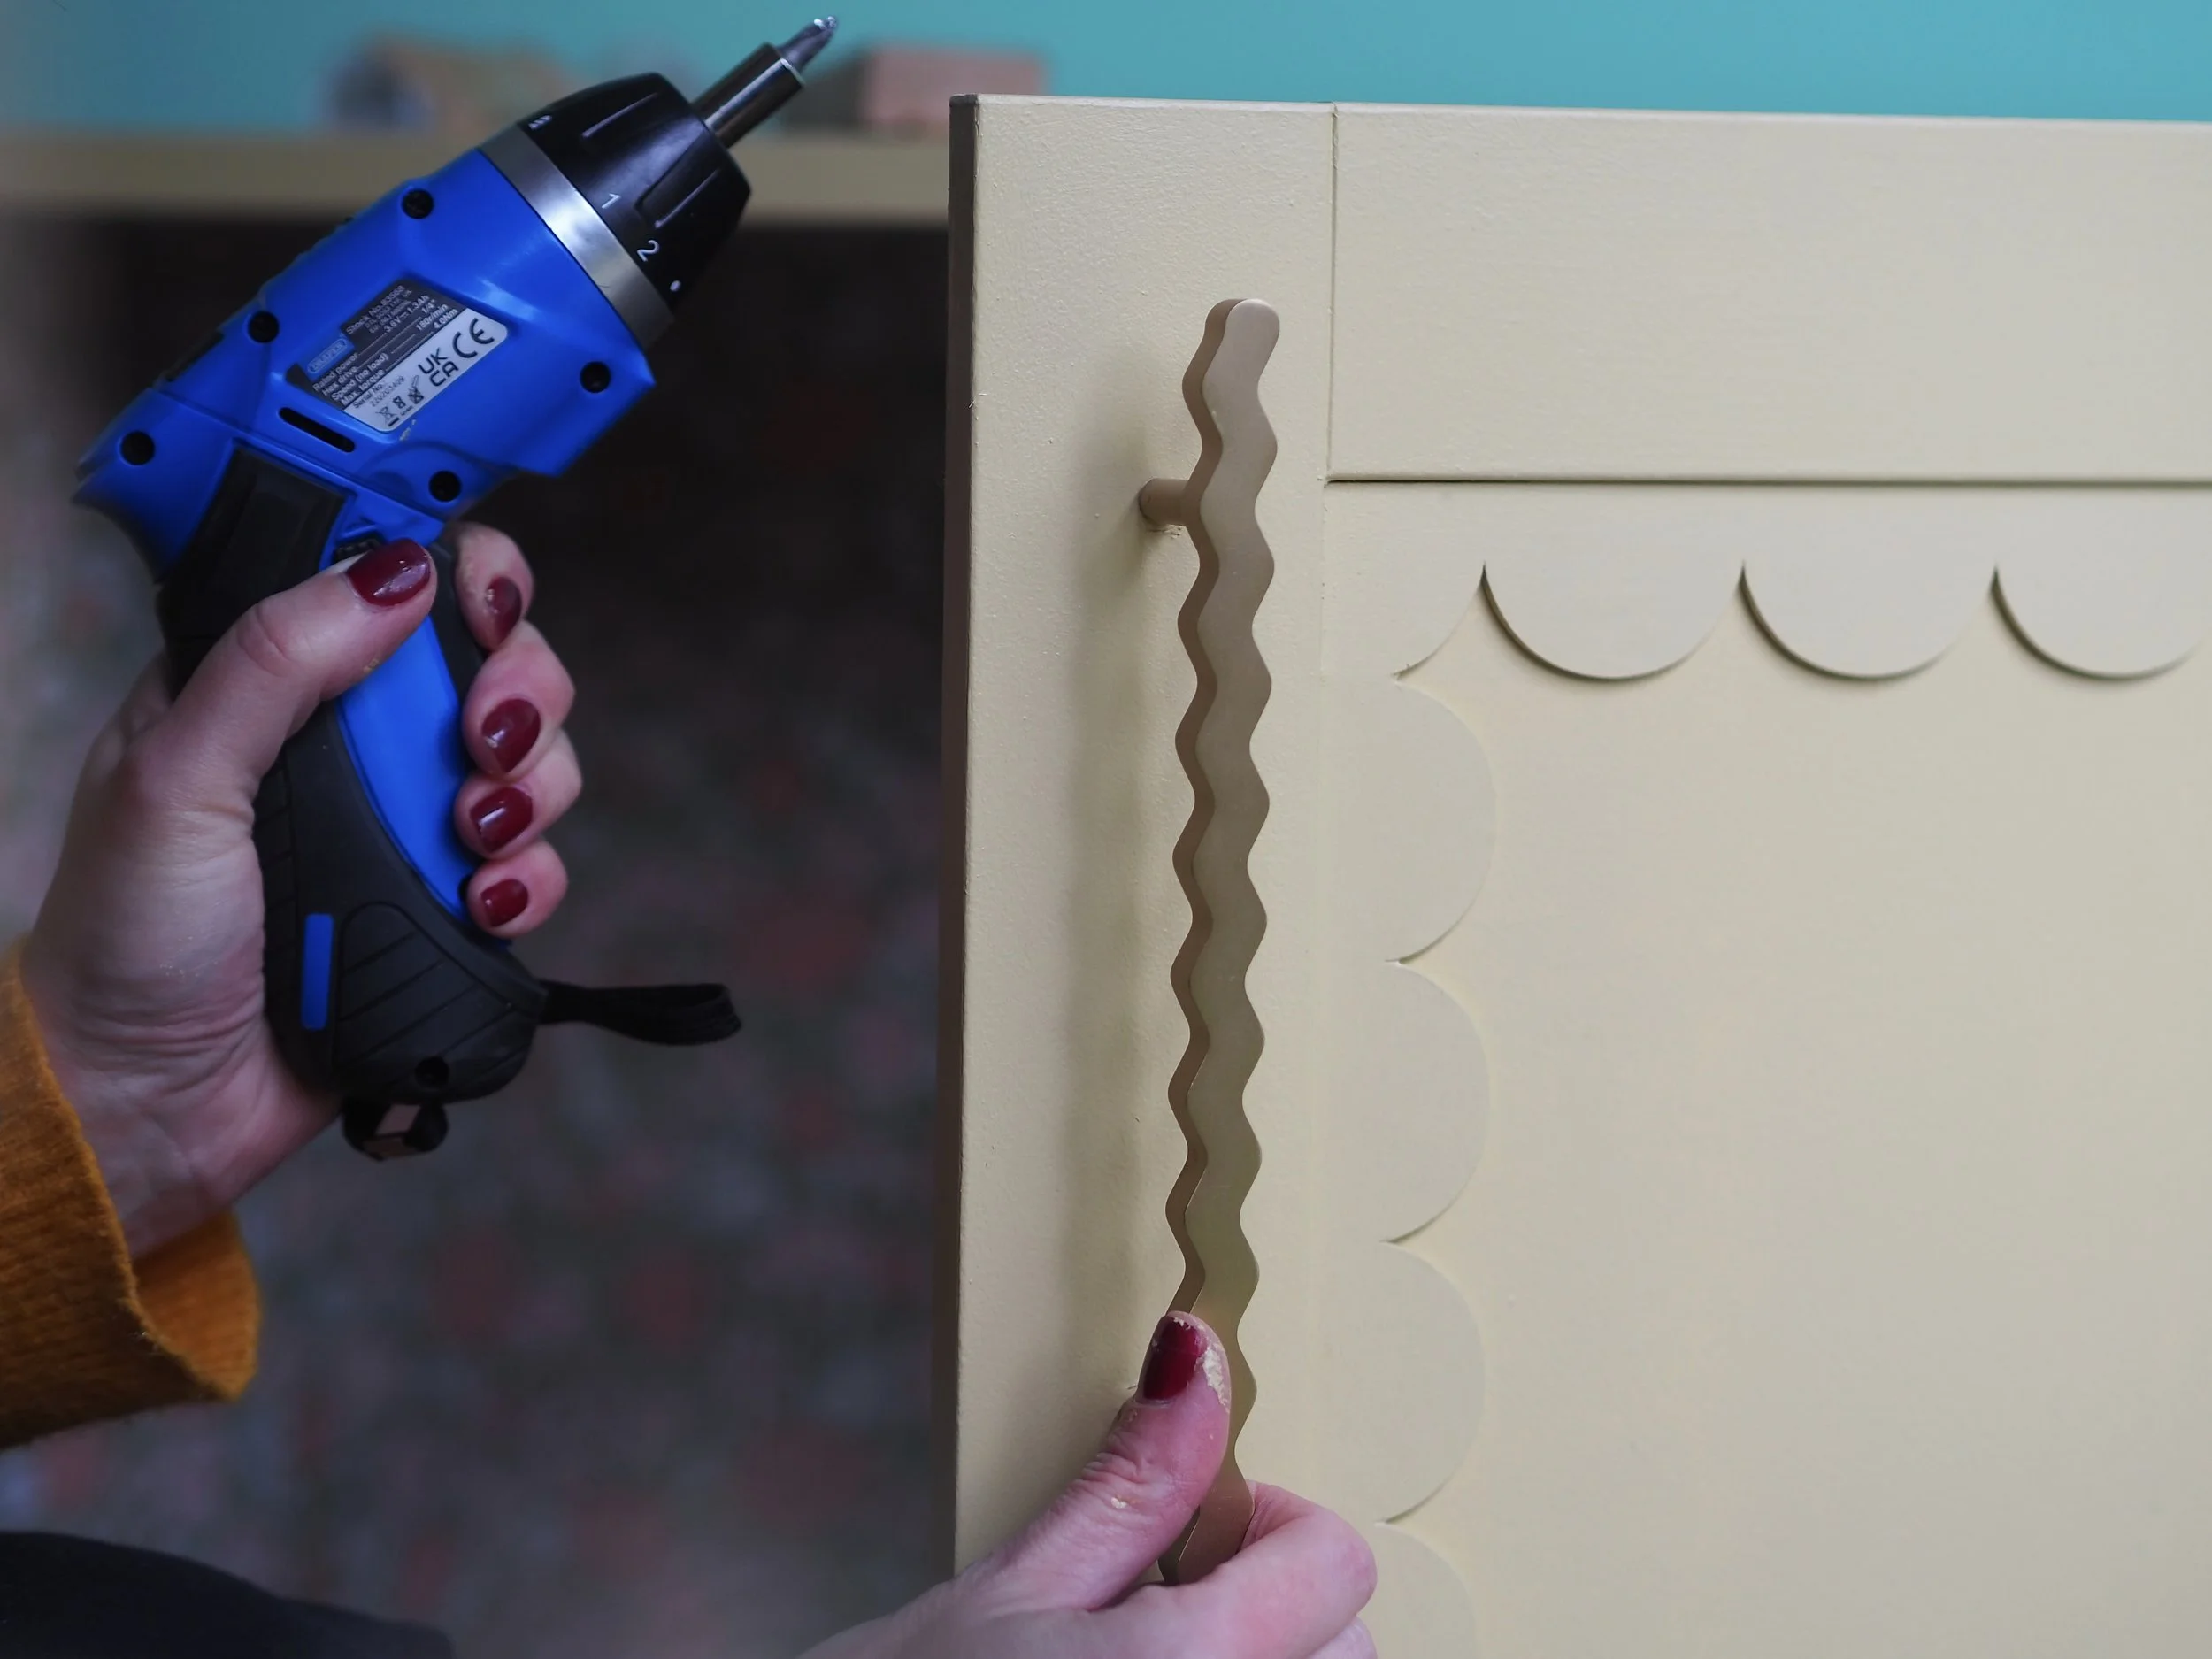
The easiest and the best way to add your decorative moulding strips to the wall is with a super-strong interior grab adhesive. I have always found No More Nails to be the best in a squeezy tube so no gun is required. This way, you can stop and start glueing quickly and easily as you go. The great thing about using glue is that it also gives you a bit of time to fiddle and move each piece after application if required (I found this helpful if each piece did not initially match up perfectly.) If your walls are a bit warped and the glue does not hold the moulding strip flush, use a hammer and a lost head nail (lost head nails have no real head, so they can be hammered down under the wood and you can fill the nail hole easily with filler or decorators caulk) to secure the moulding down to the wall.

To make your moulding look seamless and like it was always there, you need to fill in any gaps or holes in the wood and caulk the sides of the moulding between the wall and the wood with decorators caulk. First of all, check any areas where you have had to inserts nails and caulk in the hole the nail left. Do the same for each corner join so there is no line where each piece of wood meets. Smooth in the caulk using your finger, wiping away any excess, then once dry give it a light sanding. Do the same for every side of your moulding where it meets the wall, smoothing in the caulk with your finger.
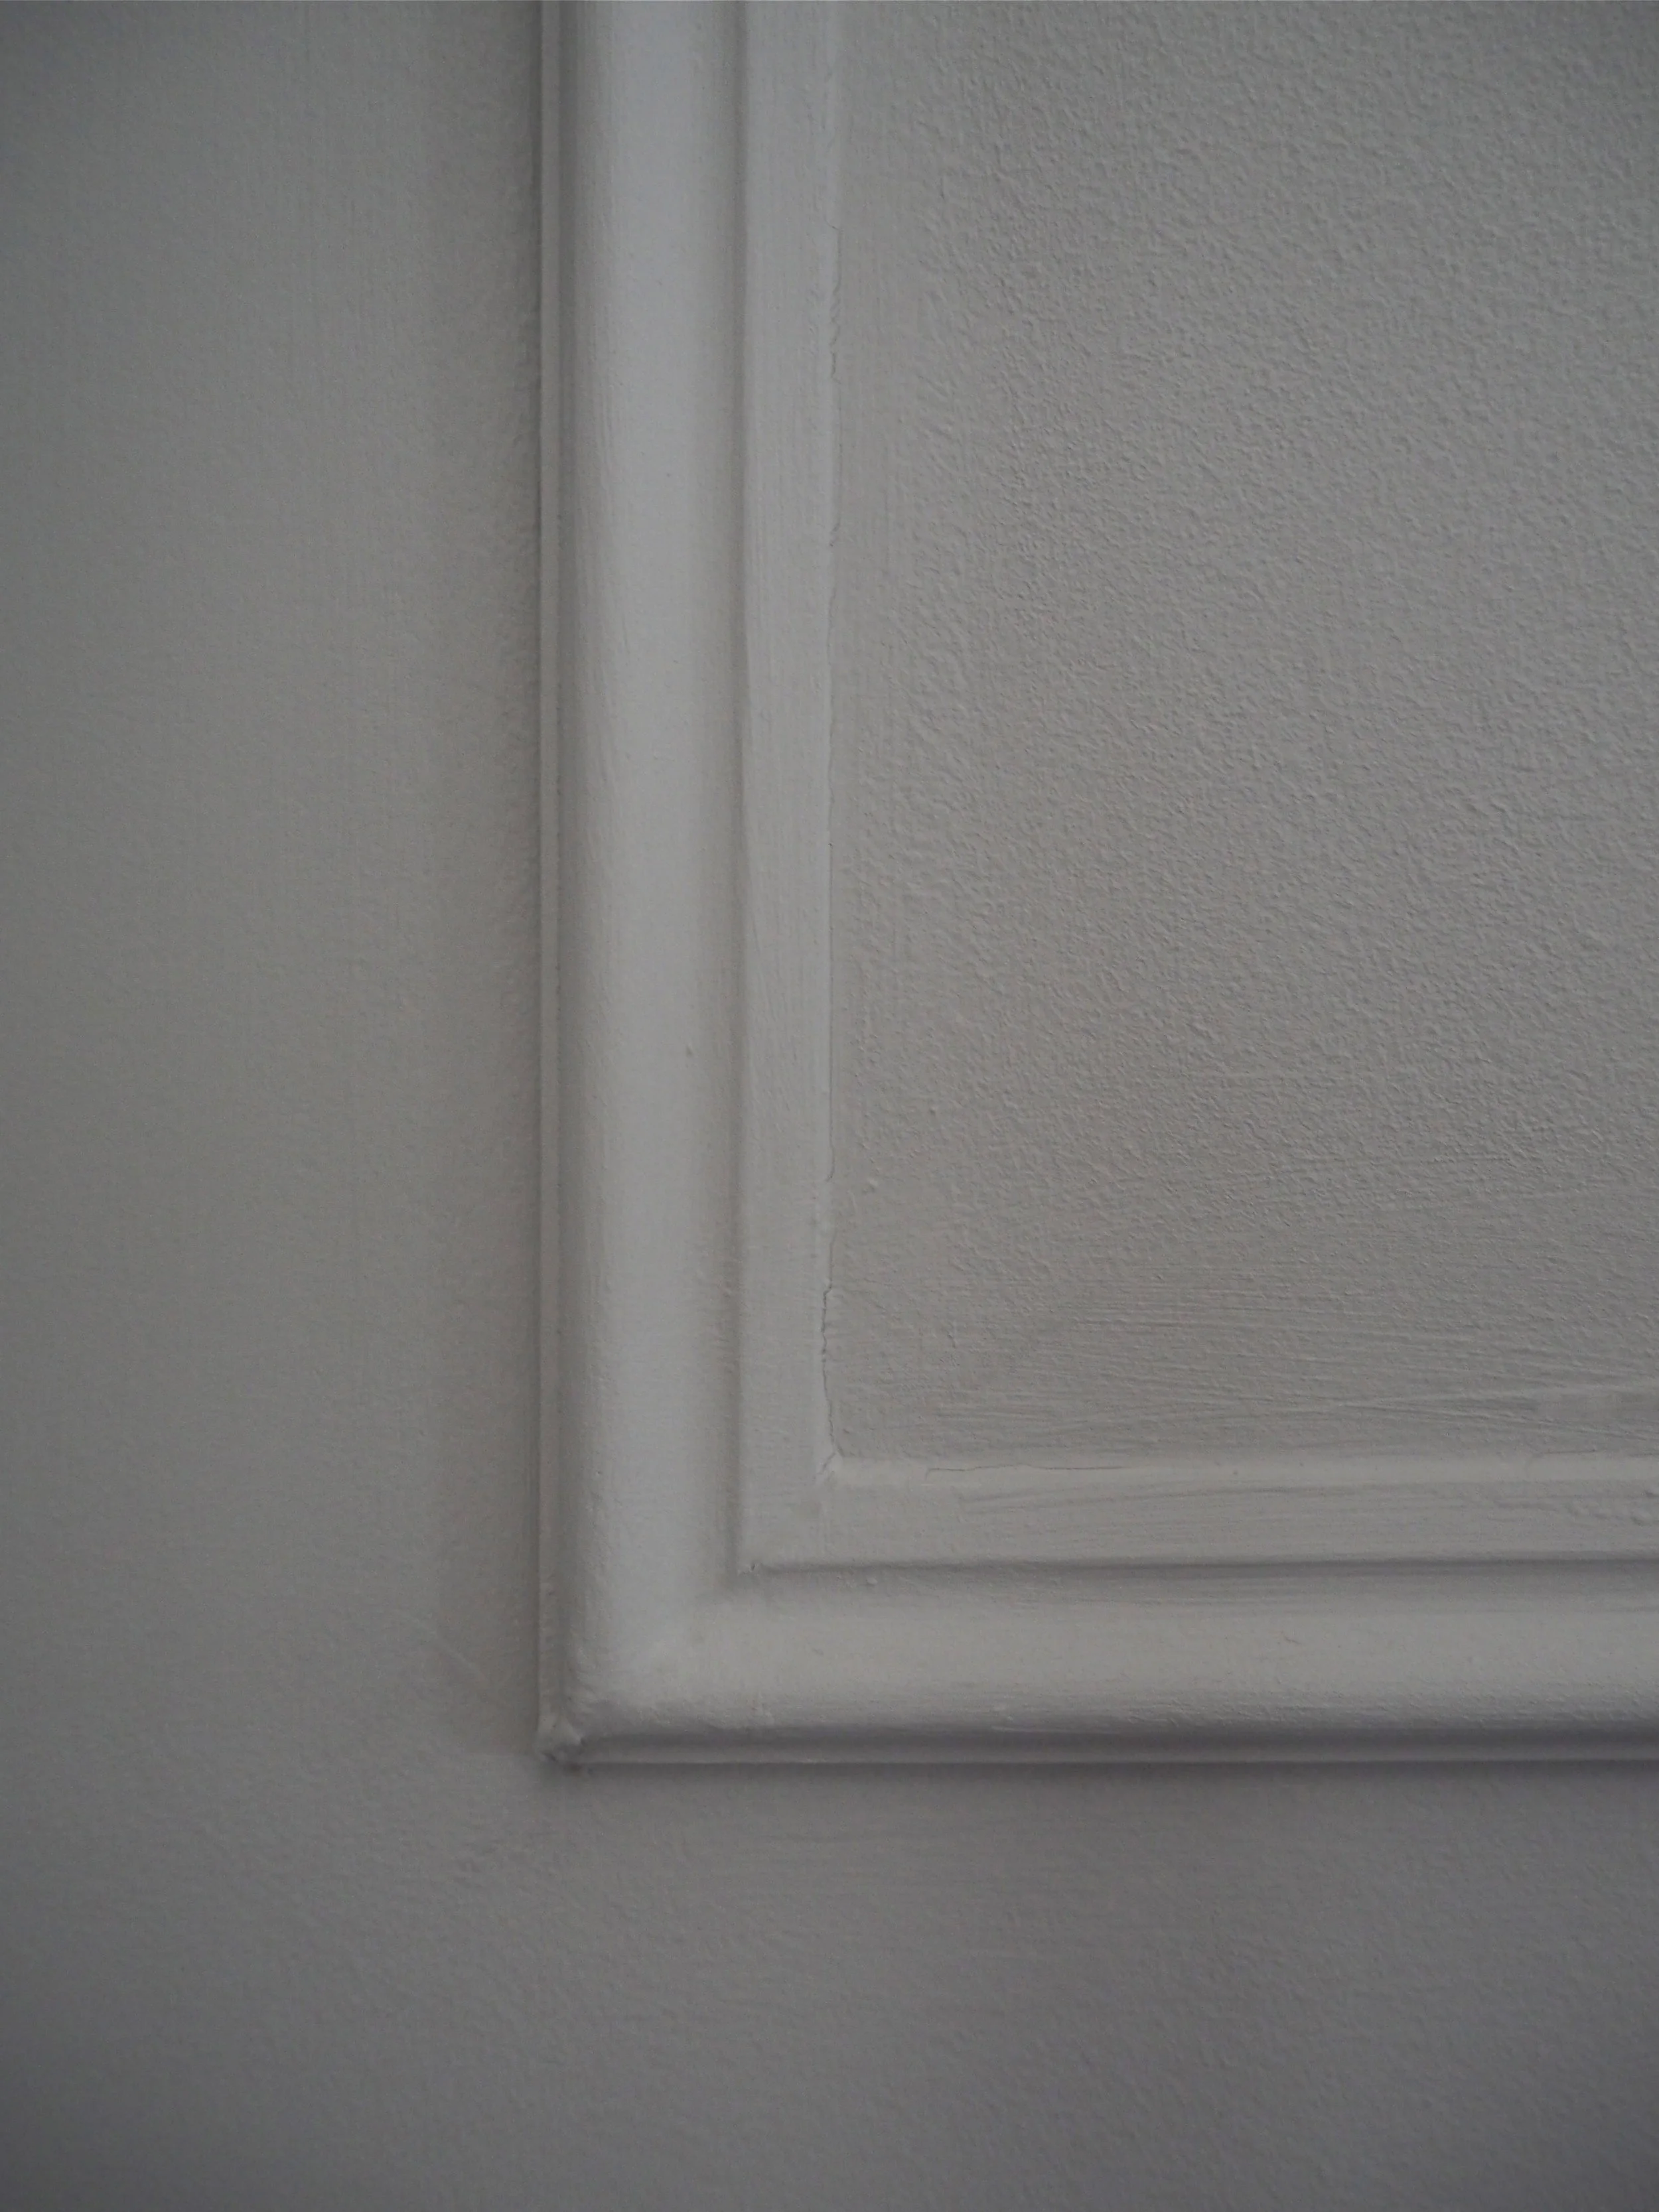


As decorative moulding is bare wood, it will need to be primed before you apply any paint to stop the wood absorbing your wall paint and to also cover any knots or flaws in the wood. Using a paintbrush, give your moulding two coats of good quality primer and leave it to dry before applying your paint.
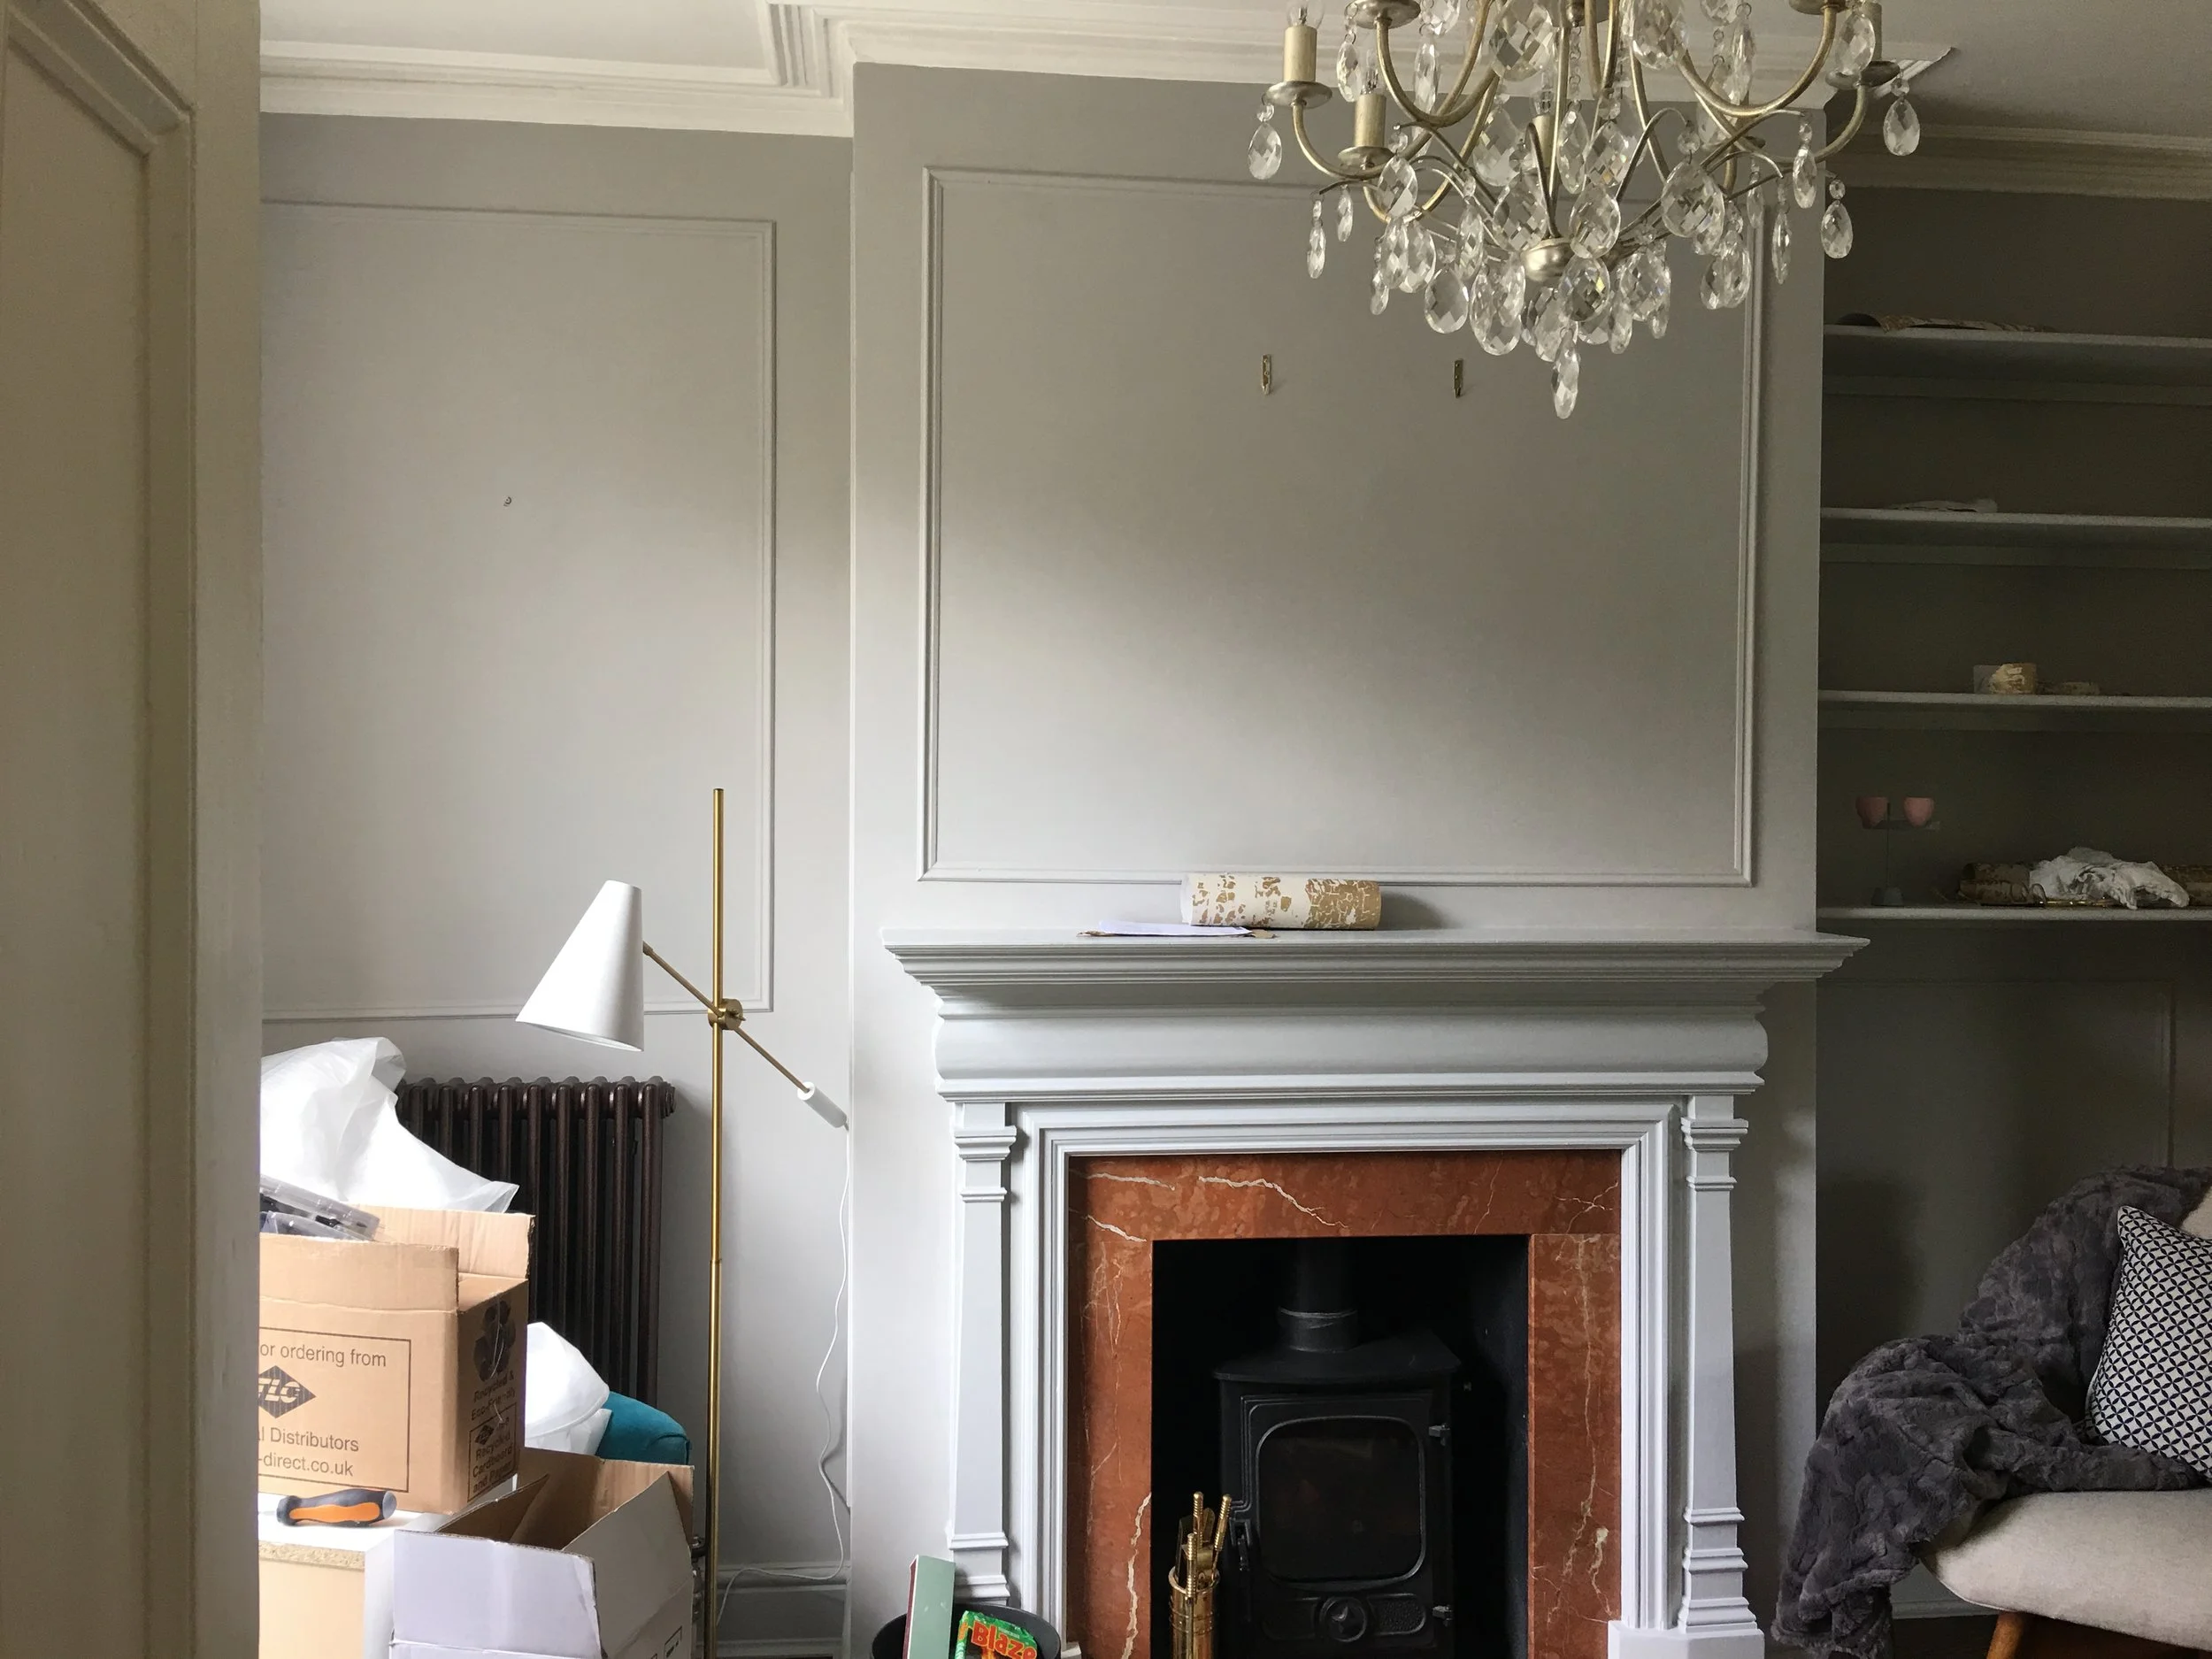
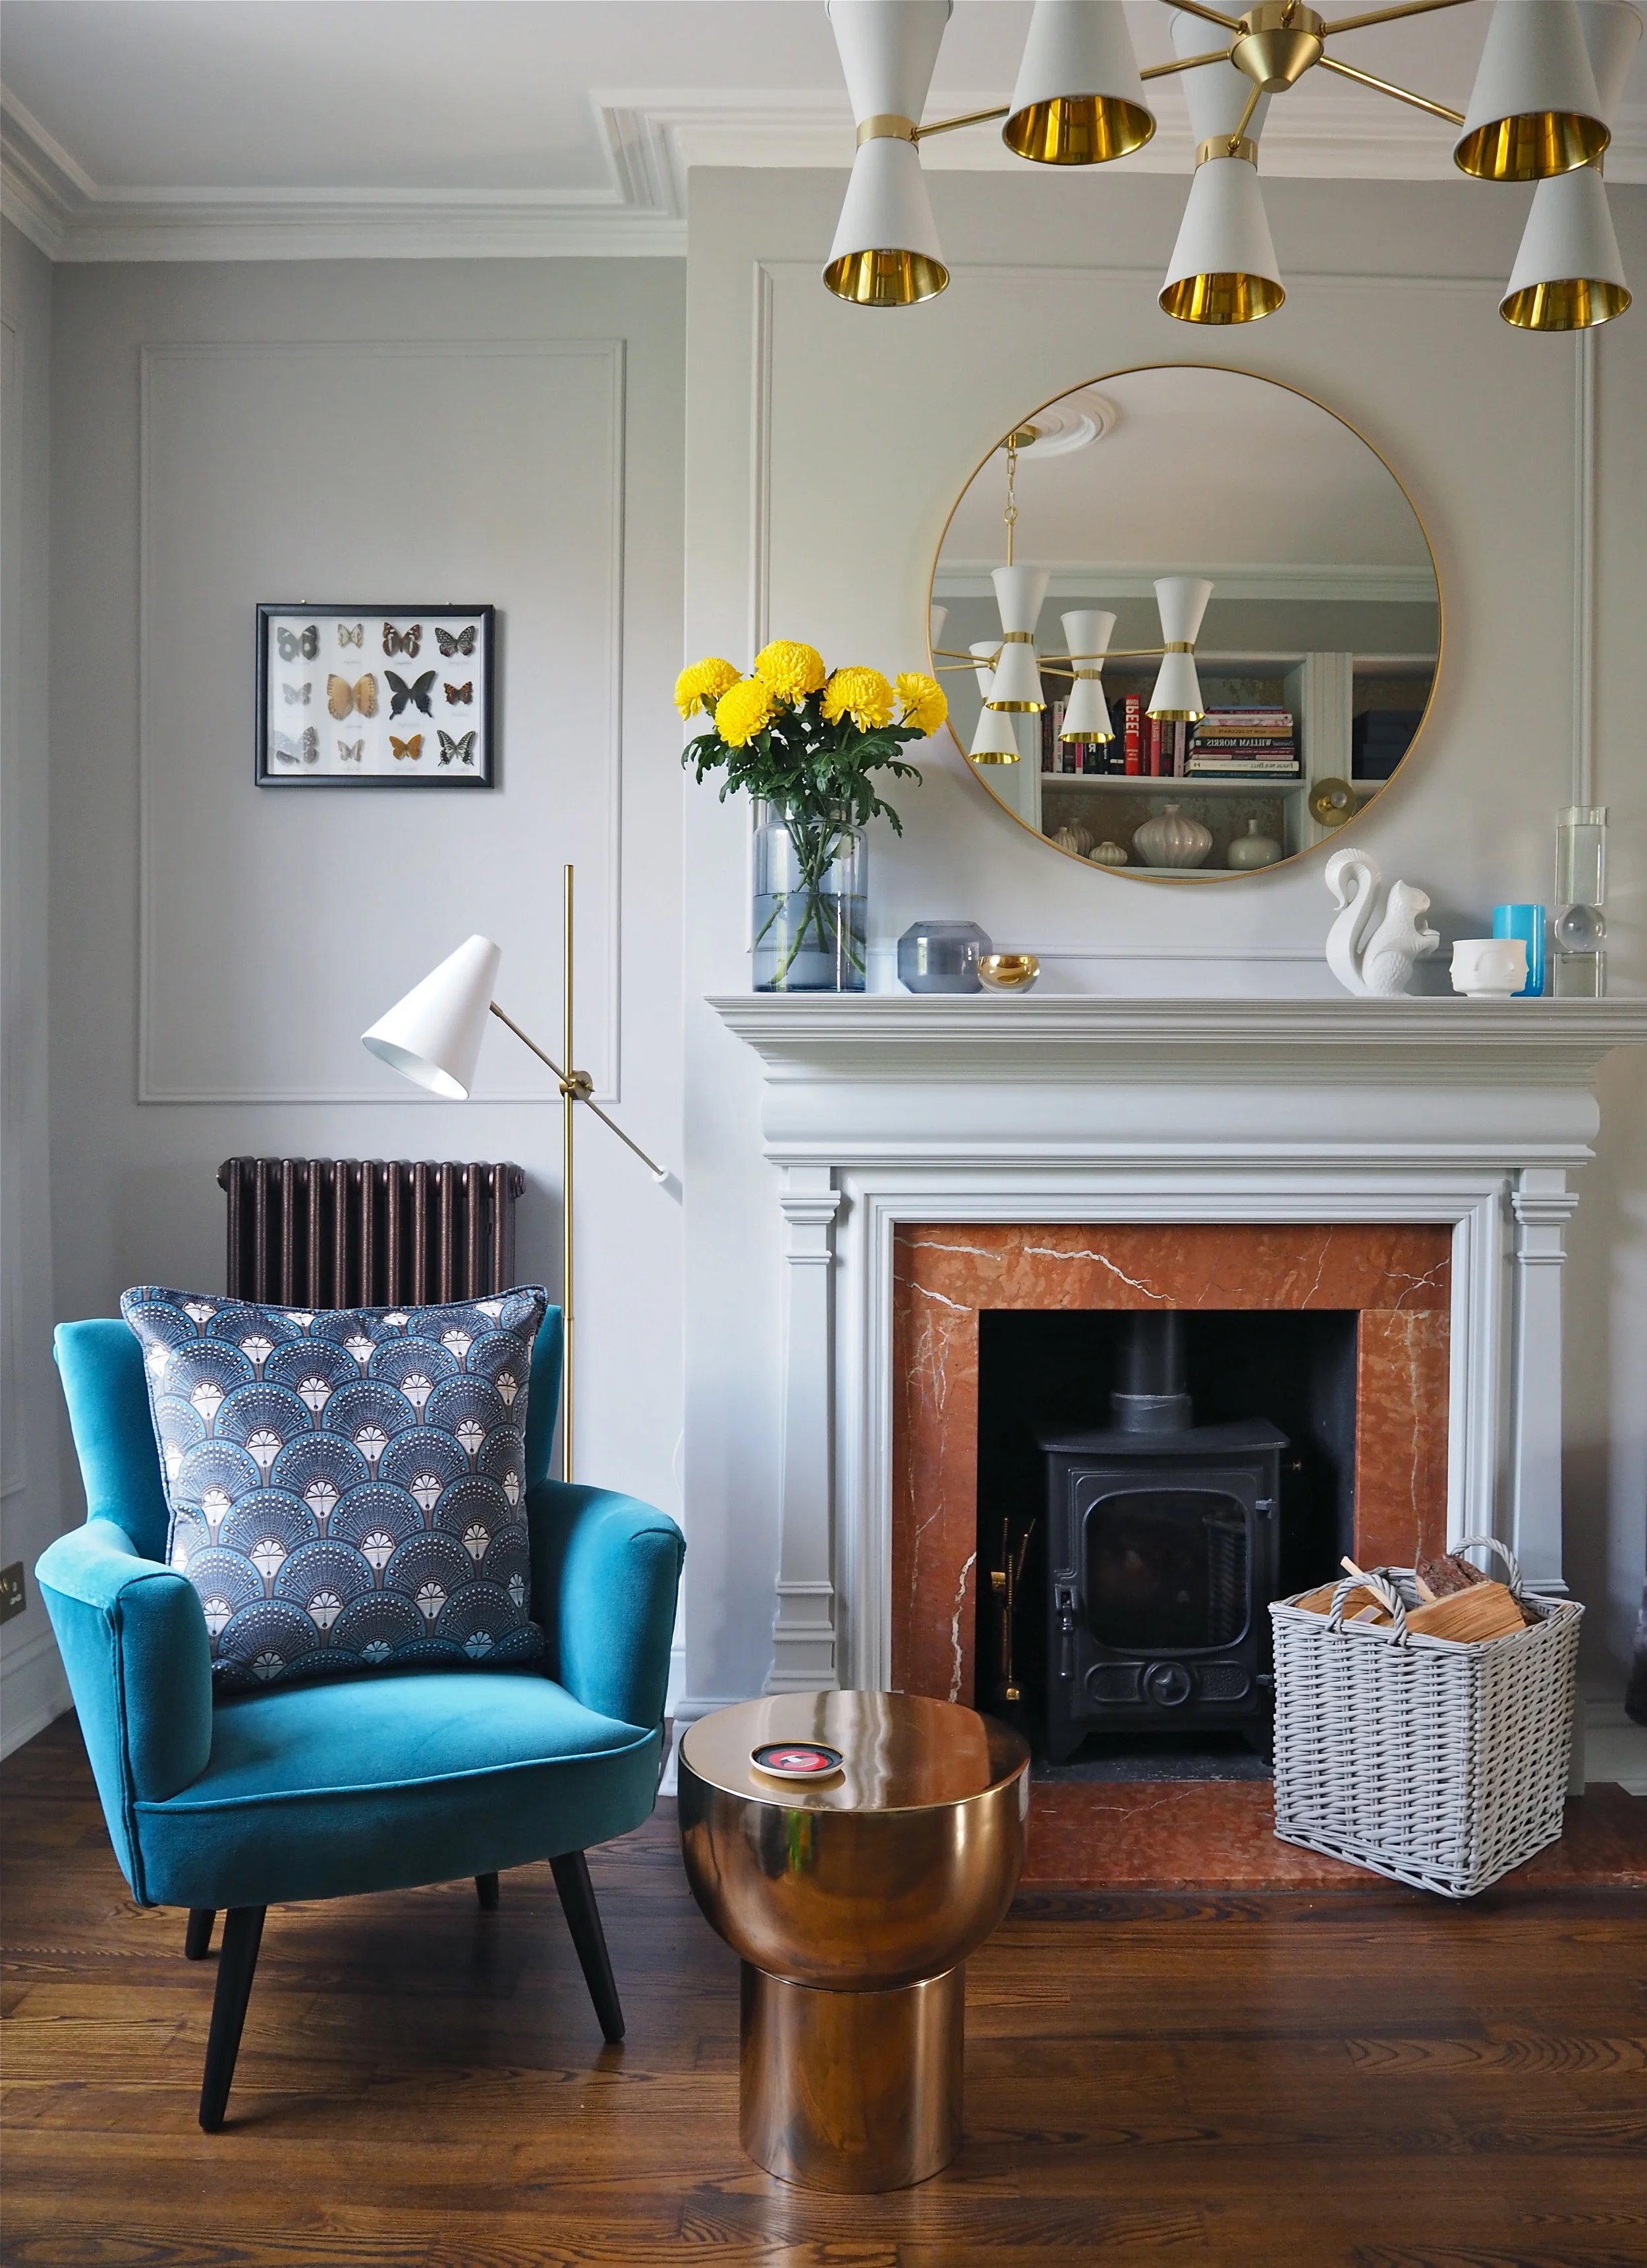
That's it! Once you get started and know what you are doing, wall panels are easy to apply. It is also a really cheap way of adding interest to a room. I knew that I did not want wallpaper in this room, but the walls felt bare without any detail. Now, I am so delighted with how this room looks, I am already planning on adding panelling to my next room!
Does this give you the confidence to give this a go yourself? Let me know in the comments section below...