How To Repair A Peeling Bathroom Wall Or Ceiling
When I covered how I repaired my flaky, peeling bathroom ceiling on Instagram stories recently, I had so many messages about it that I decided to document the process over here on the blog. While this will not be my most glamorous blog post, it will sure beat all the badly filmed ‘boring bloke in a bathroom’ You Tube videos I had to endure to learn how to carry out this DIY task myself!
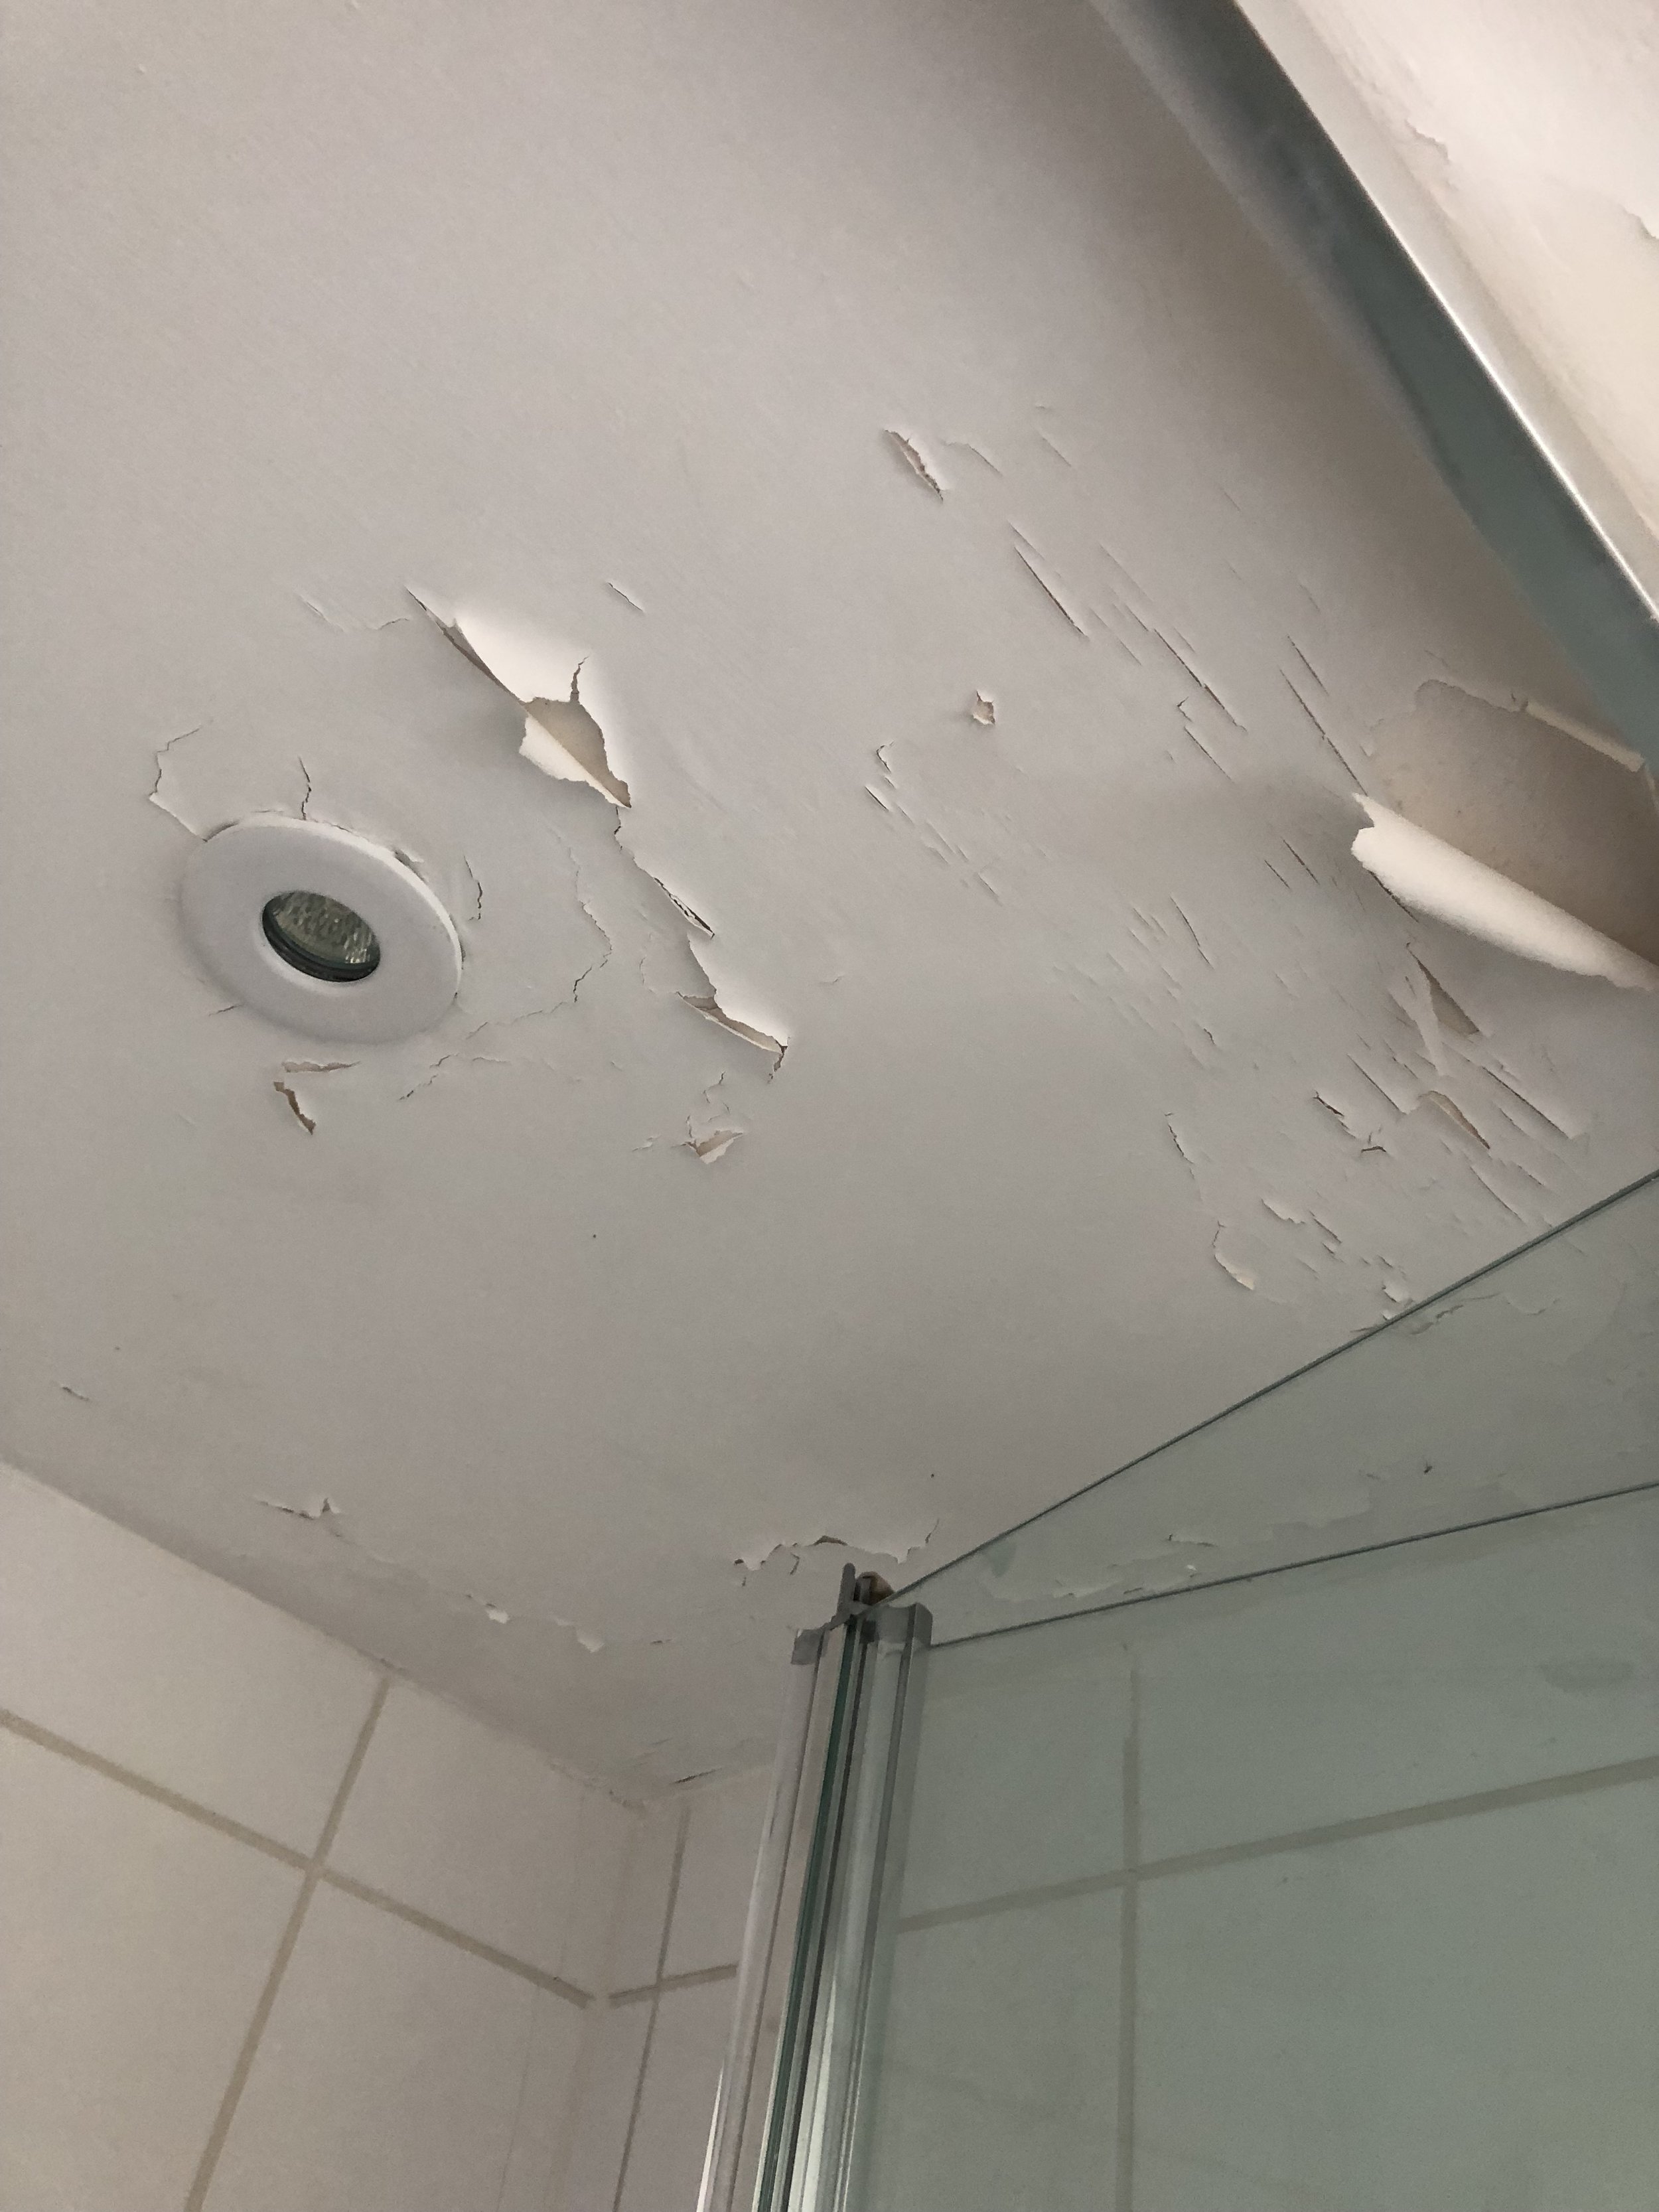
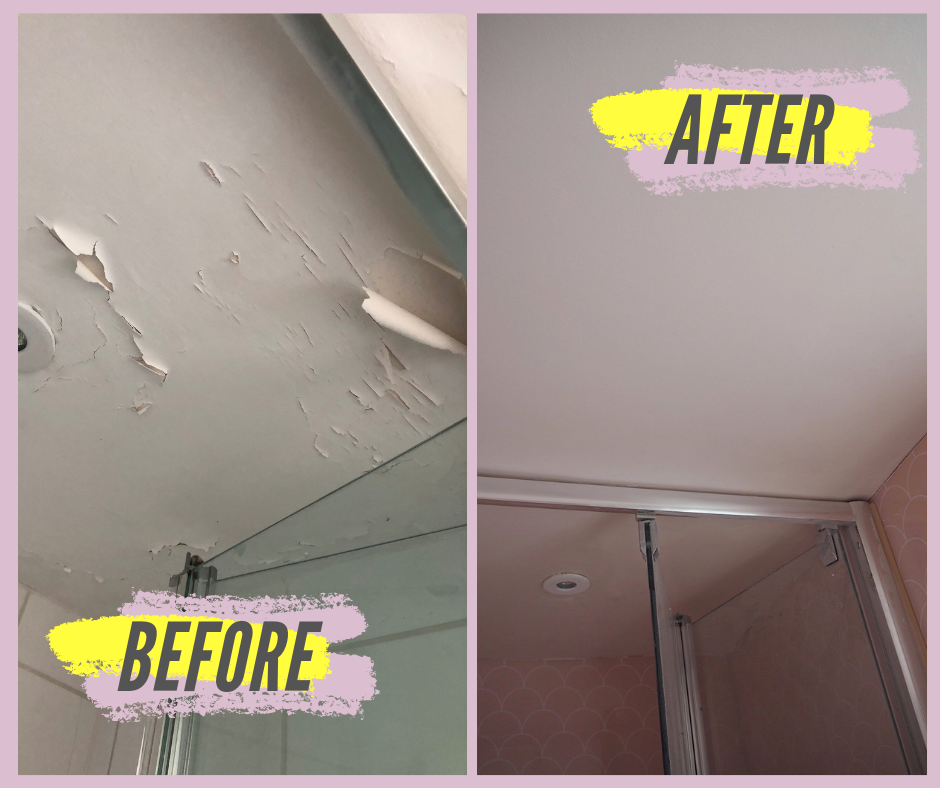
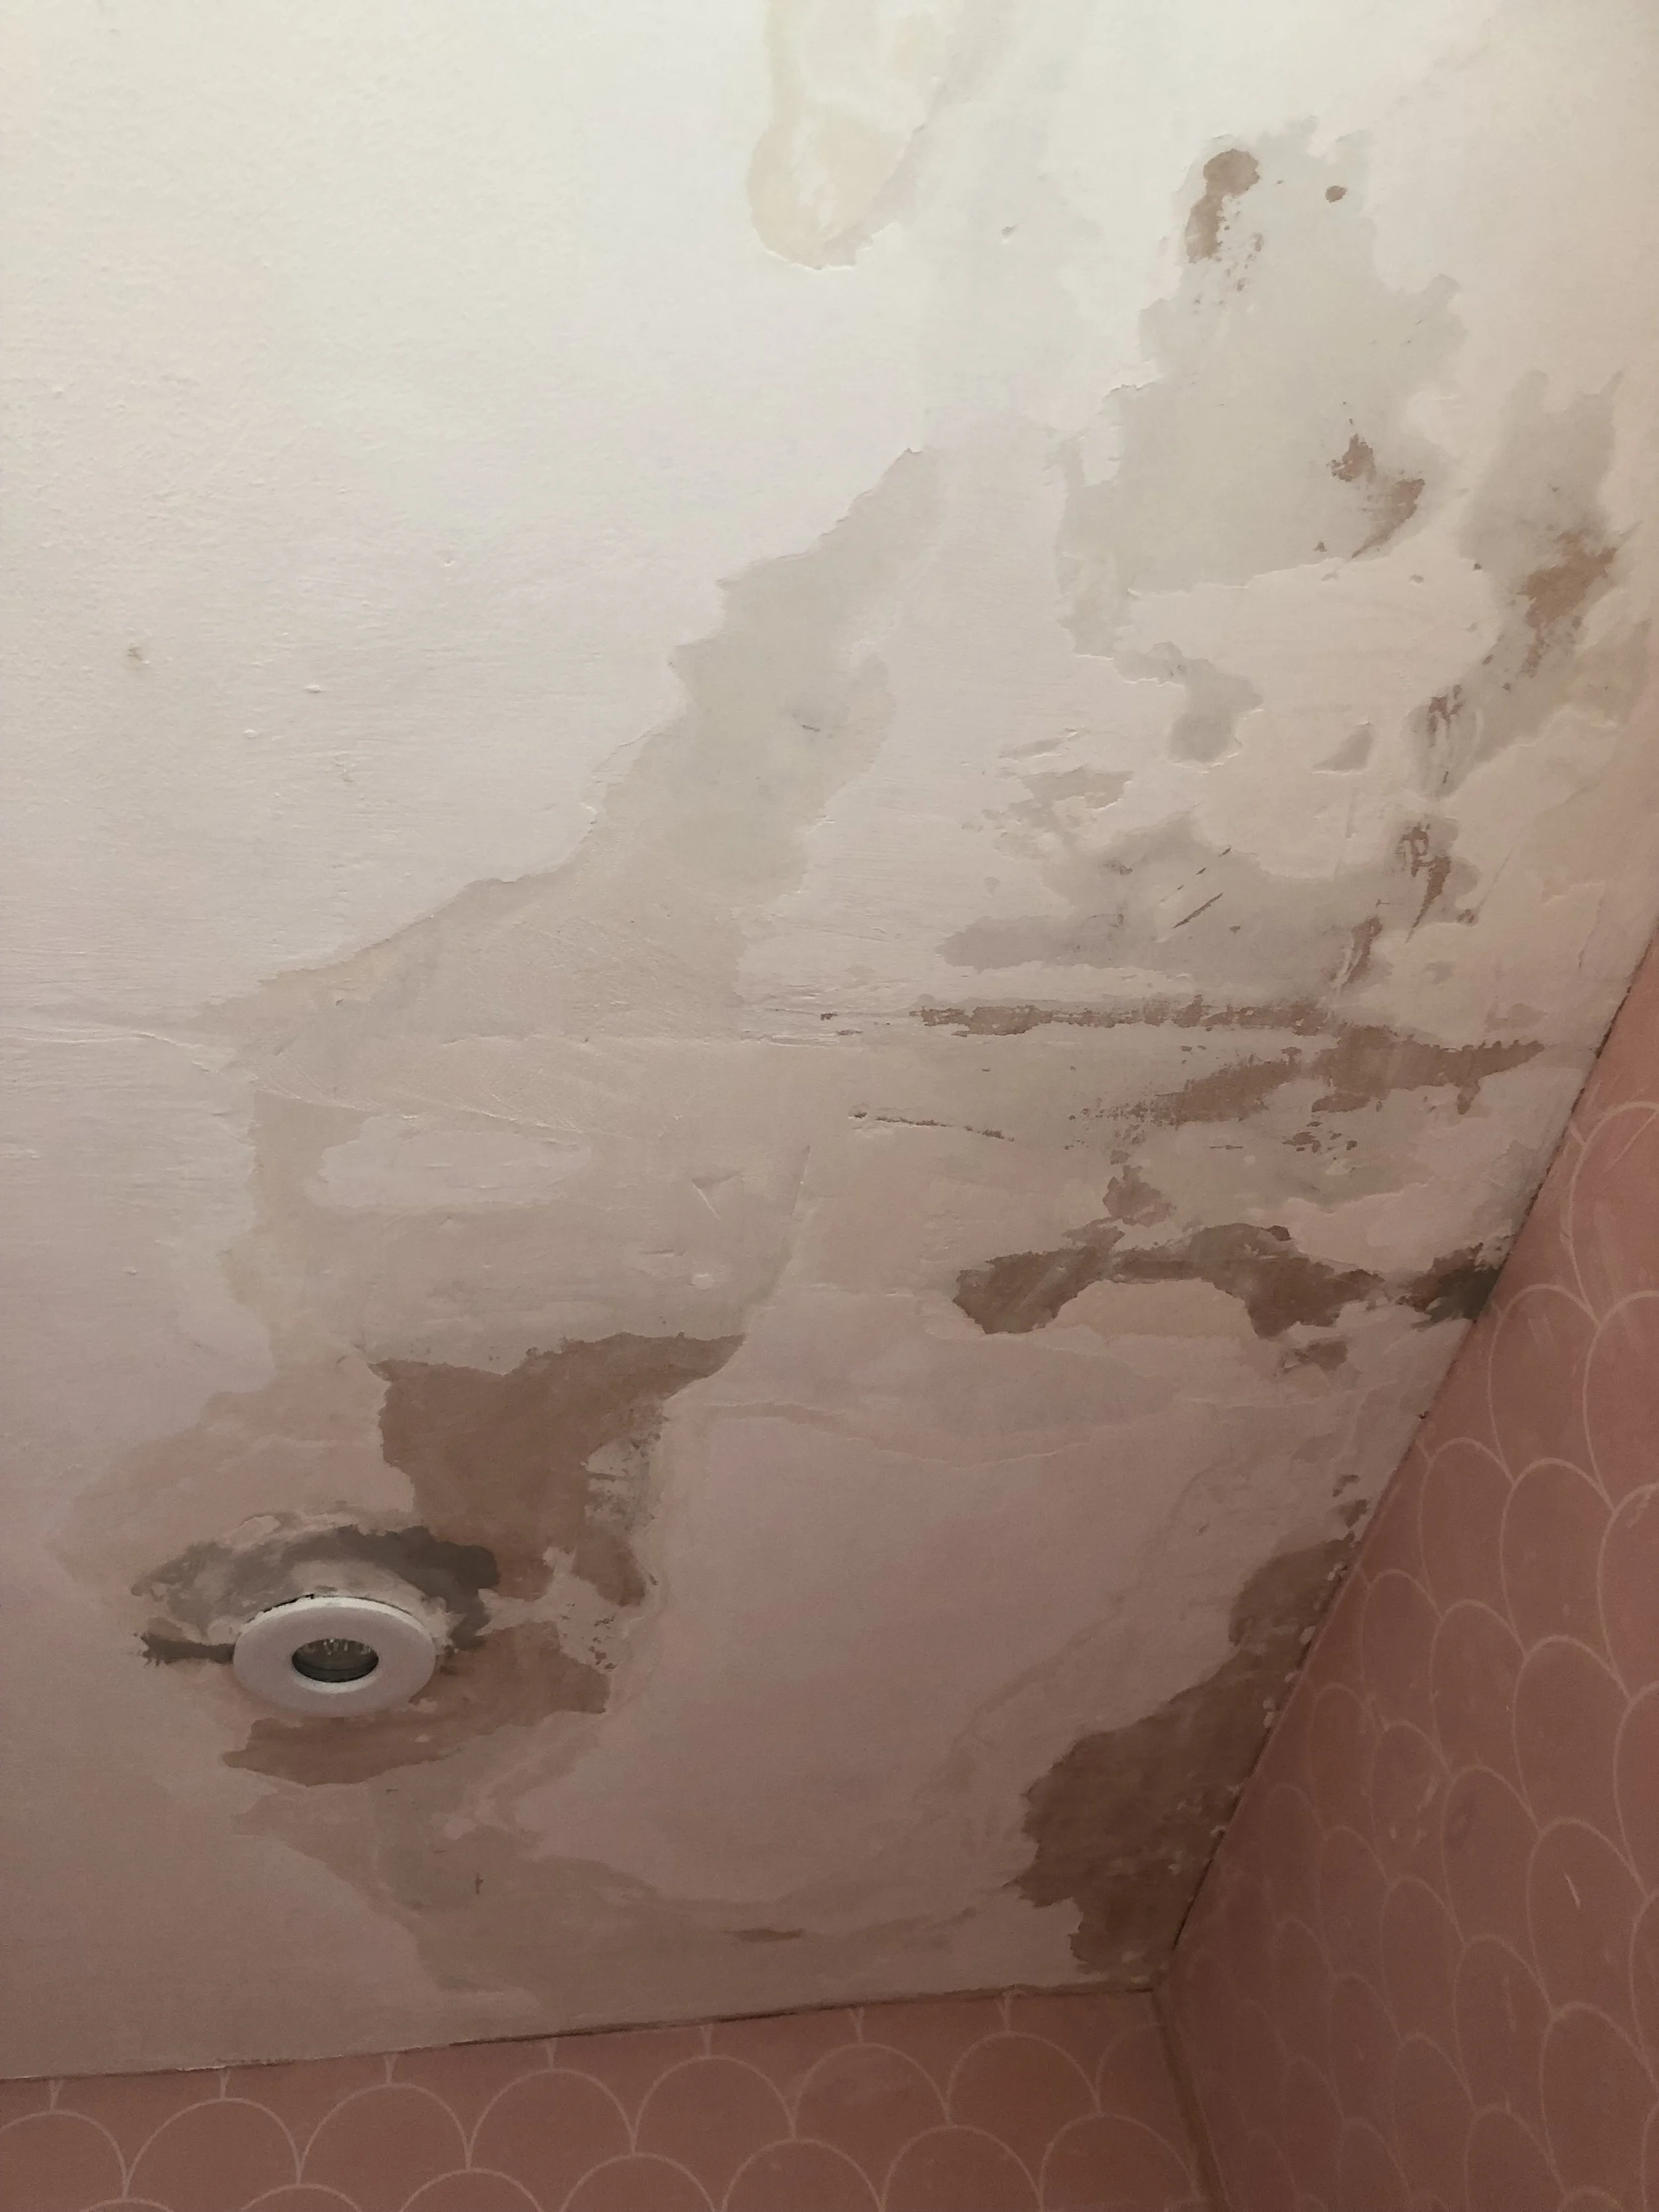
Our tiny downstairs en-suite had always had issues with peeling paint on the ceiling. We have a shower in here that is hardly used, but the condensation was enough to seep in under the paint and push it away from the plaster. I’ve done a few patch-up jobs in the past, scraping off the worst of the damage and touching it up with a kitchen and bathroom paint, but the problem always resurrected itself quite quickly. Upon having the tiles replaced in this bathroom, I decided it was time to tackle this ceiling once and for all with the proper products that would repair the existing damage and stop the paint peeling in the future. There were four key products that I used that gave me a super-smooth, repaired ceiling and peace of mind that the peeling would not come back:
Find the links to all these products in the DIY guide below….
To begin, I used a paint scraper to scrape away all the loose paint. This is a horrible job on a ceiling, so make sure you wear a dust mask and protective glasses for your safety. It's also a good idea to have a particle-capture purifier placed in the room for a few days afterwards to absorb pollutants.
Once all the loose paint has been completely removed, use a sander with a medium-grit paper to sand and smooth the ceiling down as much as possible. I used the Ryobi Palm Sander as it is nice and light to hold above my head, plus it has a dust collection box which sucks the dust into the machine, rather than just let it all fall on your head!
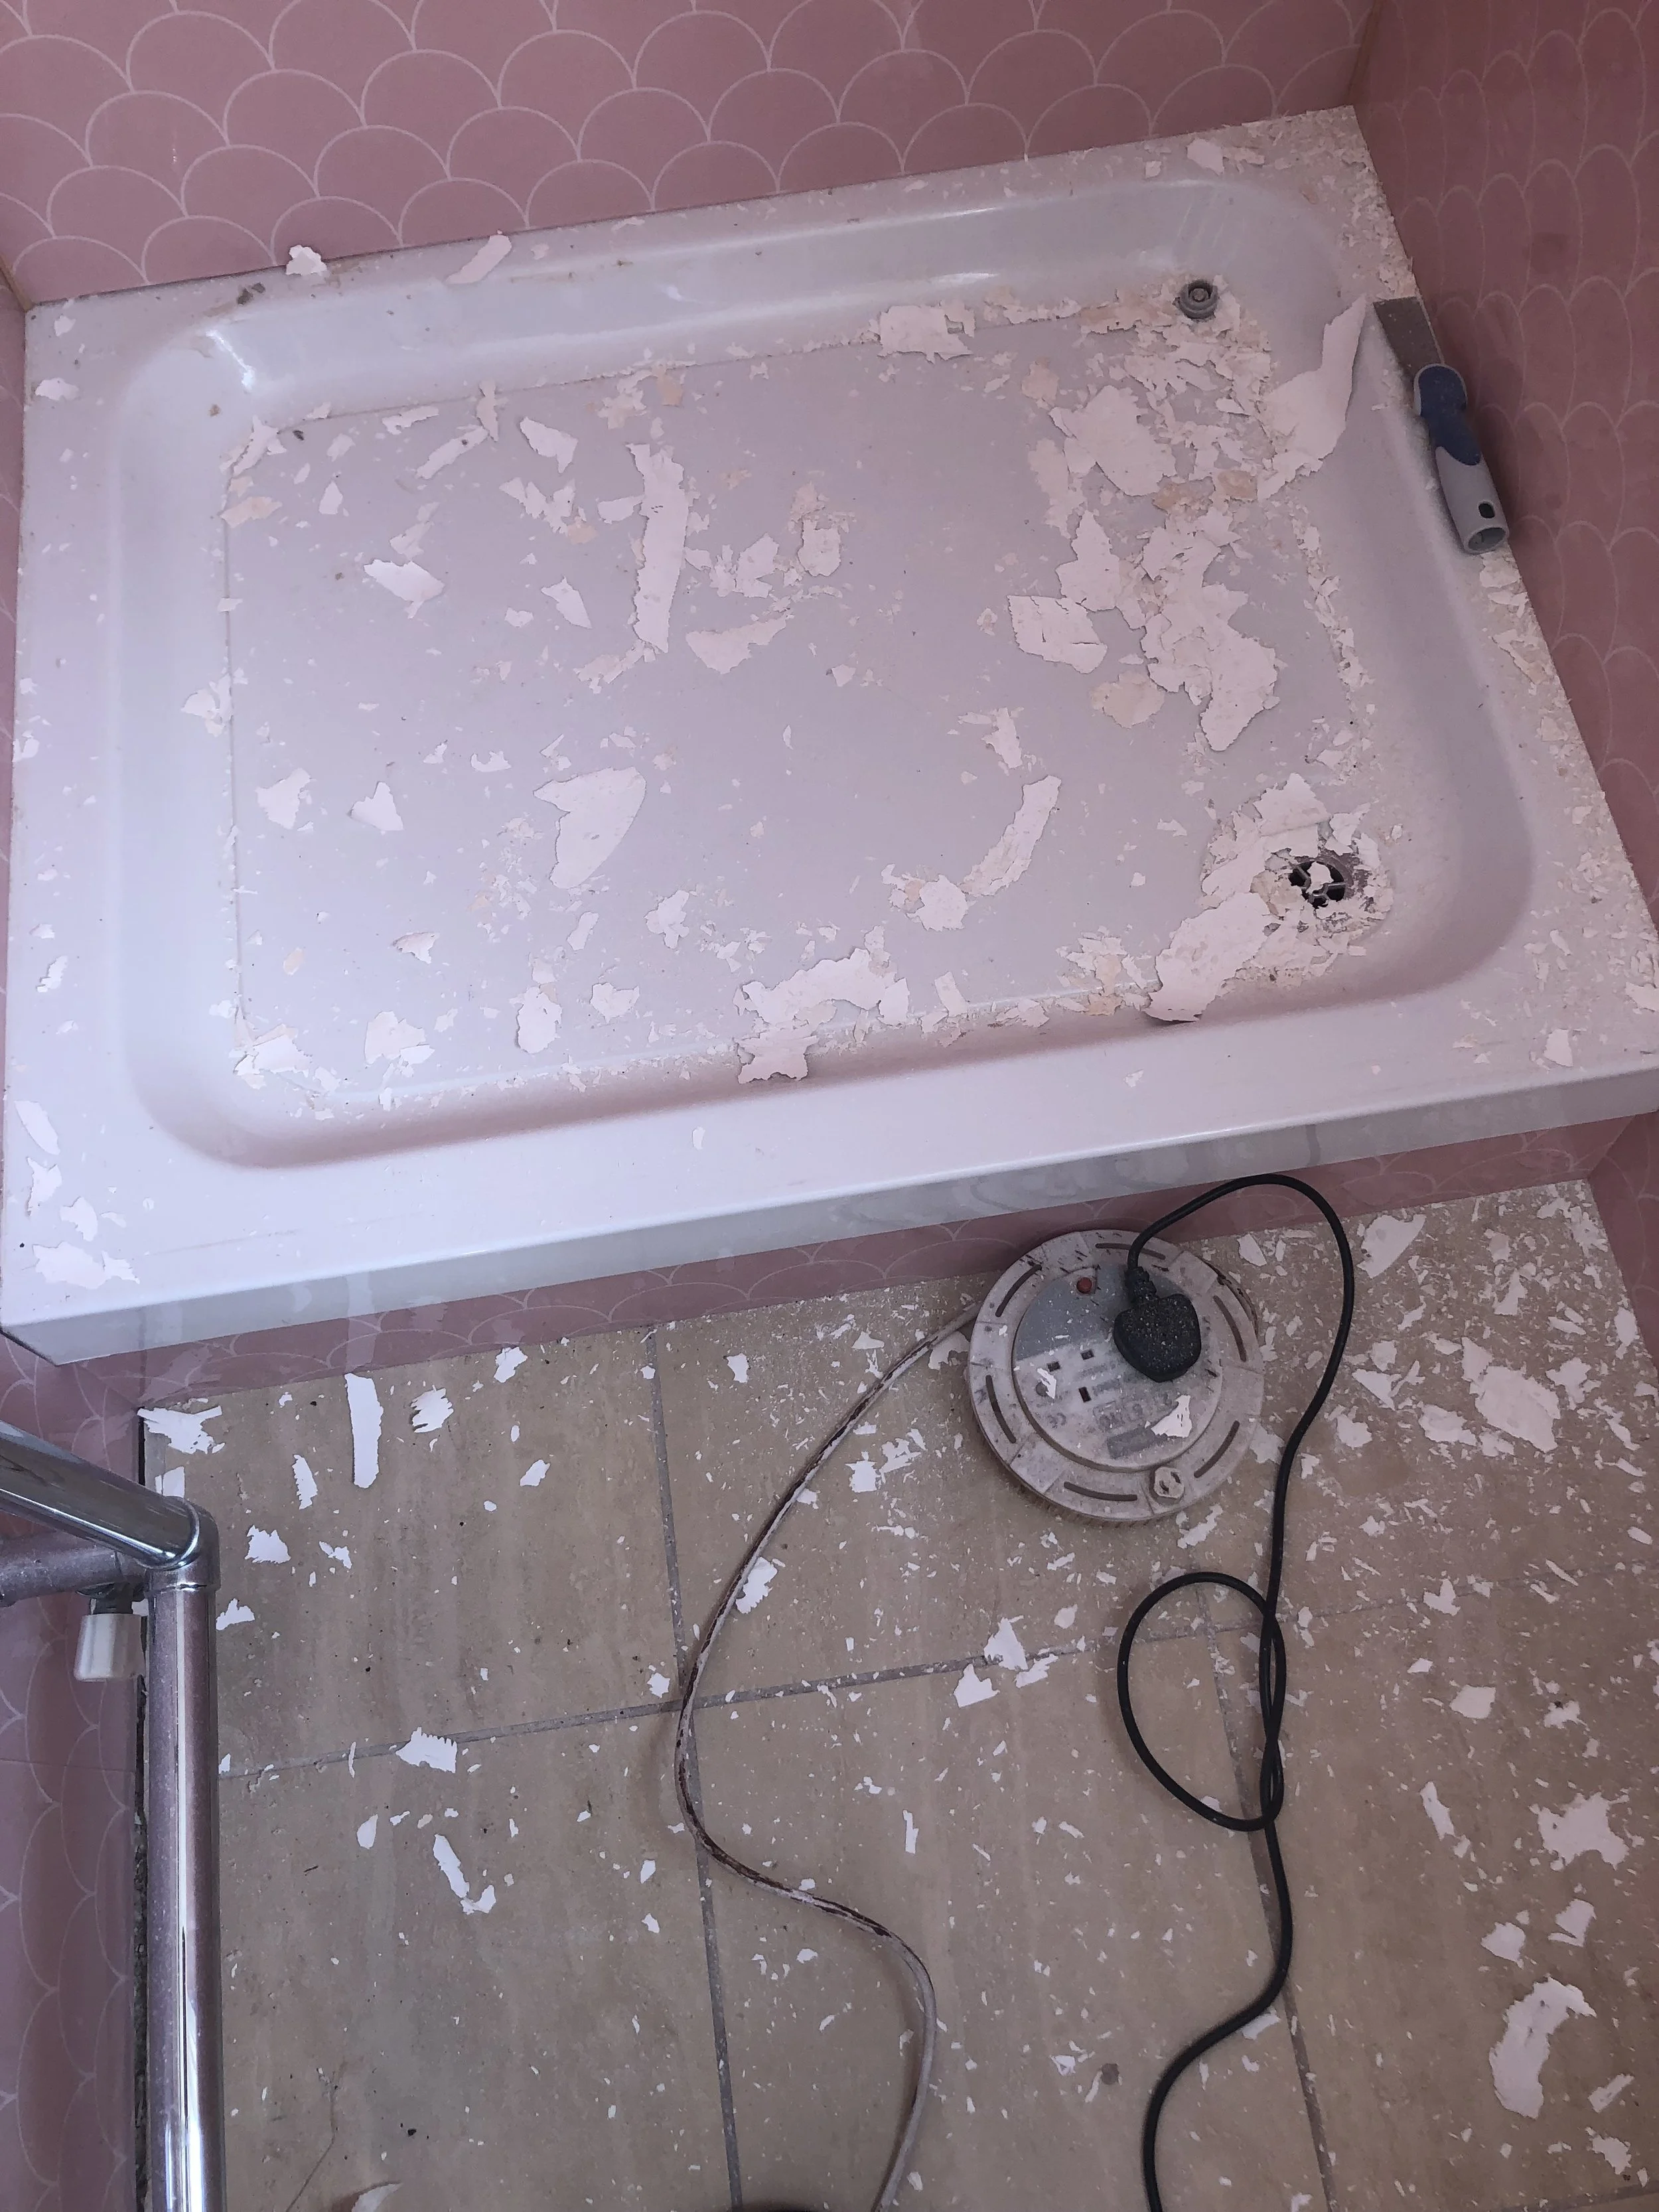
A good tip I got after I shared this photo online was to cover the plughole with tape so the paint flakes don’t trickle down there!
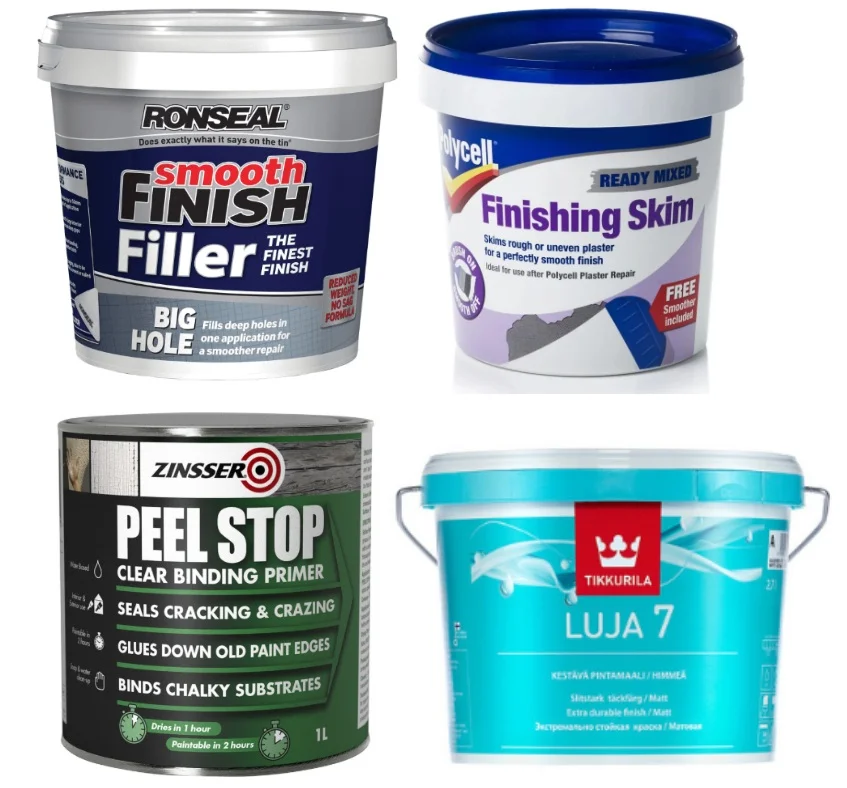
Once the ceiling was rid of any flaky paint, I filled in any really deep holes with Ronseal Smooth Finish Filler. Once the filler was dry, I then sanded the filled area until smooth and this is what I was left with:
As you can see, the ceiling was still really uneven. Some paint had been removed back to the plaster, while some layers remained. To get a perfectly smooth finish ready for priming and painting, I had to put on a patching compound to level everything out. After a bit of research, I decided that Polycell Finishing Skim was the right product for the job. Finishing Skim is a more watery type of filler that you apply with a paintbrush, then smooth over with the scraper that is supplied in the tub. I applied the skim quite liberally in all directions with the paintbrush as I found that this had the best outcome. After I smoothed it over with the plastic scraper and left it overnight to dry, this is what it looked like:
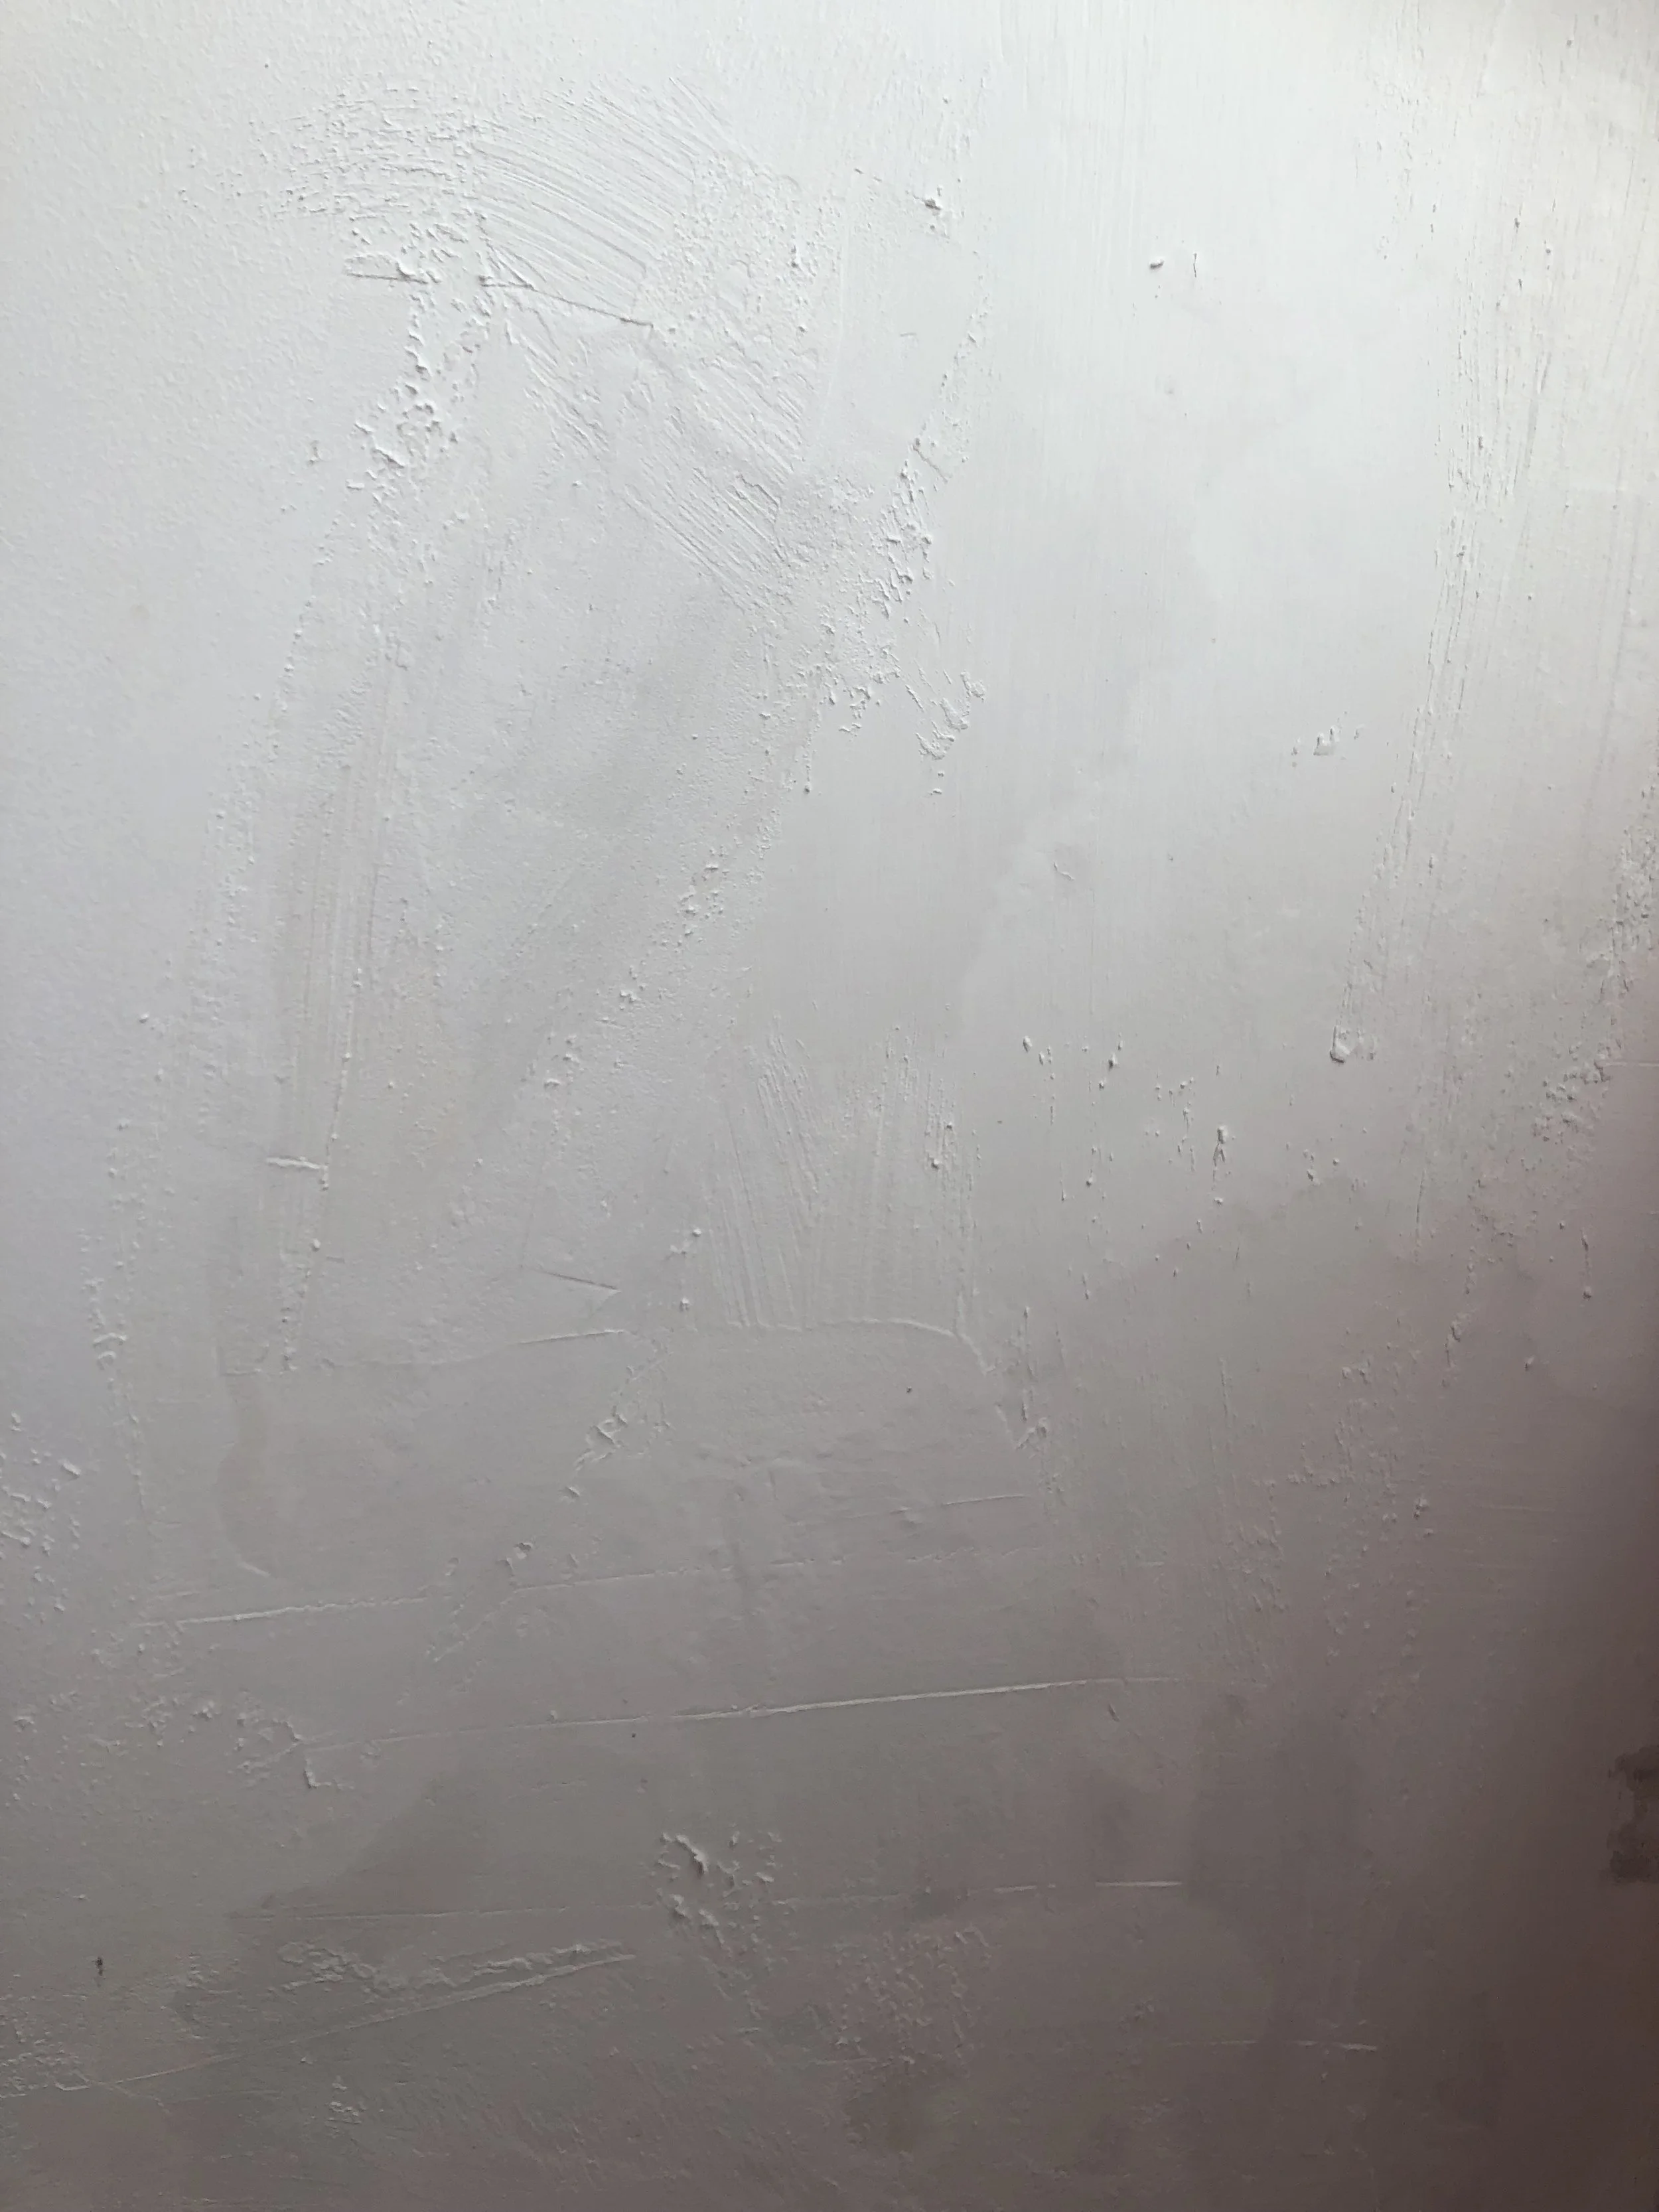
I then gave it a good going over with the sander again (using a fine grain paper this time) and this was the result:
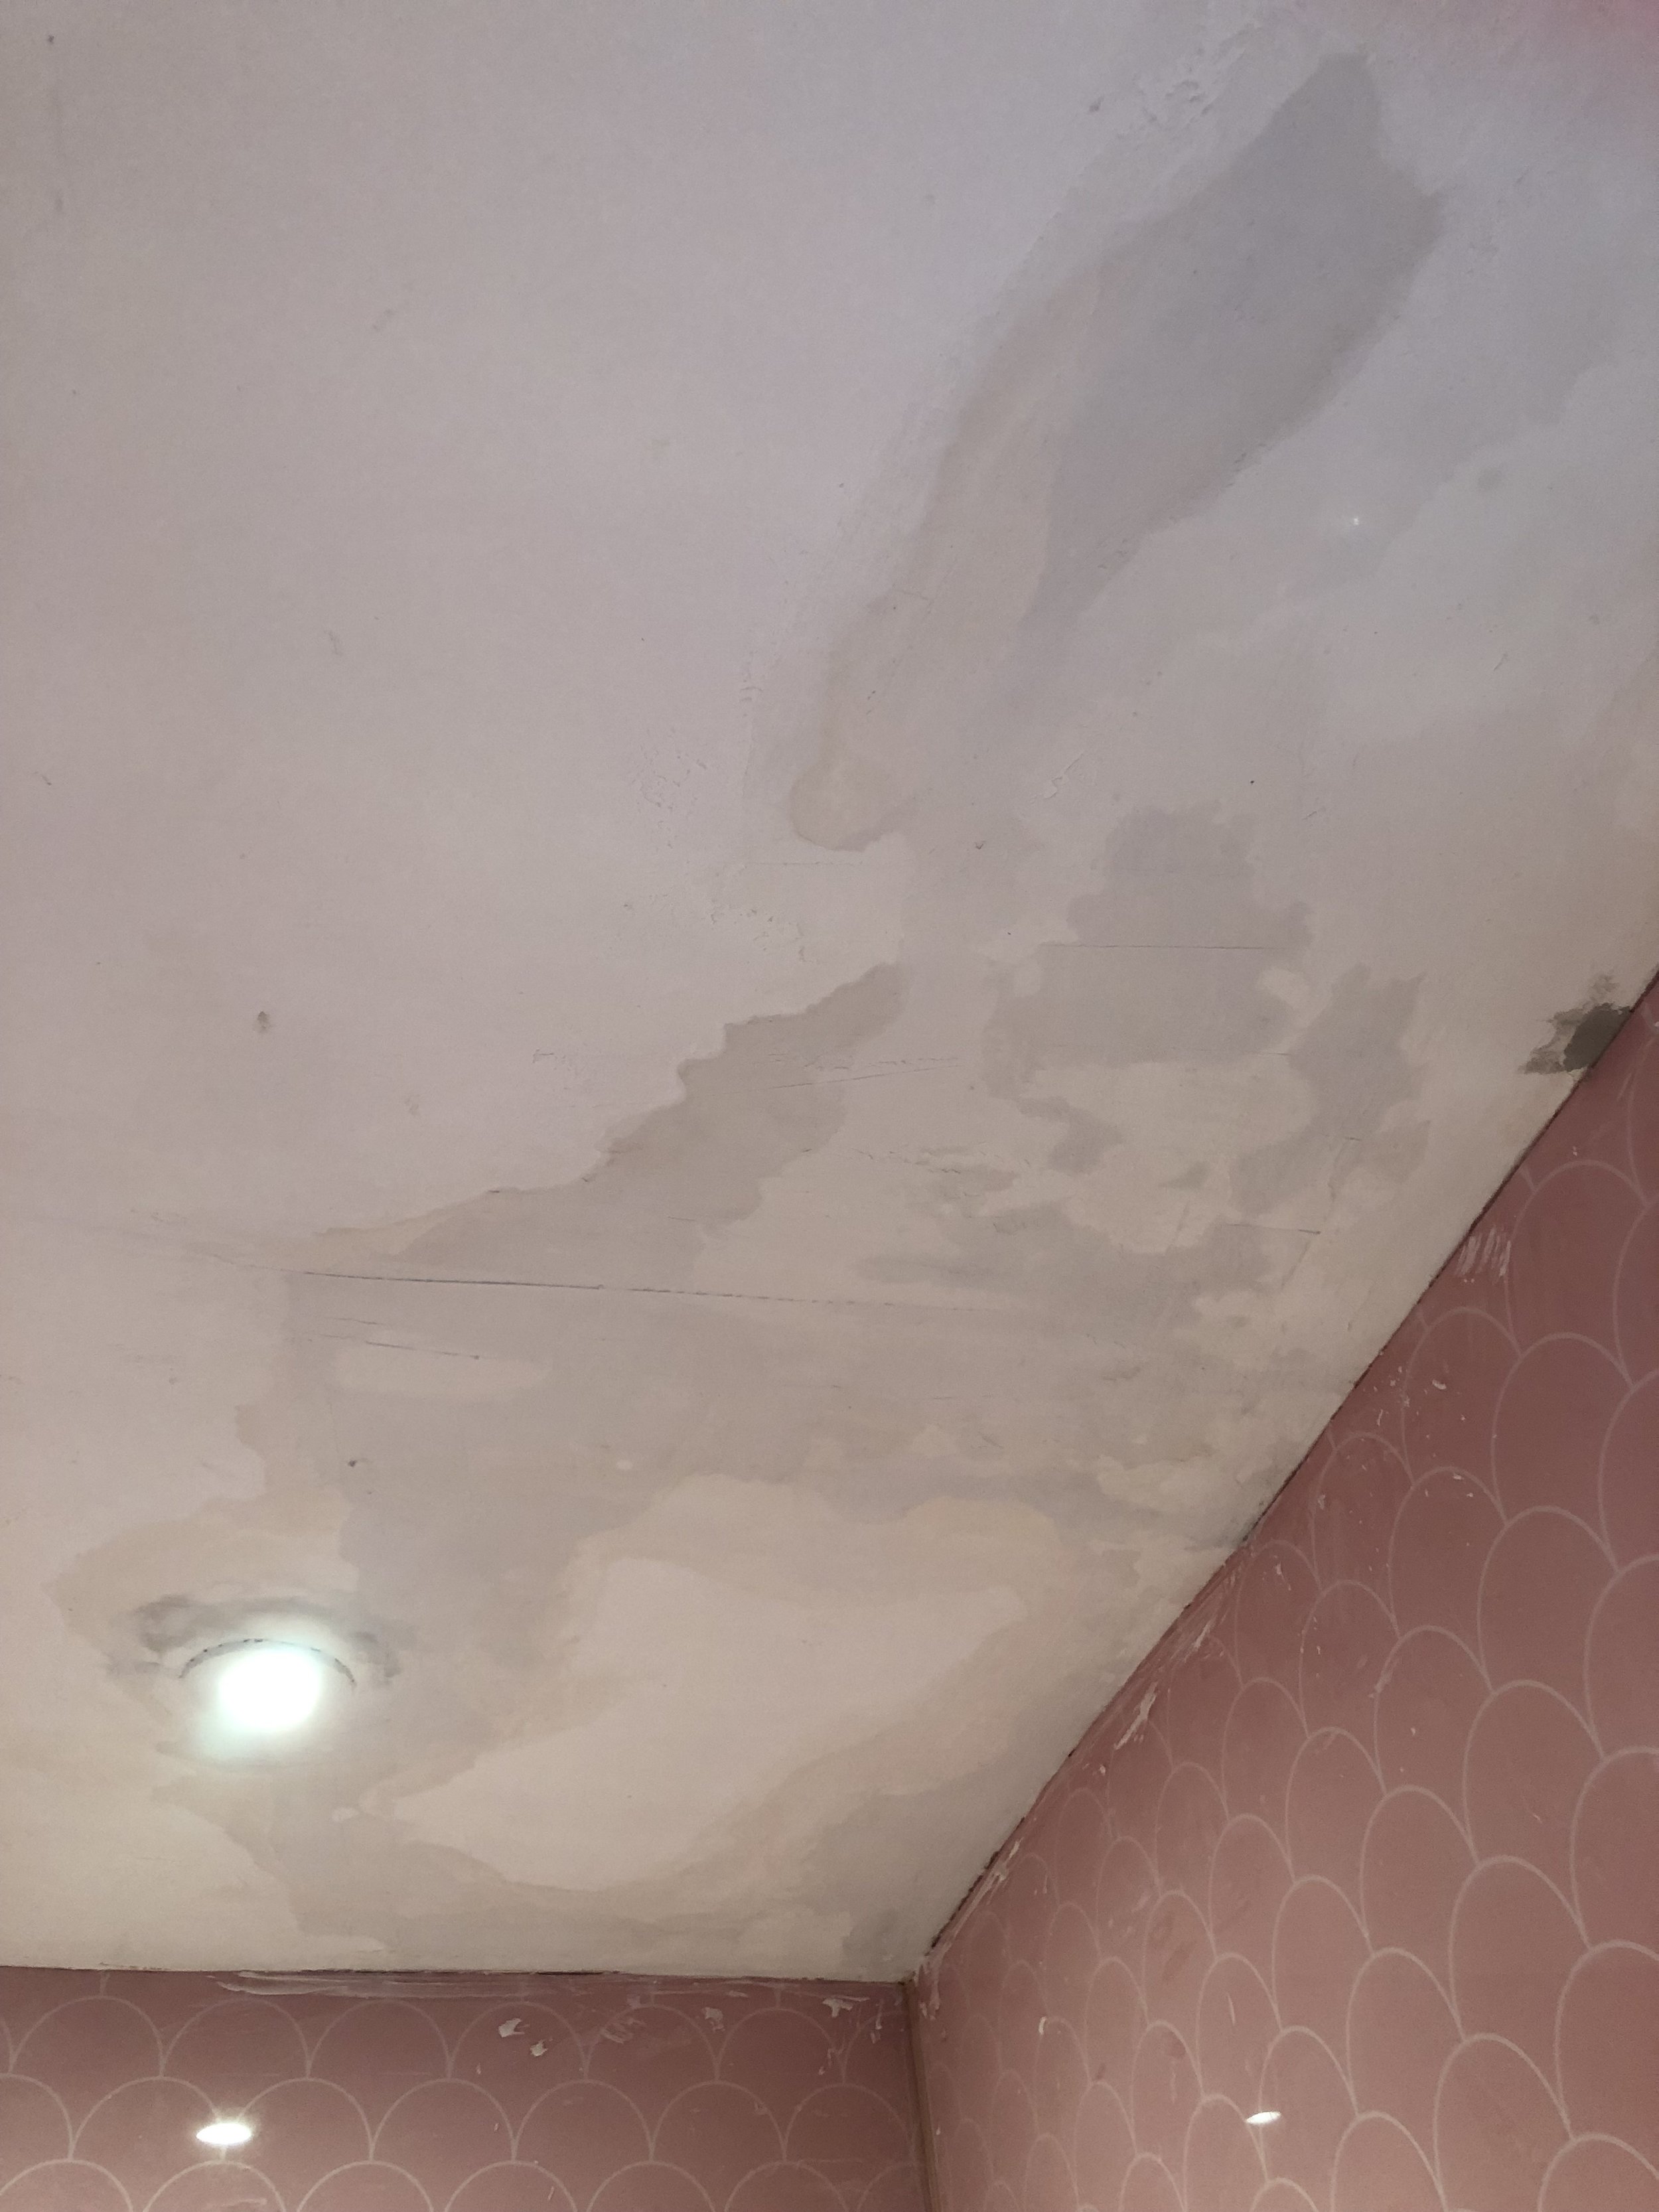
I have to say I was overjoyed with the result. The ceiling was now flat and smooth ready for priming and painting. I cleared away the sander and washed down the ceiling with sugar soap to remove any surface dust.
Now the ceiling was fixed I needed to make sure that I focused on prevention from this happening again. I have a brilliant local decorators merchant who give me a wealth of advice and they recommended two products: Zinsser Peel Stop Primer and Tikkurila Luja Matt 7 Anti-Mould paint.
Zinsser products I have used before and love. Their B.I.N. primer is the best primer going and I’ve used it in a multitude of DIY projects. Peel Stop actively bonds down old paint edges and seals any cracks so that any moisture in the atmosphere cannot penetrate and push out the paint. I used one generous coat of this on my ceiling and let it dry overnight before applying three coats of Tikkurila Luja 7.
A Finnish brand, Tikkurila paint is anti-mould and incredibly hard-wearing. It will not soften when exposed to moisture and it has been designed for use in high humidity environments such as swimming pools, distilleries and hospitals. As mentioned, I purchased Tikkurila in my local decorators merchants, so seek out your local trade paint specialist to purchase in your area.
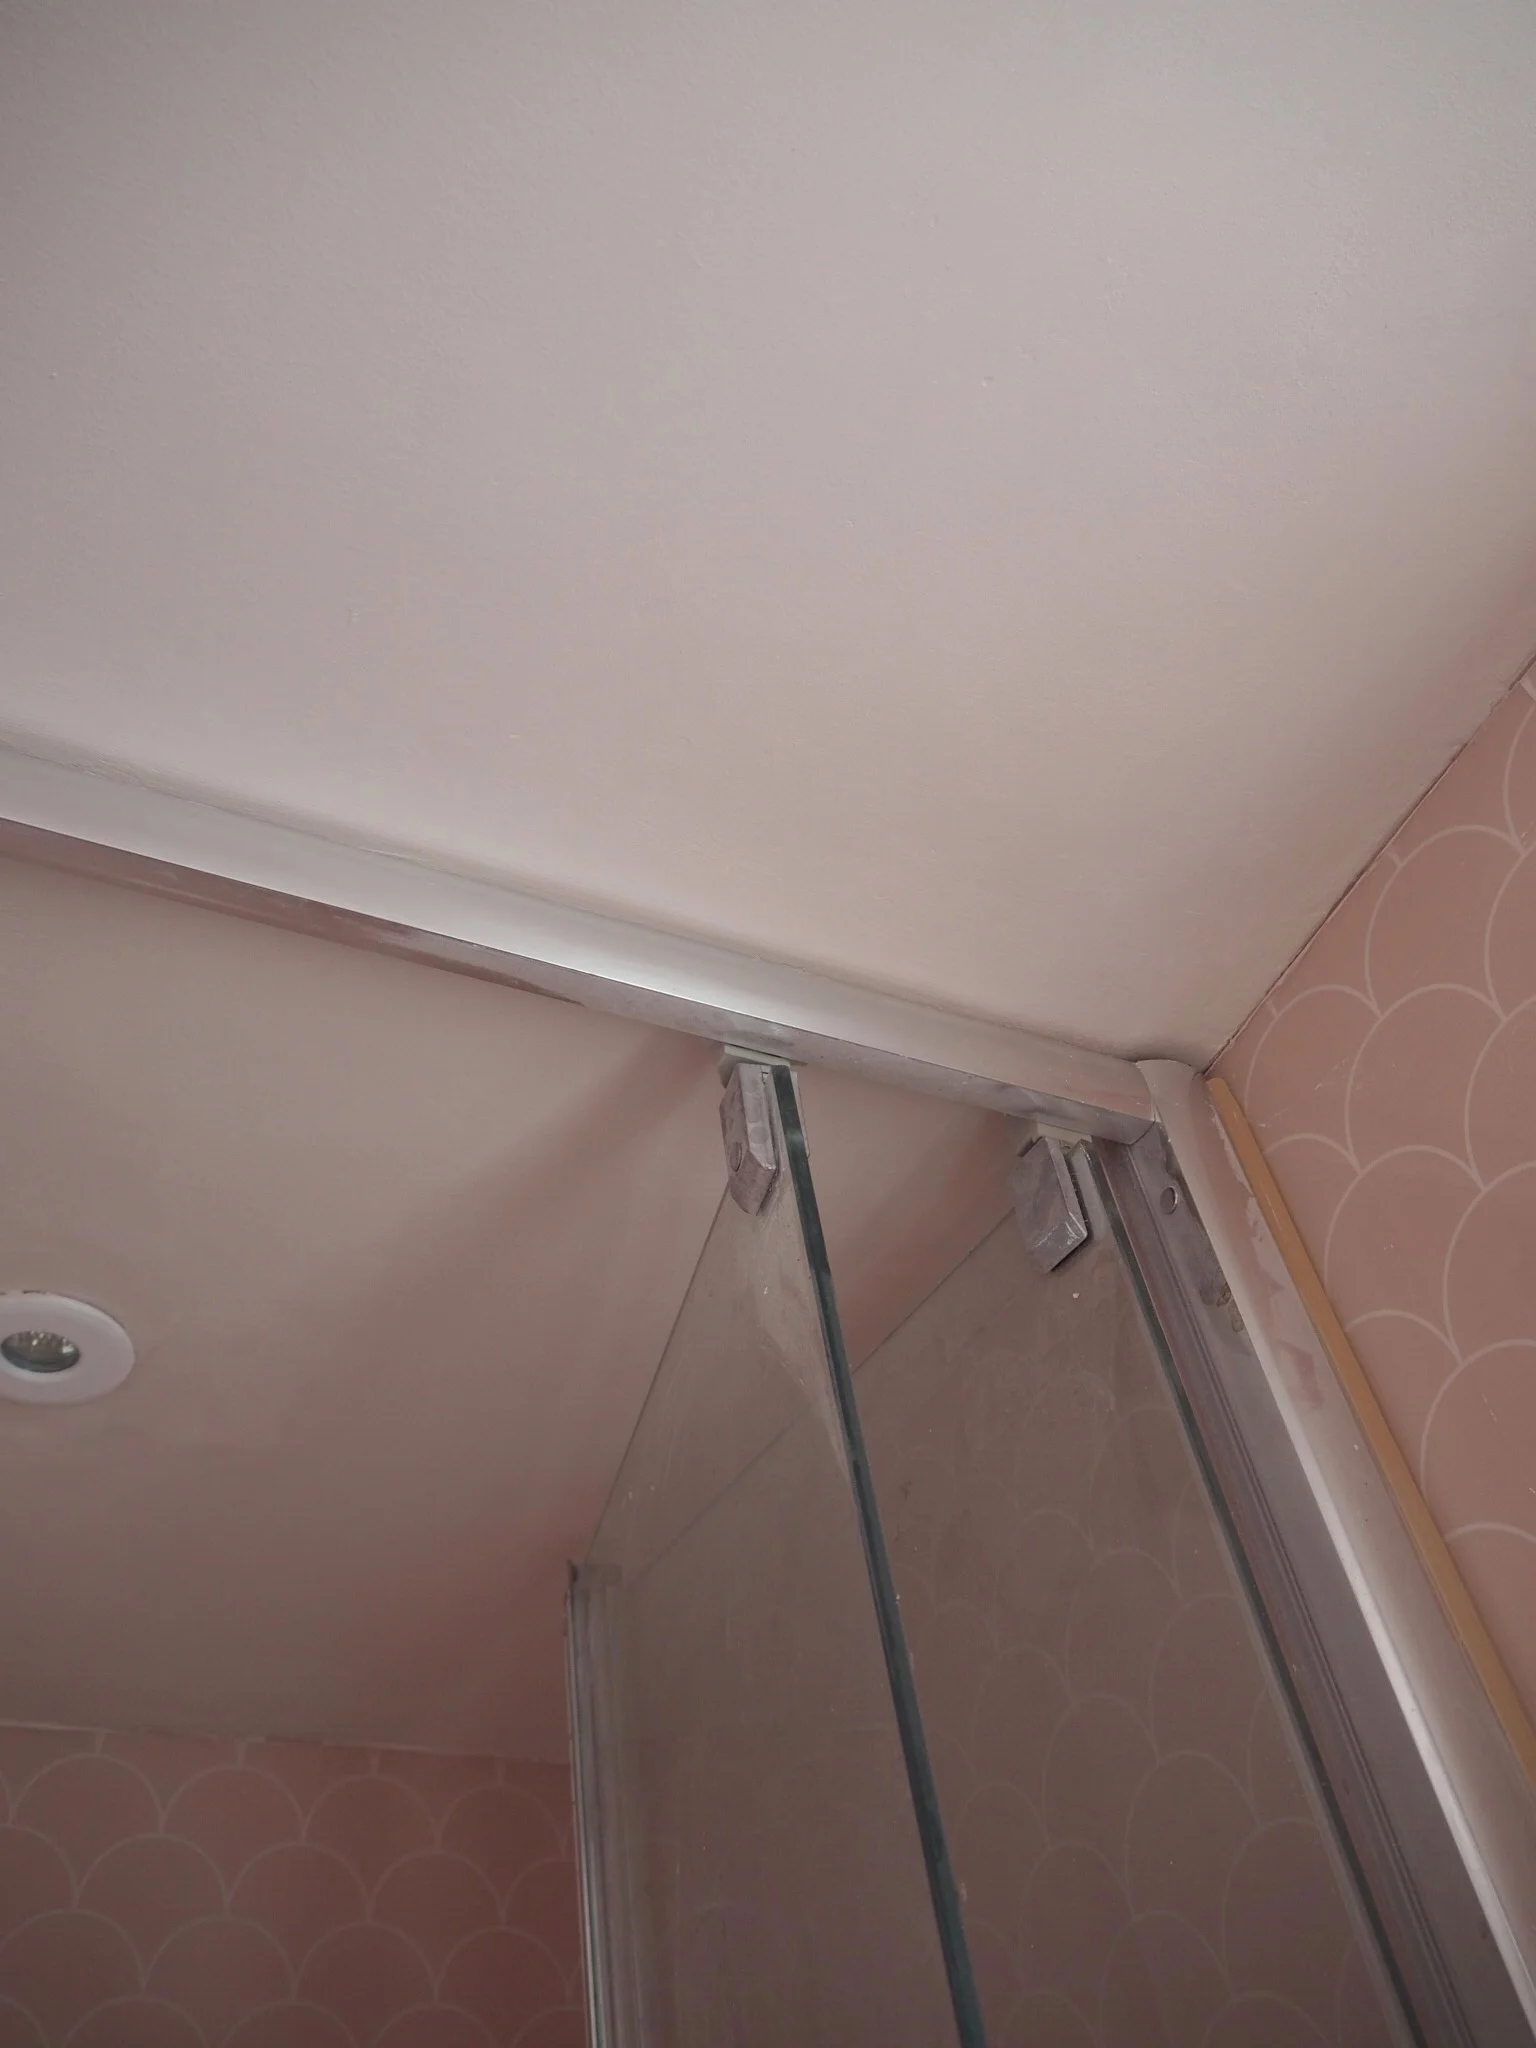
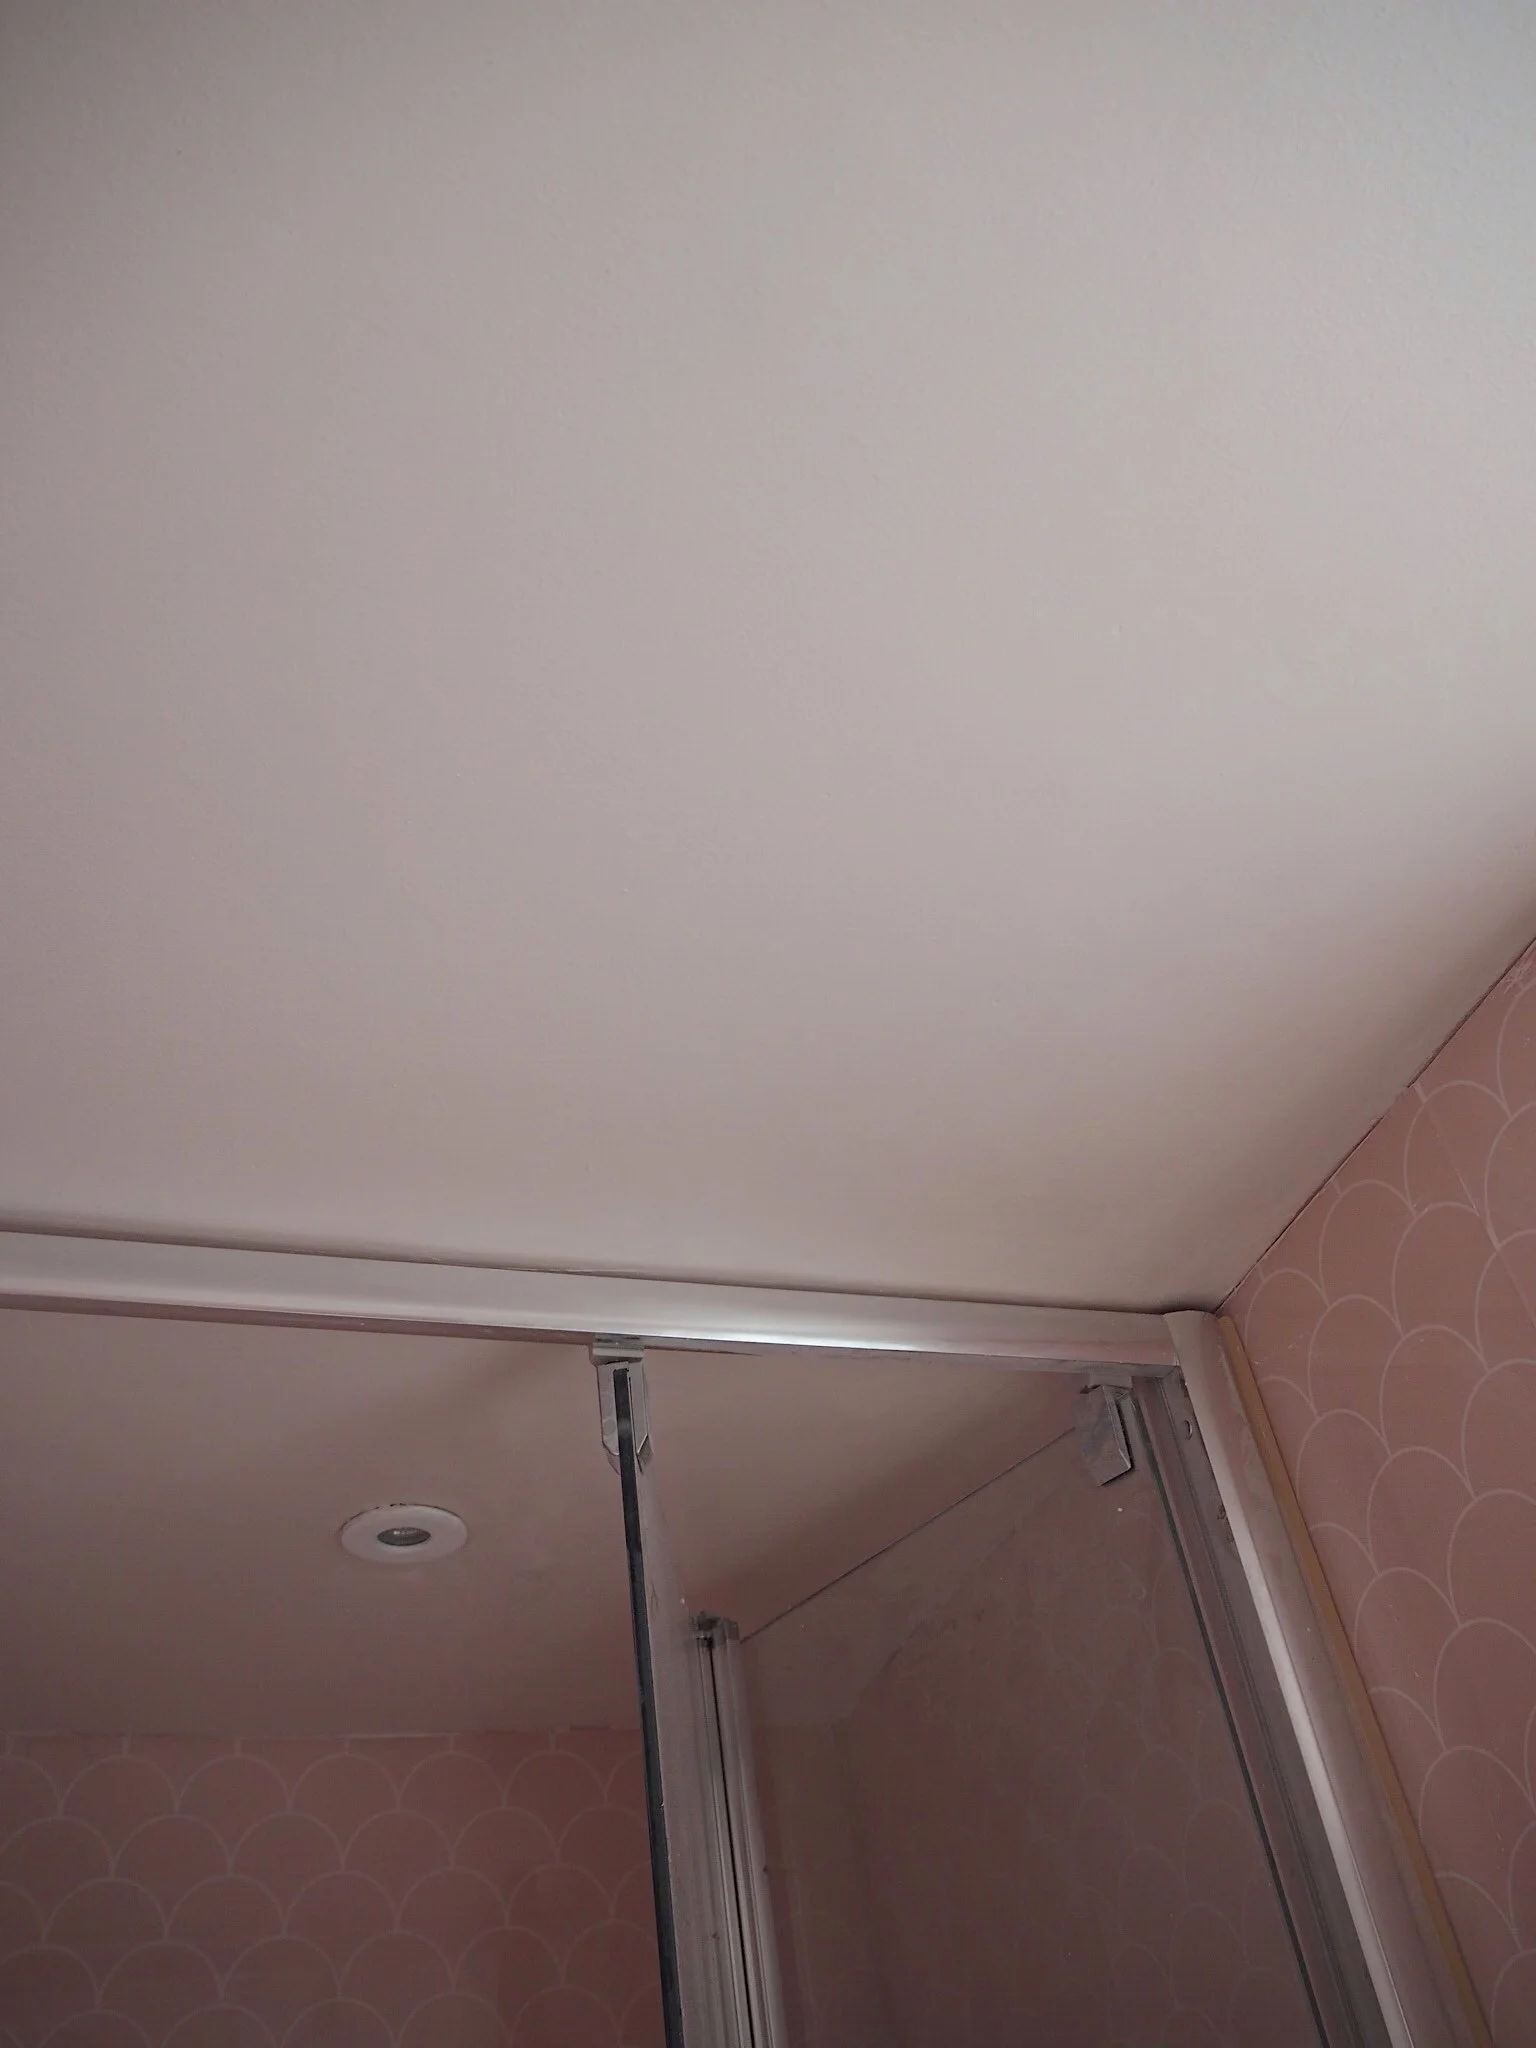
The final result
I couldn’t be happier with the DIY job and a flaky ceiling is now not something that I should have to deal with in the future. Stay tuned for the full bathroom reveal which is coming on the blog next week!
* While this post is not sponsored in any way, please note that links within the post are affiliate (which means if you purchase anything via my links i’ll get a tiny commission.)