DIY Back Door Re-Vamp With Home-Made Awning

The awning was the starting point for the rest of the revamp design
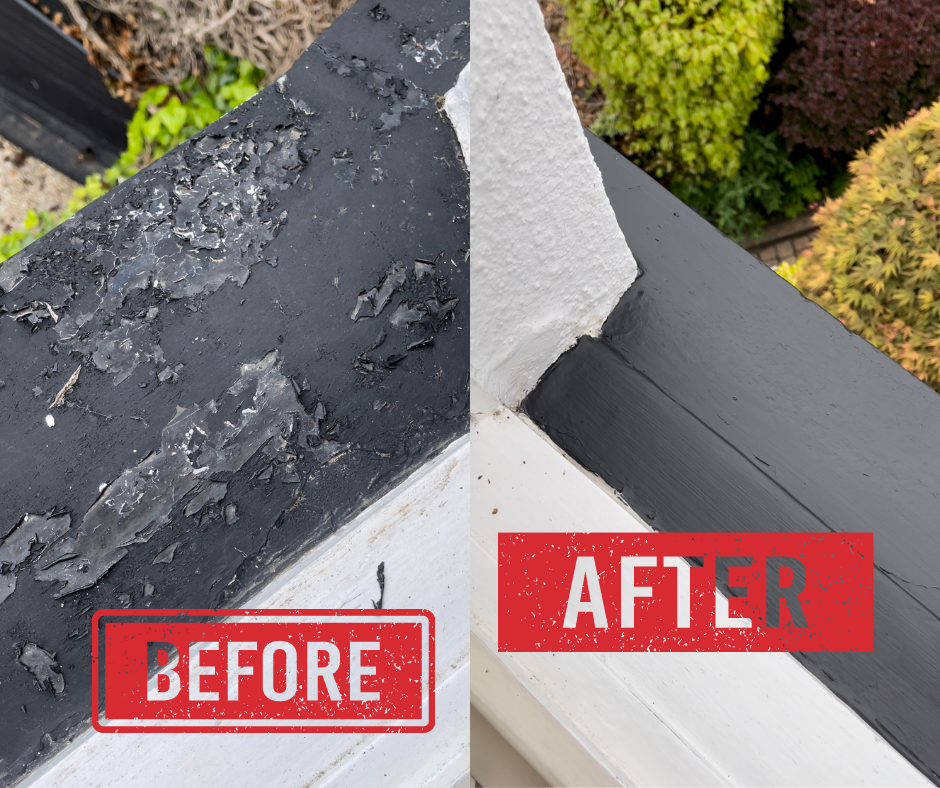
The back door to our house was needing a little bit of love. Its paint was peeling and it was just generally uninspiring. It also still had a Christmas decoration on it which I had been meaning to take down in like, forever. Instead of just giving it a new lick of paint, I decided to add a few more features to really jazz it up properly and give it a bit of 'wow-factor'. Ideally, I’d love a retractable screen door on the back of my property, but I am going to work with what I have!

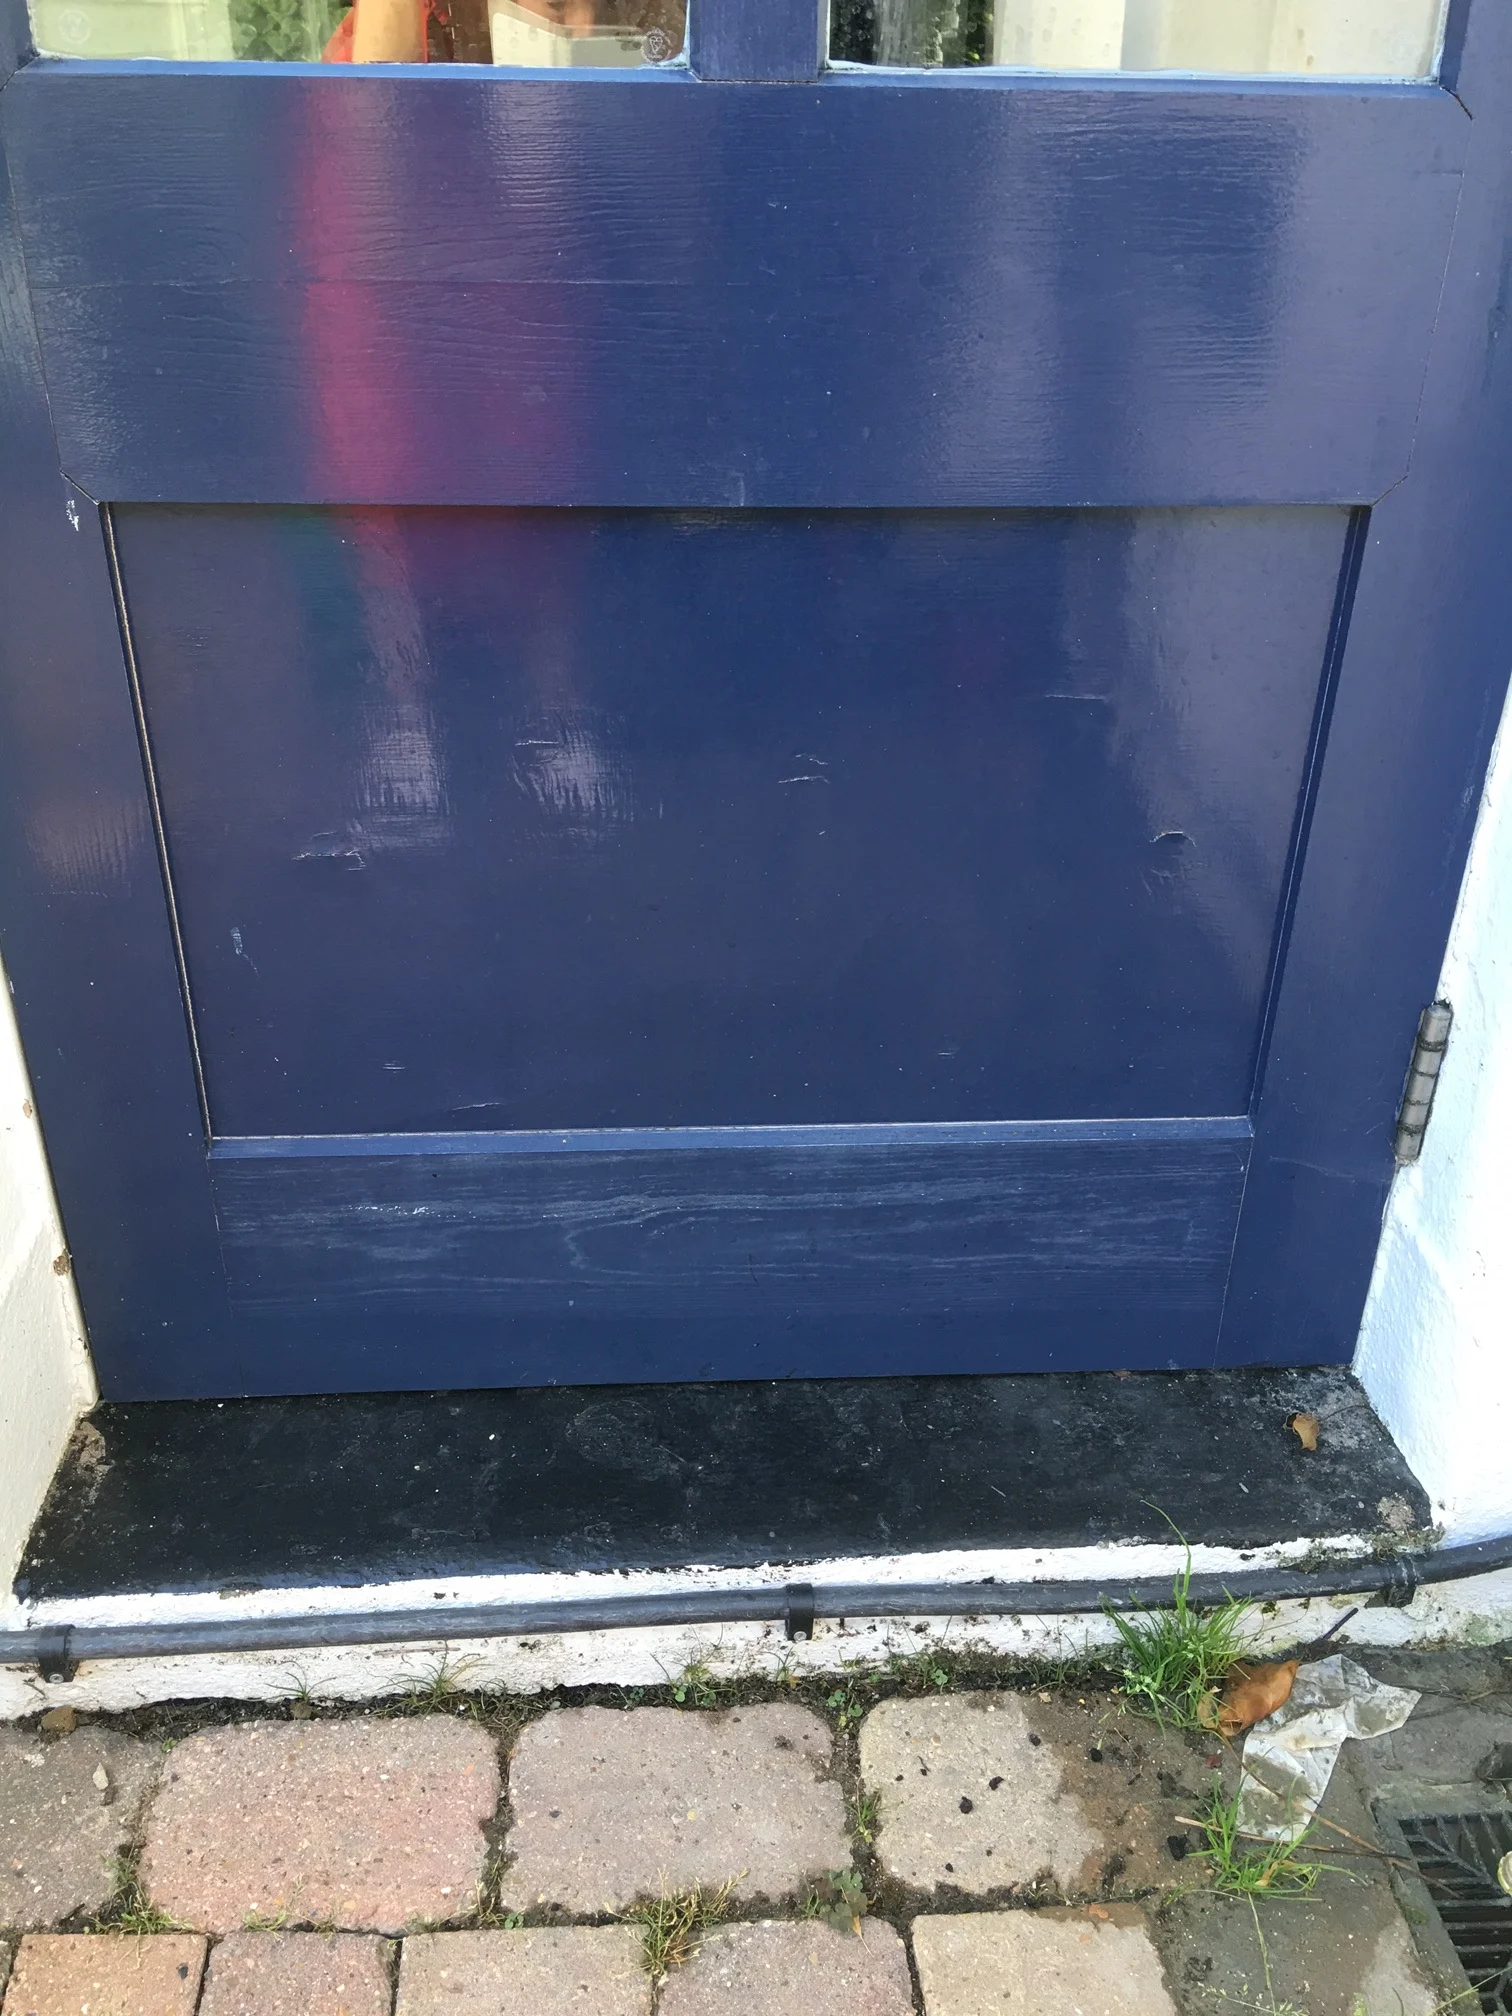
The 'before' back door, which was fine, but a bit tired and boring.
I had previously worked in the prime-property-porn area of Kensington in London. On my lunch break I often took a stroll down some of the most expensive streets just to ogle the houses. Many of the homes had little striped canopies over the front doors or windows, which I recently found out was called 'awning'. I think they are more an American thing on houses over there than here in Britain, but they just look so cute. I decided I wanted to Kensington-up my Essex home, so set about DIY-ing some awning.
HOW TO CREATE THIS DIY AWNING:
You will need:
Awning fabric (I brought mine from from Fabric UK, it cost £20 for a metre)
Couple of thin pieces of strong wood. I brought mine from Wickes for a couple of pounds each.
Drill, screws, wall plugs, screwdriver, scissors, tape measure and a hand saw
Staple gun
Needle & thread
Paint (optional)
After I'd chosen the black and white block stripe awning fabric online, I measured the width that I wanted my awning to be (basically, wide enough to cover my back door.) The fabric online was 120cm in width, which was just enough for me as I only needed one drop side to my awning (the other side was blocked by the wall) so I just ordered a metre for £20. When you measure for awning remember you need enough fabric for the top, then the two drop sides and the front drop. When the fabric arrived I held it against the wall to get an idea of how far out from the wall I wanted the awning to come, took a rough measurement, then set about creating these two triangle supports:
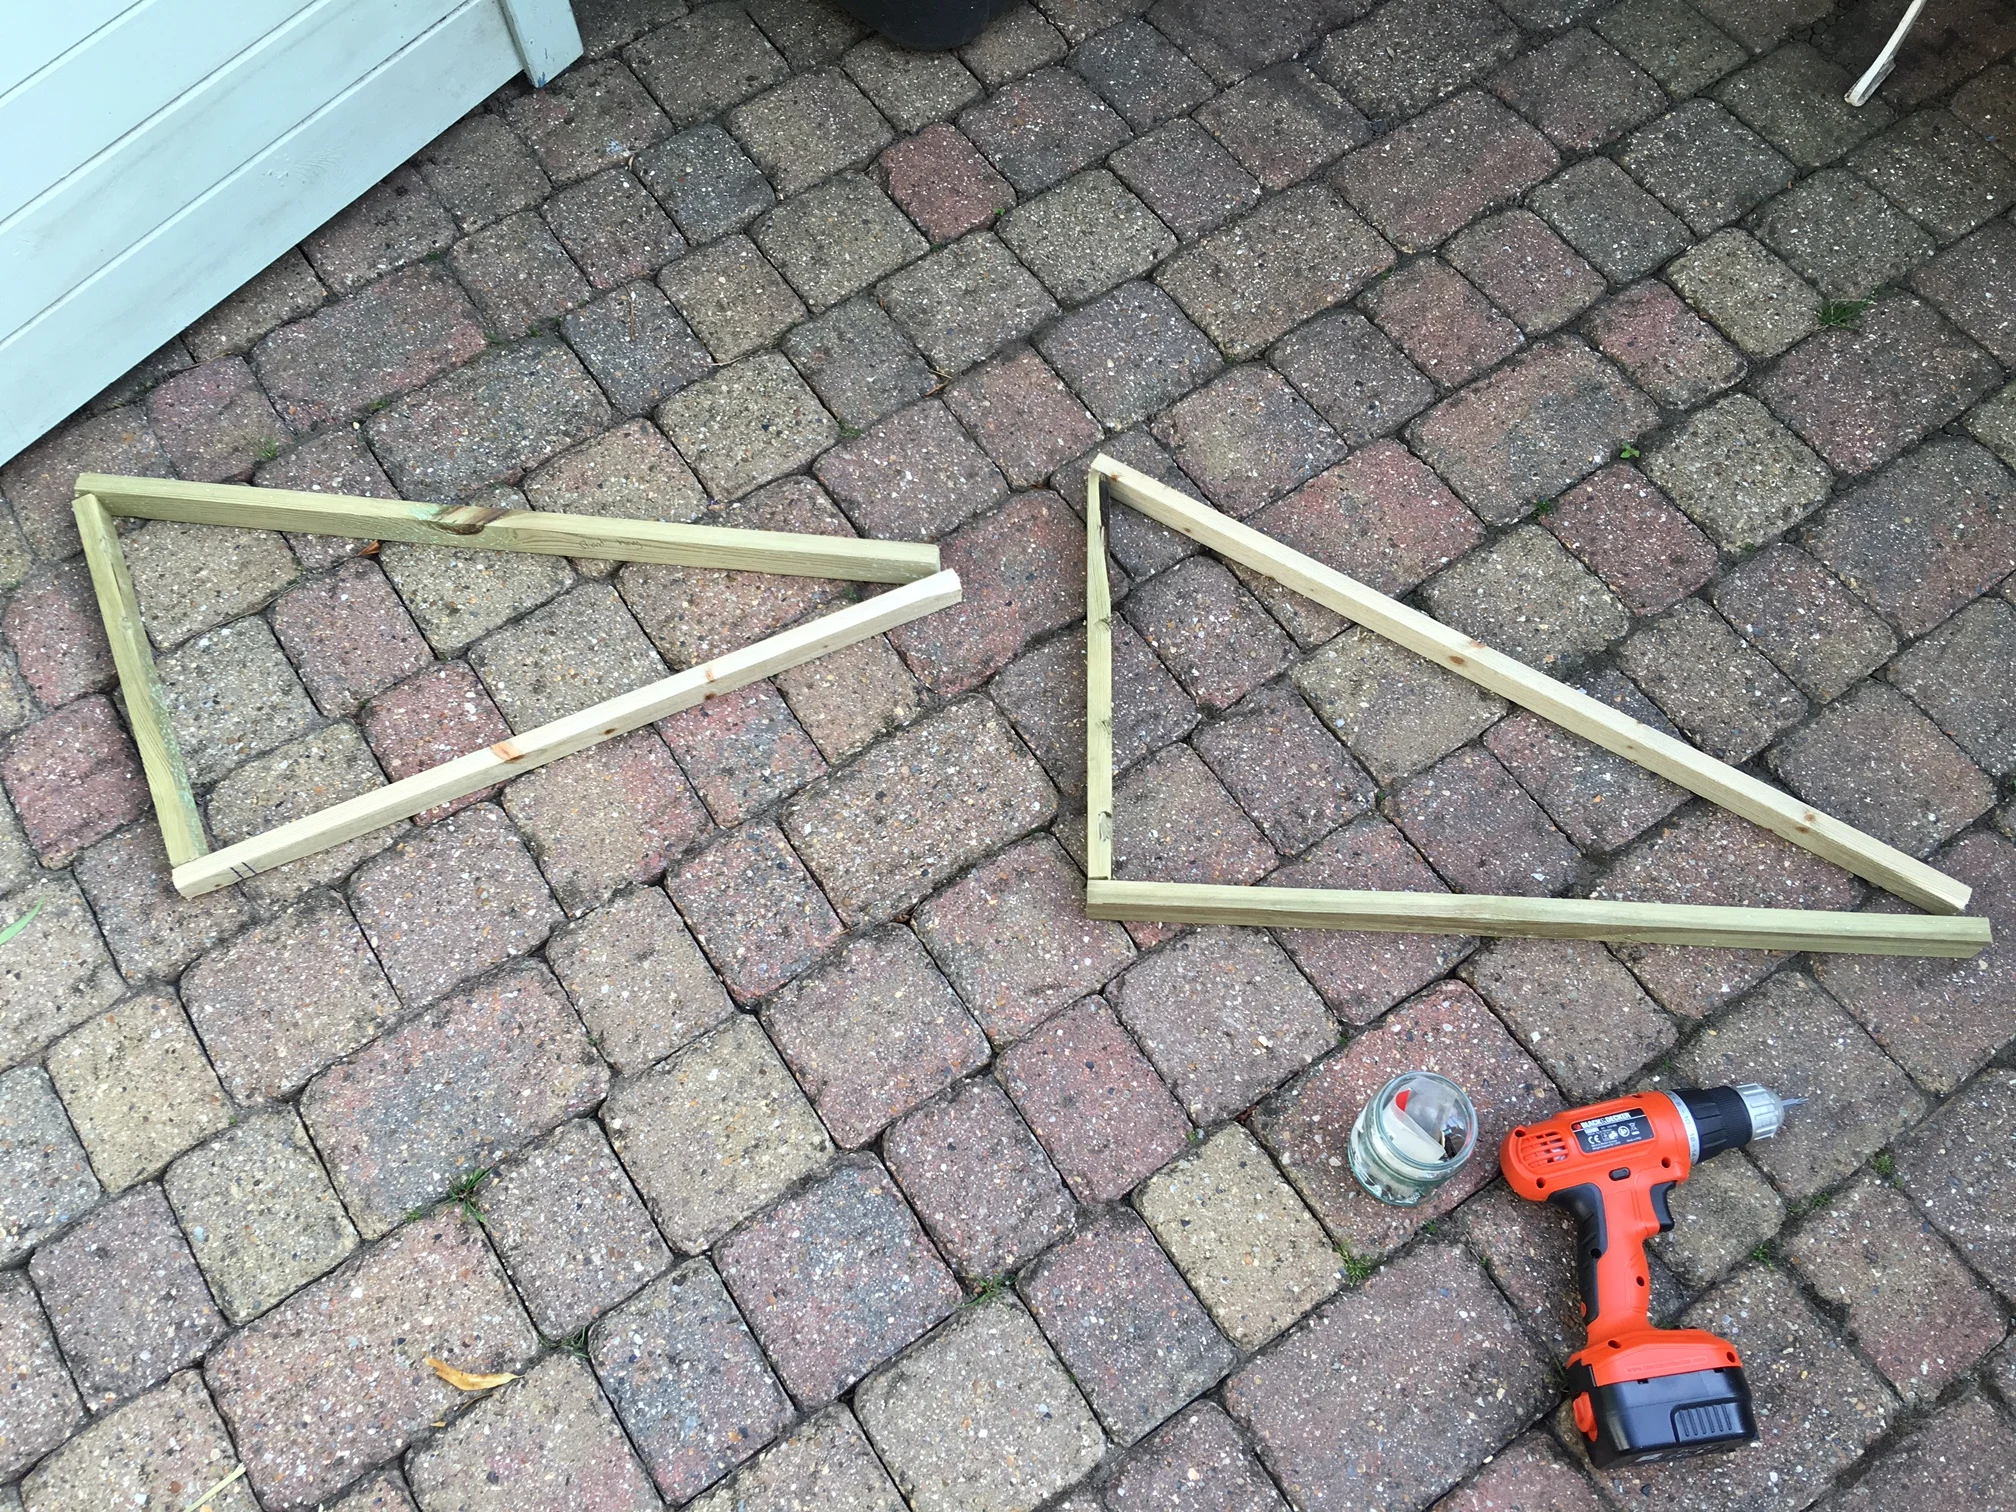
Make sure that each support is exactly the same size by measuring correctly before sawing the three pieces. It's a good idea to write on the wood exactly what each part is so it's less confusing when you come to join them.
To make these two supports, measure how high you want your awning and how far you want it to come out. Screw all these pieces together with some long screws. It doesn't need to look perfect as it will be covered when it is up:
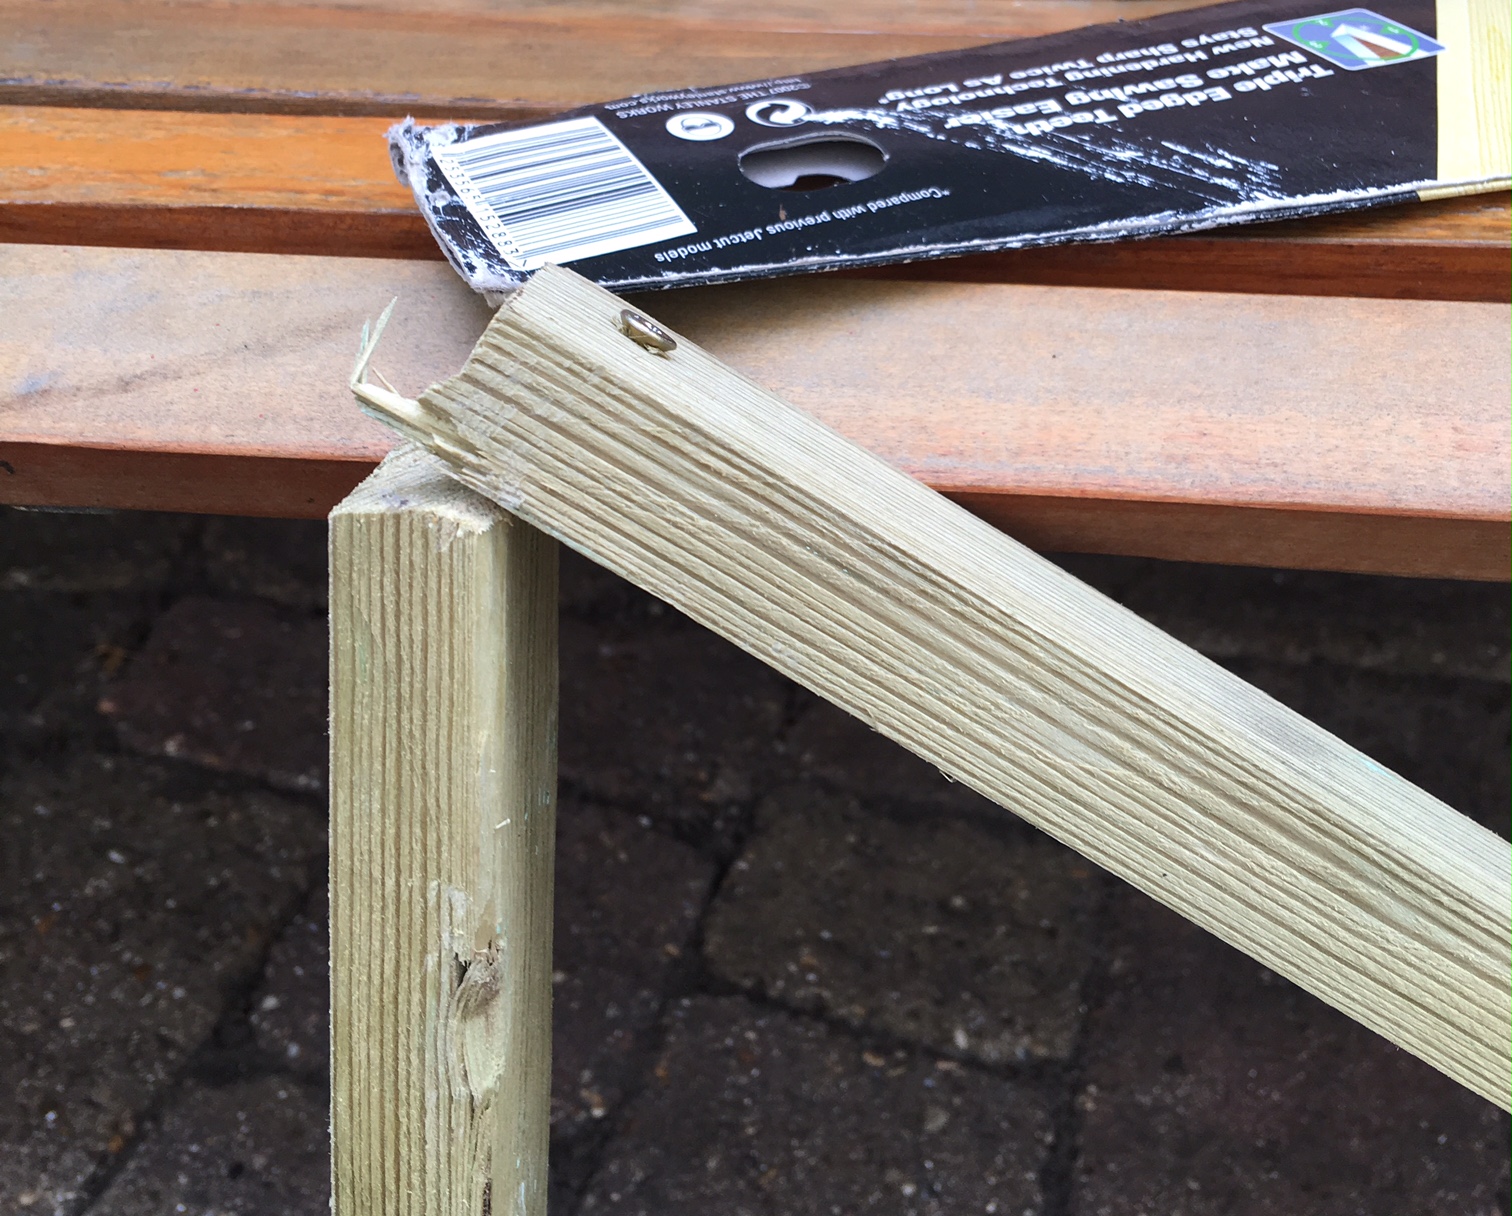
I painted these two supports black (I just used the same paint I was using on the door), then made some screw holes in the wood with a drill where I wanted to hang them on the wall. I also made a screw hole at the front of the supports where I would be attaching an extra support piece for the fabric. Drilling screw holes in the wood beforehand stops your wood from splitting:
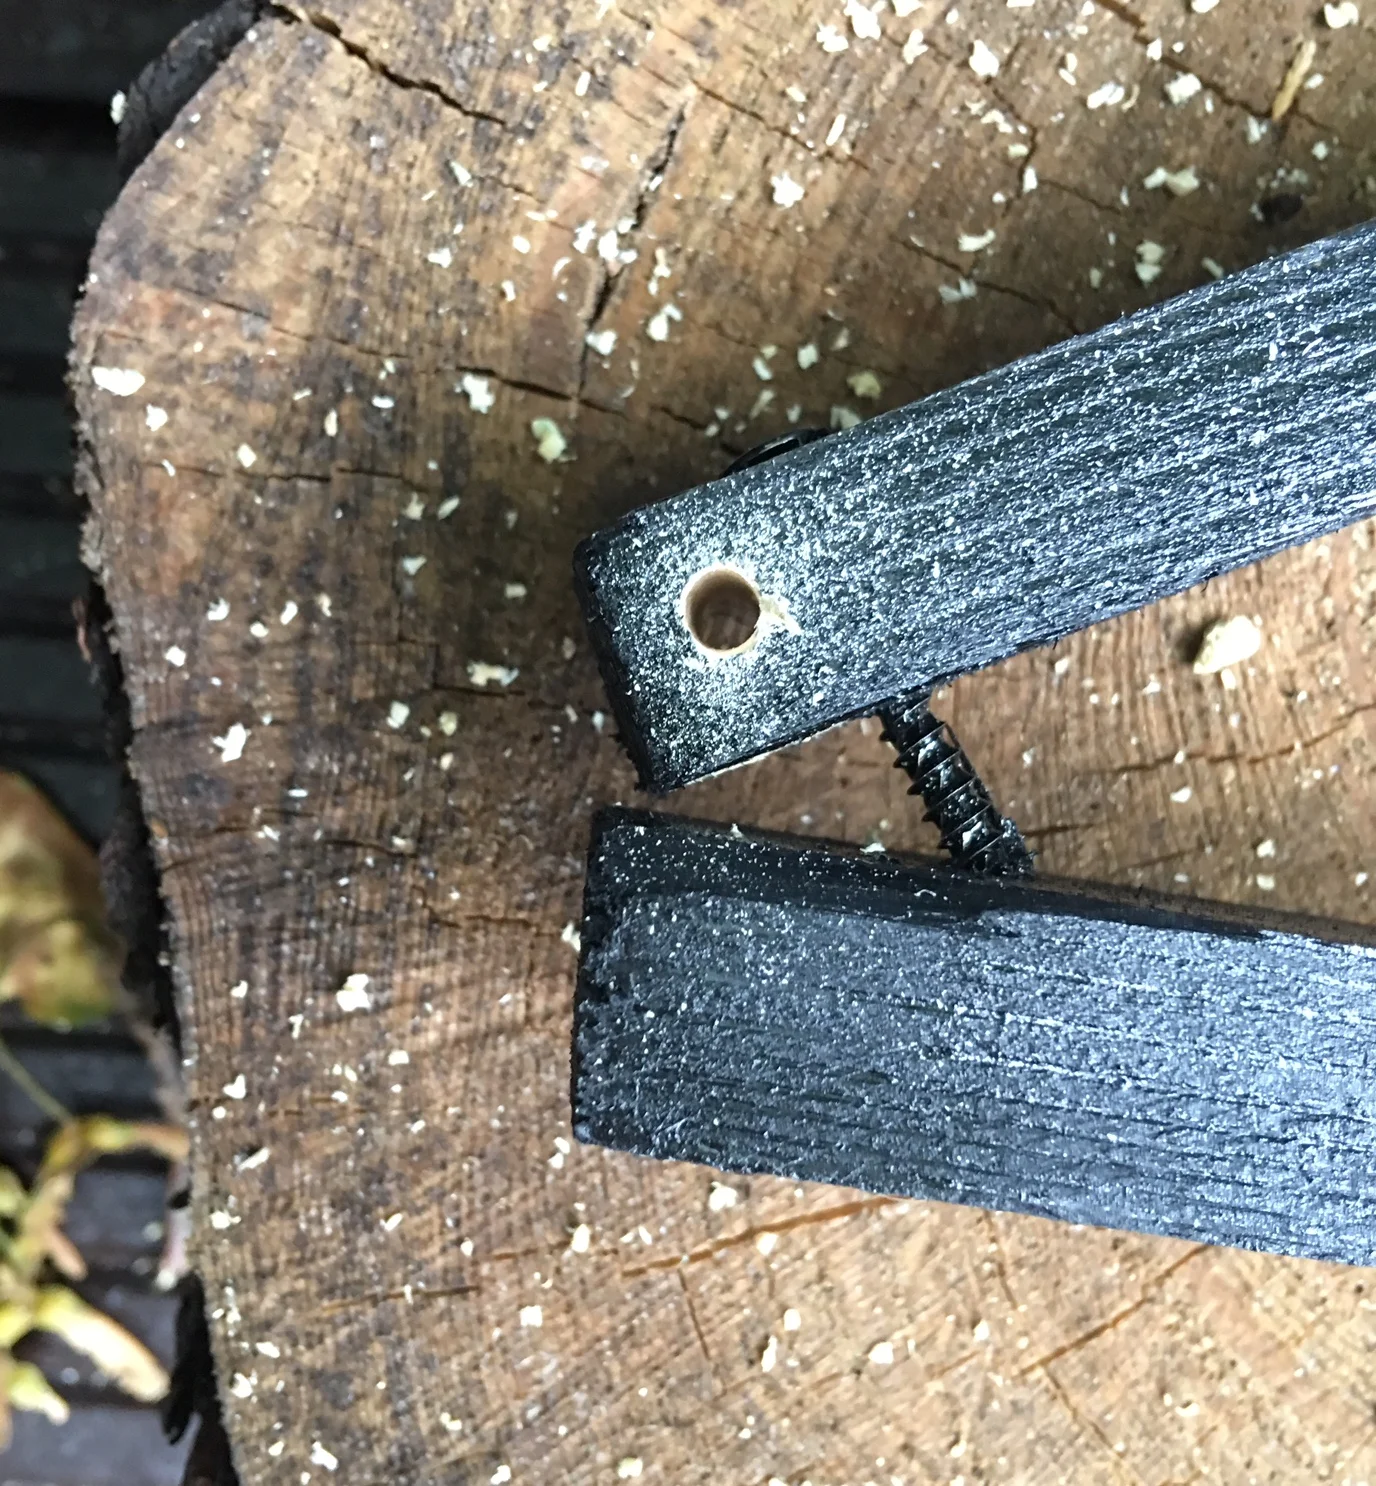
Pre-drill screw holes to stop your wood from splitting
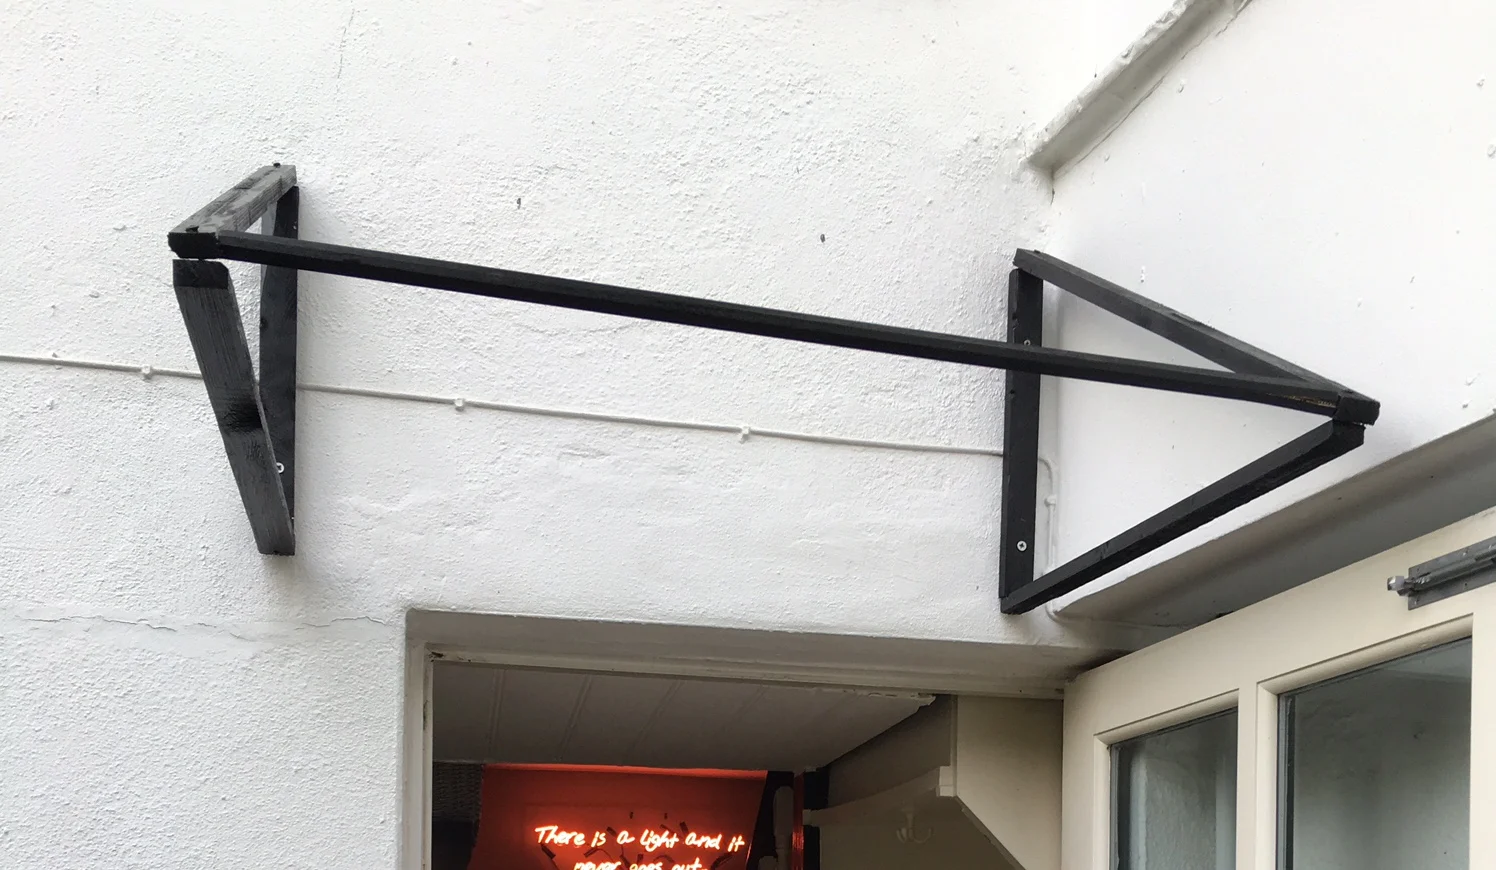
I attached both the triangle supports above my back door with wall plugs and screws suitable for brick, then added an extra piece of wood to support the awning at the front:
Once most of the awning support was up, I took a piece of wood the width of the awning and used a staple gun to attach the awning fabric for hanging.
Place your fabric down, position your wood just near the top then fold the fabric over and staple it. This will give a nice tidy join once the wood is on the wall as you won't be able to see the staples:
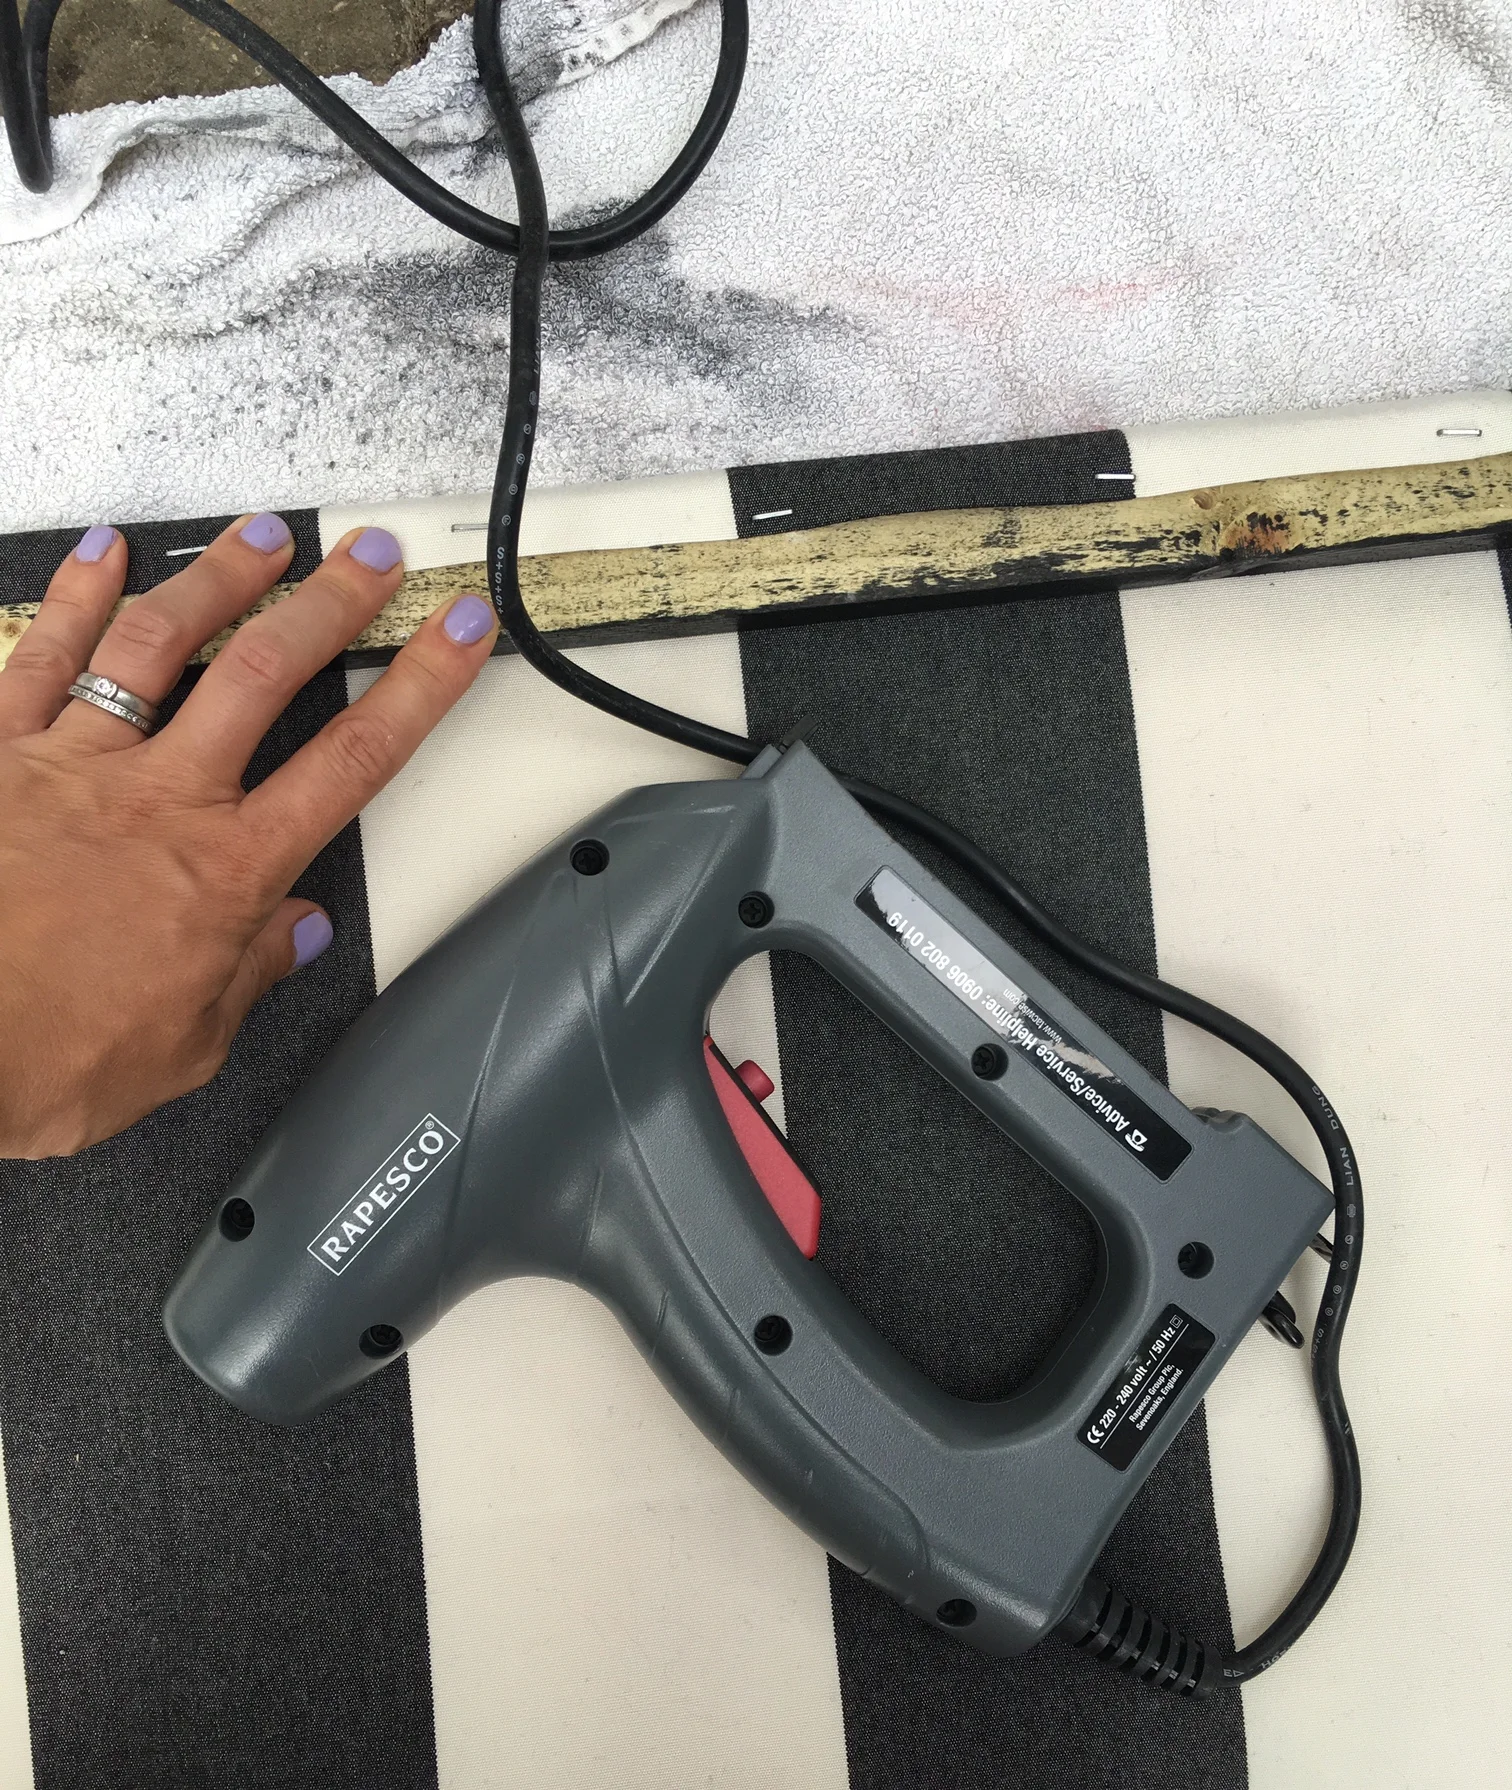
Position the fabric so it just folds over the top of the wood and staple it in place.
Place your awning fabric on the wall and screw the wood in place. Drape the fabric into the correct position and then use a staple gun to secure it to the wooden support. Try and conceal the staples as much as possible - on my fabric I stapled only on the black stripes, then coloured in the staples with black permanent marker after so they were not visible. It worked pretty well!
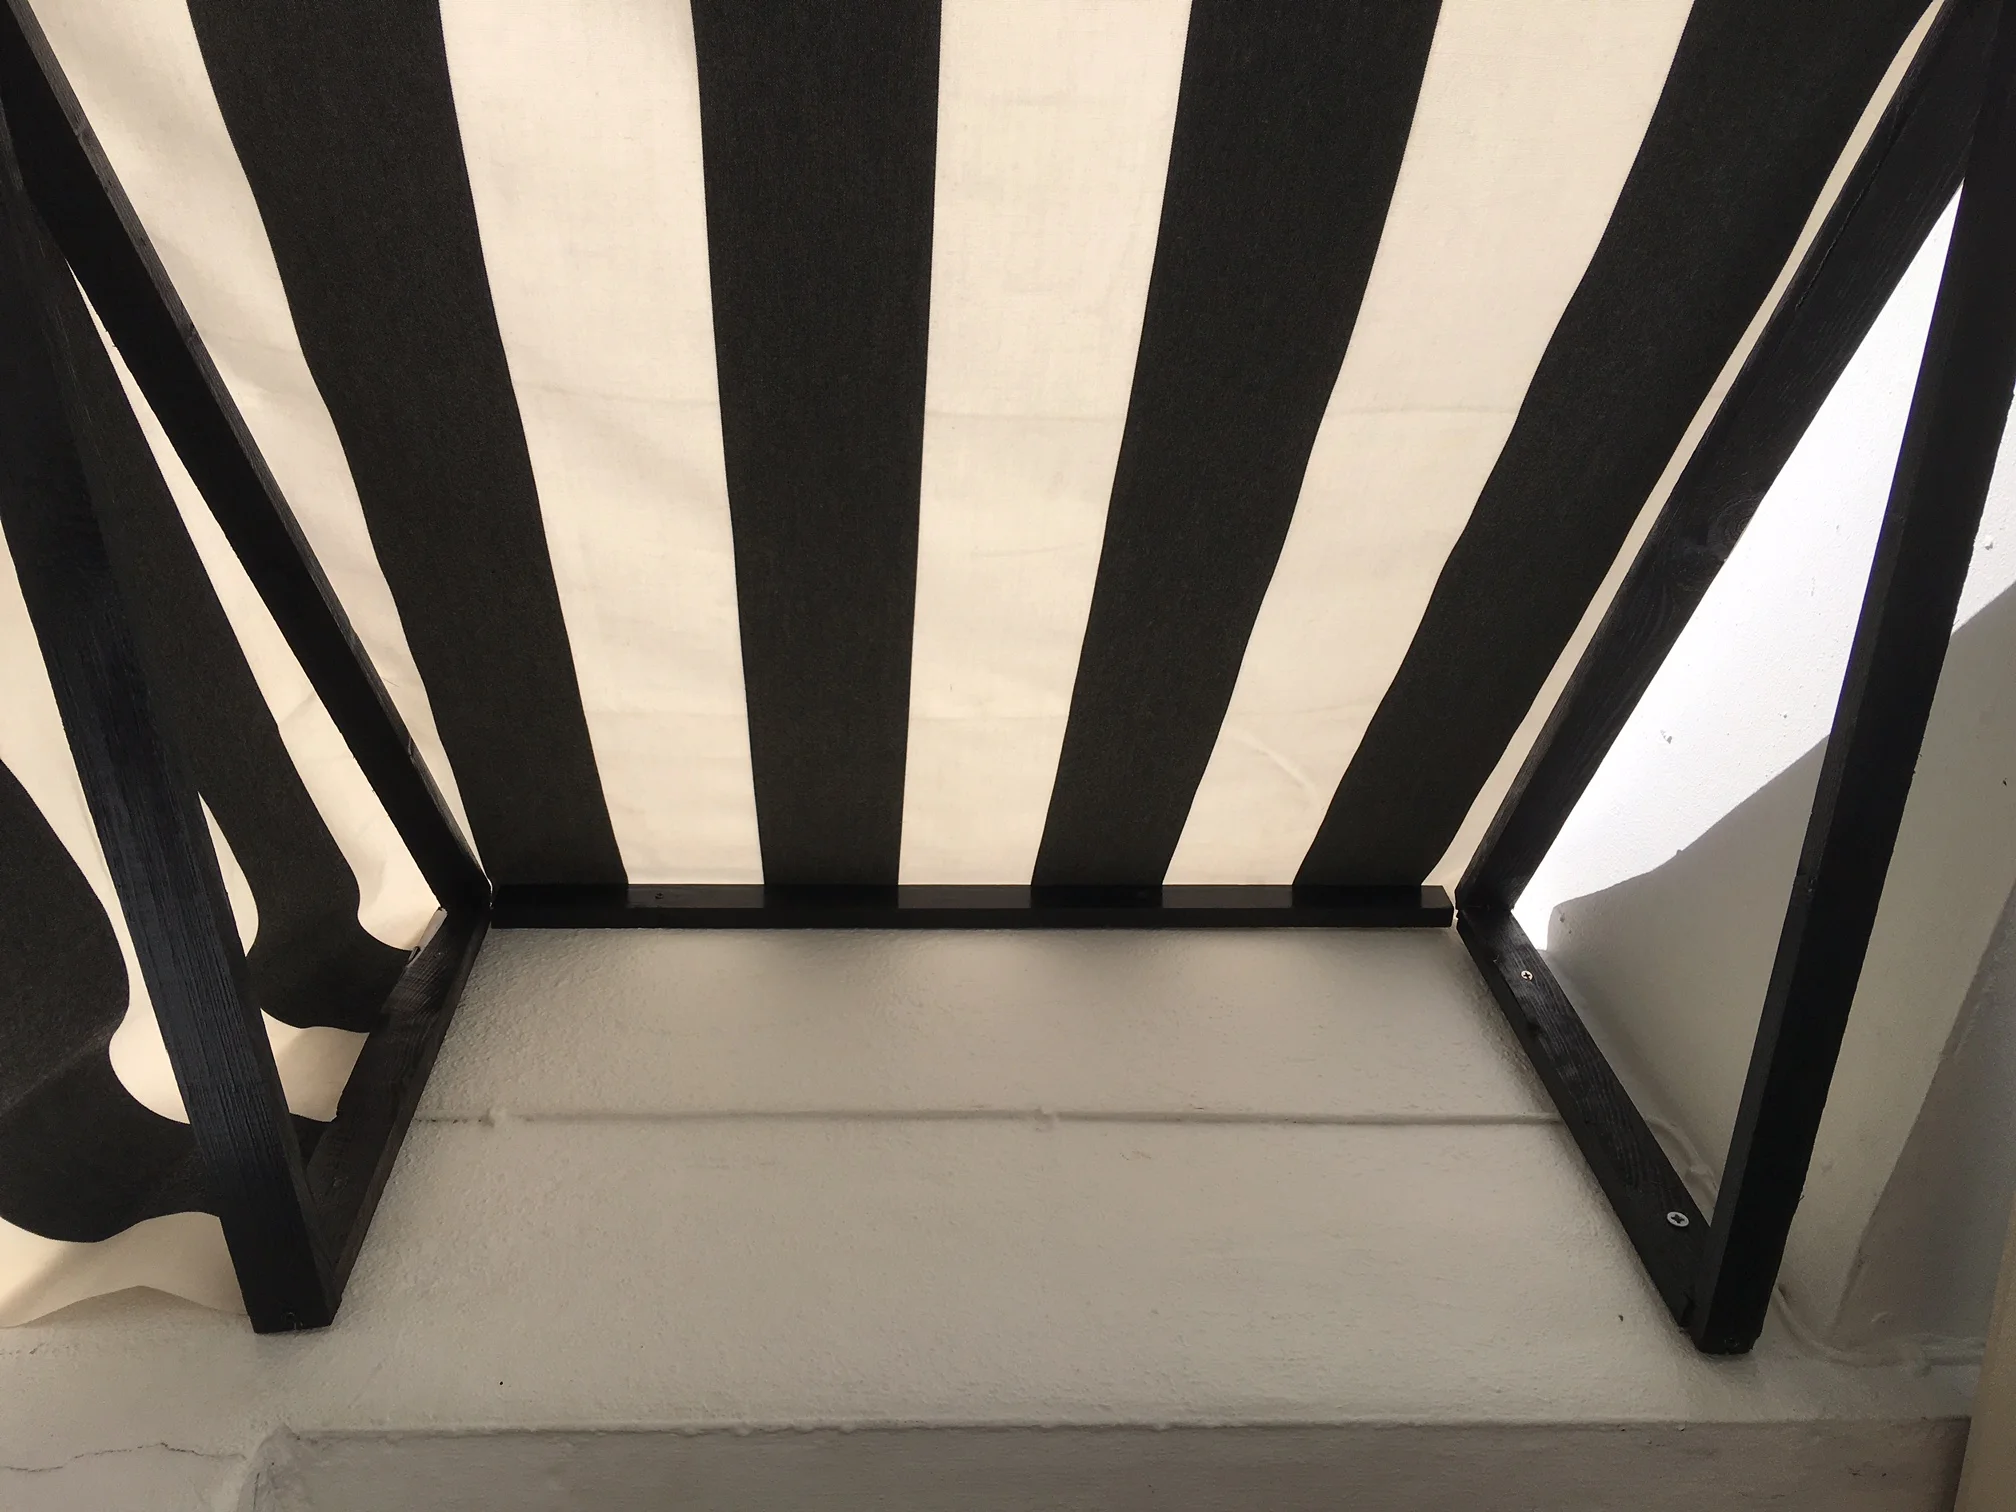
This is how your awning structure should look from underneath.
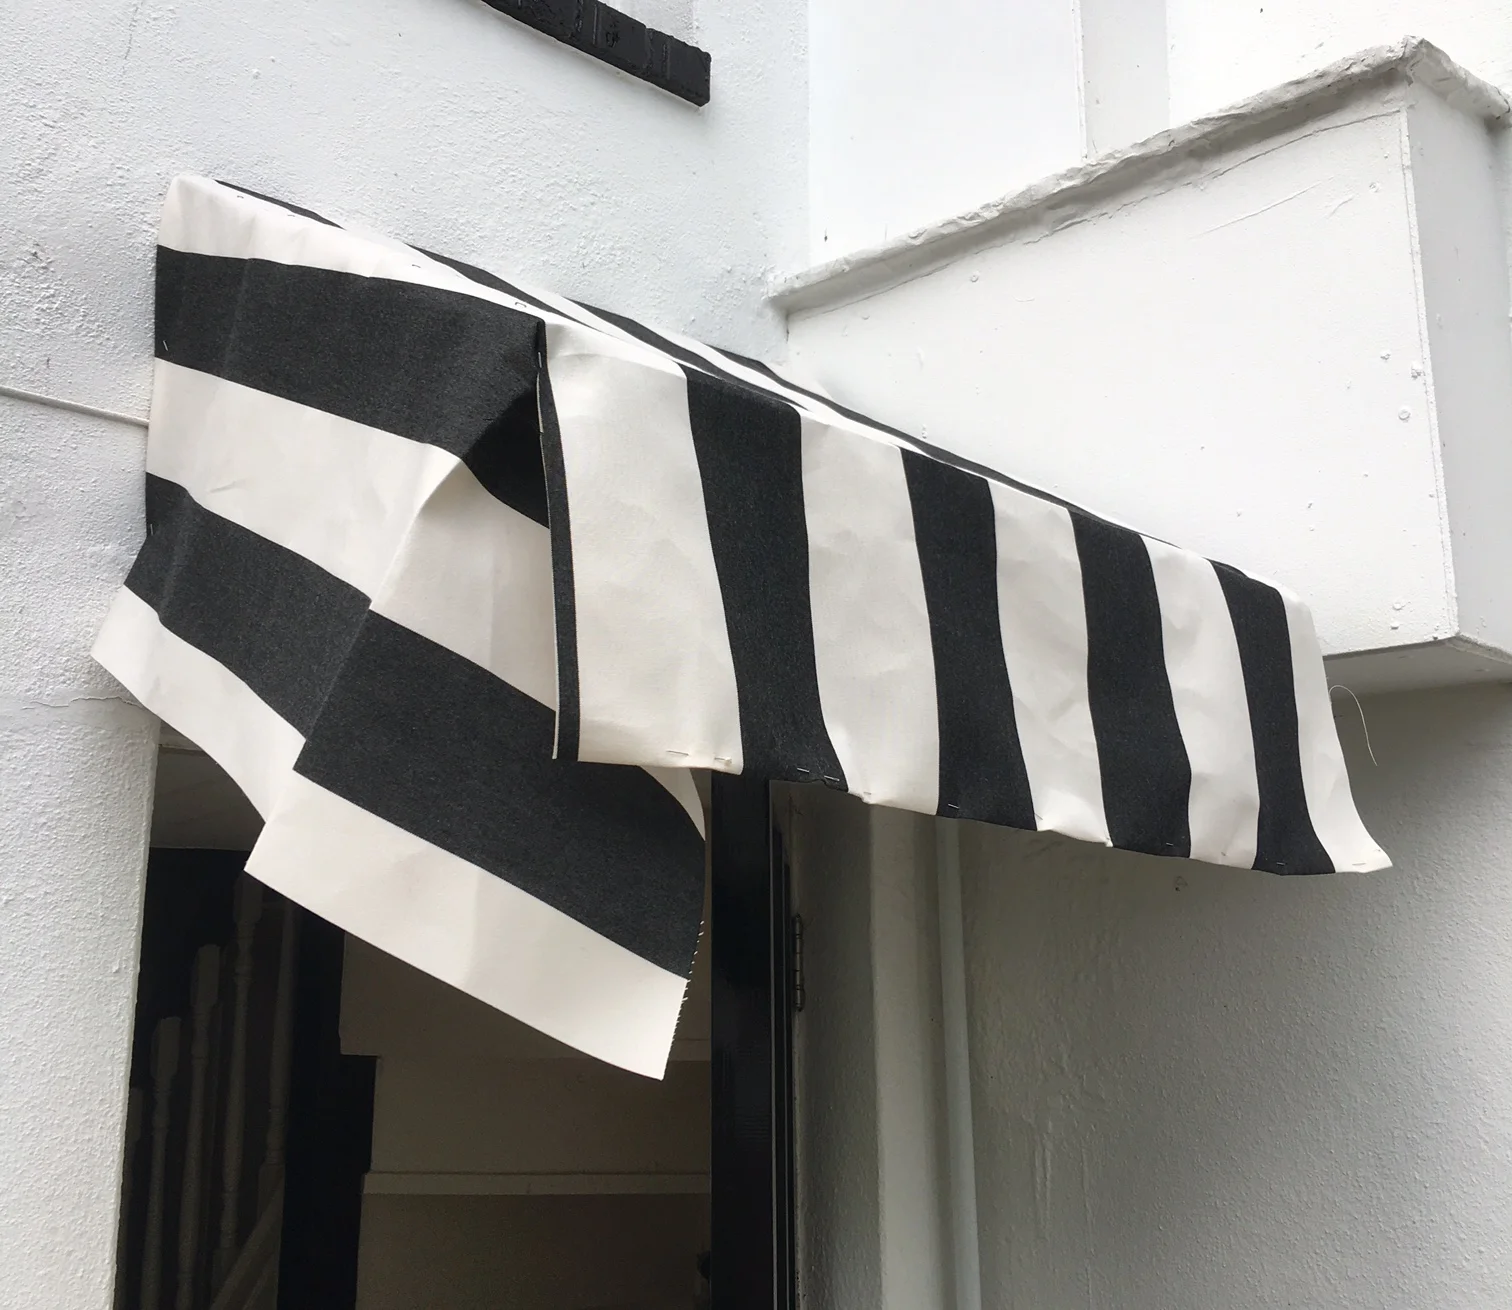
Once secure, I set about hemming up the fabric. Now I know that I probably should have done this before securing it to the wall (hence I was sewing standing up a ladder for about an hour), but I wanted to make sure the fabric was level and didn't need trimming once up. It depends on what sort of person you are as to when to hem the fabric. If you are one of those people spot on with measurements, you should probably do it on the ground while having a cup of tea and watching Orange Is The New Black. If you suck at measurements, like me, you might want to join me getting a tan with a needle and thread halfway up a stepladder after the fabric has been erected...
I cut the fabric on the corner of my awning to create two separate 'drops' - one at the front and one at the side. I then hand stitched a simple hem line with a back-stitch, then cut away any excess fabric:
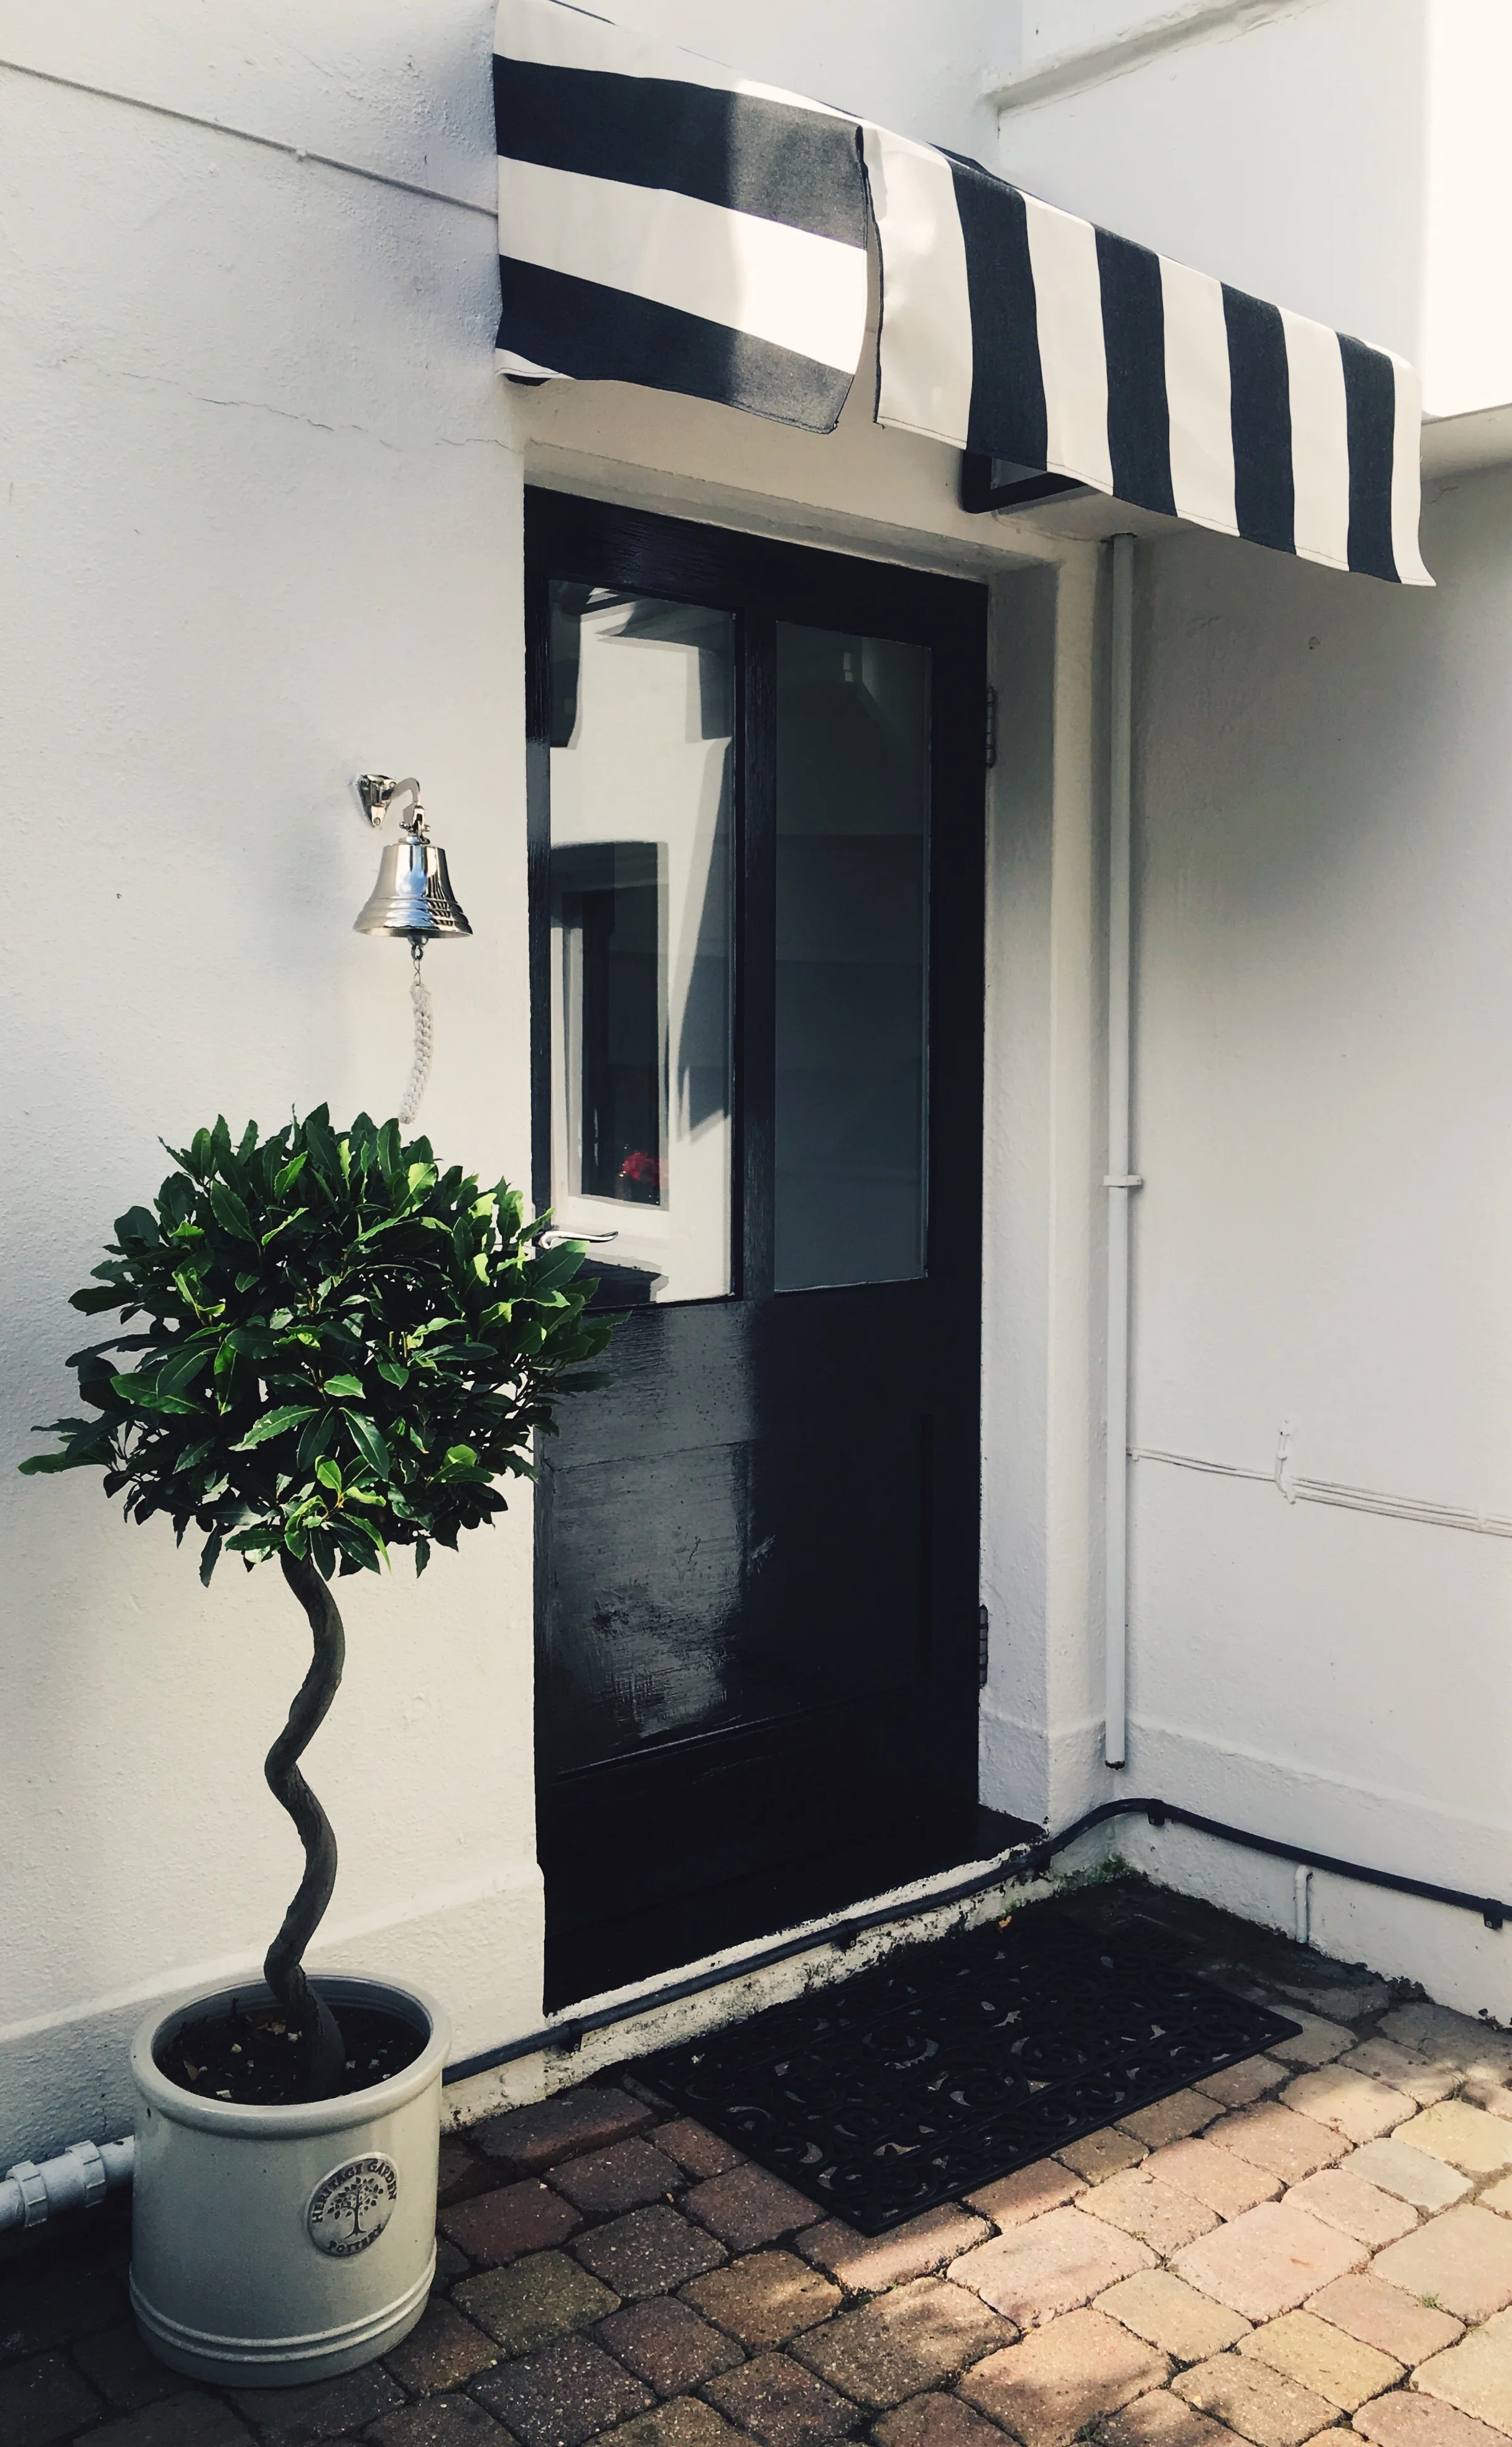
And this is the final result!
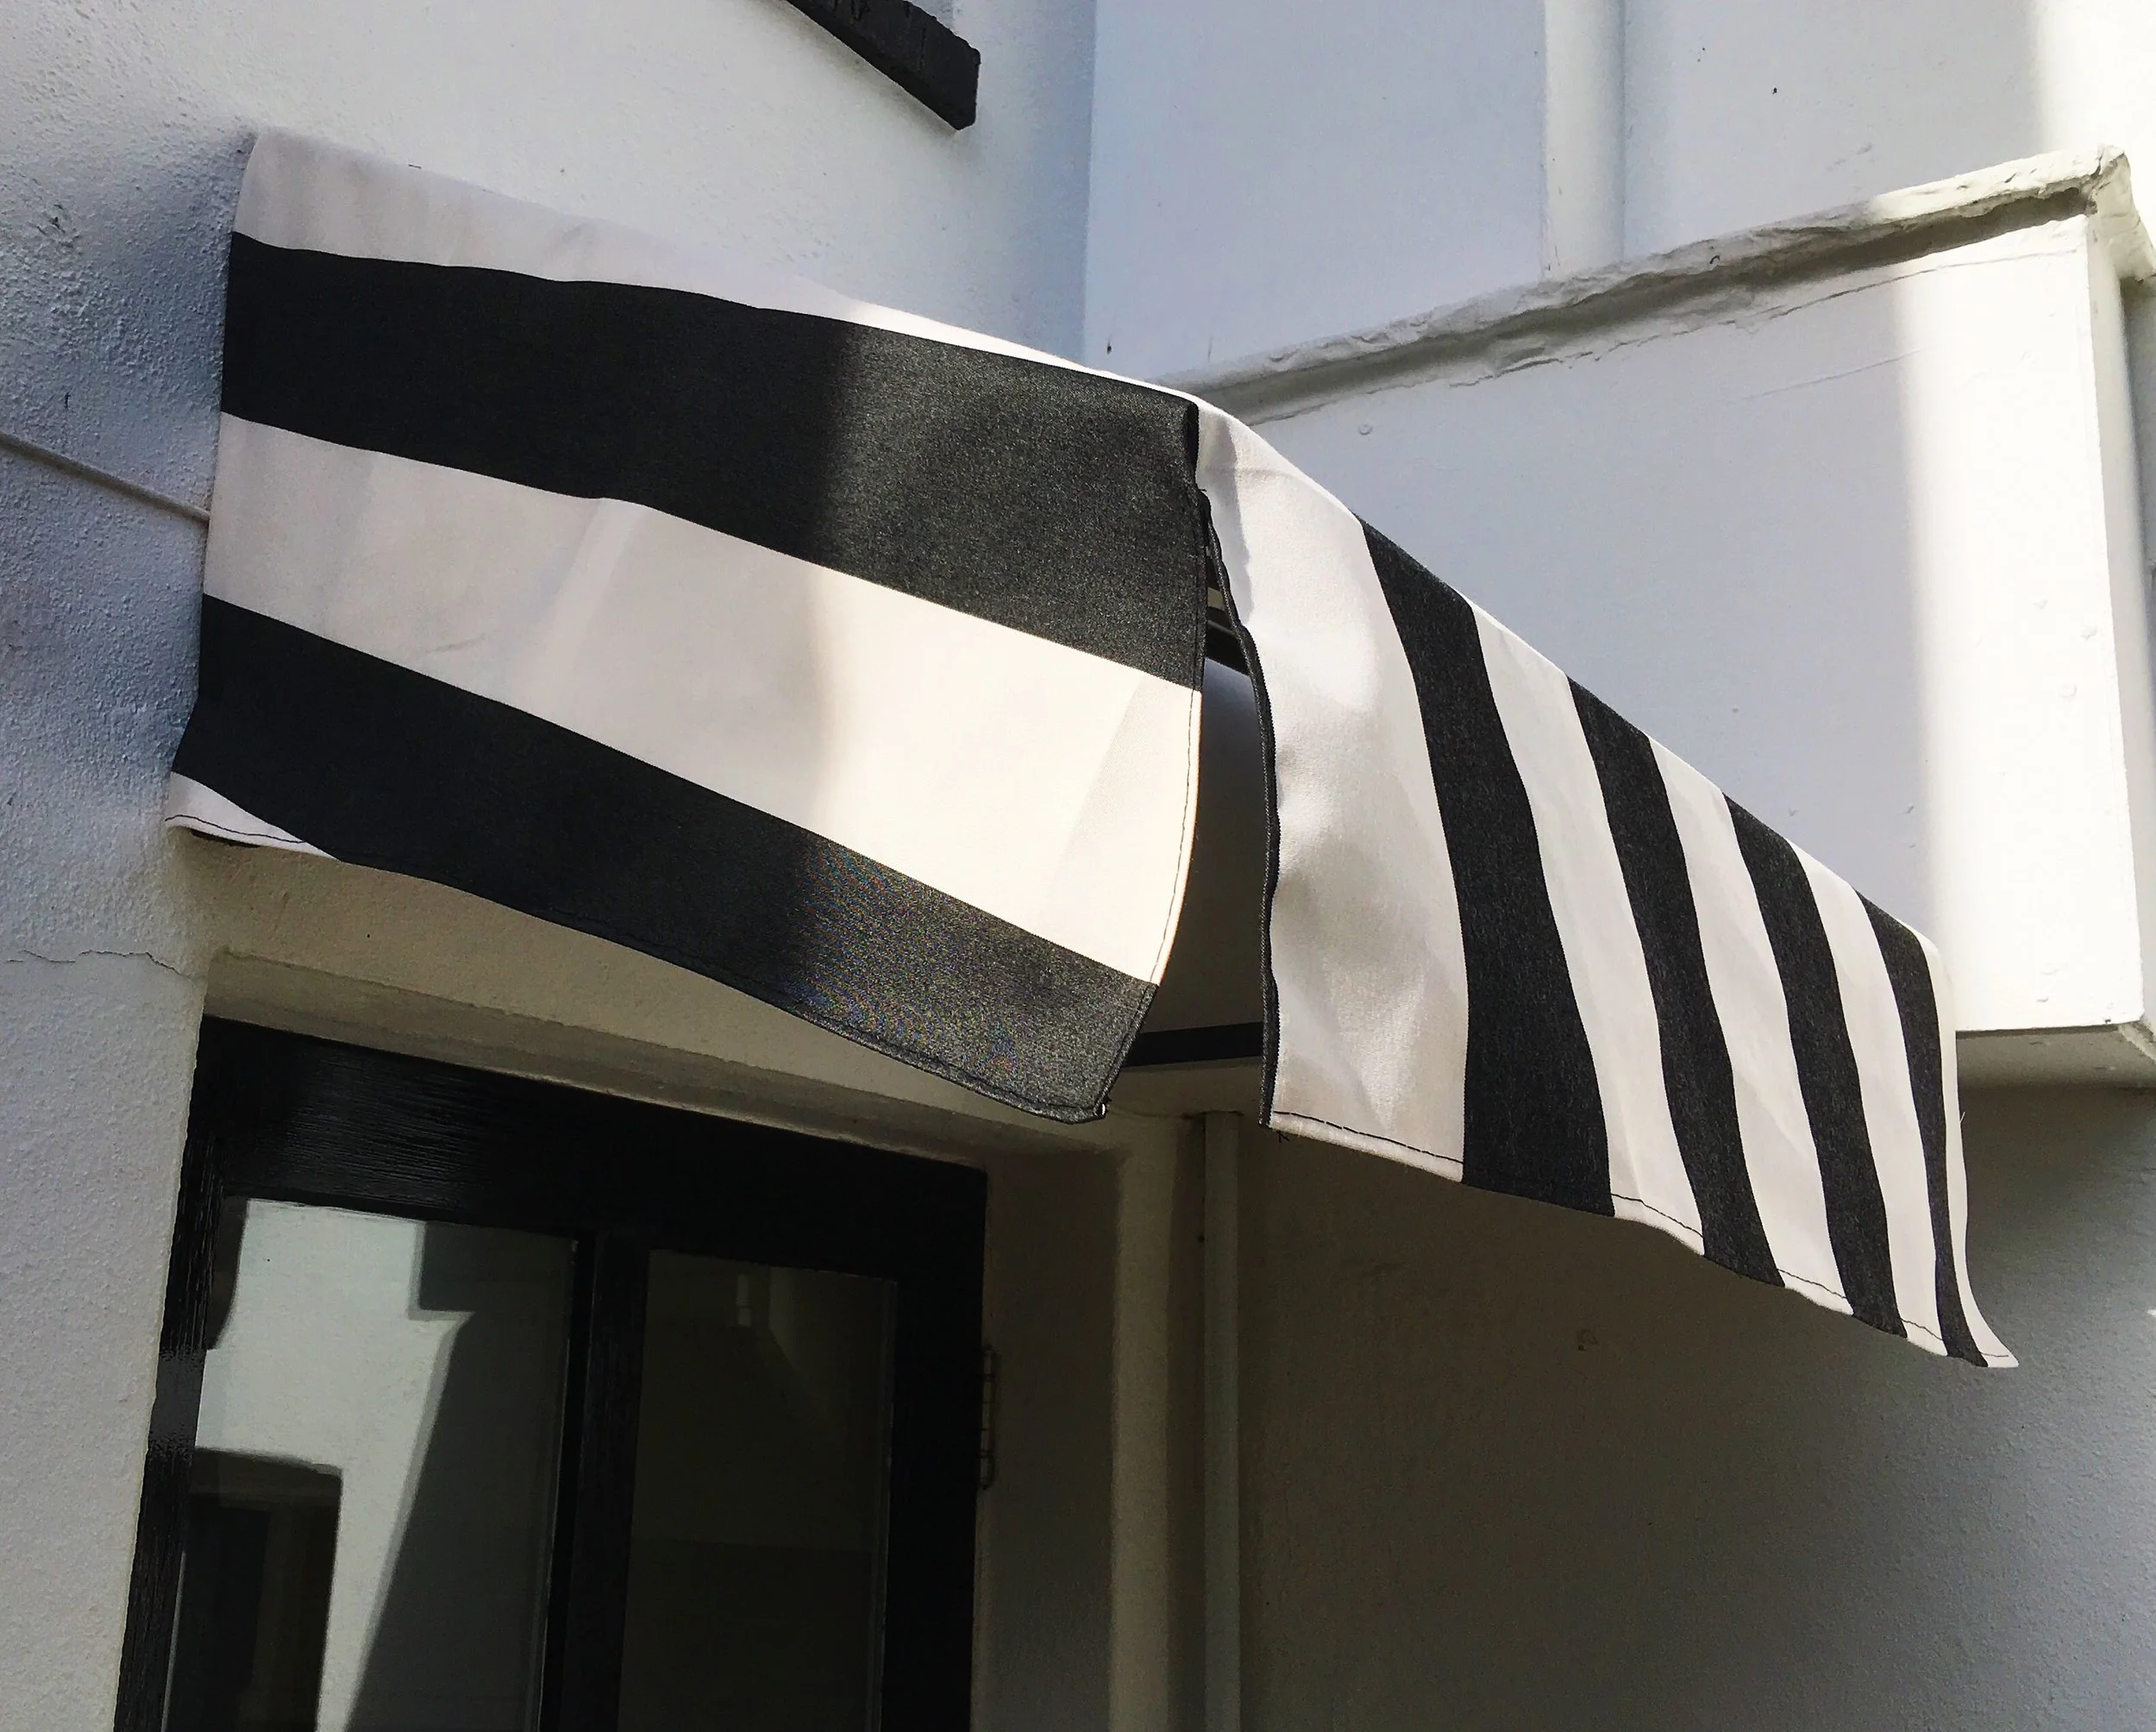
The completed DIY awning.
I was a bit nervous the first time that it poured with rain, but the awning was unscathed. I think the trick is to secure the fabric down as flat as possible so the rain just runs off. All in all, I was pretty happy with the awning, and it came in at around £30 in total.
As I went for black and white striped awning, I gave the door two coats of black gloss, and added this pretty wrought-effect outside rubber door mat to match
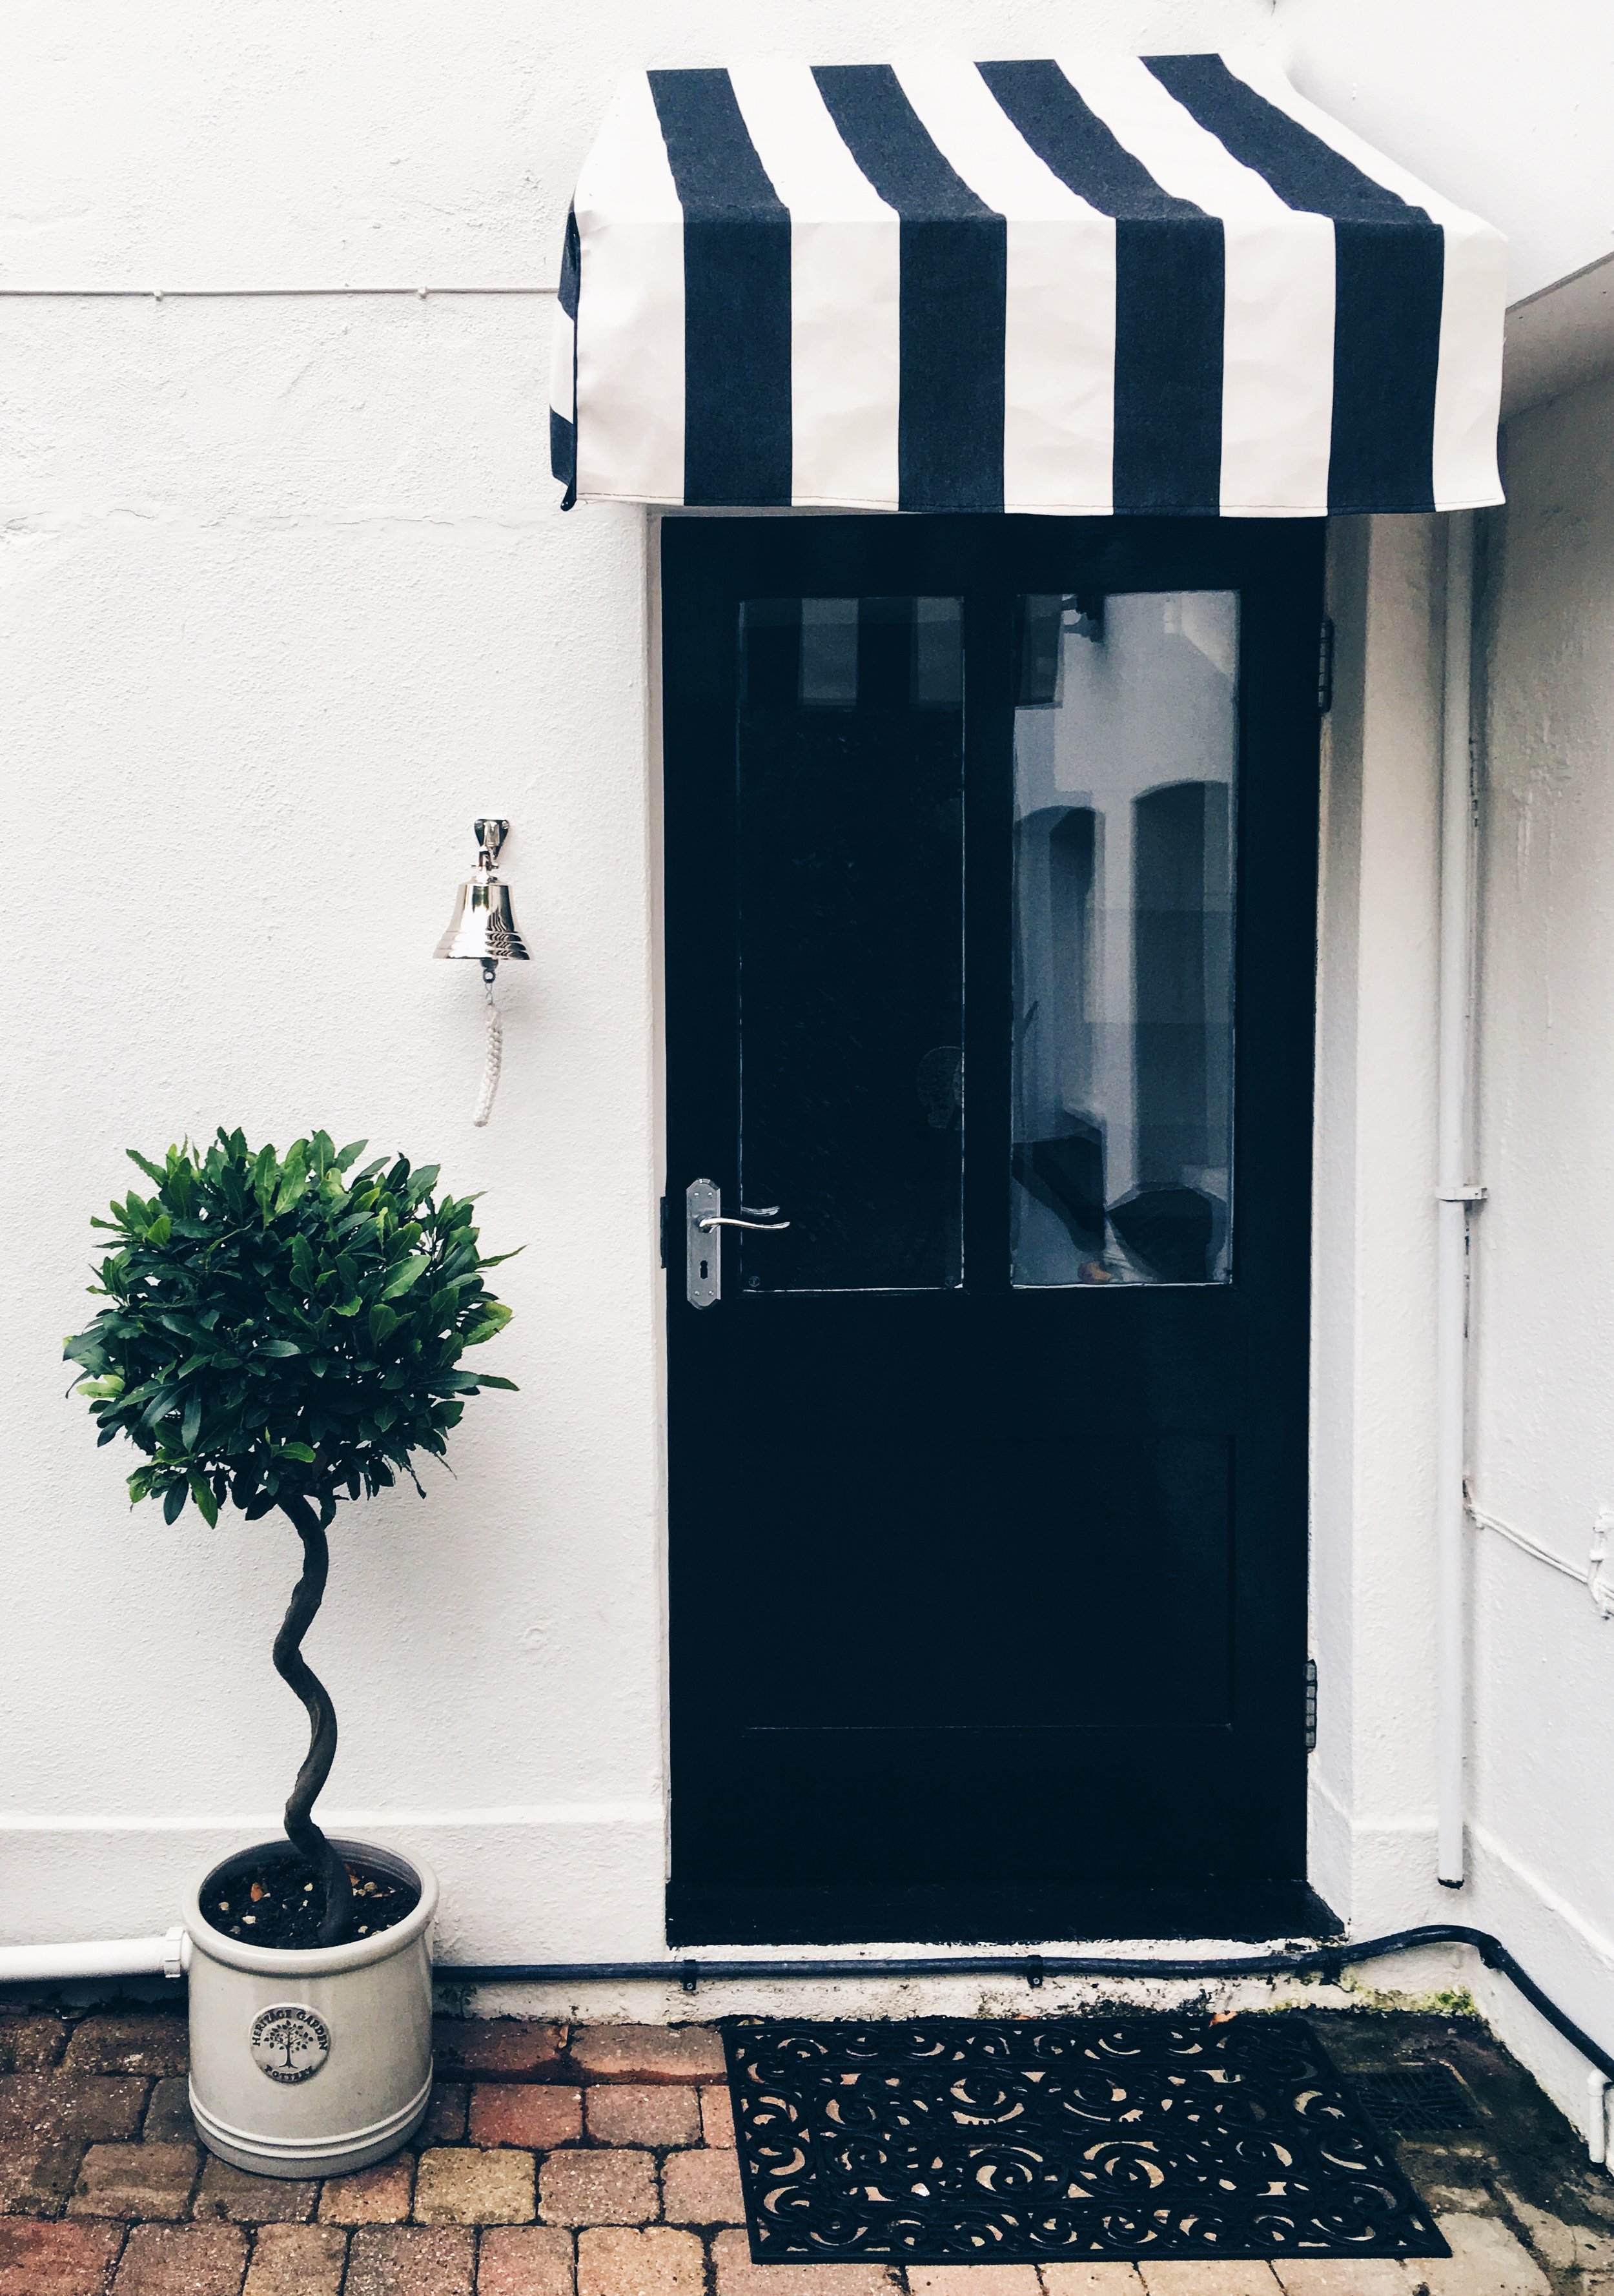
A house a few streets away has a ship bell for guests to ring, so I totally nicked the idea and added this chrome ship bell that I brought in my local St Clare's Hospice. They do also sell these ship bells in different colours and sizes on Ebay for about a tenner.

No Kensington home is complete without plush topiary, so I added this beautiful spiral bay tree in a gorgeous Heritage Garden Pottery pot.
What do you think to the re-vamp? Let me know in the comments section below!