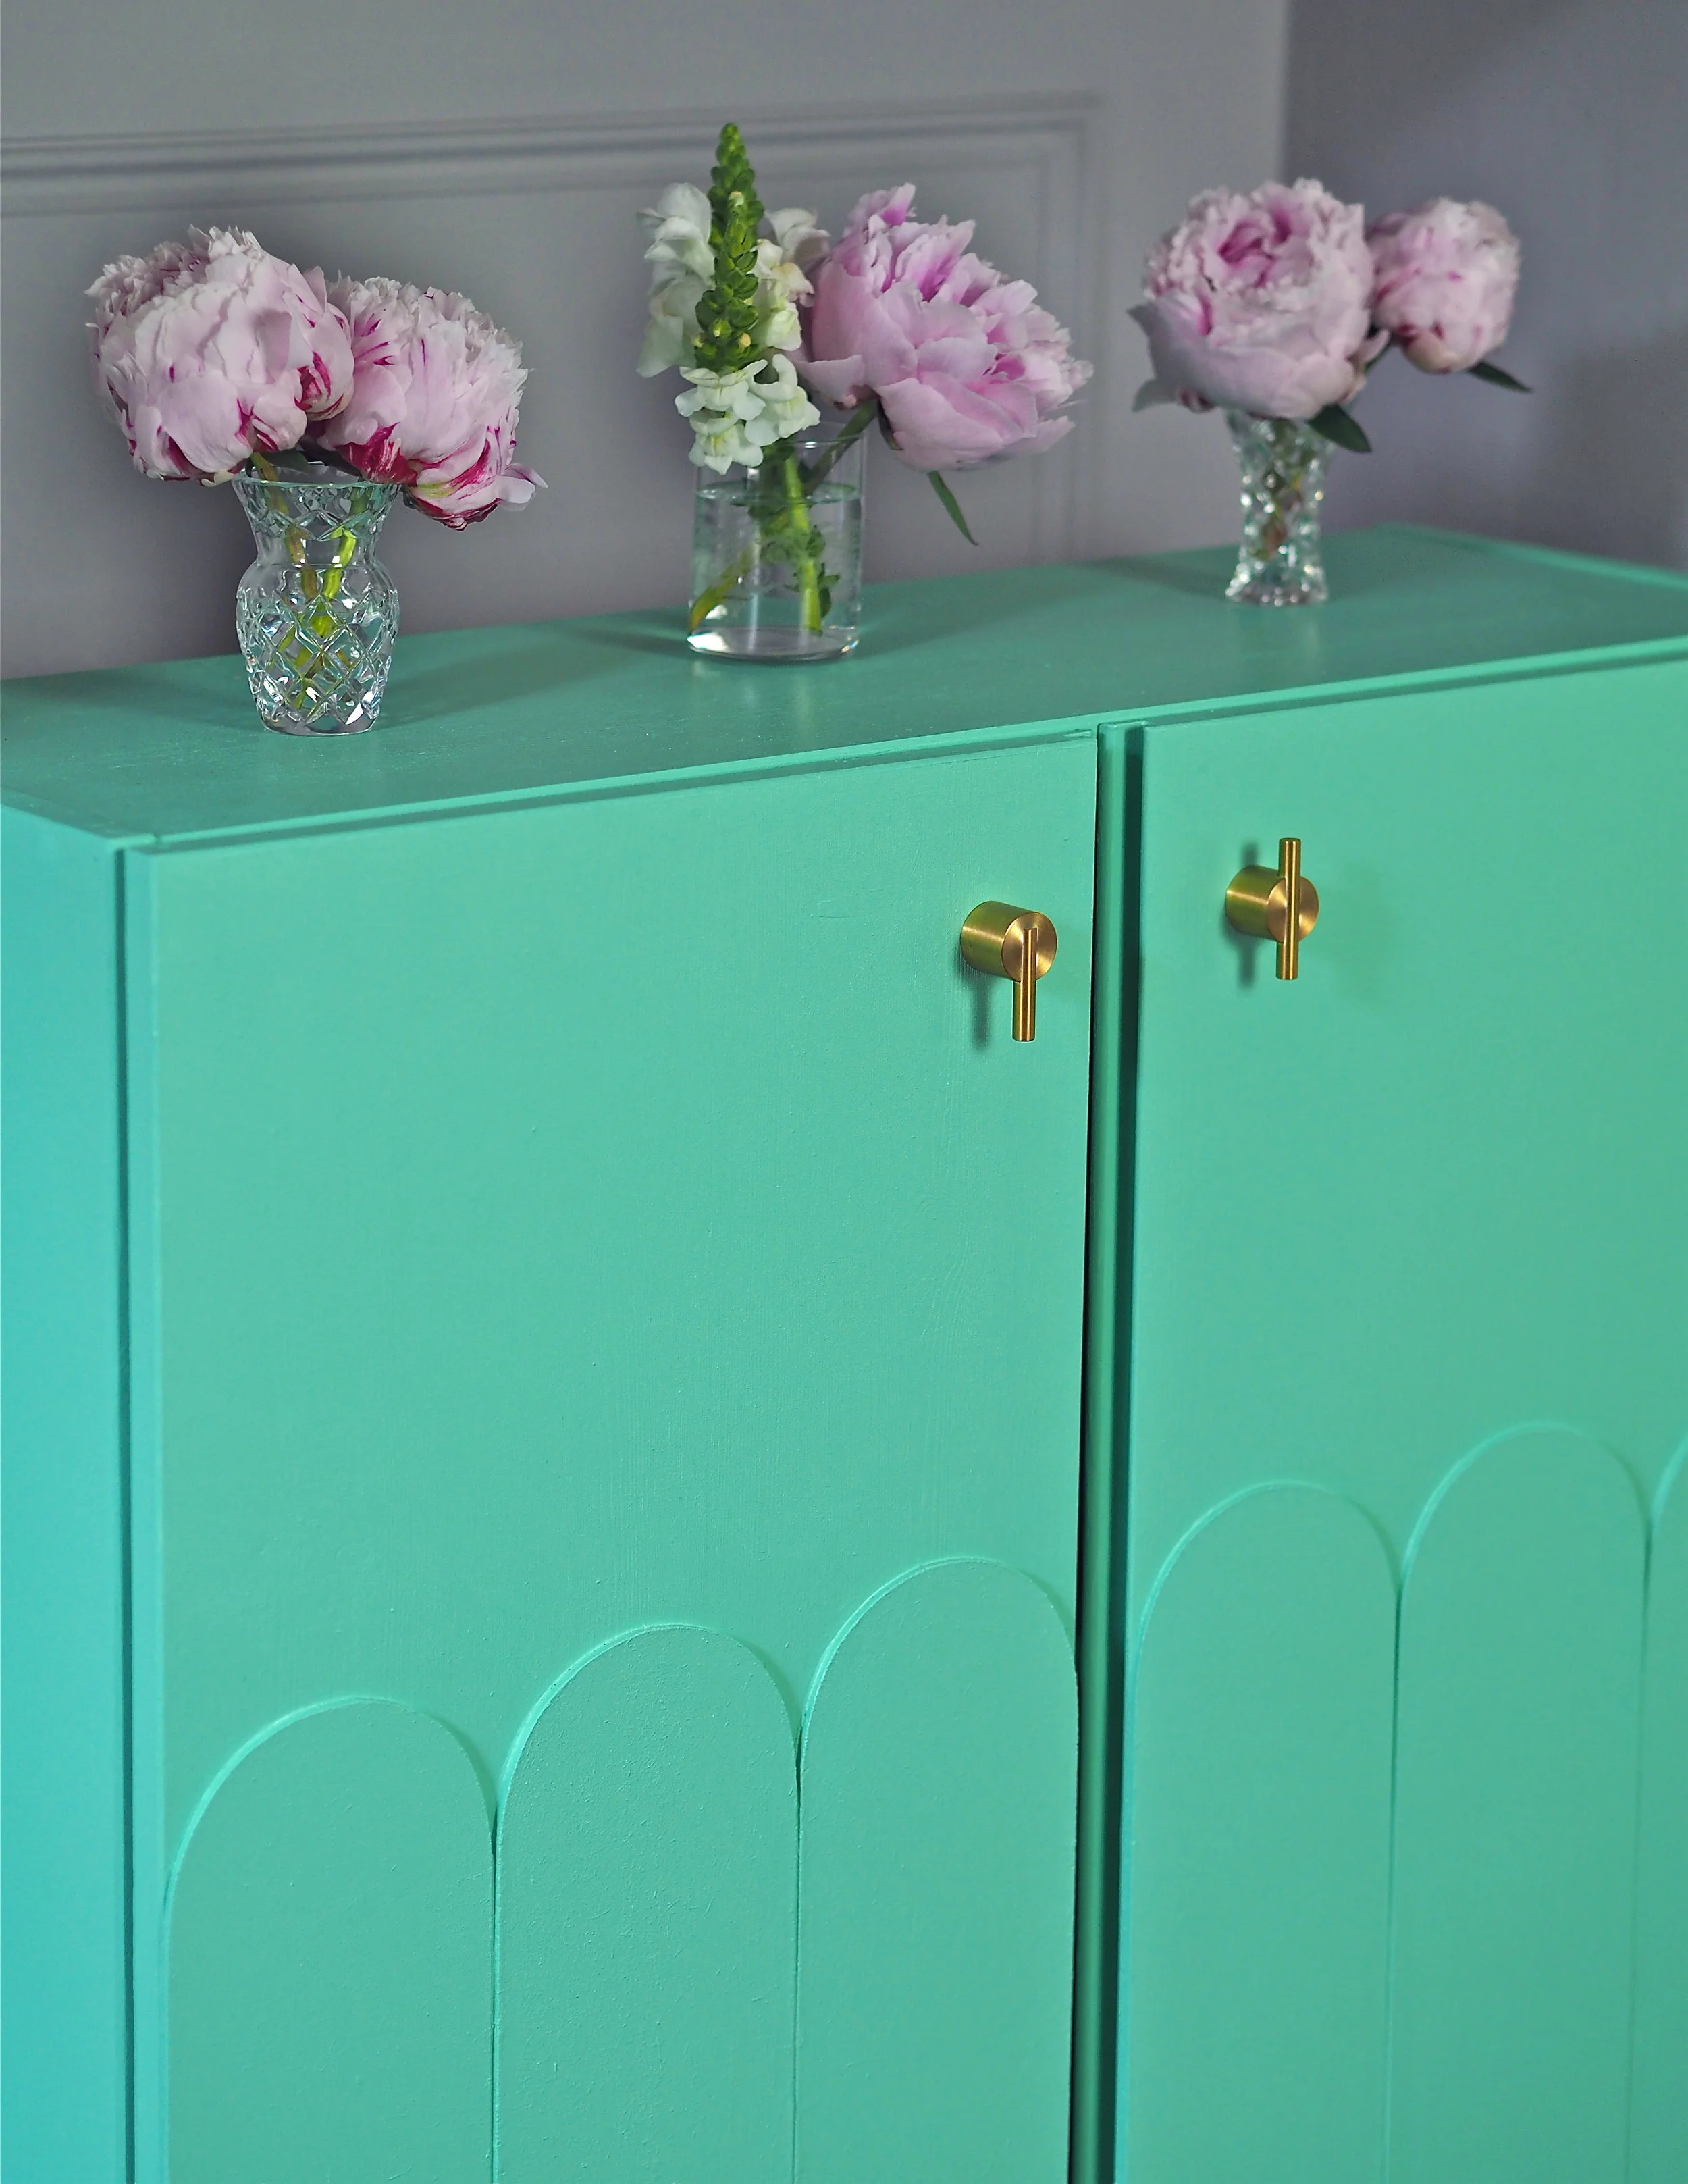
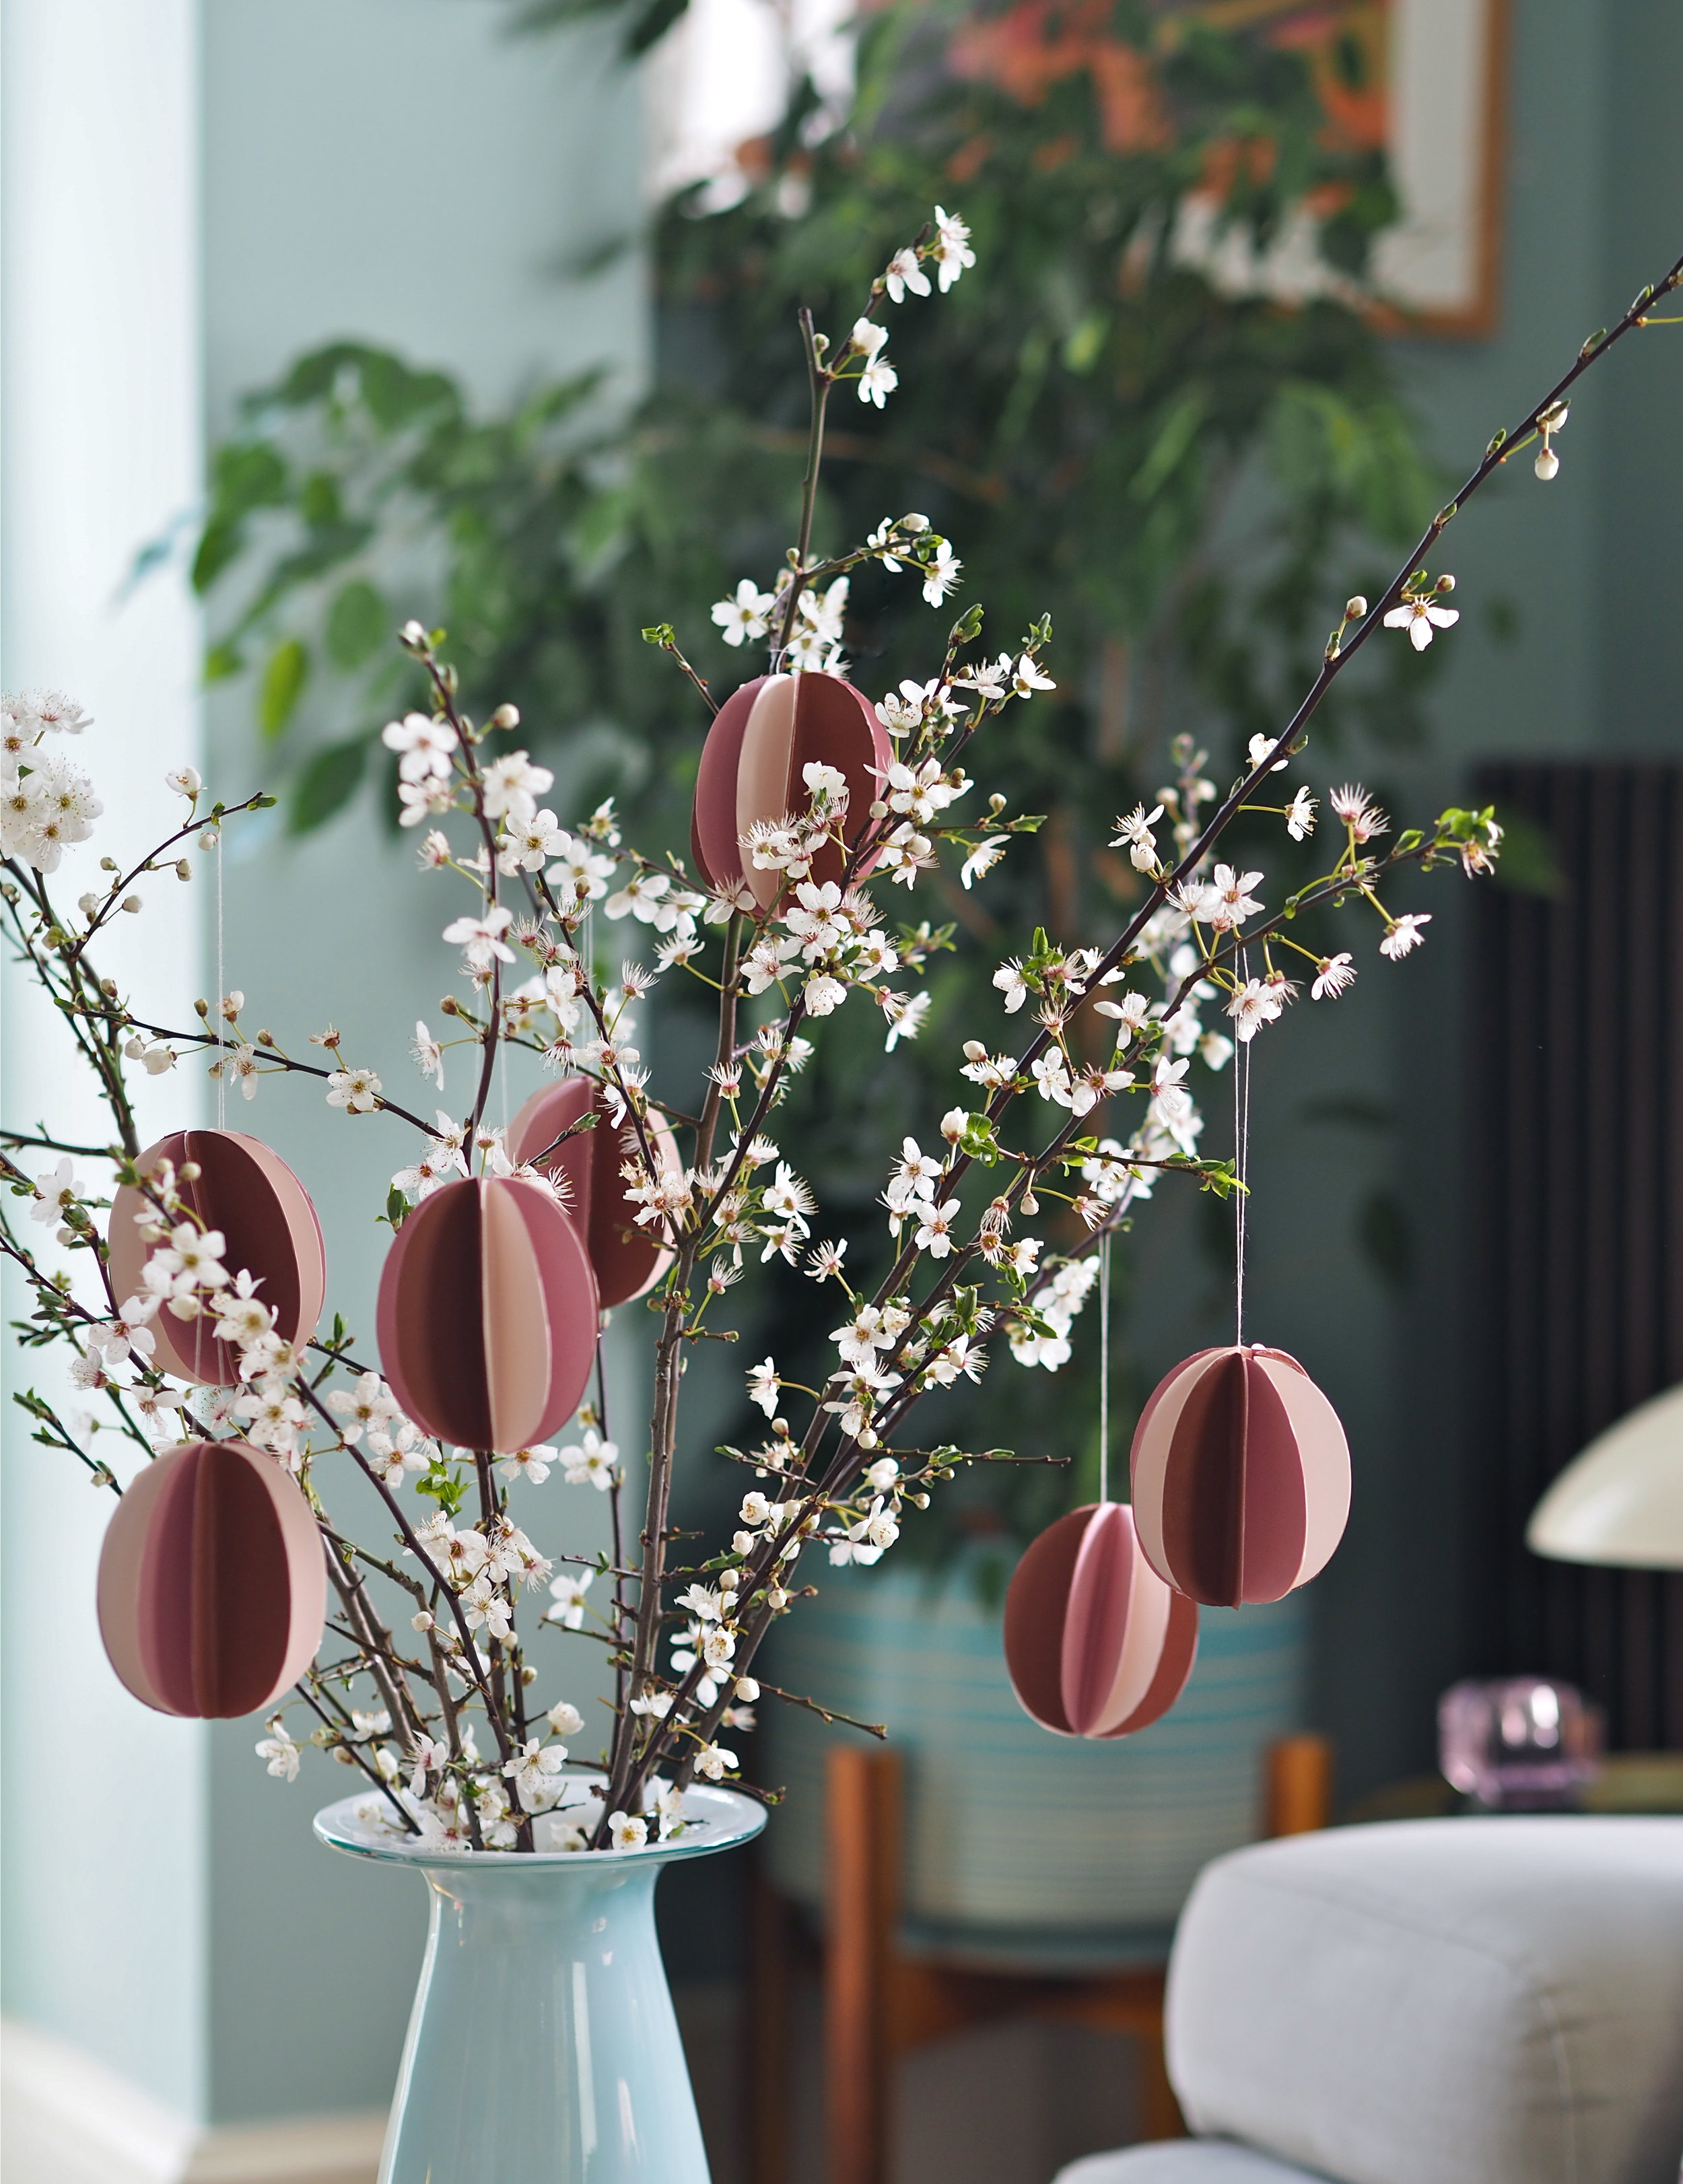
DIY Scandi Paper Decorations
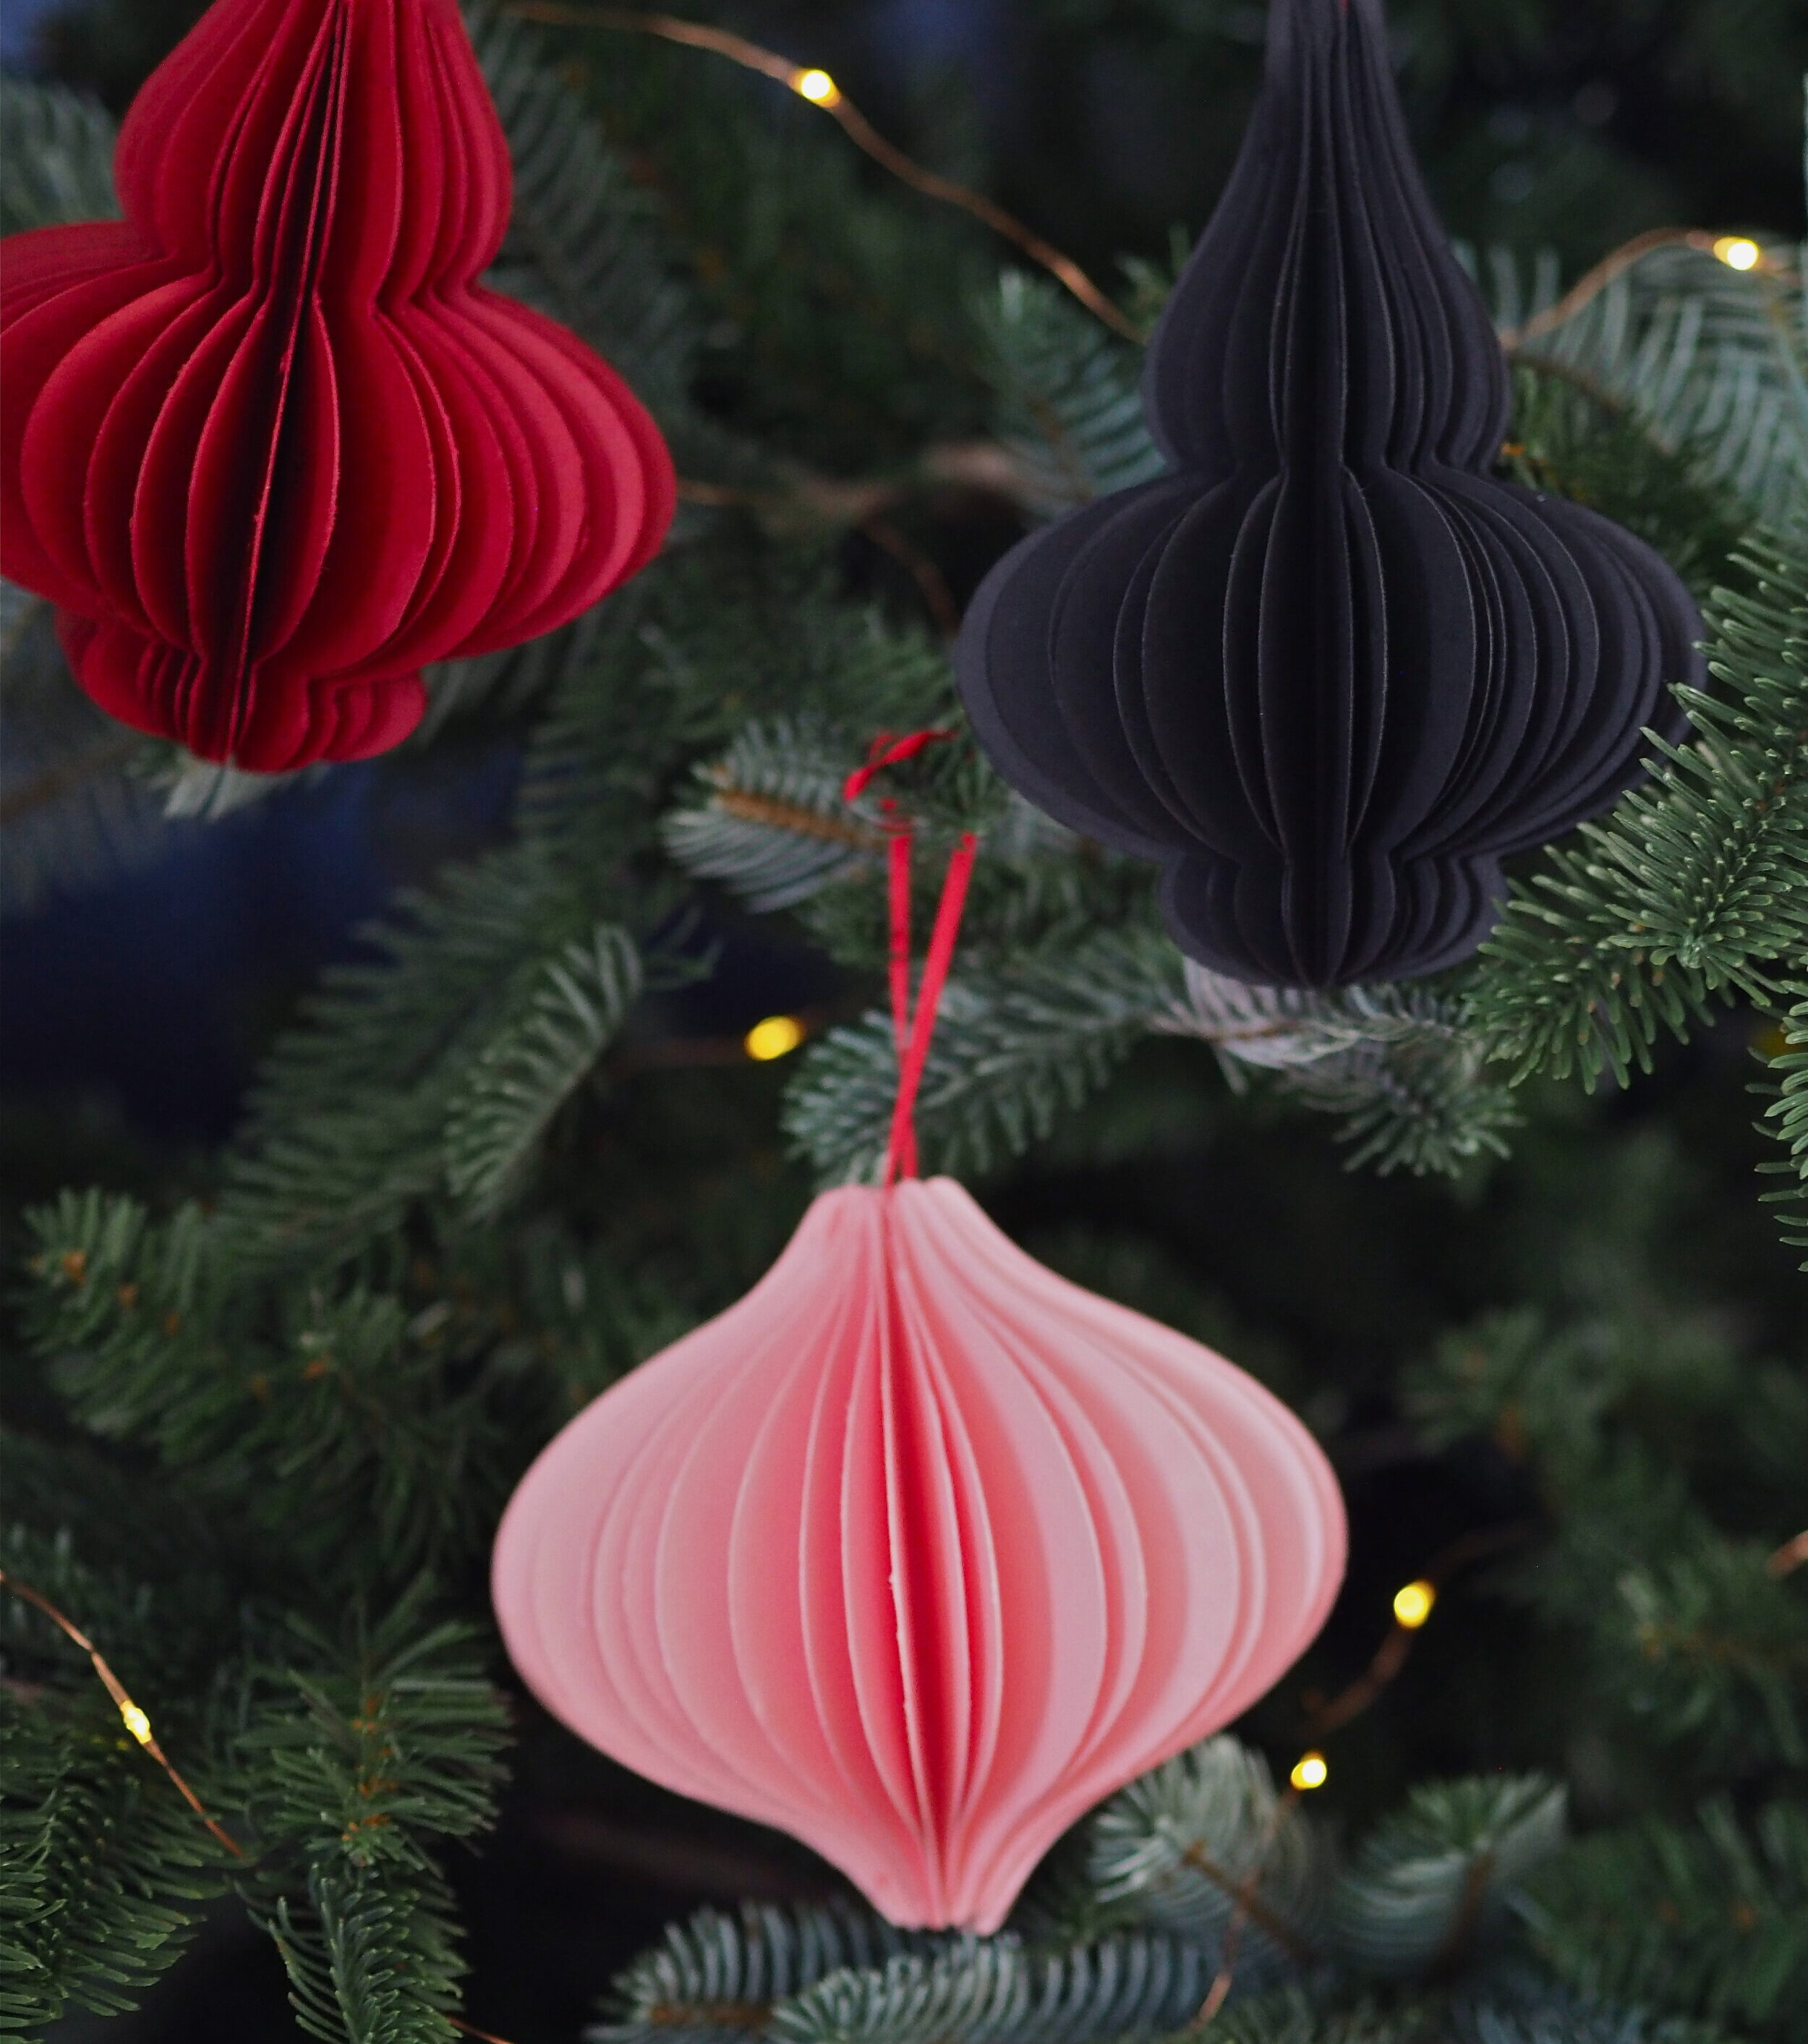
Simple, Scandi-style paper decorations provide a stylish edge to any Christmas tree and if you hand-make them, you can personalise them to be any colour, shape and size that you like! My formula for making these is a simple cut, fold and glue method, which creates that very on-trend ‘ribbed’ look that is so popular in interiors and on glassware this season.


I chose a decadent colourway of cherry red, light pink and black for my decorations, using single large sheets of paper card bought from a craft store. The best type of card for these decorations is 180gsm, which is a thin card that is easy to fold. Anything thicker and your decoration will be harder to create, while the tip of each section will not meet perfectly at the top.


As you need to cut quite a lot of the same shapes from your card, this DIY is easier if you use a craft-cutting tool like a Cricut machine. However, if you do not own one of these, create a template on a thick piece of cardboard and cut around it using a cutting knife and pad. Depending on the chosen size of your decoration (mine range from 13-16cm in height) and your card thickness, you’ll need around 20 cuts outs all exactly the same in shape, height and width.

To start, fold each piece exactly down the middle to create a crease.
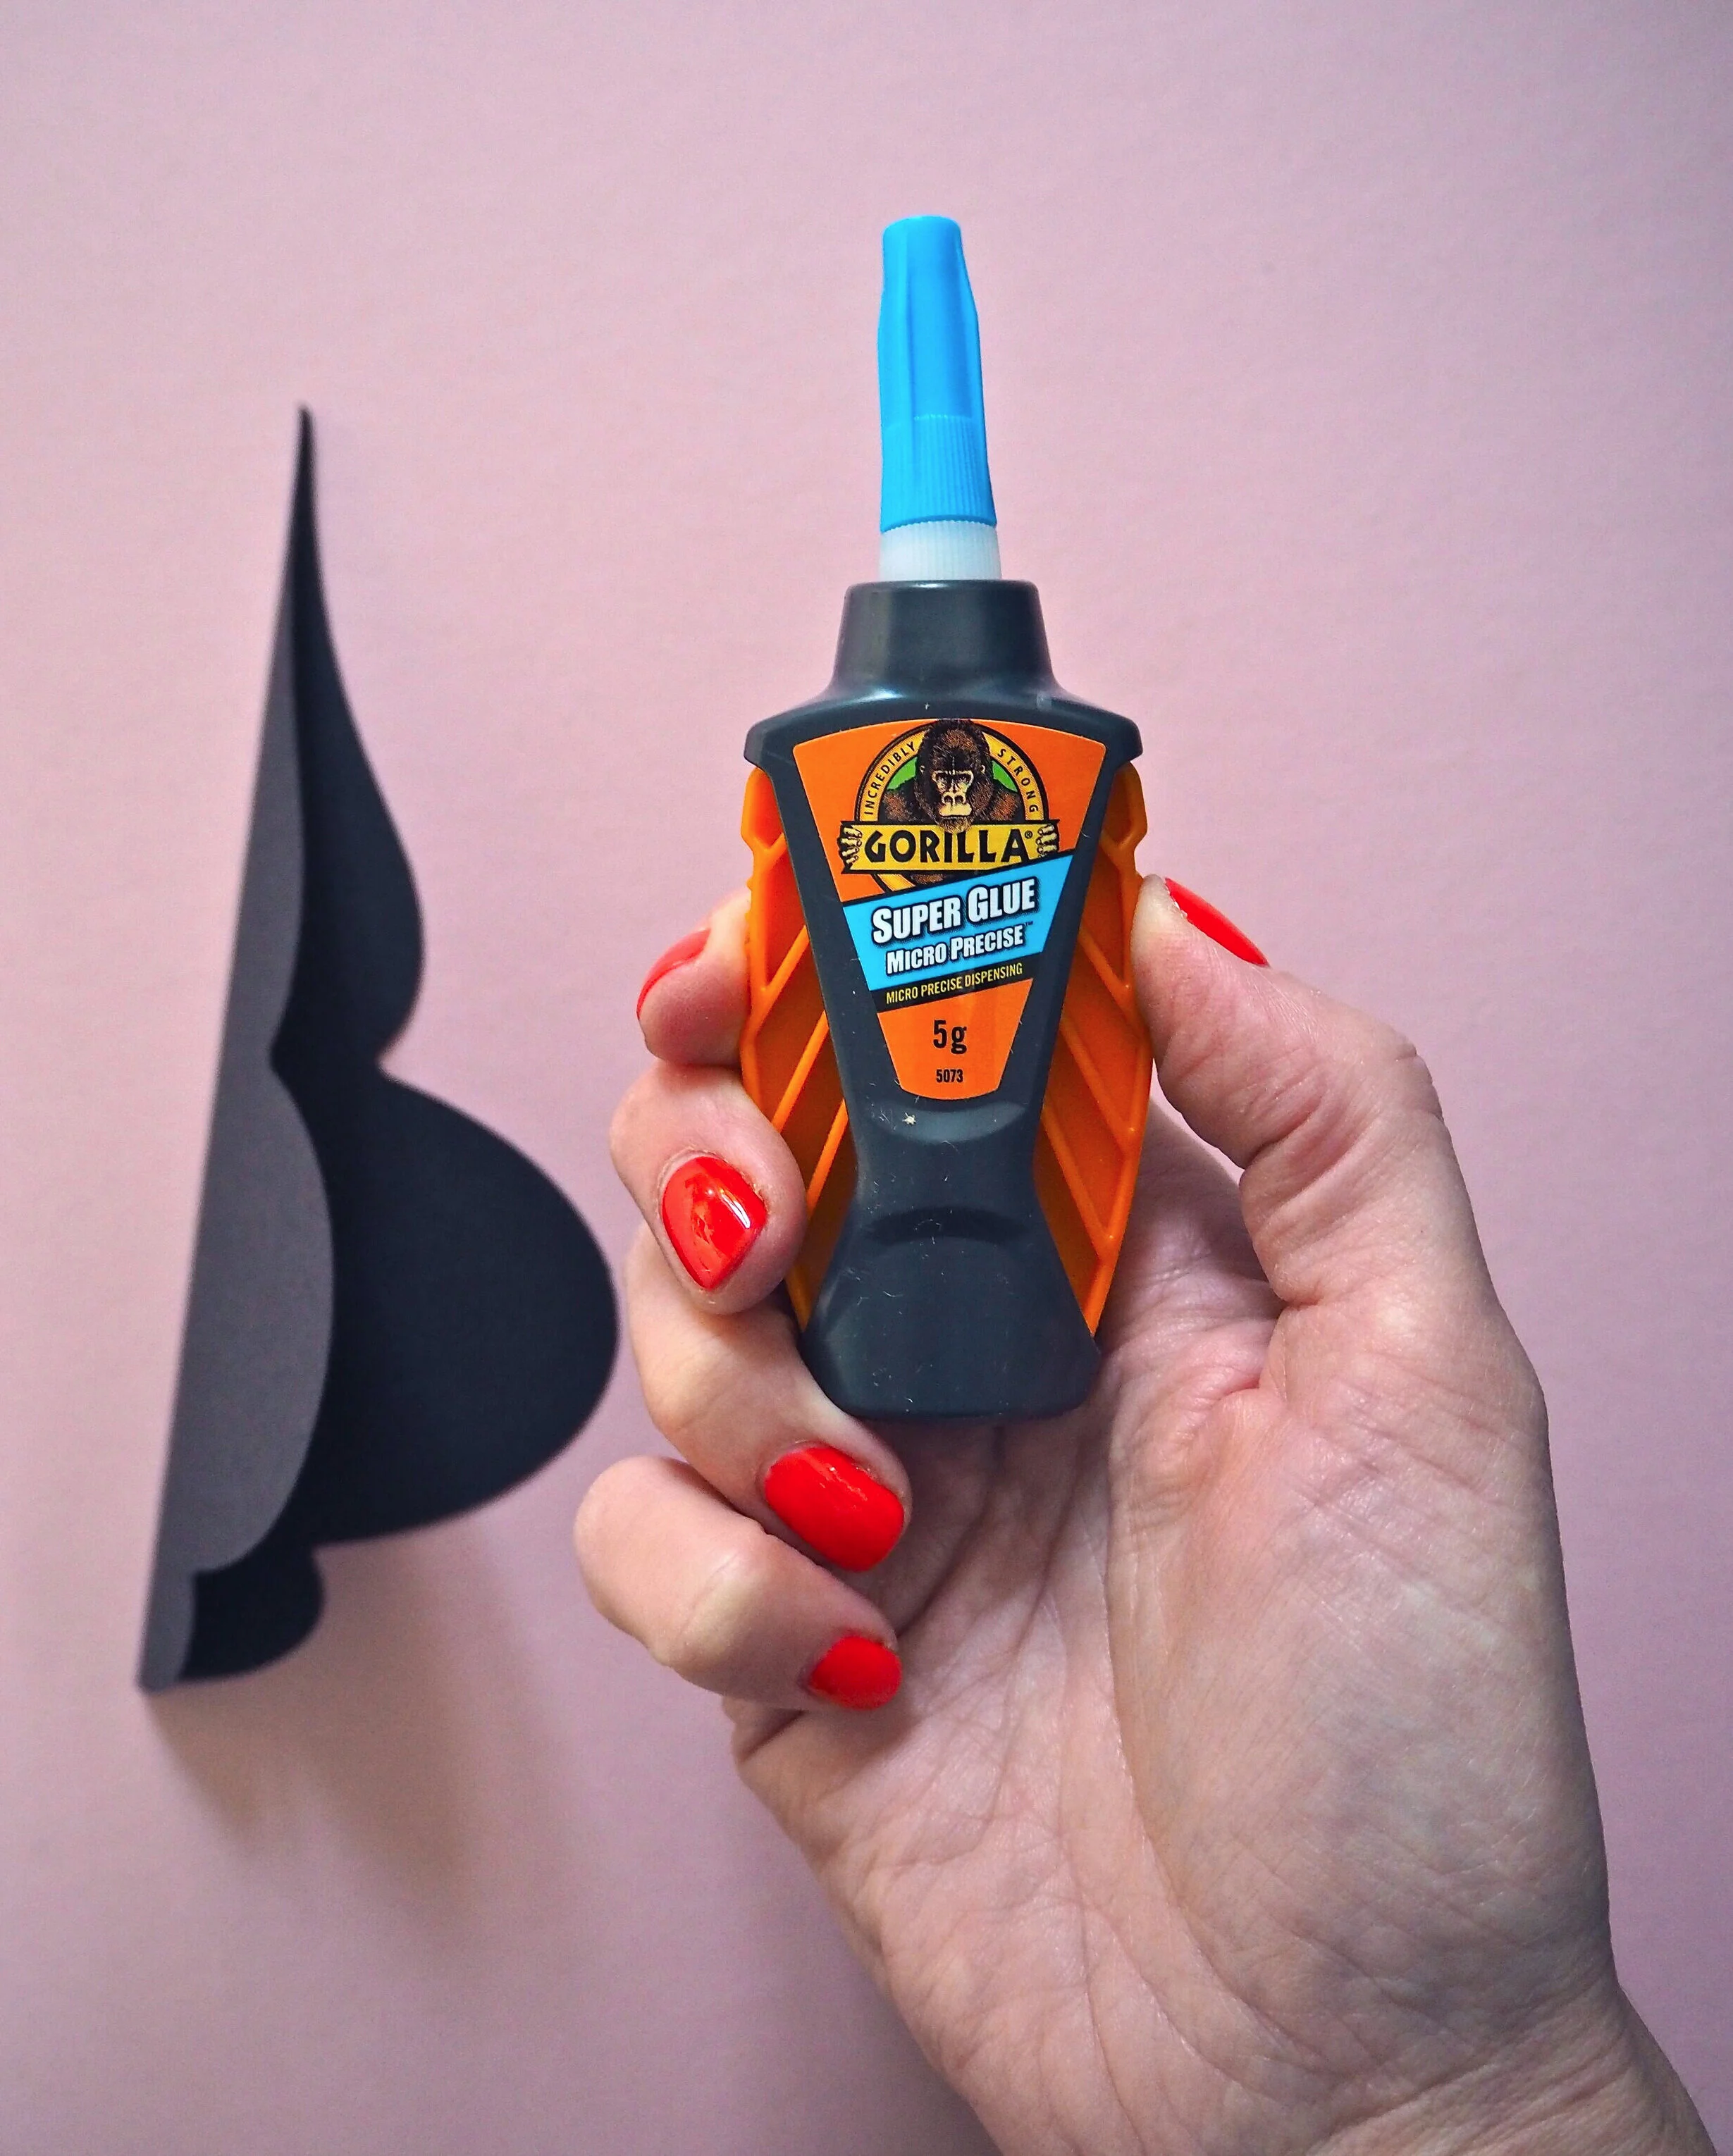
Using Gorilla’s Super Glue Micro Precise, apply a number of tiny dots of glue along the outside edge of a single folded shape along the crease. Glue is distributed by gently squeezing the orange sides of the dispensing tool and the harder you squeeze, the more glue is dispersed. Line up and apply another folded shape on top of your glued shape and press down firmly for 10-45 seconds. Repeat this same action until 50% of your shapes are used up.


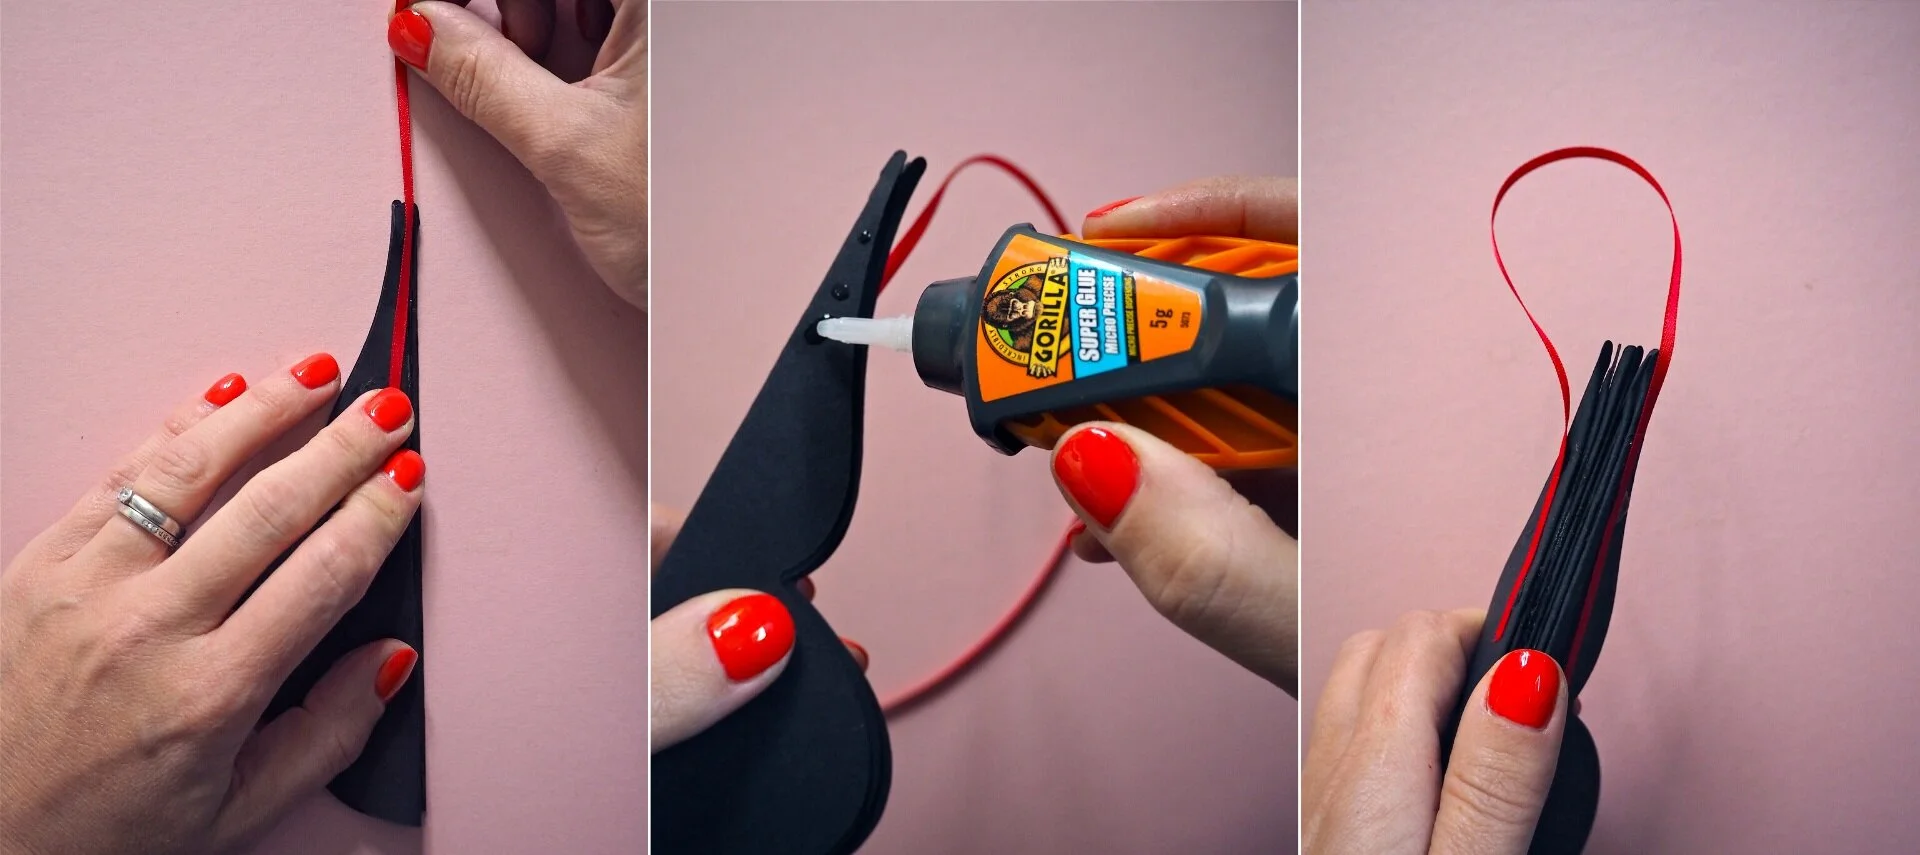
Now is the time to attach your loop that will hang your decoration. Taking a small strip of ribbon, apply a small amount of glue to the tip of your decoration and press one edge of ribbon on top for 10-45 seconds. Once attached, turn your decoration over and do the same on the other side:
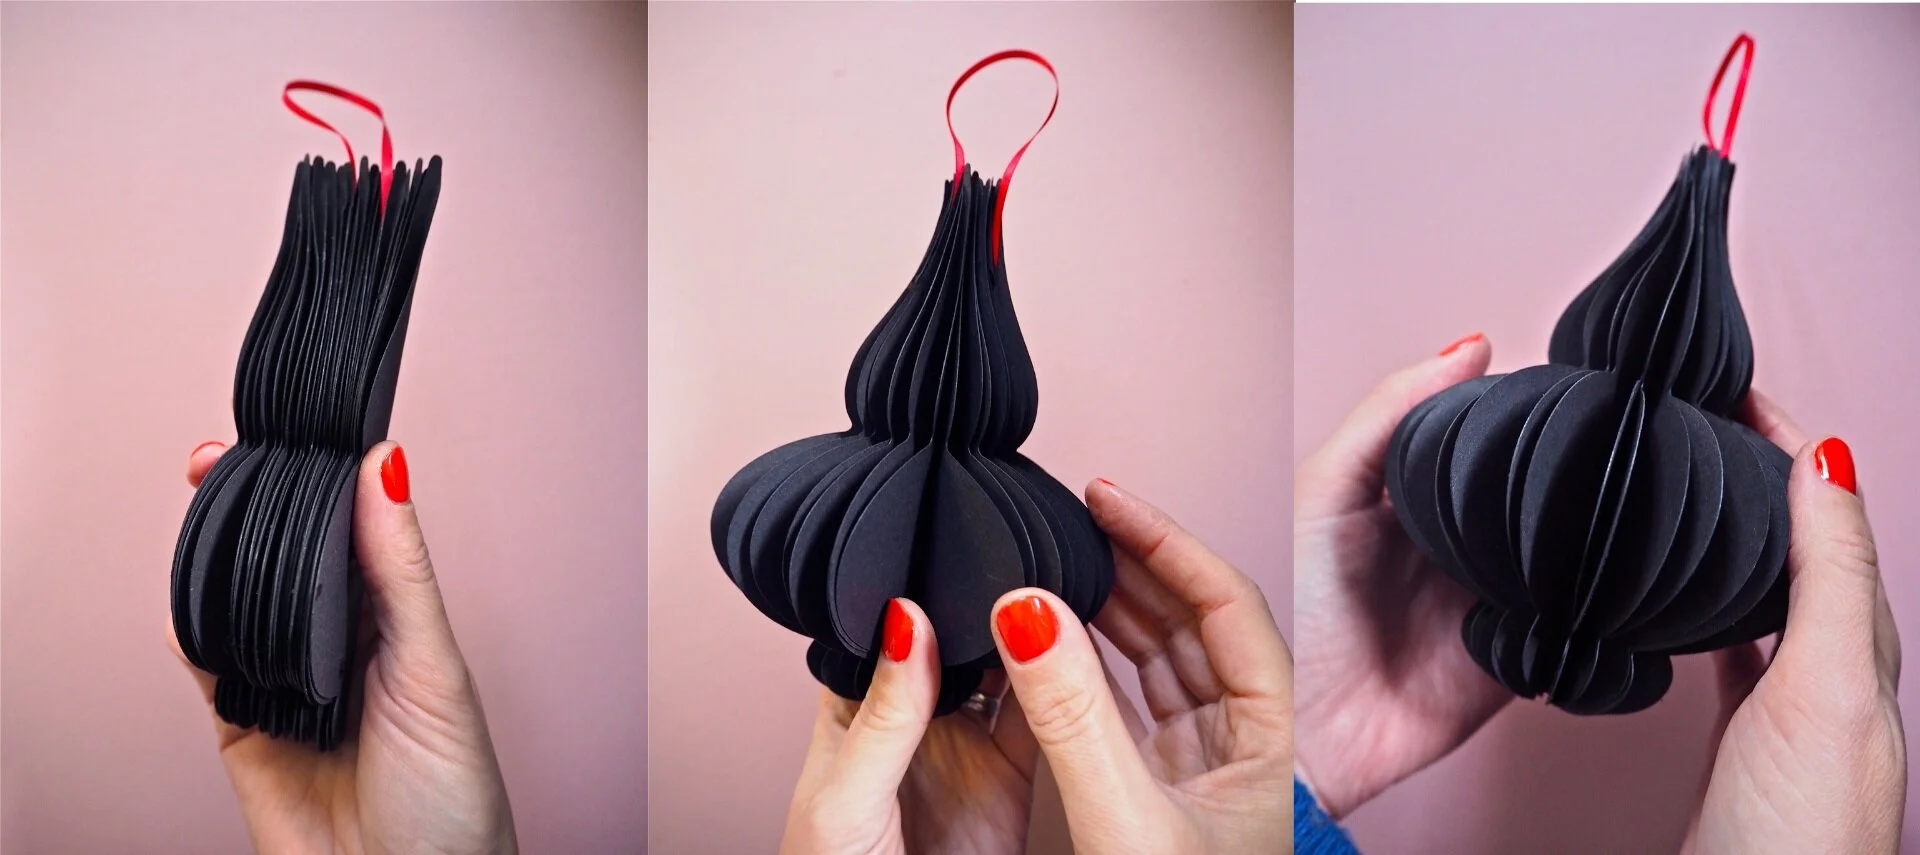
Dividing up the remaining folded shapes you have left, apply the rest as before to build up the shape. Leave your glue to cure for 24 hours before opening up the decoration into a full circle. Prize apart each section so there is the same distance between each layer of card, then glue together the adjoining sides (If you want to be able to fold your decoration flat again, simply secure the two end sides with a small removable paper clip, rather than glue).


And there you have it! Simple but effective, Scandi-style paper decorations. I really hope you enjoyed this Christmas craft, part of my ongoing collaboration with Gorilla. For my other projects with the brand, please scroll down to the bottom of this post!