How To Reupholster A Bed: The DIY That Transformed My Bedroom In A Day
One of the most transformative DIYs that I have recently undertaken was to recover my old bed frame. I couldn’t believe how well the DIY came out - it looked like I had purchased a totally new bed! It was also a lot easier to do than I expected, taking less than a day to complete. If you fancy giving this a try yourself, here is how I did it:
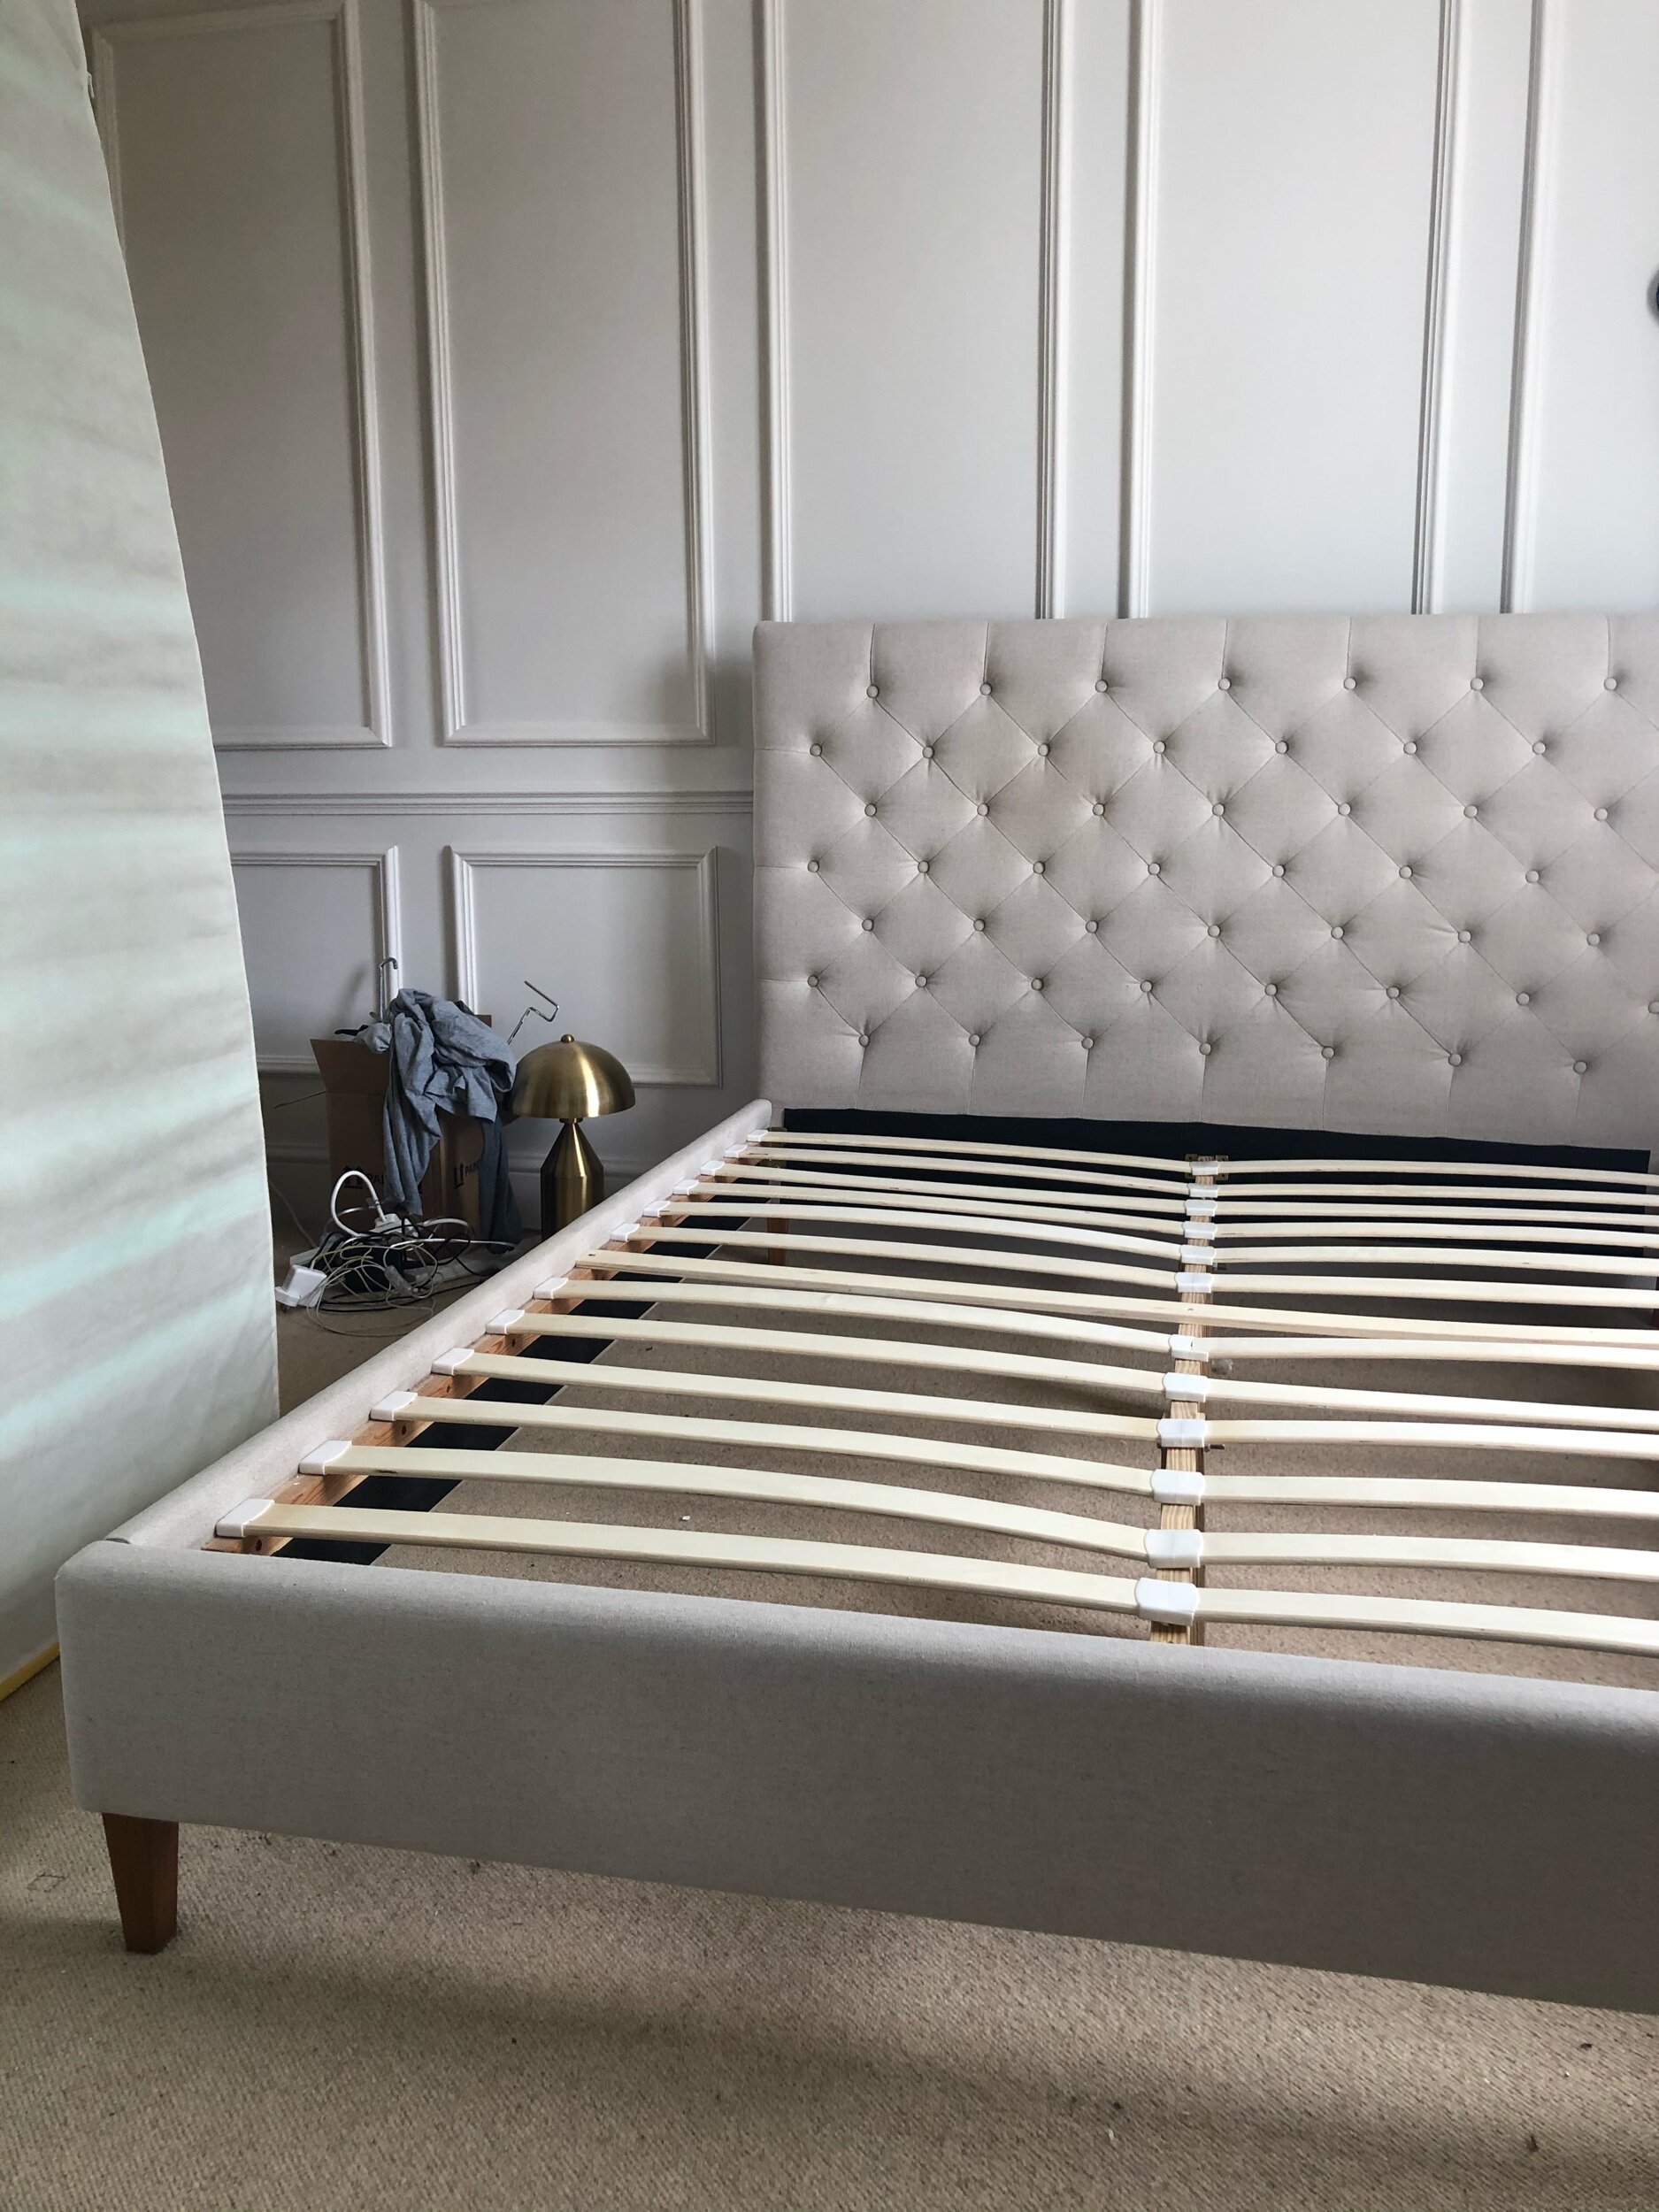
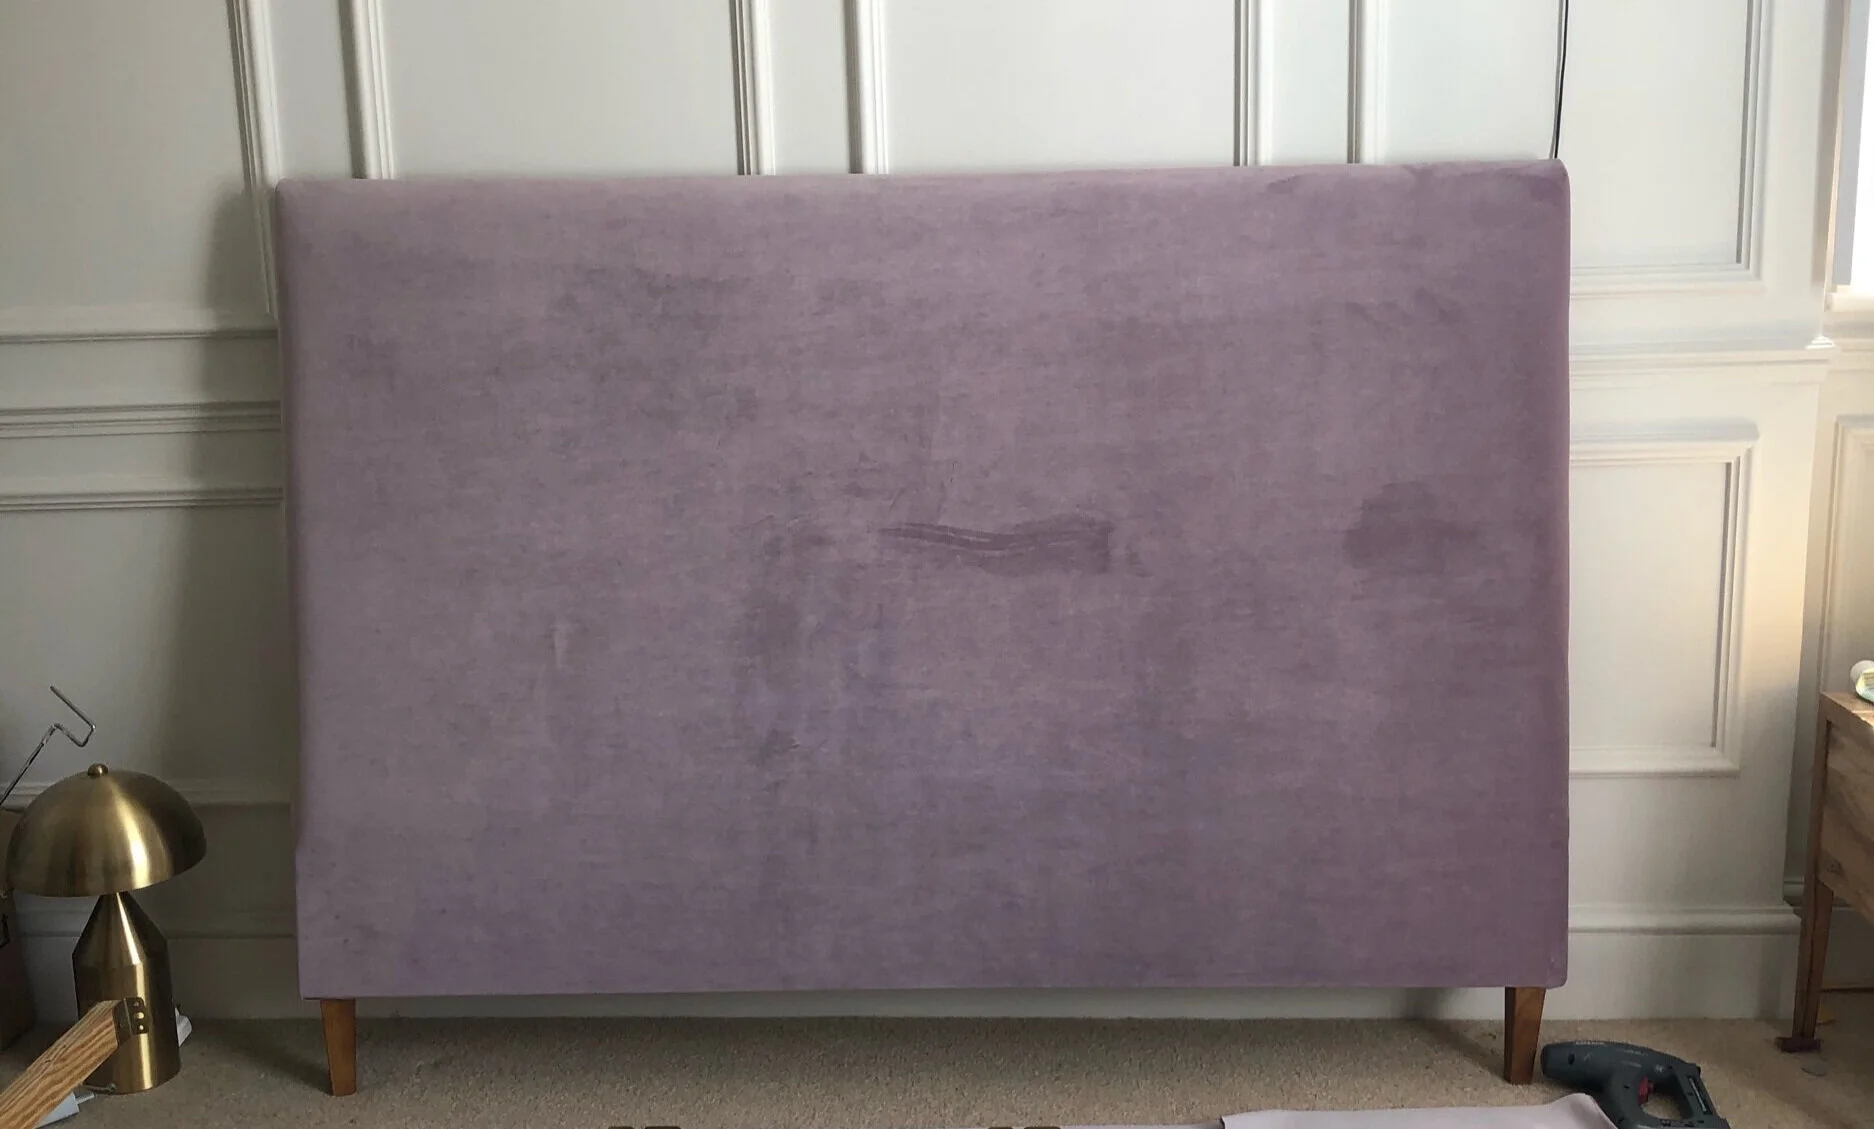
My bed ‘before’.

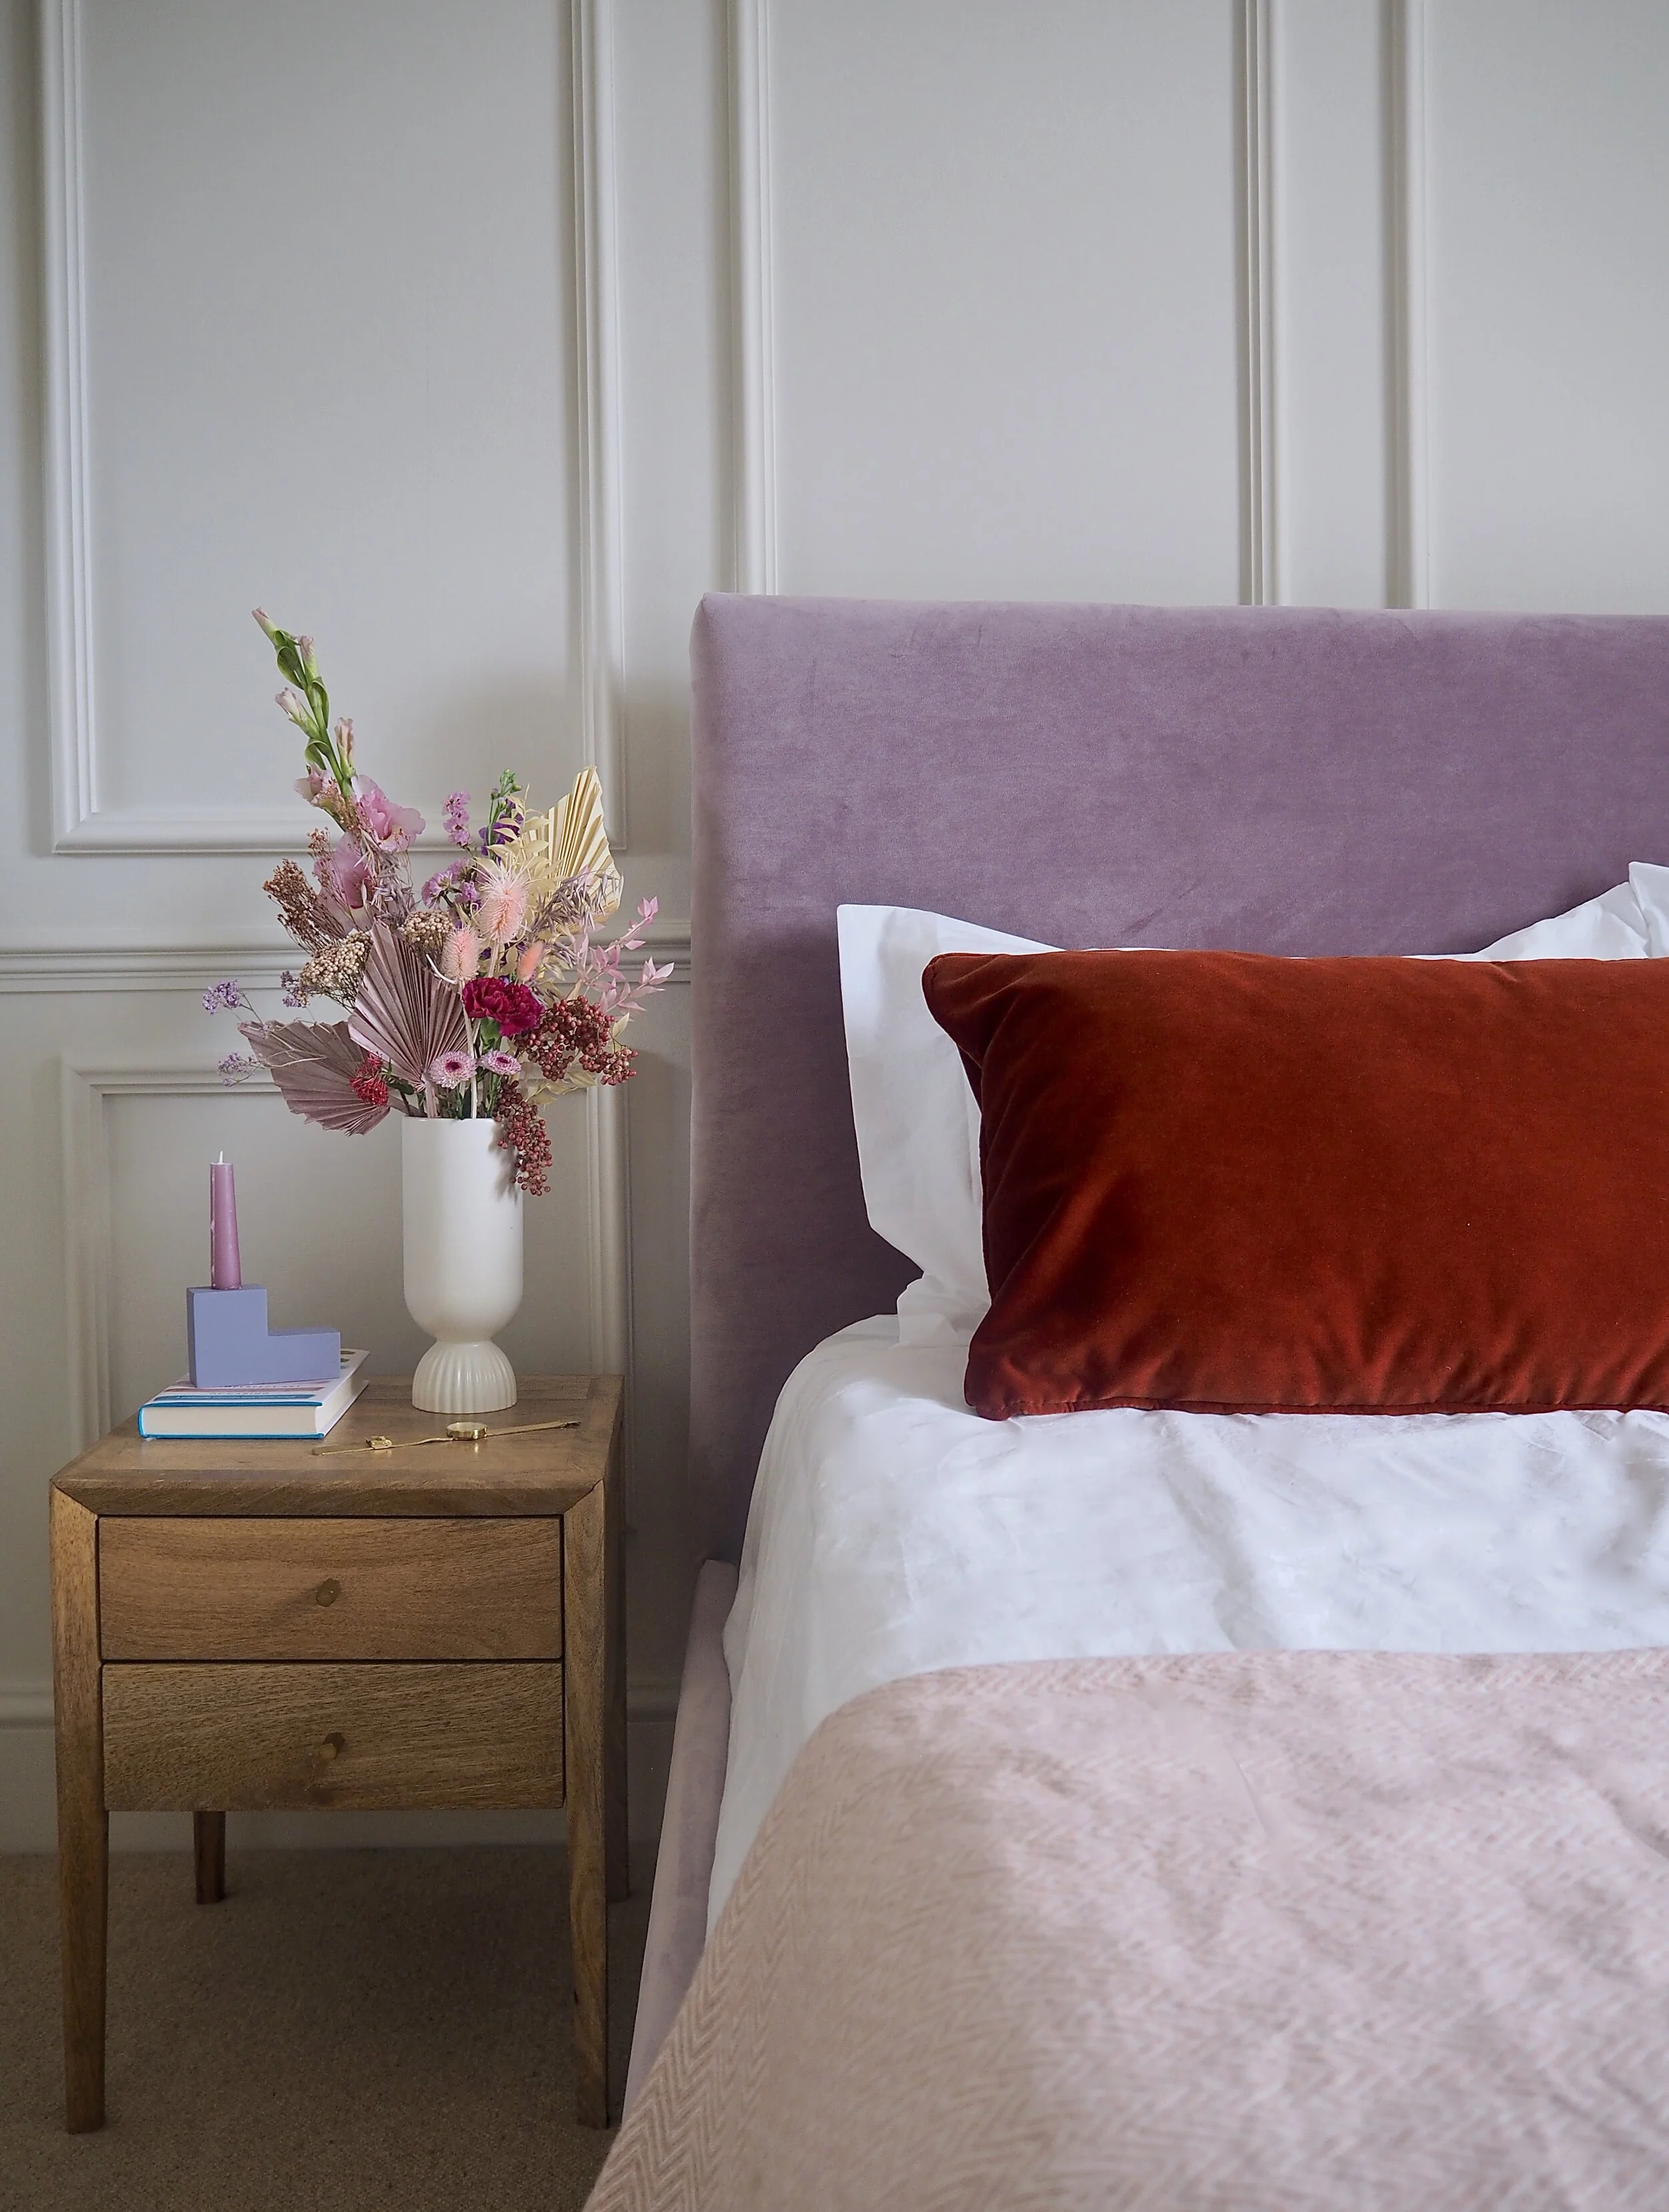
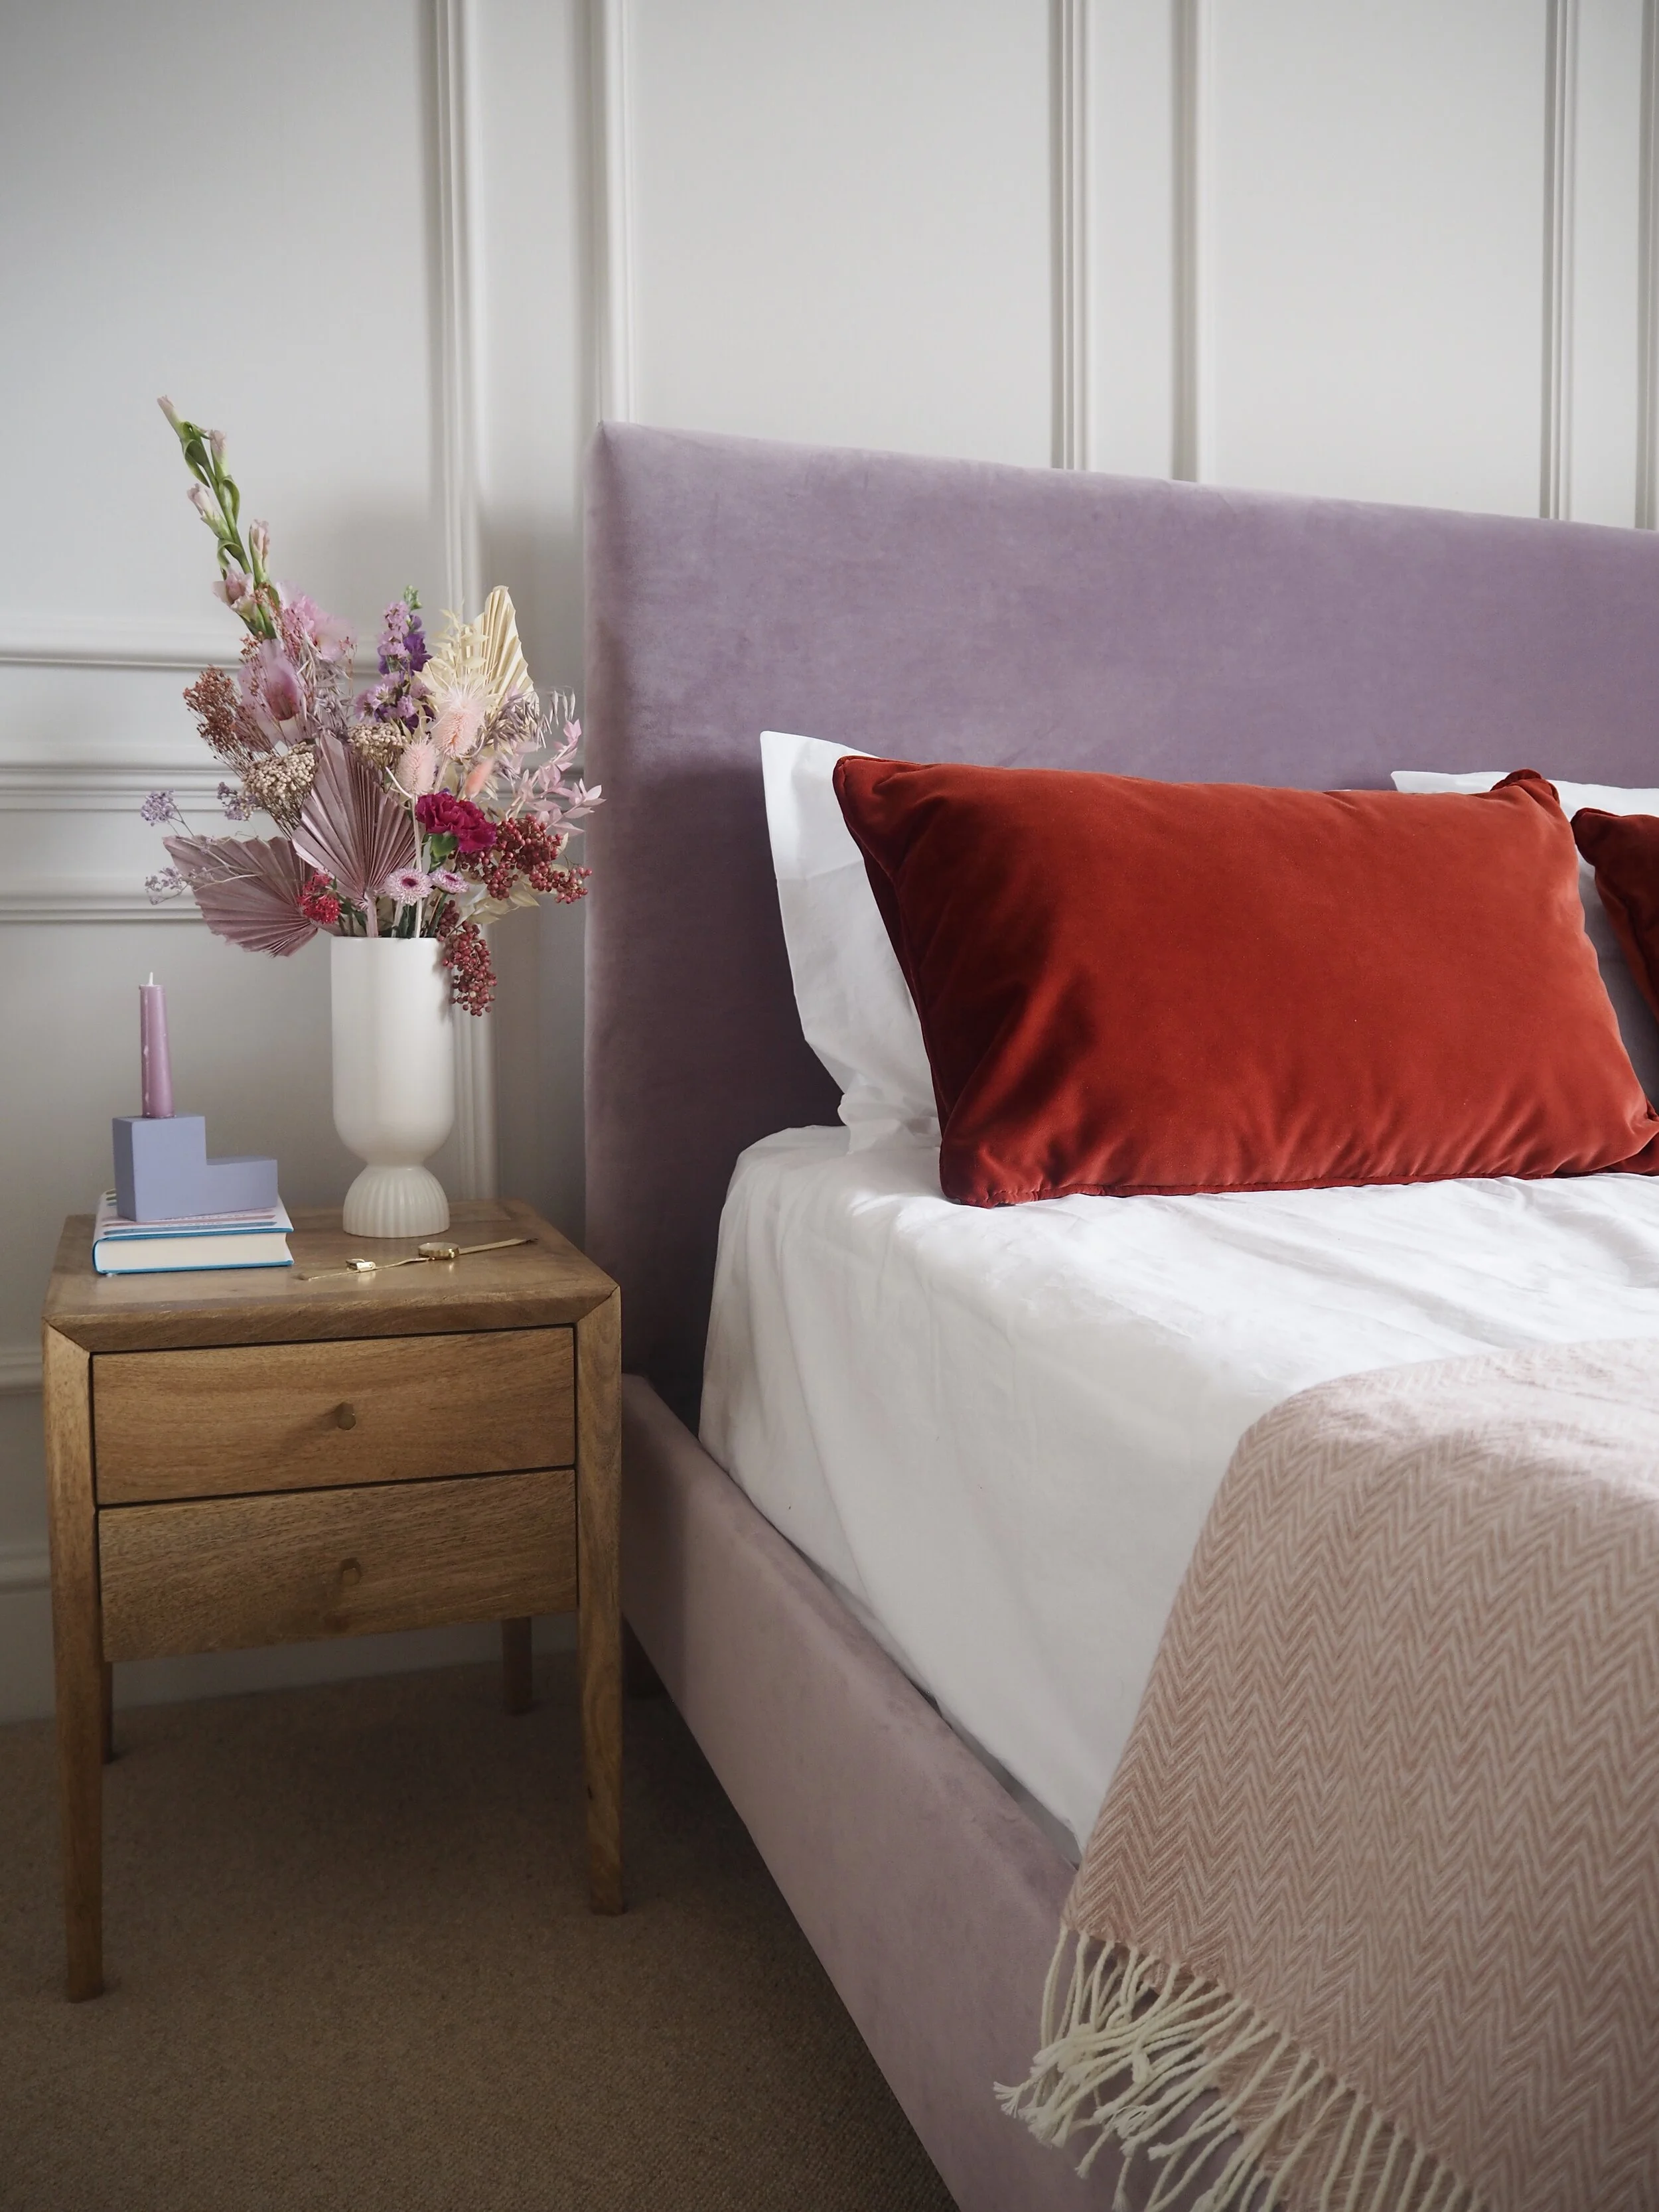
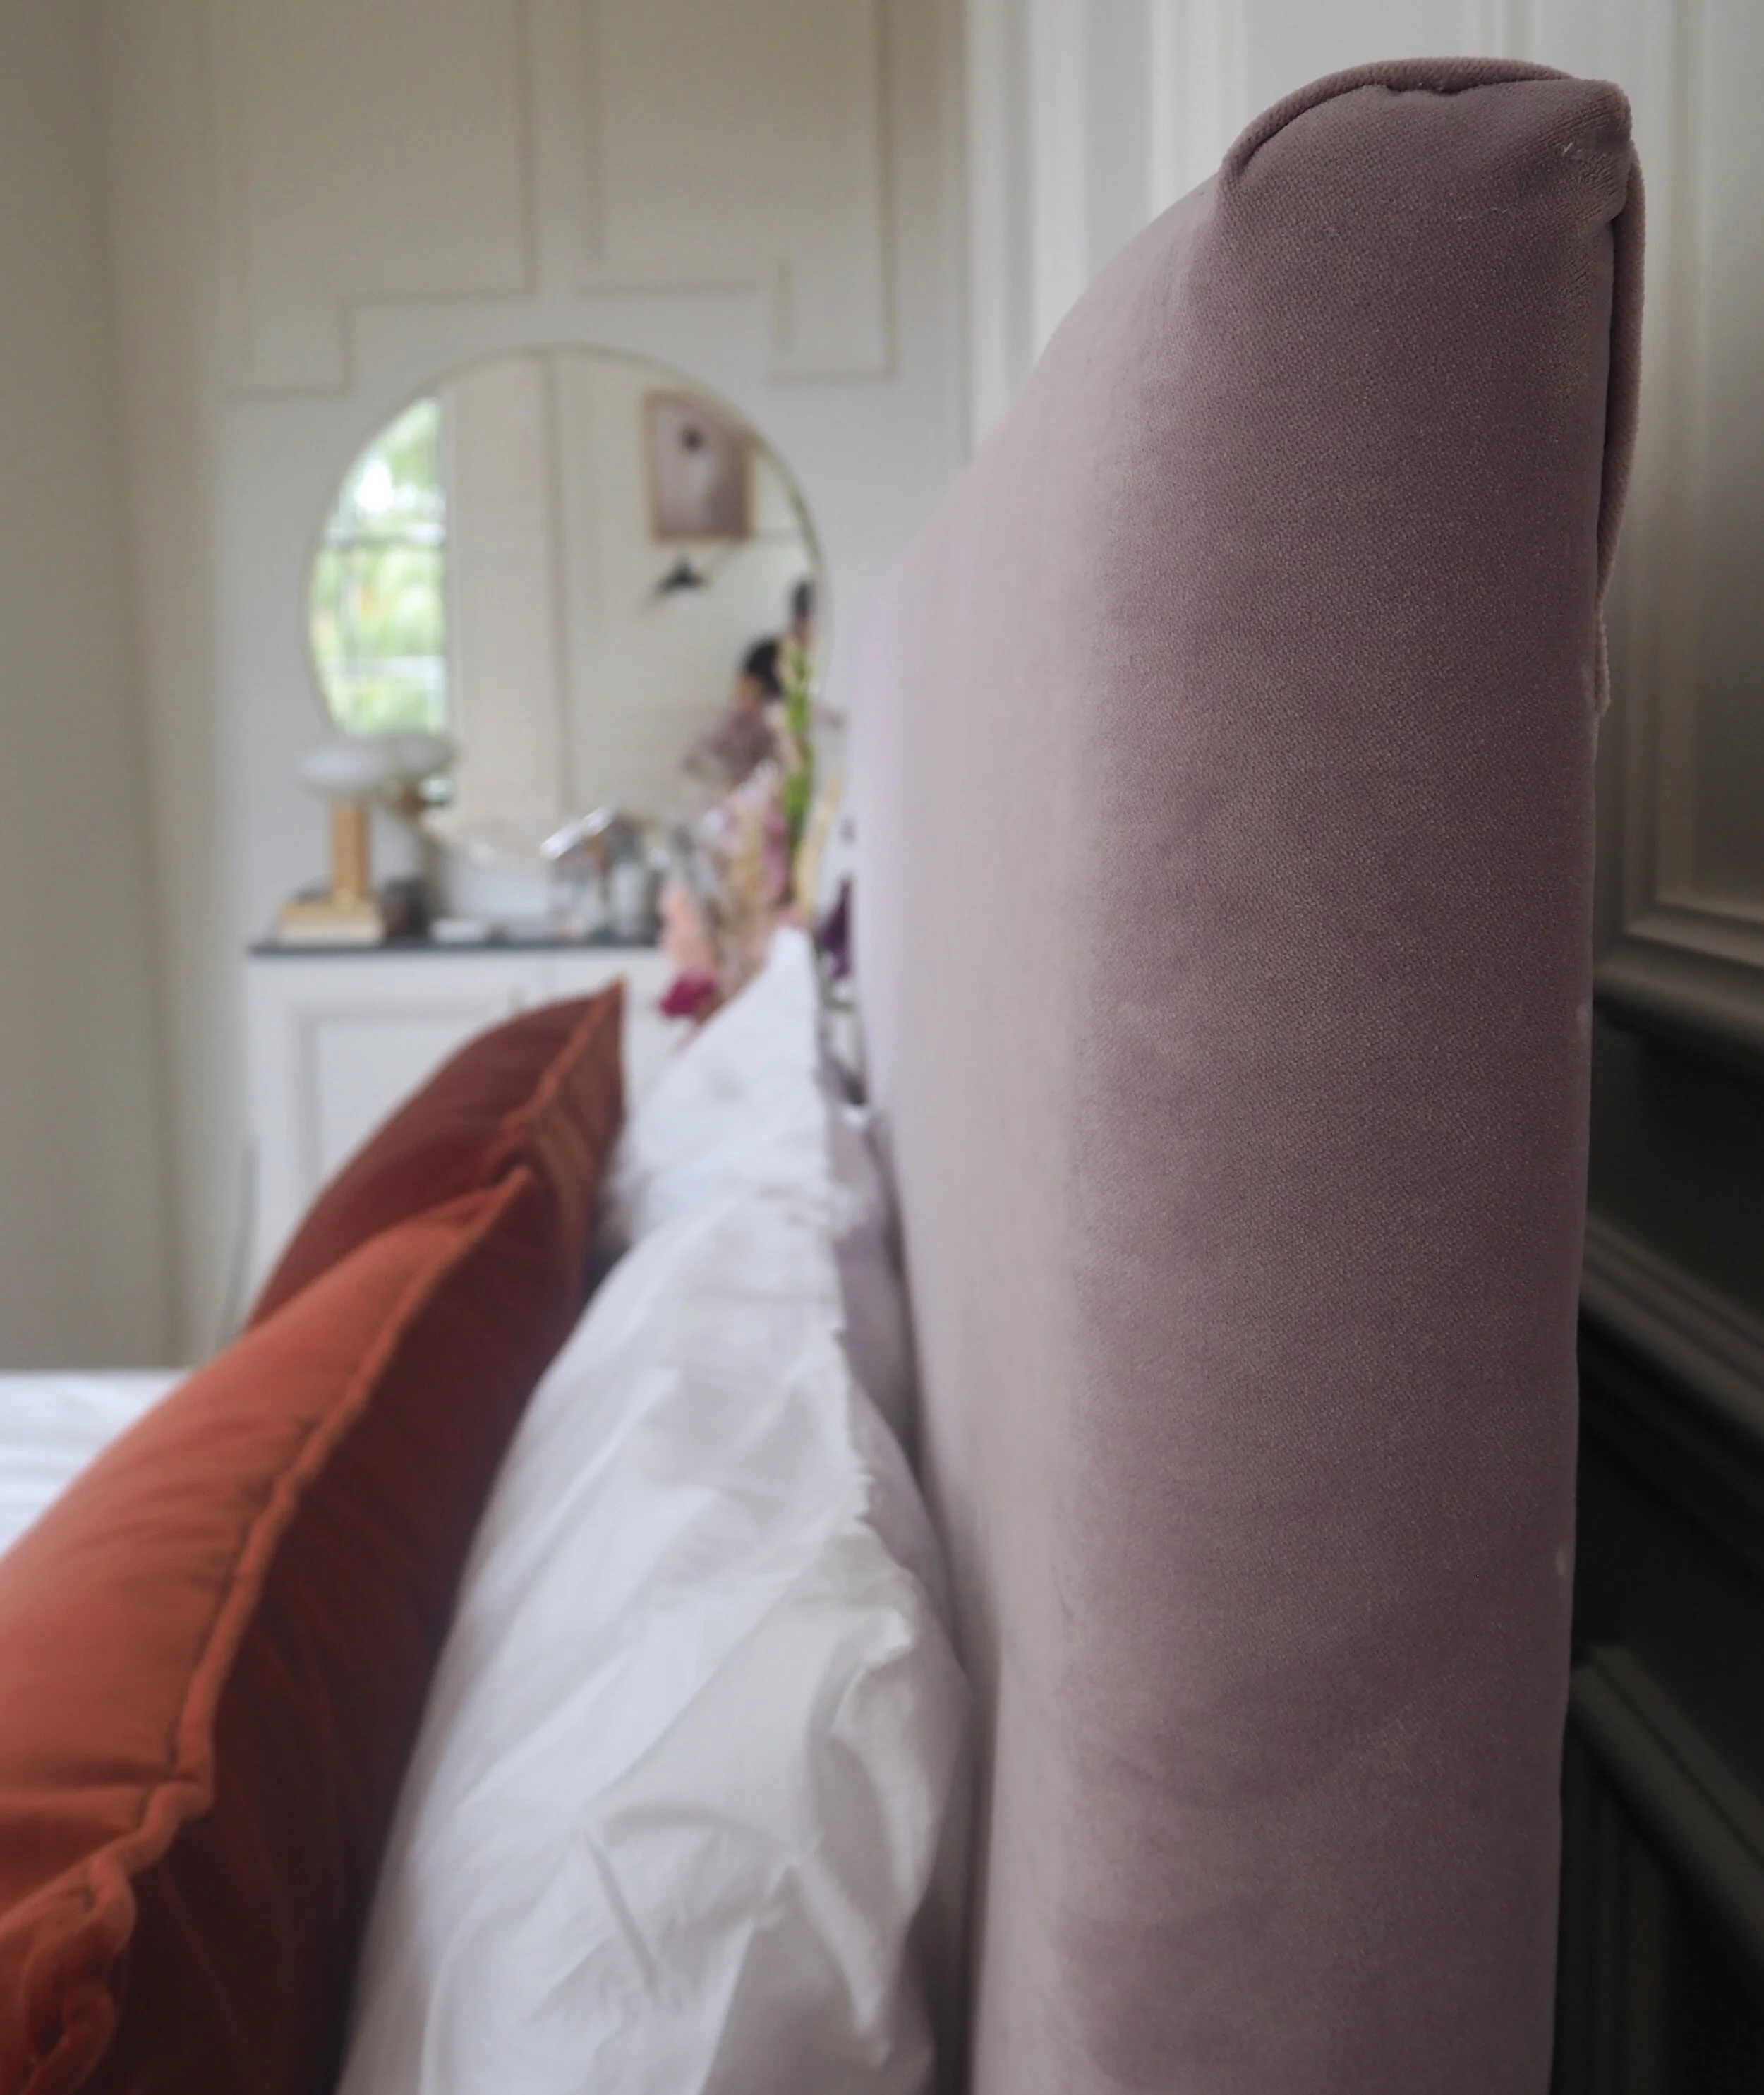
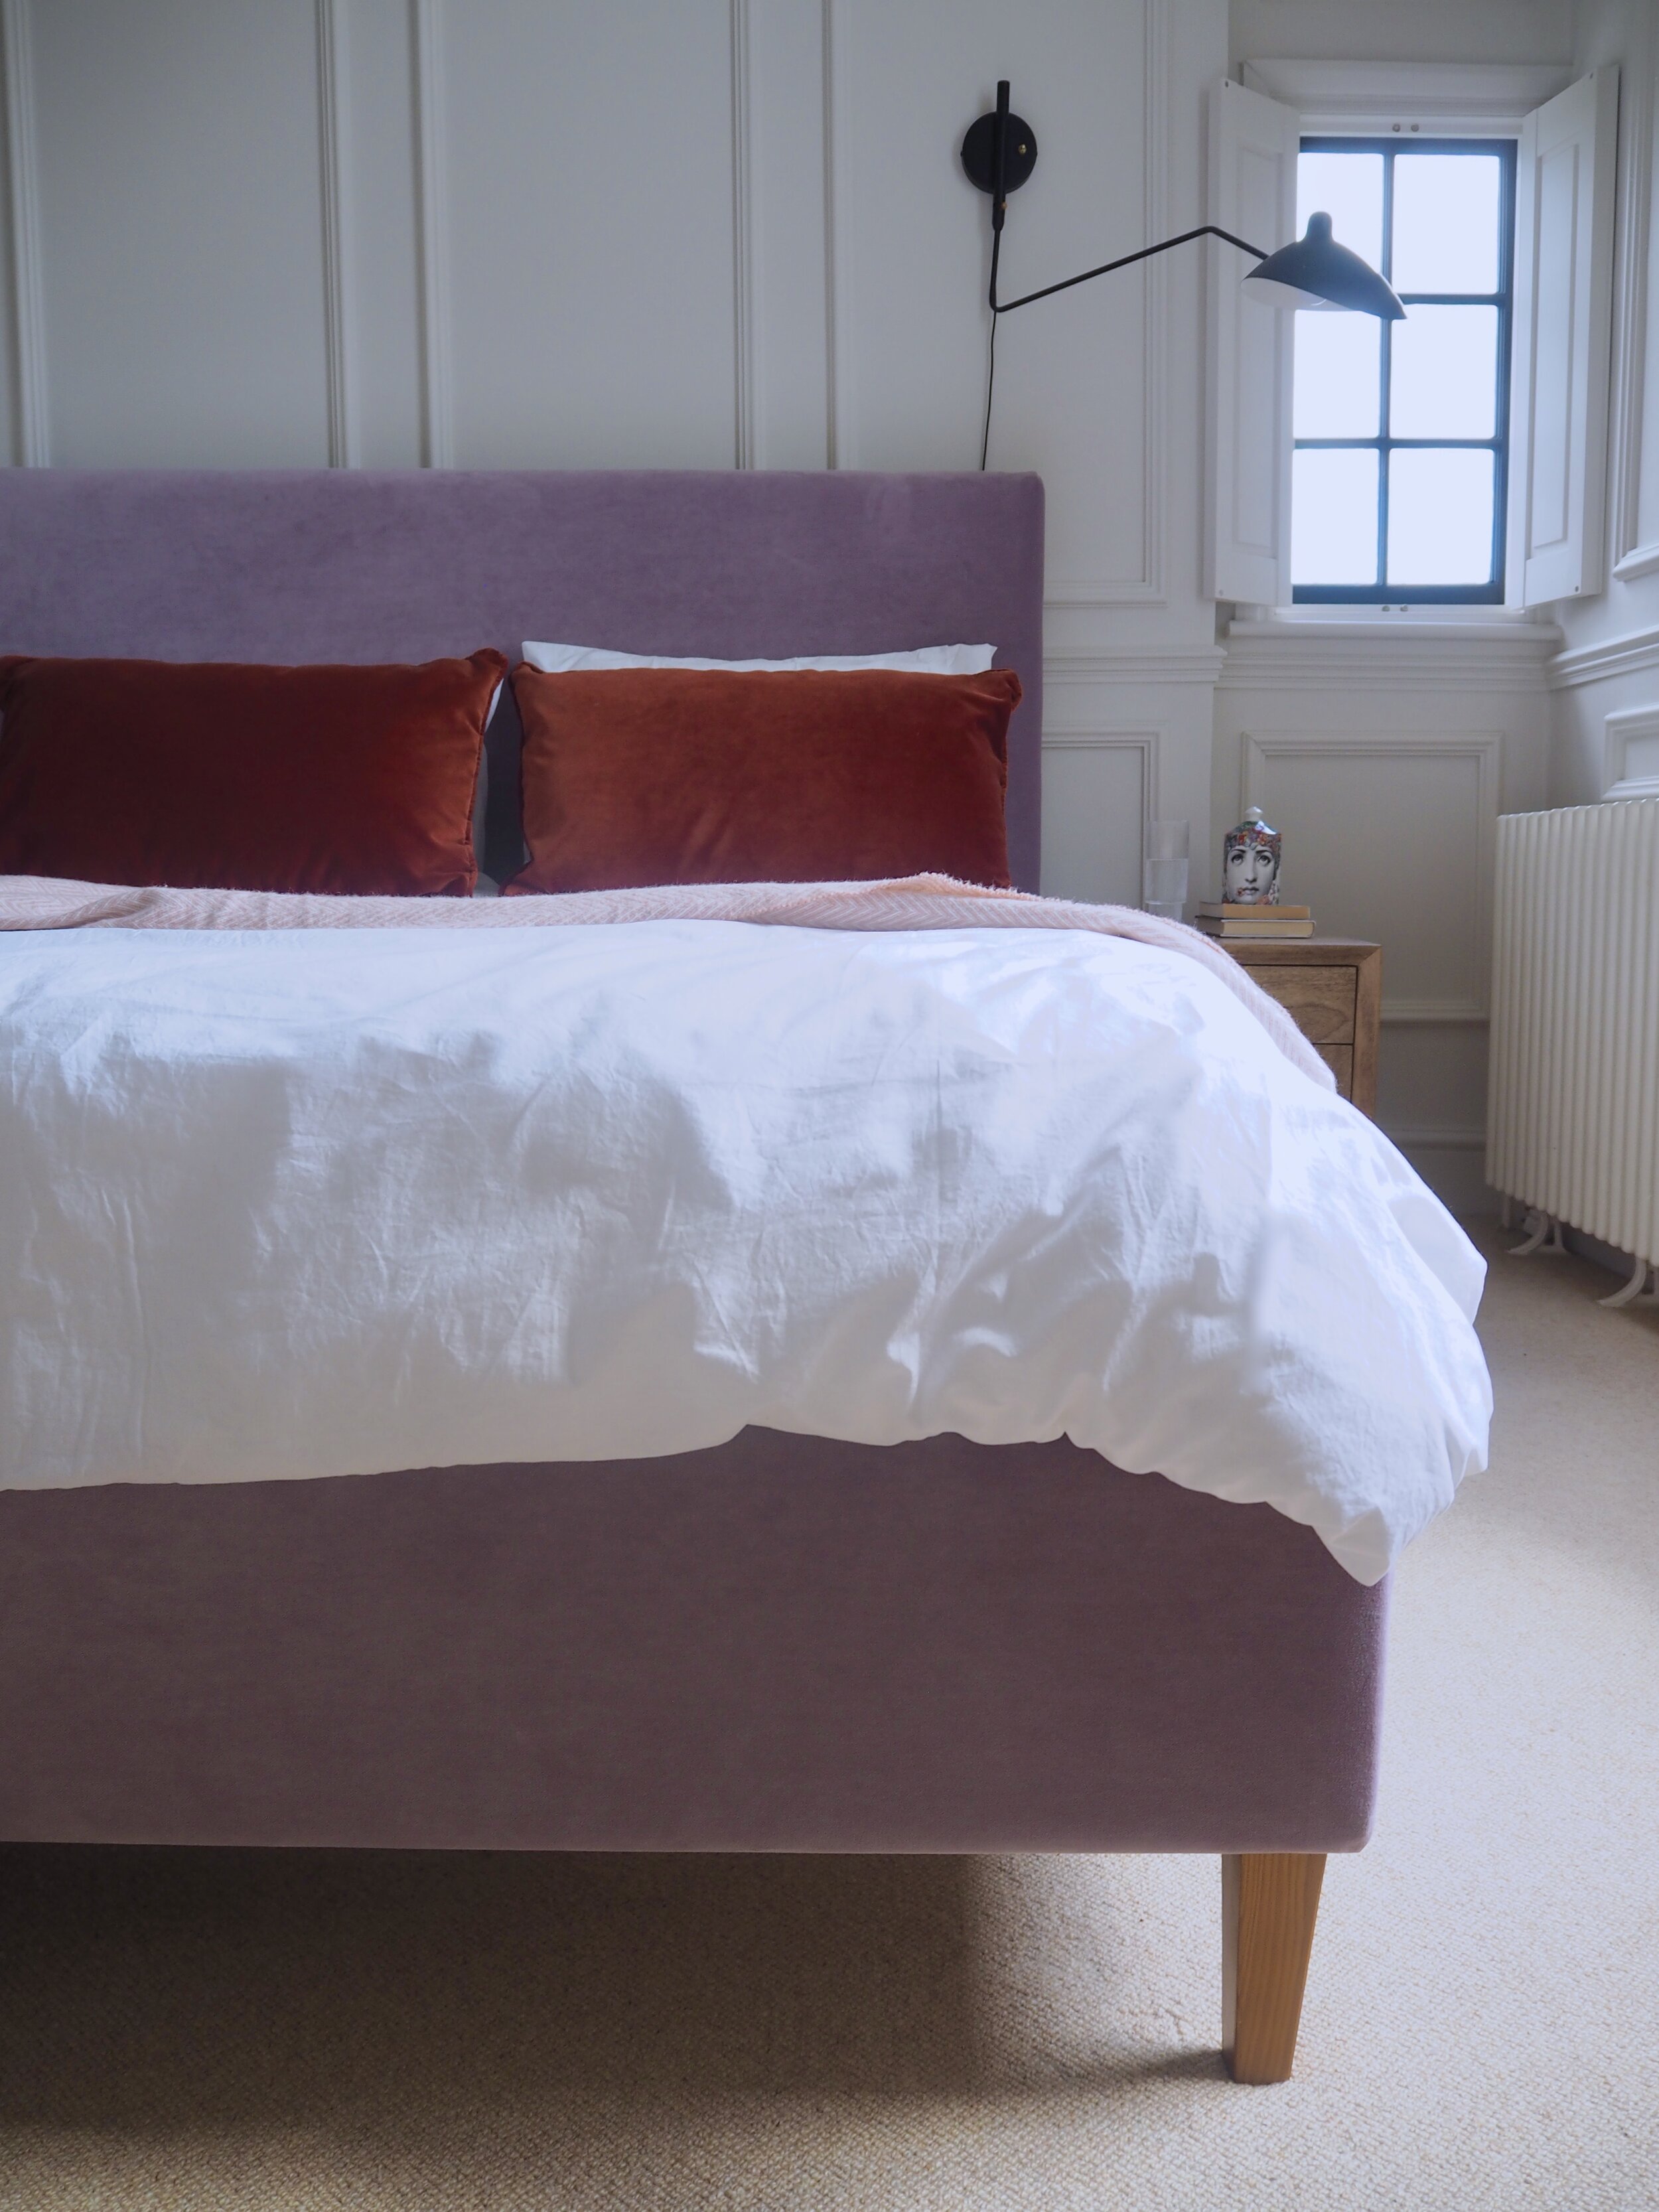
My bed frame ‘after’.
Step 1: Choose your fabric wisely
You will need to make sure that you choose an upholstery fabric when covering your bed, so stay away from selecting thin cotton or linens. You will be pulling the fabric taut during the process, so you need a fabric that can handle this and will not rip or tear. I also wanted a fabric that was easy to clean and looked luxurious, so I chose a good-quality Linwood fabric in a stain-resistant velvet.
If you’ve fallen in love with a fabric but you don’t think that it is durable enough for a bed, Crown Fabric offers an upholstery protection application to prevent stains and marks.
Pro tip: According to upholstery specialists at Ultra Cleaning - a reputable cleaning company - even stain-resistant fabrics benefit from professional deep cleaning every 6-12 months. This helps maintain your bed's luxurious appearance and extends the fabrics lifespan without causing damage during the cleaning process.
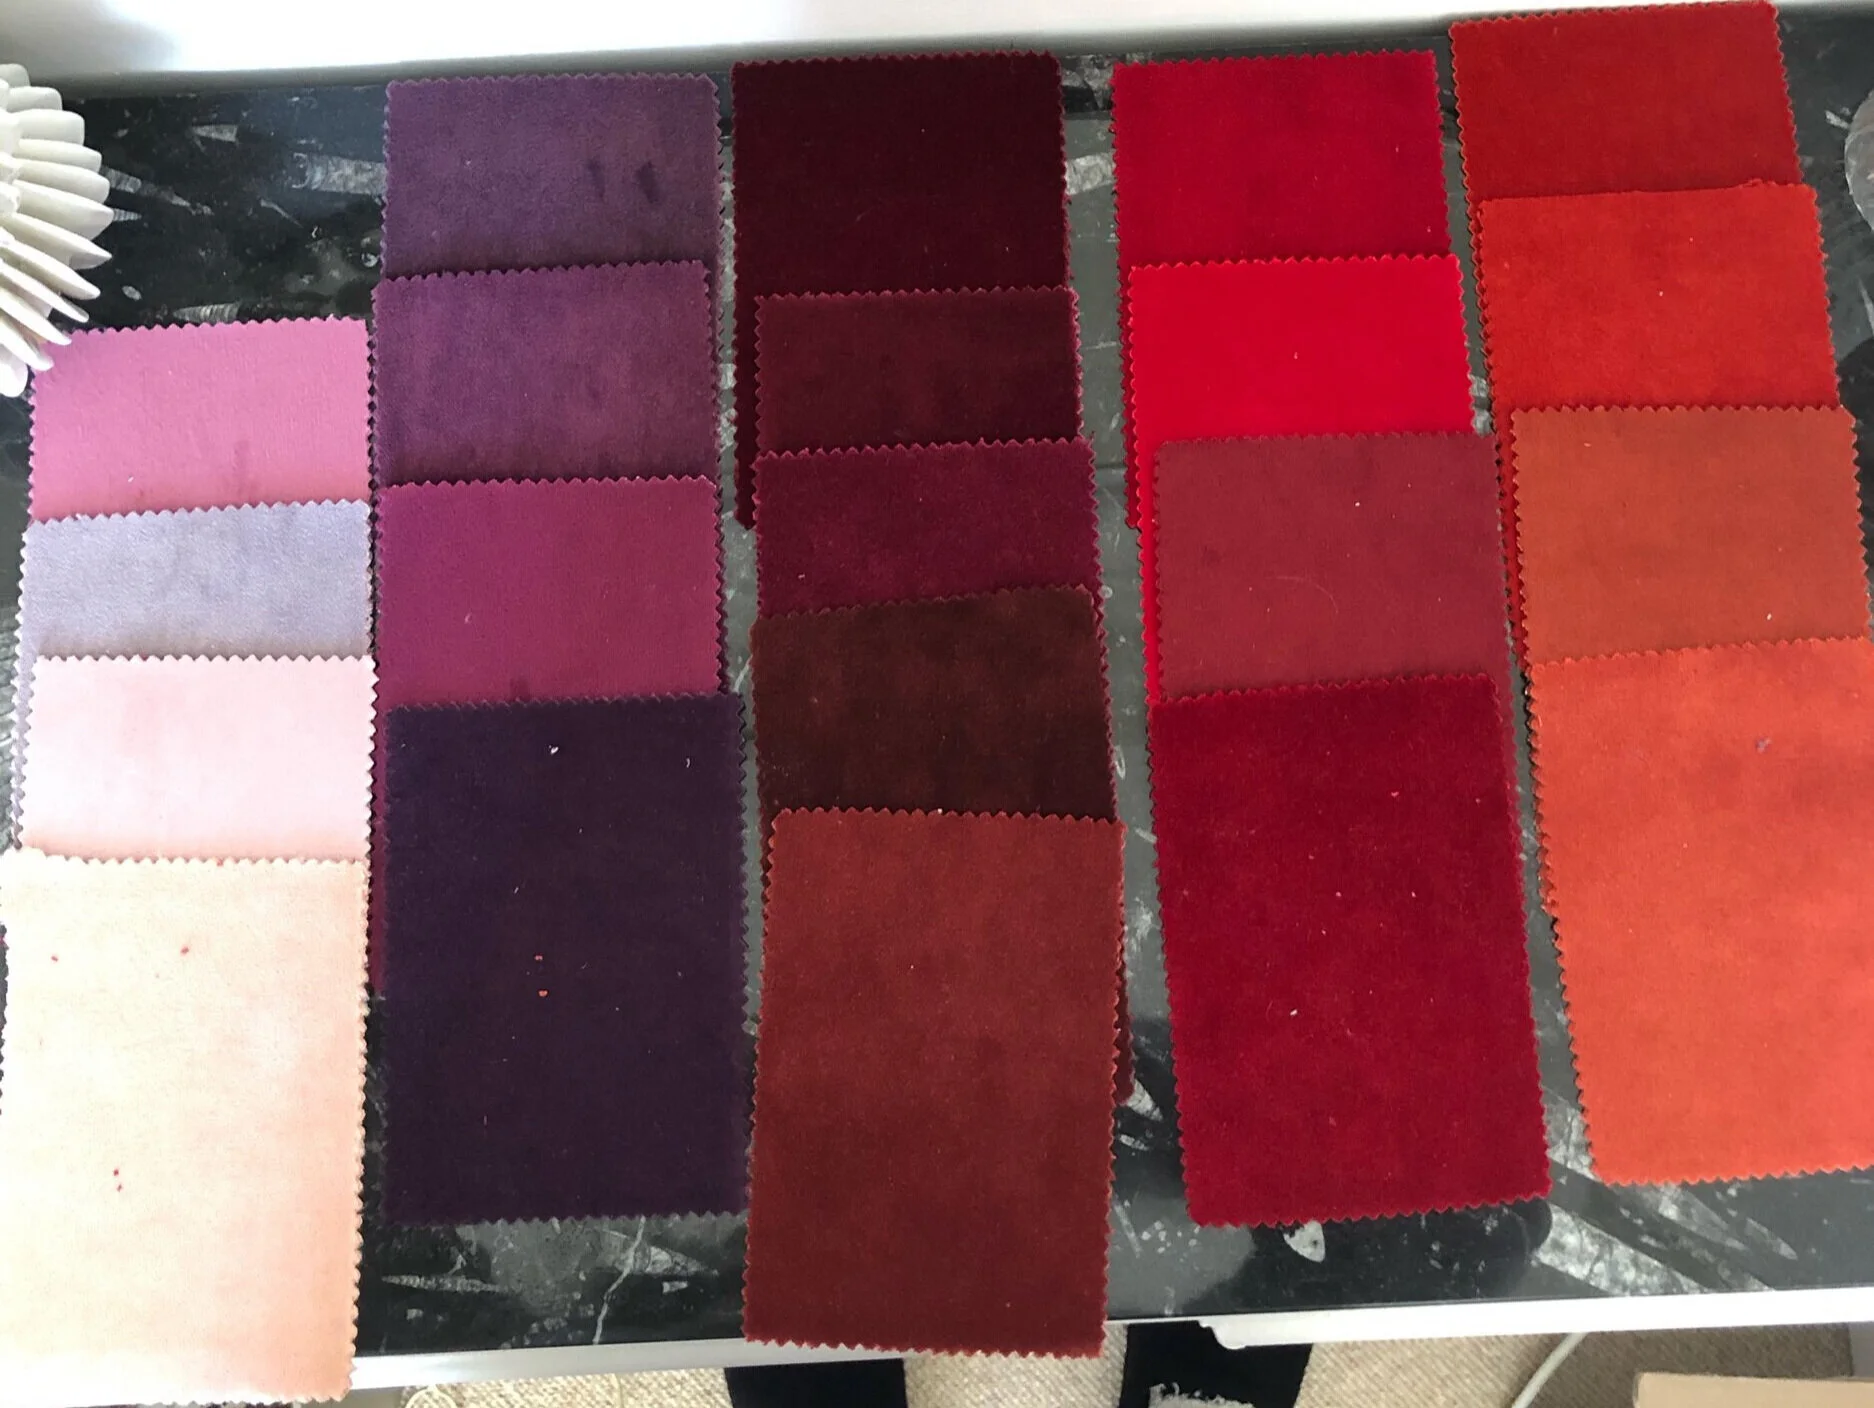
As you can see from all the Lindwood samples that I ordered, I really did take a lot of time selecting my preferred colour!
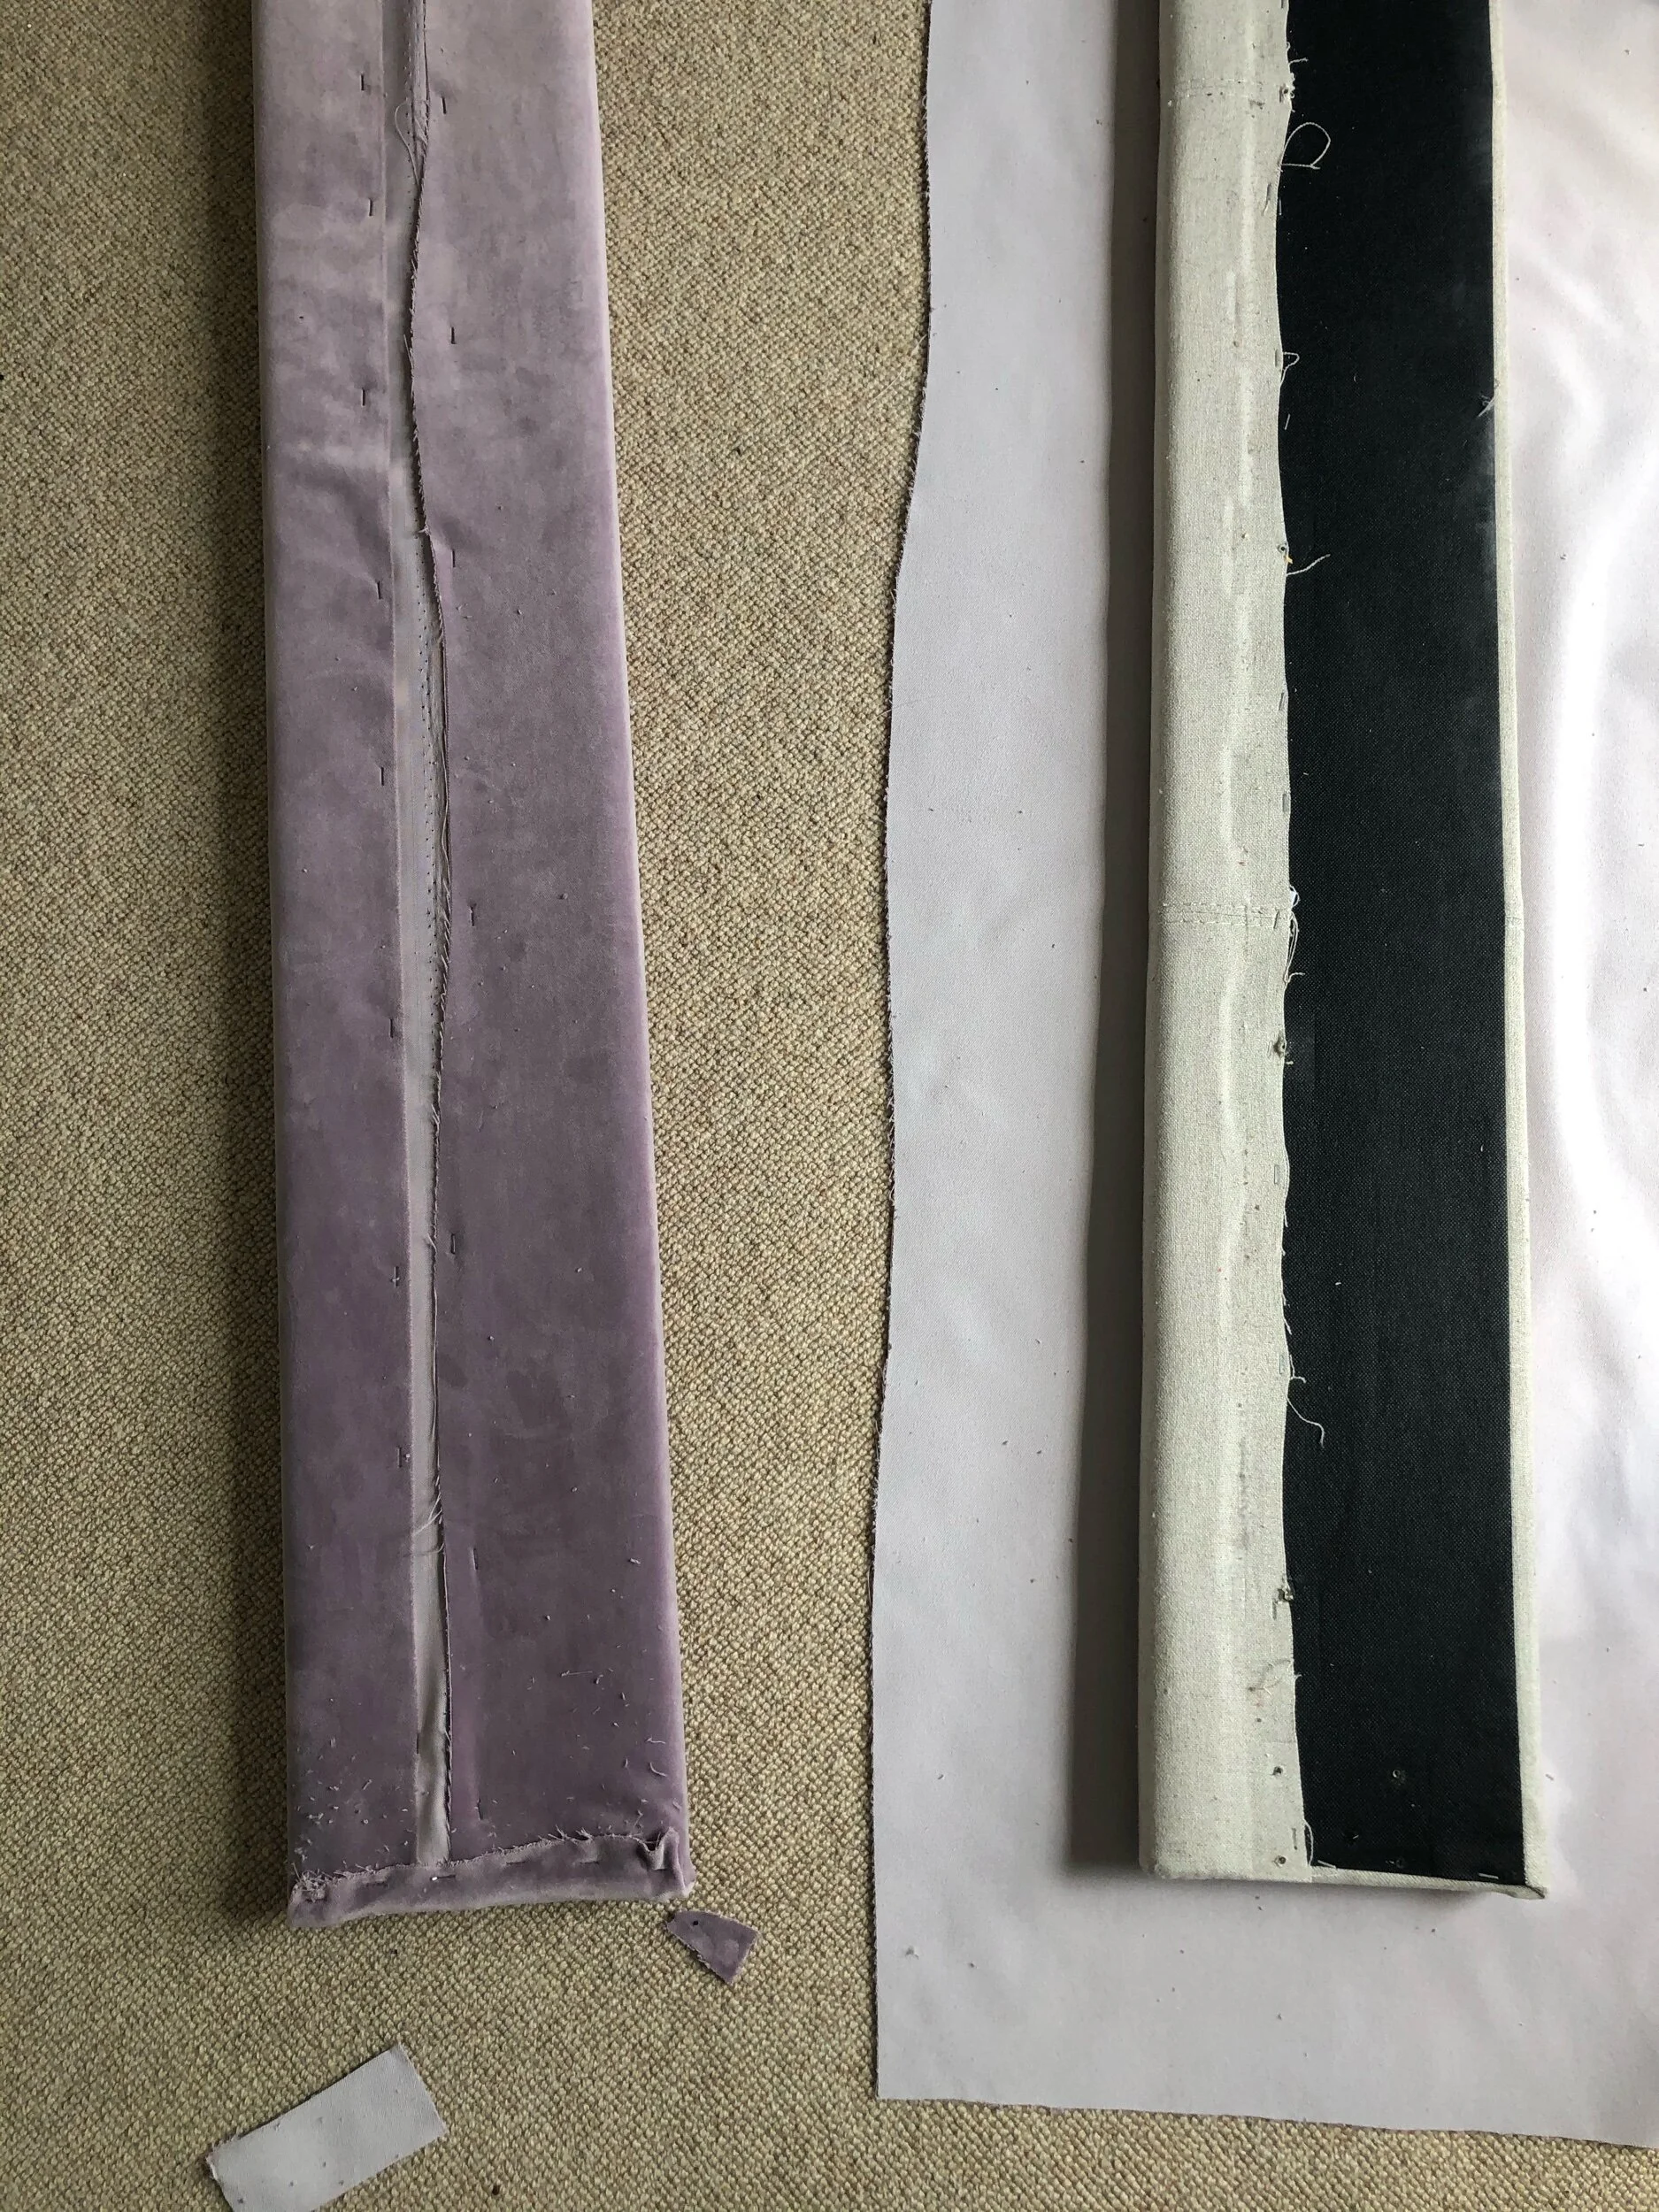
As my bed had a buttoned headboard detail that I wanted to do away with, it was important that the fabric I chose was really thick so that it did not slump into the holes. I have to say the Linwood Omega Velvet that I selected was perfect for this upholstery DIY and I highly recommend using it. I did not use any padding between the headboard and the new fabric because it didn’t need it. If your bed is made of leather, or another material other than fabric (or has any raised details), you may need to consider adding an in-between layer first.
Chenille fabric is another excellent option for upholstery as it is renowned for its durability and luxurious texture. Chenille not only resists wear and tear, but it also has a distinctive aesthetic appeal.

I had to be really careful that I chose a fabric thick enough that would not ‘slump’ into the button detail.
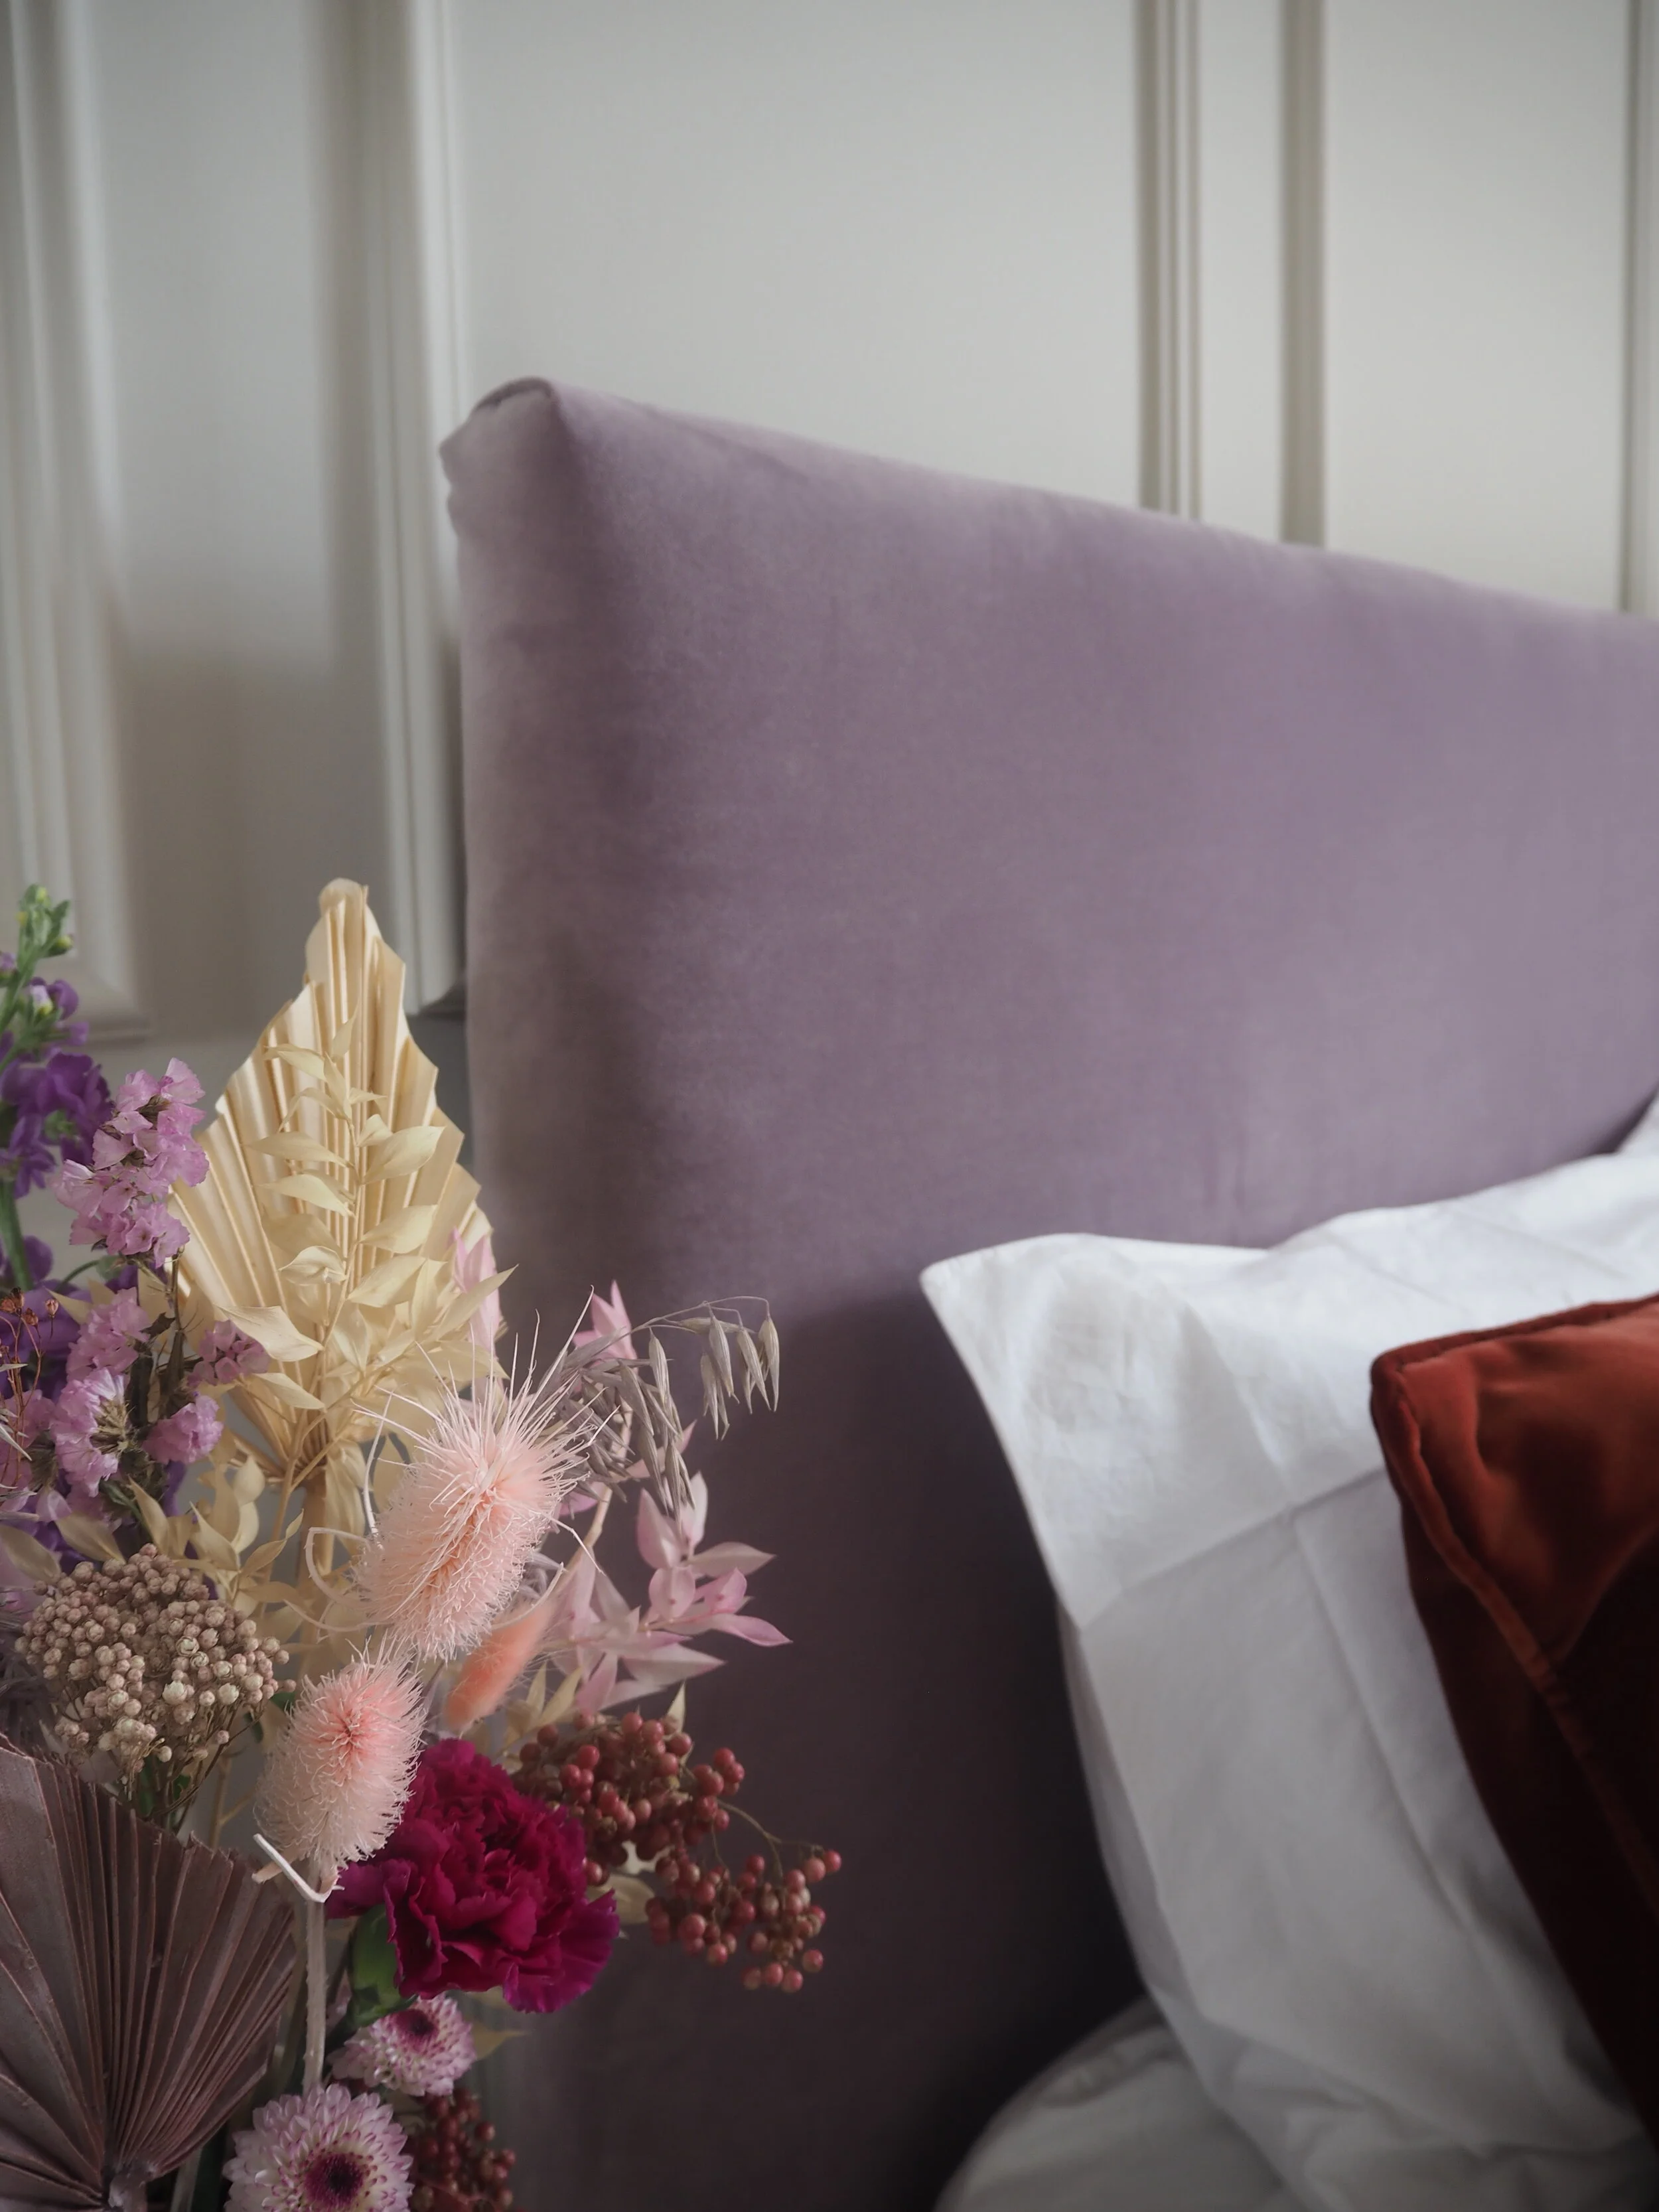
I am a huge fan of the current trend for lilac in interiors, so I opted for the beautiful shade of Omega: Isis: a very soft, light purple tone.
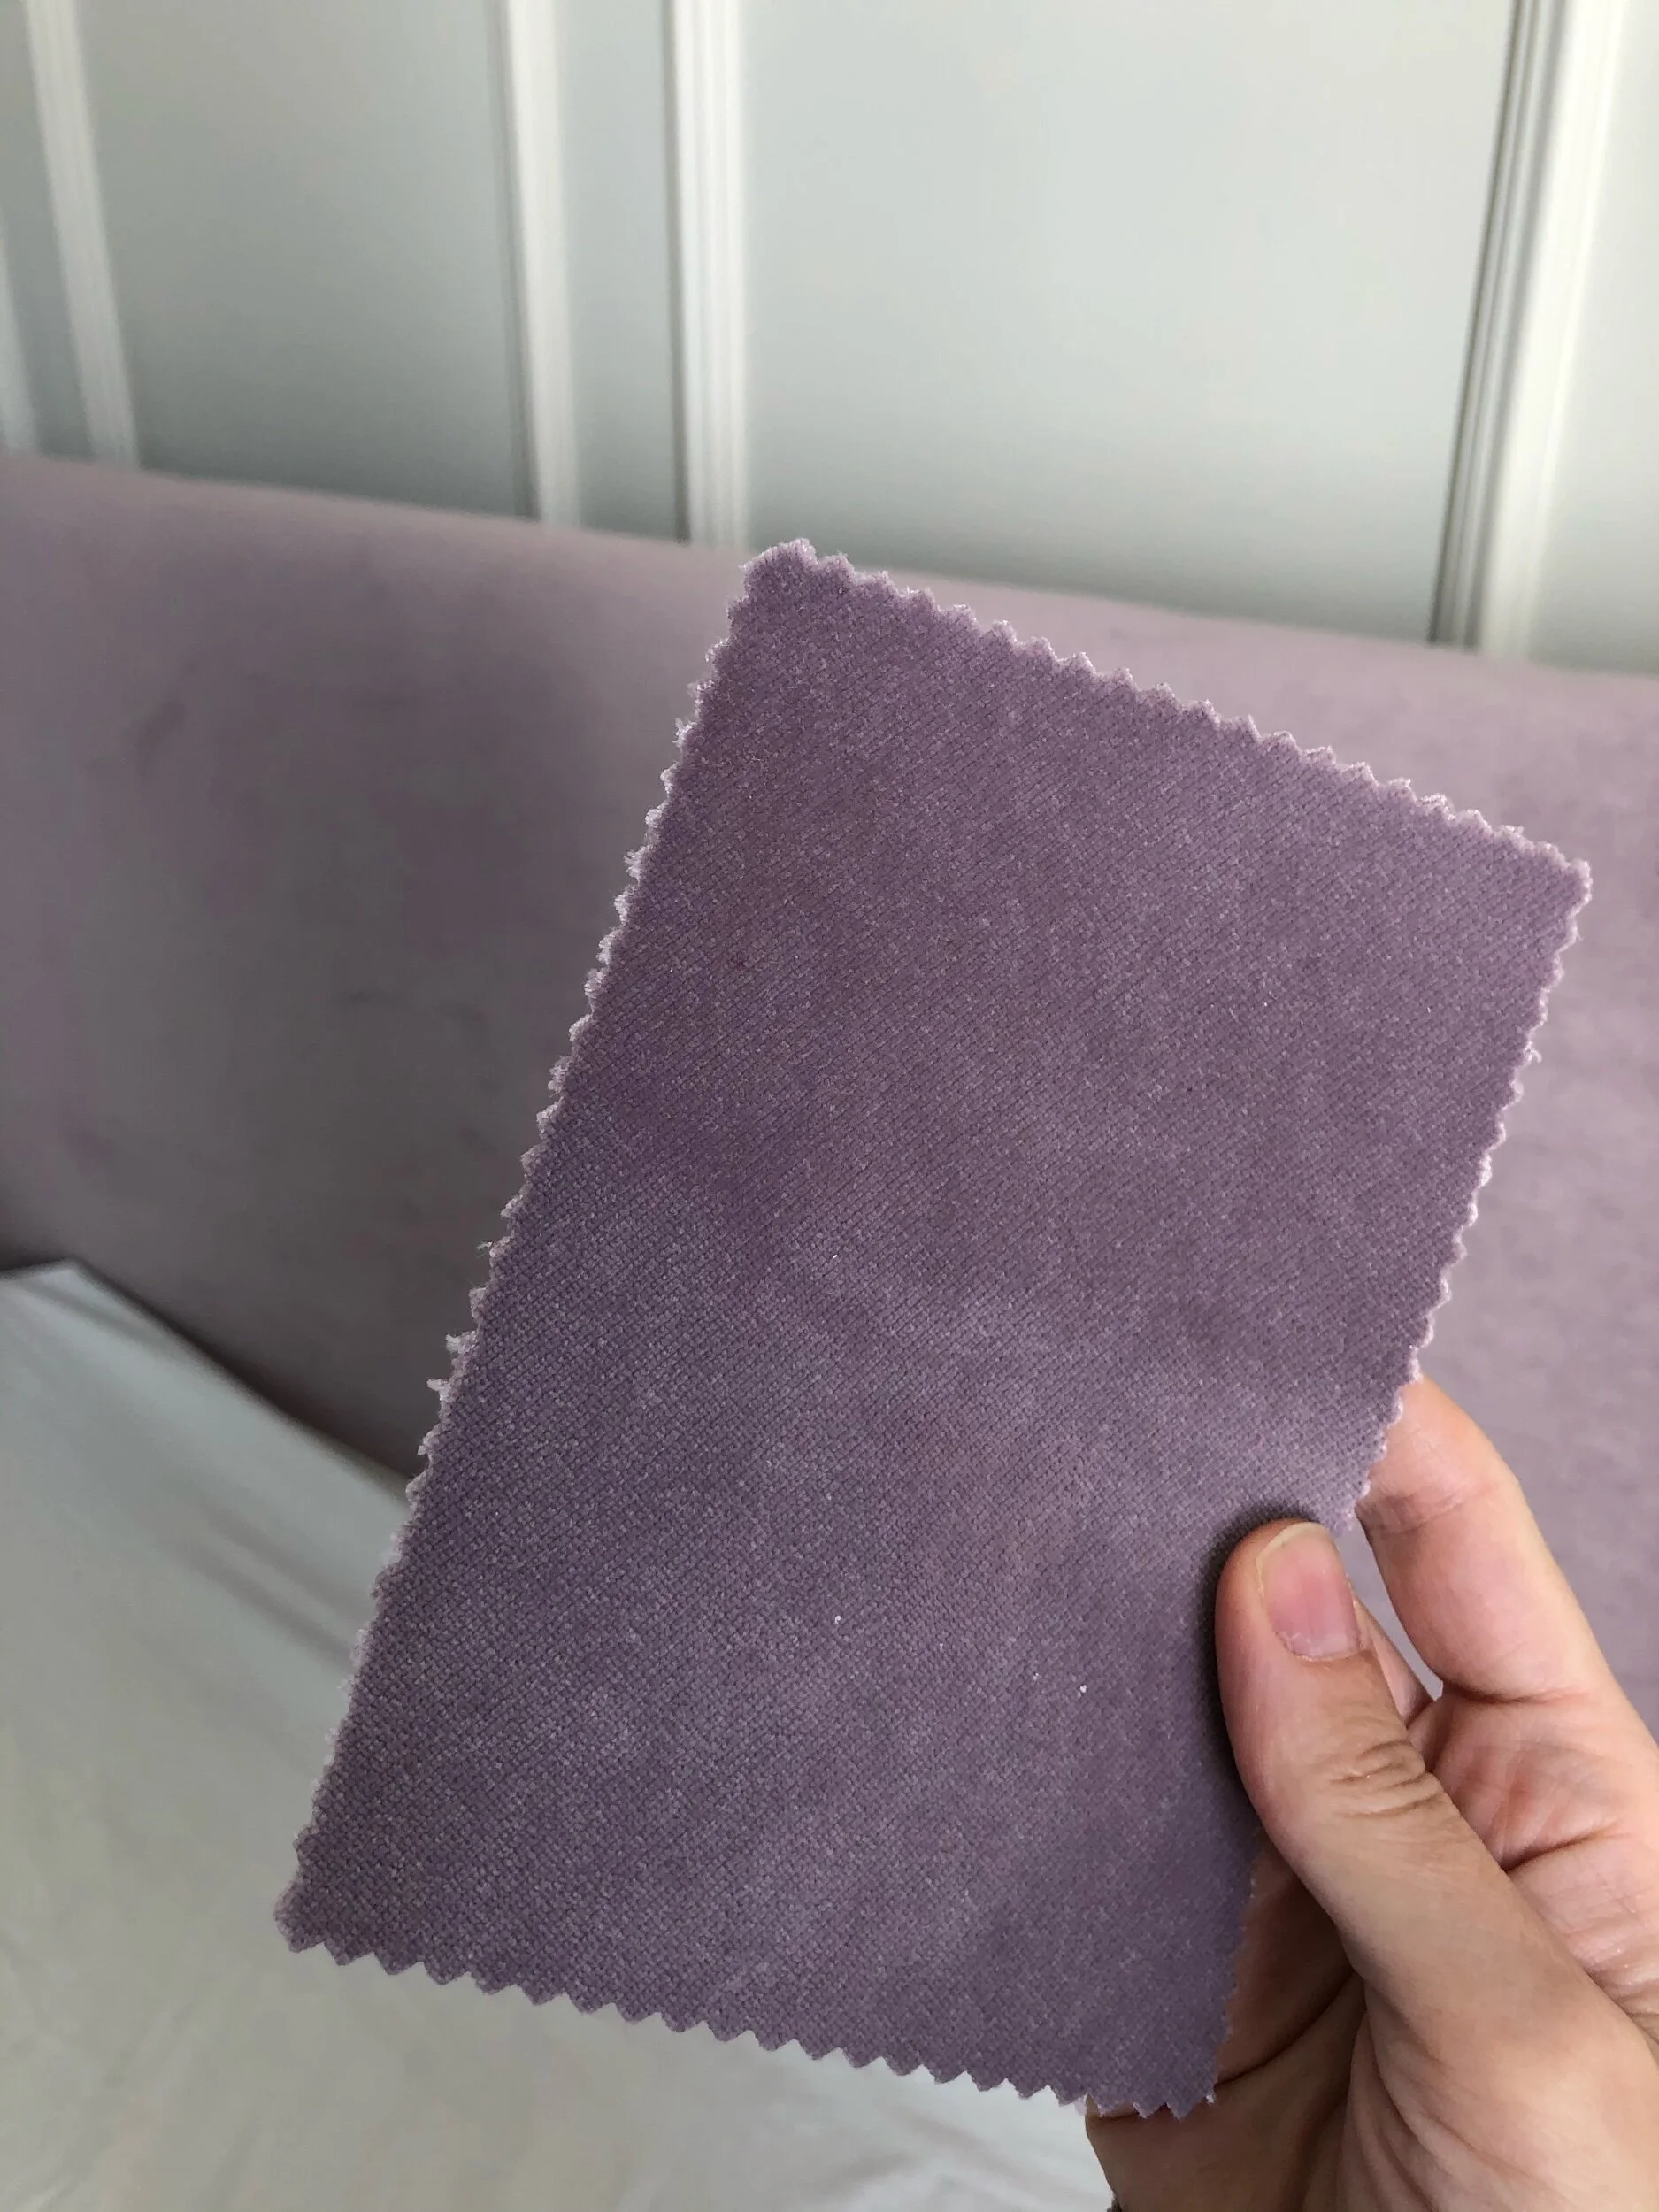
Linwood ‘Isis’ from the Omega collection of stain-resistant velvets.
Step 2: Measure how much fabric you will need
To order the right amount of fabric required to cover the bed, I took measurements of all the visible parts of the frame, then added on the extra amount of fabric that I would need for pulling over and securing it in place.
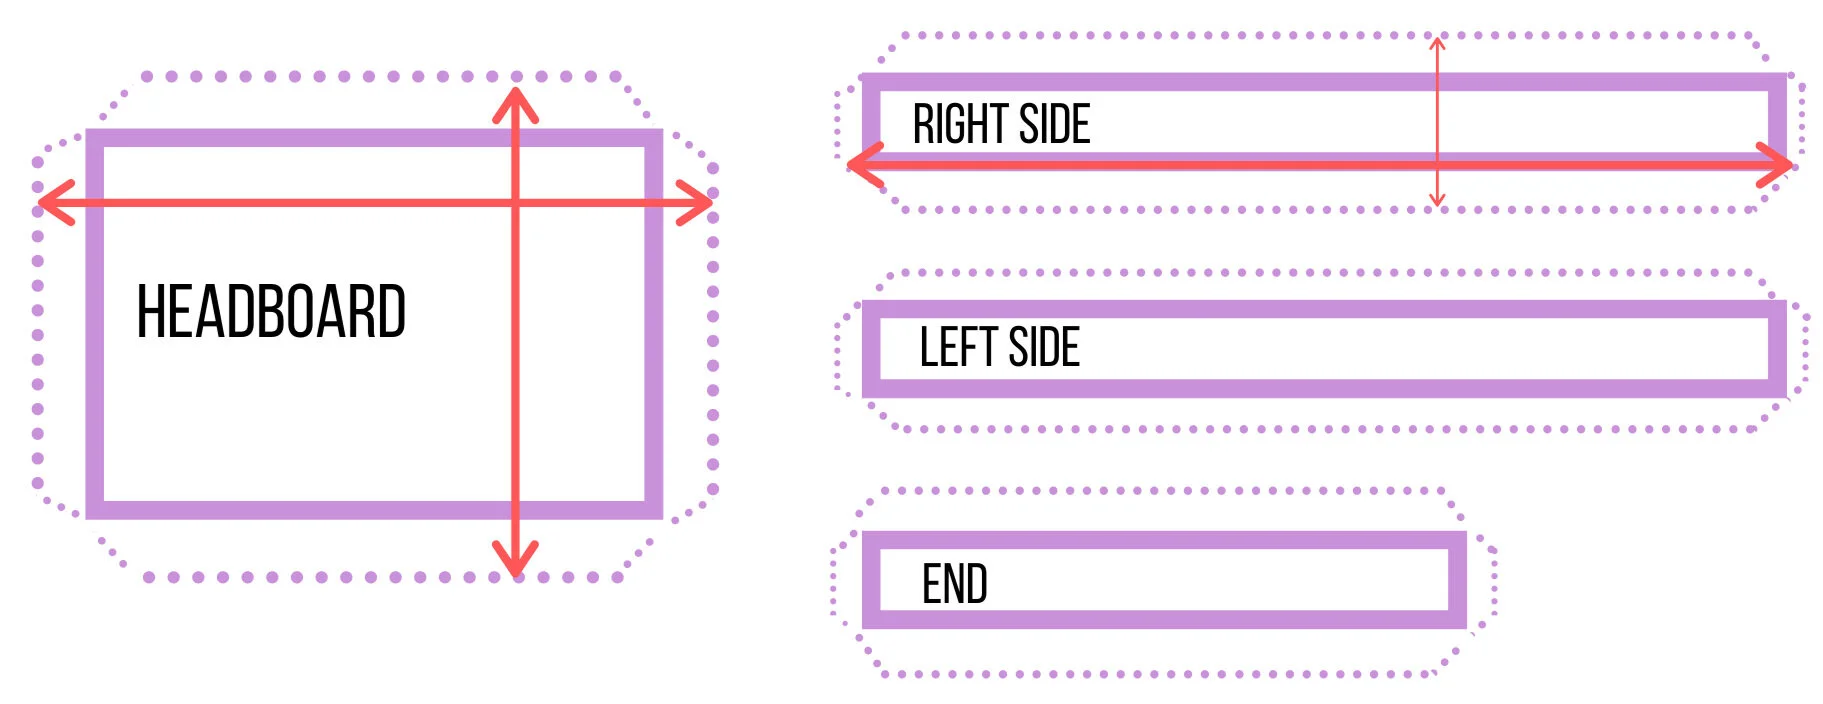
Make sure that you have enough fabric to cover all the visible parts of the bed, as well as having enough fabric to pull and staple on the underside.
First of all, I measured the height and width of the headboard, then added on 10cm extra around each edge. For example, the height of my headboard was 100cm, so I added on an extra 20cm to the height, making the fabric requirement to cover this area 120cm high. I then did the same for the width.
I did the same for both sides of the bed and the end piece, making sure that I could wrap the fabric around enough so that no staples would be visible when the bed was rebuilt and a mattress was in place.
Linwood fabric comes at a width of 137cm, so I needed 5 metres in total to cover the whole king-size bed - 2m for the headboard and 3m for the rest.
Step 3: Get the right tools for the job
Apart from the fabric itself, the good news is that you do not need many tools to do this DIY! What I would advise is that the staple gun you use is ‘Pro’ or ‘heavy-Duty’, avoiding simple craft staple guns which will not be up to the job. Here is a list of what I found worked really well for covering my bed:
Aluminium Ruler (really good for getting a precise fabric measurement)
Fabric scissors (perfect for cutting fabric so it doesn’t fray)
Multi-head cordless screwdriver (electric is better but you can use manual)
Long-arm hex key set (many bed legs or bed frames are built using hex keys and this set contains everything you need)
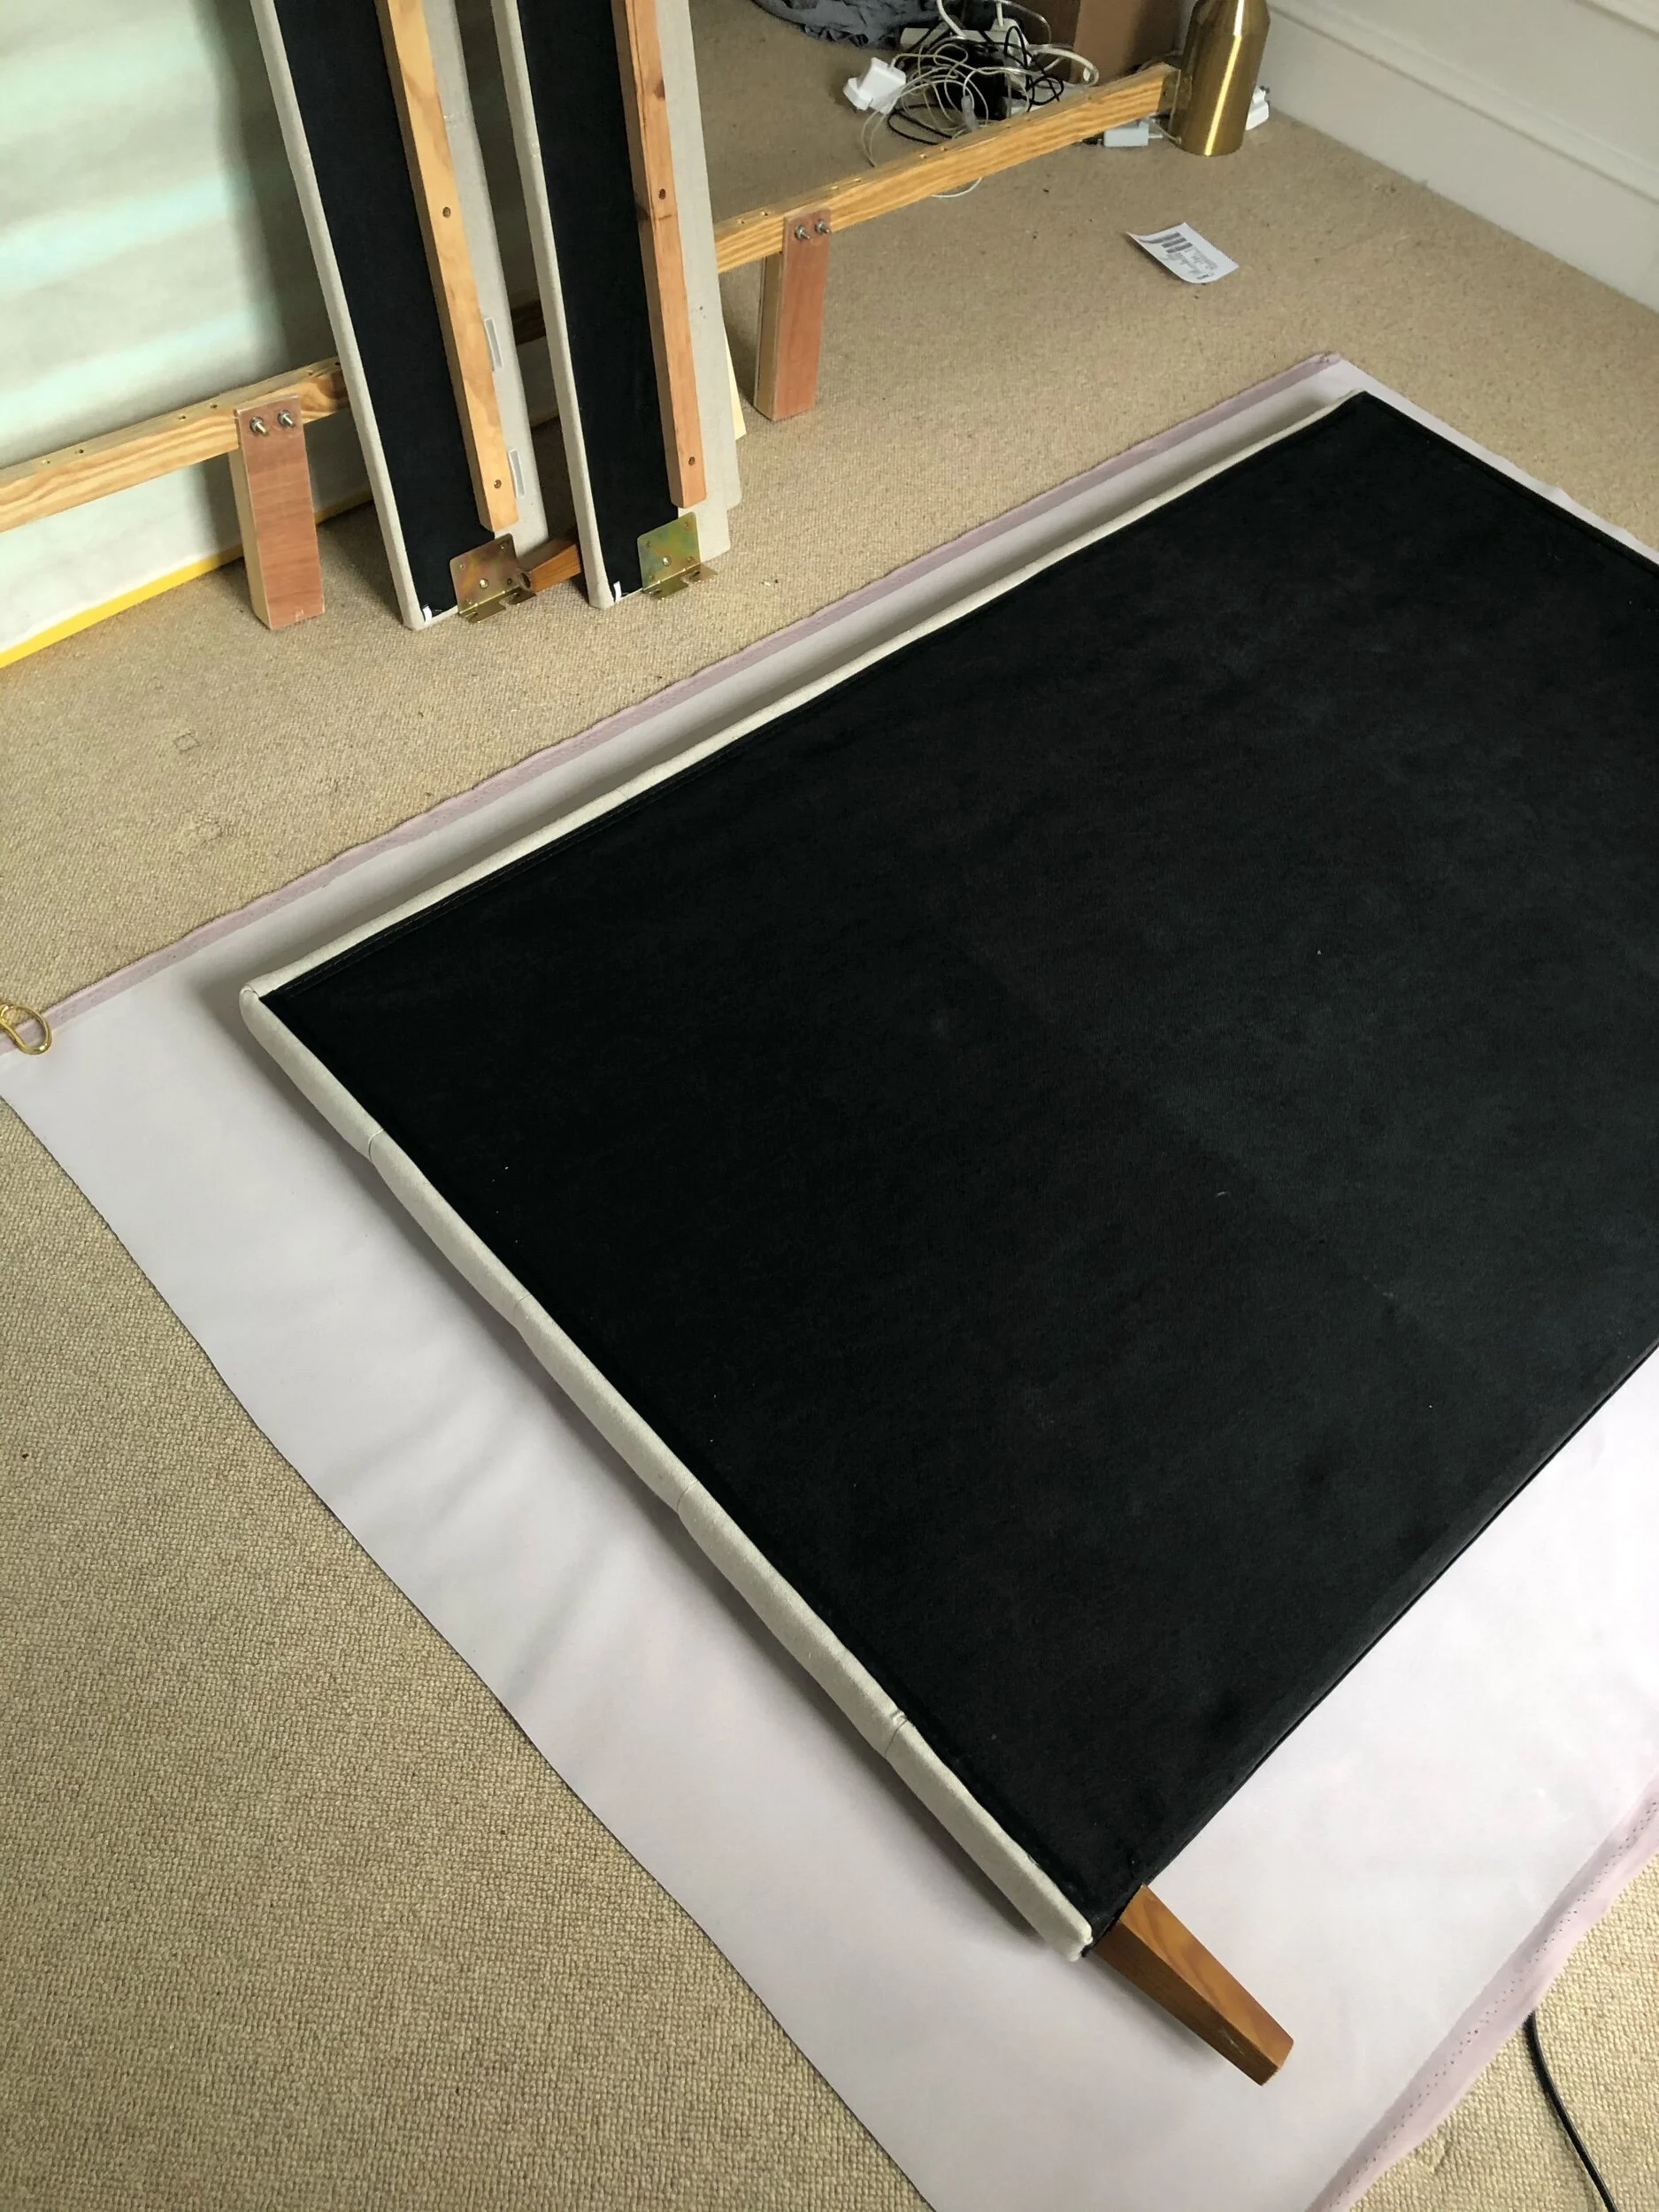
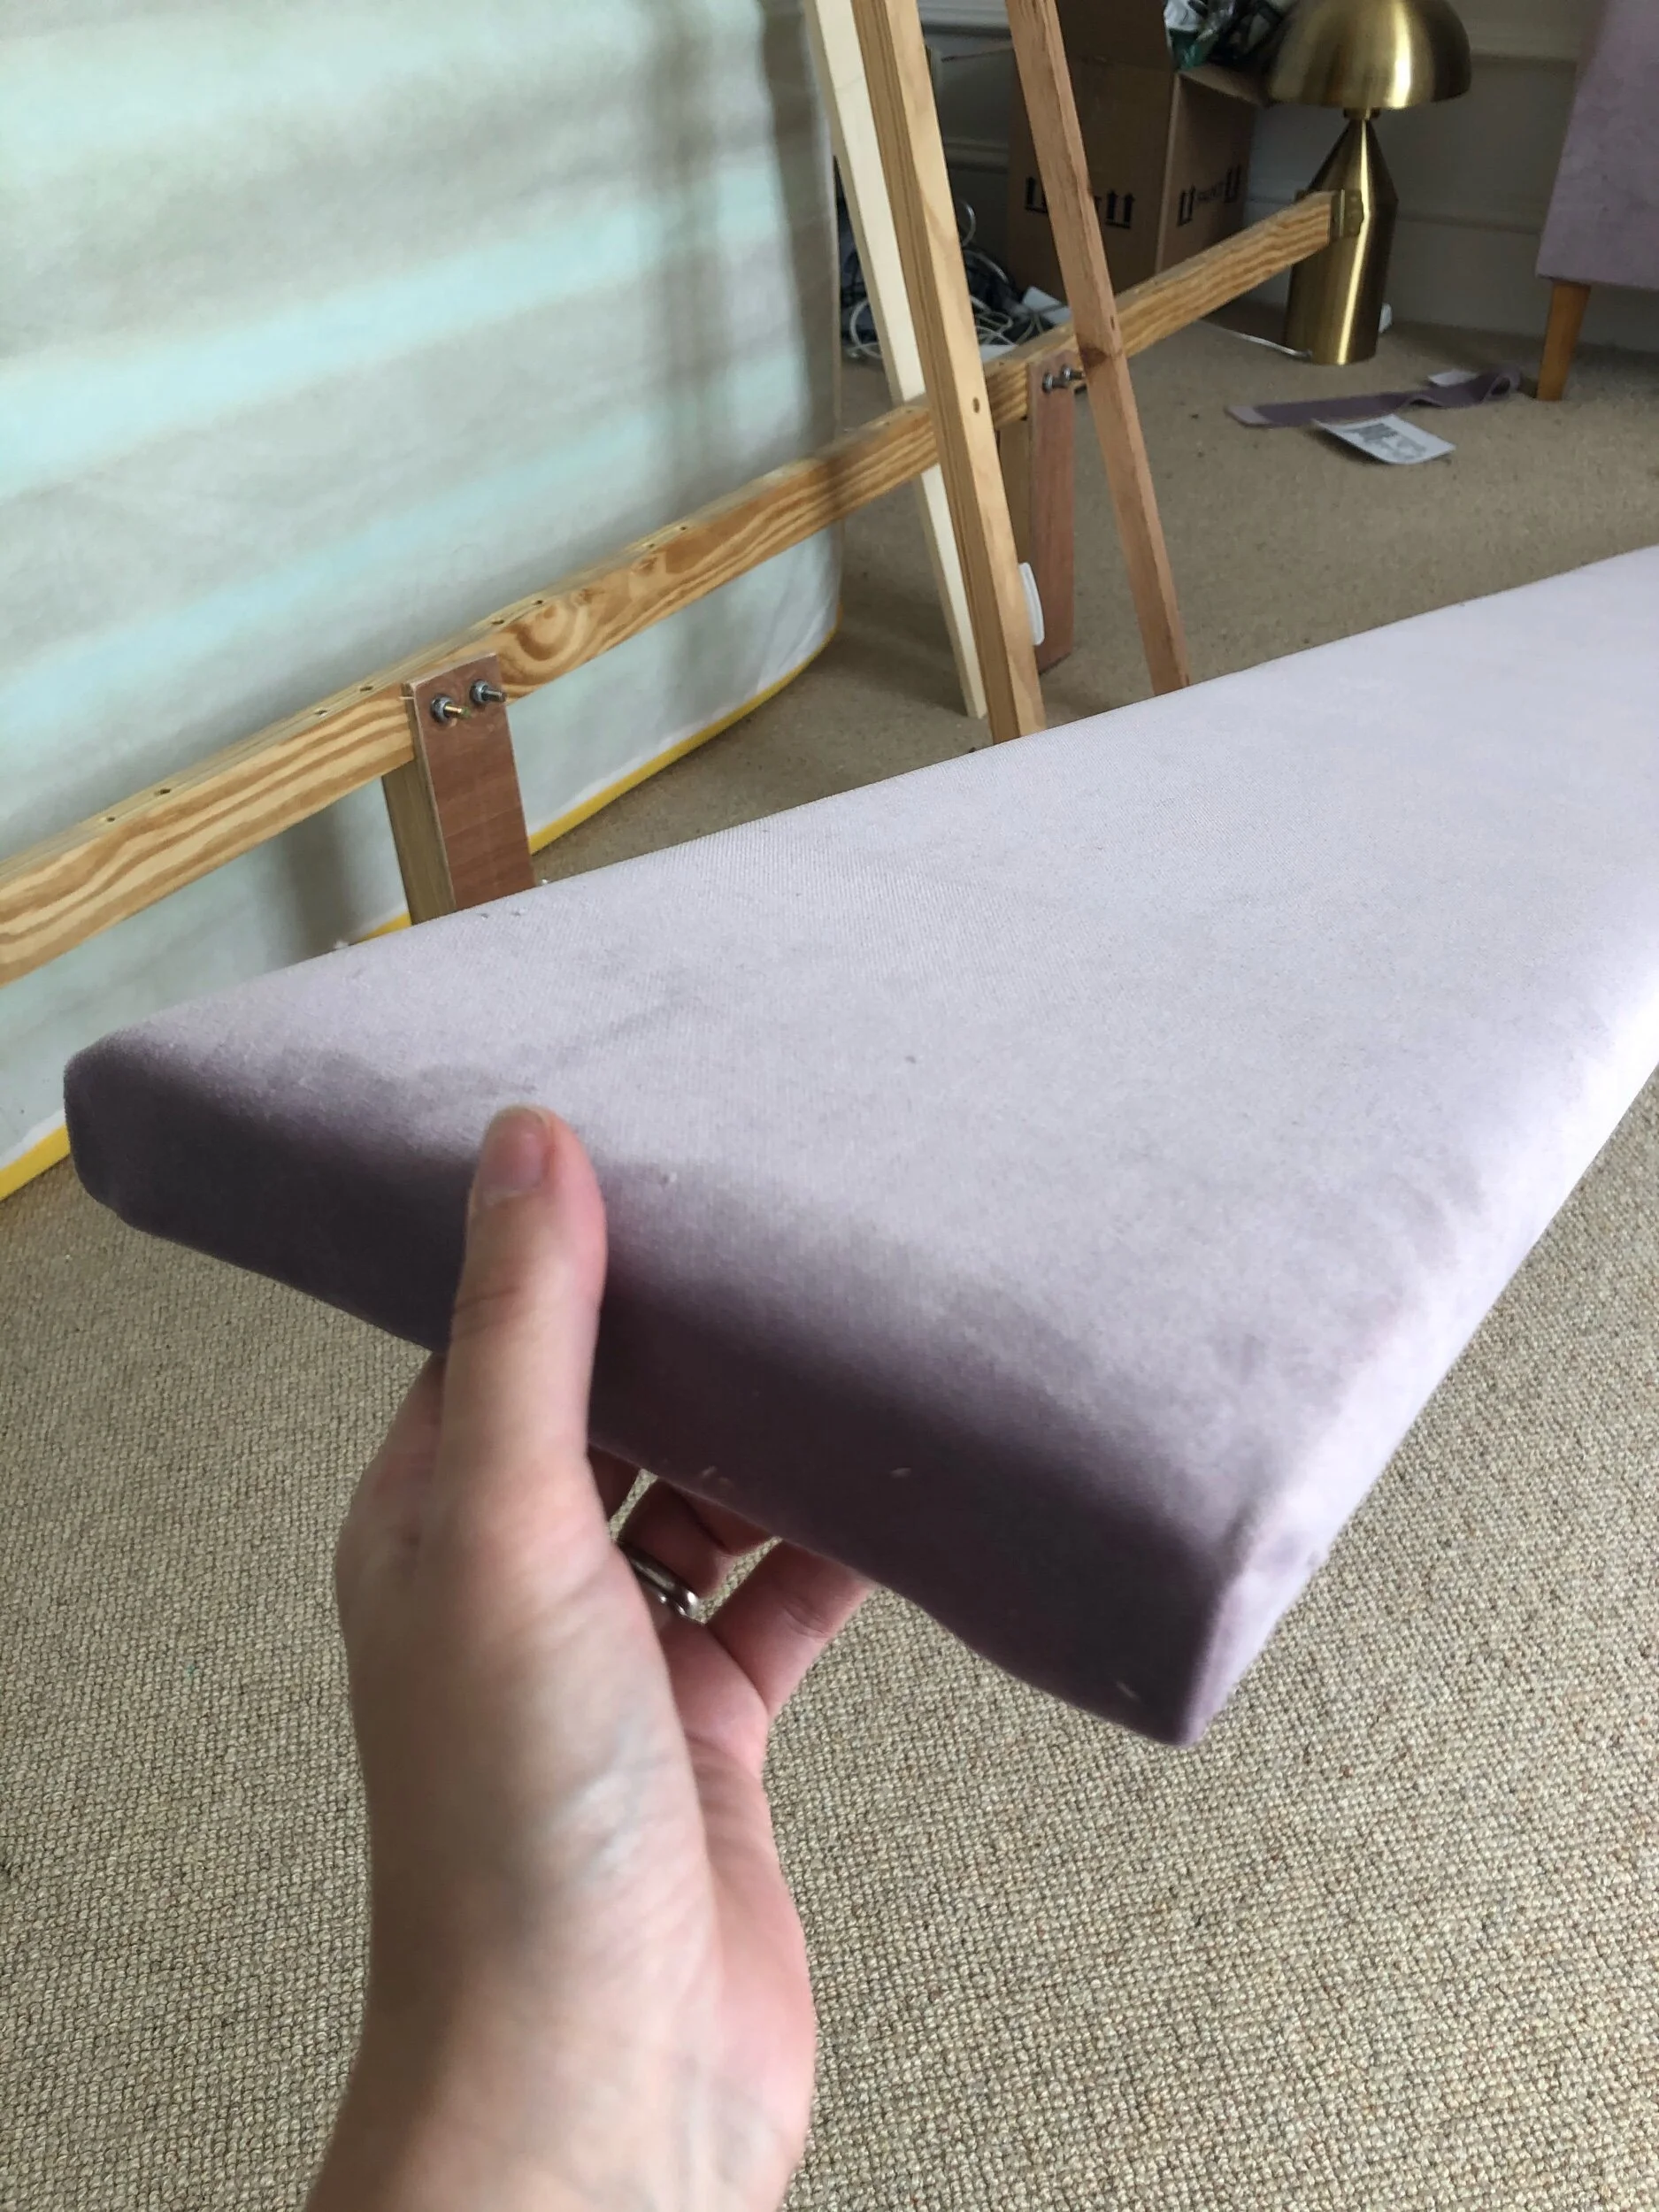
Step 4: Dismantle your bed
Depending on how your bed is built, you’ll need a combination of your screwdriver and your hex keys to take your bed frame apart. Only dismantle what you need to in order to recover the bed to save yourself more work! Often, I covered over screw holes with the fabric and just used scissors to pierce through where a screw might need to go when the bed was rebuilt.
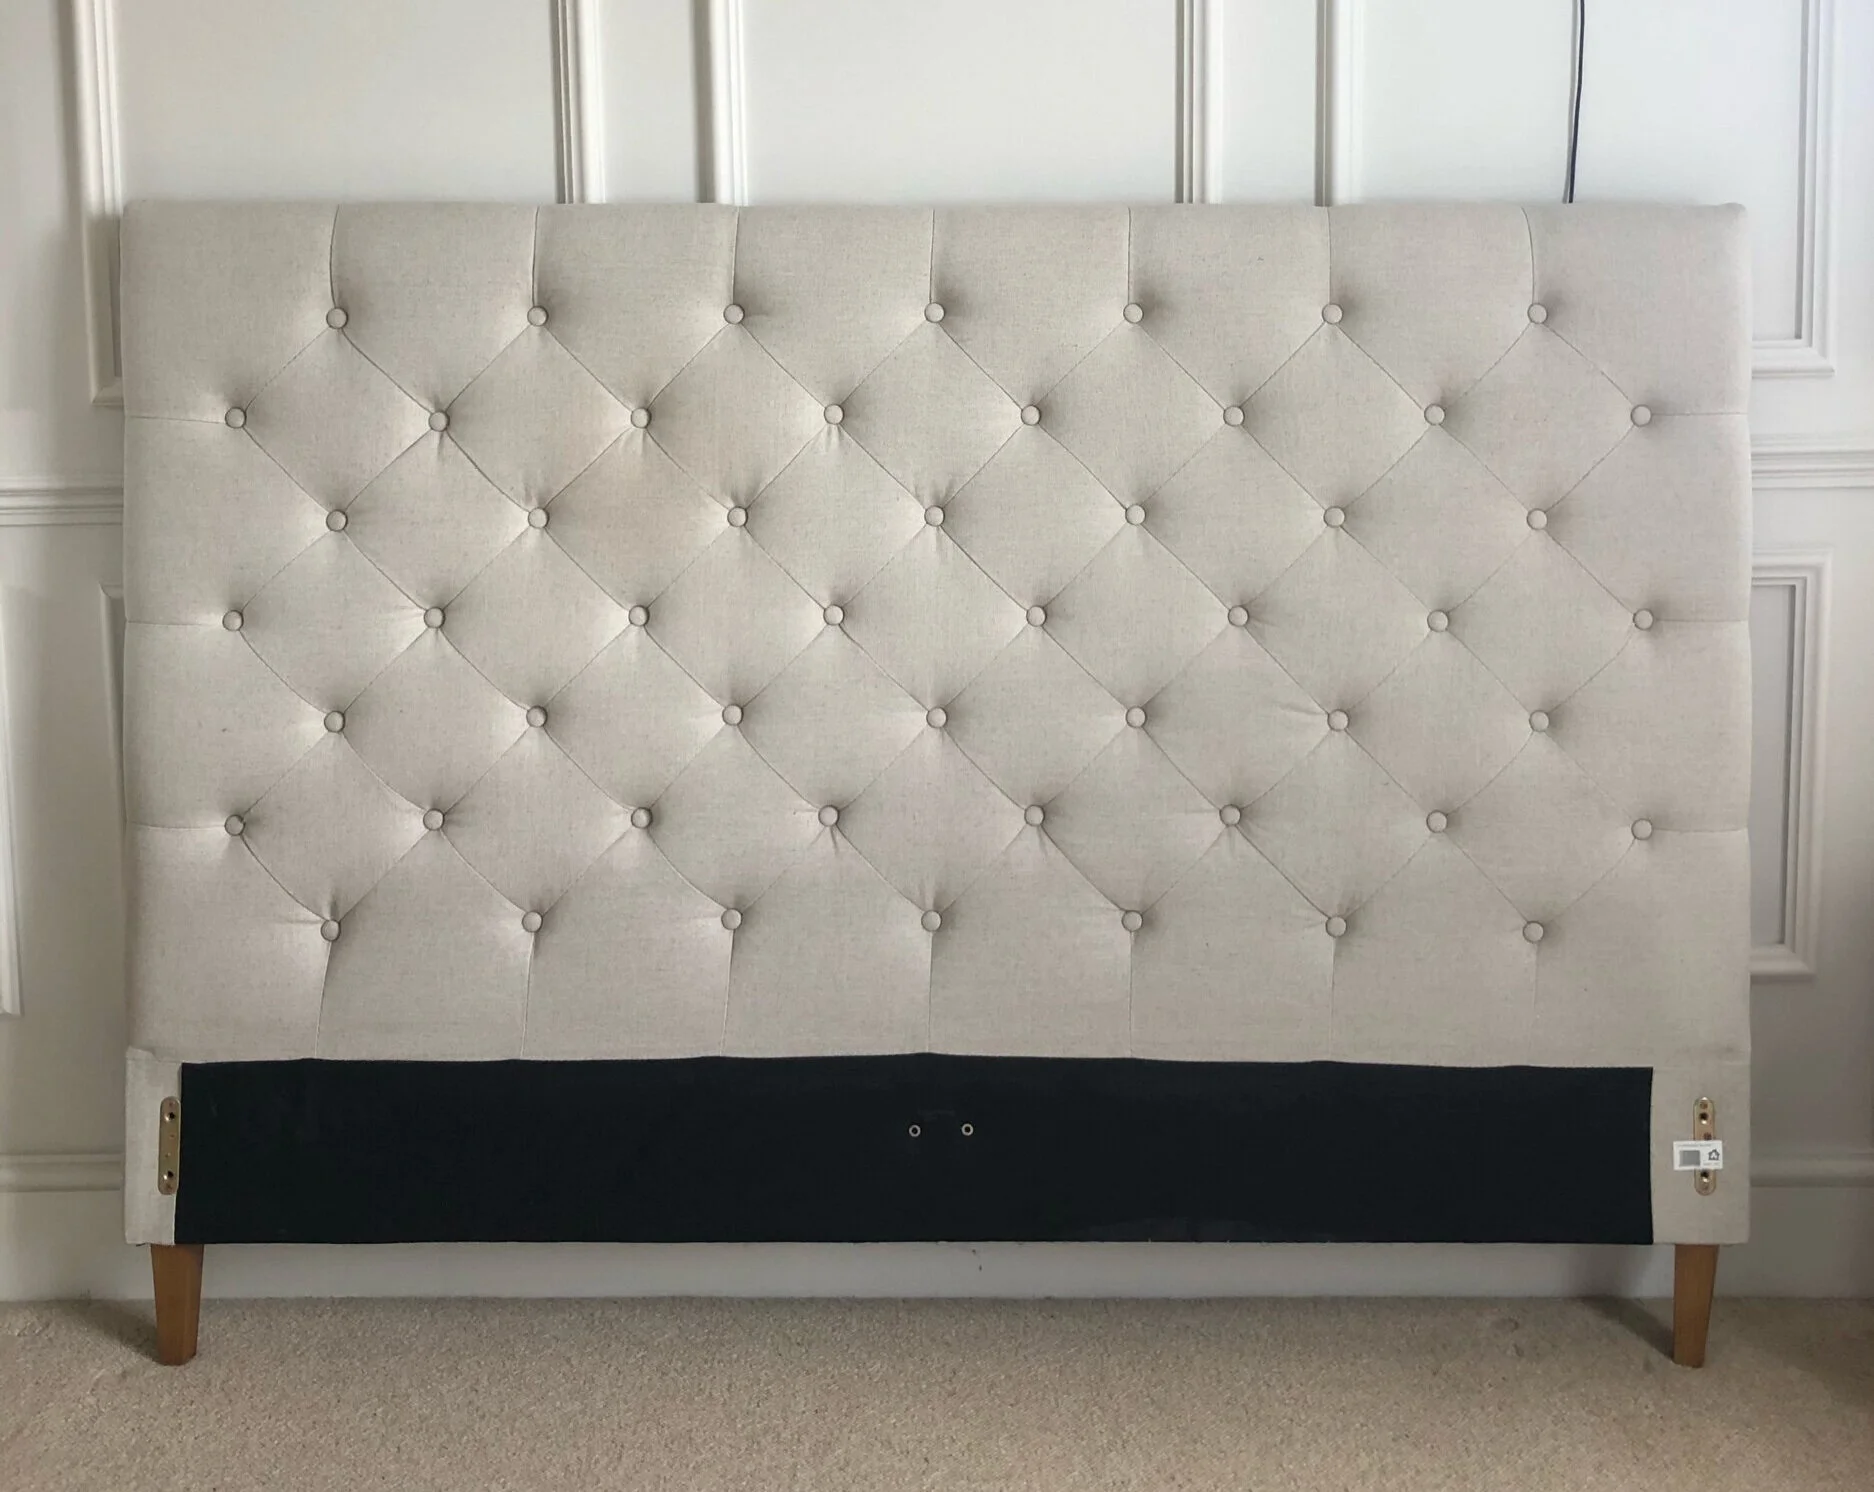
It was easier for me to cover the whole headboard and make holes for screws to be inserted when the bed was rebuilt.
Step 5: Cut your fabric to size
Depending on how much room you have, roll out your fabric and lay it face down on the floor. Place your headboard and the rest of the bed frame to be covered on top, so you can cut your fabric to size.

Step 6: Start with the headboard
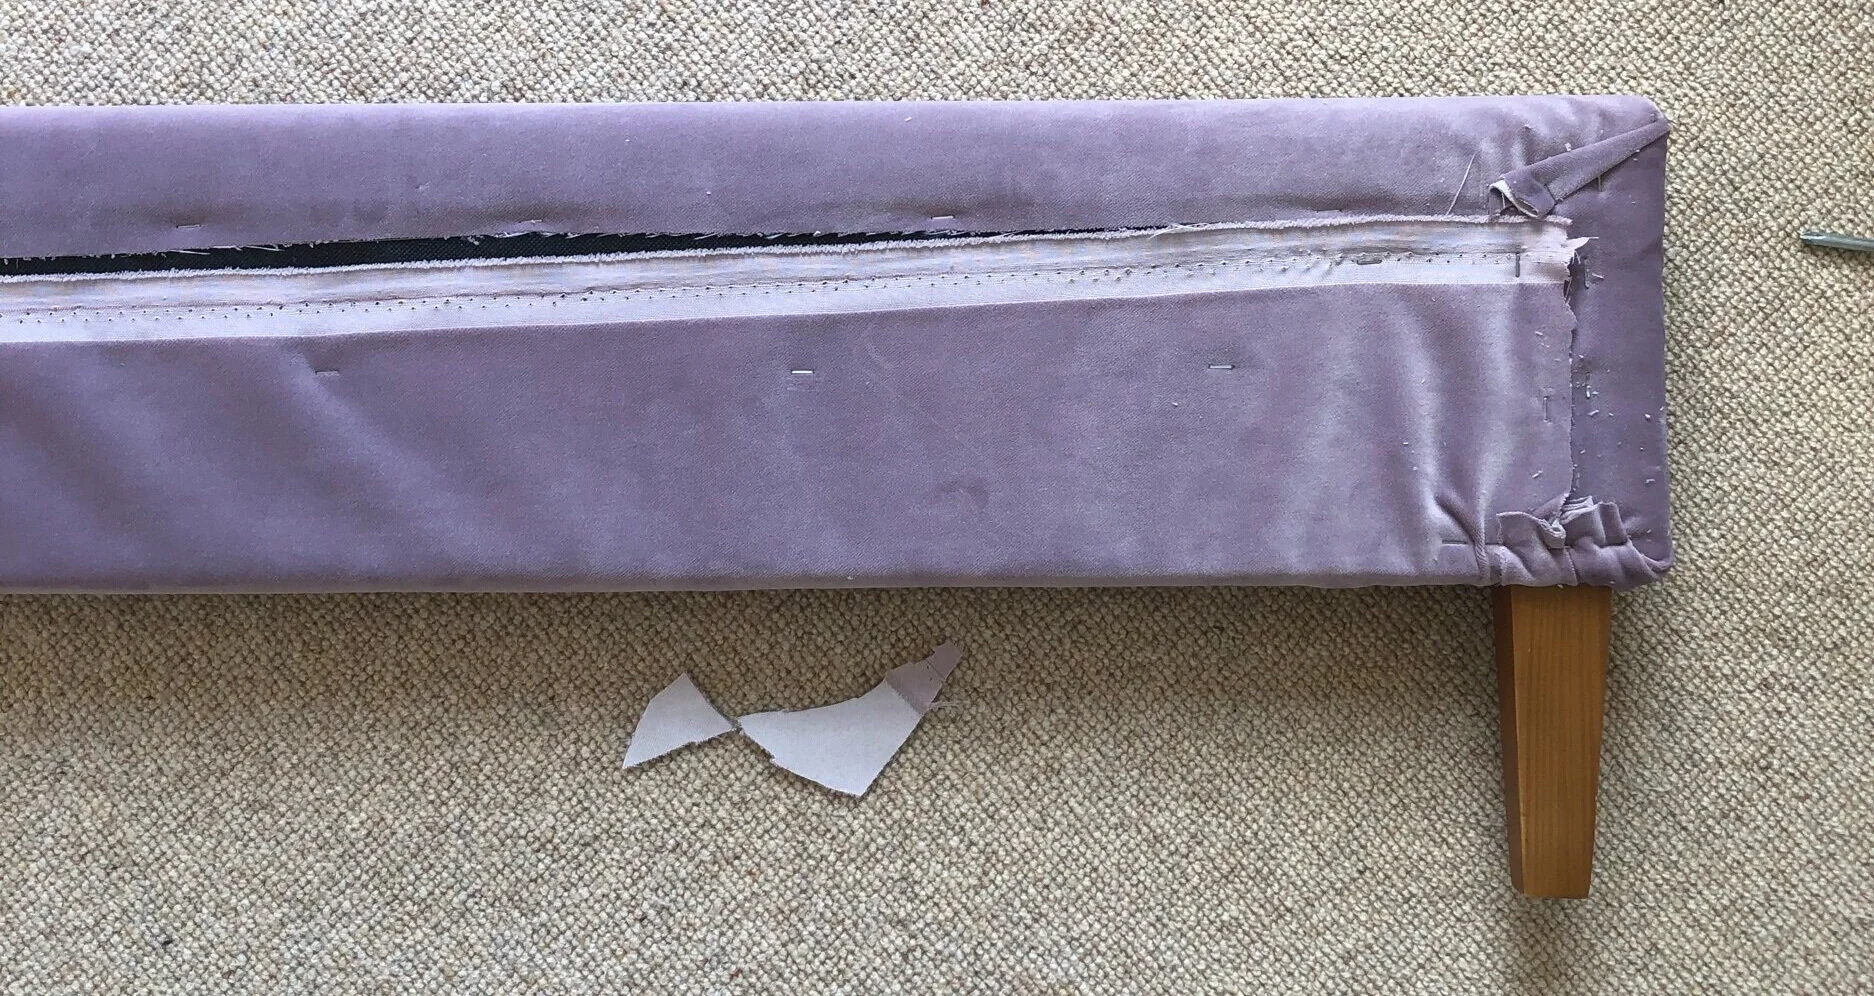
Make sure your fabric is completely flat on the floor and there are no groupings or creases anywhere. Fold over one side of the fabric overhang and with your staple gun, staple the fabric down onto the back of the headboard. It is important to make sure you are stapling into the stud frame so the staples are holding, rather than just stapling into any foam or sponge. Then, do the same on the opposite end, making sure you are pulling the fabric as taut as possible from the other stapled side.
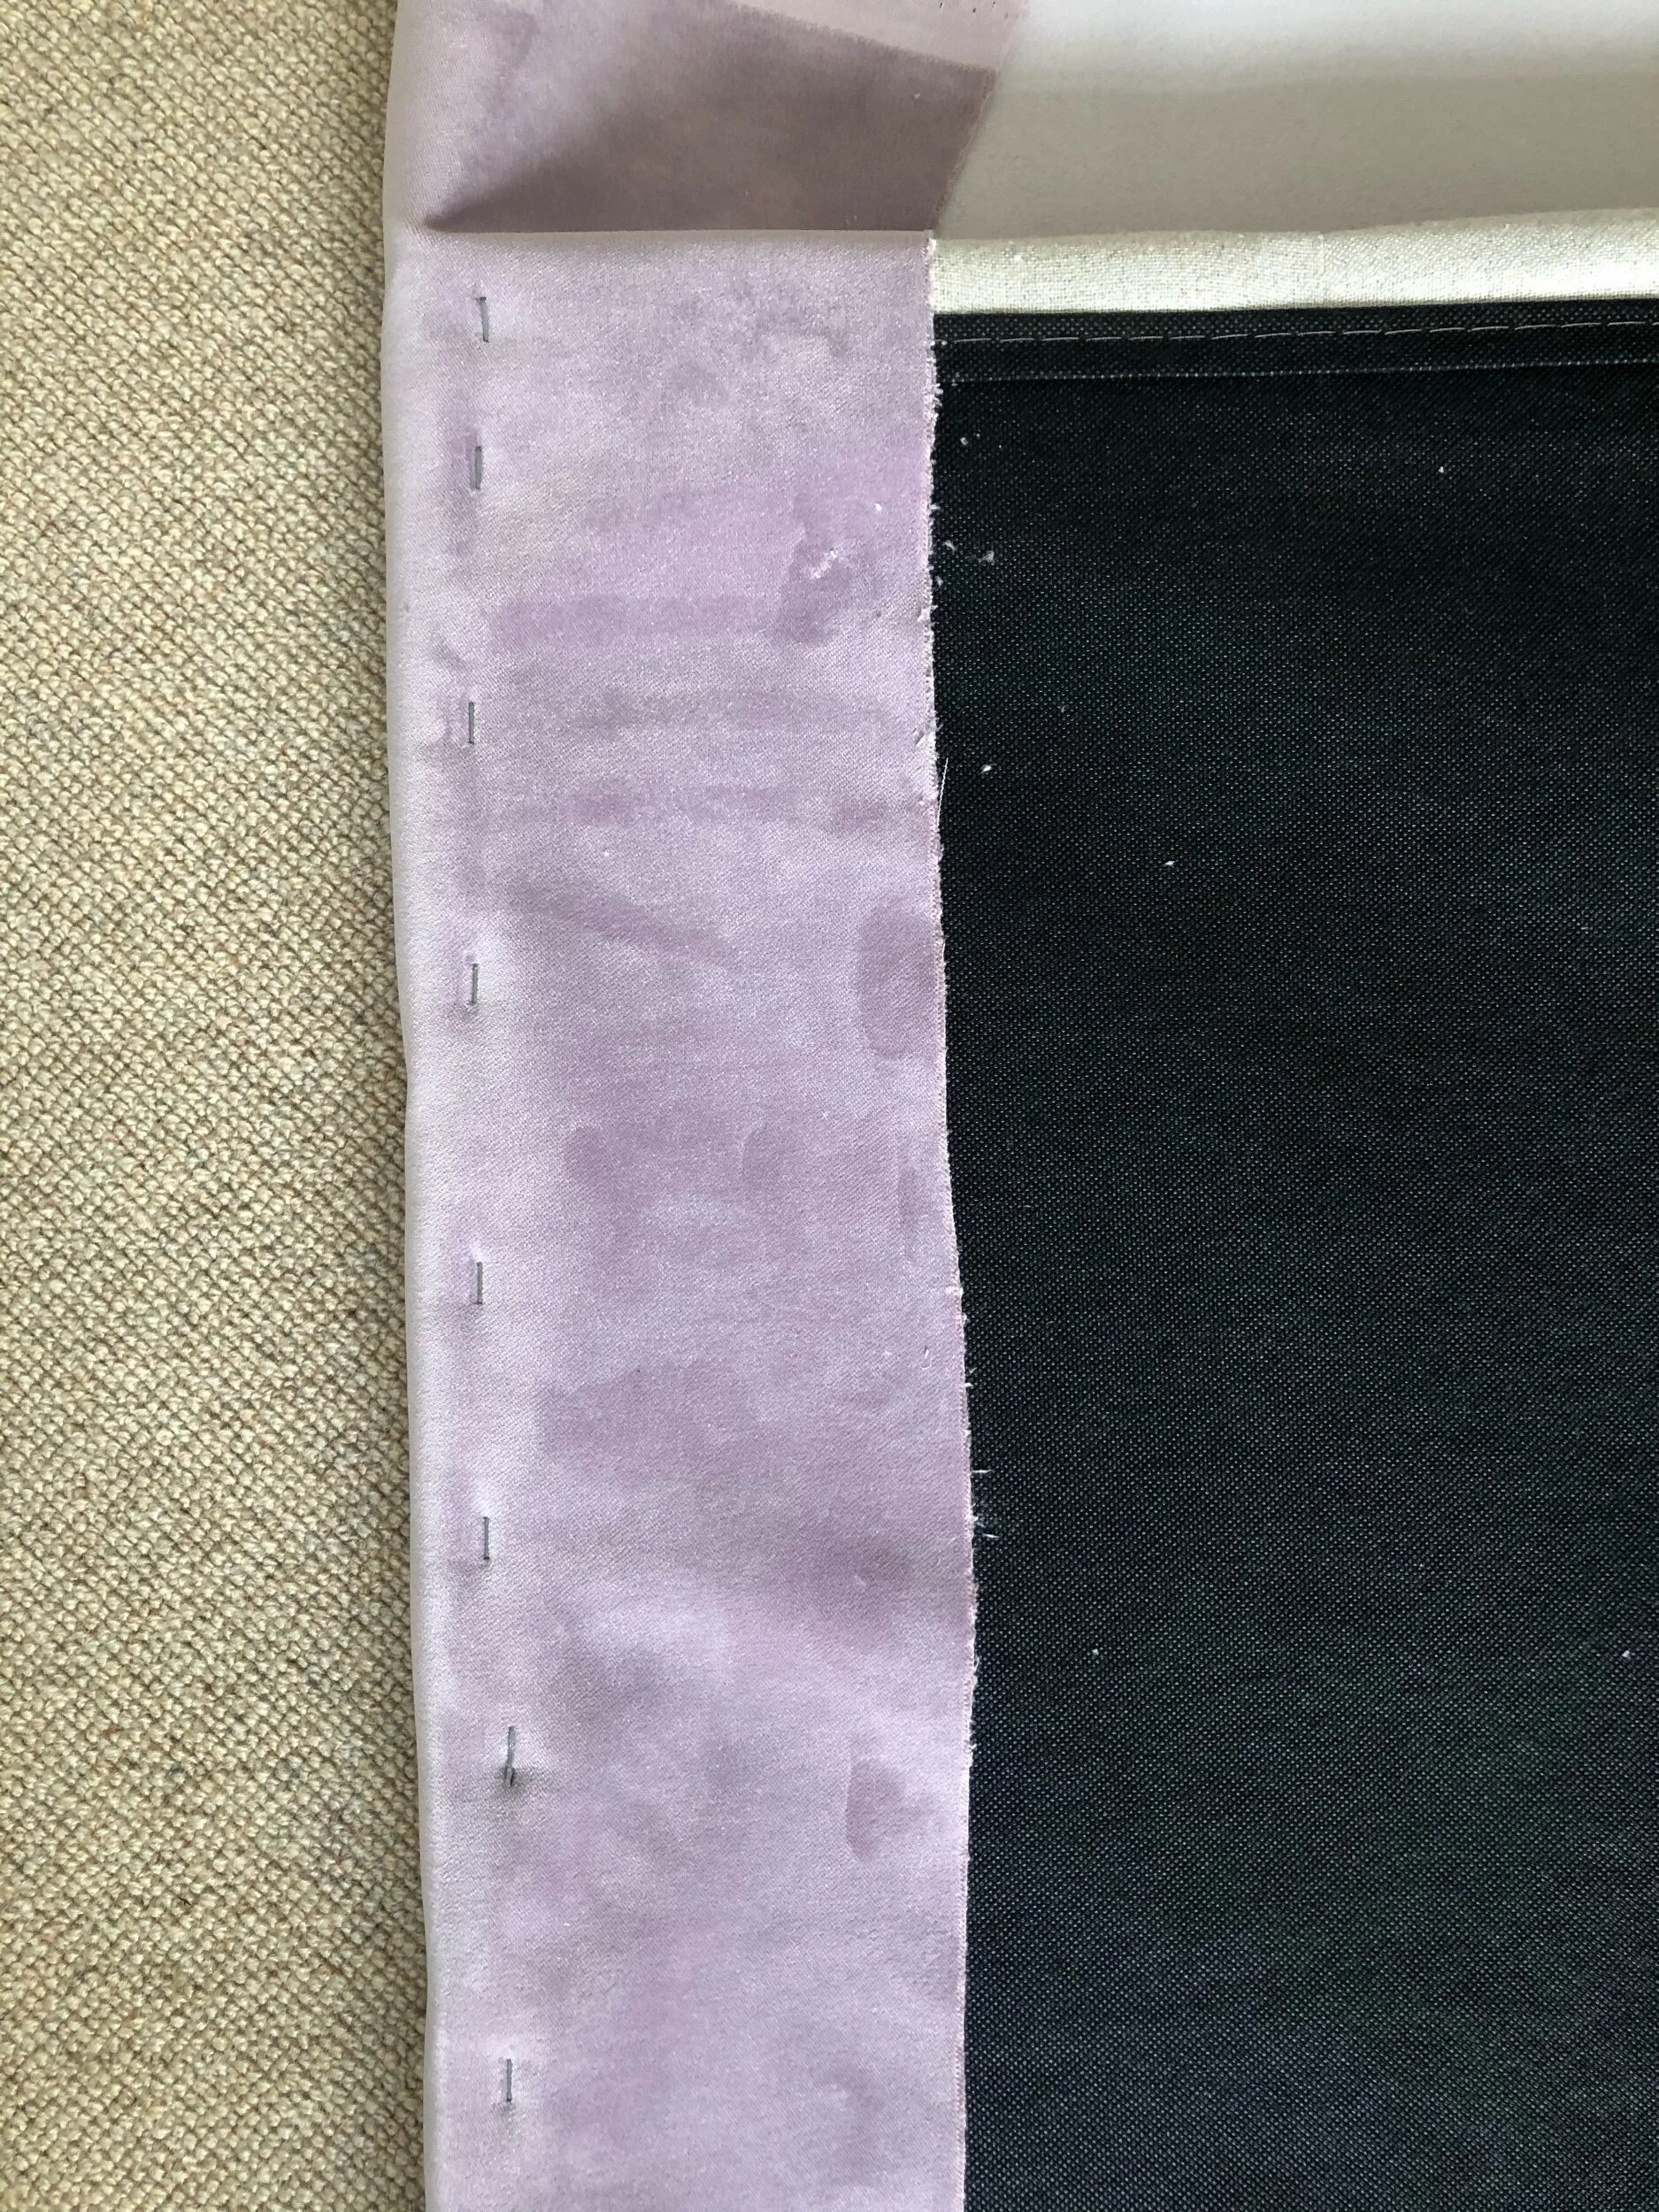
Once both sides of your headboard are stapled in place, you need to do your folds at the top and at the bottom of the headboard. To do this, I made sure I did a neat fold by pulling tightly and tucking in as much fabric as possible. I also cut away any overly unnecessary fabric if it gave quite a ‘bulge’ in the corner.


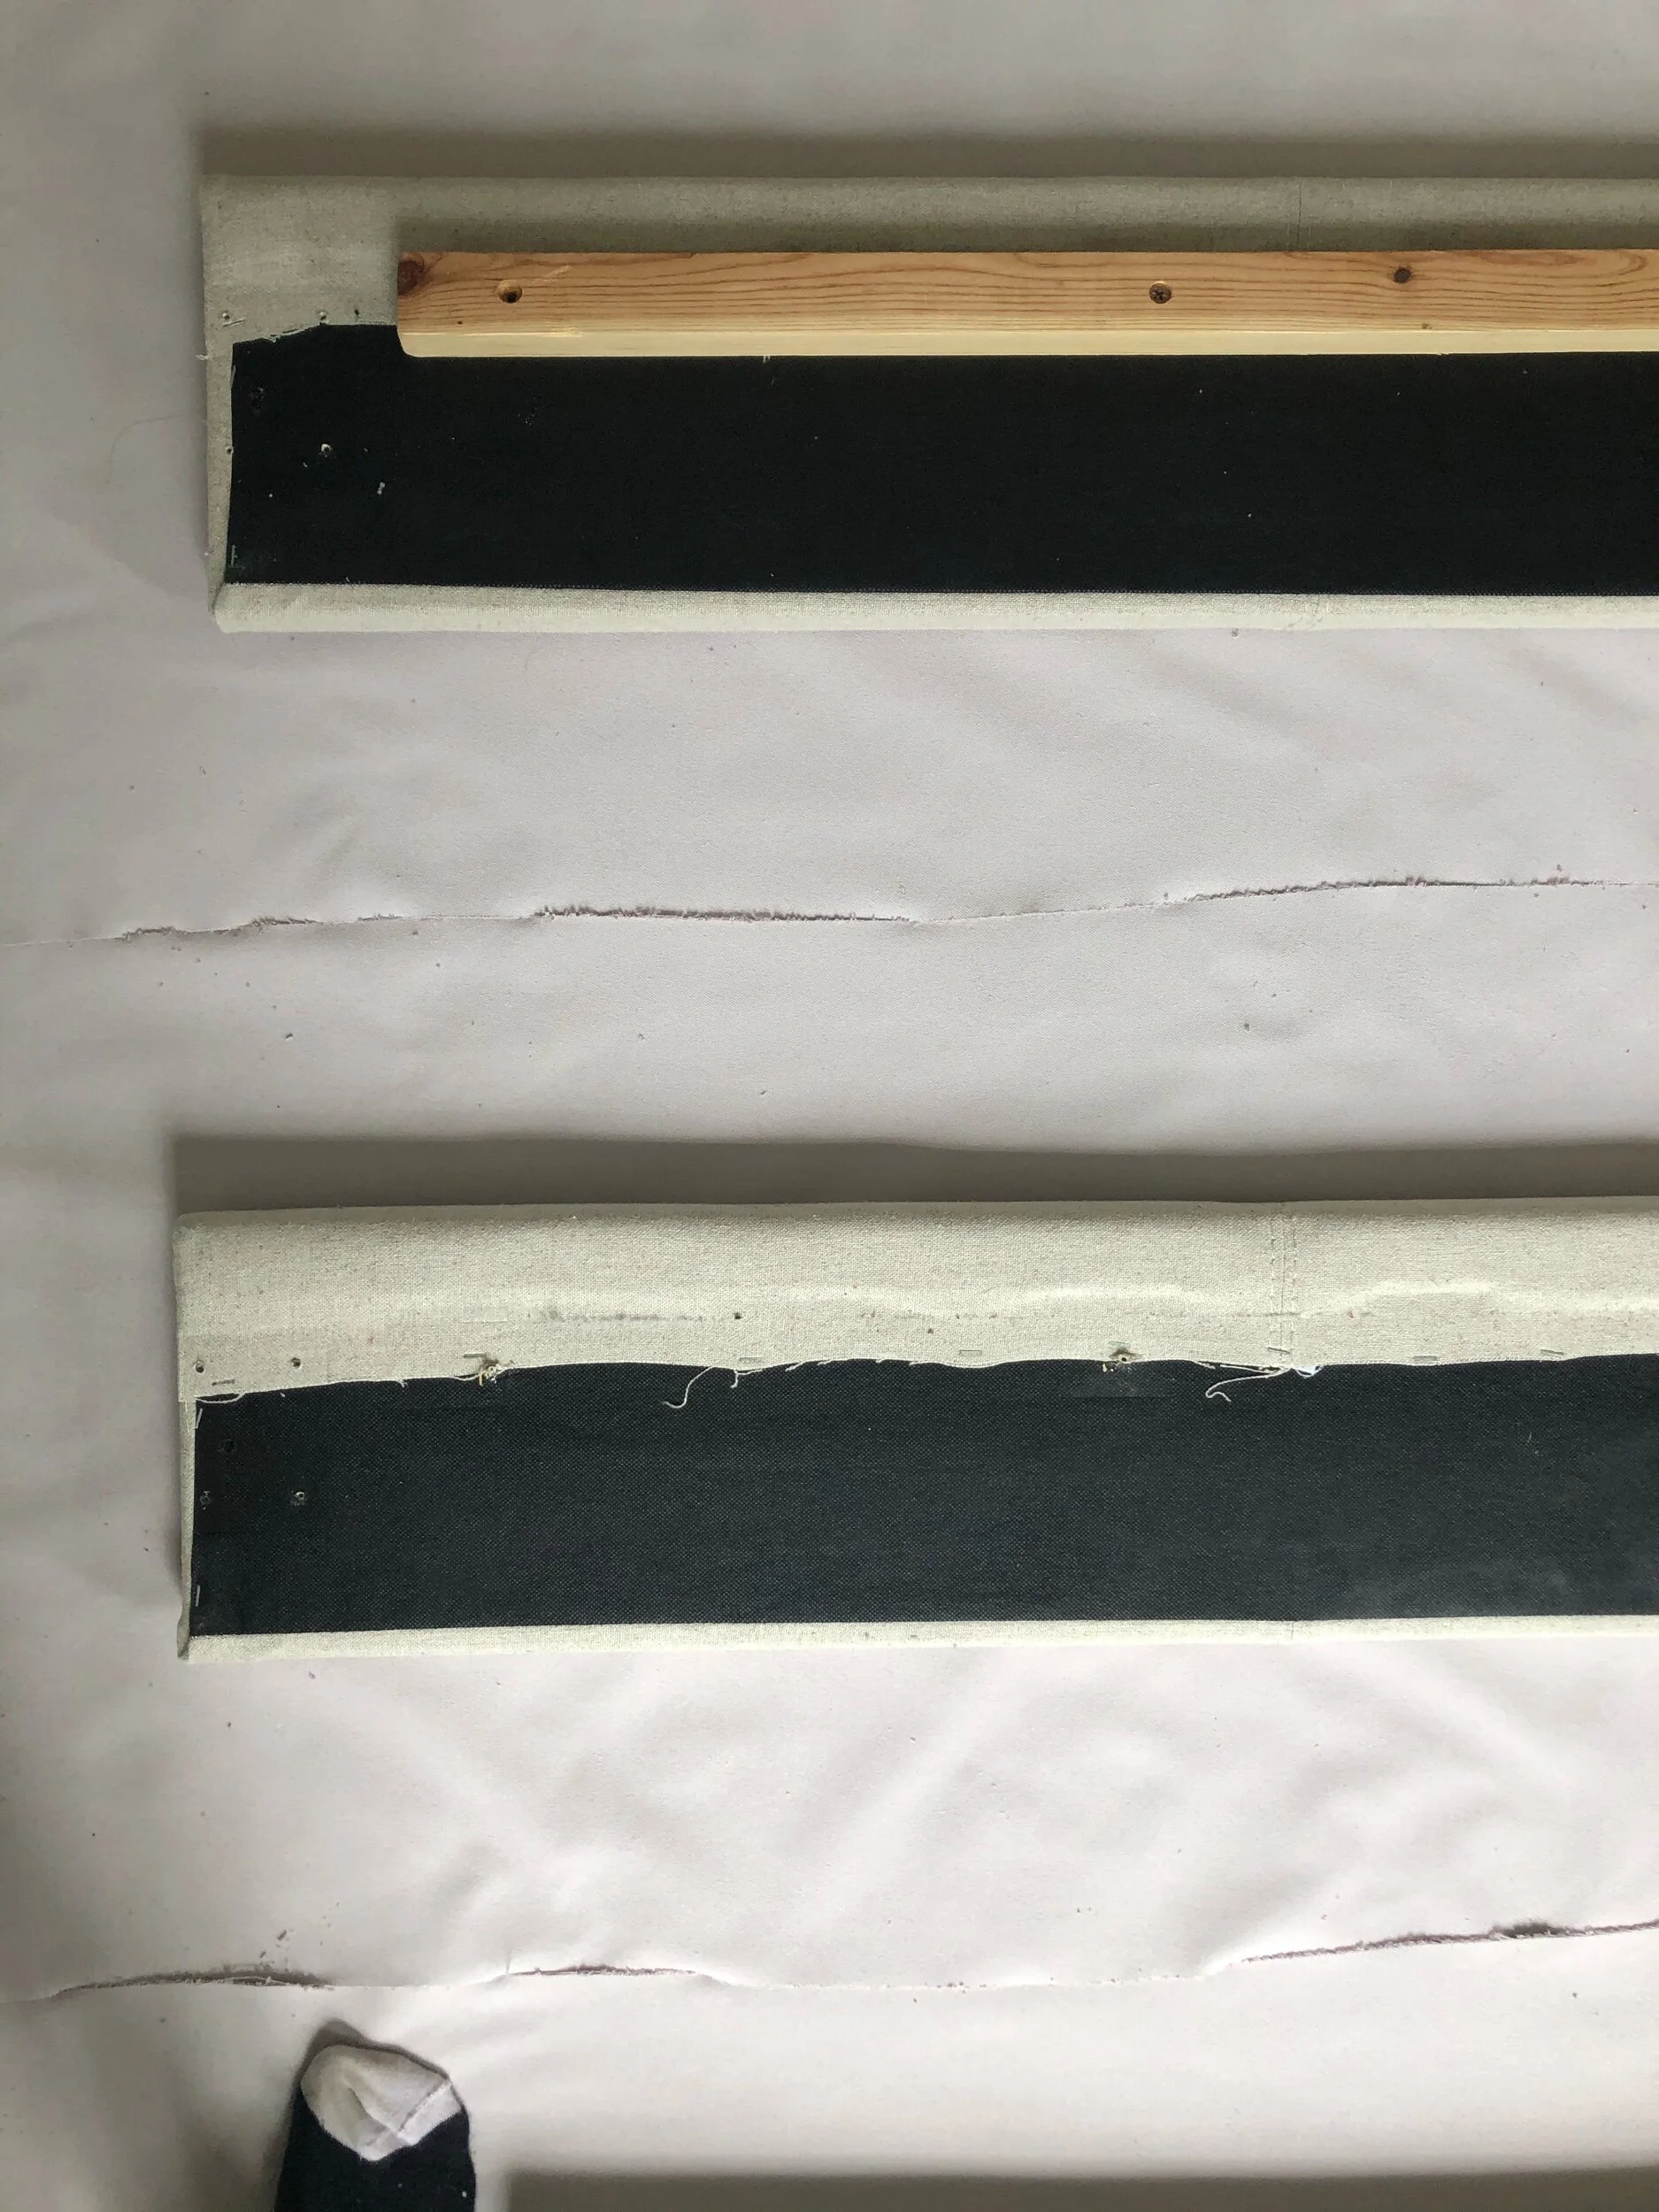
Once everything was stapled down, I turned the headboard over and made sure I was happy with the application before cutting away the excess fabric dangling away from the staples.
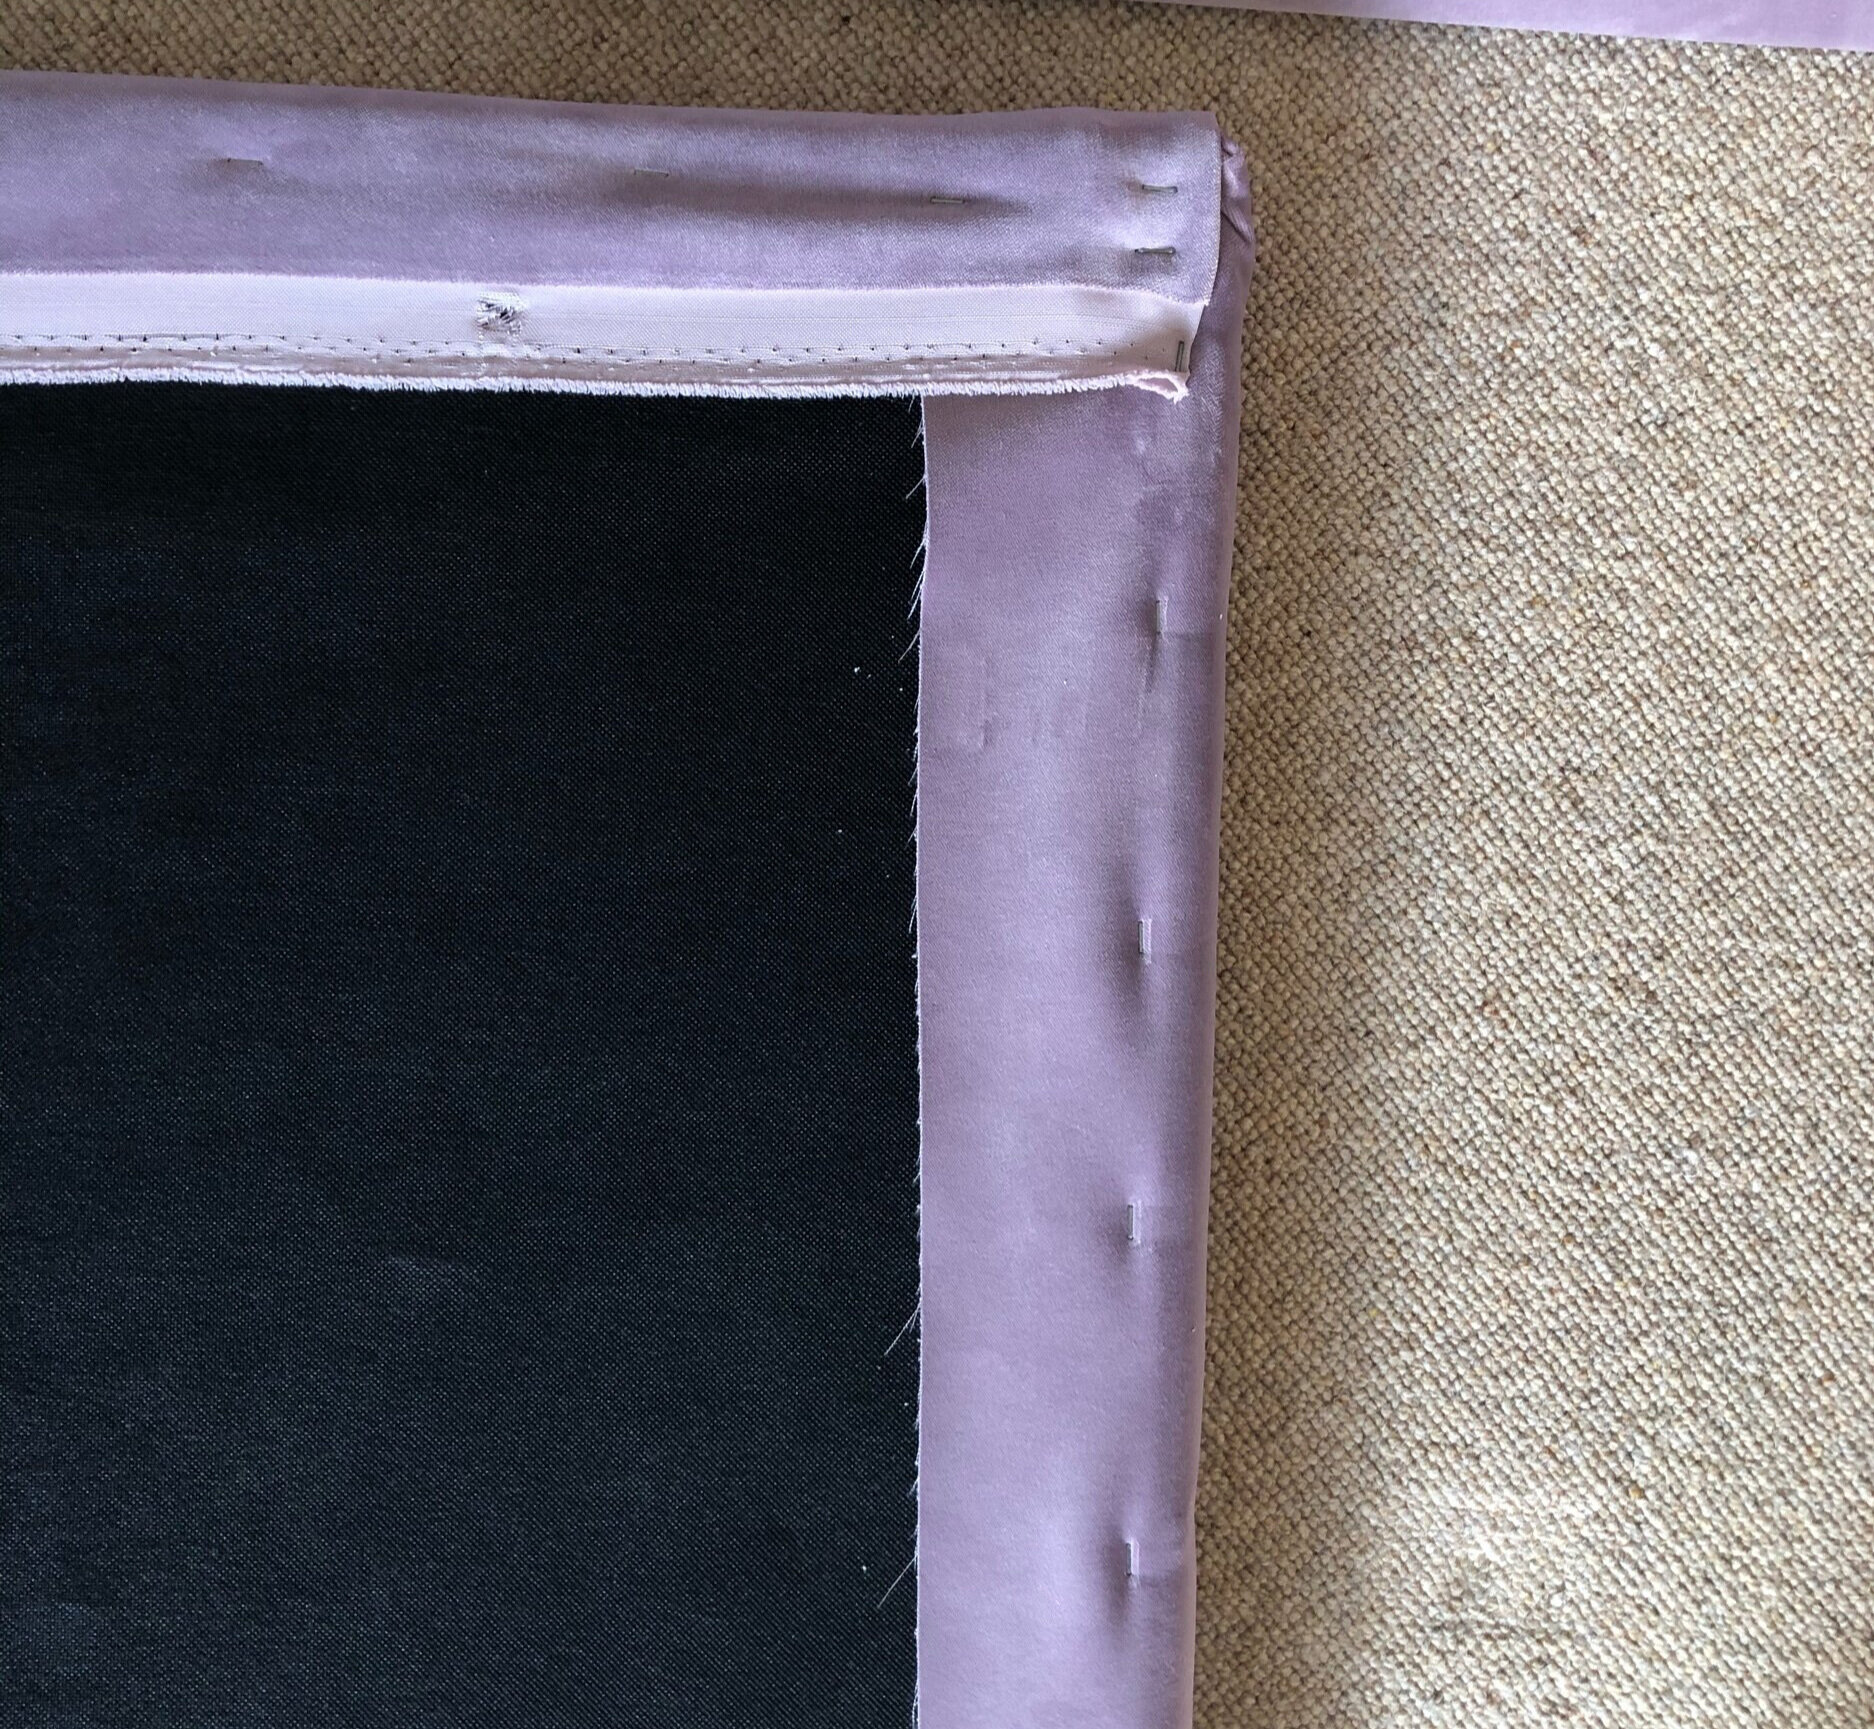
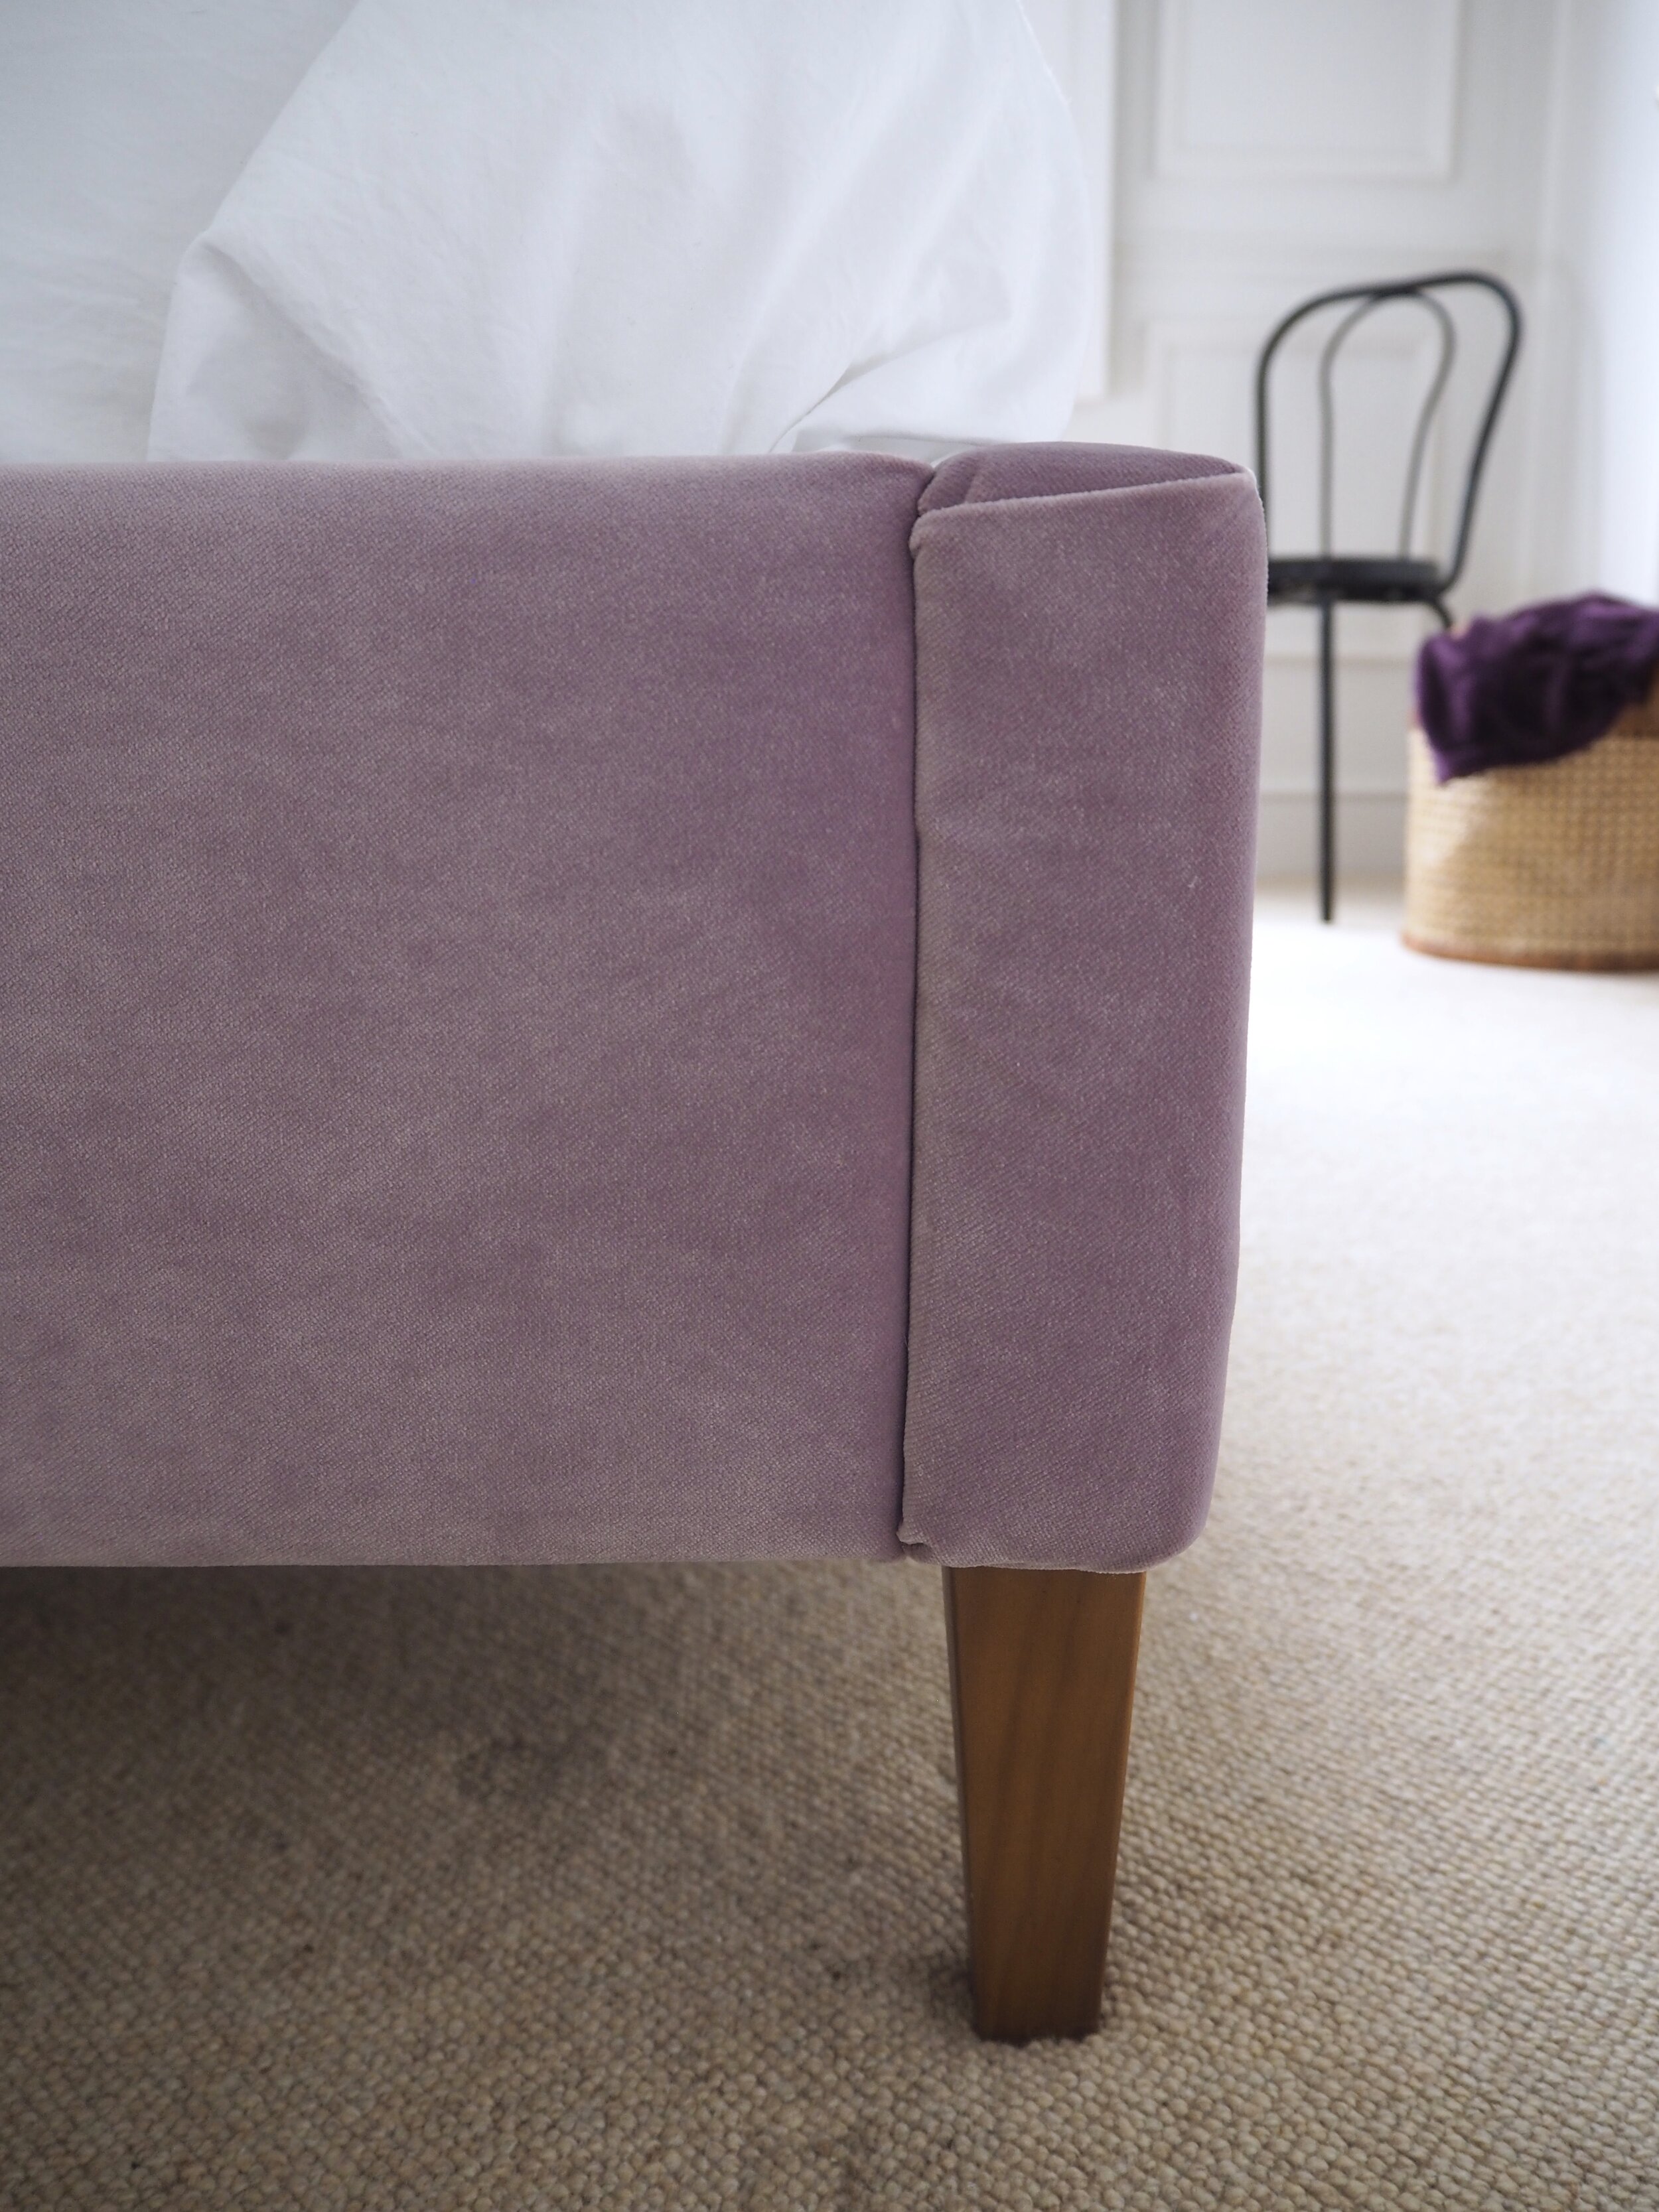
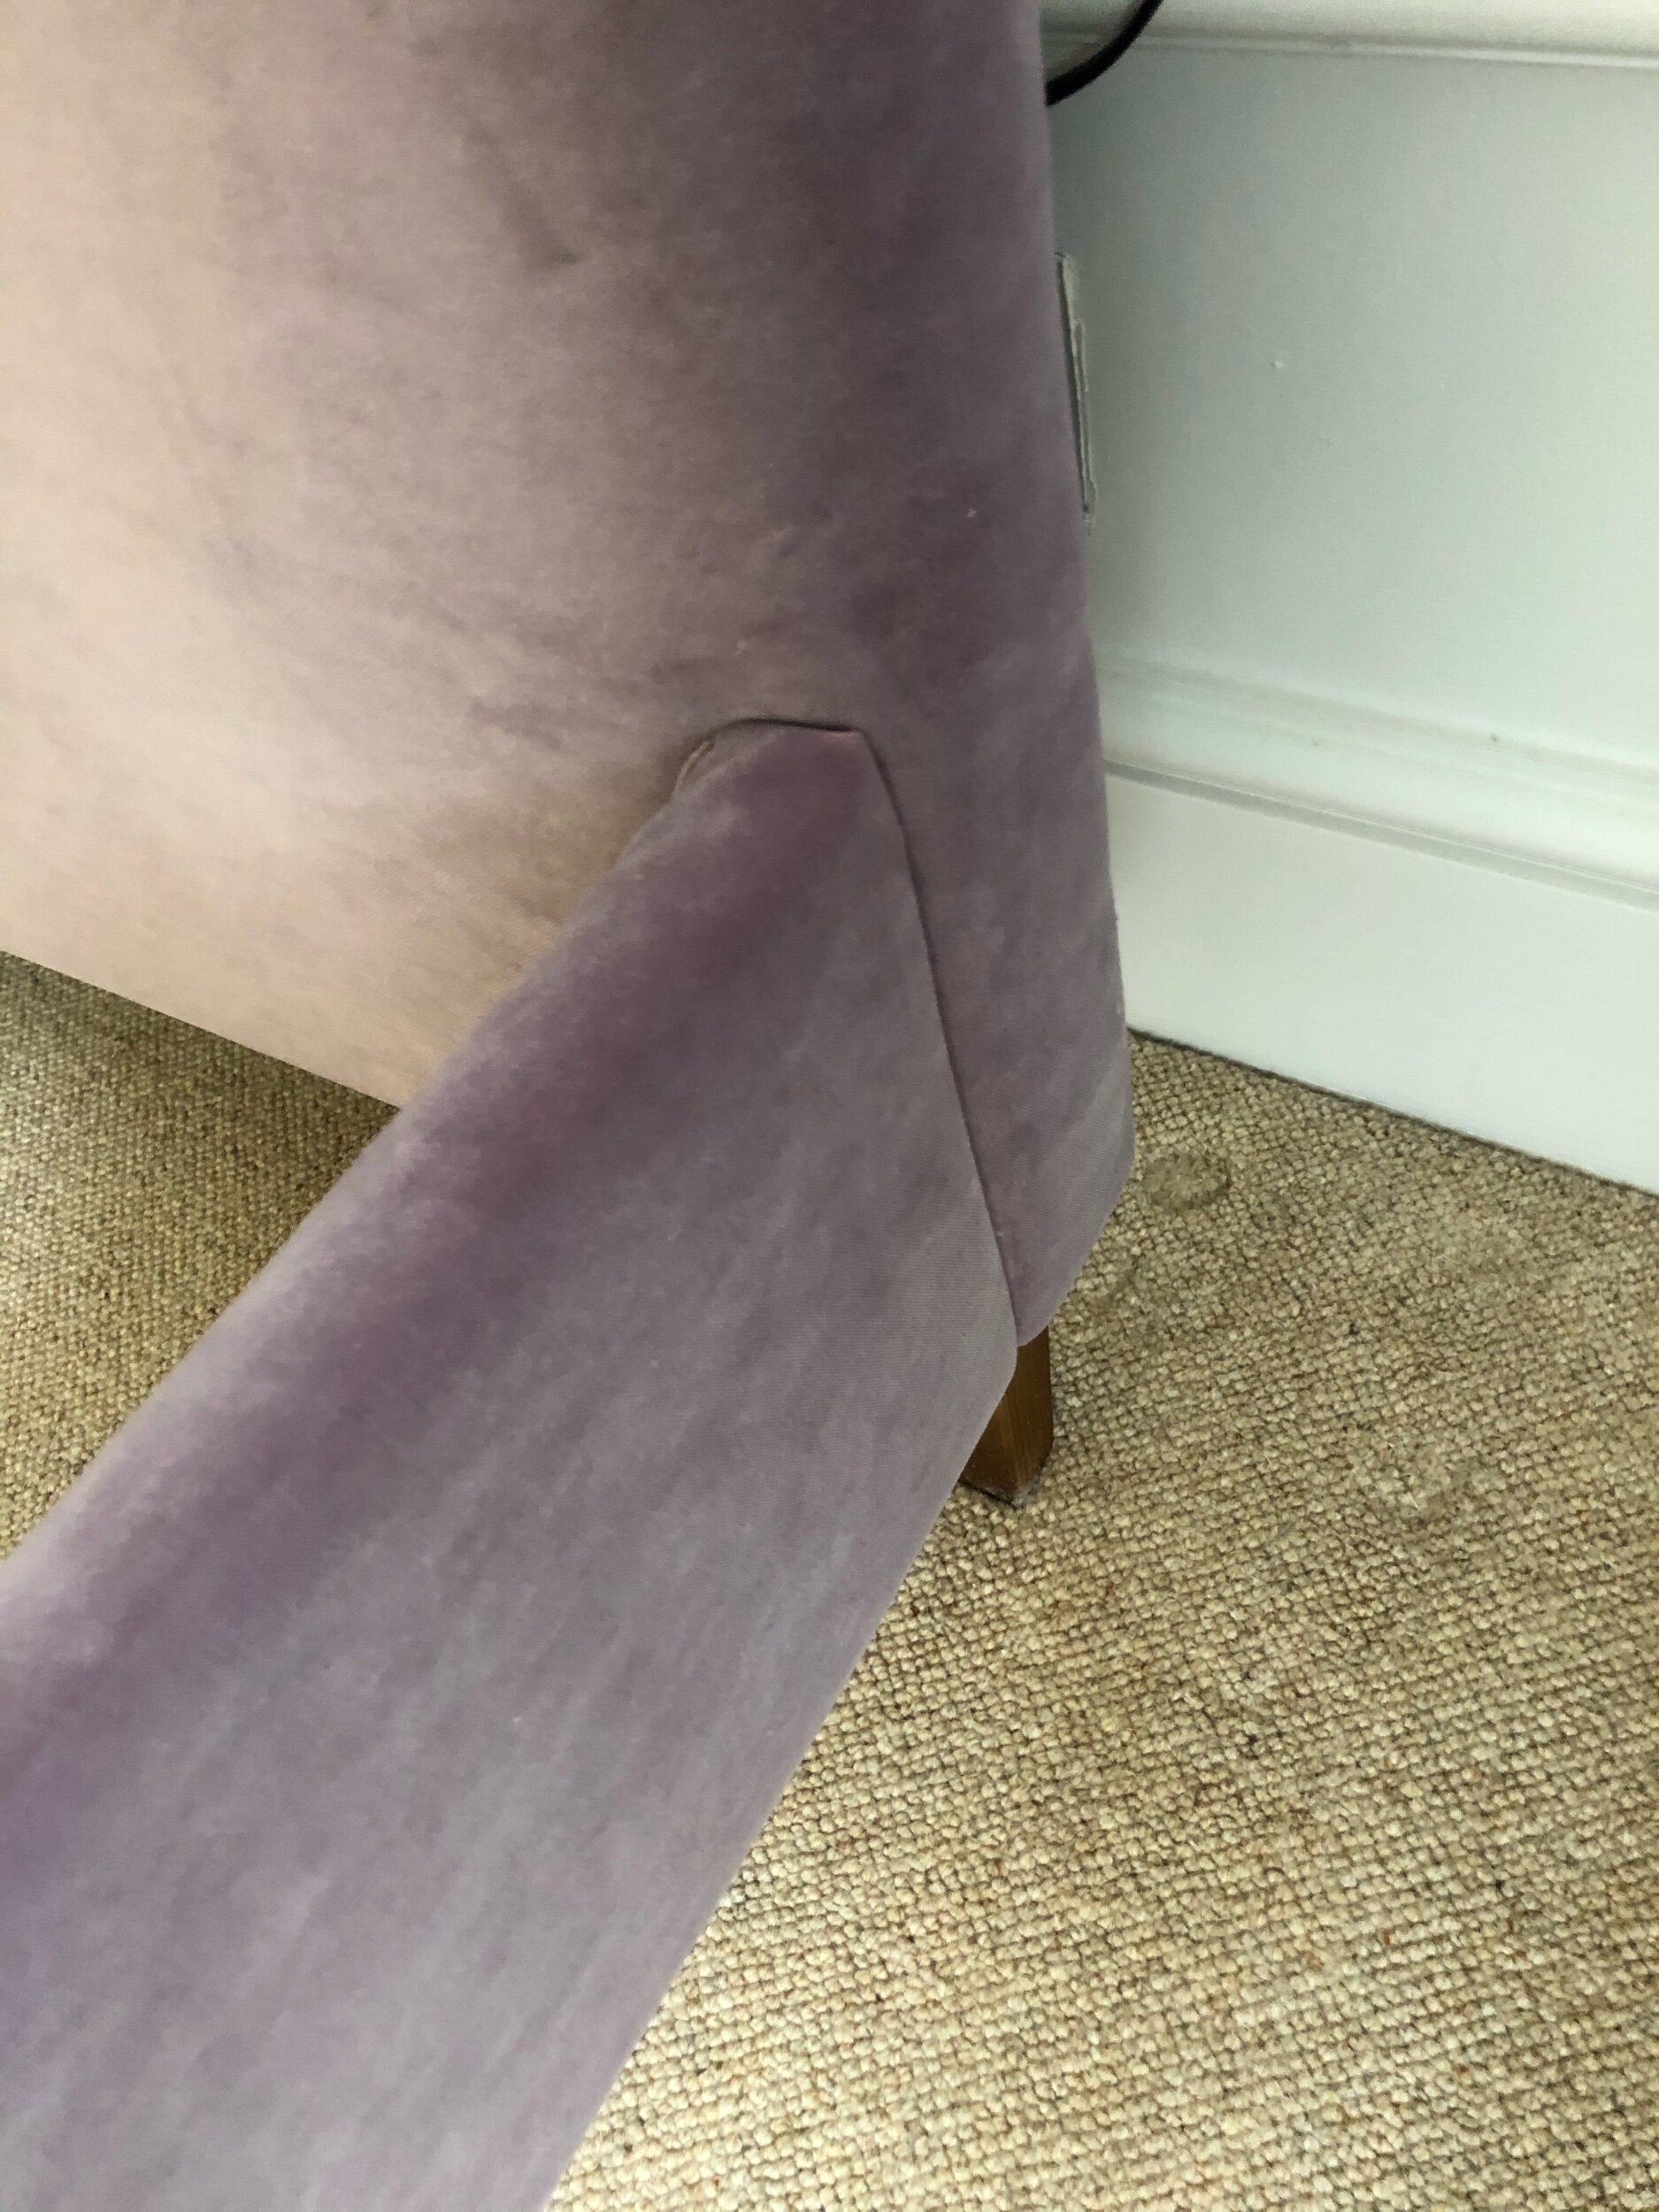
How the folds looks around the back of the reupholstered headboard
Step 7: Cover the rest of the frame
For the sides and the base, I removed anything blocking them from being recovered and simply folded over the fabric and stapled into place, as per the headboard. I didn’t want any staples visible once the bed was rebuilt, so I followed the pattern of how the previous material was applied.
Step 7: Rebuild the bed!
Once everything was covered I just had to rebuild the bed and put on the mattress! Where I had enclosed any screw holes, I simply felt with my finger the previous dent in the frame and pierced the fabric with some sharp scissor ends. A good tip is to take photos on your phone as you disassemble the bed, so you easily remember how it was constructed in the first place.
If you want to see this whole process in full, I did film a speeded-up video of it on my IGTV feed - click here to view it!
*Please note that Linwood kindly gifted the fabric for marketing purposes after I approached them about attempting this DIY.