How to install attractive fluted wall panel moulding with floating shelf

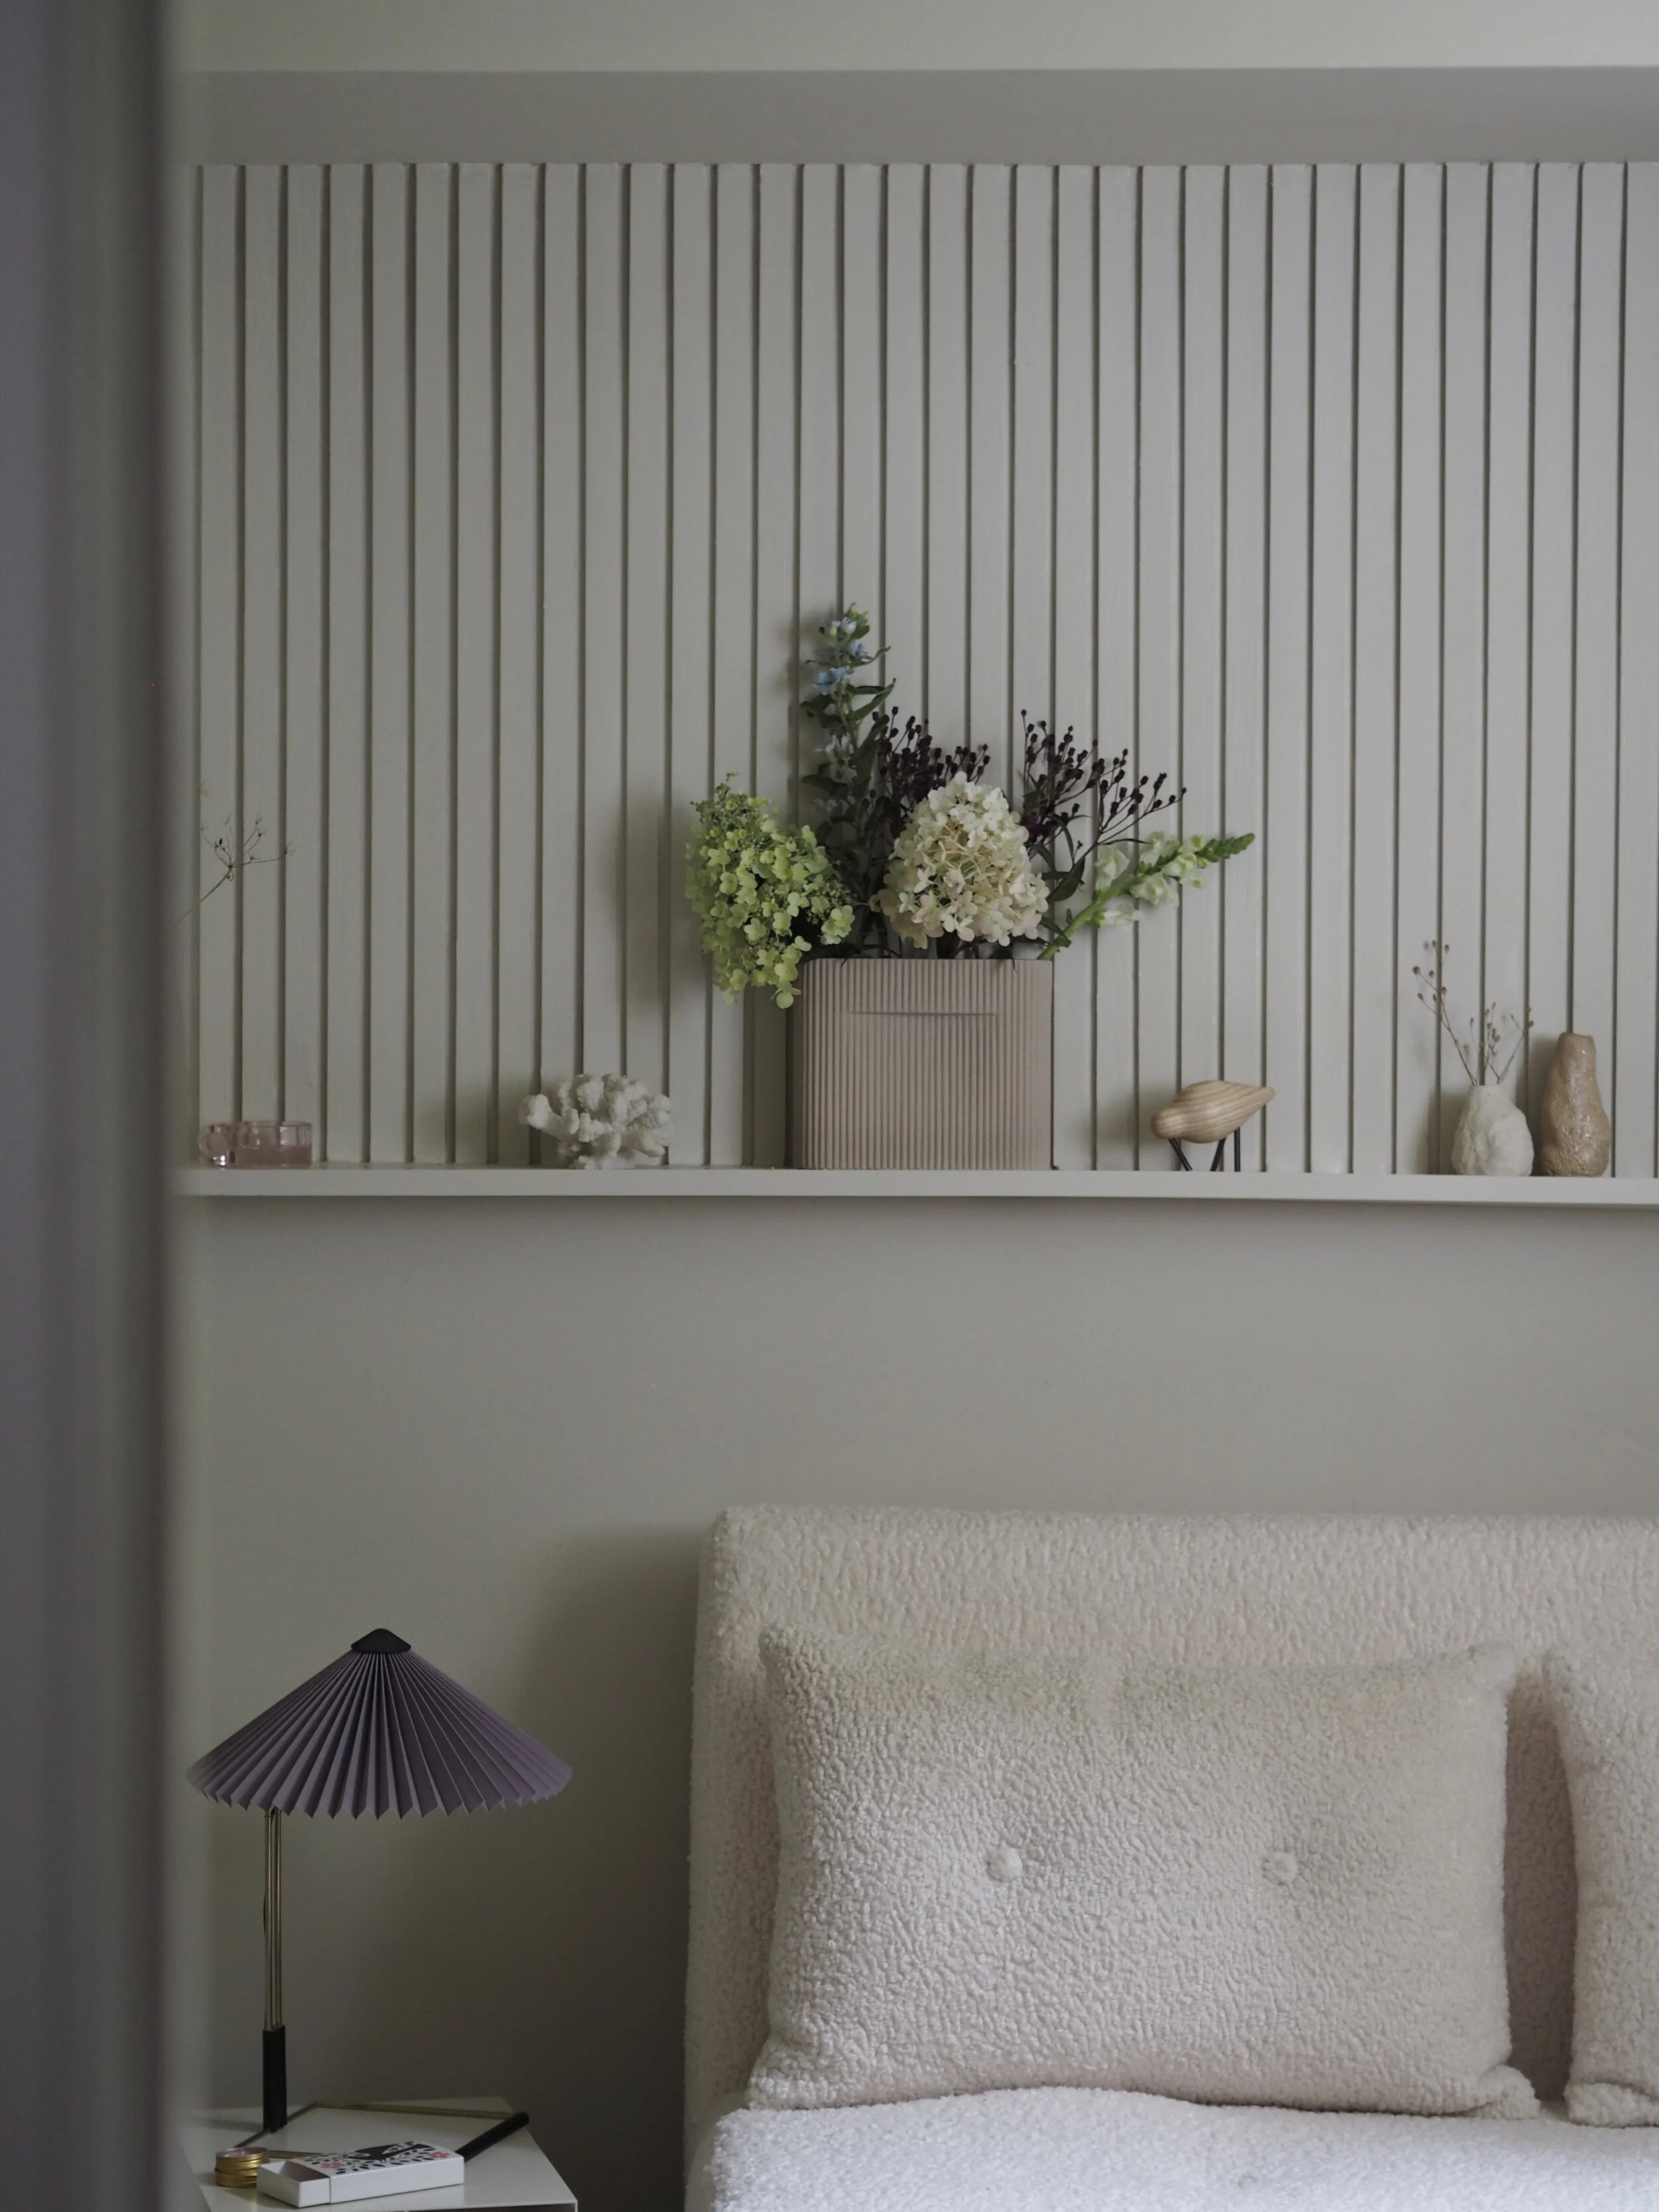
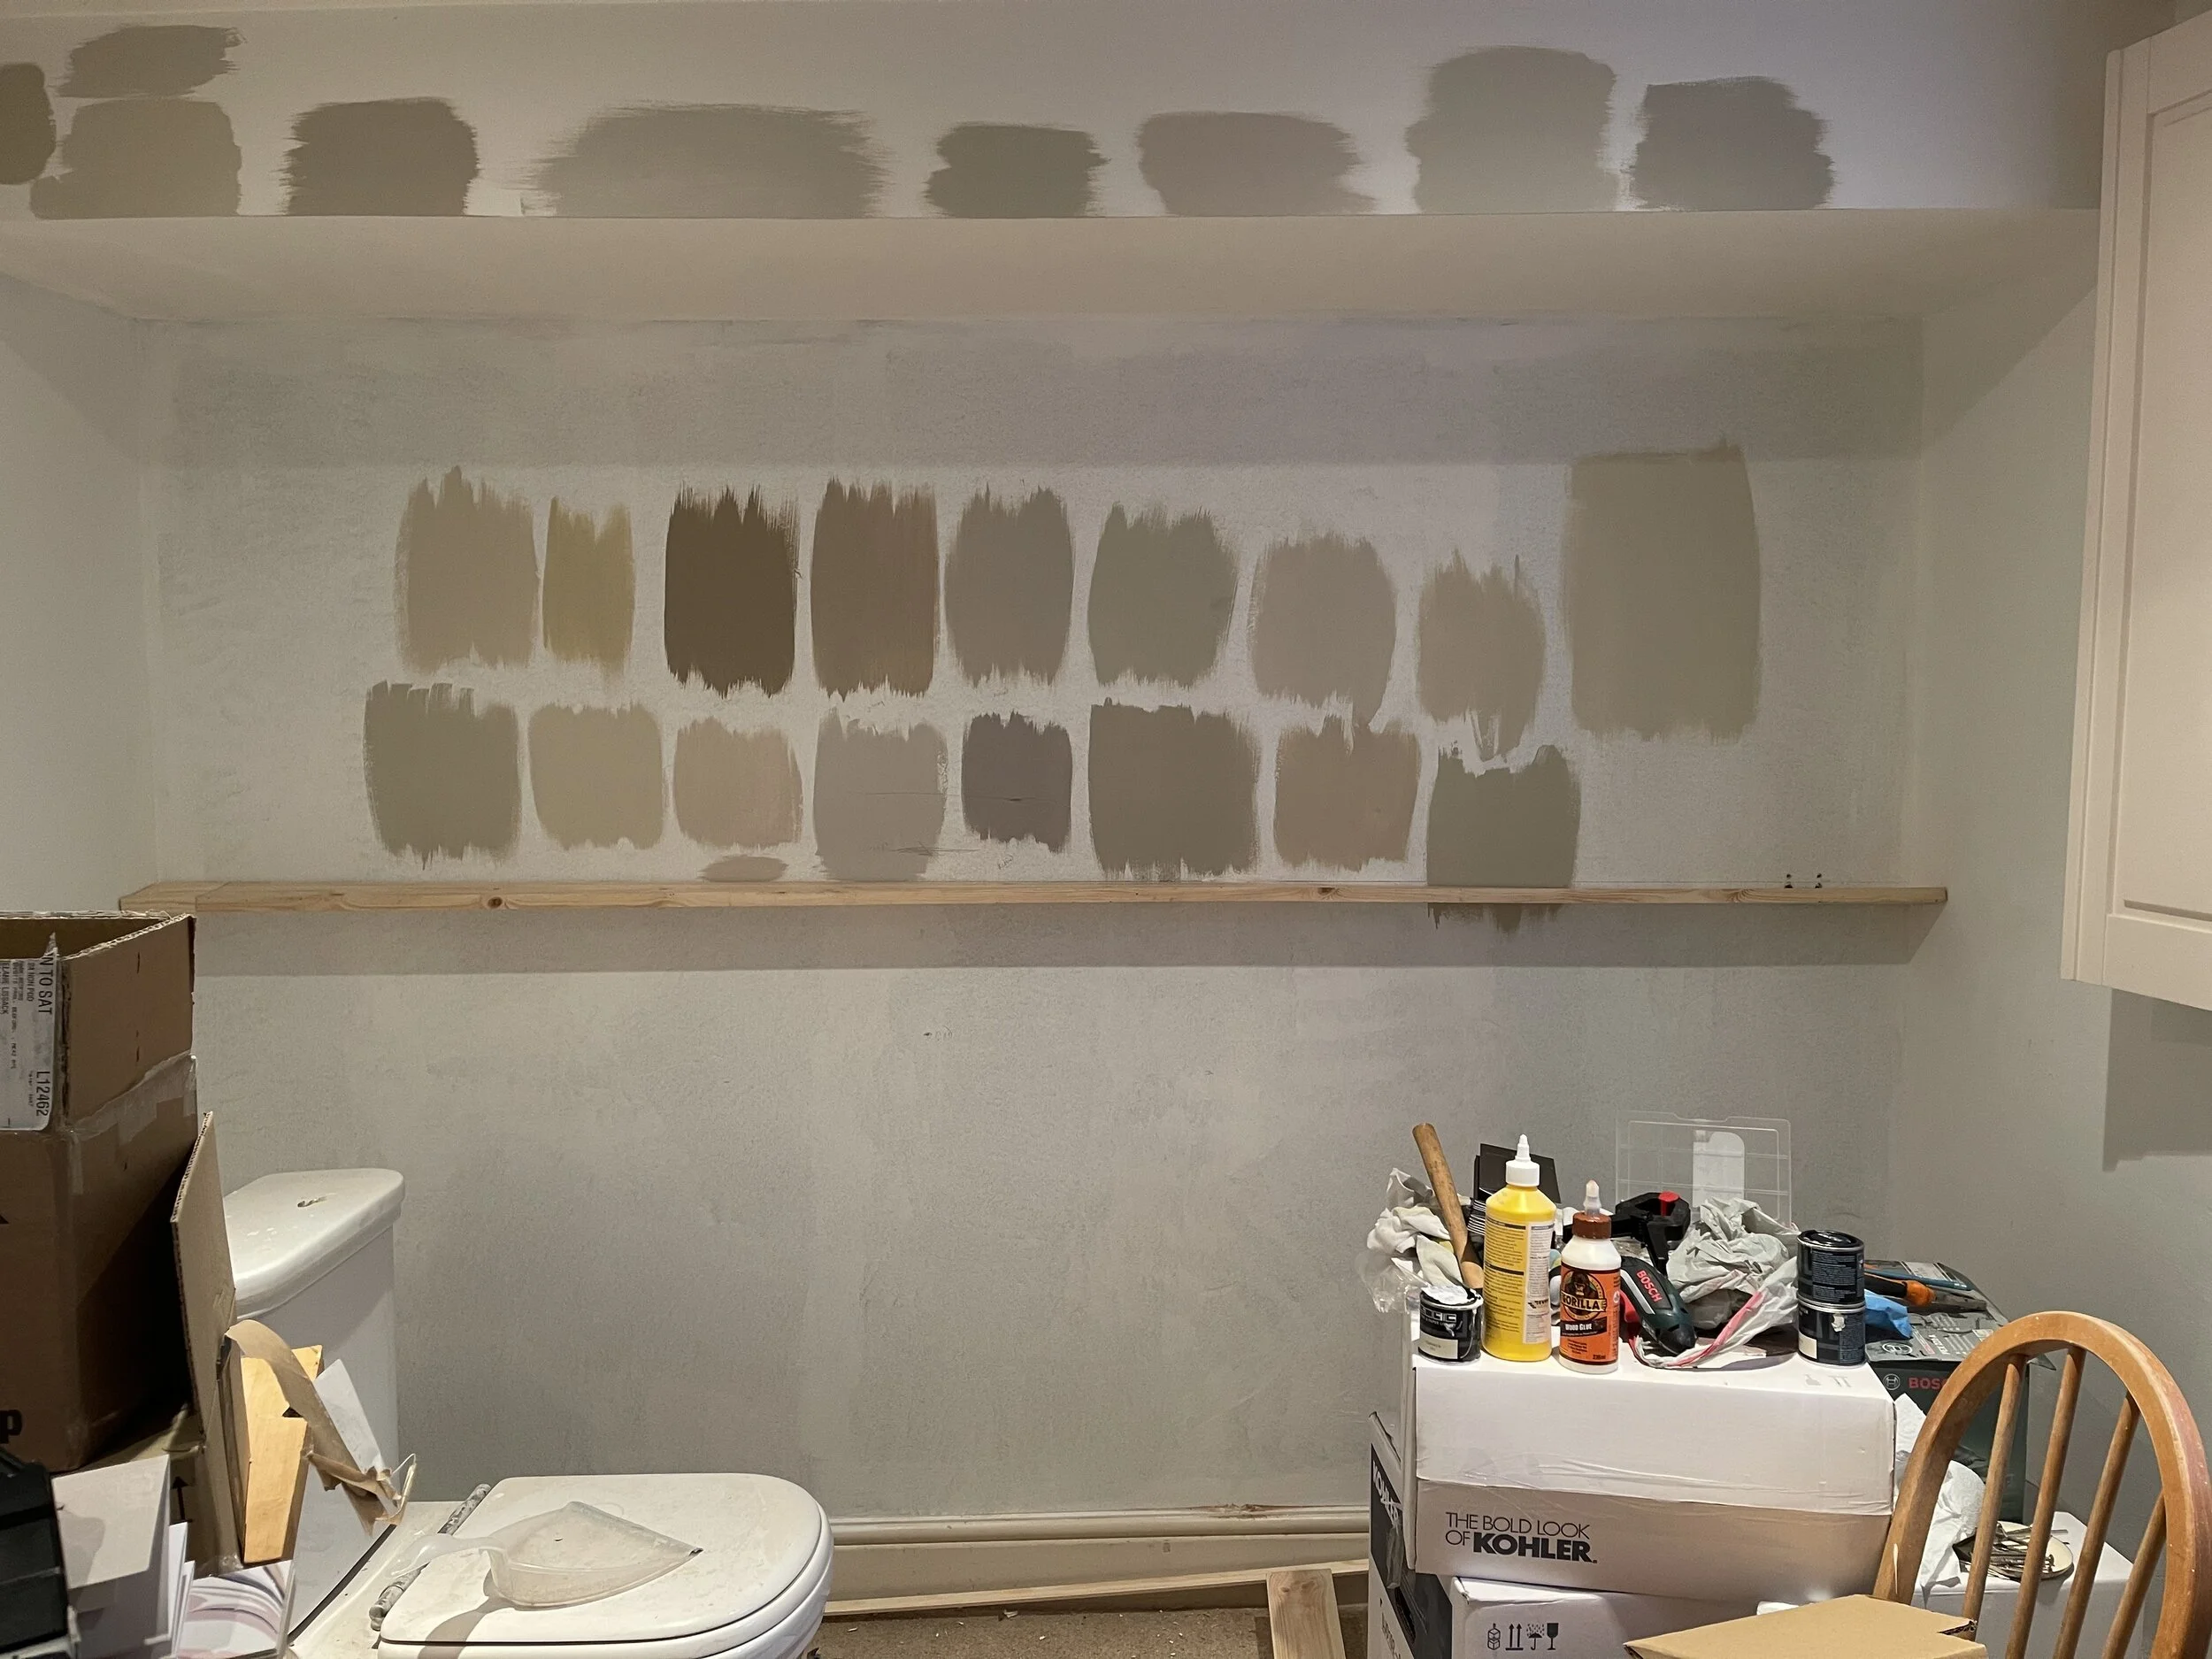
This compact room in the basement of my home required some visual interest, so I installed a striking slatted wood feature wall with added floating shelf. This is a budget-friendly DIY using pine strip wood and a length of timber purchased from my local DIY store.

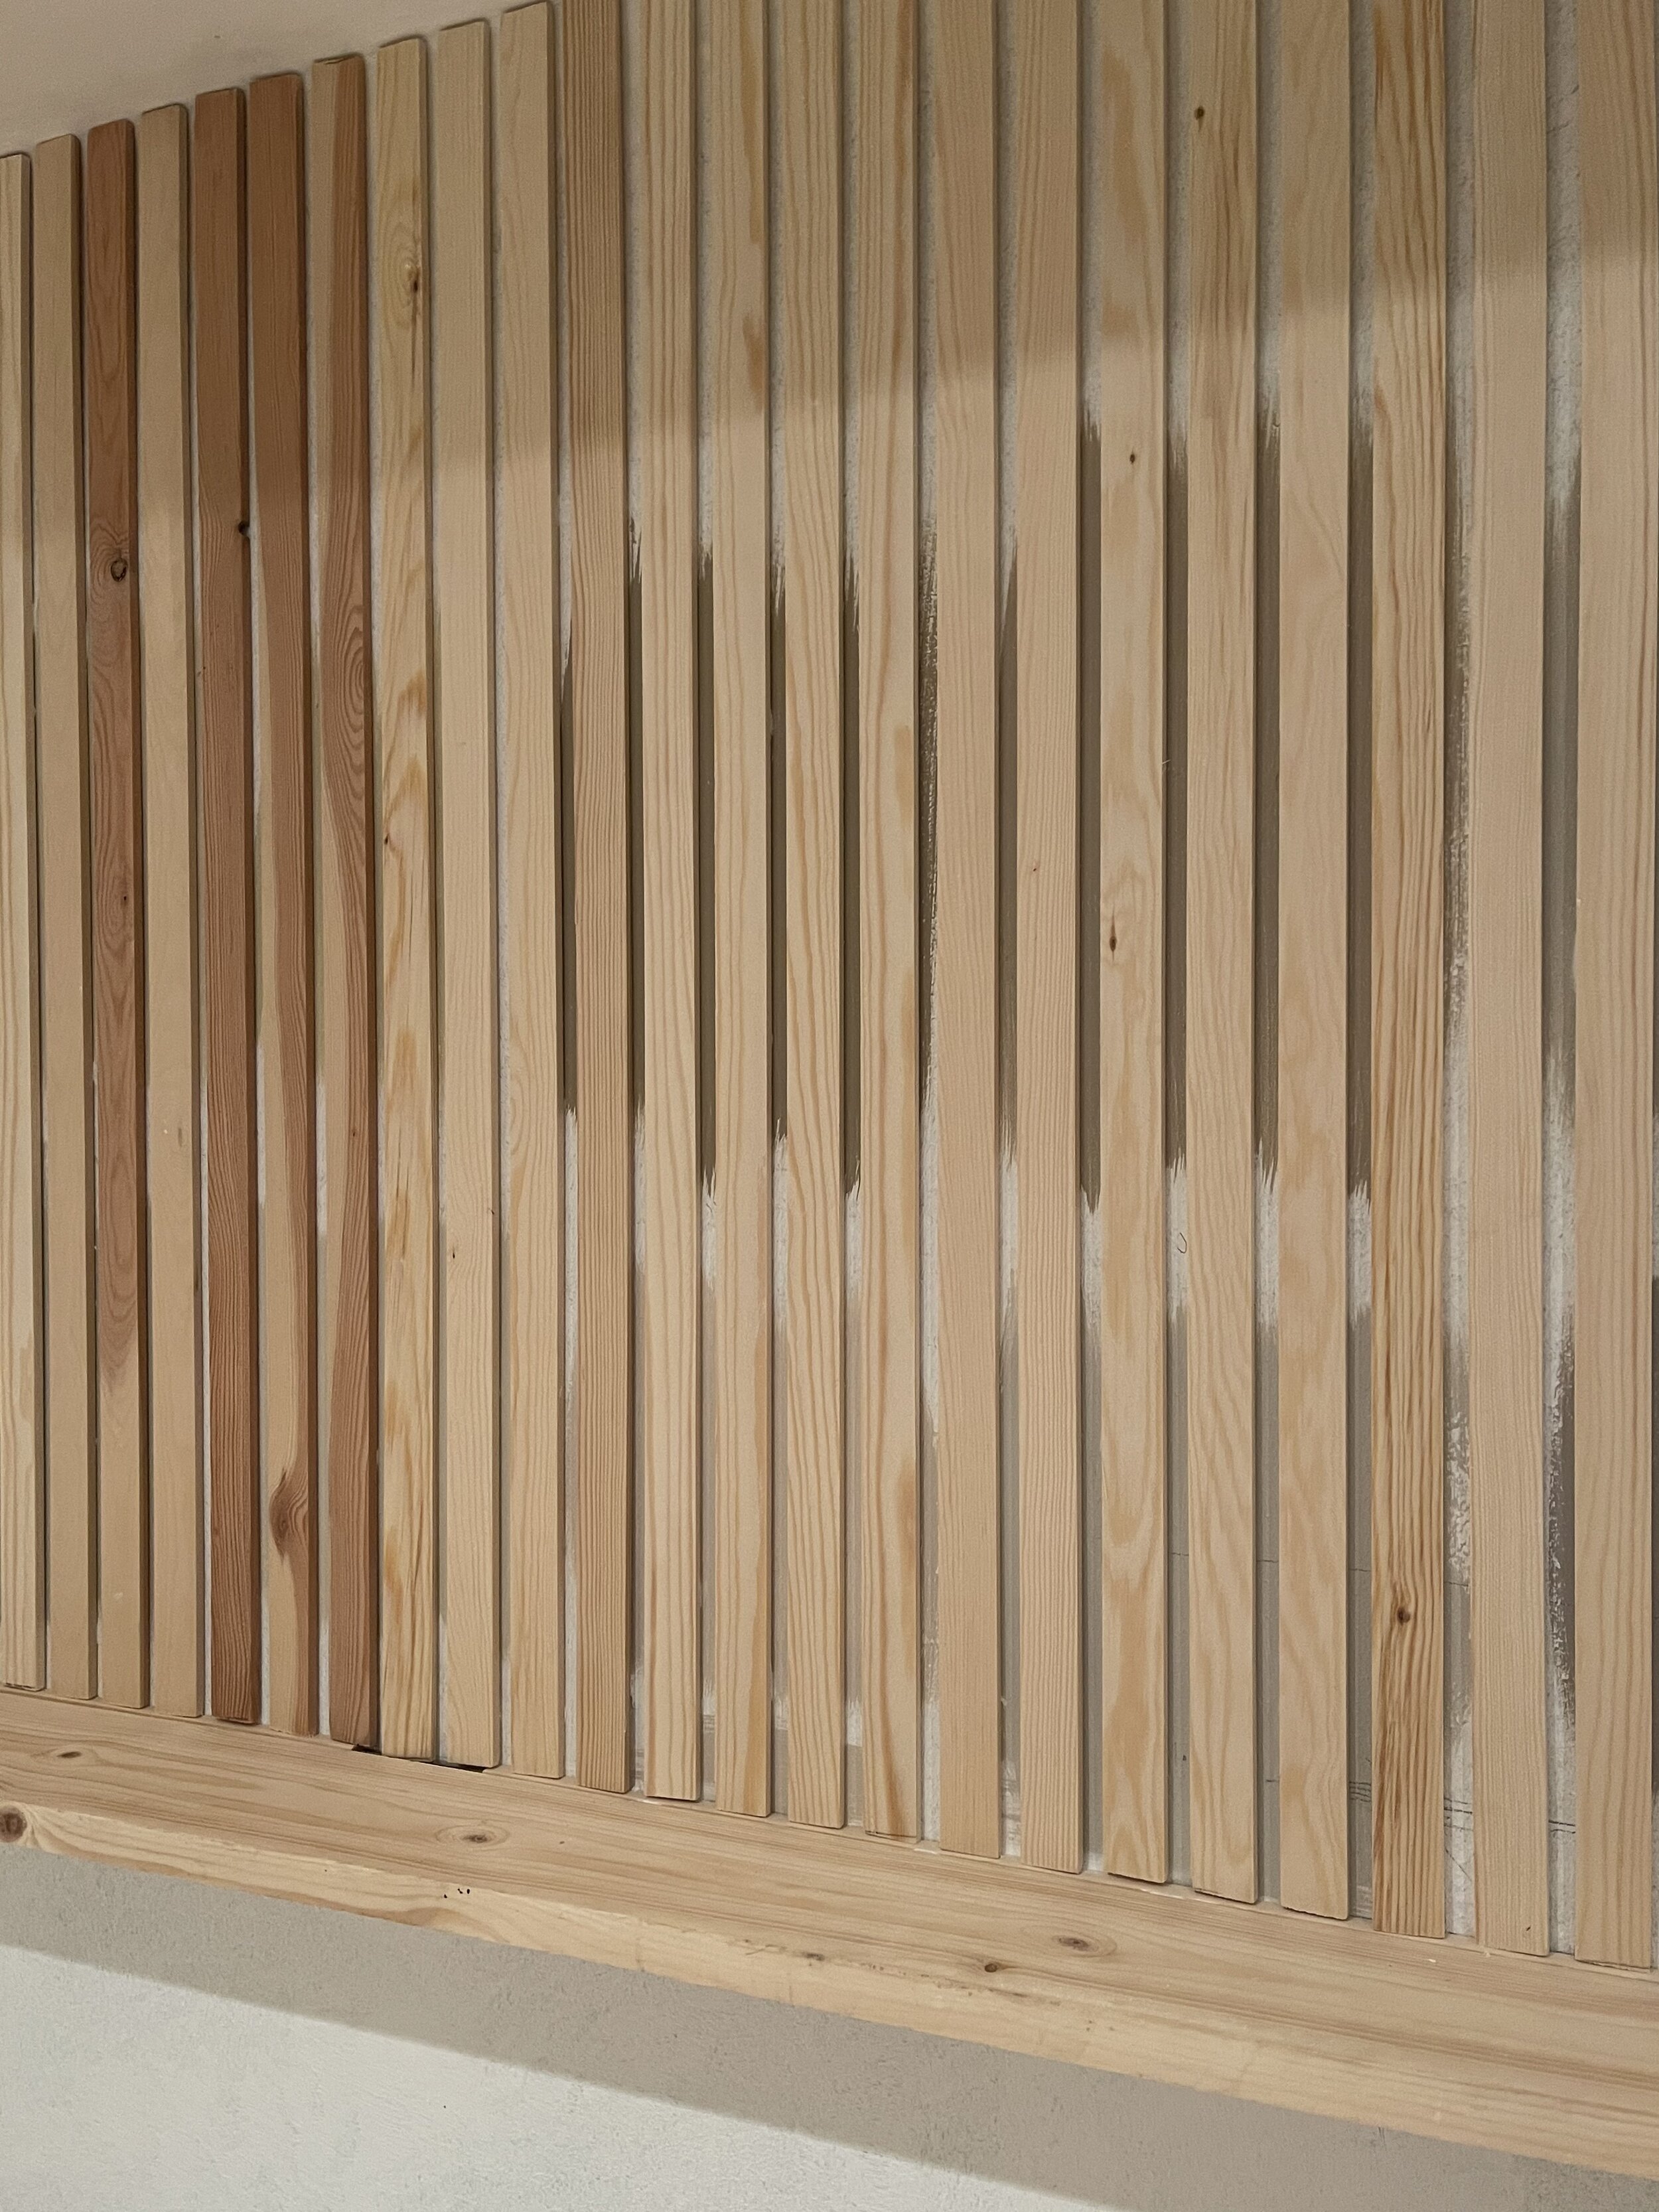
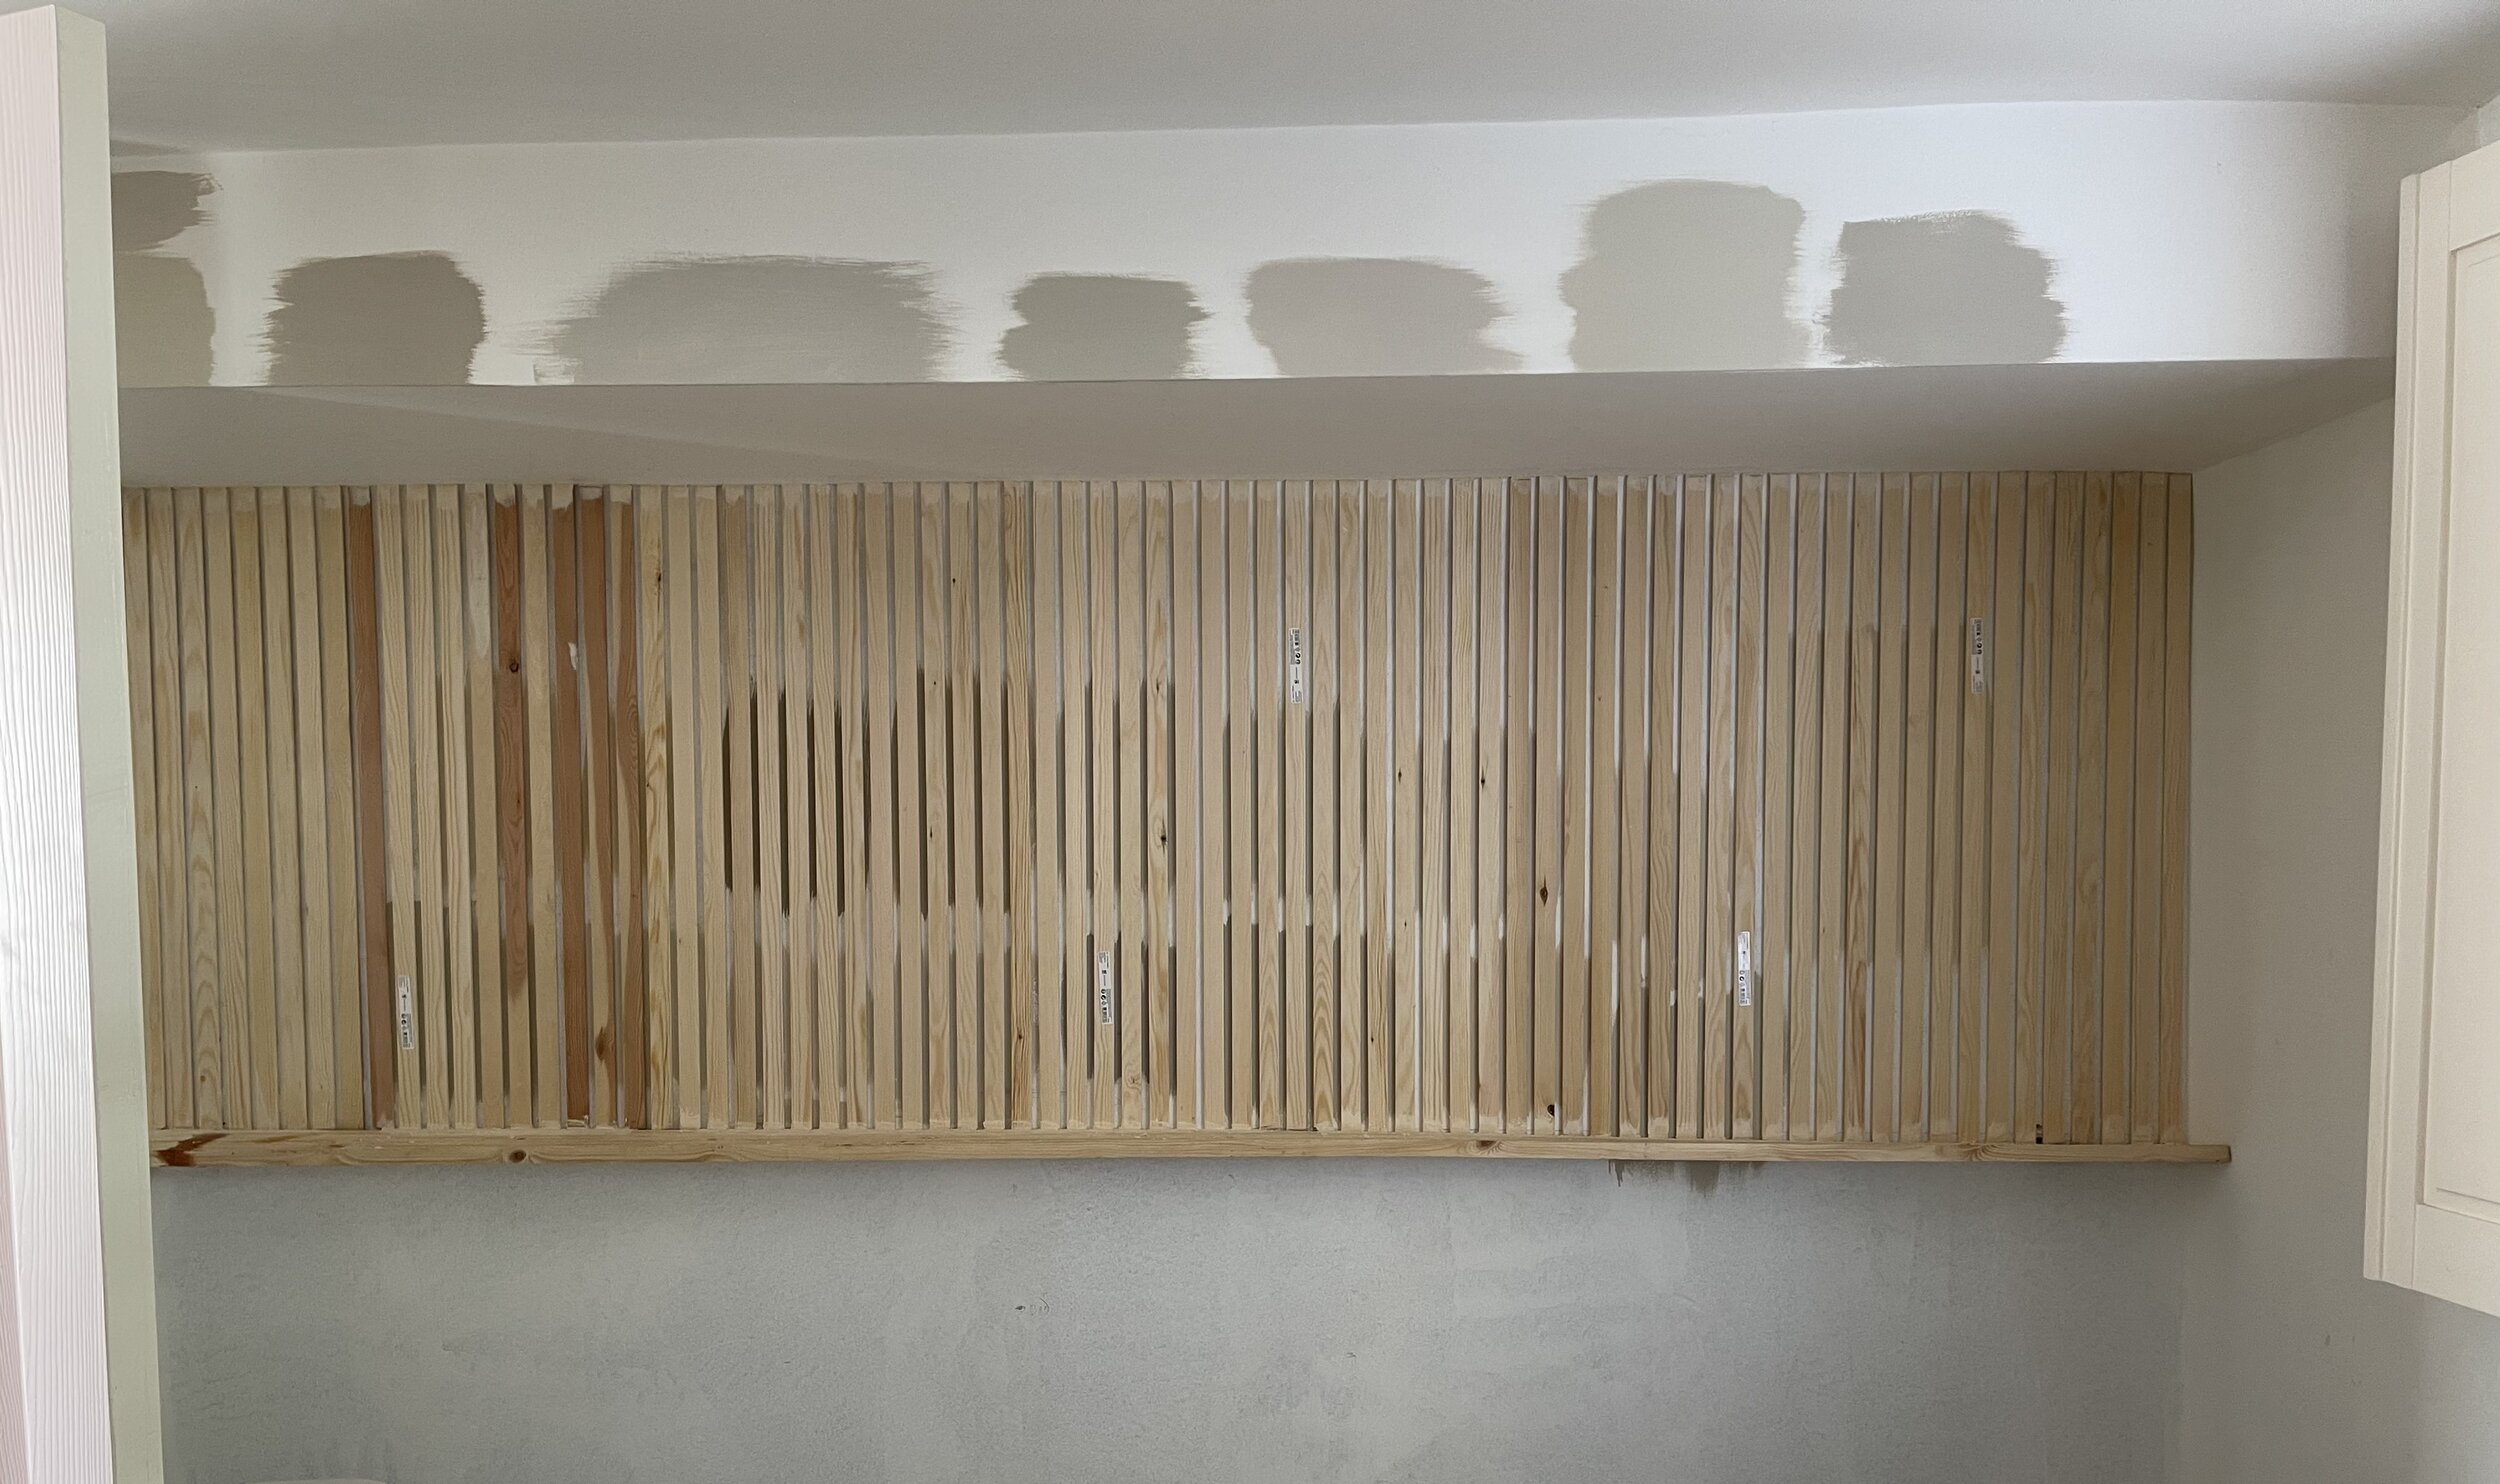
As the back of the sofa was going to be placed against this wall, I decided not to create a full-length slat design. Instead, I opted to take this feature halfway down and separate it from the base of the wall with a slim shelf. It seemed silly to spend money on timber that would not be visible (while the shelf would allow another level of visual interest to display decorative objects).
To create this floating shelf half slat wall I used the following items:
For the slats:
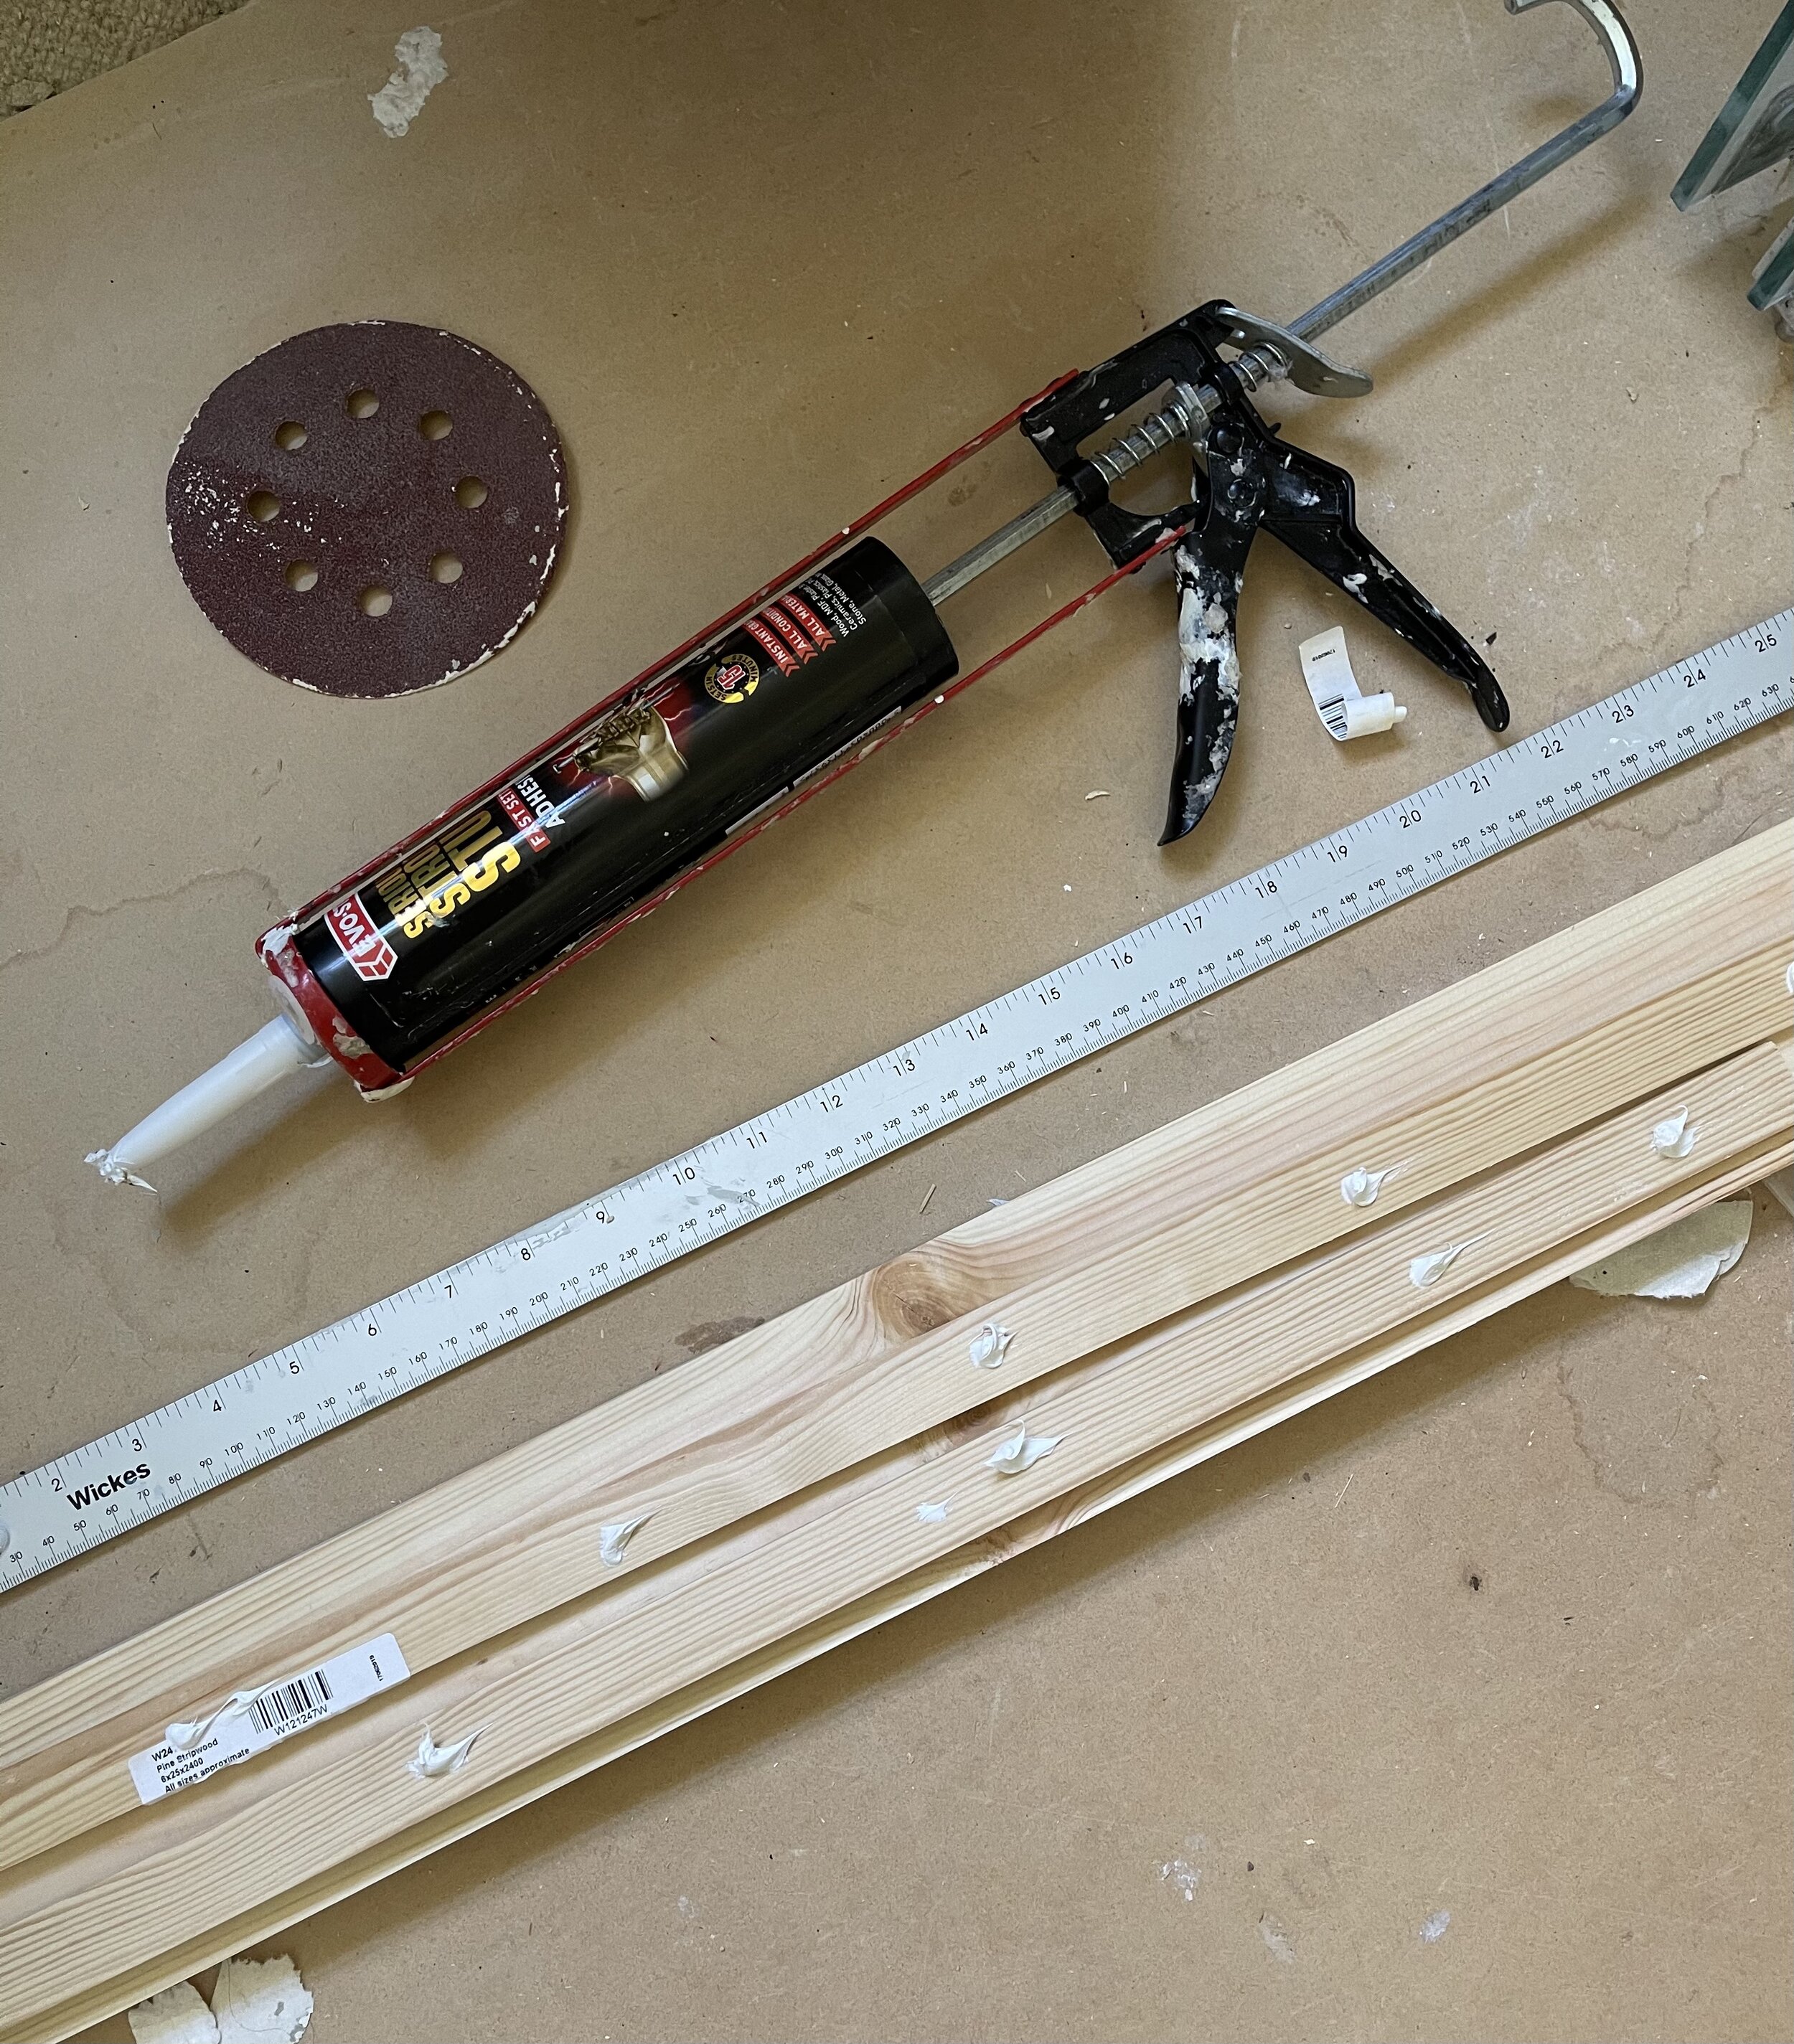
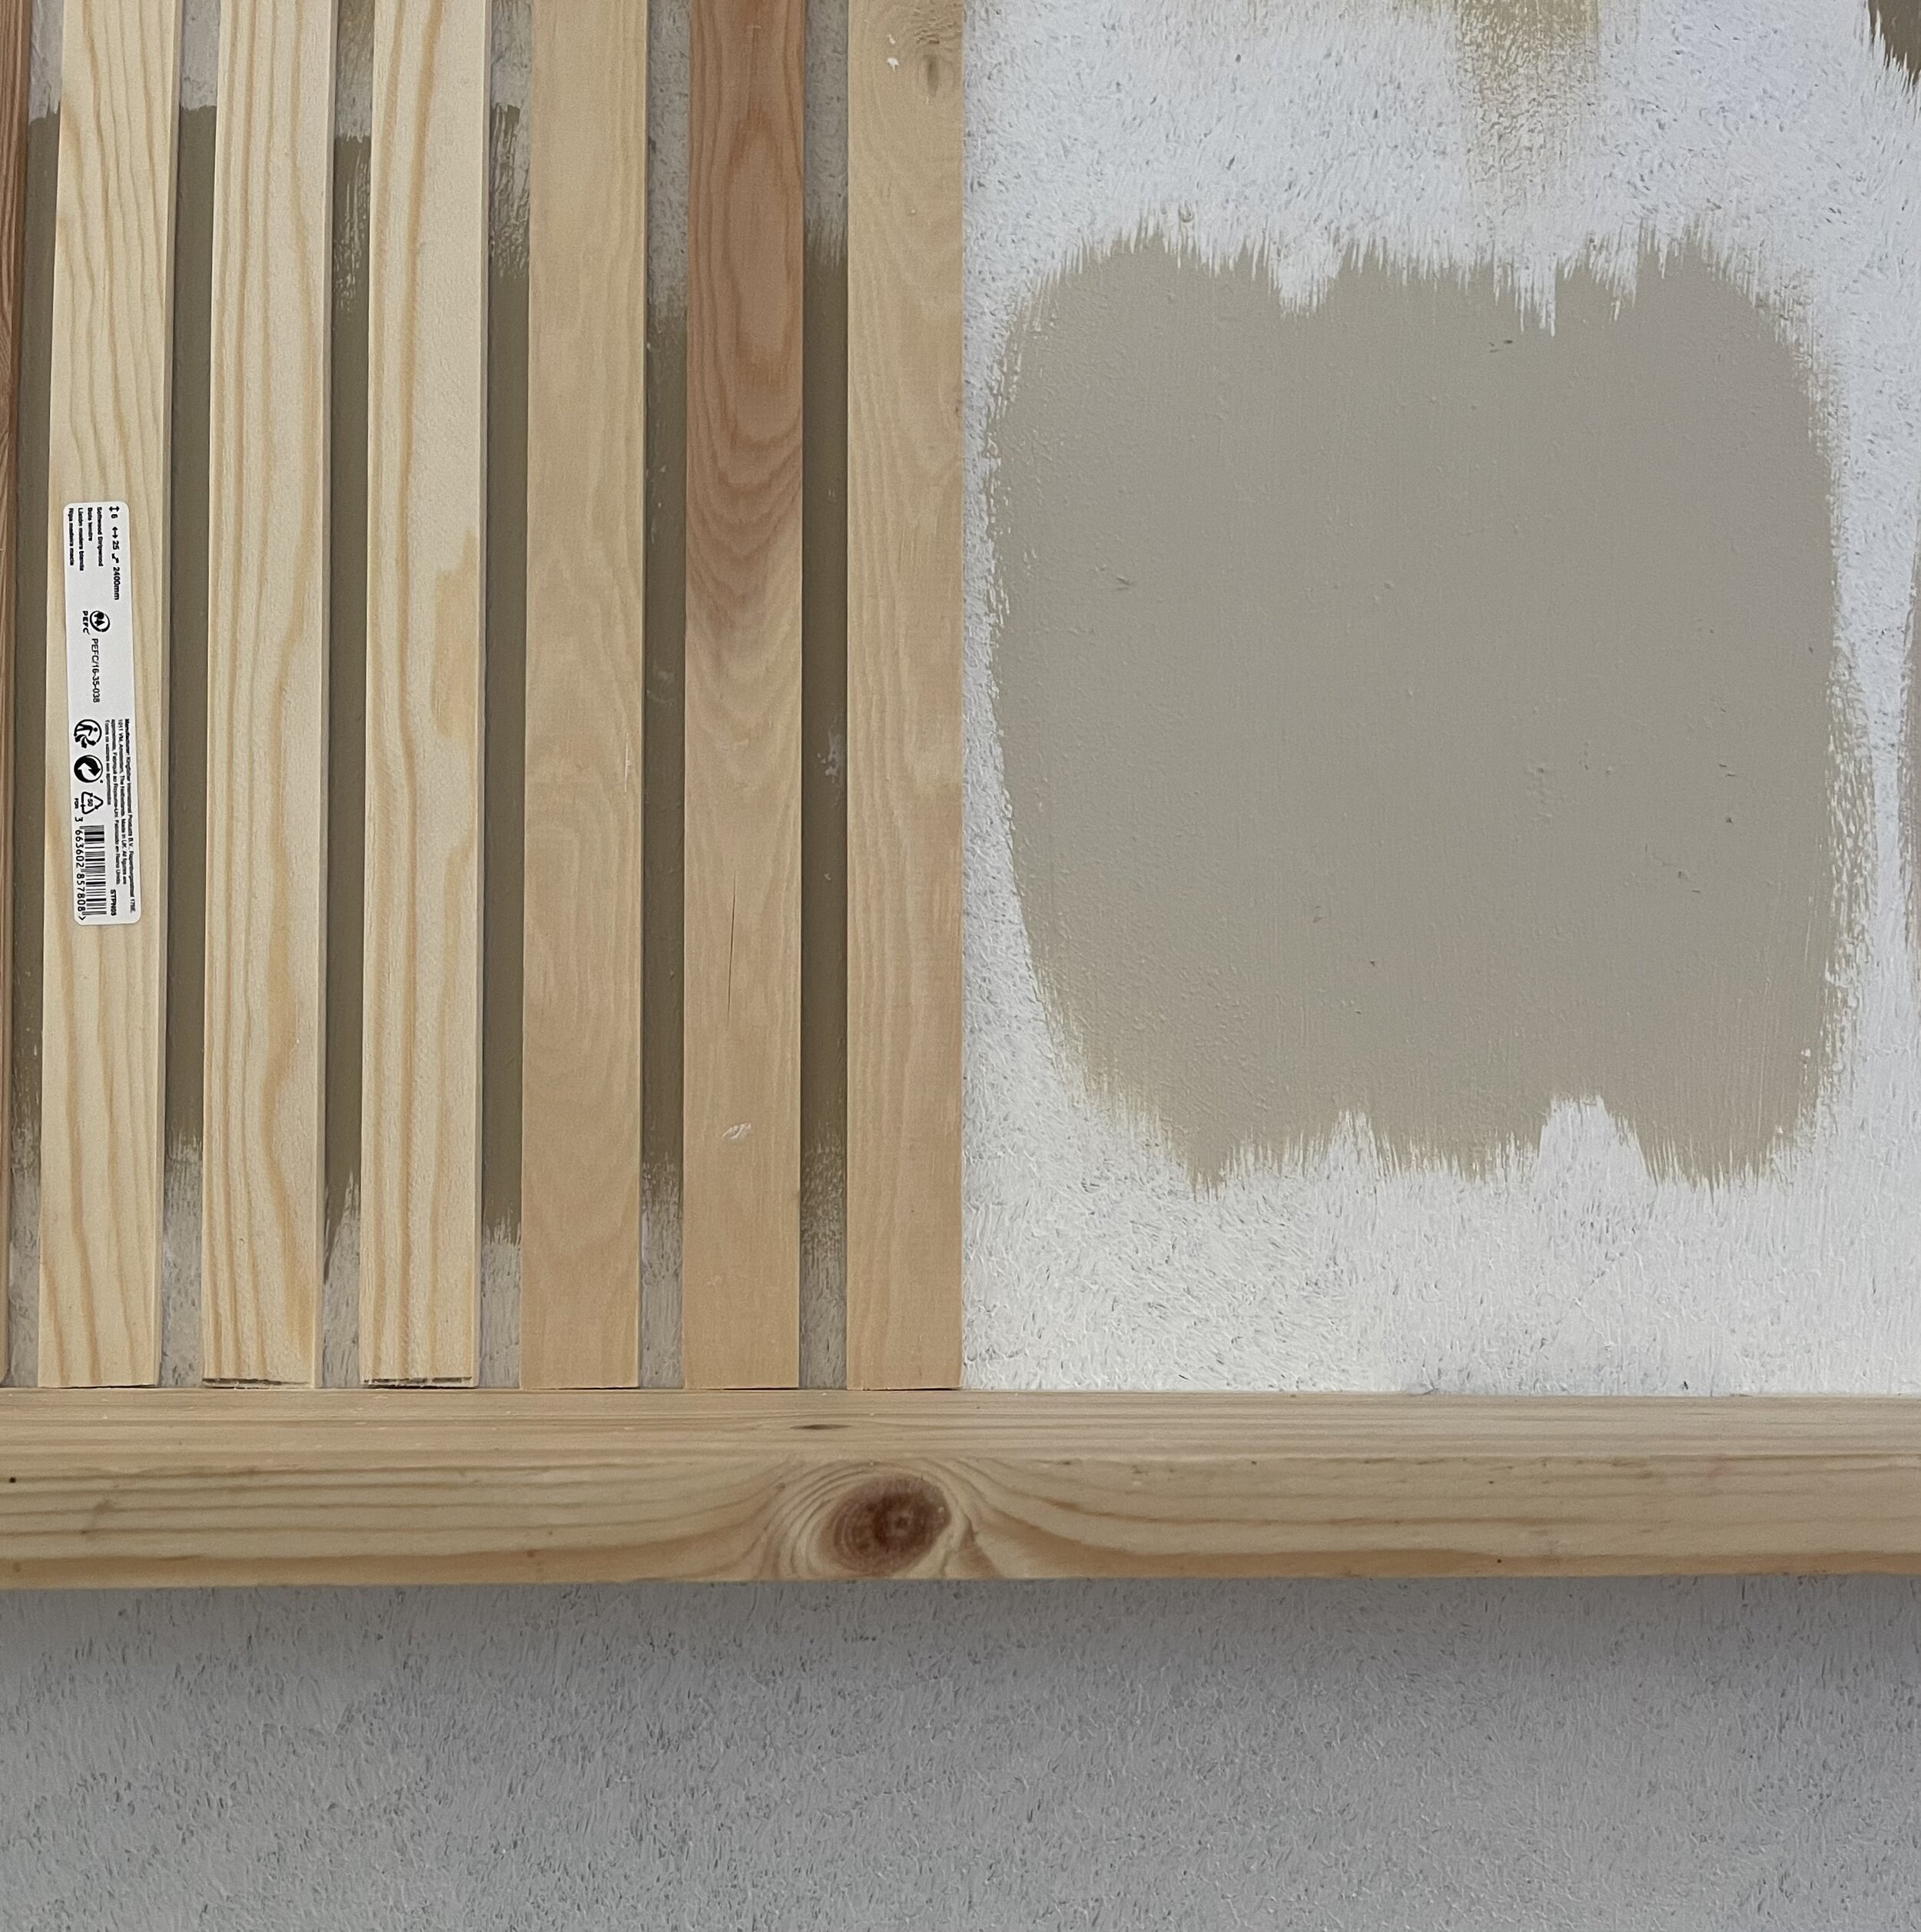
Pine strip wood: 6mm x 25mm x 2.4m
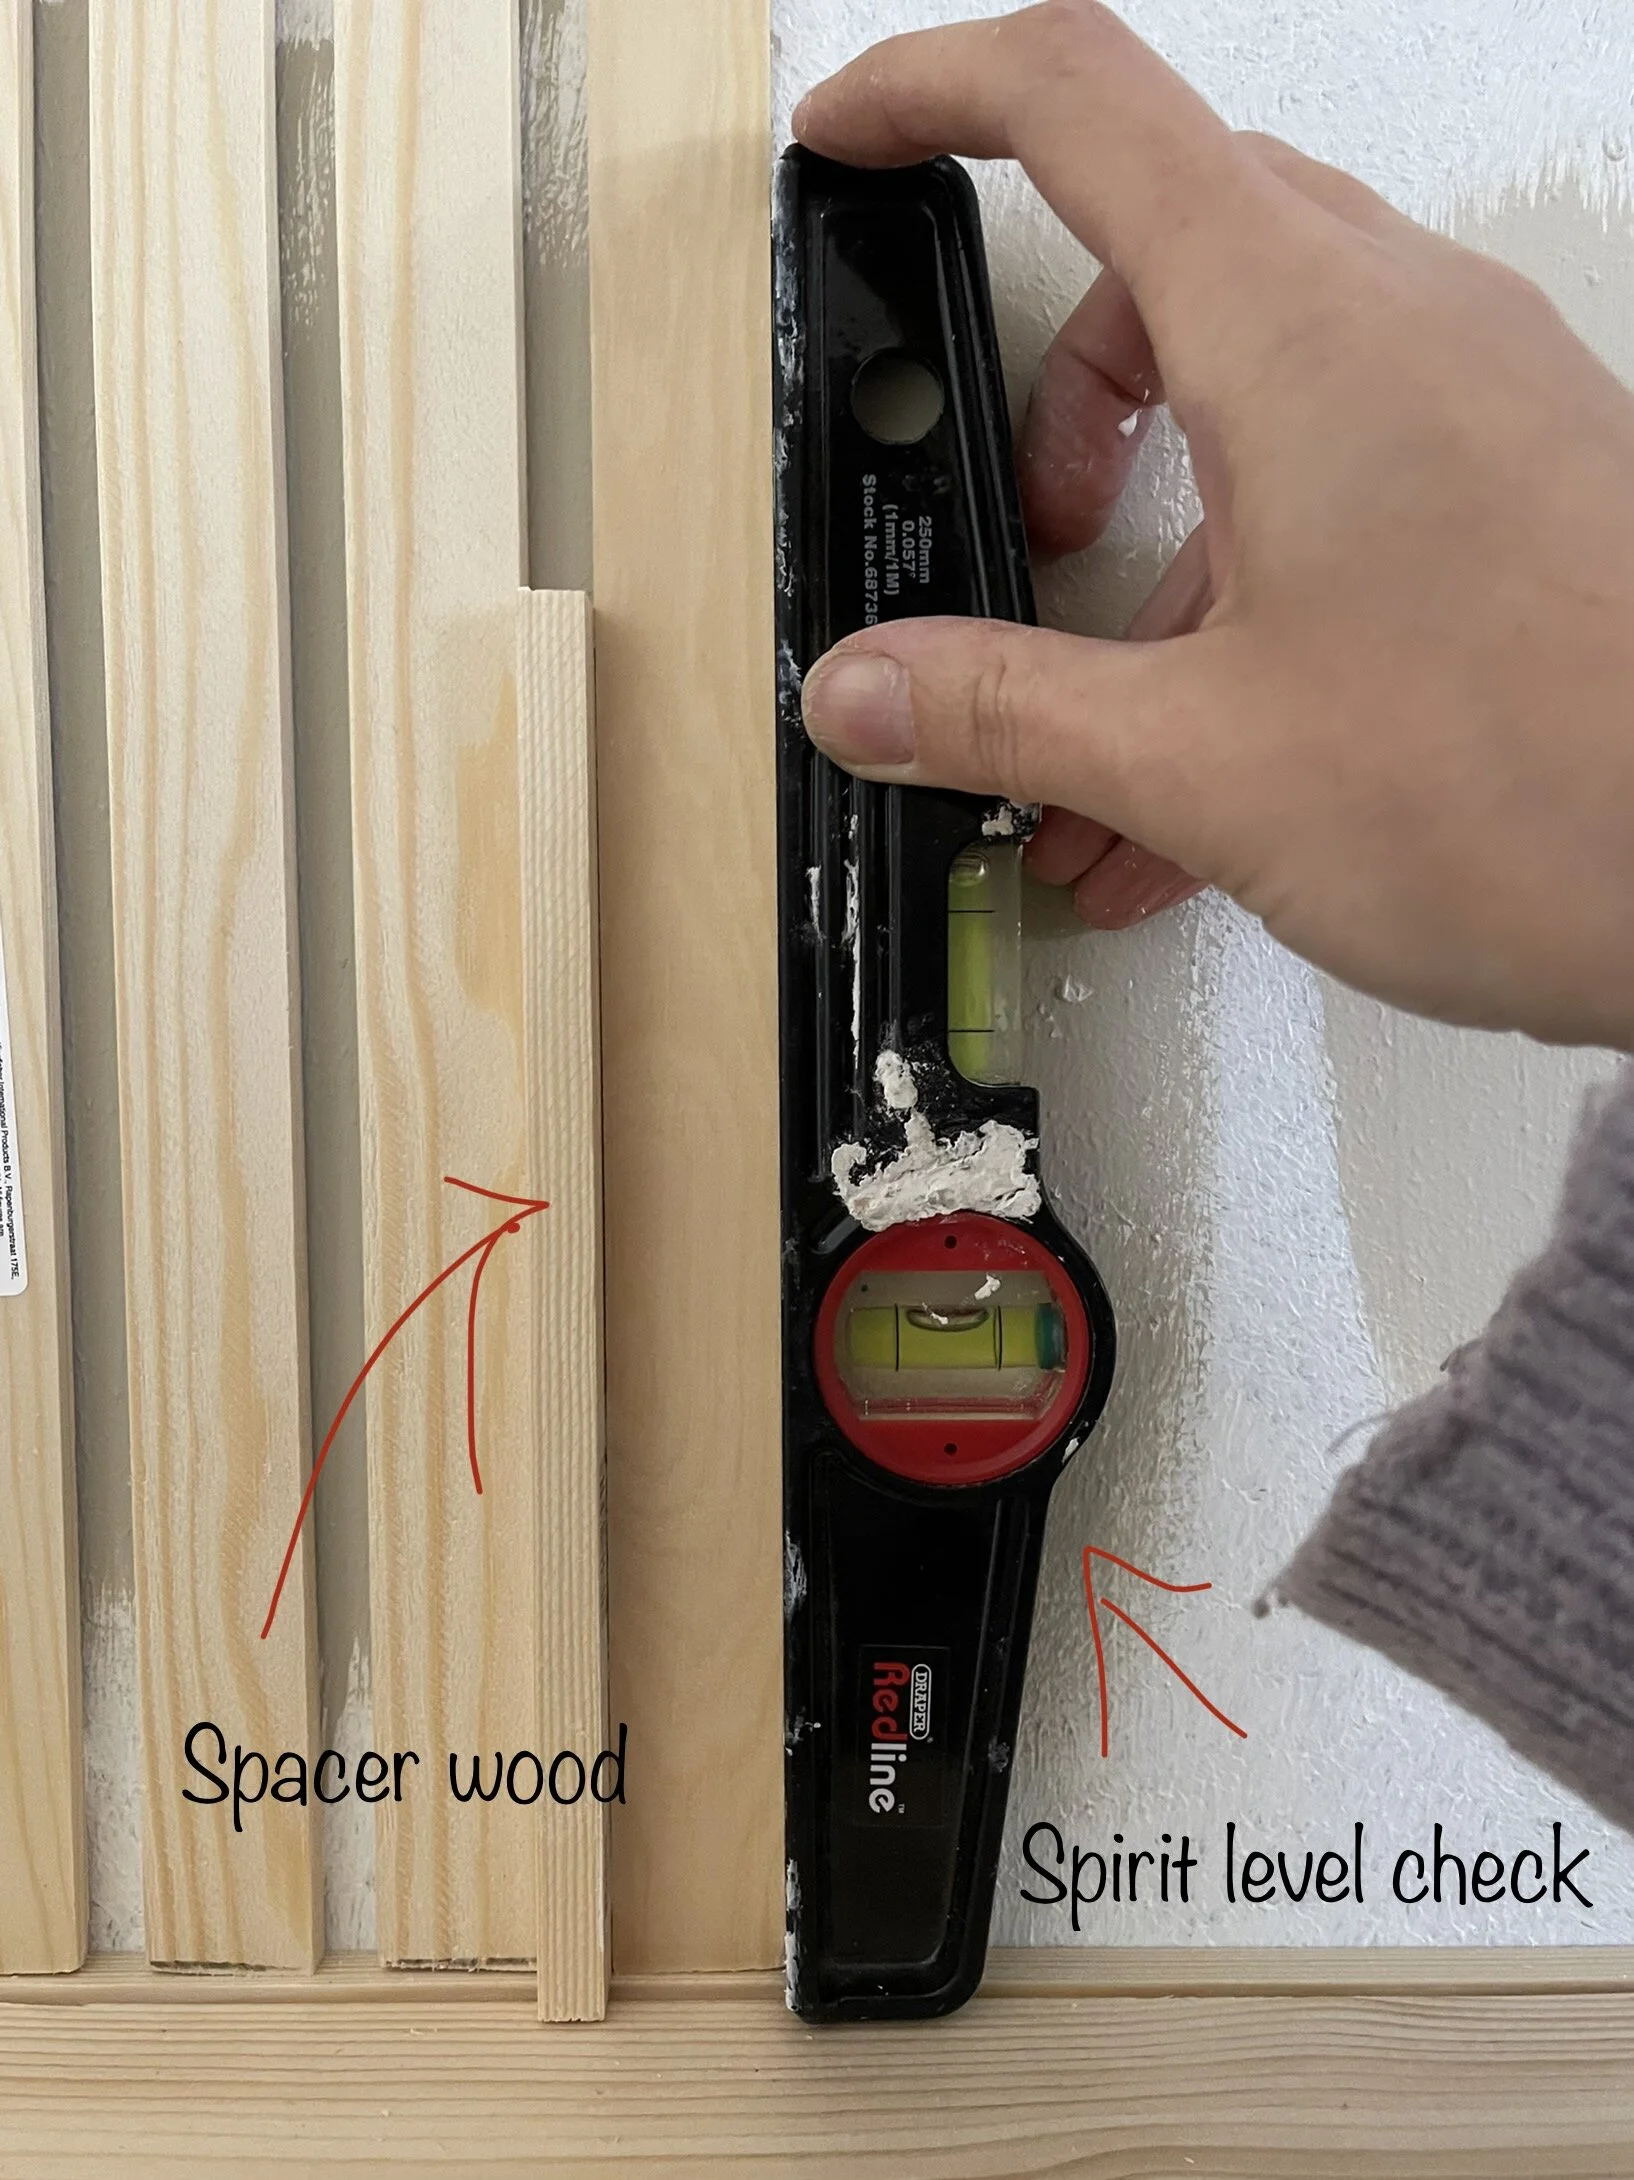
Spacer (a strip of wood that is the exact width of the gap that you want to leave between each slat. My spacer was 1cm wide)
Electric Saw (a hand saw is fine if you don’t have an electric saw as the strip wood is thin, but the DIY will take longer. If doing this by hand I would advise also getting a cheap mitre box to help you cut the wood in a perfectly straight line)
Pencil
No More Nails Mega Grab Adhesive
Wood filler and a filling knife
Microfibre cloth
For the floating shelf:
Plank of timber for the floating shelf (I used 10cm x 2cm x 2.4m)
Floating shelf brackets with wall plugs
A drill with an Auger Wood Drill Bit.
You’ll also require a good quality stain-blocking primer and an eggshell paint unless you want to just stain the wood a natural shade.
First, decide where you want your floating shelf to sit on the wall. Use an aluminium ruler and a spirit level to mark a straight pencil line across the wall where the shelf will sit. Using a drill, fix a number of floating shelf brackets across the pencil line.
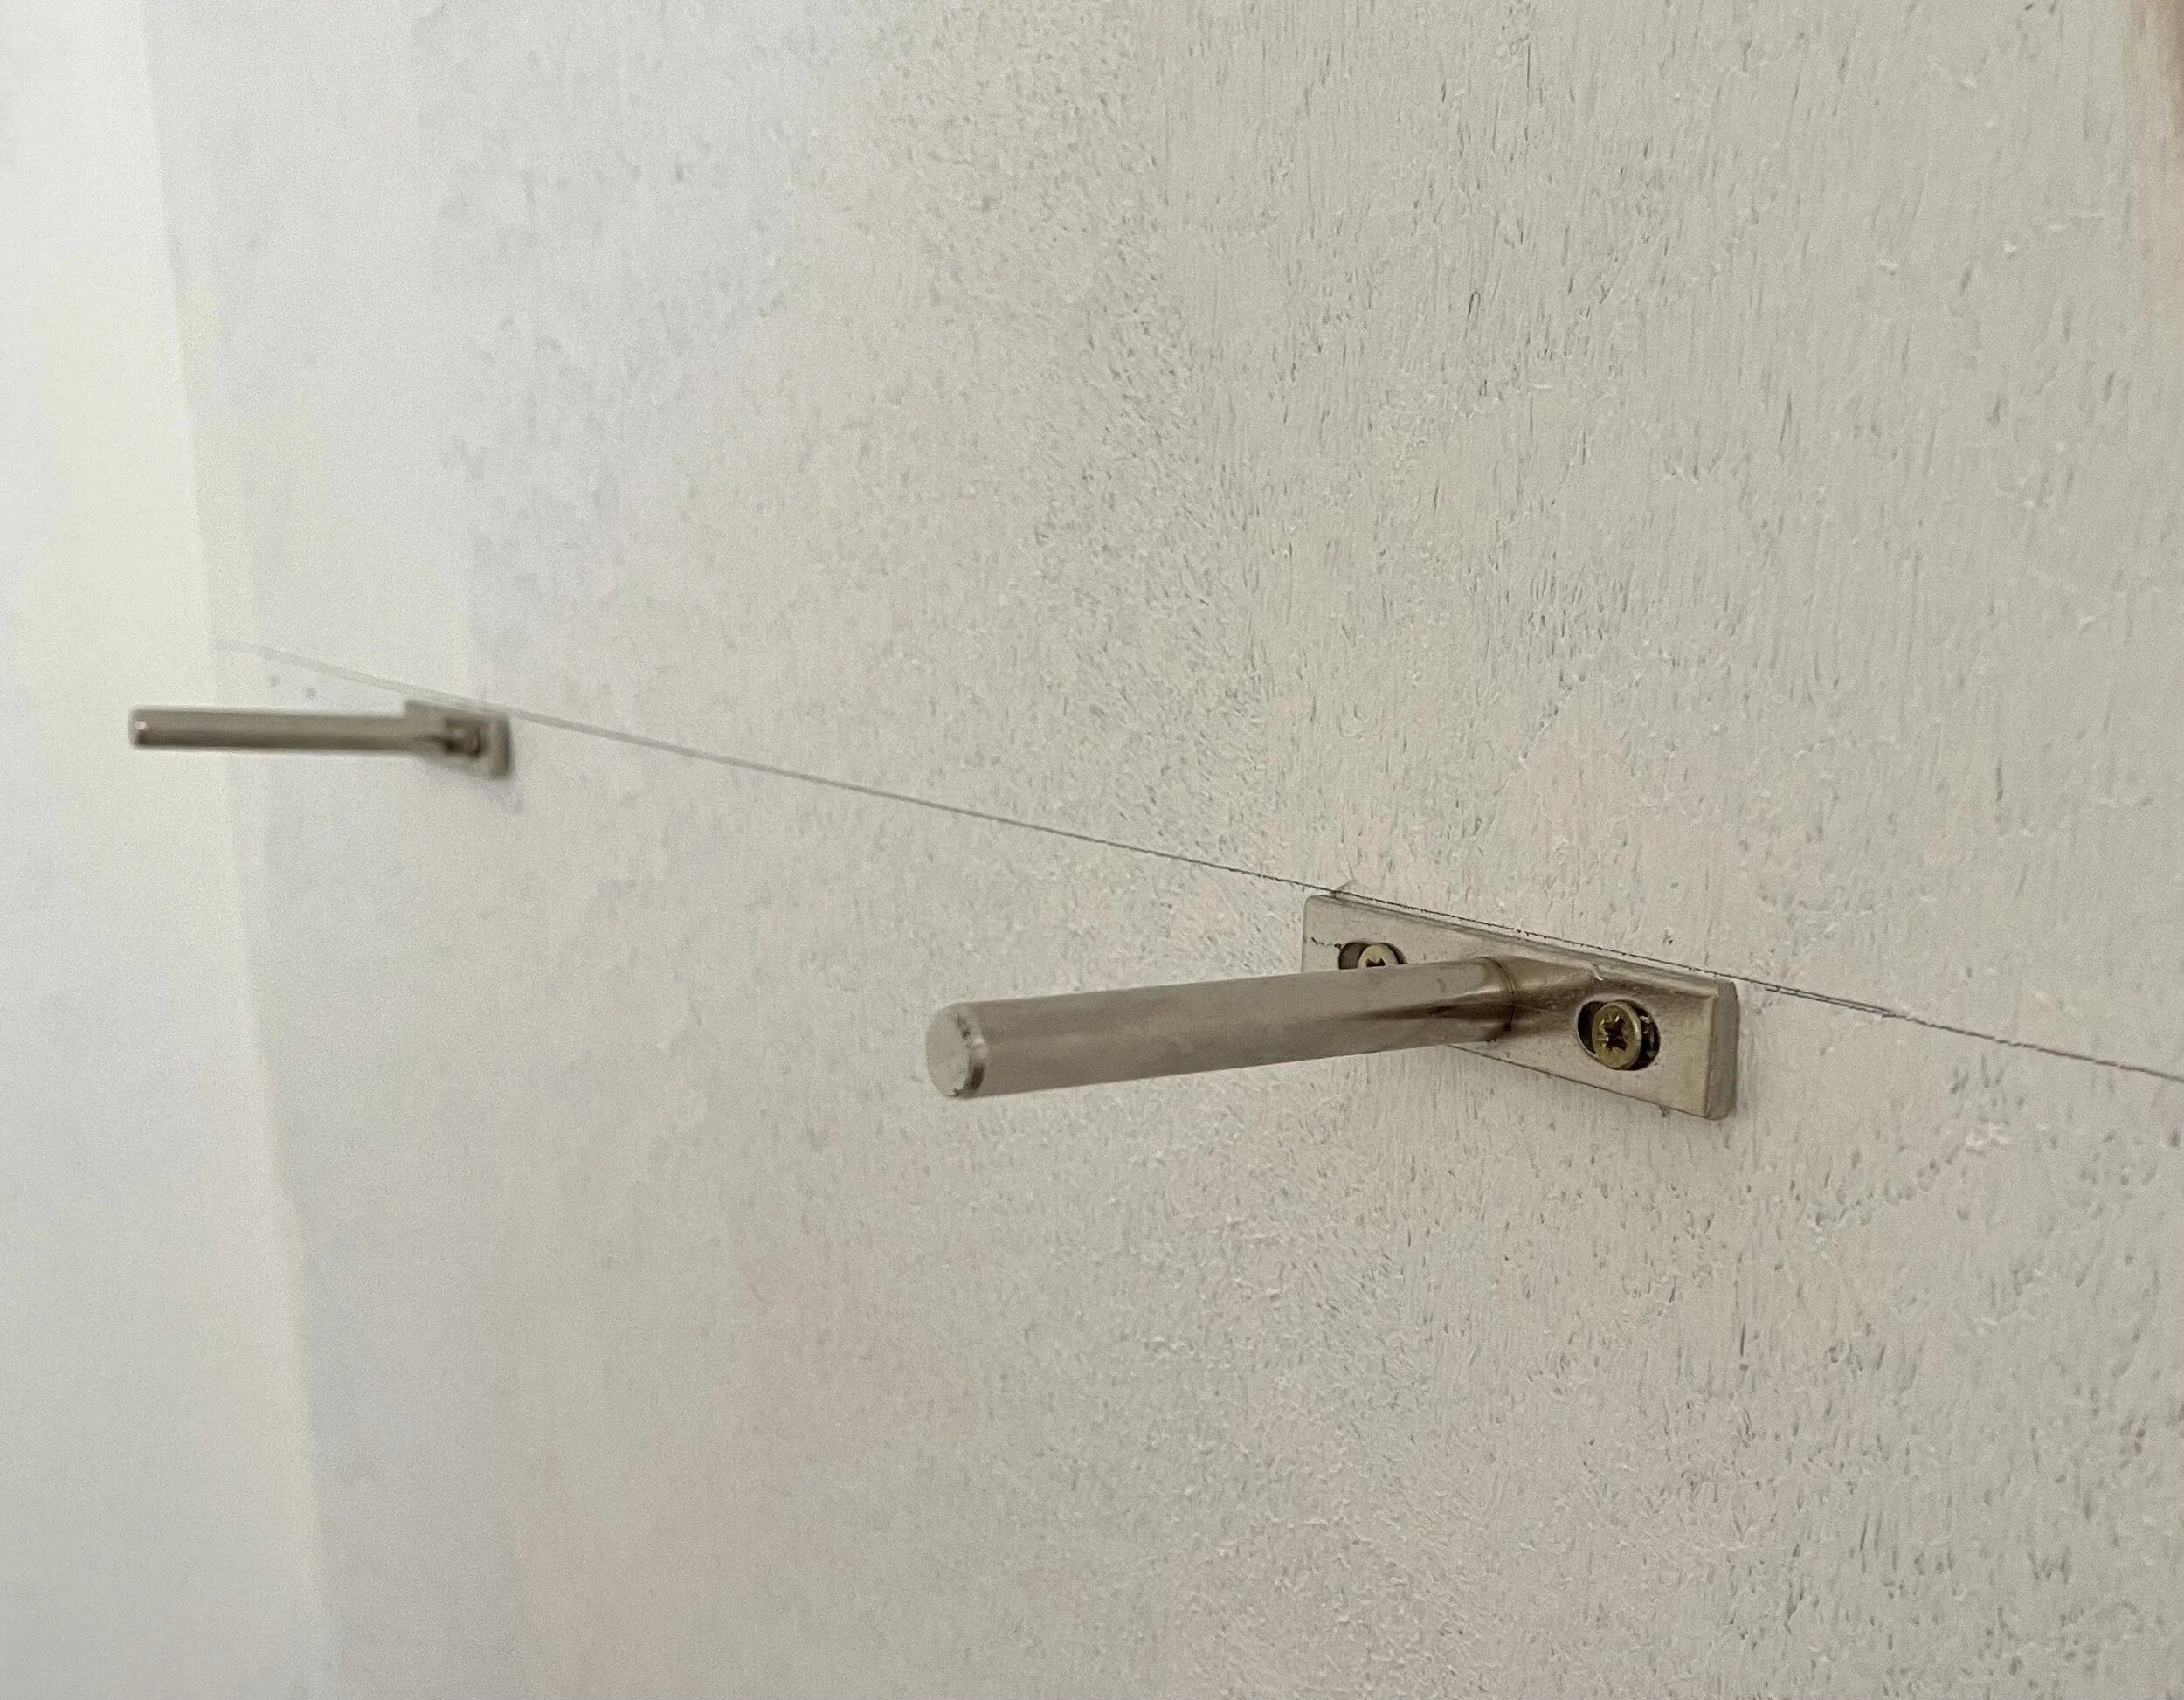
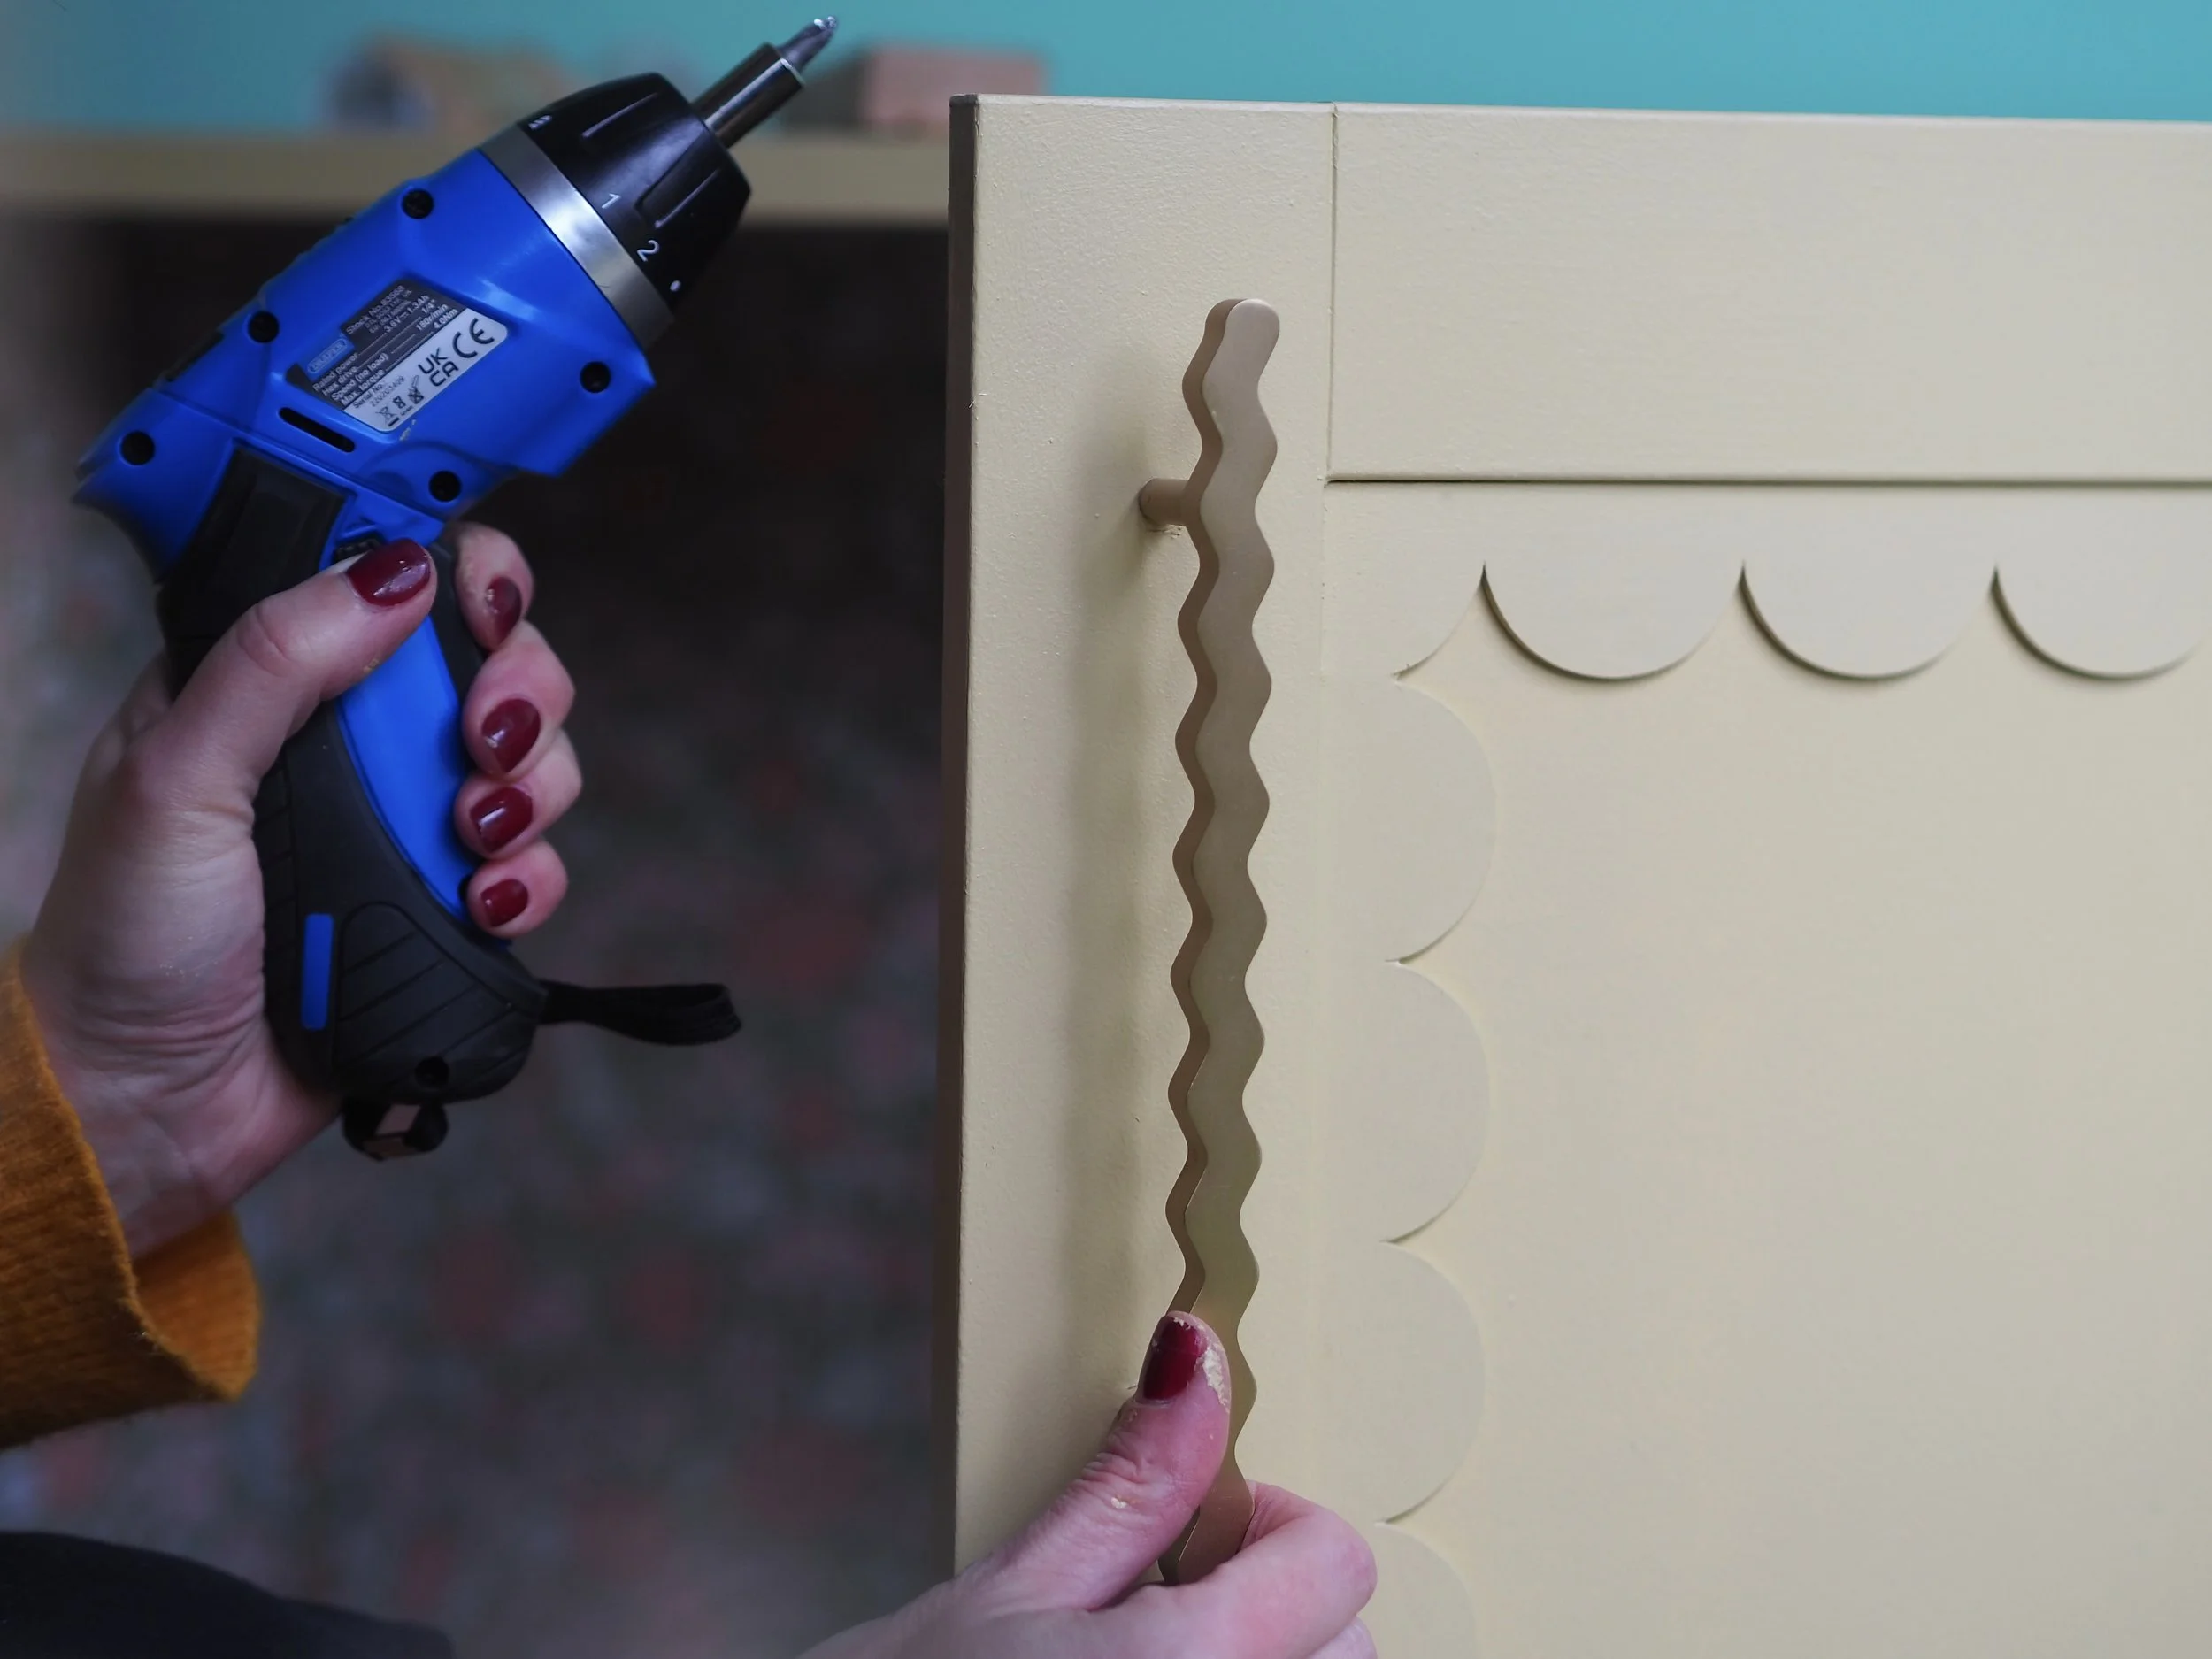
Cut your timber plank to the length of your wall (if your wall is wider than your timber, add another plank on at the end - the join can be filled and painted over, so it will not be visible). Once your brackets are securely attached to the wall, pick up your strip of timber and press it firmly against the tips of the brackets until a small indent is created in the wood (by doing this, you will know exactly where to drill your wood holes into the side of the plank, without relying on measurements).
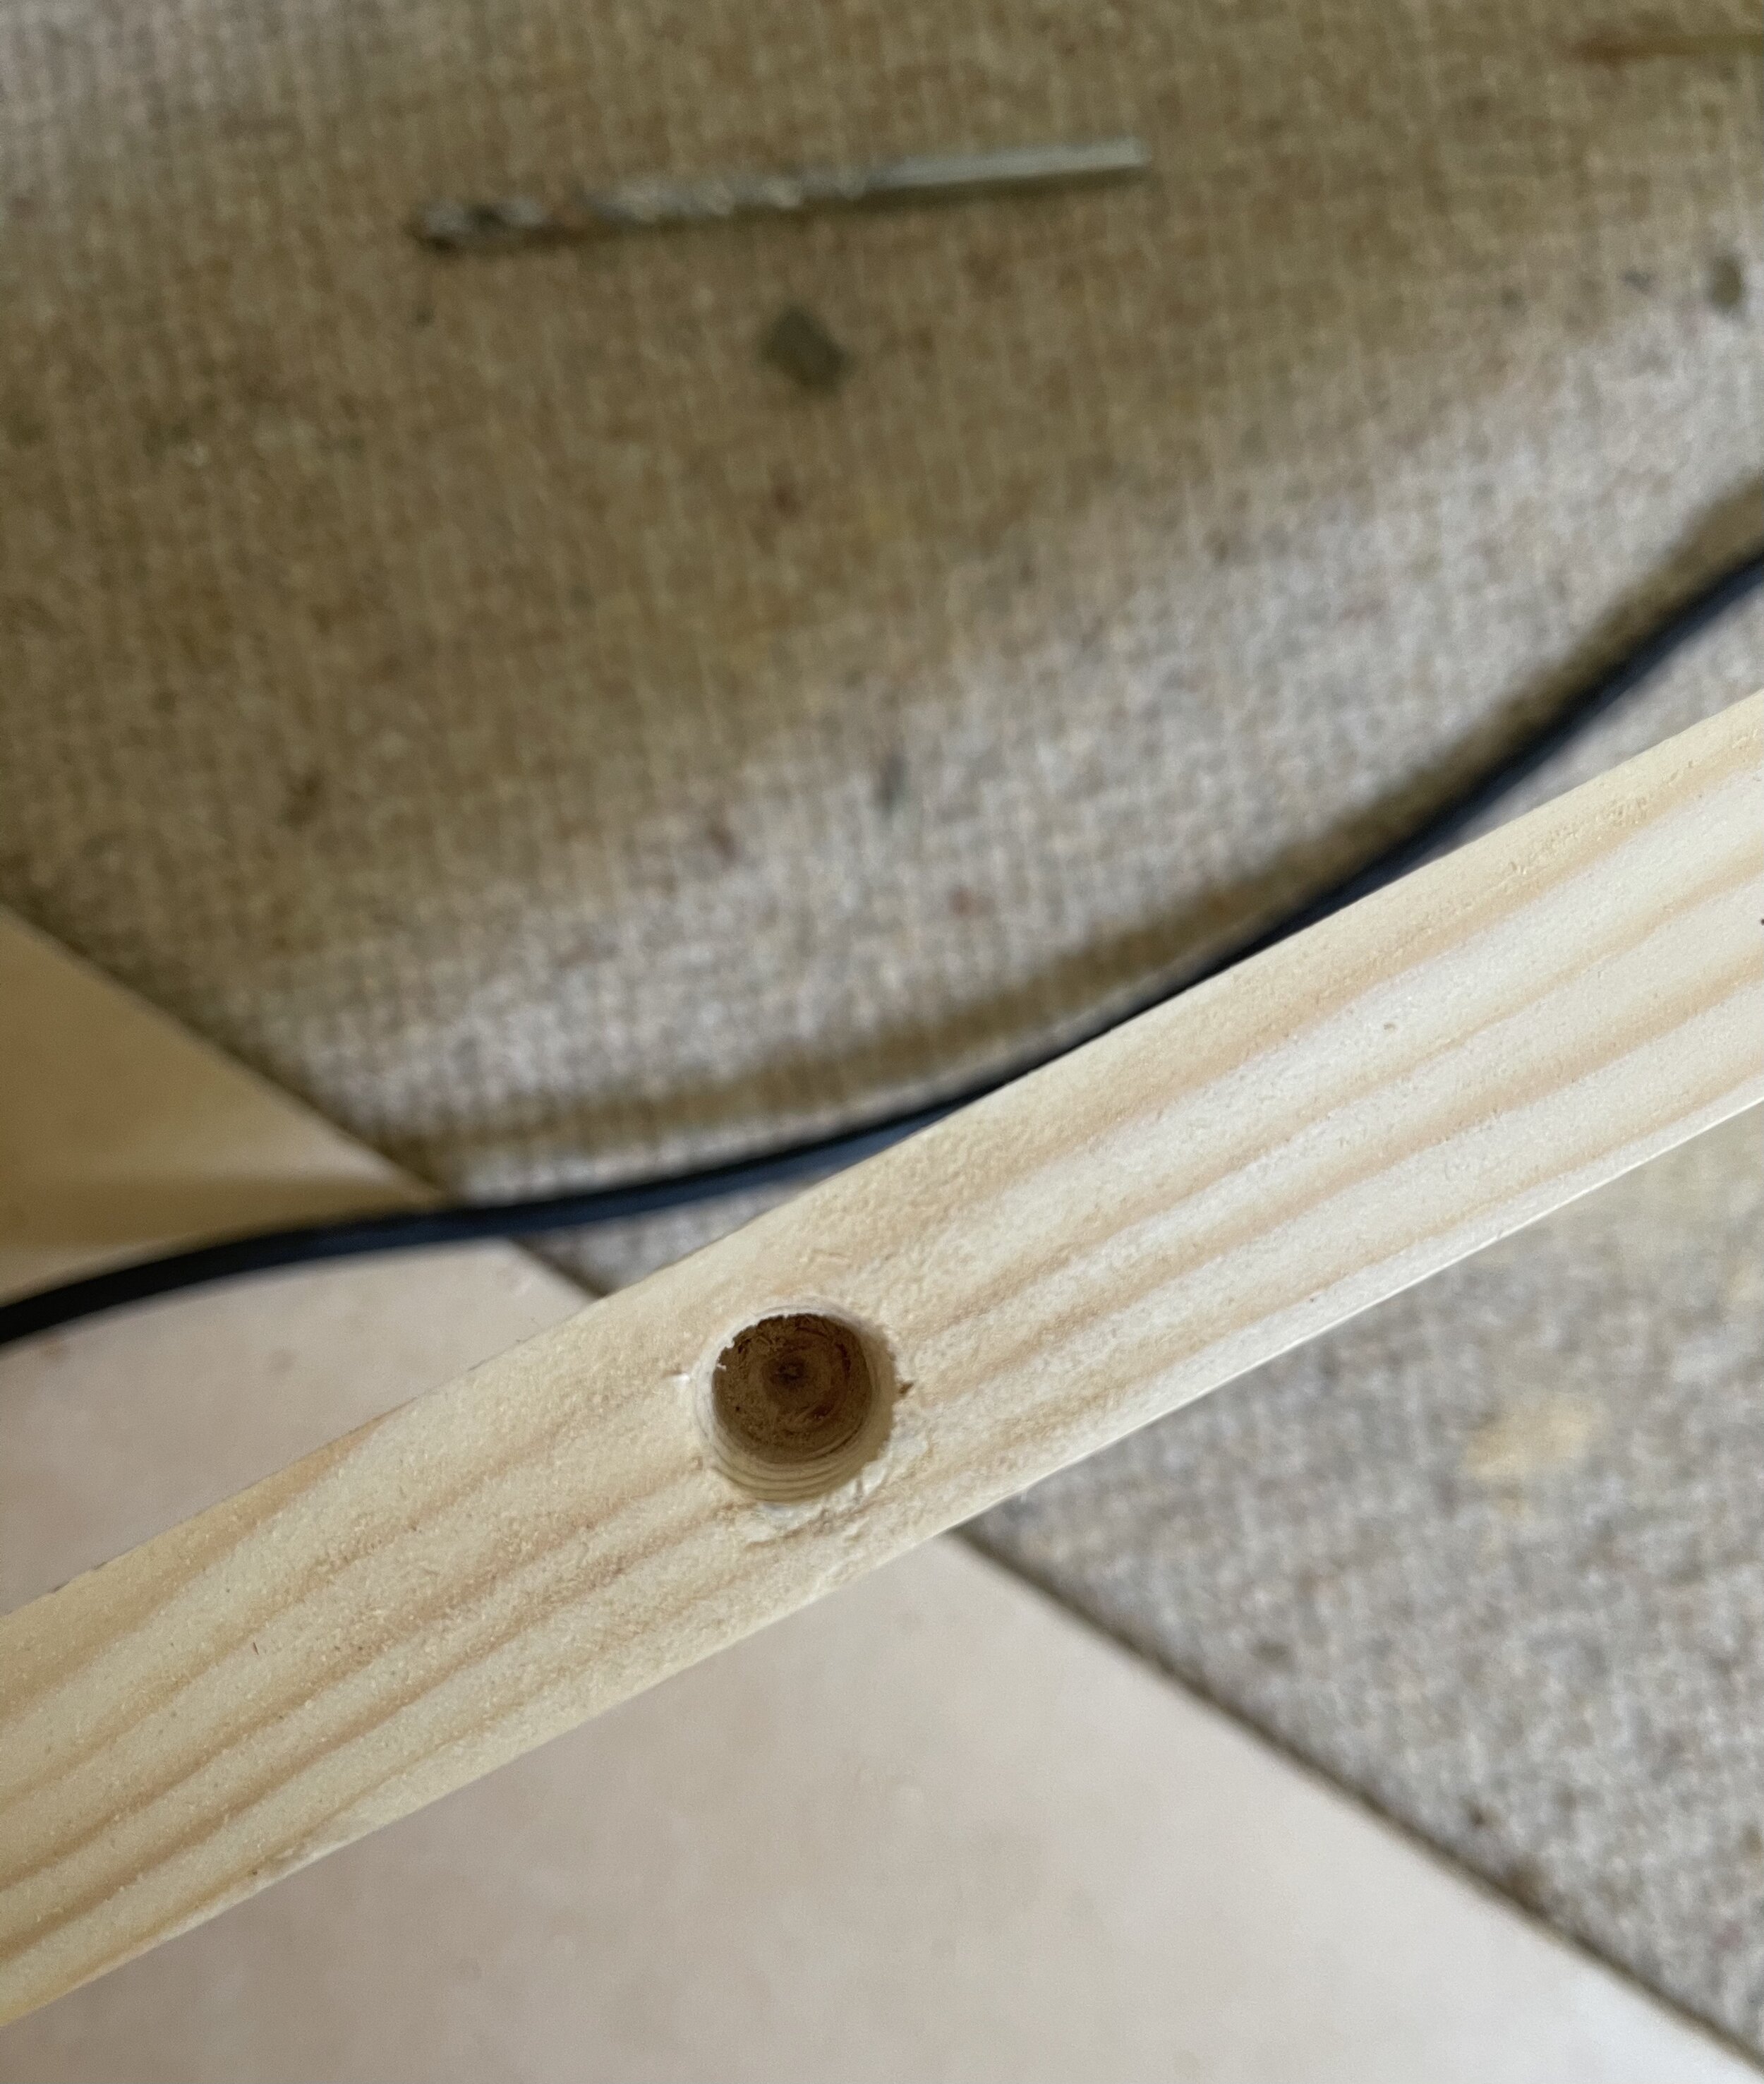
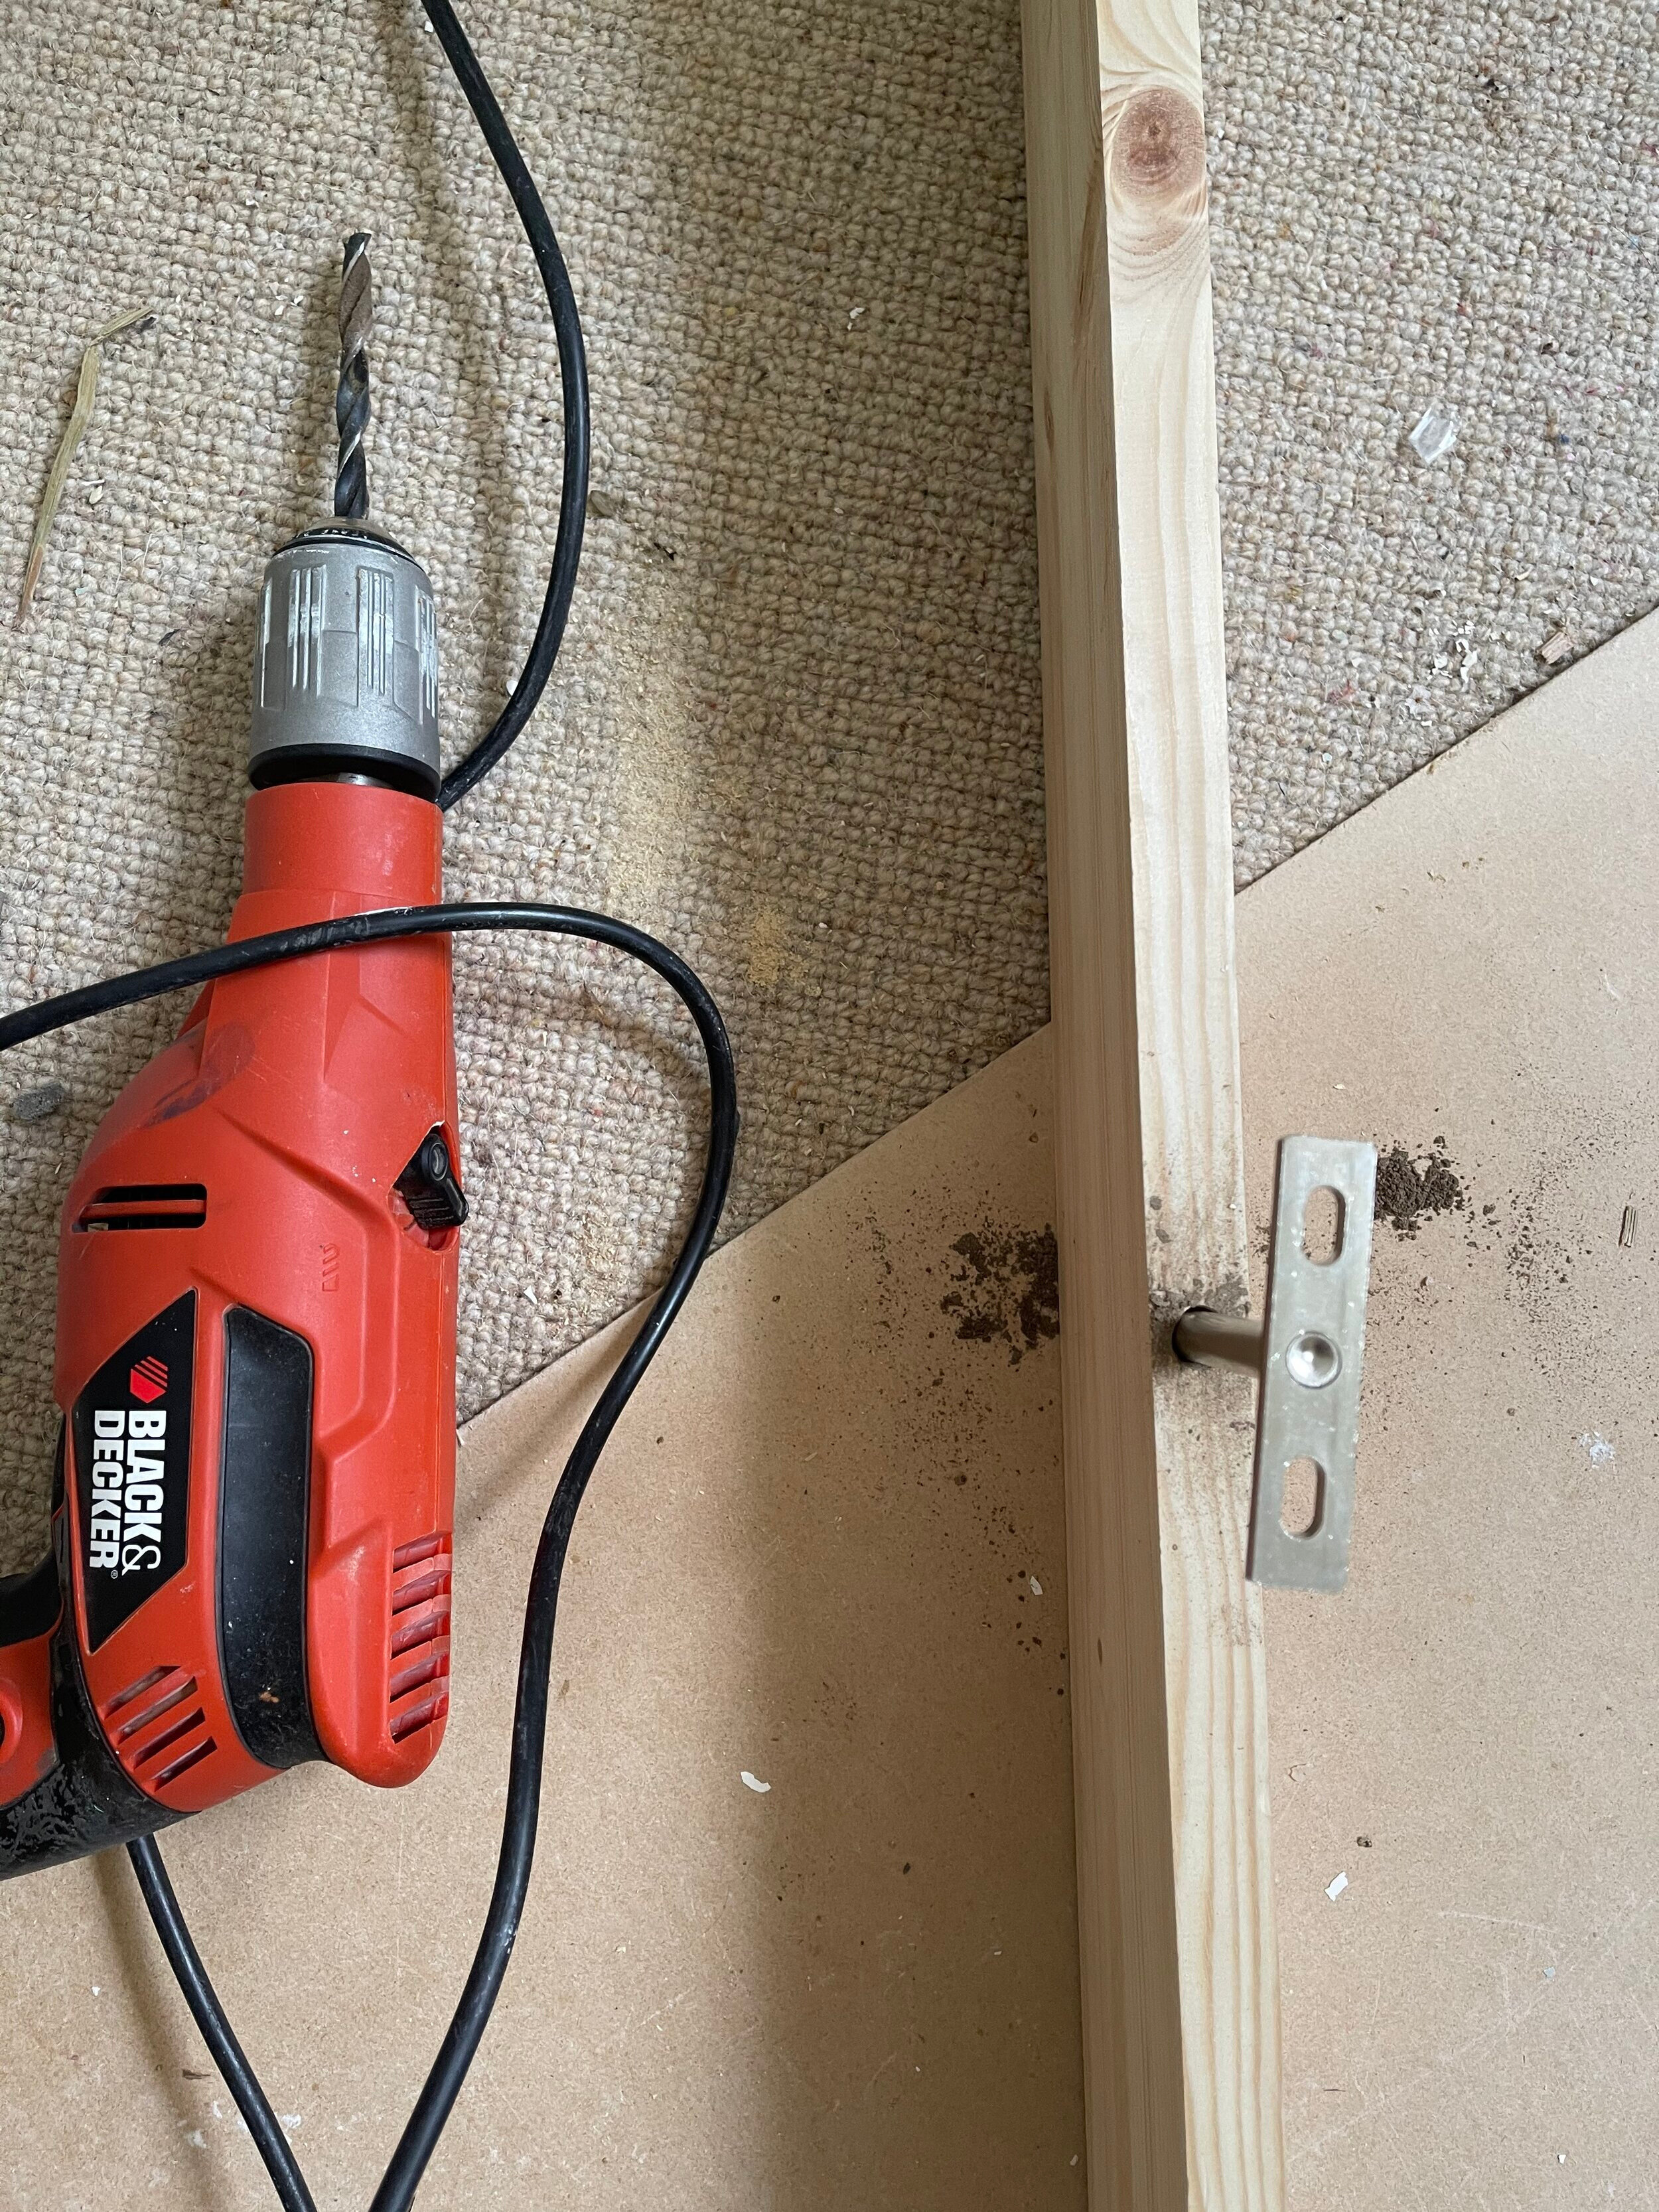
Choose an Auger Drill Bit slightly wider than the pin of your floating shelf brackets. Drill a deep hole into the timber on the side so that it can be slotted onto the bracket. Once all your holes are drilled, check the plank aligns with all the bracket positions, then remove it from the wall and fill the holes with a strong mega-grab adhesive. Slot the glued-filled plank back onto the brackets and hold it firm for a while to secure (the glue will provide extra adhesion to make sure your shelf remains fastened to the wall and won’t slide off the bracket pins).
DIY NOTE: I have to say, although this is the neatest and tidiest way of having a floating shelf as you cannot see any fixings, I did not find it easy AT ALL. If you are not the most confident DIYer, then I would advise you to use alternative floating shelf brackets which can be seen (but you won’t need to drill deep holes into the side of wooden planks which I found quite strenuous work).
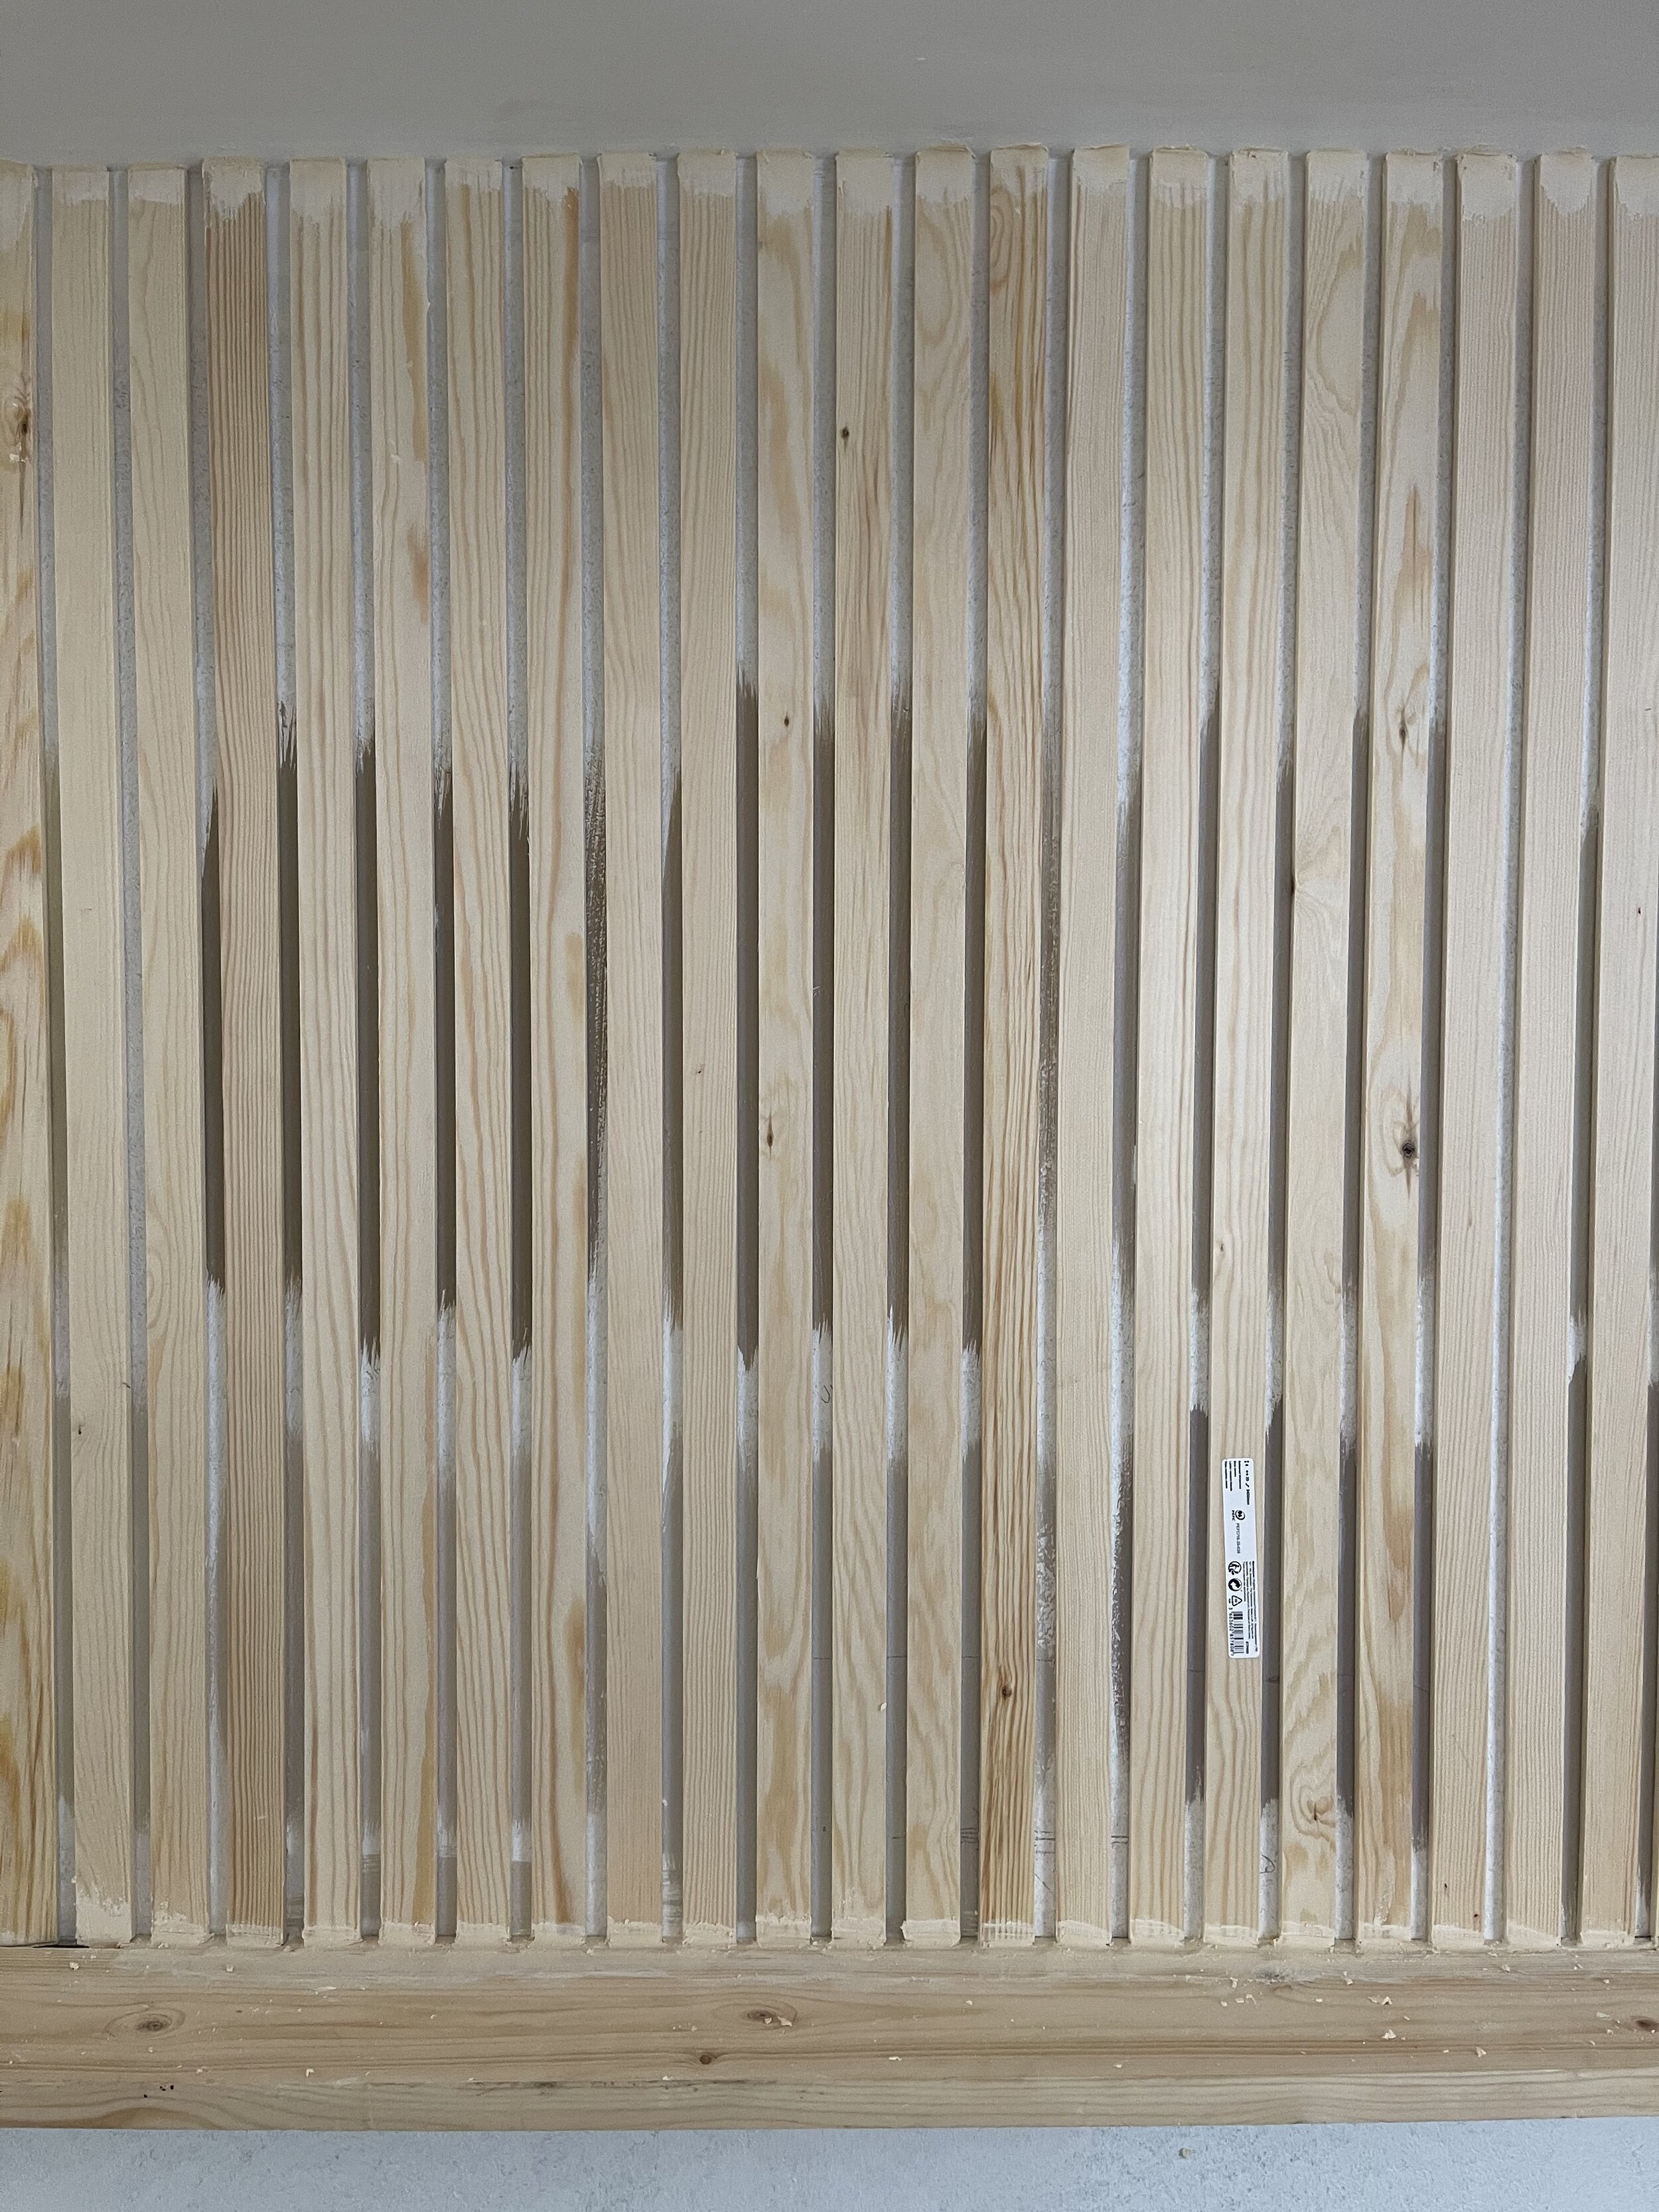
Next, you need to apply your first piece of thin stripwood perfectly vertical onto your wall (it is this first strip that all your other slats need to align with, so the first one has to be right!) Start at the end of one side of the wall and measure from the top down to the shelf. Cut your strip wood to size and check it perfectly fits before applying a mega grab adhesive to the reverse side (I use an aluminum ruler to measure where to cut my stripwood, as it gives you a more precise measurement than a tape measure due to the sturdy structure). If it is the right size (you really only want the smallest of gaps to fill between the ceiling and shelf at the end) apply the mega grab and erect your first strip to the wall while using a spirit level. Check your stripwood is perfectly vertical by moving your spirit level all the way down until you are confident that the slat is completely level. The glue will give you enough time to rectify any slight skewing of the stripwood.
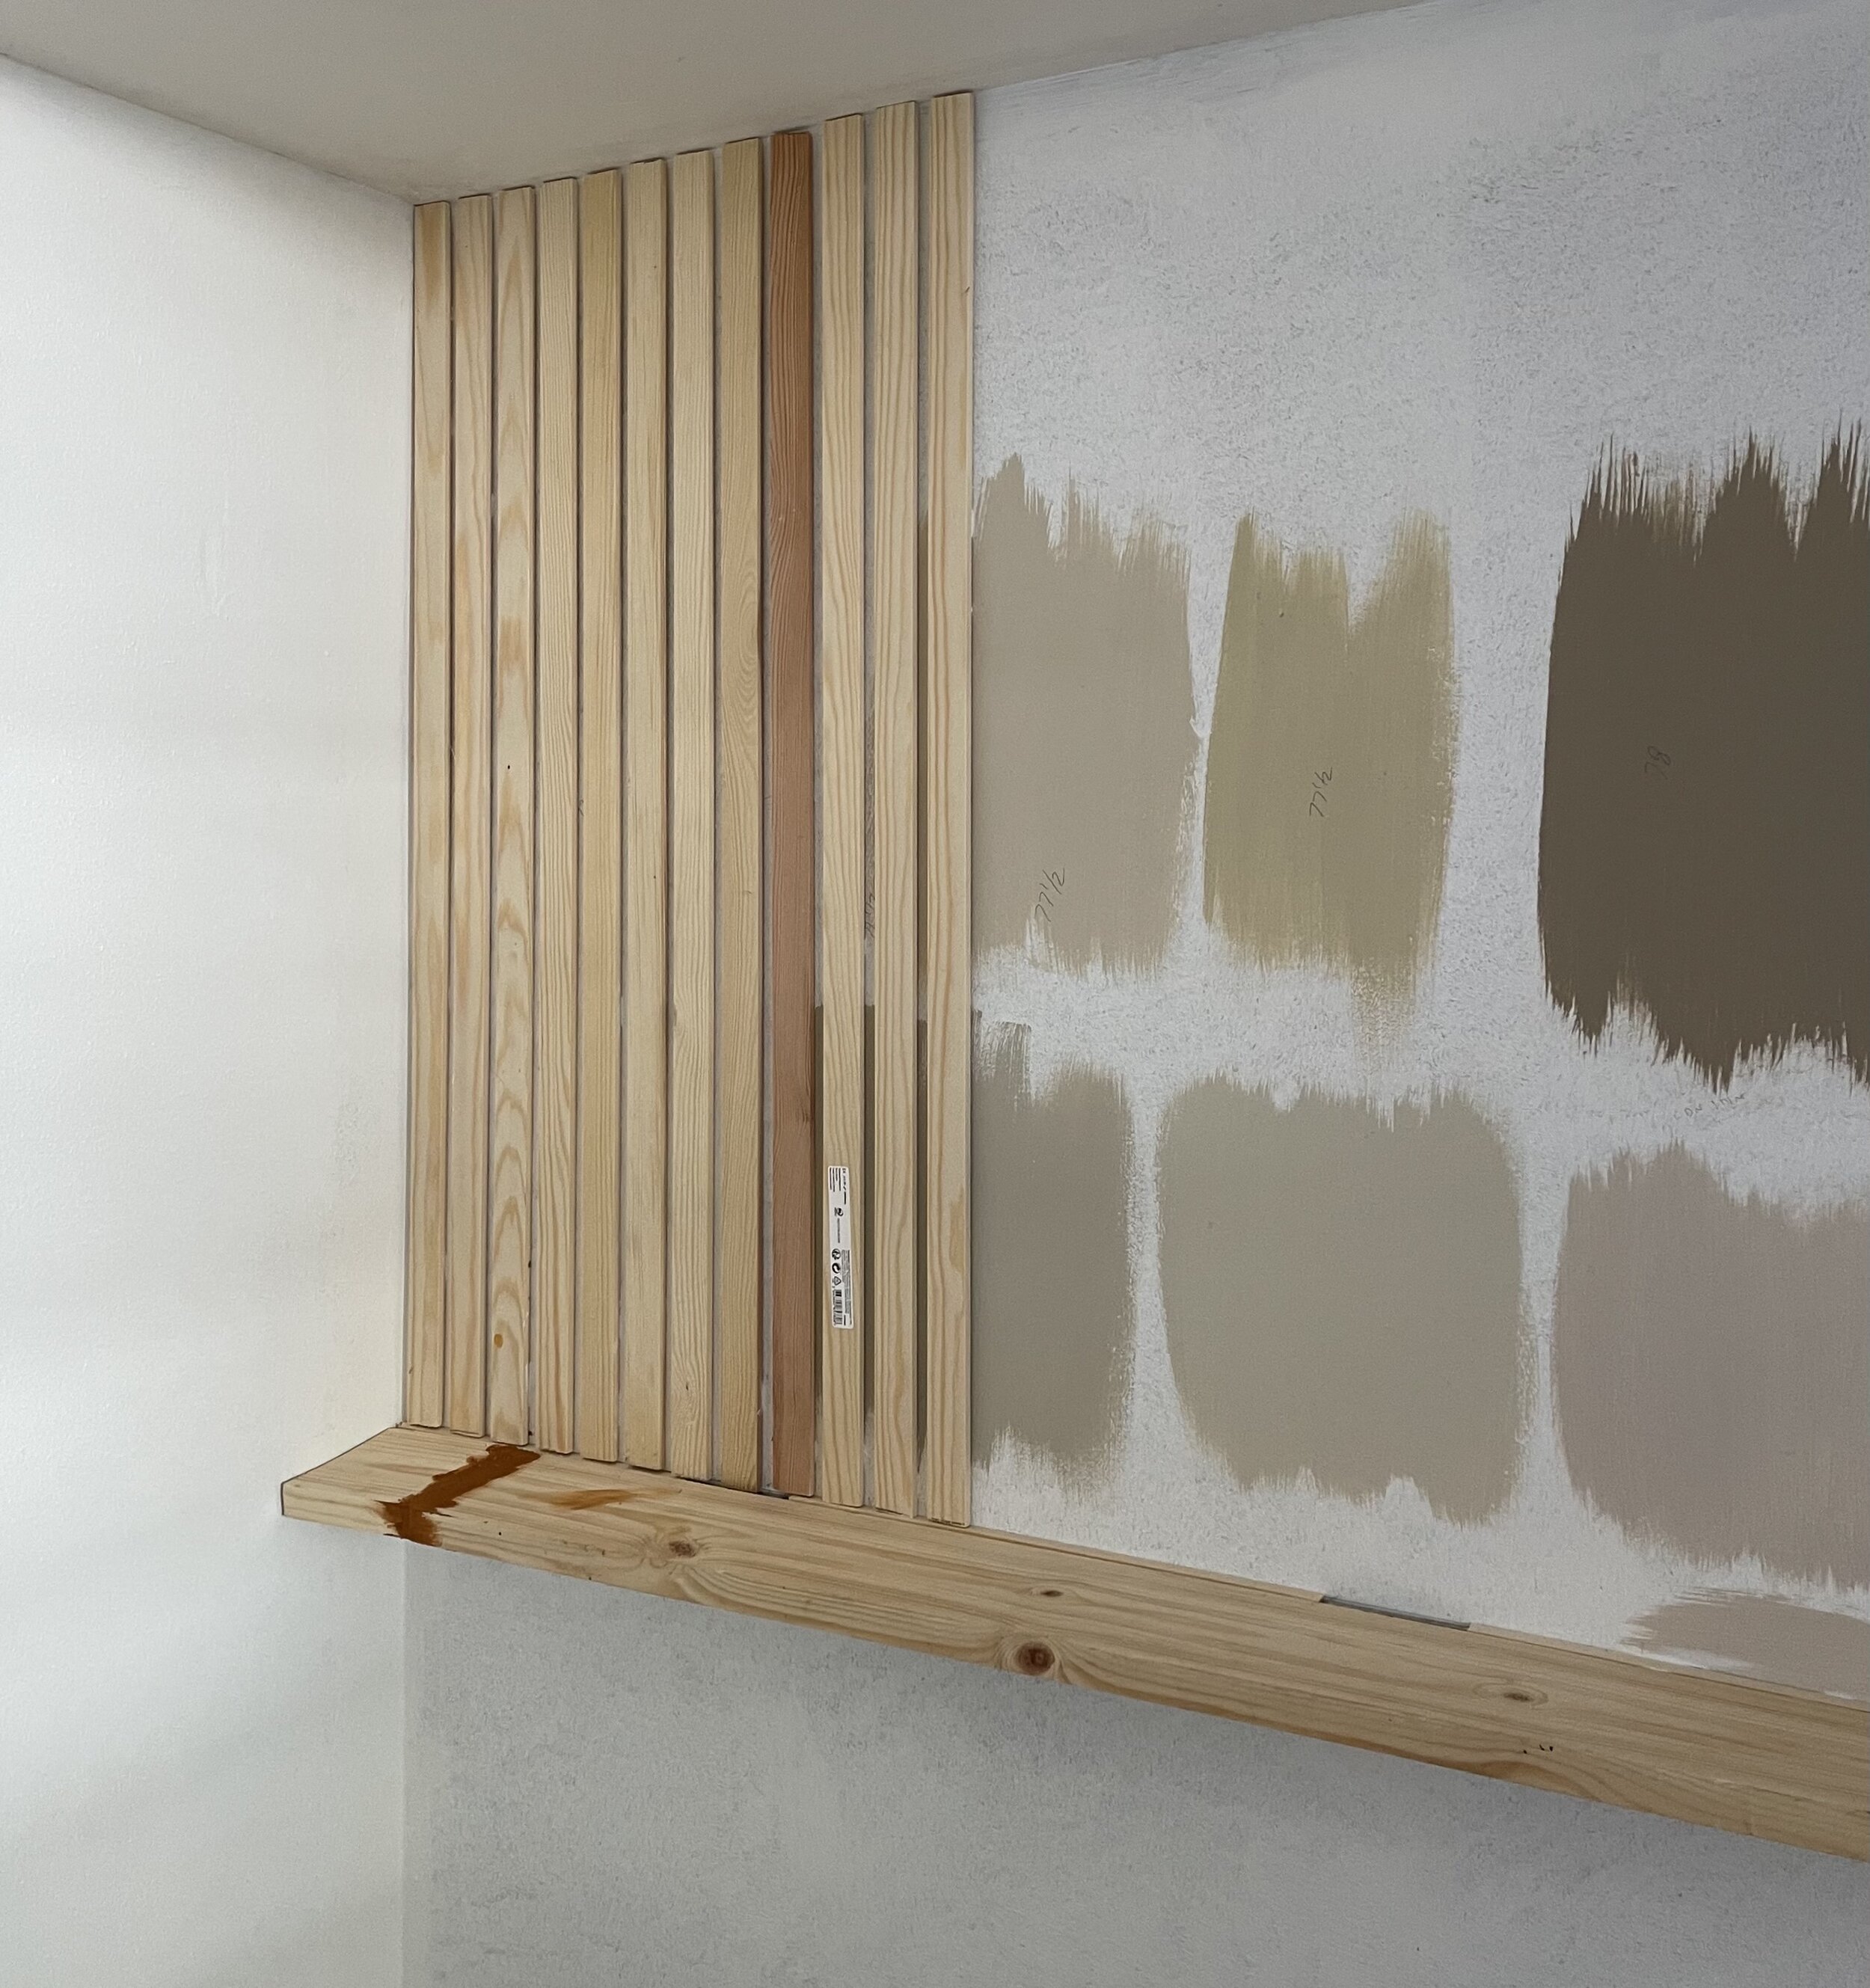
Once your first slat is up, measure for your next slat. Do not cut all your slats into one single size at the start of the project - you’ll find most ceilings are floors are not perfectly level! I tended to cut and apply three slats at a time before measuring the wall length again. Use a spacer to make sure that each slat is exactly the same width apart from the next so that you get a professional-looking finish to your wood slat wall. The width between each of my slats is exactly 1cm apart, and I used a 1cm strip of wood as a spacer to obtain this. Once you have stuck your next piece of strip wood on the wall using the spacer, remove the spacer and again check your next piece is vertical using the spirit level.
The repeat method that I followed for this process:
Measure wall length
Measure 3 x pieces of stripwood to the wall measurement
Cut 3 x pieces of stripwood
Check the fit of all 3 pieces against the wall
Apply glue to the reverse of all 3 pieces
Affix piece 1 using a spirit level
Add spacer
Affix piece 2 on the opposite side of the spacer
Remove spacer and check piece 2 is vertical using the spirit level
Add spacer
Affix piece 3 on the opposite side of the spacer
Remove spacer and check piece 3 is vertical using the spirit level
Repeat until the design is complete
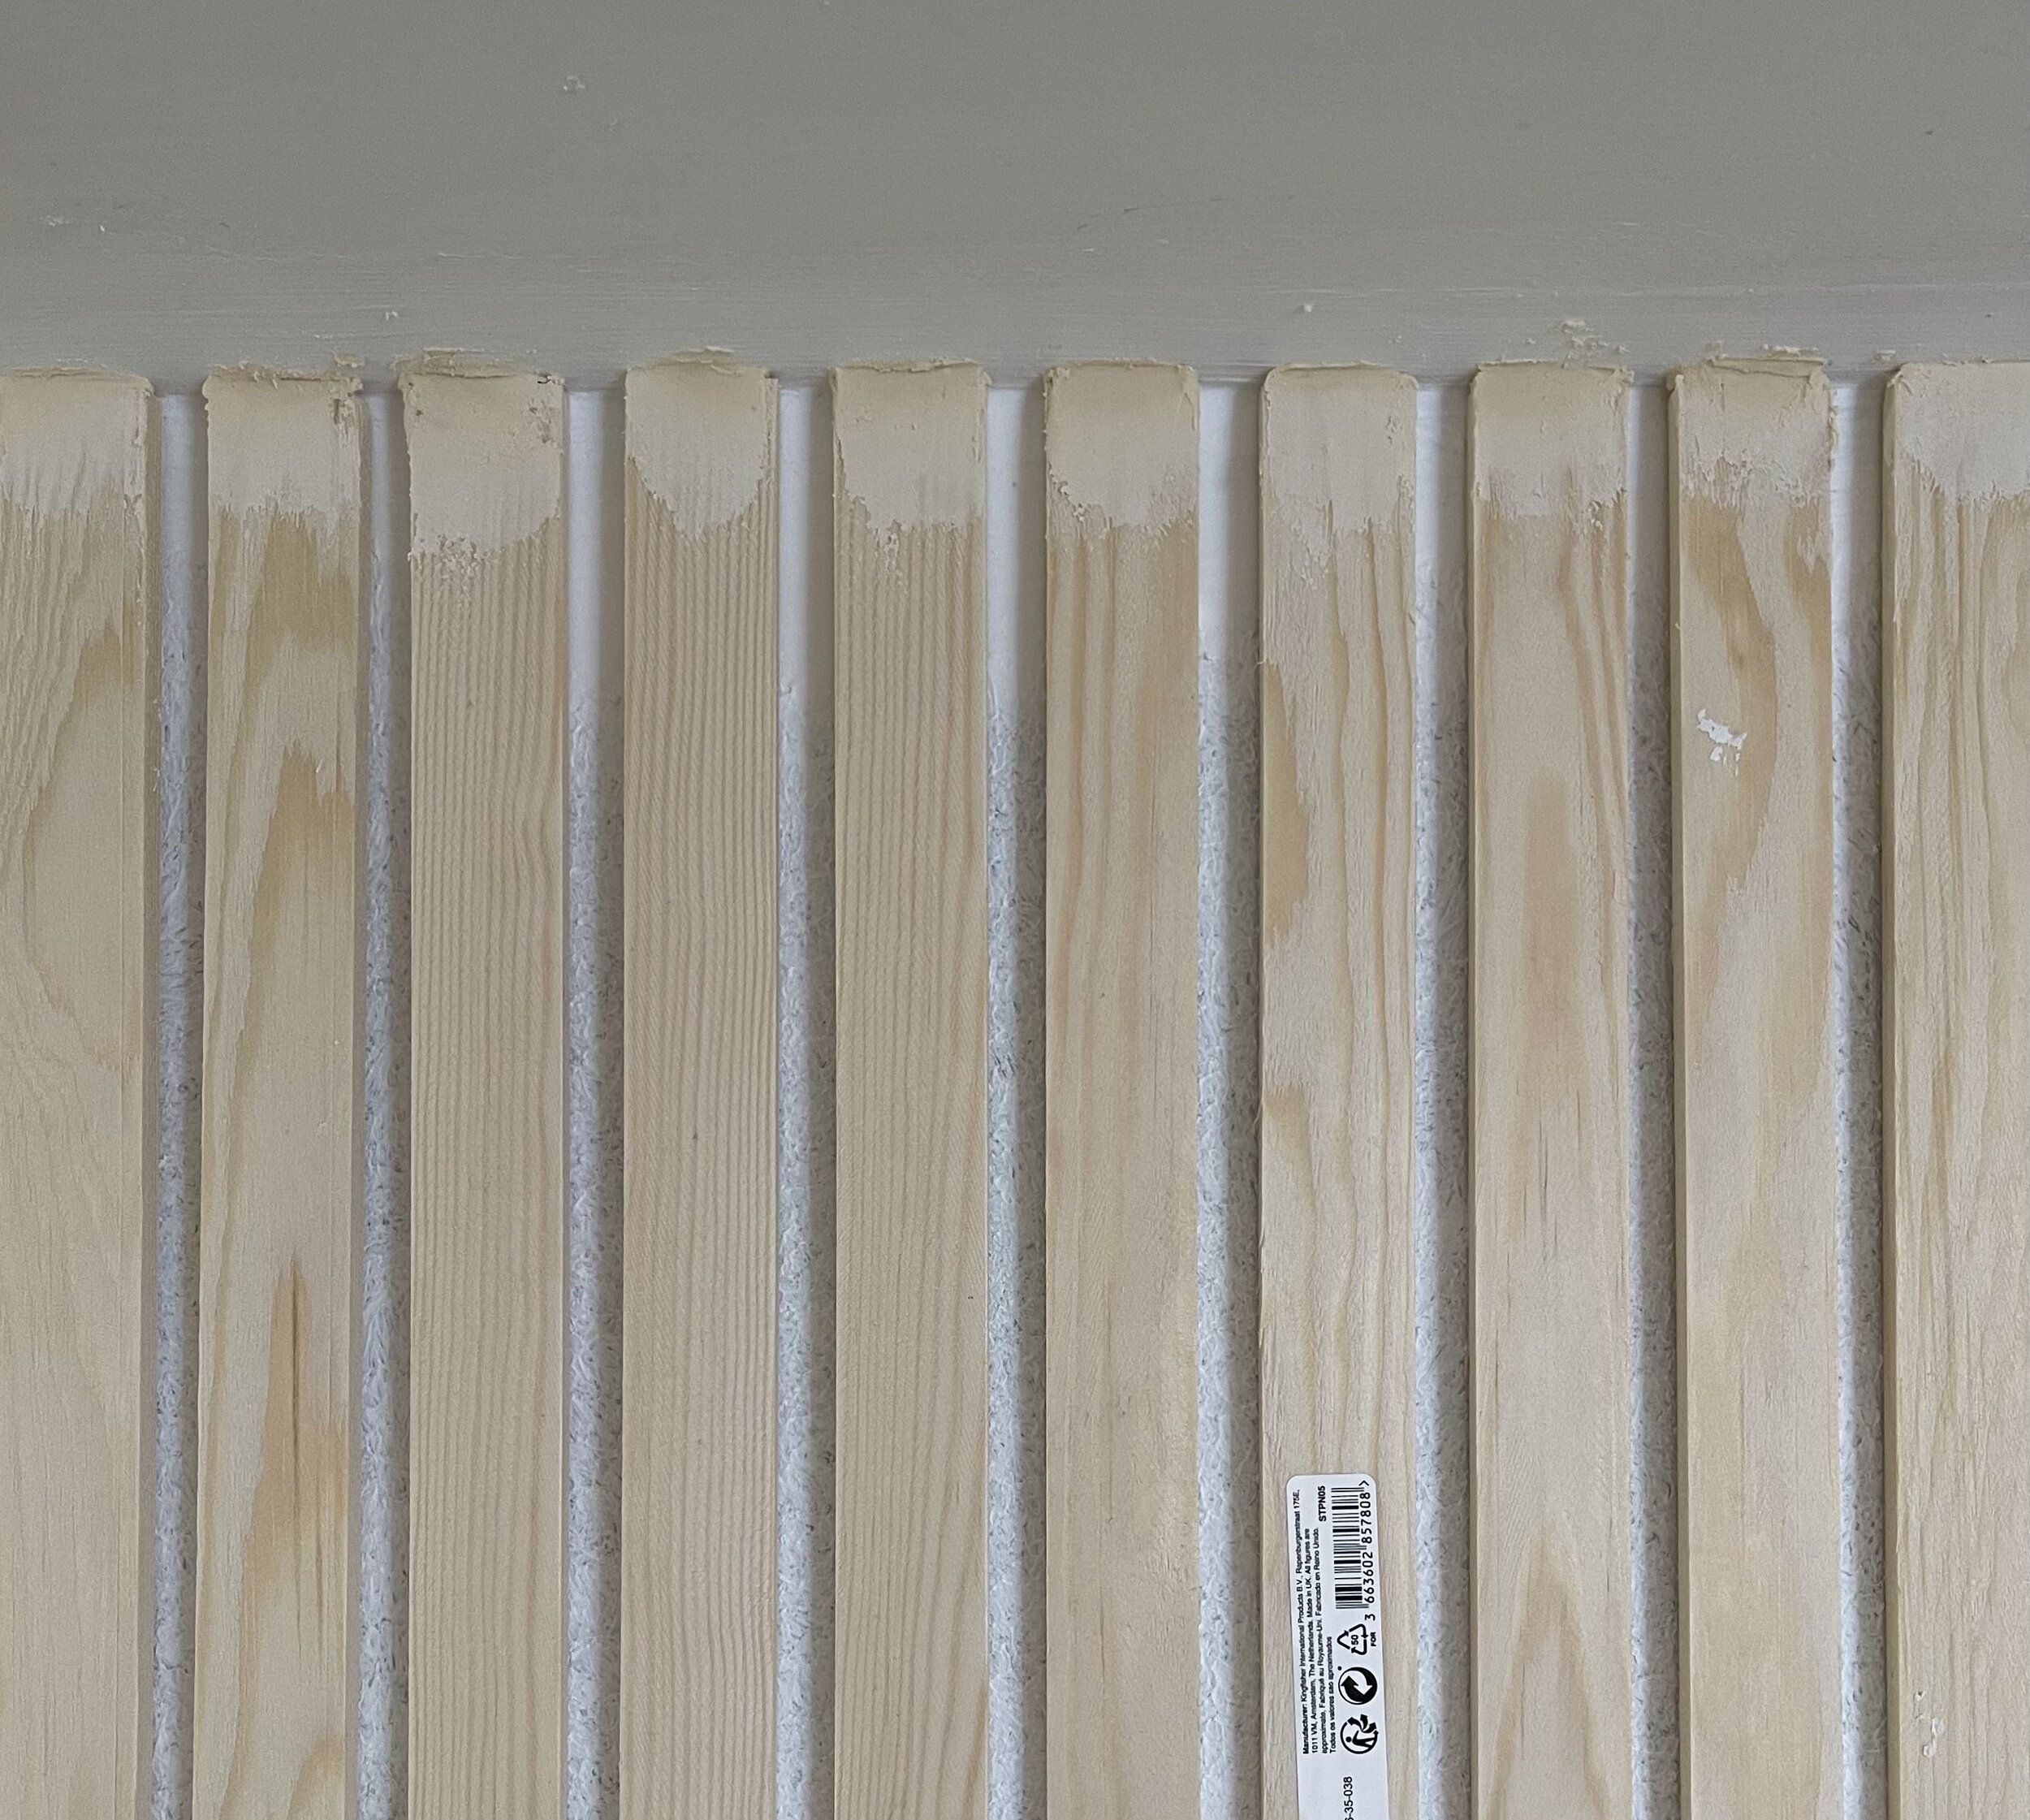
I gave my decorative wood slat wall 48 hours for all the glue to dry before filling any gaps where the individual slat strips met both the shelf and the ceiling. Using a small filling knife, I applied ready mixed wood filler and flattened and shaped it into the crevices. Once the filler was dry, I gave it a light sand using a sanding block so the filler was smooth and even with the wood. I also gave the wood slats and the shelf a brisk sand to make sure that there were no rough surfaces or wood splinters, then washed and cleaned everything down with a microfibre cloth ready for painting.
To decorate, I primed everything in Zinsser B.I.N. I use this primer as it has a stain blocker in it (meaning that any knots in the pine would not leak through my paintwork). Once everything was primed, I gave it all two coats of hard-wearing water-based eggshell using a mix of paintbrushes (I used a large-scale brush for painting the majority of the surface area, plus a pointy brush to get deep into the slat grooves). I painted my slats the same colour as the rest of the room for a cohesive look, but you could paint yours a different colour to make it stand out (or stain the wood for a natural wood look).
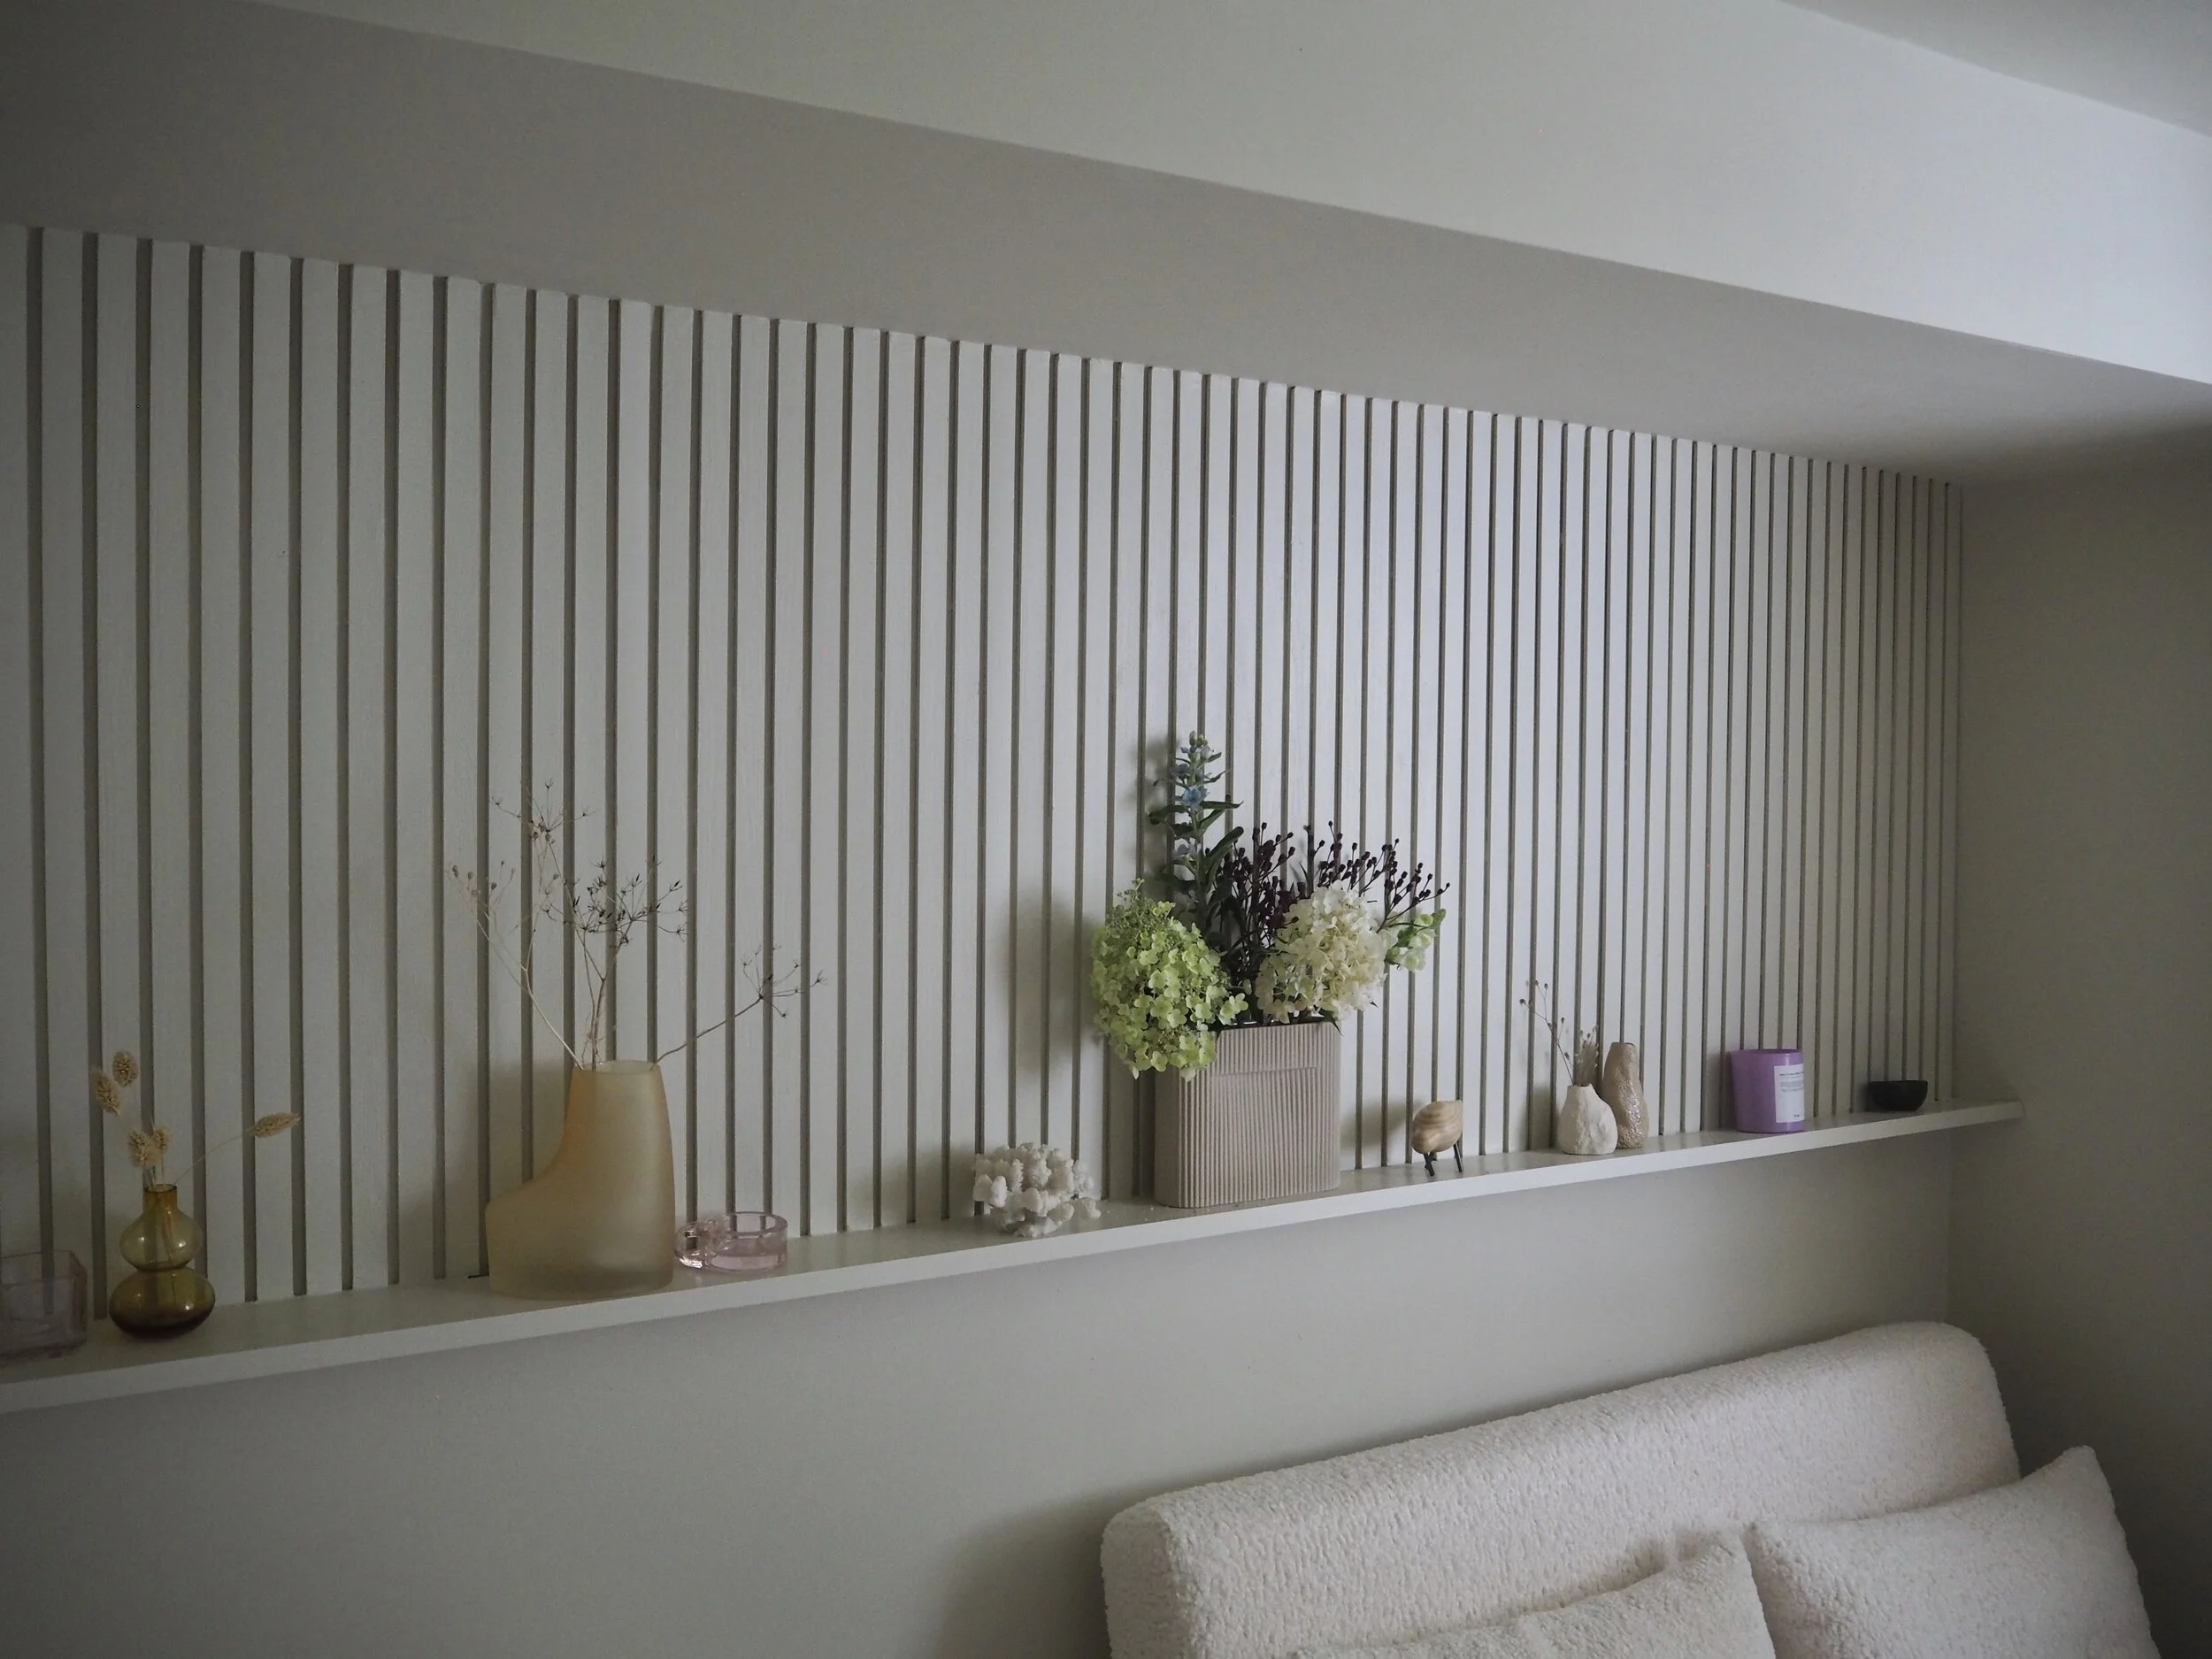
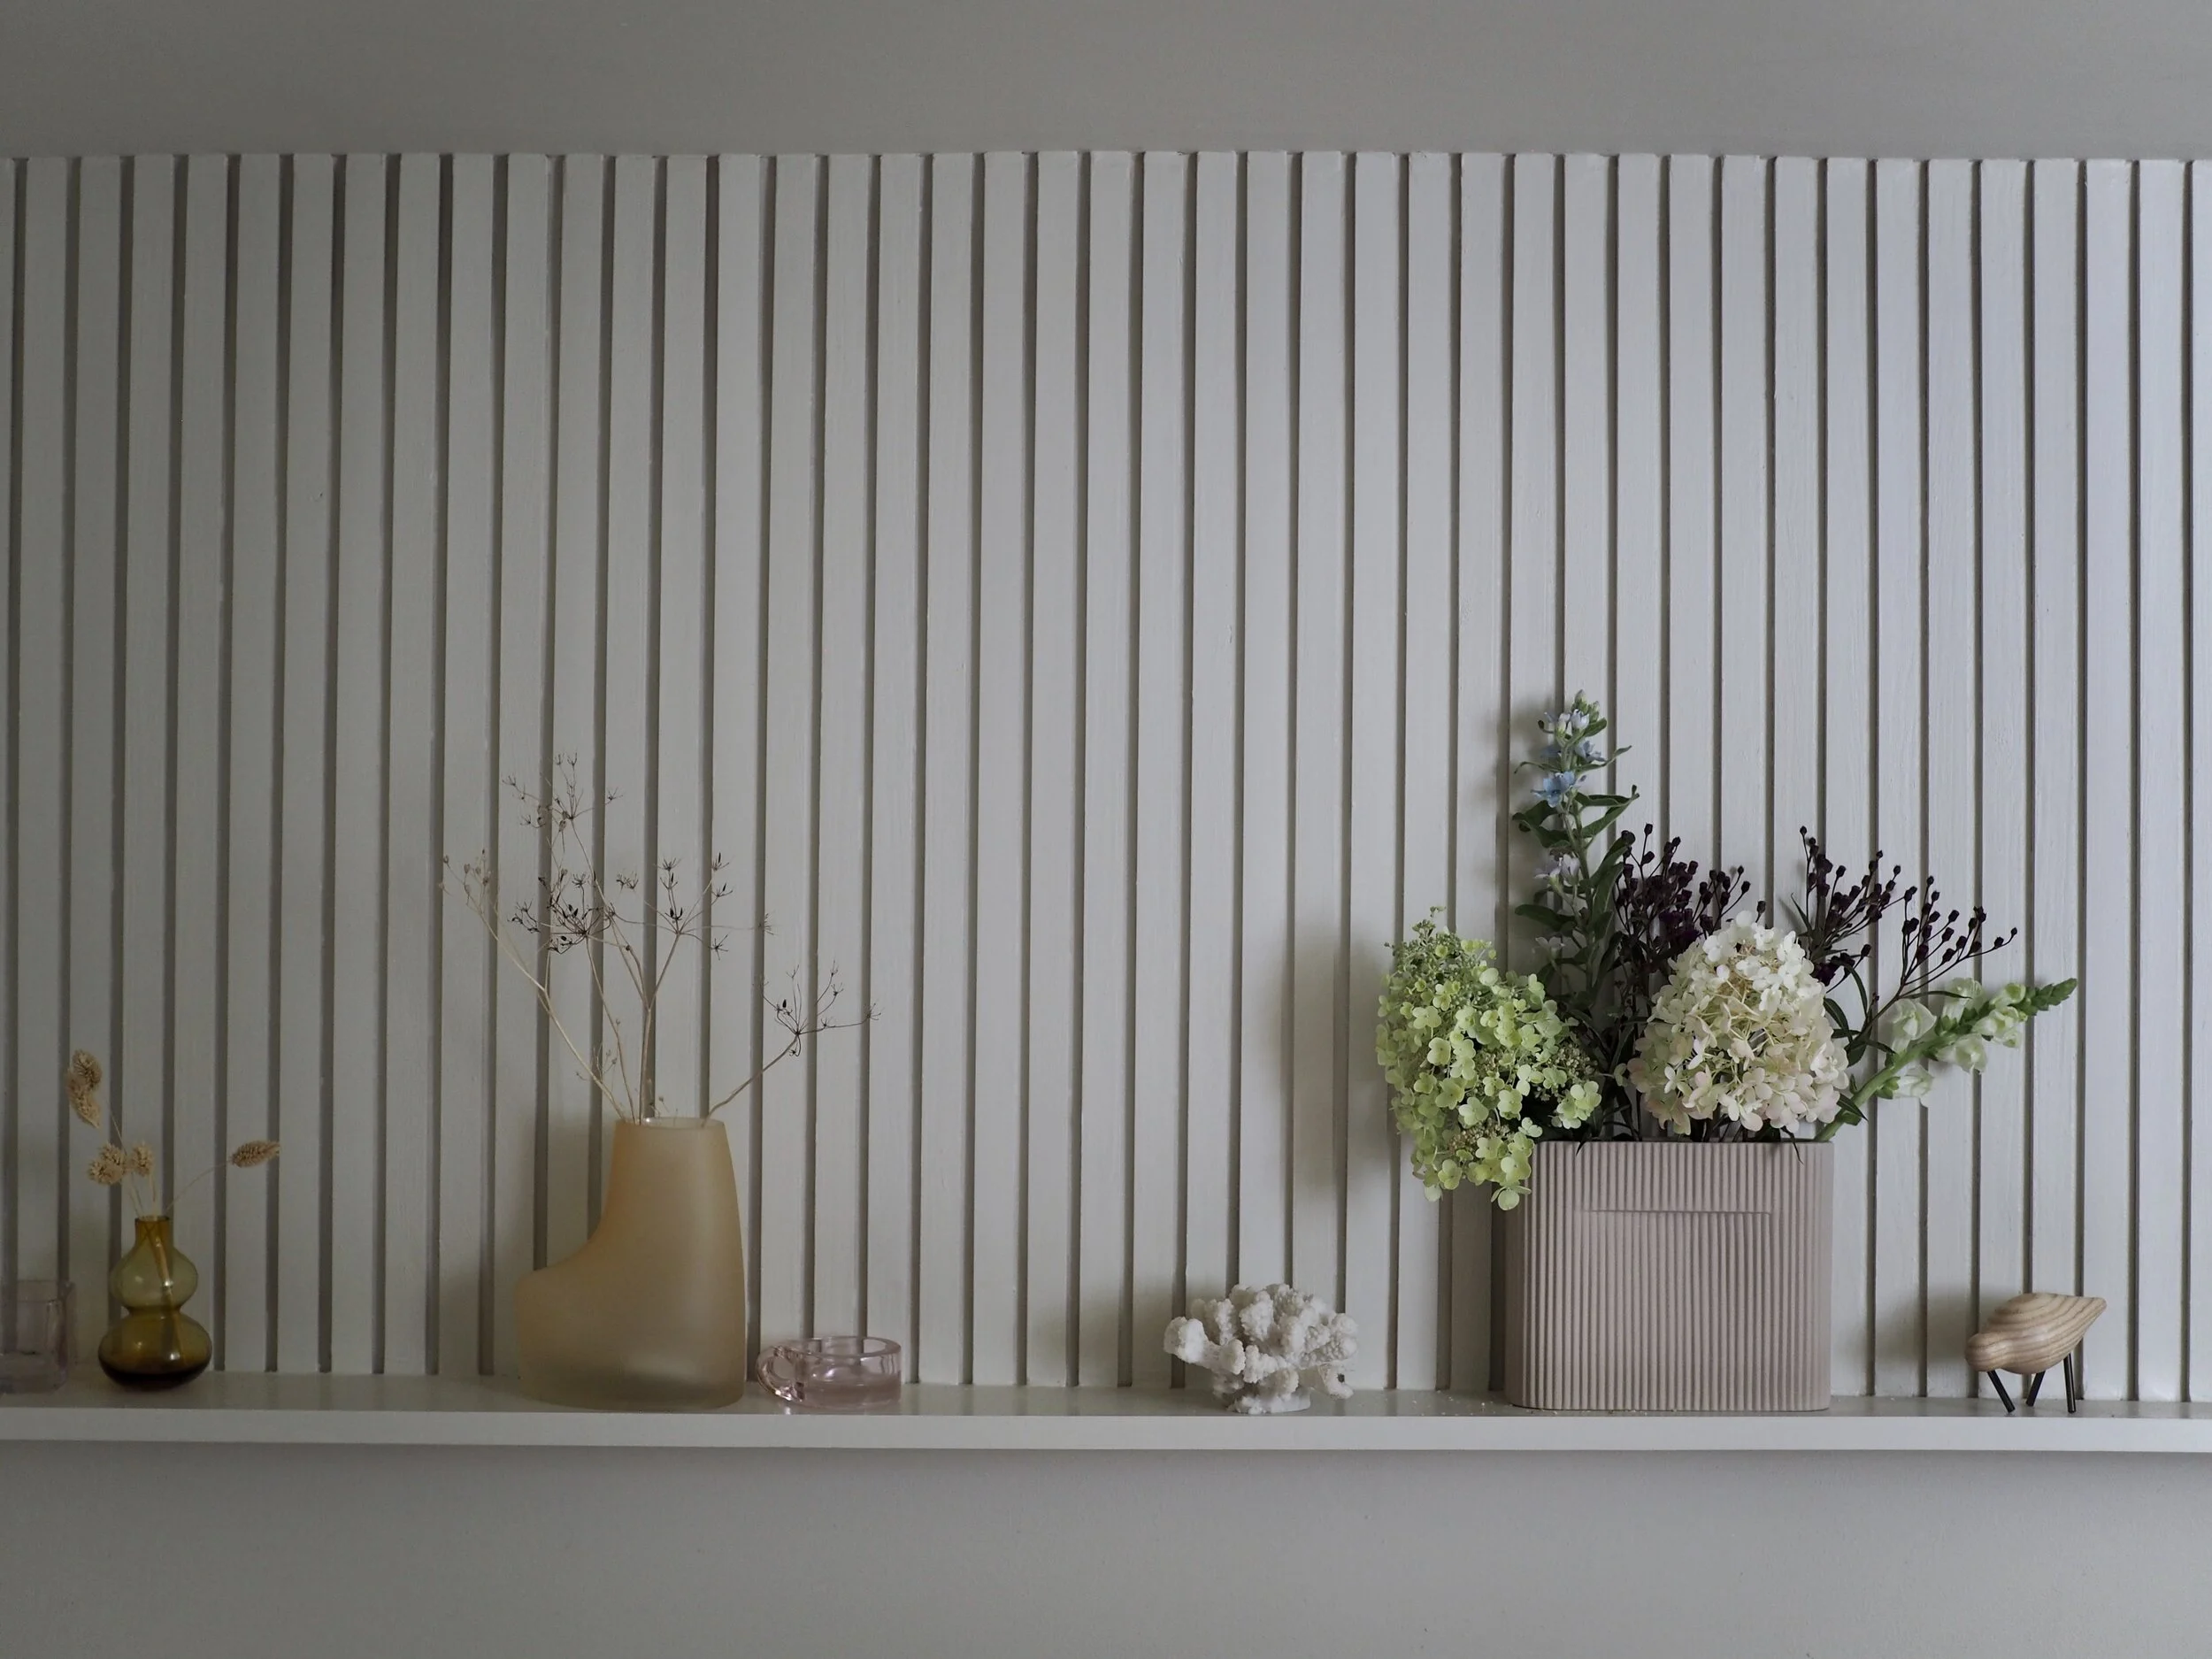
I’m really happy with my DIY feature wall! It did take a bit of time and patience, but it only cost me around £80 in total to create. If you want to see a video of me putting this slat wall together, check out my Instagram Reel on the process!