DIY Dried Flower Door Wreath

* Please note that there are some affiliate links used in this post.
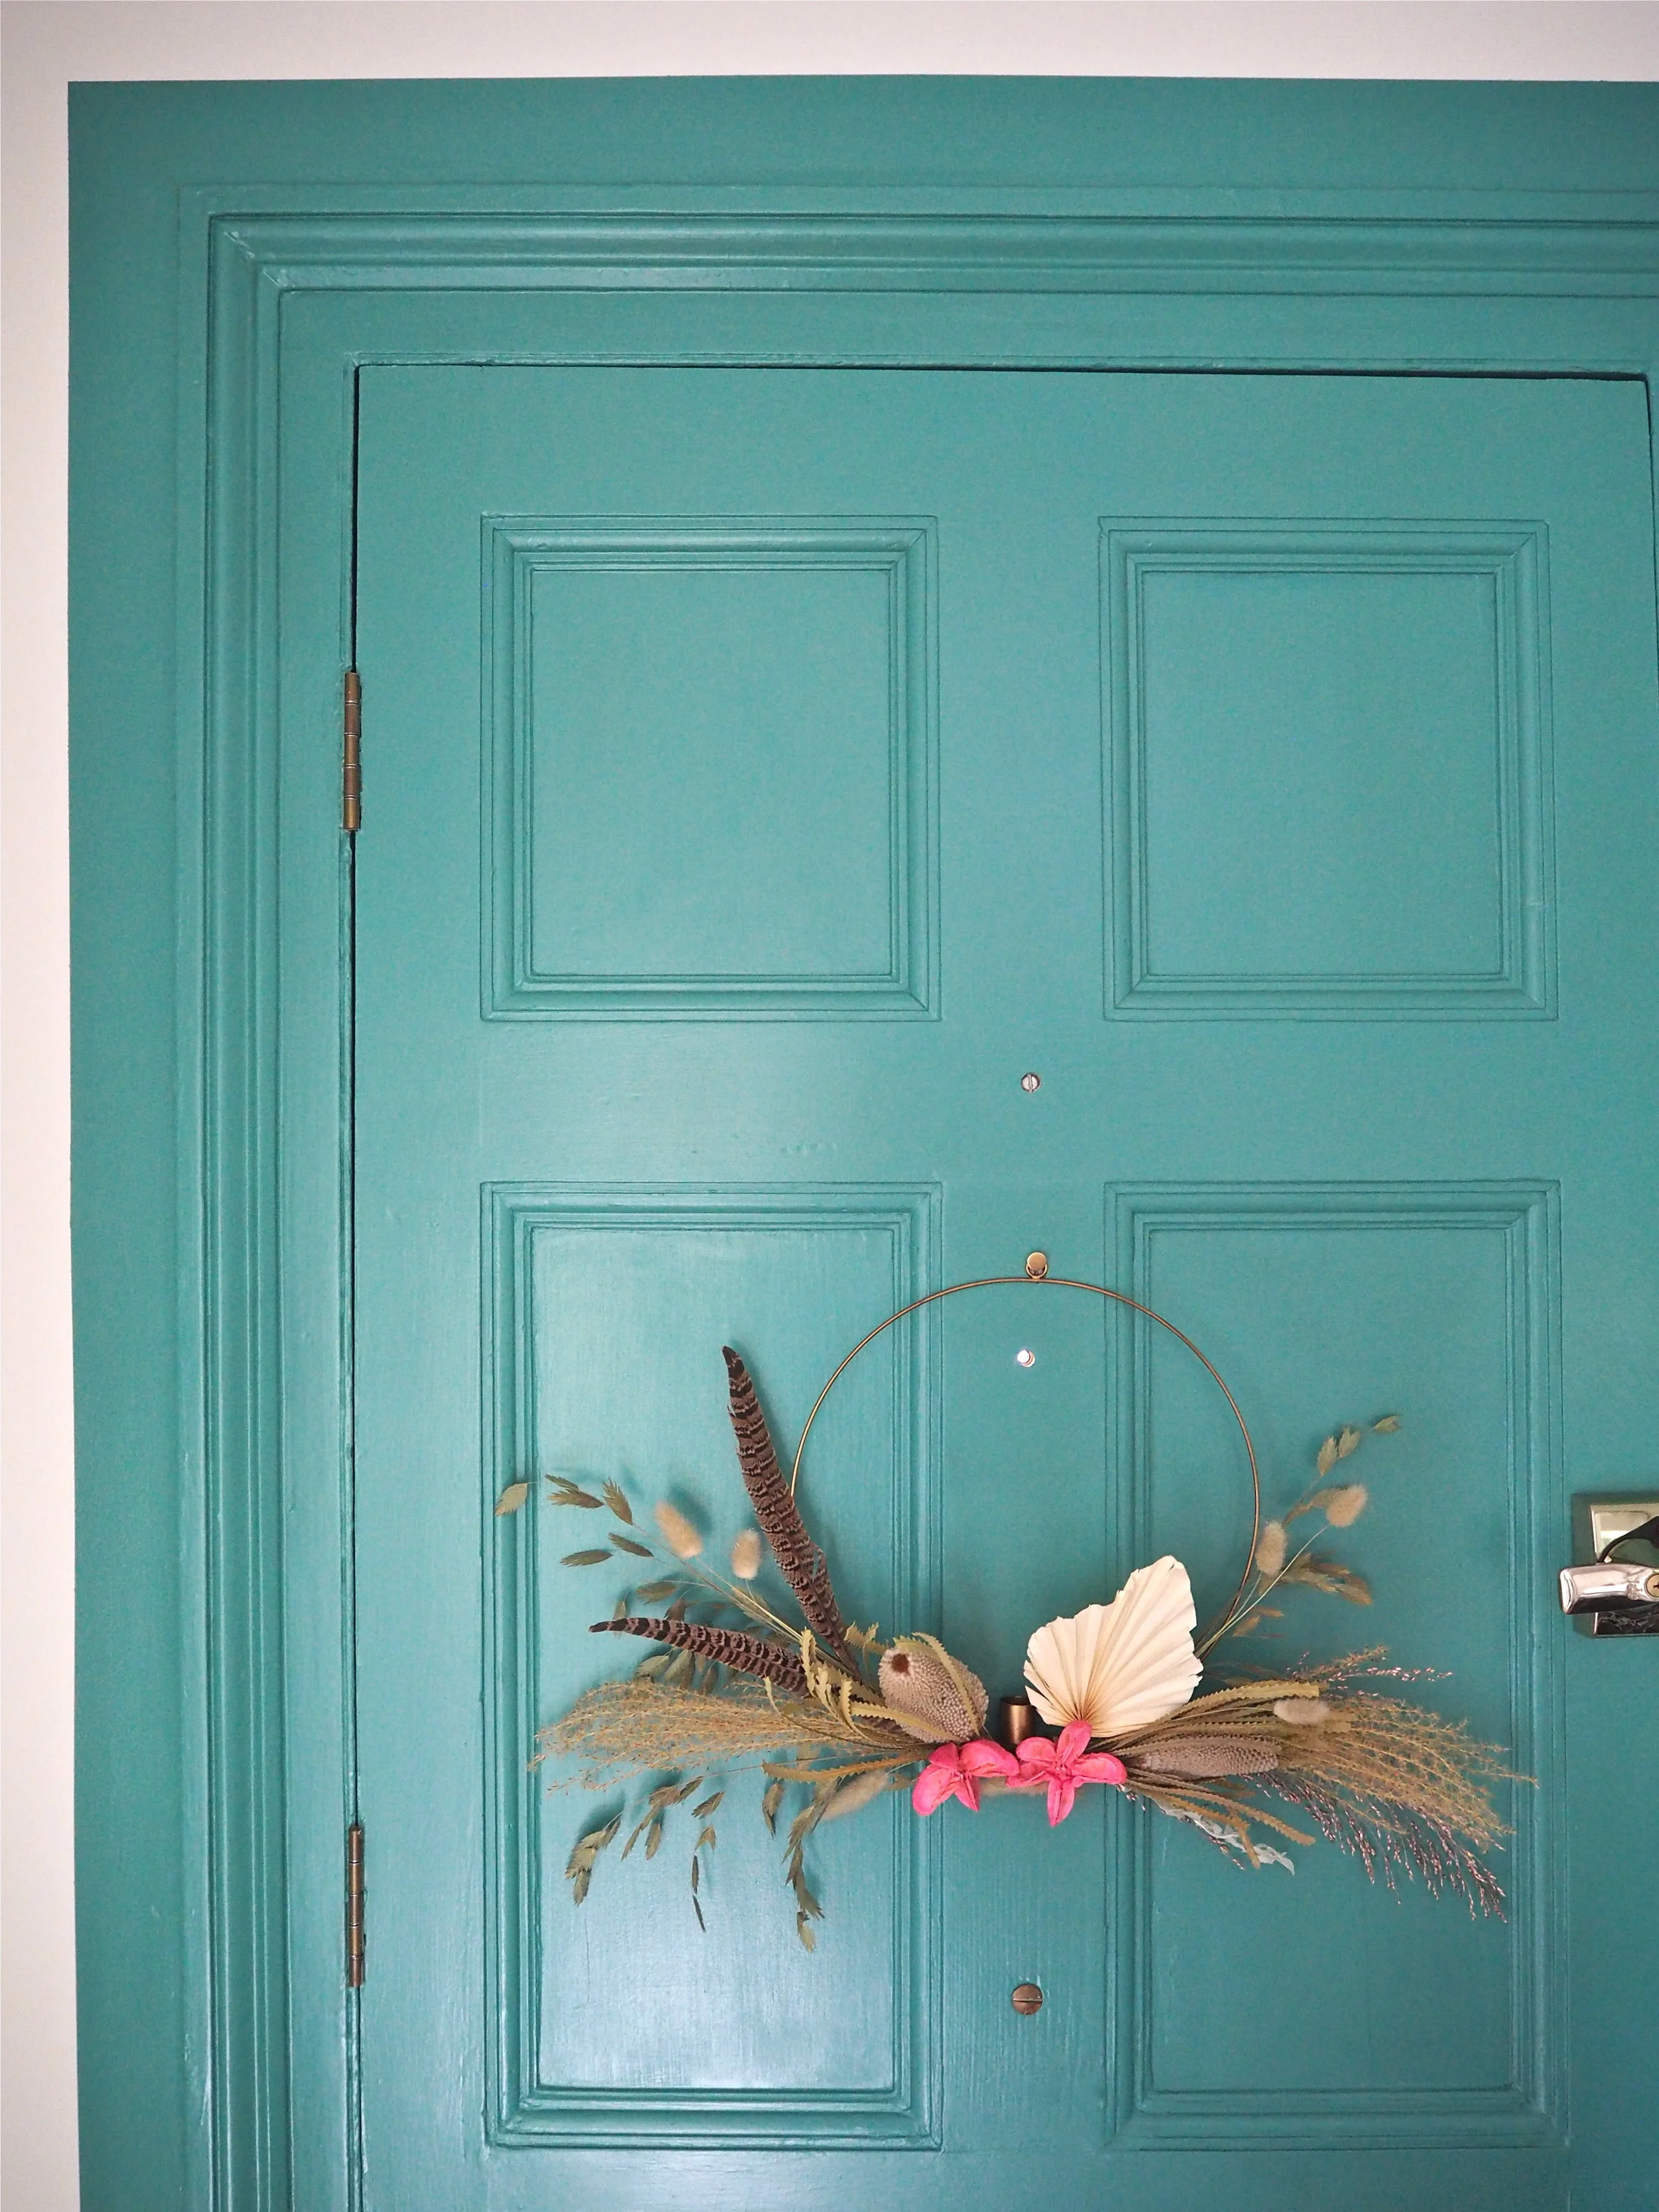
Having previously painted the back of my front door this vivid turquoise colour, I really wanted to make the most of this attention-grabbing entryway, so decided to create a dried flower wreath that would stand out against the bold hue. I’m slightly obsessed with dried flowers and wild grasses at the moment. The floral trend first started in Scandinavian interiors (as all the best trends do) and is becoming more popular in the UK. As someone who happily spends a decent amount of cash on fresh flowers, buying dried is a lot more economical as they last! I’ve been slowly replacing vases that usually contain fresh flowers with dried around my home as they look just as great and do not need replacing after a week. It’s still quite hard to buy dried flowers and only contemporary florists (the flowers used in this DIY I purchased from a local florist near to me, One Six Queens in Essex) and large flower markets seem to stock them. For a bit more money you can buy dried flowers online (try Shida Preserved Flowers ) although you can also dry out flowers yourself - just hang them fresh upside down in a warm, dry location.
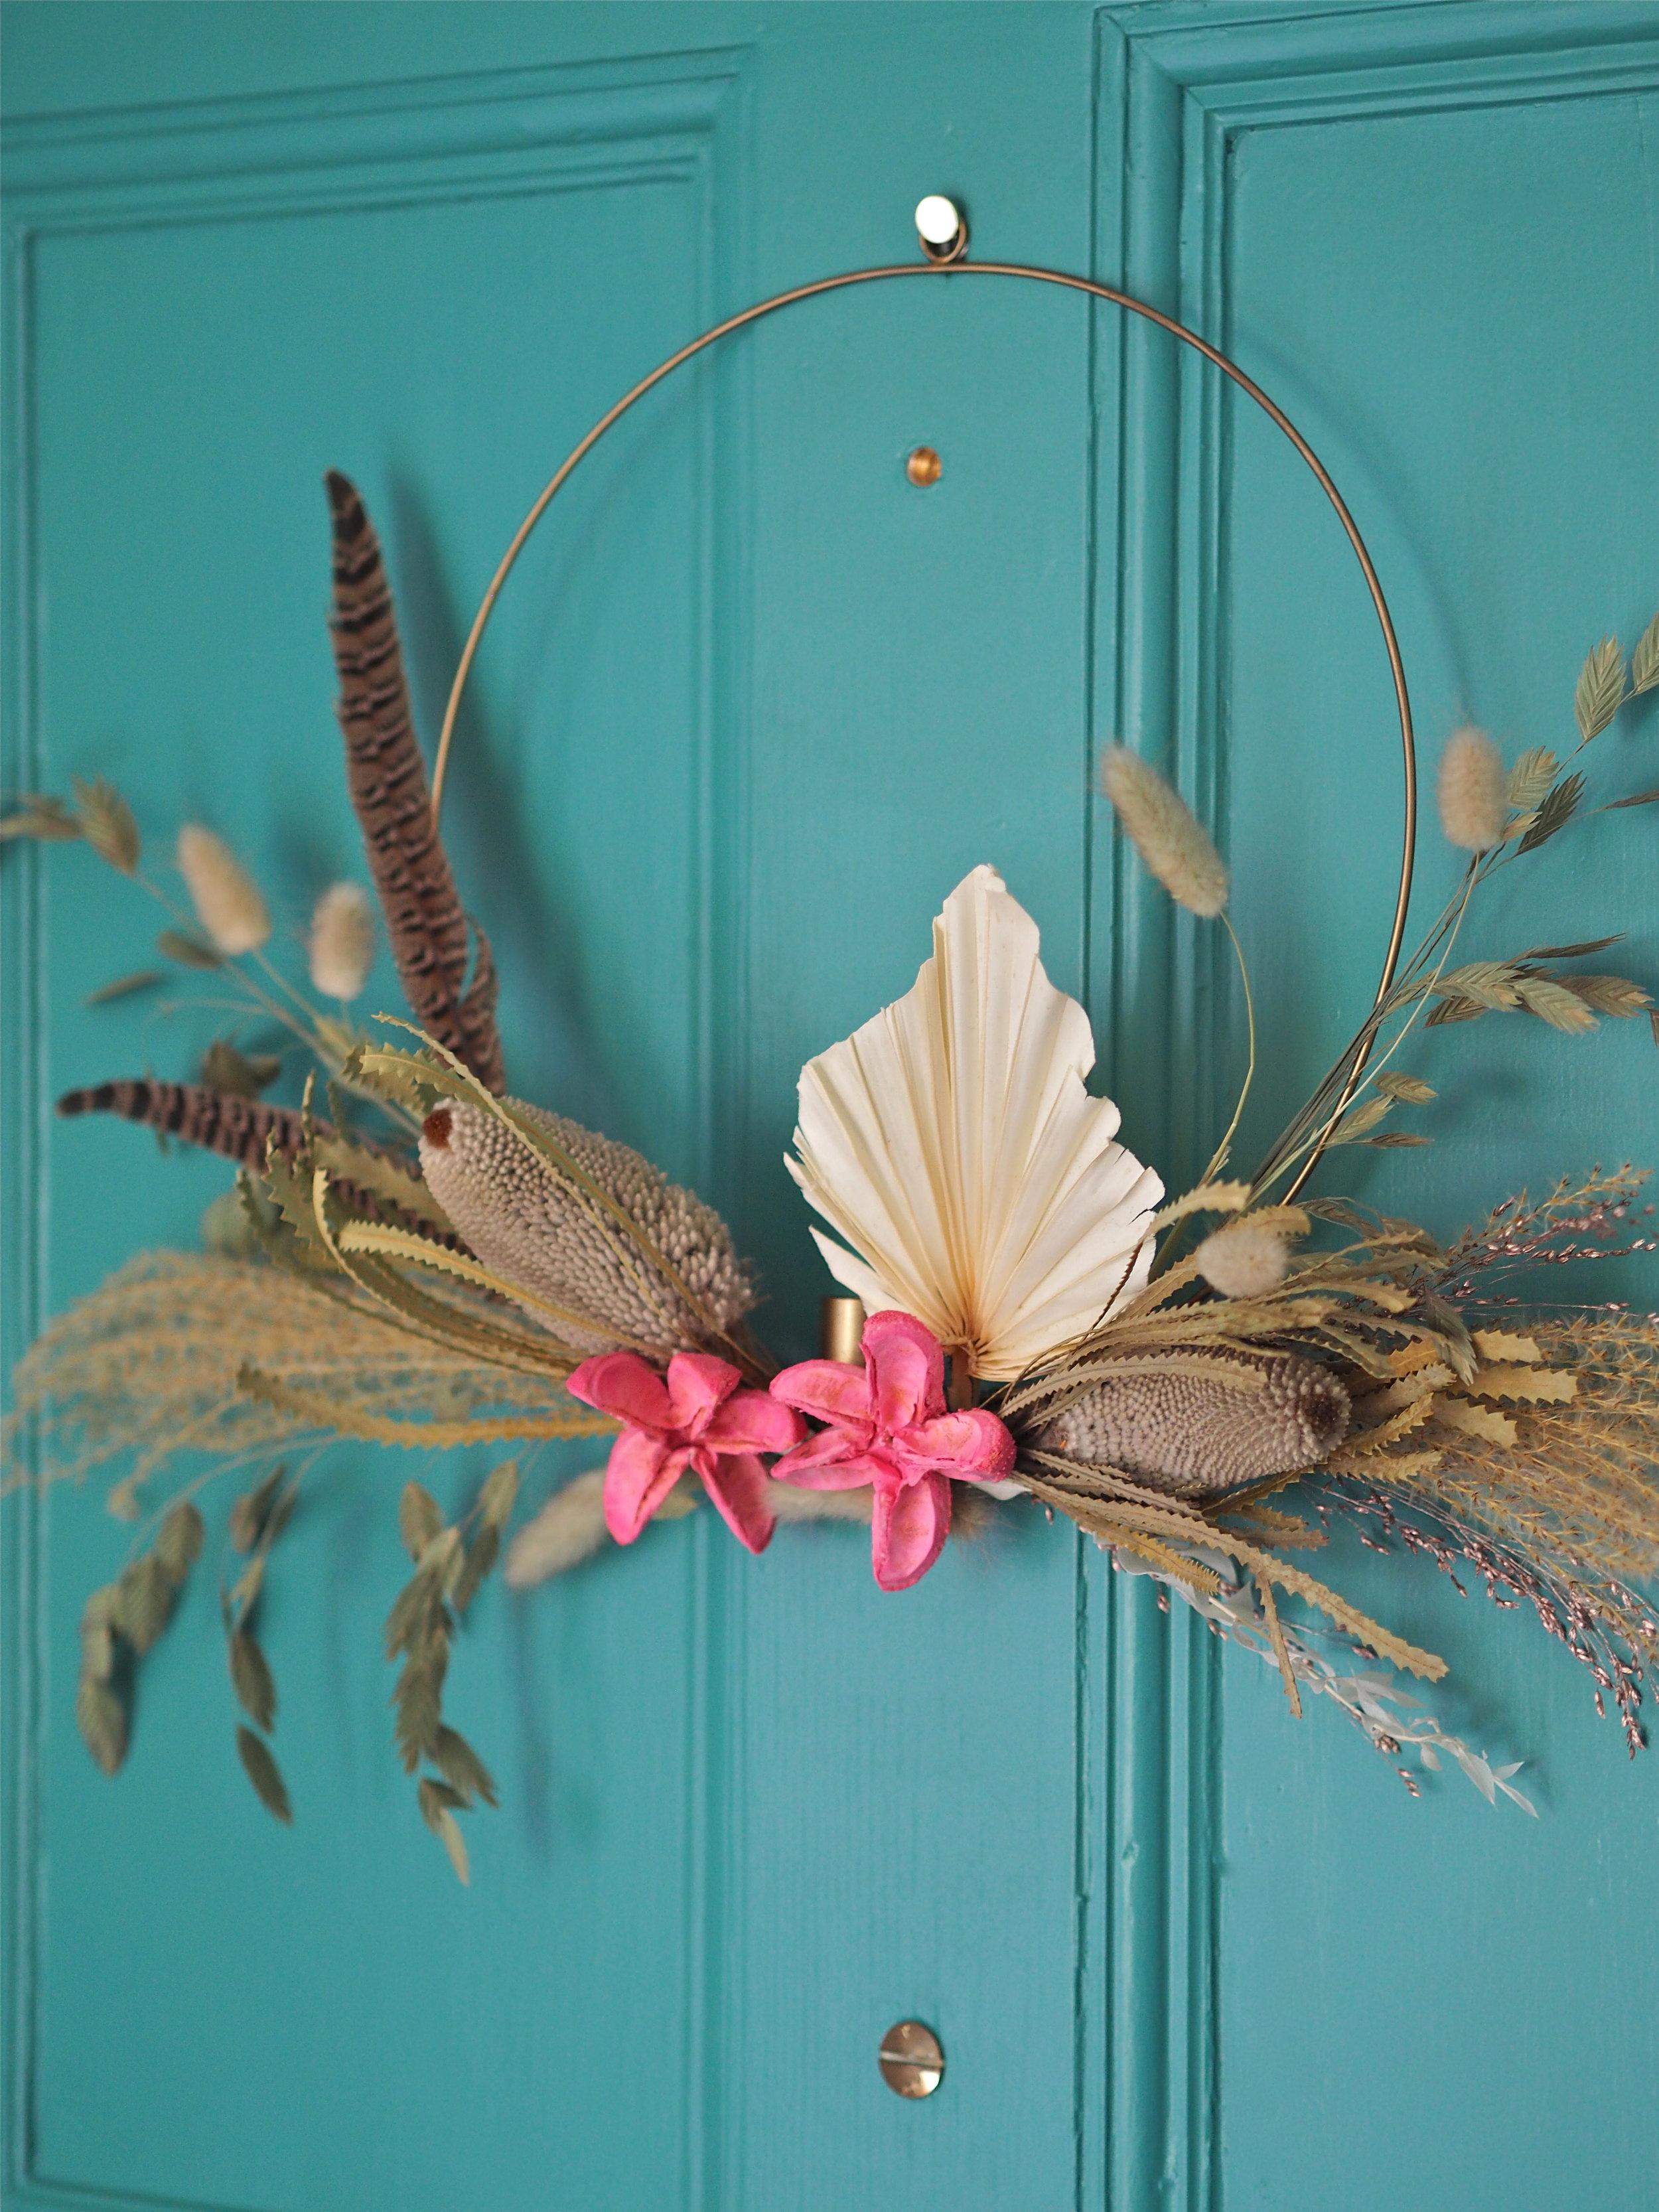
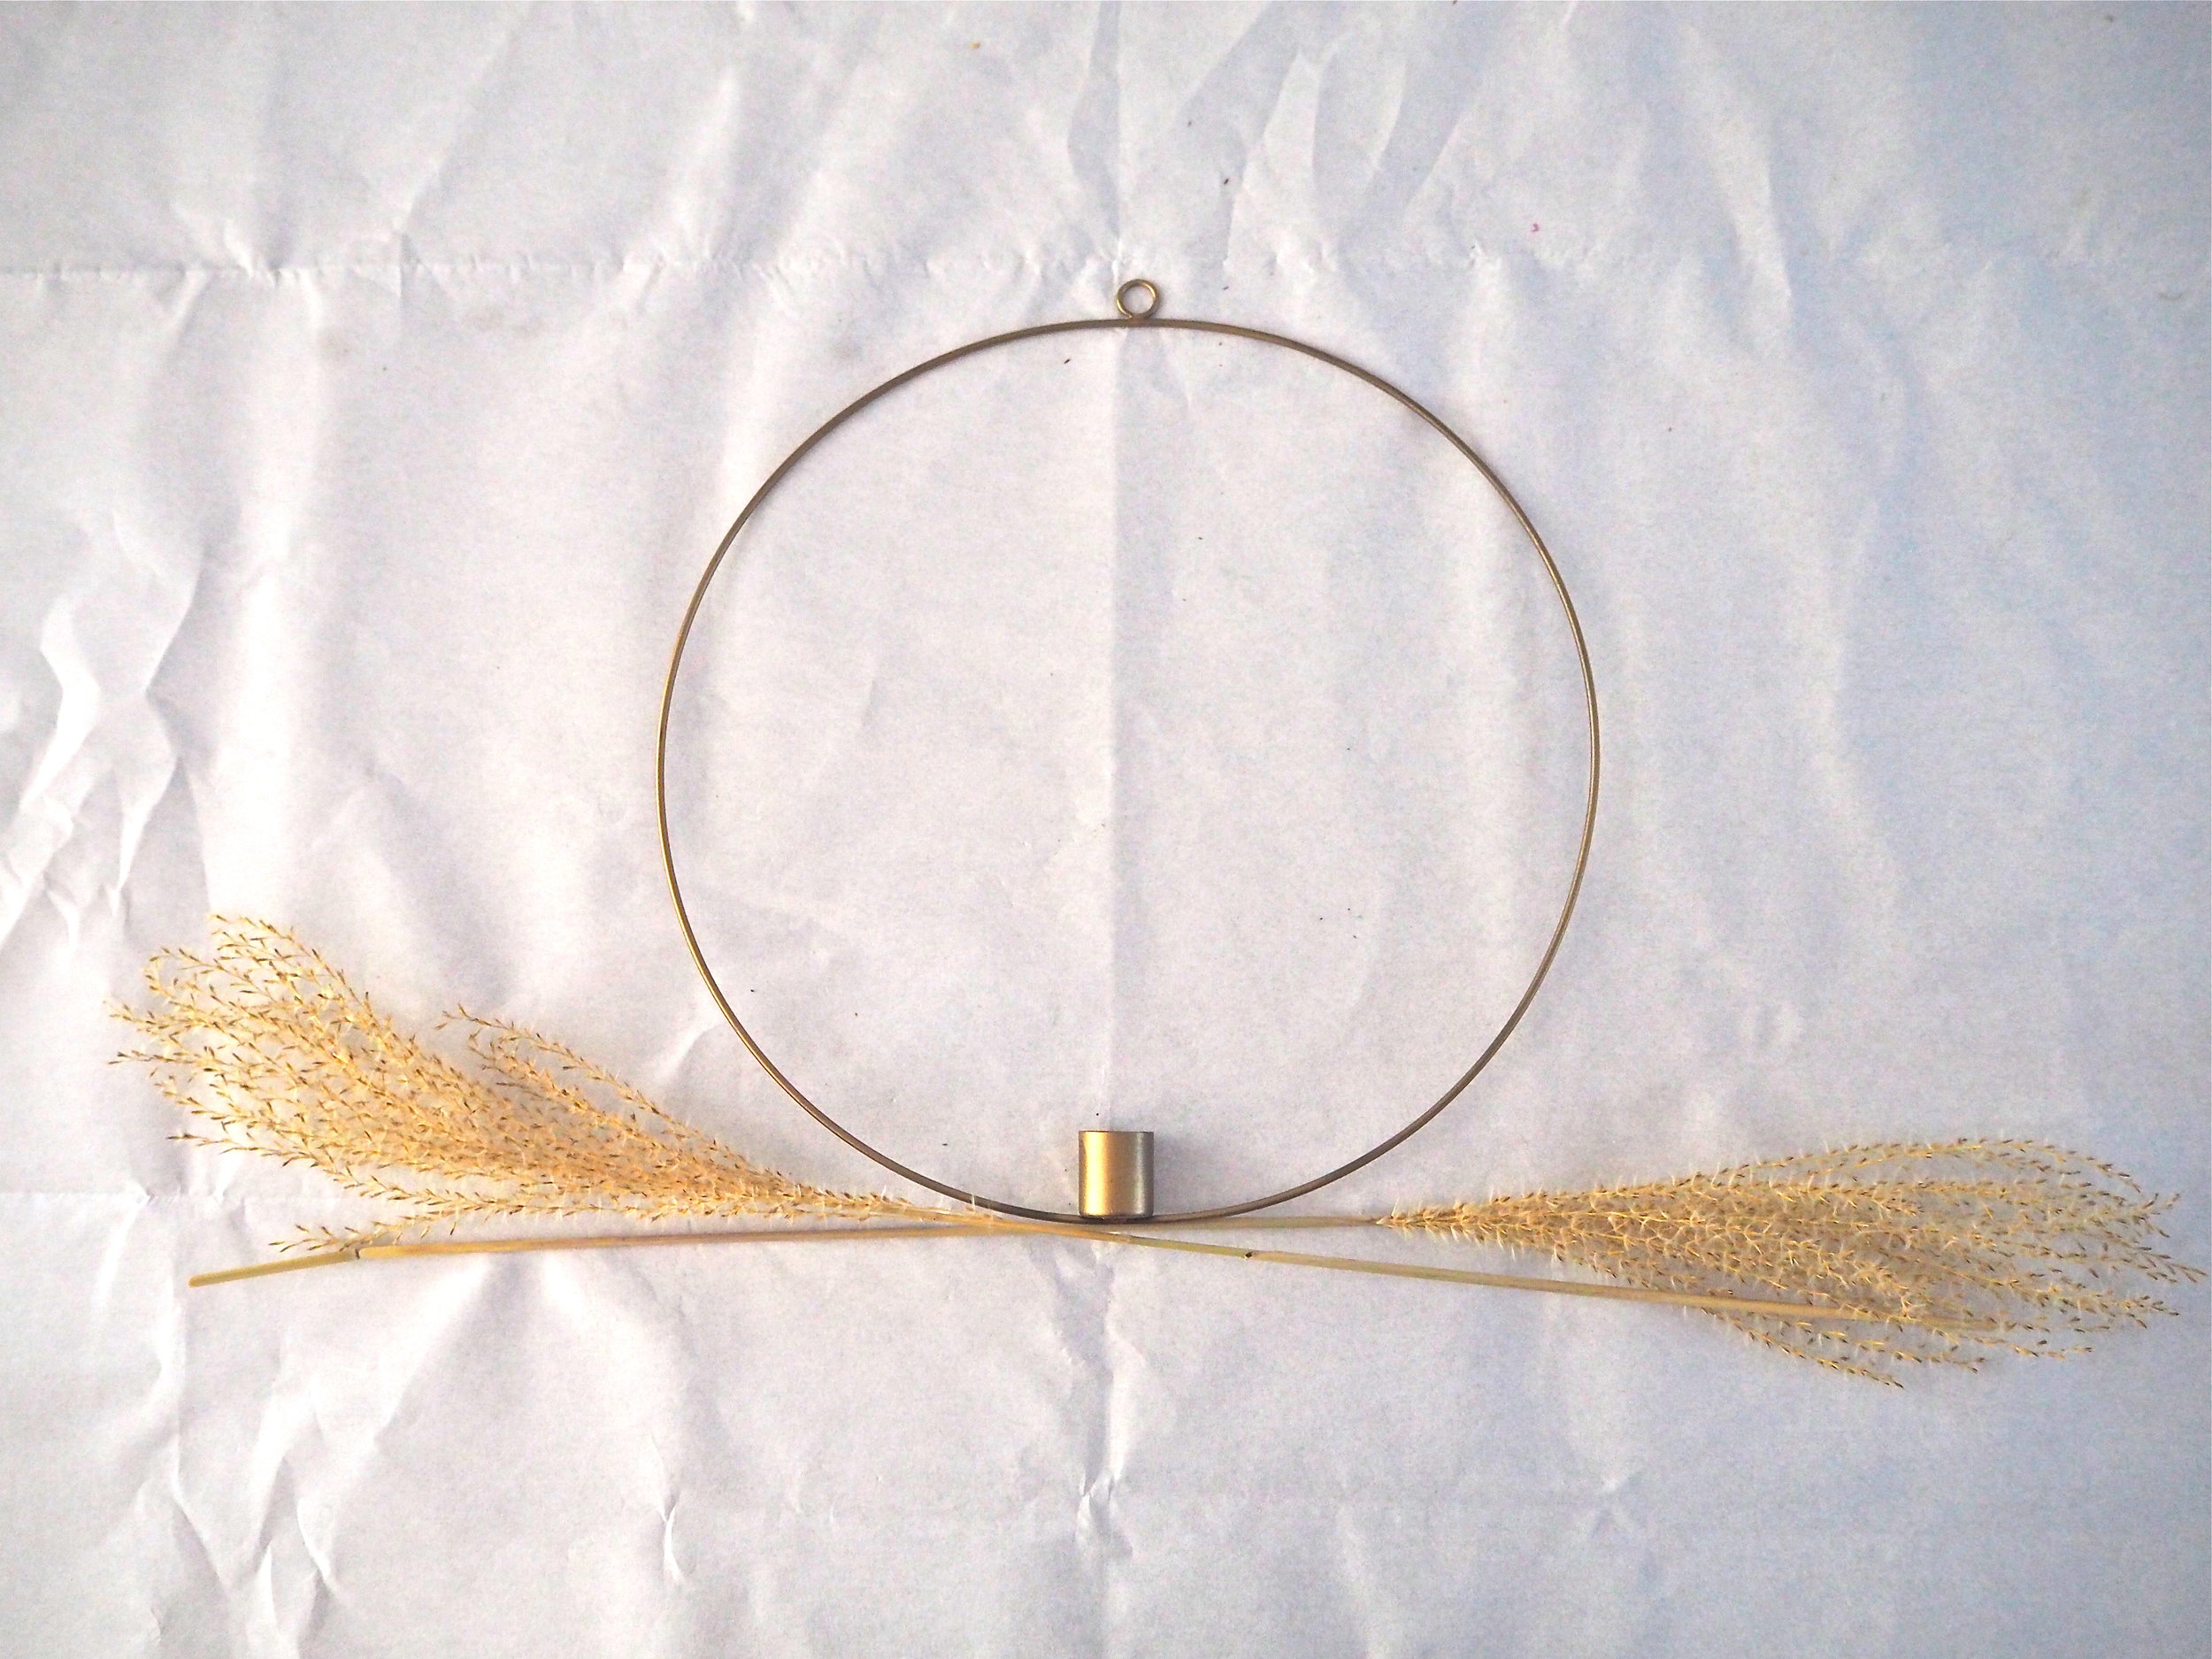
The wreath that I made here is a very simple, modern style of wreath that only covers the base of the wreath hoop. The brass hoop I purchased local to me, but you can buy something similar online for a few pounds.

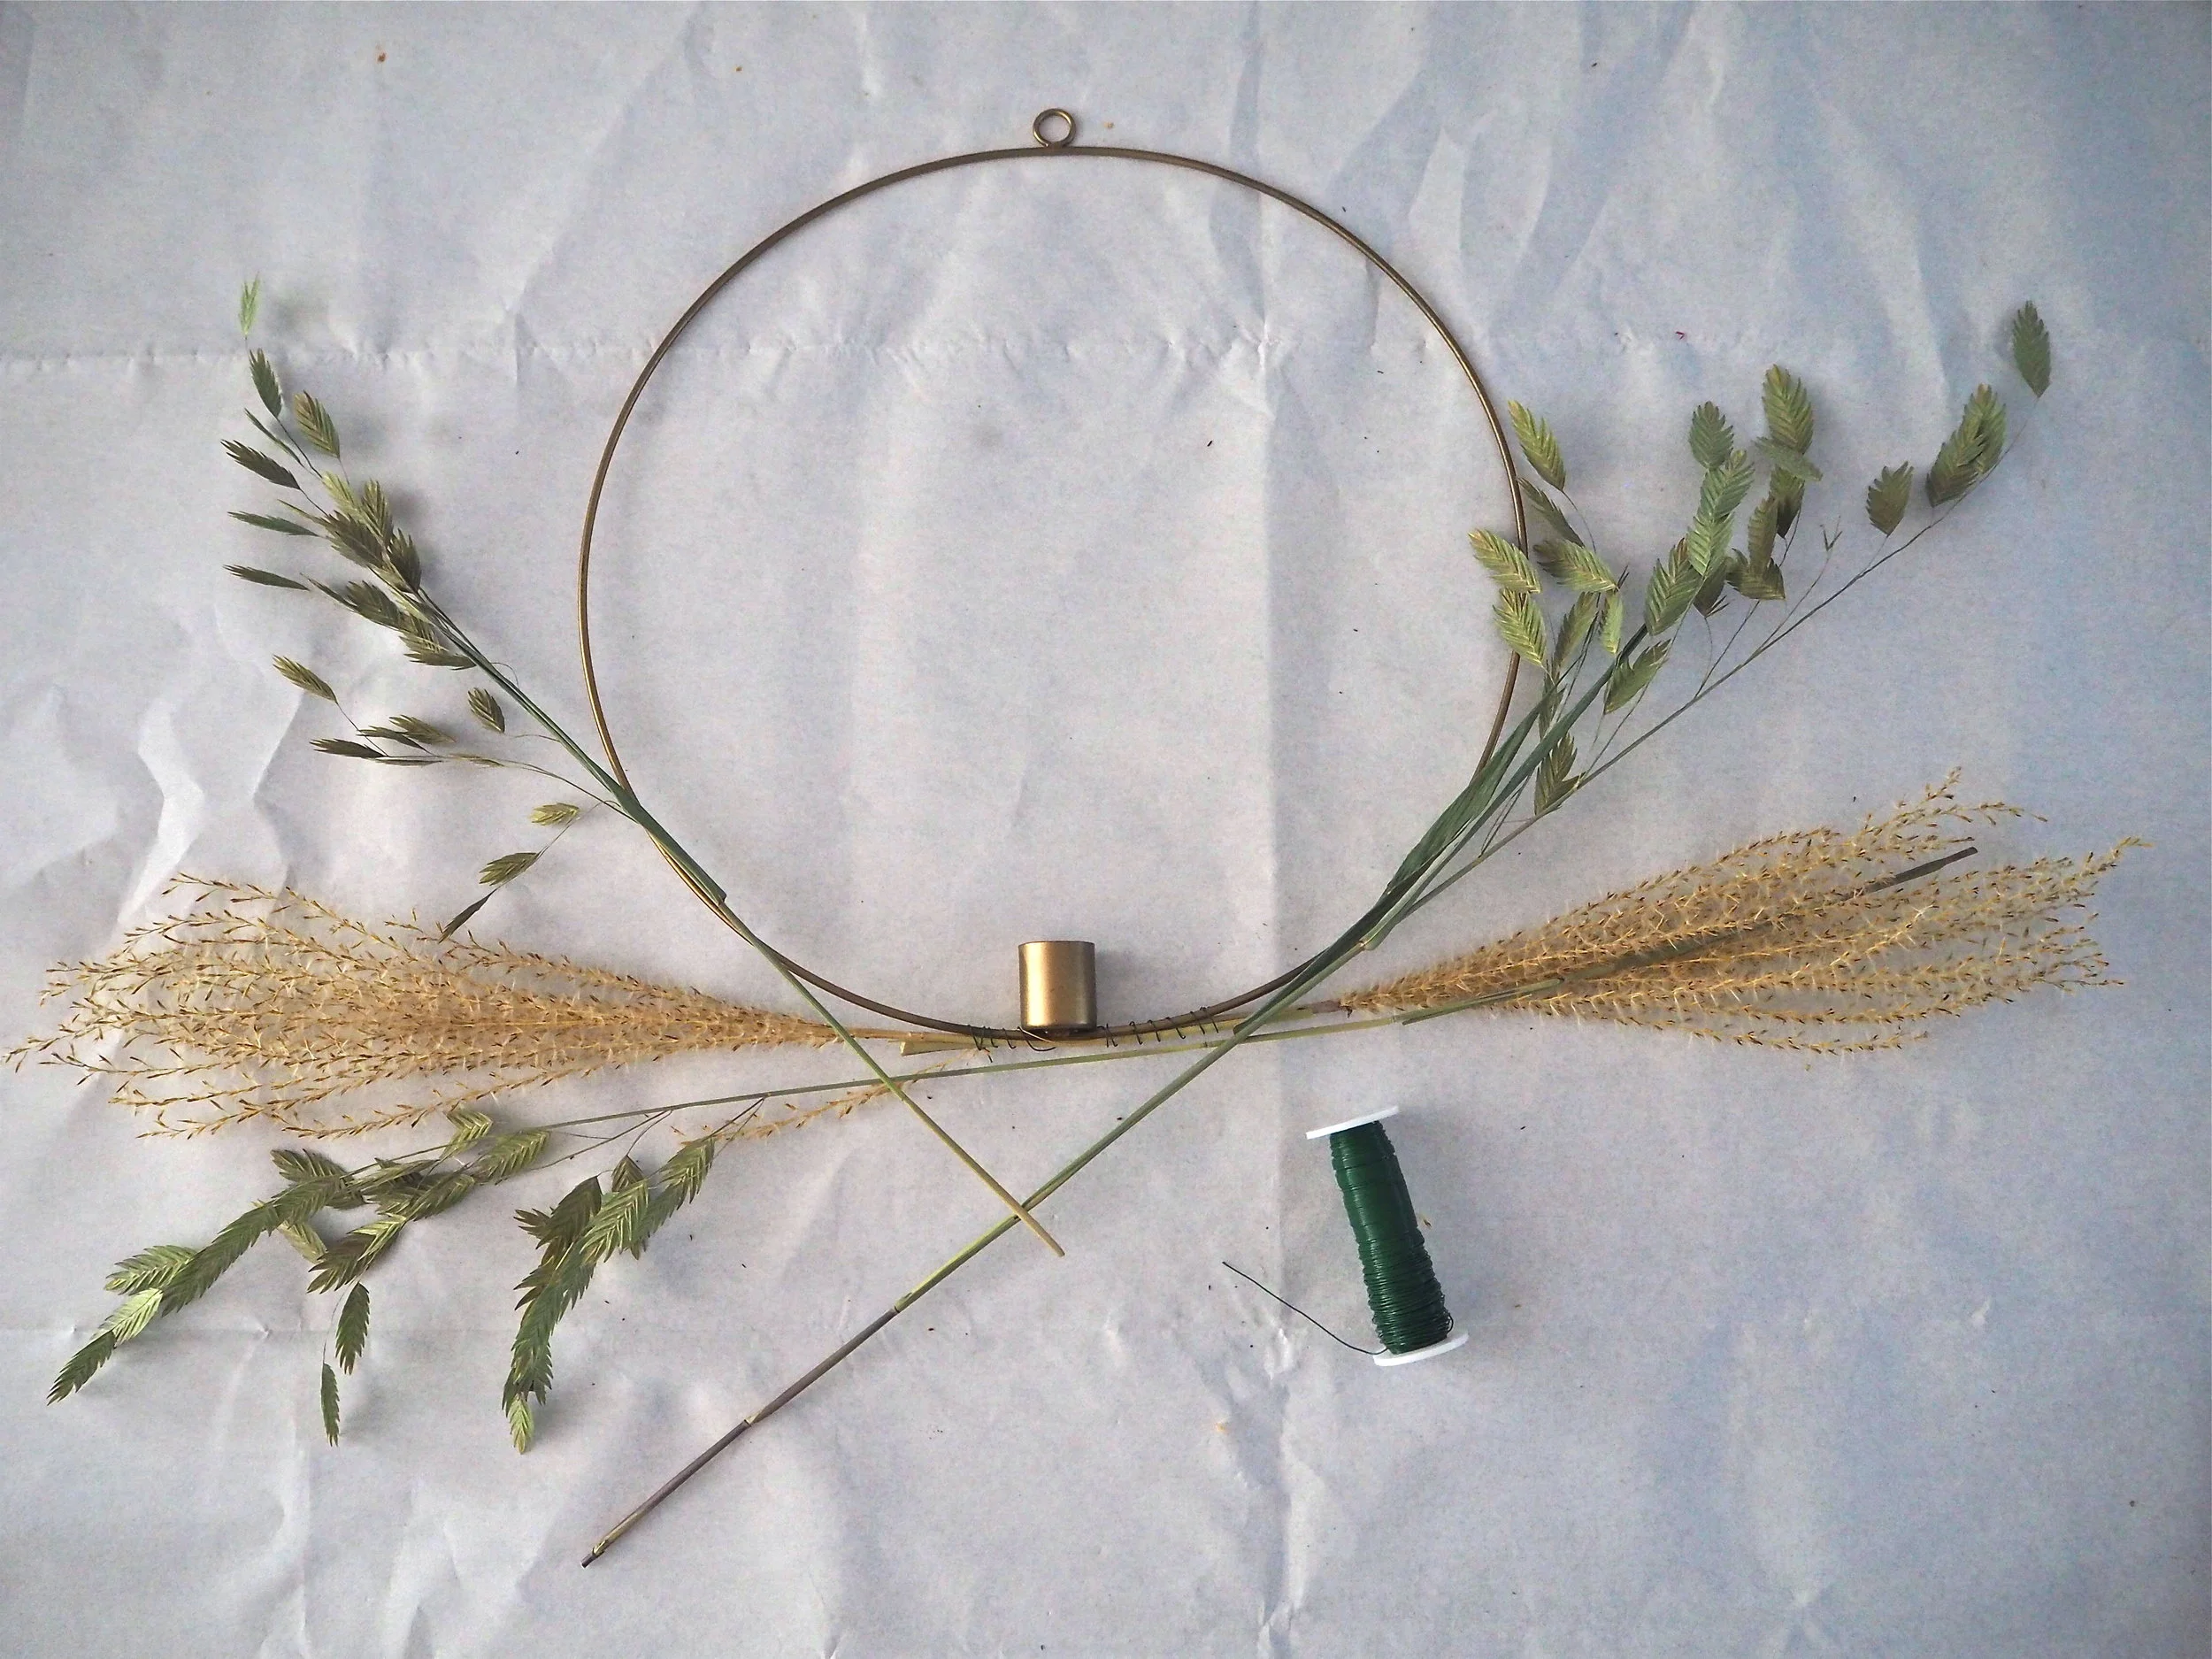
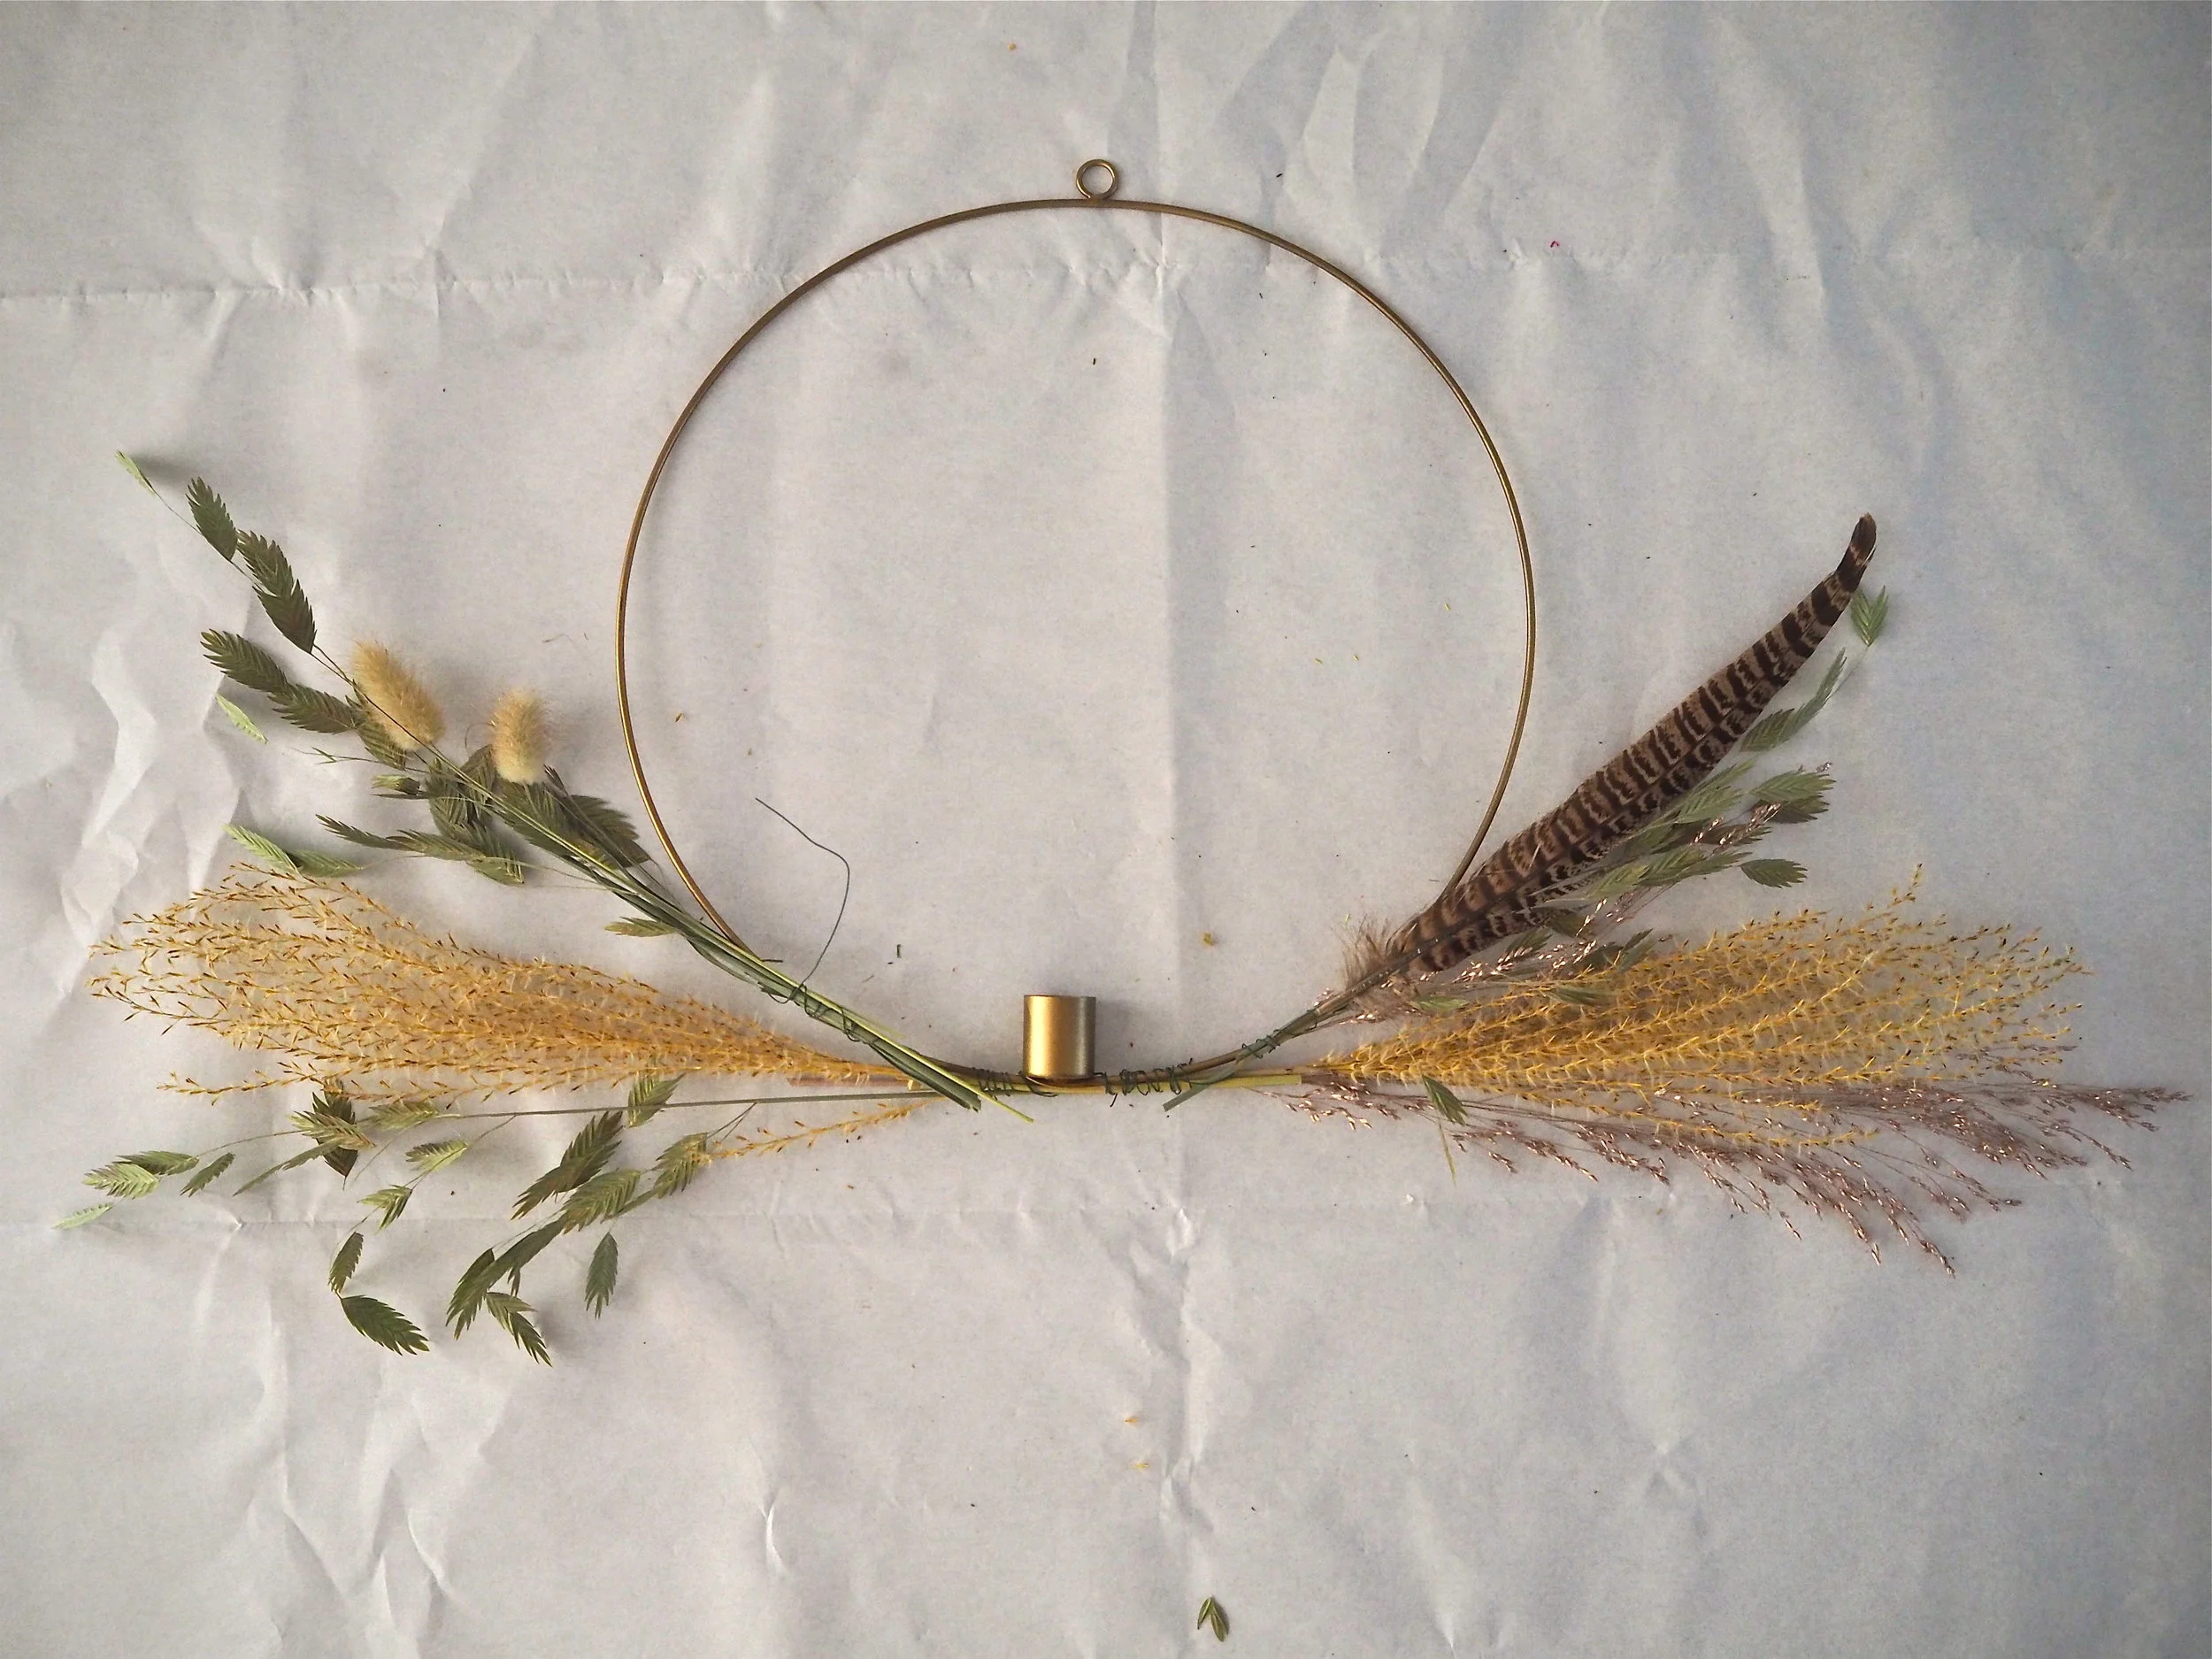
Below are the dried flowers that I used to make the wreath. You want to have a mix of dried foliage and grasses that will provide a base to the design, with a few bigger floral pieces to go at the front. I also used a few pheasant feathers to finish off the look. As well as the hoop and the dried flowers, you’ll also need some strong clear superglue, green florists wire, plus wire cutters or secateurs.

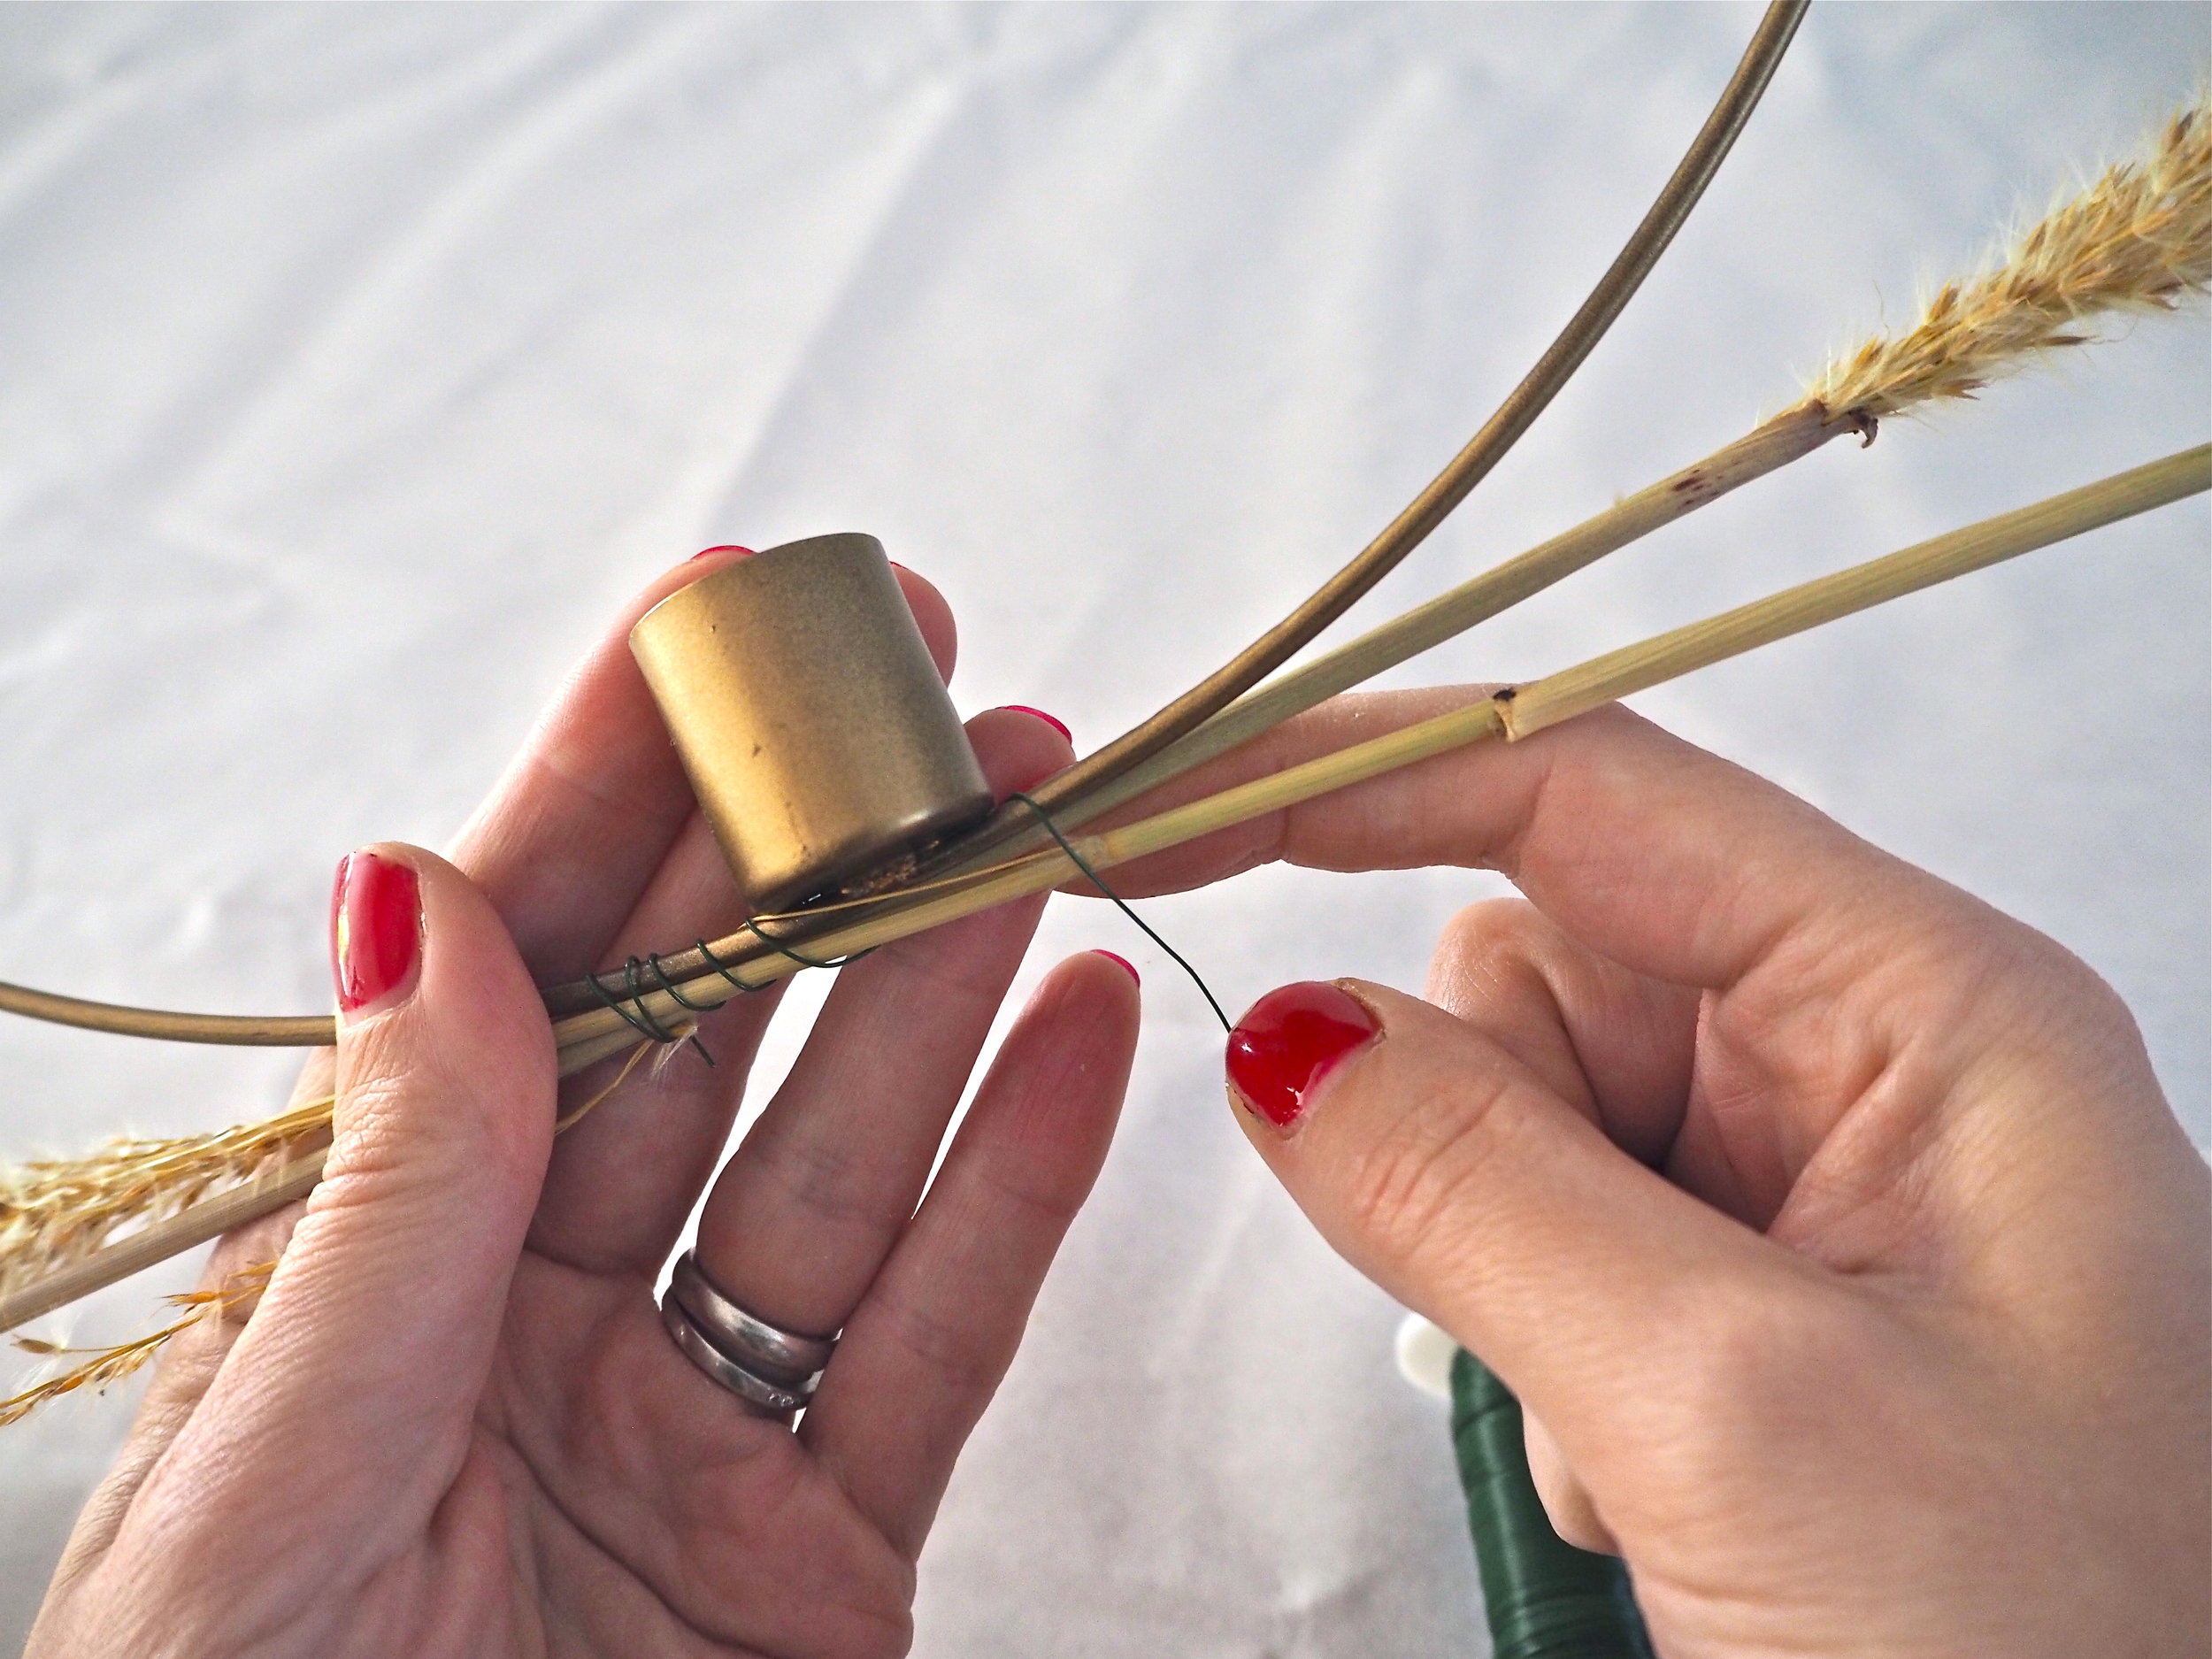
They key to getting the design right first time is to lay your hoop flat on a plain background, then lay your flowers down on top until you decide the best way to arrange them. For this wreath I used a lot of symmetry each side with each of the dried grasses and flowers to get a good balance. Using your florist wire, wrap the stems onto the base of the hoop by looping the wire tightly around both until the stem feels secure. Cut the wire and tuck the end in towards the hoop.

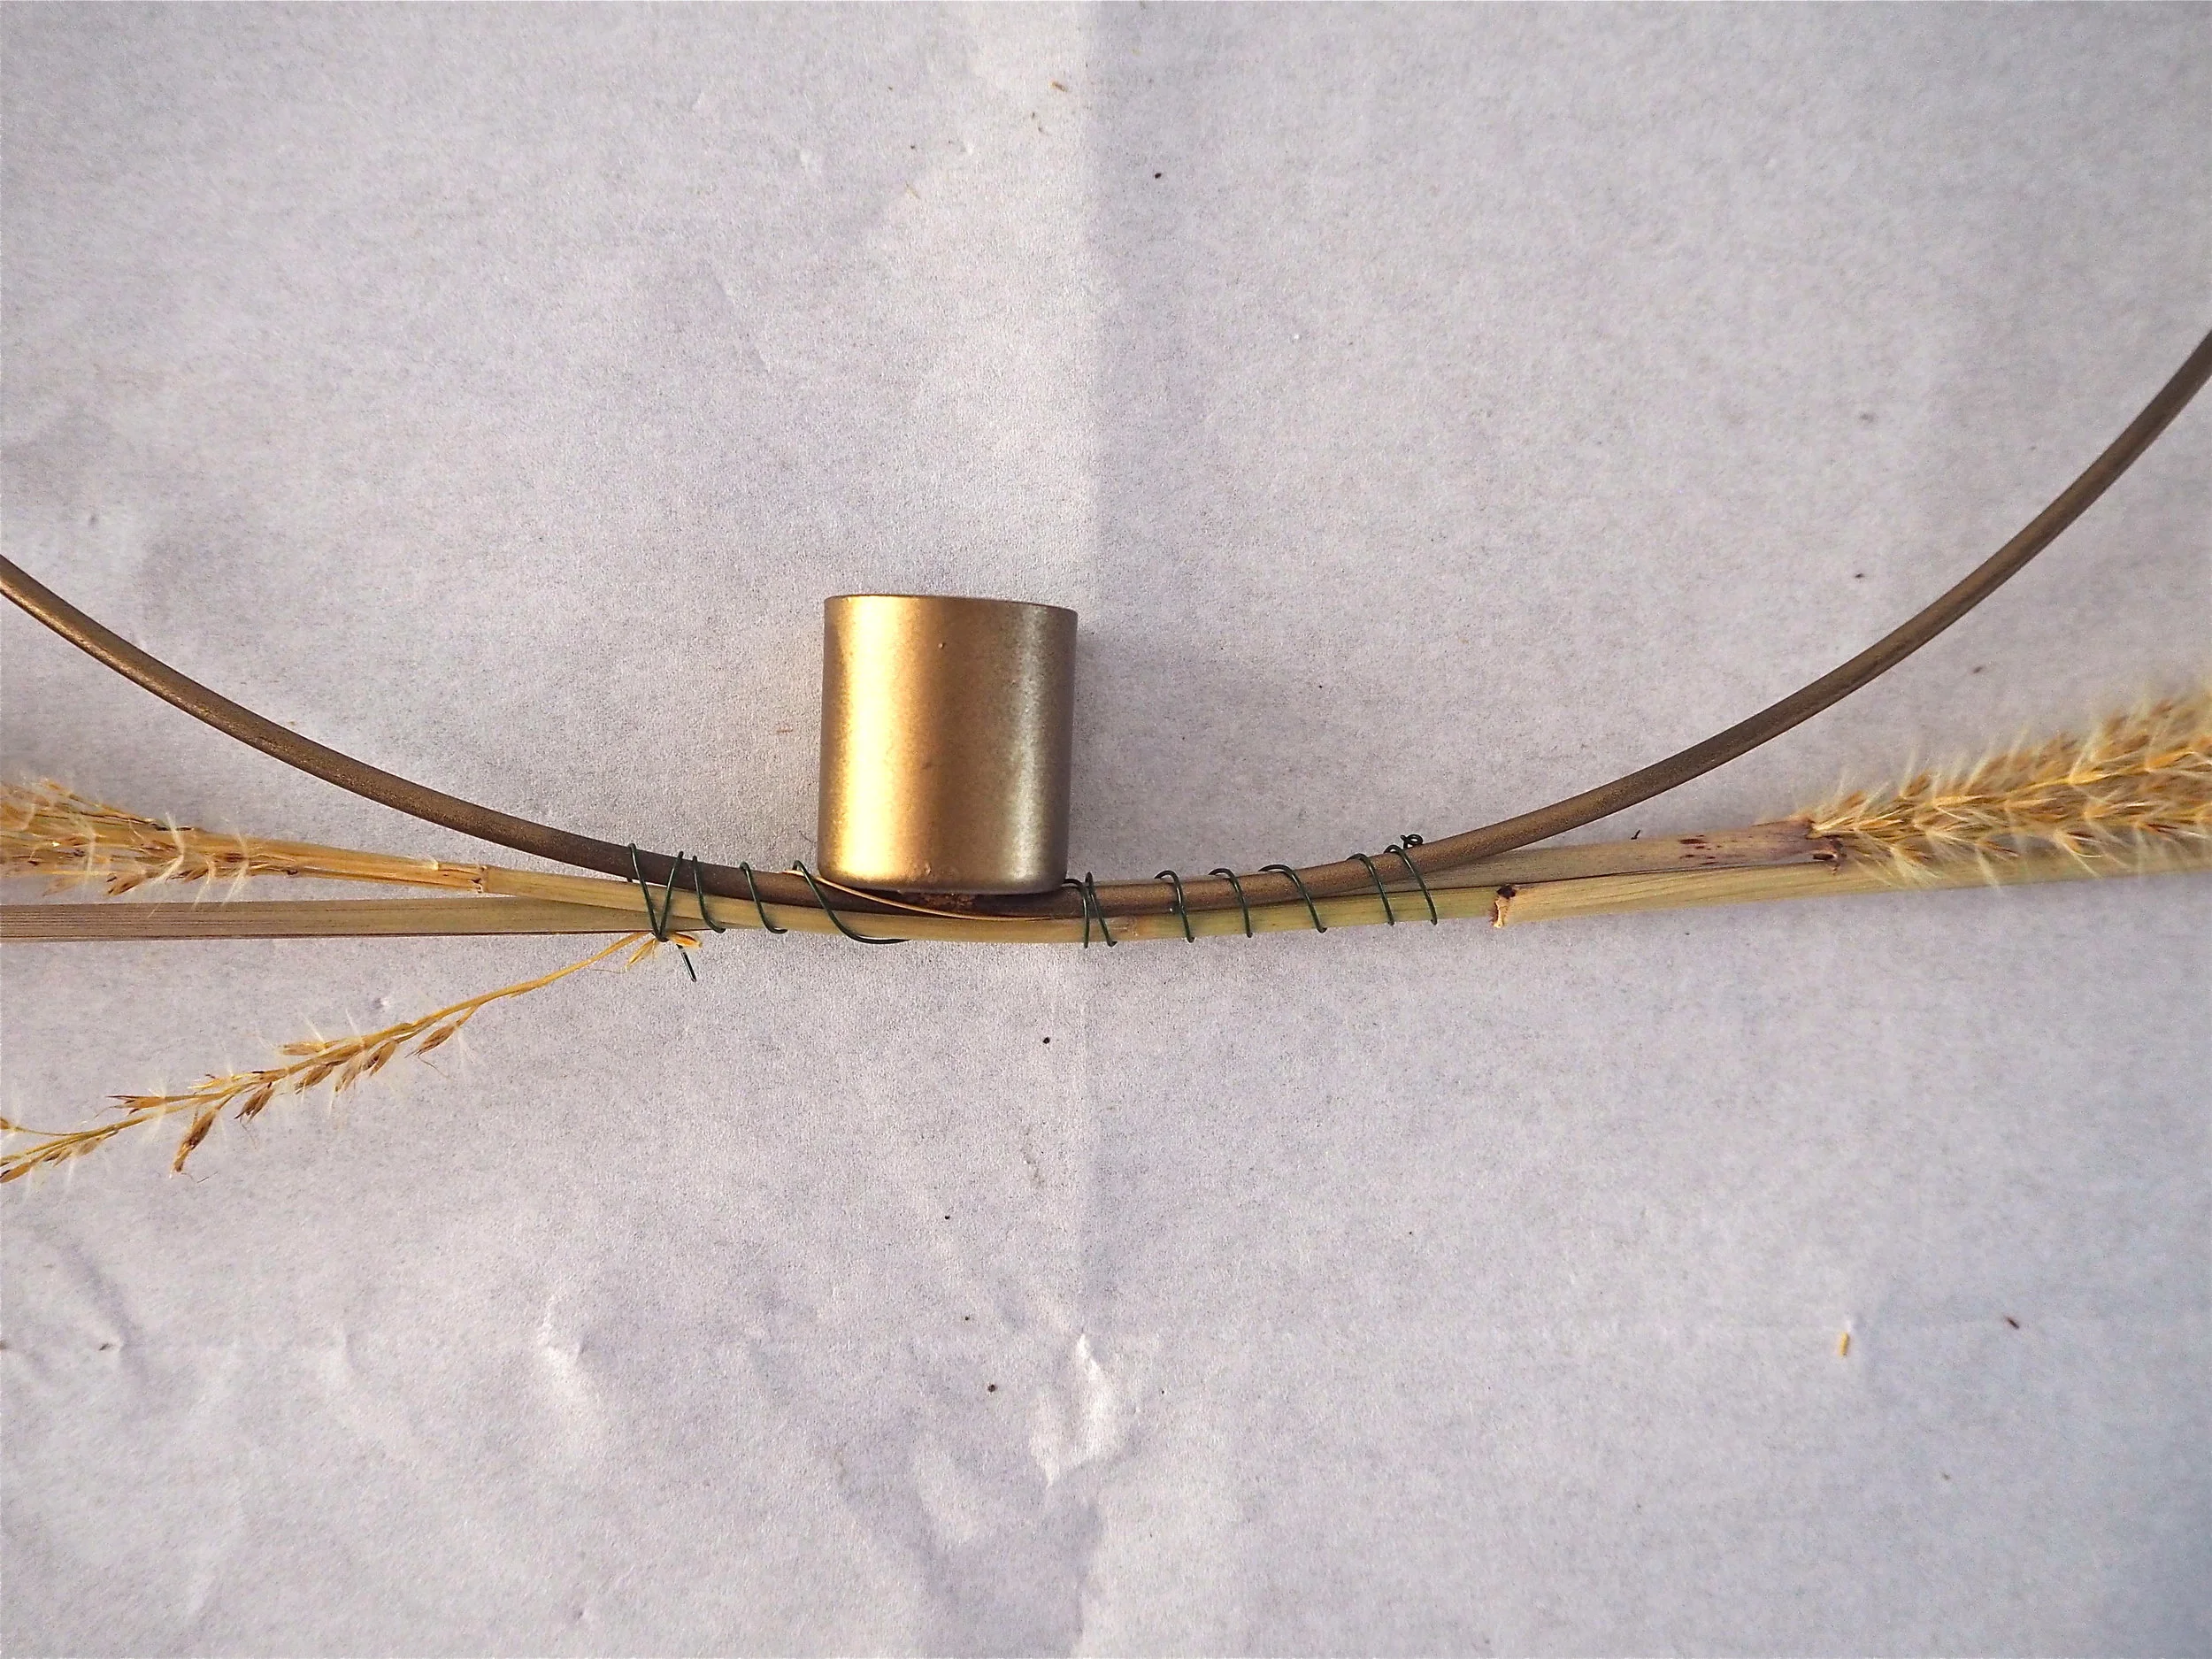
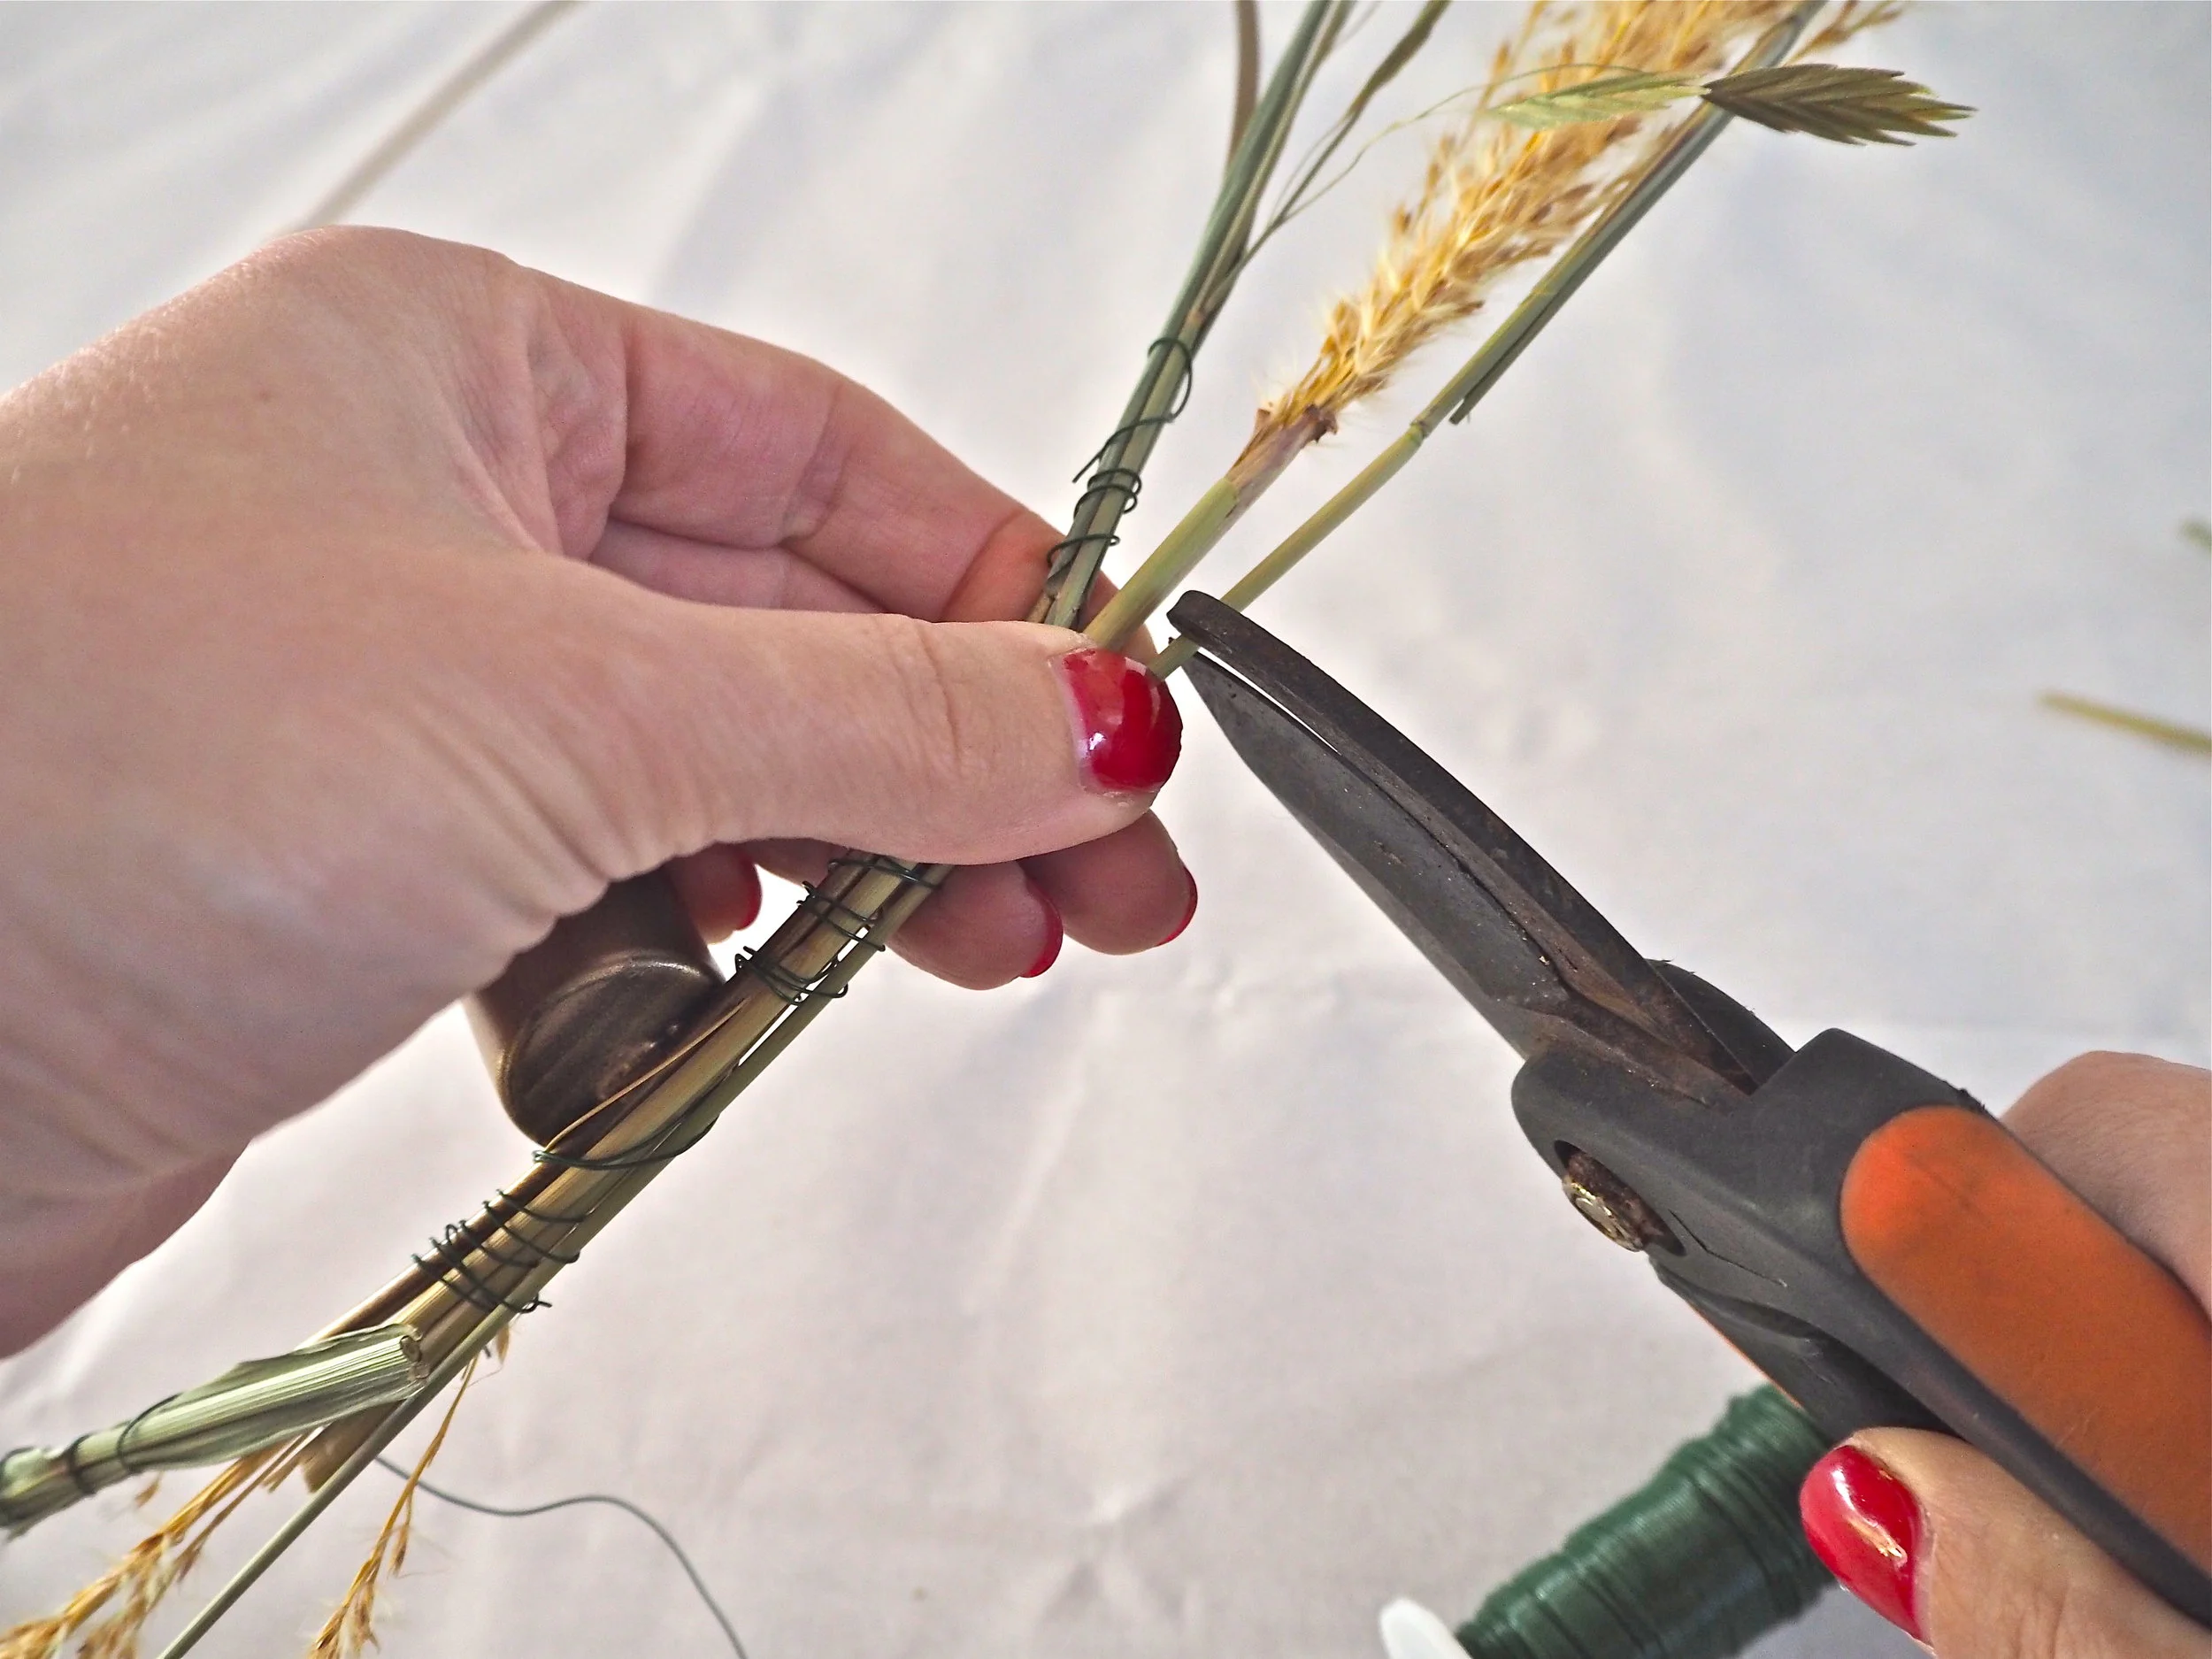
Build up the wreath by adding more wild grasses with the wire. Arrange the grasses at a 2, 3 , 4, 8, 9 and 10 o’clock angle to get the best result. Cut away any stems left over once the grass is secure to the hoop.
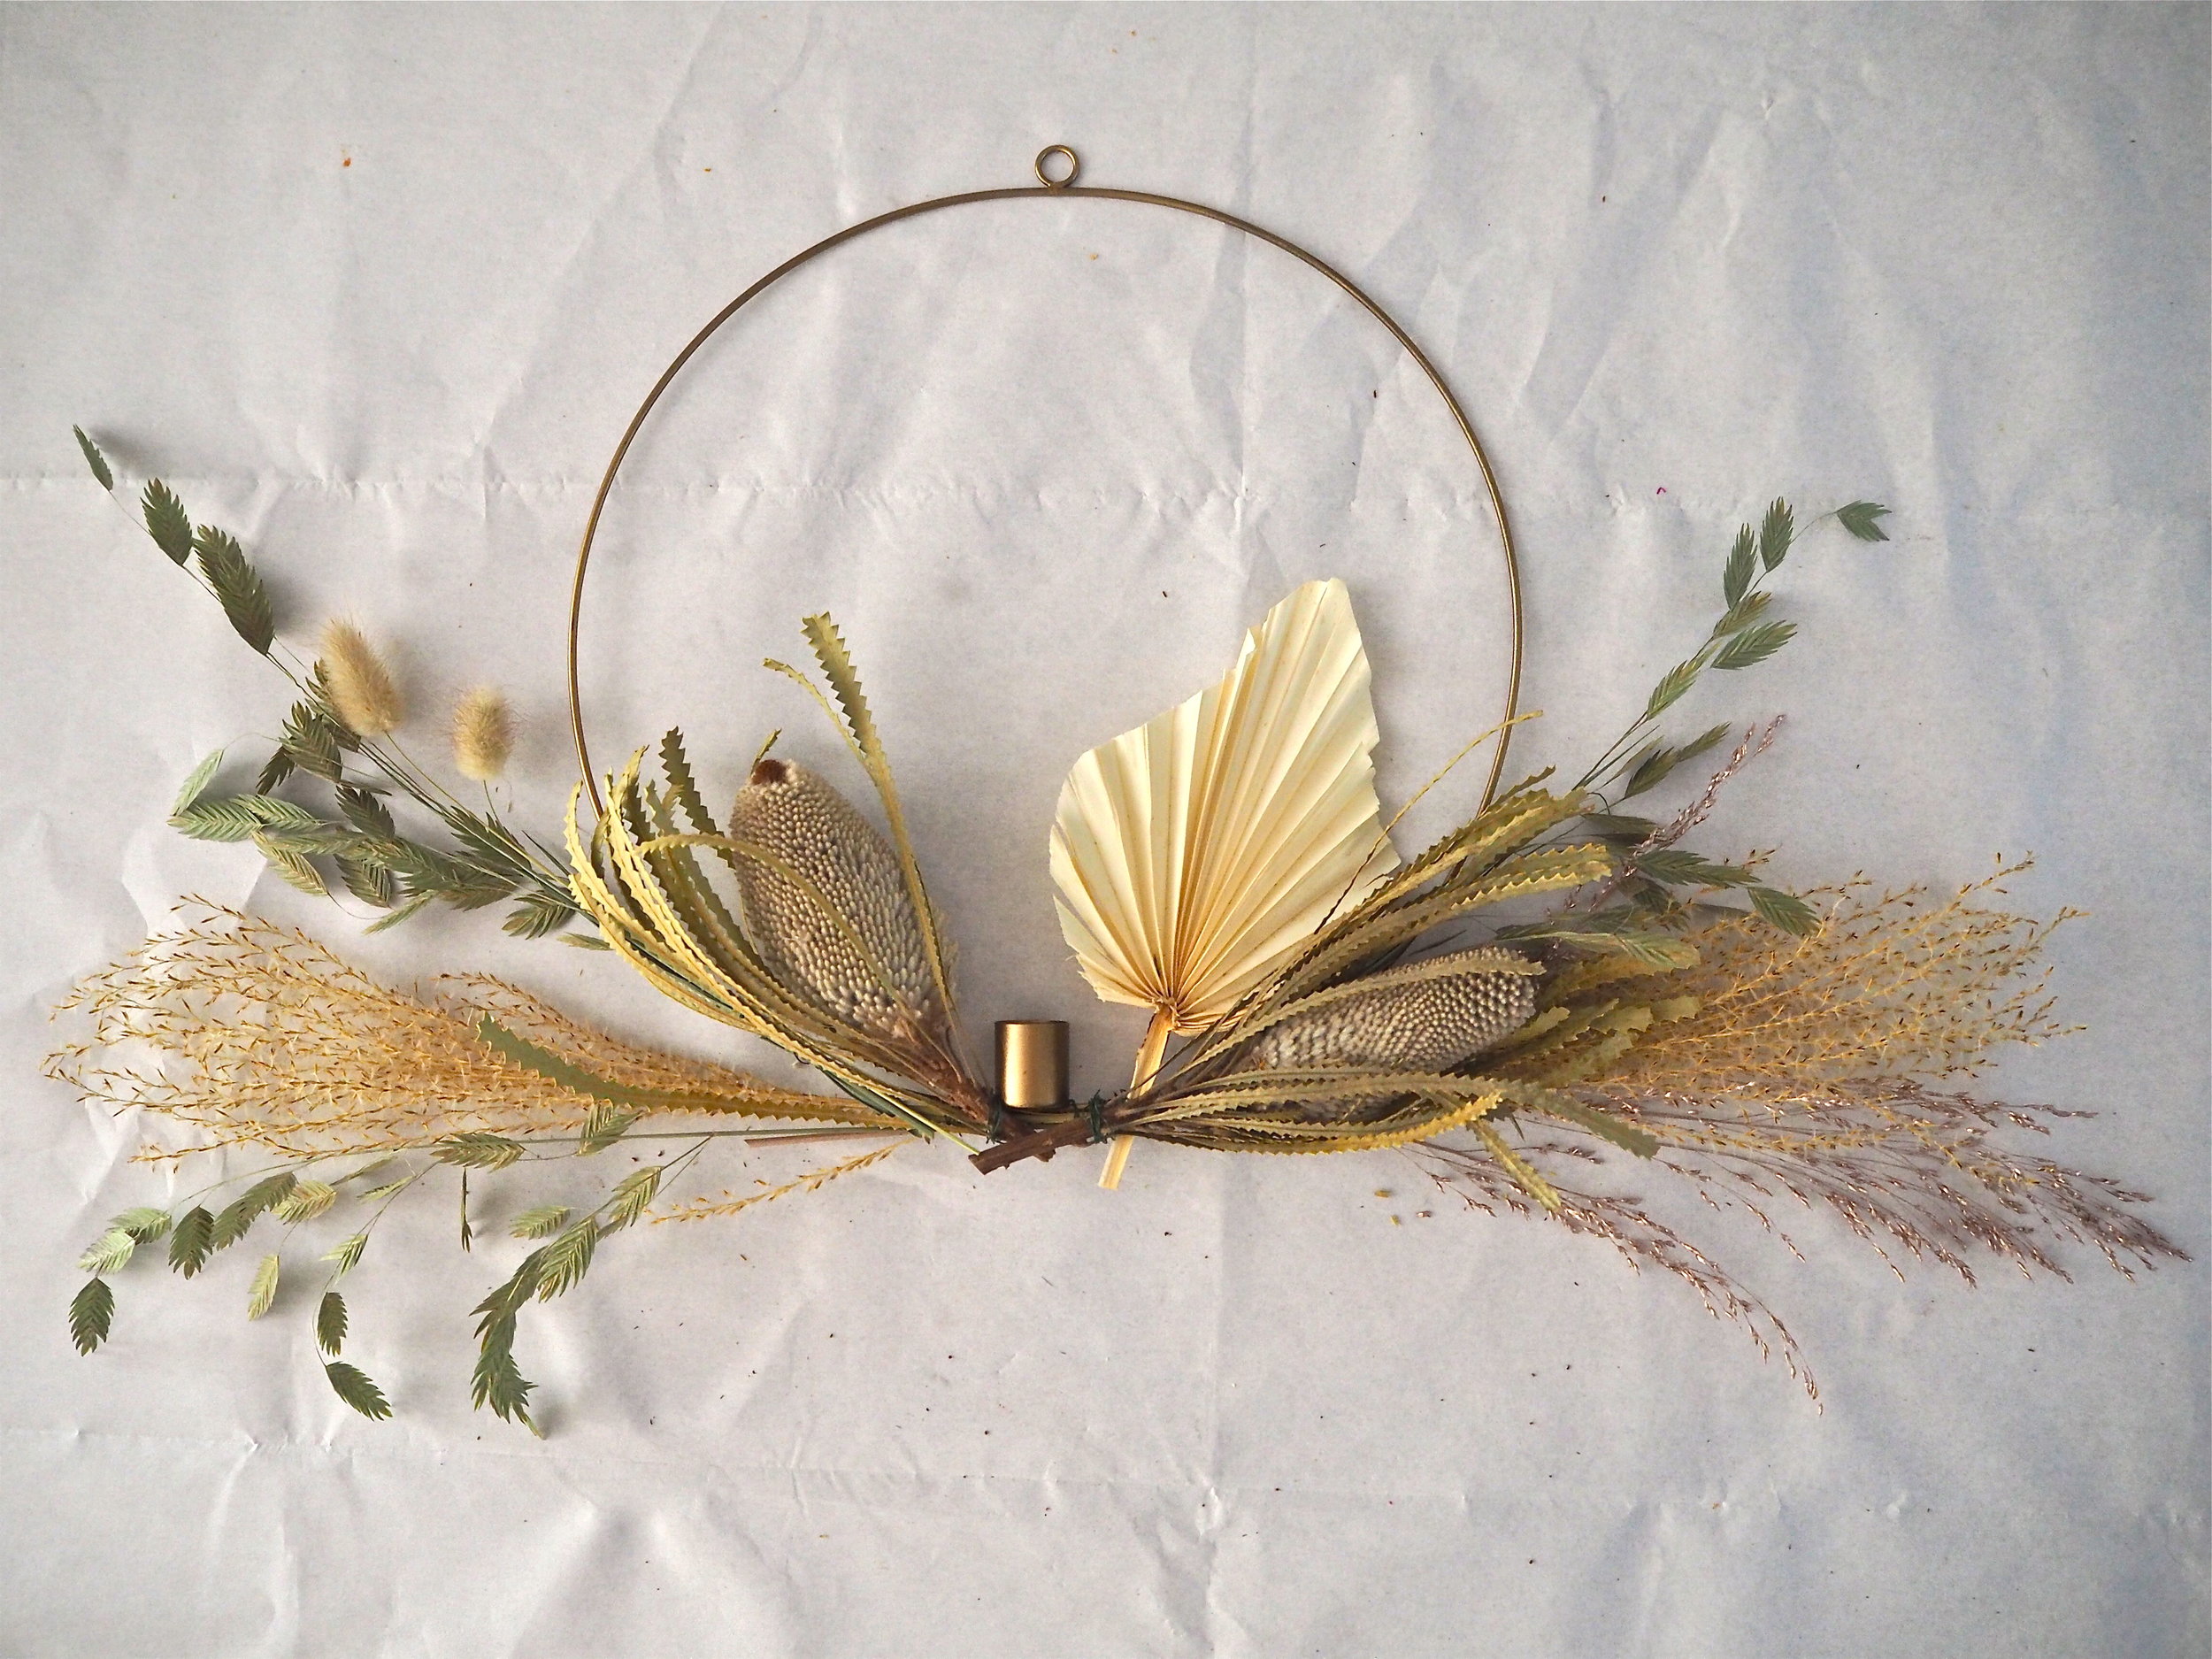
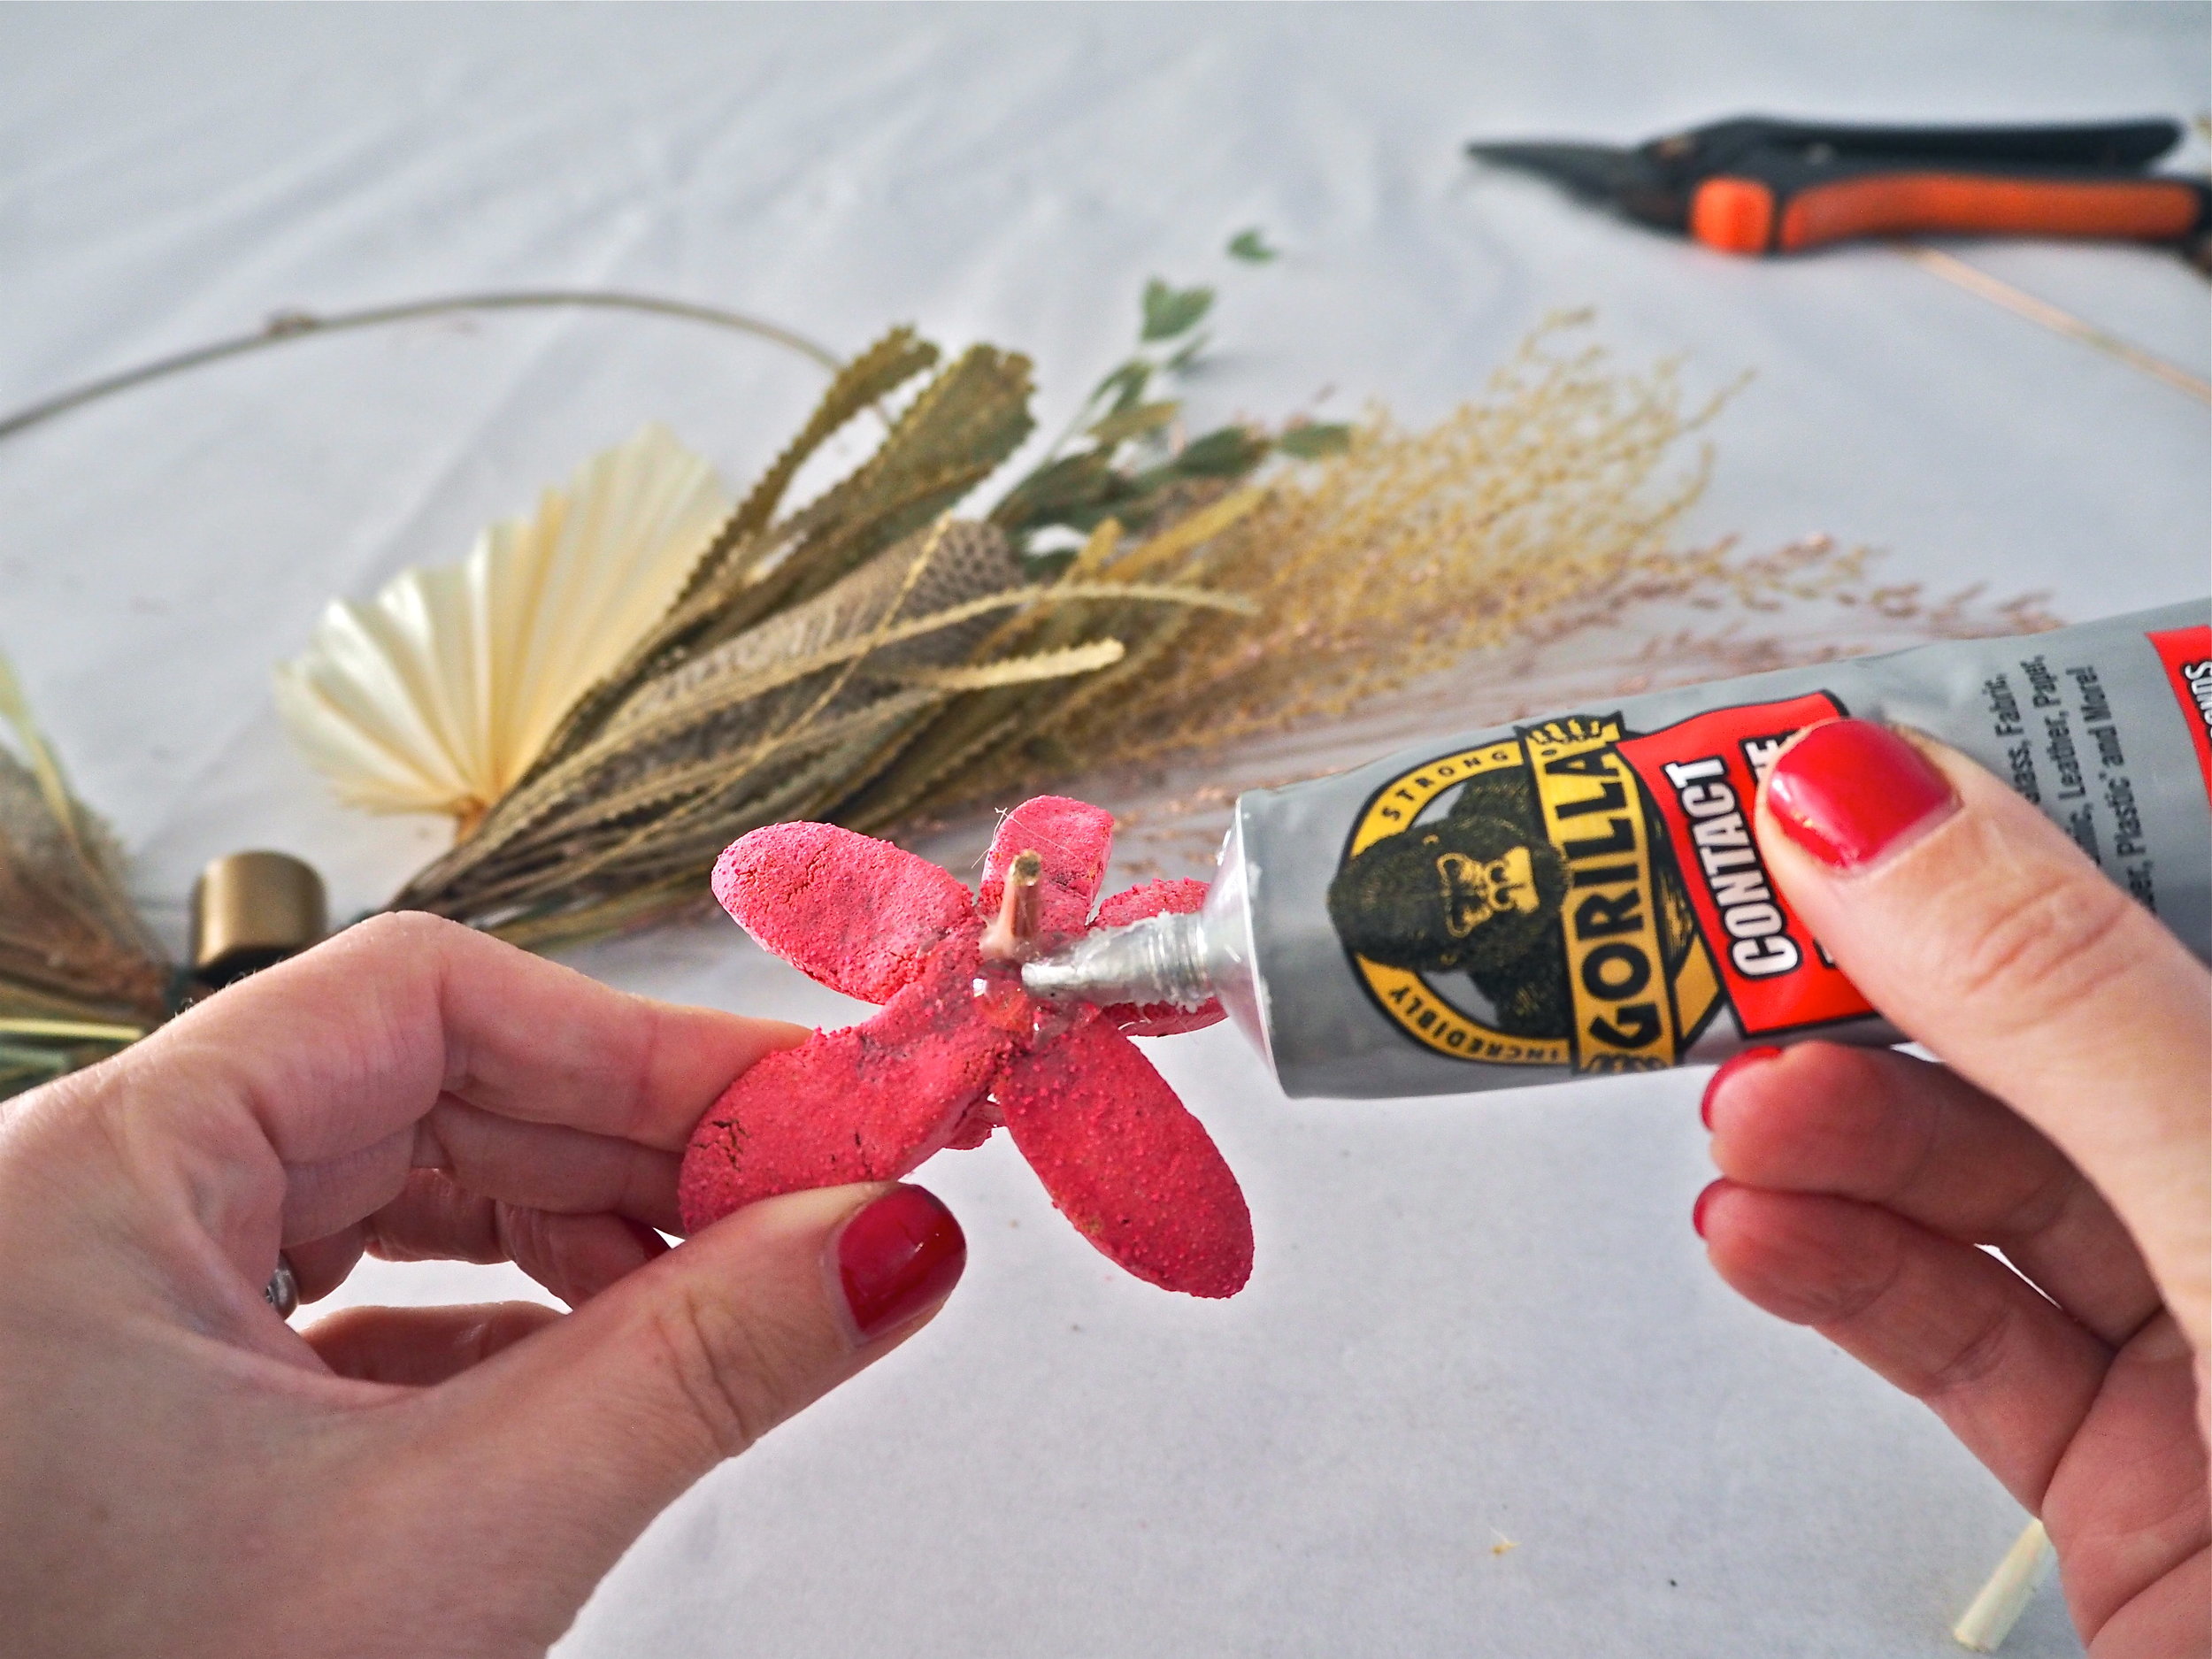
Once you’ve added most of your grasses and flowers, concentrate on the visible florist wire and untidy stems on your wreath. These need to be hidden, which can be done by swapping the wire for superglue and using dried flower heads with the stem removed.
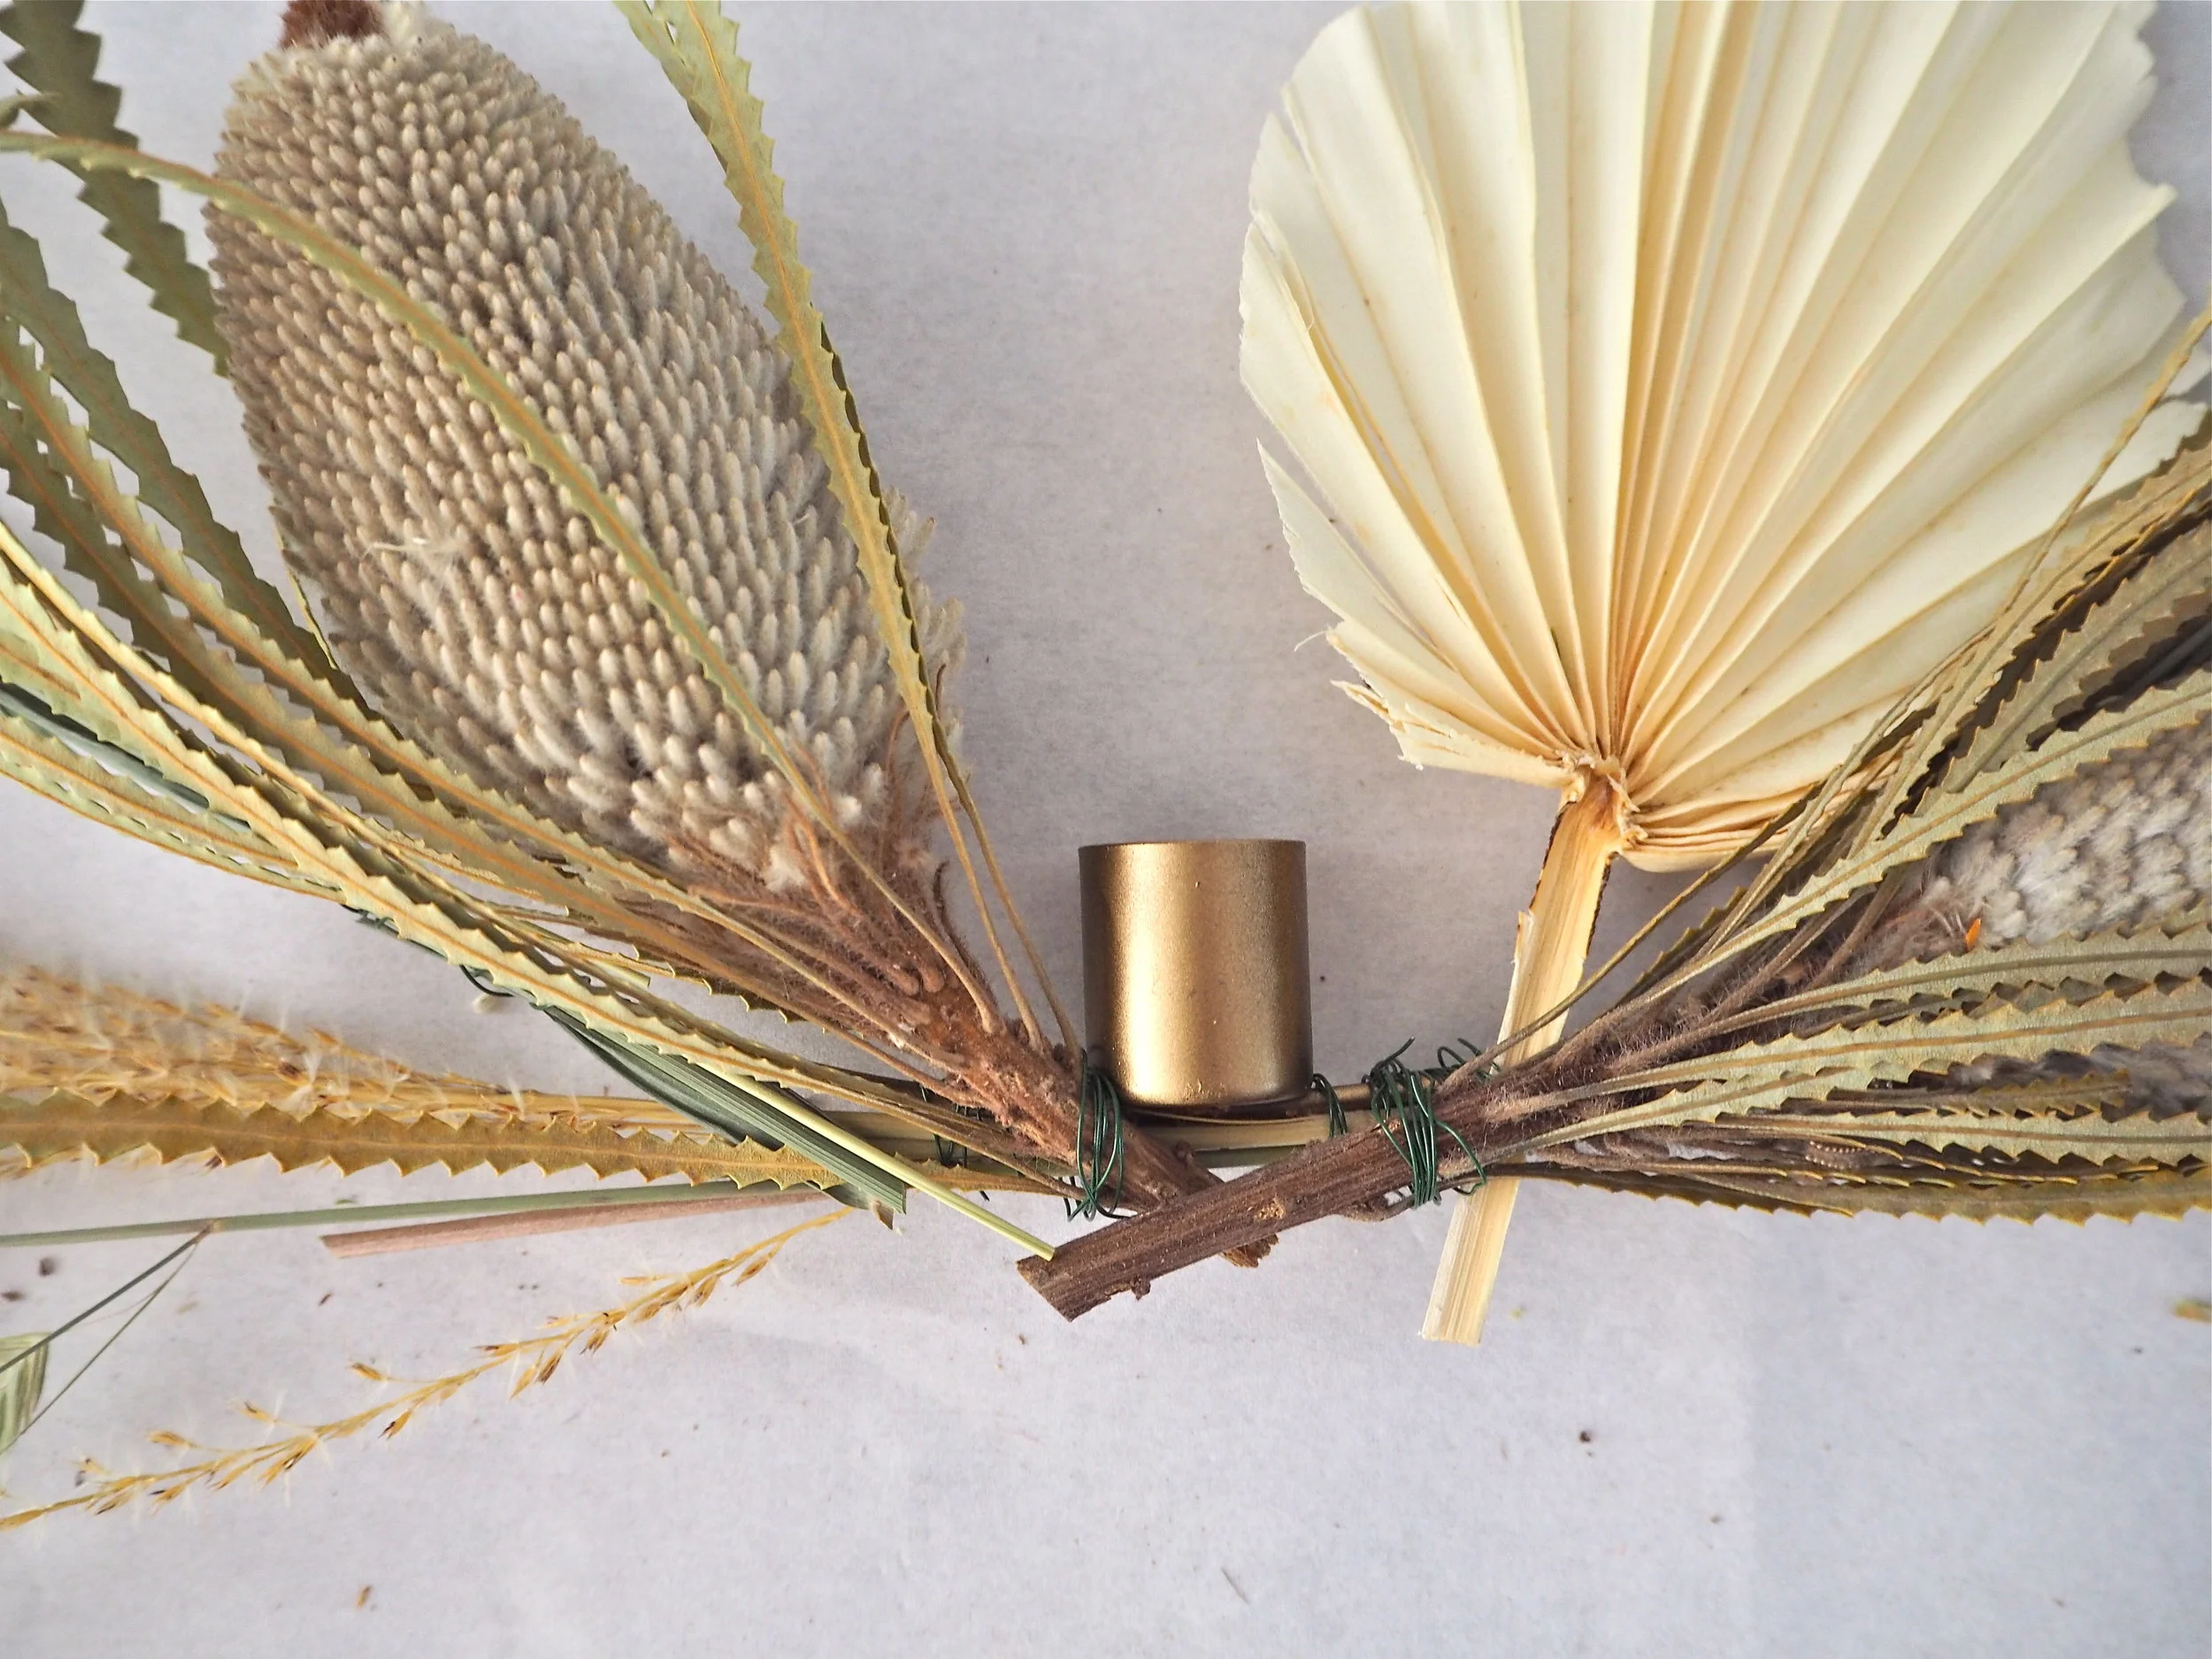
Simply apply a thick layer of glue on the back of your chosen flower heads, place in position and hold for a short while until the glue has adhered.

For any other areas that need tidying, or for sections that look like they need to be filled up, simply tuck in extra grasses or feathers into any free sections of wire (or use the glue.)

Once the superglue has had a chance to dry properly, simply hang your wreath on your door! I used a gold push pin in my door, alternatively, you can use ribbon and a door hanger hook.